Battle Frontier (Generation III)
- Battle Dome redirects here. For the 2005 board game by Hasbro and Milton Bradley, see Pokémon Battle Dome.

|
The contents of this article have been suggested to be split into Battle Tower (Generation III), Battle Palace, Battle Factory (Generation III), Battle Pyramid, Battle Dome, Battle Arena, and Battle Pike. Please discuss it on the talk page for this article. |
| |||||
| |||||
| Location: | South of Route 130 | ||||
|---|---|---|---|---|---|
| Region: | Hoenn | ||||
| Generations: | IIIE | ||||
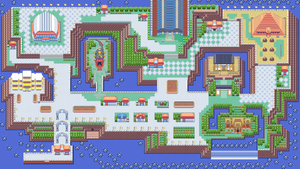
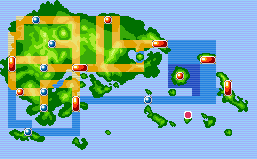 Location of Battle Frontier in Hoenn. | |||||
| Pokémon world locations | |||||
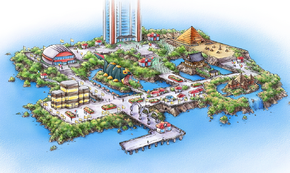
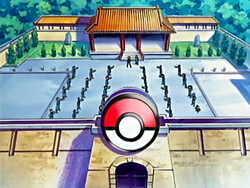
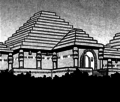
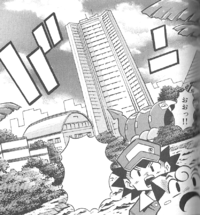
The Battle Frontier (Japanese: バトルフロンティア Battle Frontier) is a special post-Pokémon League area in Pokémon Emerald that features several arenas where powerful Trainers can battle each other.
The Battle Frontier replaces the Battle Tower in its location south of Route 130, and likewise is only accessible by taking the S.S. Tidal from Lilycove City or Slateport City. Unlike the plain Battle Tower in Pokémon Ruby and Sapphire, the Battle Frontier is composed of seven distinct battle facilities, each lead by a Frontier Brain who may be challenged after certain winning streaks have been made through their respective facility.
In Pokémon Omega Ruby and Alpha Sapphire, the Battle Resort exists where the Battle Frontier was in Pokémon Emerald. However, there are some other references to the Battle Frontier. In the Battle Maison, a man mentions that the Pike Queen Lucy has been scouted and asks if anyone else meets Scott's expectations. A remix of the music for the Hoenn Frontier Brains is used as the battle theme for the Battle Chatelaines.
The Battle Frontier is owned and operated by Scott, whom the player meets throughout the game in Pokémon Emerald. He resides in a house located between the Battle Dome and Battle Tower, and gives the player various rewards as they progress through the Battle Frontier.
Items
| Item | Location | Games | |
|---|---|---|---|
| Frontier Pass | Gift from a guide in the front gate upon first entering | E | |
| 2-3BP | Gift from Scott when first talked to at his house | E | |
| Retro Mail | Held by Meowow, a Meowth the player can receive in a trade | E | |
| Silver Shield | Gift from Scott after winning 50 battles in a row at the Battle Tower | E | |
| Gold Shield | Gift from Scott after winning 100 battles in a row at the Battle Tower | E | |
| Lansat Berry | Gift from Scott after earning all seven silver Symbols | E | |
| Starf Berry | Gift from Scott after earning all seven gold Symbols | E | |
Pokémon
| Pokémon | Games | Location | Levels | Rate | |||||||||||
|---|---|---|---|---|---|---|---|---|---|---|---|---|---|---|---|
| Special Pokémon | |||||||||||||||
|
R | S | E |
|
The same as the Traded Pokémon | One | |||||||||
|
R | S | E |
|
40 | One | |||||||||
| A colored background means that the Pokémon can be found in this location in the specified game. A white background with a colored letter means that the Pokémon cannot be found here. | |||||||||||||||
Trainers
For Trainers and the Pokémon they may use in Battle Frontier facilities, refer to:
- List of Battle Frontier Trainers (Generation III)
- Battle Frontier (Generation III)/Pokémon (Group 1)
- Battle Frontier (Generation III)/Pokémon (Group 2)
- Battle Frontier (Generation III)/Pokémon (Group 3, 001-151)
- Battle Frontier (Generation III)/Pokémon (Group 3, 152-386)
Overview
Upon the player's first entry into Hoenn's Battle Frontier, their Trainer Card will be upgraded into a Frontier Pass by a woman at the entrance. This pass holds the Trainer Card, as well as a small map of the Battle Frontier and the player's records with the Frontier. Saved-up Battle Points, or BP, are listed, as are any of the seven Frontier Symbols the player has won. One battle from within one of the facilities may be recorded and stored on the Frontier Pass, which may be watched or overwritten with another at any time.
On winning through a set amount of battles in any given facility, Battle Points will be awarded, usually in small amounts, but gradually growing through each consecutive streak. Defeating the Frontier Brain of a given facility for the first time awards the silver Symbol of that facility, as well as 10BP, while the second defeat of the same Brain gives the Symbol a golden color and the player another 10BP. The Frontier Brain will only appear in 3-vs-3 single battle mode.
No two Pokémon entered can hold the same item, though all items are allowed to be held. Items cannot be used from the Bag during battle (except in the Battle Pyramid, in which the player can use items from their Battle Bag). Battles conducted here do not award experience or money. The following Pokémon cannot be entered for battle:

|
Mewtwo | 
|
Mew | 
|
Lugia | 
|
Ho-Oh | 
|
Celebi |

|
Kyogre | 
|
Groudon | 
|
Rayquaza | 
|
Jirachi | 
|
Deoxys Speed Forme |

|
Egg |
Facilities
Battle Tower
| Battle Tower バトルタワー Battle Tower | |||||||||||||||||||||
| |||||||||||||||||||||
| "Keep the win streak as the toughest TRAINER!" | |||||||||||||||||||||
| |||||||||||||||||||||
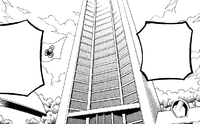
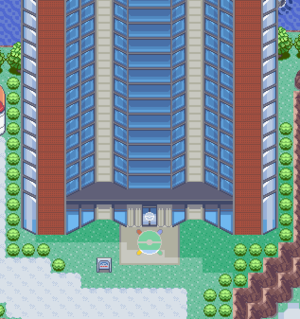
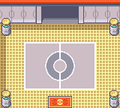
Returning from Pokémon Ruby and Sapphire, the Battle Tower (Japanese: バトルタワー Battle Tower) is the most standard of the facilities. Like before, it features a standard 3-vs-3 single or 4-vs-4 Double Battle format, with straight runs of 7 Trainers that get progressively more powerful as the player goes on.
At the 35th and 70th battle, five and ten runs through, respectively, Salon Maiden Anabel, the Frontier Brain, appears. If she is defeated, she awards the Ability Symbol.
All multiplayer functions found in Ruby and Sapphire are retained, as well. For a detailed description of these, see Battle Tower (Generation III). An apprentice will occasionally appear in the lobby and ask the player for help. If that apprentice is later battled, he/she will use the Pokémon and moves that he/she was told to use. Through a glitch, players may exploit the Battle Tower in Emerald to clone their Pokémon.
Gallery
|

|
|
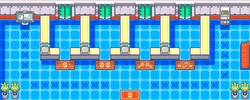
| Inside the Battle Tower | Hallway after exiting the elevator | Before battle in the Battle Tower |
Battle Palace
| Battle Palace バトルパレス Battle Palace | |||||||||||||||||||||
| |||||||||||||||||||||
| "Keep your eyes on POKÉMON battles!" | |||||||||||||||||||||
| |||||||||||||||||||||
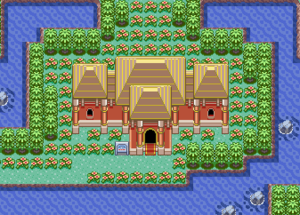
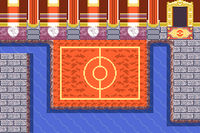
In the Battle Palace (Japanese: バトルパレス Battle Palace), Pokémon battle on their own, without any commands from their Trainers. This is very similar to the rules at the Verdanturf Battle Tent. The style of the Pokémon's battle depends on its Nature, and this style may change when the Pokémon's HP falls low.
At a streak of 21 (three trips through) or 42 (six trips through), Palace Maven Spenser challenges the player. If defeated, he awards the Spirits Symbol.
Battle style
Depending on its Nature, a Pokémon may use different moves in the Battle Palace. All moves belong to one of three categories: Attack, Defense, or Support. The following is the list of attacks in each category:
- Attack: Any move not listed under Defense or Support.
- Defense: All moves that target the user, the user's side, or the entire field, but not moves that call other moves. These moves include Acid Armor, Agility, Amnesia, Aromatherapy, Barrier, Baton Pass, Belly Drum, Bide, Bulk Up, Calm Mind, Camouflage, Charge, Conversion 2, Conversion, Cosmic Power, Defense Curl, Destiny Bond, Detect, Double Team, Dragon Dance, Endure, Focus Energy, Follow Me, Growth, Grudge, Hail, Harden, Haze, Heal Bell, Helping Hand, Howl, Imprison, Ingrain, Iron Defense, Light Screen, Meditate, Milk Drink, Minimize, Mist, Moonlight, Morning Sun, Mud Sport, Perish Song, Protect, Rain Dance, Recover, Recycle, Reflect, Refresh, Rest, Safeguard, Sandstorm, Sharpen, Slack Off, Softboiled, Splash, Stockpile, Substitute, Sunny Day, Swallow, Swords Dance, Synthesis, Tail Glow, Teleport, Water Sport, Wish, and Withdraw.
- Support: All moves that do not deal damage and are not categorized under Defense, as well as Counter and Mirror Coat. These include Assist, Attract, Block, Charm, Confuse Ray, Cotton Spore, Counter, Curse, Disable, Encore, Fake Tears, FeatherDance, Flash, Flatter, Foresight, Glare, GrassWhistle, Growl, Hypnosis, Kinesis, Leech Seed, Leer, Lock-On, Lovely Kiss, Magic Coat, Mean Look, Memento, Metal Sound, Metronome, Mimic, Mind Reader, Mirror Coat, Mirror Move, Nature Power, Nightmare, Odor Sleuth, Pain Split, Poison Gas, PoisonPowder, Psych Up, Roar, Role Play, Sand-Attack, Scary Face, Screech, Sing, Sketch, Skill Swap, Sleep Powder, Sleep Talk, SmokeScreen, Snatch, Spider Web, Spikes, Spite, Spore, String Shot, Stun Spore, Supersonic, Swagger, Sweet Kiss, Sweet Scent, Tail Whip, Taunt, Teeter Dance, Thunder Wave, Tickle, Torment, Toxic, Transform, Trick, Whirlwind, Will-O-Wisp, and Yawn.
Each Nature has a set of ratios that determines how often a Pokémon with that Nature is likely to use Attack, Defense, or Support moves. These ratios change when the Pokémon's HP falls below 50%. During battle, a category is selected for a given turn, and a random attack in that category is chosen from the Pokémon's moveset; if no such attack exists, the Pokémon will "appear incapable of using its power" and skip its turn.
The following table lists each Nature and its move type preferences; it may be rearranged by clicking the boxes next to each column's heading.
| Nature | Attack | Defense | Support | Attack (<50%) | Defense (<50%) | Support (<50%) |
|---|---|---|---|---|---|---|
| Hardy | 61% | 7% | 32% | 61% | 7% | 32% |
| Lonely | 20% | 25% | 55% | 84% | 8% | 8% |
| Brave | 70% | 15% | 15% | 32% | 60% | 8% |
| Adamant | 38% | 31% | 31% | 70% | 15% | 15% |
| Naughty | 20% | 70% | 10% | 70% | 22% | 8% |
| Bold | 30% | 20% | 50% | 32% | 58% | 10% |
| Docile | 56% | 22% | 22% | 56% | 22% | 22% |
| Relaxed | 25% | 15% | 60% | 75% | 15% | 10% |
| Impish | 69% | 6% | 25% | 28% | 55% | 17% |
| Lax | 35% | 10% | 55% | 29% | 6% | 65% |
| Timid | 62% | 10% | 28% | 30% | 20% | 50% |
| Hasty | 58% | 37% | 5% | 88% | 6% | 6% |
| Serious | 34% | 11% | 55% | 29% | 11% | 60% |
| Jolly | 35% | 5% | 60% | 35% | 60% | 5% |
| Naive | 56% | 22% | 22% | 56% | 22% | 22% |
| Modest | 35% | 45% | 20% | 34% | 60% | 6% |
| Mild | 44% | 50% | 6% | 34% | 6% | 60% |
| Quiet | 56% | 22% | 22% | 56% | 22% | 22% |
| Bashful | 30% | 58% | 12% | 30% | 58% | 12% |
| Rash | 30% | 13% | 57% | 27% | 6% | 67% |
| Calm | 40% | 50% | 10% | 25% | 62% | 13% |
| Gentle | 18% | 70% | 12% | 90% | 5% | 5% |
| Sassy | 88% | 6% | 6% | 22% | 20% | 58% |
| Careful | 42% | 50% | 8% | 42% | 5% | 53% |
| Quirky | 56% | 22% | 22% | 56% | 22% | 22% |
Gallery
|
|
|
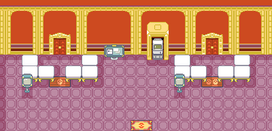
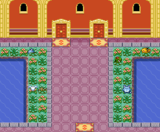
| Inside the Battle Palace | Hallway | Before battle in the Battle Palace |
Battle Factory
| Battle Factory バトルファクトリー Battle Factory | |||||||||||||||||||||
| |||||||||||||||||||||
| "Seek out the toughest POKÉMON!" | |||||||||||||||||||||
| |||||||||||||||||||||
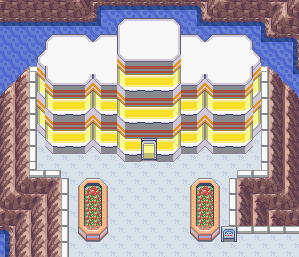
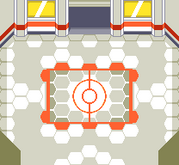
The Battle Factory (Japanese: バトルファクトリー Battle Factory) is more dedicated to research than the other facilities, and the subject of the scientists' research is the abilities of Trainers when using rental Pokémon in battle. Before the player begins a battle, they will be told some information about the opponent's team, and may switch one of the Pokémon they have with them with one of the Pokémon used by the Trainer they just defeated. This is just like the Battle Tent in Slateport City.
At the 21st and 42nd battle in a streak, three and six runs through the Battle Factory, Factory Head Noland will challenge the player to a battle. Like all other Trainers in the facility, including the player, his Pokémon are completely random, and so cannot be known until he is encountered. If he is defeated, he awards the Knowledge Symbol.
In addition to win streaks, the monitors inside the lobby display the number of times the players swapped their Pokémon during the challenge.
Battle style
A Trainer's battle style is based on the moves that his or her Pokémon know. Certain moves fall under one of seven different categories, as shown below:
Depending on how many moves in each category the Trainer's Pokémon know, his or her battle style will be described differently. A move may be counted more than once if more than one Pokémon has it, and any attack not in any of the categories is not considered.
Each category has a threshold number. For the first three categories, this is three, while for the last four categories, it is two. If the Trainer's Pokémon know enough moves to cross the threshold in exactly one or two categories, then their battle style is described by whichever of those categories is farthest down on the table below. If they do not cross the threshold in any category, though, or if they cross it in more than three categories, then the Trainer's battle style is given a special description.
| Category | Battle Style |
|---|---|
| (None) | "appears to be free-spirited and unrestrained" |
| 1 | "appears to be one based on total preparation" |
| 2 | "appears to be slow and steady" |
| 3 | "appears to be one of endurance" |
| 4 | "appears to be high risk, high return" |
| 5 | "appears to be weakening the foe to start" |
| 6 | "appears to be impossible to predict" |
| 7 | "appears to depend on the battle's flow" |
| (3 or more categories) |
"appears to be flexibly adaptable to the situation" |
Stat calculation
The Pokémon that are offered to the player at the beginning of the round are generated with uniform IVs in each stat. The IVs that the Pokémon get are based on the length of the player's win streak:
| Current Round | Fixed IV |
|---|---|
| 1 | 3 |
| 2 | 6 |
| 3 | 9 |
| 4 | 12 |
| 5 | 15 |
| 6 | 21 |
| 7 or later | 31 |
However, depending on the number of rentals (including swaps) the player has performed, some number of the generated Pokémon may have fixed IVs corresponding to the following round. The number of rentals required is shown below:
| Rent/Swaps | # of stronger Pokémon offered |
|---|---|
| Less than 15 | 0 |
| 15 to 21 | 1 |
| 22 to 28 | 2 |
| 29 to 35 | 3 |
| 36 to 42 | 4 |
| 43 or greater | 5 |
The Pokémon used by Trainers in the Battle Factory are also generated with fixed IVs in each stat. The first six Trainers in each round have Pokémon with uniform IVs corresponding to the current round (using the lookup table above), while the last Trainer's Pokémon have IVs corresponding to the following round. However, due to a bug, the "current round" used for the Trainers' Pokémon is the player's current win streak in the Battle Tower, not the Battle Factory. This means, for instance, that if the player currently has a 10-round win streak in the Battle Tower, and starts round 1 of the Battle Factory, the player's Pokémon will have IVs of 3, while the opponent Pokémon will all have IVs of 31.
The only exception to this IV calculation is Factory Head Noland. His Pokémon always have IVs corresponding to two rounds after the current win streak in the Battle Factory (not the Tower). This means that during the Silver Symbol fight, his Pokémon will have IVs of 15, and during the Gold Symbol fight, they will have IVs of 31.
Gallery
|
|
|
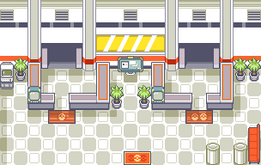
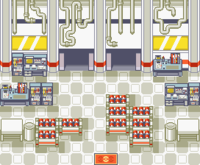
| Inside the Battle Factory | Room with rental Pokémon | Before battle in the Battle Factory |
Battle Pyramid
| Battle Pyramid バトルピラミッド Battle Pyramid | |||||||||||||||||||||
| |||||||||||||||||||||
| "Advance through the Battle Quest!" | |||||||||||||||||||||
| |||||||||||||||||||||
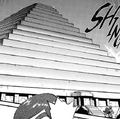
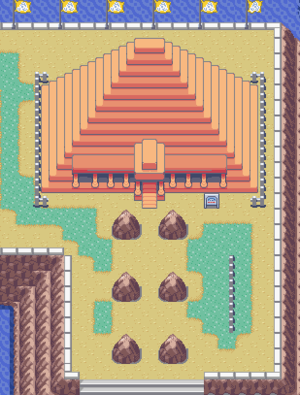
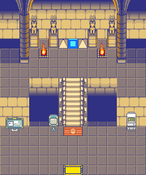
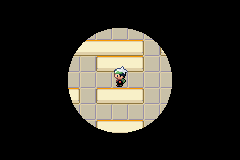
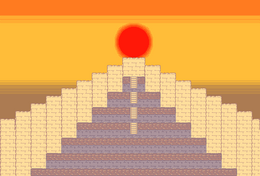
The Battle Pyramid (Japanese: バトルピラミッド Battle Pyramid) is a 7-layer pyramid. Trainers advance from one level to the next by stepping on a blue tile. Each level is shrouded in darkness, and can only be lit up by defeating opponents on the level. After a battle, a defeated trainer may provide the player with contextual hints on certain aspects of the challenge, such as the location of a given floor's exit, the number of remaining Trainers to be fought on a floor, or the number of remaining items on a given floor. The Ability Run Away does not guarantee escape here, but will be credited if the player does successfully escape with a Pokémon with the Ability.
Trainers cannot take any items into the pyramid, and items found within can only be used while inside, being stored in a special Bag called the Battle Bag that is handed out to those who challenge it. The Battle Bag has only 10 different slots, each capable of holding a quantity of up to 99 of each individual item. If the player is victorious, the Battle Bag stores said items for the next challenge. However, upon defeat the Battle Bag's contents return to one Hyper Potion and one Ether. If the player successfully completes a round but has more than 10 item types total (including bag slots and held items) after completion, they must discard any extra item slots in their Battle Bag to get down to the required 10 slots.
Wild Pokémon are encountered within the Battle Pyramid, with strategies differing depending on how many floors the player has ventured through. Several of the wild Pokémon have high base Speed, making them difficult to escape from. A Hex Maniac next to the PC will tell the player what to expect in their next attempt. The tactics used by the wild Pokémon will progress as follows (note that after the list has been completed, it will restart from the beginning):
| Category | Description | Tactic | Wild Pokémon |
|---|---|---|---|
| 1 | I see a shower of sparks… …And in it, I see your POKéMON struggling with paralysis… |
Pokémon with moves that paralyze | Plusle, Minun, Pikachu, Electabuzz, Vileplume, Manectric, Breloom and Jolteon |
| 2 | I see poison… …And, I see your POKéMON suffering from the effects of poison… |
Pokémon with moves that poison | Gulpin, Roselia, Butterfree, Seviper, Skarmory, Ludicolo, Crobat and Gengar |
| 3 | I see bright red flames… …And, I see your POKéMON suffering from burns… |
Pokémon with moves that burn | Growlithe, Vulpix, Magcargo, Ninetales, Medicham, Weezing, Dusclops and Houndoom |
| 4 | I sense the tremendous pressure of unrequited anger… It is a curse… …And, I see your POKéMON drained of Power Points and having no recourse but to use STRUGGLE… |
Pokémon with moves or Abilities that waste PP | Dunsparce, Banette, Misdreavus, Ninetales, Absol, Dusclops, Shedinja and Gengar |
| 5 | I see POKéMON loftily airborne… …And, I see your POKéMON frustrated by powerless GROUND-type moves… |
Pokémon with Levitate | Haunter, Chimecho, Solrock, Misdreavus, Claydol, Weezing, Flygon and Gengar |
| 6 | I sense terrific energy rising from the ground below… …And, I see your POKéMON unable to escape the power's clutches… |
Pokémon with Abilities that prevent escape | Diglett, Trapinch, Wynaut, Wobbuffet and Dugtrio |
| 7 | I see ICE-type POKéMON… …And, I see your POKéMON fighting the freezing effects of ice… |
Ice-type Pokémon | Glalie, Sneasel, Dewgong, Piloswine, Jynx, Cloyster, Walrein and Lapras |
| 8 | I see a flurry of moves that imperil the user… …And, I see your POKéMON falling to them… |
Pokémon with Selfdestruct or Explosion | Weezing, Electrode, Gengar, Golem, Pineco, Solrock, Forretress and Shiftry |
| 9 | I see PSYCHIC-type POKéMON… …And, I see your POKéMON in torment from PSYCHIC moves… |
Psychic-type Pokémon | Wobbuffet, Metang, Exeggutor, Slowking, Xatu, Alakazam, Starmie and Espeon |
| 10 | I see ROCK-type POKéMON… …And, I see your POKéMON suffering from ROCK moves… |
Rock-type Pokémon | Golem, Steelix, Omastar, Lunatone, Shuckle, Armaldo, Cradily and Aerodactyl |
| 11 | I see FIGHTING-type POKéMON… …And, I see your POKéMON pummeled by FIGHTING moves… |
Fighting-type Pokémon | Poliwrath, Hariyama, Breloom, Medicham, Hitmonchan, Hitmonlee, Heracross and Machamp |
| 12 | RAIN DANCE… SUNNY DAY… SANDSTORM… HAIL… I see POKéMON that become stronger with the weather… …And, I see your POKéMON confounded by different types of moves… |
Pokémon with moves that alter the weather | Quagsire, Tropius, Pupitar, Lapras, Cacturne, Flareon, Walrein and Gyarados |
| 13 | I see BUG-type POKéMON… …And, I see your POKéMON suffering from different kinds of attacks… |
Bug-type Pokémon | Pineco, Shuckle, Venomoth, Scizor, Heracross, Forretress, Armaldo and Shedinja |
| 14 | I see DARK-type POKéMON… …And, I see your POKéMON suffering from DARK-type moves… |
Dark-type Pokémon | Sableye, Sneasel, Crawdaunt, Shiftry, Cacturne, Absol, Houndoom and Umbreon |
| 15 | I see WATER-type POKéMON… …And, I see your POKéMON suffering from WATER-type moves… |
Water-type Pokémon | Octillery, Dewgong, Pelipper, Quagsire, Ludicolo, Slowking, Starmie and Blastoise |
| 16 | I see GHOST-type POKéMON… …And, I see your POKéMON suffering from GHOST-type moves… |
Ghost-type Pokémon | Duskull, Haunter, Banette, Misdreavus, Sableye, Dusclops, Shedinja and Gengar |
| 17 | I see STEEL-type POKéMON… …And, I see your POKéMON suffering from enormously powerful moves… |
Steel-type Pokémon | Mawile, Magneton, Steelix, Scizor, Forretress, Skarmory, Aggron and Metagross |
| 18 | I see flying POKéMON… …And, I see your POKéMON suffering from enormously powerful moves… |
Flying- and Dragon-type Pokémon | Dragonair, Vibrava, Altaria, Flygon, Aerodactyl, Gyarados, Kingdra and Charizard |
| 19 | I see those that have evolved from the power of stones… I also sense fire, water, and electricity… …And, I see your POKéMON suffering from those three powers… |
Pokémon that have evolved by Water, Thunder, or Fire Stone | Arcanine, Poliwrath, Raichu, Vaporeon, Jolteon, Flareon, Ninetales and Starmie |
| 20 | I see NORMAL-type POKéMON… …And, I see your POKéMON suffering from enormously powerful moves… |
Normal-type Pokémon | Kangaskhan, Swellow, Ursaring, Porygon2, Tauros, Fearow, Snorlax and Slaking |
Item balls on the ground and Pickup share the same pool of items. These items change per 7 floors/1 round.
The items found include HP-restoring and PP-restoring items, Fluffy Tails, status-restoring Berries, Revives, Sacred Ashes, battle items, as well as various held items.
| Round | 30% | 10% | 5% | |||||||
|---|---|---|---|---|---|---|---|---|---|---|
| 1 | ||||||||||
| 2 | ||||||||||
| 3 | ||||||||||
| 4 | ||||||||||
| 5 | ||||||||||
| 6 | ||||||||||
| 7 | ||||||||||
| 8 | ||||||||||
| 9 | ||||||||||
| 10 | ||||||||||
| 11 | ||||||||||
| 12 | ||||||||||
| 13 | ||||||||||
| 14 | ||||||||||
| 15 | ||||||||||
| 16 | ||||||||||
| 17 | ||||||||||
| 18 | ||||||||||
| 19 | ||||||||||
| 20 | ||||||||||
| 21 | ||||||||||
| 22 | ||||||||||
| 23 | ||||||||||
| 24 | ||||||||||
| 25 | ||||||||||
| 26 | ||||||||||
| 27 | ||||||||||
| 28 | ||||||||||
| 29 | ||||||||||
| 30 | ||||||||||
| 31 | ||||||||||
| 32 | ||||||||||
| 33 | ||||||||||
| 34 | ||||||||||
| 35 | ||||||||||
| 36 | ||||||||||
| 37 | ||||||||||
| 38 | ||||||||||
| 39 | ||||||||||
| 40 | ||||||||||
After passing through 21 floors (three passes/rounds through) and 70 floors (ten passes/rounds), Pyramid King Brandon appears at the top to challenge the player. If he is defeated, he awards the Brave Symbol.
Gallery
|
|
|
| Inside the Battle Pyramid | A dark maze | Top of the Battle Pyramid |
Battle Dome
| Battle Dome バトルドーム Battle Dome | |||||||||||||||||||||
| |||||||||||||||||||||
| "Your path to the invincible superstar!" | |||||||||||||||||||||
| |||||||||||||||||||||
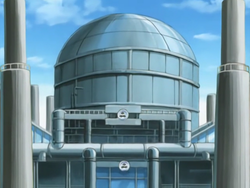
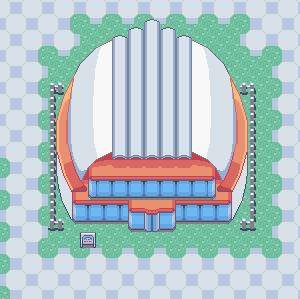
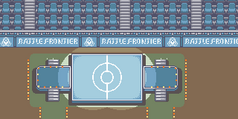
The Battle Dome (Japanese: バトルドーム Battle Dome) is a tournament between 16 Trainers.
Before each battle, the player can find out about their opponent, such as the Pokémon they use, their battle style, and how they train. Competitors can find out who was eliminated in each round by looking at the tournament bracket.
After the player has won five and ten championships, Dome Ace Tucker will challenge him or her. On his defeat, he awards the Tactics Symbol.
Seeding
The tournament bracket is organized as follows:
- Left Bracket: 1 vs 9, 13 vs 5, 8 vs 16, 12 vs 4
- Right Bracket: 3 vs 11, 15 vs 7, 6 vs 14, 10 vs 2
Seedings are determined by their ranking: the sum of the combined base stat totals of all Pokémon, plus 1/20 of the product of the number of different types represented by the Pokémon and the highest level among the Pokémon. If two Trainers tie in ranking, the higher internal Trainer number will win the tiebreaker; the player will always win the tiebreaker against any CPU Trainer, while Dome Ace Tucker will win any tiebreaker against other CPU Trainers. In the event of a tie battle, the higher seed advances and the lower seed is eliminated.
Battle Style
The battle style of a Trainer is solely determined by the effort values of all of the Trainer's Pokémon. A stat is considered to be emphasized if it makes up at least 30% of the team's EVs (taking Nature into account: for this calculation, EVs on a Pokémon with a beneficial Nature are worth 10% more, while EVs on a hindering Nature are worth 10% less), and neglected if there are no EVs in that stat among the entered Pokémon.
If there are any emphasized stats, they are shown (if there are three emphasized stats, only two are shown). Otherwise, if there are any neglected stats, they are shown (if there are more than two, only two are shown; the ones that are shown are further influenced by the number of entered Pokémon having a hindering Nature in the particular stat). Otherwise, the Trainer is said to "raise Pokémon in a well-balanced way."
CPU Battles
Note that the game does not simulate battles between two CPU Trainers. Instead, the outcome between two CPU Trainers is broken down as follows: each Trainer is scored based upon the sum of the following:
- The type affinity of damaging attacks: each attack dealing damage on the team is compared against each Pokémon on the opposing team. 4 points are awarded if the attack is normally effective, 12 if super effective, and 20 if 4× super effective. No points are awarded if the attack is resisted. 8 points are deducted if the attack is 4× resisted, and 16 points are deducted if the attack is ineffective. For the purposes of calculating this, Ground-type attacks are considered to be neutral against Pokémon with Levitate. Against Pokémon with Wonder Guard, type matchups that are not super effective do not award nor deduct points.
- The sum of the base stats of all Pokémon, divided by 10
- The seeding of the Trainer, minus 1
- A random value from 0 to 31
The Trainer with the higher score advances; if this is a tie, then the higher-seeded Trainer advances. During tournaments in which he may be challenged by the player, Tucker always appears as the #2 seeded contestant, and will always win his battles against CPU opponents.
CPU Pokémon Selection
To determine the Pokémon sent out by a CPU Trainer against the player, each of the CPU Trainer's three Pokémon is given a score. There are two scoring methods, which are chosen at random: the offensive method and defensive method. Both methods compare the type affinity of the Pokémon's damaging attacks against each of the three Pokémon on the player's team. In the offensive method, 2 points are awarded if the attack is normally effective, 4 if super effective, and 8 if 4× super effective. In the defensive method, 2 points are awarded if the attack is resisted, 4 if 4× resisted, and 8 if ineffective. 2 points are deducted if super effective, and 4 are deducted if 4× super effective. No points are awarded or deducted in any other scenario. For the purposes of this calculation, type matchups that are not super effective against Pokémon with Wonder Guard are ignored (no points are awarded or deducted), and Ground-type attacks are considered to be neutral against Pokémon with Levitate.
If all three Pokémon tie in one method, the other method is used. If all three Pokémon tie in the second method, then two Pokémon and the order they appear are chosen at random. Otherwise, the two highest-scoring Pokémon is chosen (if there is a tie for the second selection, the second selection of Pokémon is chosen at random). There is a 40% chance that the CPU Trainer will lead off with the higher-scoring Pokémon, and a 60% chance of leading off with the lower-scoring Pokémon.
Gallery
|
|
|
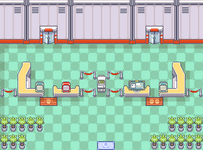
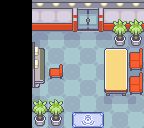
| Inside the Battle Dome | Trainers can view info on their opponents | Before battle in the Battle Dome |
Battle Arena
| Battle Arena バトルアリーナ Battle Arena | |||||||||||||||||||||
| |||||||||||||||||||||
| "Let the toughest teams gather!" | |||||||||||||||||||||
| |||||||||||||||||||||
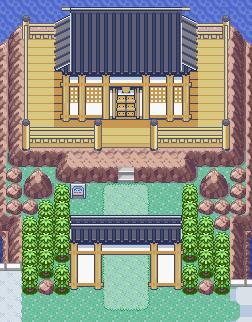
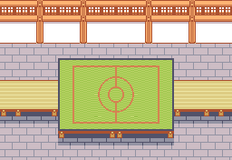
The Battle Arena (Japanese: バトルアリーナ Battle Arena) pits two Pokémon against one another for three rounds. If both Pokémon last all three rounds, they are rated on how they battled in three aspects, and the Pokémon with the higher score wins, and the losing Pokémon leaves battle. If they somehow tie, both Pokémon leave battle. A knockout results in an automatic win for the Pokémon that is still standing. Trainers are not allowed to switch out their Pokémon, and they must be sent out in the order they were entered.
Pokémon are scored on their mind, skill, and body. This is much like the Fallarbor Town Battle Tent rules. The Pokémon with the better rating in each category scores two points, while a tie will award one point to each Pokémon.
- Mind judges Pokémon on their offensive style. One point is awarded if a move that deals damage is chosen for use (except Counter, Mirror Coat, and Bide, which do not award points, and Fake Out, which deducts one point), and one point is deducted if Protect, Detect, or Endure was chosen. All other moves do not award points. Only the move selection matters; even if the Pokémon does not actually use the move (due to an effect such as paralysis), it will still score in this category. The Pokémon with the higher number of points wins the two points in the overall judgment.
- Skill judges Pokémon on accuracy. One point is awarded if any move is used successfully, while two points are deducted if the move misses, fails, or is prevented from executing due to an effect such as paralysis. If the move was caused to fail by Protect, Detect, or flinching from Fake Out, however, no points are deducted. Hitting a move super effectively rewards two points rather than one, but dealing not very effective damage instead deducts one point. The Pokémon with the higher number of points wins the two points in the overall judgment.
- Body judges the amount of HP remaining at the end of the third round compared to their amount at the start of the first. The Pokémon with the better ratio wins the two points in the overall judgment.
After 28 wins and 56 wins, Arena Tycoon Greta appears to challenge the player. On her defeat, she awards the player with the Guts Symbol.
Gallery
|
|
|
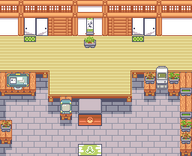
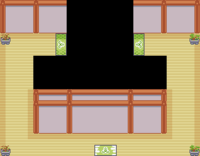
| Inside the Battle Arena | Hallway | Before battle in the Battle Arena |
Battle Pike
| Battle Pike バトルチューブ Battle Tube | |||||||||||||||||||||
| |||||||||||||||||||||
| "Choose one of three paths!" | |||||||||||||||||||||
| |||||||||||||||||||||
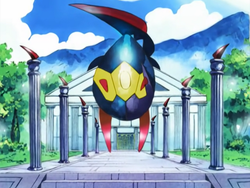
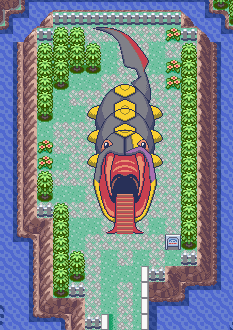
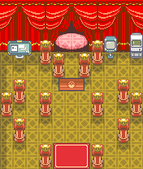
The Battle Pike (Japanese: バトルチューブ Battle Tube) is a long pike in the design of a Seviper. The player is challenged to make it through seven rooms, but before each one they are given a choice of three rooms to enter. In any room, one of the following eight events may occur:
- Single battle: A Trainer with 3 Pokémon walks up to the player and battles.
- Double battle: Two Trainers each with 1 Pokémon walk up to the player and battle.
- Single battle and healing: The Single battle Trainer is more difficult than usual and the winner's Pokémon are completely healed.
- Wild Pokémon: Wild Seviper, Milotic, Dusclops, Electrode, Breloom, and Wobbuffet appear as the player crosses the room.
- No event: An NPC stands in the room but does nothing.
- Status effect: A surprise attack will inflict a status on one or more of a player's Pokémon. The status includes Kirlia's burn, paralysis, poison, or sleep and Dusclops's burn or freeze.
| Status Effect | Probability |
|---|---|
| Poison | 35% |
| Freeze | 25% |
| Paralysis | 20% |
| Sleep | 10% |
| Burn | 10% |
- One or two recovery: One or two of the player's Pokémon will be healed.
- Full recovery: All three of the player's Pokémon will be healed.
The player may not change the order of his/her party during a challenge.
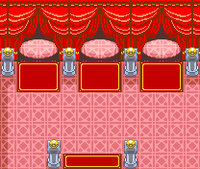
In the area where the player must pick one among the three rooms, a lady standing outside will name one room and hint at what is in that room. Each quote has two possibilities, but the first is more common than the second.
| Quote | Result 1 | Result 2 |
|---|---|---|
| For some odd reason, I felt a wave of nostalgia coming from it... |
Status ailment | Heals one or two Pokémon |
| Is it...A Trainer? I sense the presence of people... |
Single battle | Heals all Pokémon |
| It seems to have the distinct aroma of Pokémon wafting around it... |
Wild Pokémon | Single battle, then heal party |
| I seem to have heard something... It may have been whispering... |
Idle NPC | Double battle |
| From every path I sense a dreadful presence... |
Battle Pike Queen Lucy | |
The Frontier Brain of the Battle Pike is Pike Queen Lucy. She challenges Trainers who complete two passes through the pike (Silver) and 10 passes through the pike (Gold). By beating her, one is awarded with the Luck Symbol.
Wild Pokémon
| Pokémon | Games | Location | Levels | Rate | |||||||||||
|---|---|---|---|---|---|---|---|---|---|---|---|---|---|---|---|
| Room 1-280 | |||||||||||||||
|
R | S | E |
|
46, 60-96 | 26% | |||||||||
|
R | S | E |
|
46, 60-96 | 26% | |||||||||
|
R | S | E |
|
45, 60-95 | 48% | |||||||||
| Room 281-560 | |||||||||||||||
|
R | S | E |
|
46, 60-96 | 26% | |||||||||
|
R | S | E |
|
46, 60-96 | 26% | |||||||||
|
R | S | E |
|
45, 60-95 | 48% | |||||||||
| Room 561-840 | |||||||||||||||
|
R | S | E |
|
46, 60-96 | 26% | |||||||||
|
R | S | E |
|
46, 60-96 | 26% | |||||||||
|
R | S | E |
|
45, 60-95 | 48% | |||||||||
| Room 841+ | |||||||||||||||
|
R | S | E |
|
46, 60-96 | 26% | |||||||||
|
R | S | E |
|
46, 60-96 | 26% | |||||||||
|
R | S | E |
|
45, 60-95 | 48% | |||||||||
| A colored background means that the Pokémon can be found in this location in the specified game. A white background with a colored letter means that the Pokémon cannot be found here. | |||||||||||||||
Level 50
|
|
| ||||||||||||||||||||||||||||||||||||||||||||||||||||||||||||||||||||||||
|
|
| ||||||||||||||||||||||||||||||||||||||||||||||||||||||||||||||||||||||||||
Open Level
|
|
| ||||||||||||||||||||||||||||||||||||||||||||||||||||||||||||||||||||||||
|
|
| ||||||||||||||||||||||||||||||||||||||||||||||||||||||||||||||||||||||||||
Gallery
|
|

|
| Inside the Battle Pike | Room with three entrances | Before battle in the Battle Pike |
Other points of interest
Artisan Cave
- Main article: Artisan Cave
The Artisan Cave is a long cave connecting one end of the Battle Frontier to the other. It starts near the Battle Palace and the exit is right next to the Battle Tower. The only wild Pokémon found inside is Smeargle.
House
There is a house next to the Battle Tower. Inside, there is a Trainer who wants to trade a Meowth for a Skitty.
Record Hall
The record hall contains all of the records that the player has set at the Battle Frontier. There are three rooms. The one on the left contains records for the Battle Pike, Dome, and Factory, the one in the center has records for the Battle Tower, and the one on the right contains records for the Battle Palace, Pyramid, and Arena.
If the player mixes records with another Emerald game, Battle Frontier records will be copied over from the other game and compared.
Sudowoodo
A level 40 Sudowoodo is located in the southeast section of the Battle Frontier. Much like in Generation II, NPCs will talk about it as if it is a tree. However, when the player uses the Wailmer Pail on it, it will spring to life and battle the player. This Sudowoodo blocks the path to the Artisan Cave until it is battled. This is the only location a wild Sudowoodo can be battled in the Generation III handheld games.
Betting man
In the house south of the Battle Pyramid a man can be visited. After receiving at least 3 silver Symbols, he will ask the player to compete in a random facility, which changes daily. The player can give him 5, 10, or 15 Battle Points. If the player wins, the man will give him back twice the amount the player gave him. If the player loses, the Battle Points are lost.
Stats judge
- Main article: Stats judge
In the house above the Pokémon Center is an old man who can judge one of the player's Pokémon's stats. He examines the Pokémon's IVs and gives feedback on how high or low they are. First he describes the Pokémon's "ability", which is based on the sum of all six of its IVs. Then he indicates which stat has the highest IV and what range it falls in. If 2 or more IVs are tied for the highest then he will choose one randomly.
| Pokémon's ability | IV total |
|---|---|
| Average | 0 to 90 |
| Better-than-average | 91 to 120 |
| Quite impressive | 121 to 150 |
| Wonderfully outstanding | 151 to 186 |
| Highest IV | Range |
|---|---|
| Relatively good | 0 to 15 |
| Quite impressive | 16 to 25 |
| Outstanding | 26 to 30 |
| Flawless | 31 |
Move Tutors
In a house next to the Battle Dome, there are two Move Tutors. They will teach a Pokémon a selection of attacks for a price in Battle Points.
List of Move Tutor moves
|
| ||||||||||||||||||||||||||||||||||||||||||||||||||||||||||||||||||||||||||||||||||
Battle Point Exchange Service Corner
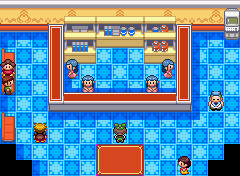
The Battle Point Exchange Service Corner, or simply the Exchange Service Corner, sells various goods in exchange for Battle Points earned at other parts of the Battle Frontier. Players can purchase goods for their Secret Base, vitamins, and items that can be held by a Pokémon.
| Leftmost cashier | |||||||
|---|---|---|---|---|---|---|---|
|
| ||||||
|
| ||||||
|
| ||||||
|
| ||||||
|
| ||||||
| Second cashier from left | |||||||
|---|---|---|---|---|---|---|---|
|
| ||||||
|
| ||||||
|
|||||||
| Second cashier from right | |||||||
|---|---|---|---|---|---|---|---|
|
| ||||||
|
| ||||||
|
| ||||||
| Rightmost cashier | |||||||
|---|---|---|---|---|---|---|---|
|
| ||||||
|
| ||||||
|
| ||||||
|
| ||||||
|
|||||||
Poké Mart
| Poké Mart | |||||||
|---|---|---|---|---|---|---|---|
|
| ||||||
|
| ||||||
|
| ||||||
|
| ||||||
|
| ||||||
|
| ||||||
|
|||||||
In the anime
In the anime, this Battle Frontier, rather than being on one of Hoenn's many small islands, is spread across the Kanto region, presumably so as to reflect on the then-recent releases of Pokémon FireRed and LeafGreen as well as Emerald. Much like how the Gyms do not have a requirement that Ash beats anyone besides the Gym Leader, Ash is not required to compete in any matches besides those against the Frontier Brain.
The Battle Frontier is owned and operated by Scott, who Ash first met in The Scheme Team.
Battle Tower
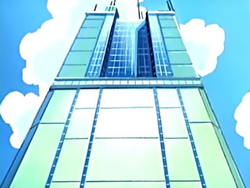
In the anime, the Battle Tower was the sixth of the facilities Ash challenged, in Talking a Good Game! and Second Time's the Charm!. After losing the first match, Ash redoubled his efforts and rechallenged Anabel, resulting in a win. This version of the Battle Tower is near Tohjo Falls.
For the Battle Tower in LaRousse City, see here.
Pokémon used in Battle Tower
| Debut | Talking a Good Game! |
|---|---|
| Voice actors | |
| Japanese | Kenta Miyake |
| English | Maddie Blaustein |
Anabel first called on Alakazam in Talking a Good Game! to help her and Ash when they were attacked by Team Rocket. Alakazam was able to beat them with its powerful Psychic attacks. Ash then realized that Anabel was a Frontier Brain and that he would have to battle Alakazam. Ash chose Corphish for the match. Anabel had the ability to telepathically communicate with her Pokémon and give commands without saying a word. In the end, Alakazam easily defeated Corphish. Alakazam then went on to defeat Ash's Tauros before finally being defeated by his Pikachu, but not before weakening it.
In Second Time's the Charm!, Ash had a rematch with Anabel. Again, she chose Alakazam as her first Pokémon. It went head to head again with Ash's Corphish once again, but this time with a little bit of luck as well as Ash's quick thinking, Alakazam was defeated by Corphish's Bubble Beam.
Alakazam's known moves are Psychic, Psybeam, Focus Punch, and Recover.
| Debut | Talking a Good Game! |
|---|---|
| Voice actors | |
| Japanese | Unshō Ishizuka |
| English | Unshō Ishizuka |
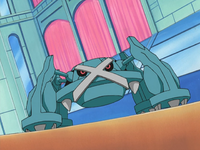
Metagross was for the first time seen during Ash's first match against her, where it easily defeated Ash's Pikachu, losing the match for Ash. During Ash's rematch against Anabel, Metagross easily defeated Ash's Corphish, but the Iron Leg Pokémon finally tied with his Tauros, as its Meteor Mash collided with Tauros's Take Down.
Metagross's known moves are Psychic, Iron Defense, Meteor Mash, and Hyper Beam.
| Debut | Second Time's the Charm! |
|---|---|
| Voice actors | |
| Japanese | Megumi Hayashibara |
| English | Megumi Hayashibara |
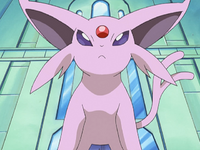
Espeon, Anabel's favorite Pokémon, was seen during Ash's rematch against her, where it battled against Ash's Pikachu. Even though Espeon at first managed to overwhelm Pikachu with its speed and power, one of Pikachu's Thunderbolts put the lights off, making it impossible for both Anabel and Espeon to see where the next attack was coming from. This cost some critical hits for Espeon, and Pikachu was finally able to defeat the Sun Pokémon with a Volt Tackle, winning the match for Ash and earning him the Ability Symbol.
Espeon's known moves are Quick Attack, Iron Tail, Zap Cannon, and Psychic.
Battle Palace
The Battle Palace was the fifth facility to be challenged by Ash in the anime, where it was on Metallica Island, near the Seafoam Islands. It appeared in Cutting the Ties that Bind! and Ka Boom with a View!. The Battle Palace challenge doesn't take place inside the palace itself, instead starting from a battlefield on a nearby plateau and then moving on into the surrounding jungle and beach. Spenser can also allow challengers to take a break in the middle of the battle.
Pokémon used in Battle Palace
| Debut | Ka Boom with a View! |
|---|
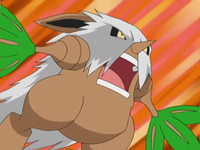
Shiftry first appeared in Ka Boom with a View!, where it was the first Pokémon to be sent against Ash, while he chose Sceptile. Before using any move, Shiftry dodged the Bullet Seed from Sceptile and was told to move to the jungle. It had immense speed, but Sceptile was just as fast, as it followed close behind. After the two Grass types reached a small waterfall, both continued their duel. Shiftry managed to push Sceptile into the pool of water, then used Rock Smash to send rocks down into the pool. However, Sceptile escaped up through the waterfall and landed a hit on Shiftry, knocking it out, and winning Ash the first victory.
Shiftry's known moves are Shadow Ball, Quick Attack, Double Team, and Rock Smash.
| Debut | Cutting the Ties that Bind |
|---|---|
| Voice actors | |
| Japanese | Kenta Miyake |
| English | Craig Blair |
- Main article: Spenser's Venusaur
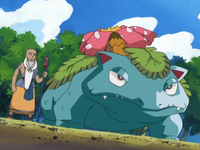
Spenser's Venusaur was the second Pokémon chosen by Spenser to go against Ash. It managed to defeat Ash's Heracross, but finally lost to Swellow.
Vensaur's known moves are Sweet Scent, Vine Whip, Razor Leaf, Tackle and Solar Beam.
| Debut | Ka Boom with a View! |
|---|---|
| Voice actors | |
| Japanese | Kōichi Sakaguchi |
| English | Kōichi Sakaguchi |
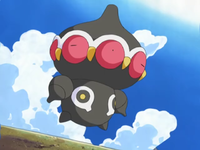
Claydol appeared in the episode Ka Boom with a View!, where it was the third Pokémon to be sent out against Ash. Claydol had to face Ash's Swellow and Sceptile before being defeated by Sceptile's newly learned SolarBeam. Claydol is the powerhouse of Spenser's team.
Claydol's known moves are Teleport, Rapid Spin, Sandstorm, Hyper Beam, and Psybeam.
Battle Factory
In the anime, the Battle Factory is located near Cerulean City, and was the first facility challenged by Ash. It appeared in Numero Uno Articuno and The Symbol Life. The Frontier Brain Noland allows the challenger to choose one of his Pokémon for him to use in a one-on-one battle. According to Scott, he suggested that a sky roof would be added so that Flying-types could use their full potential.
Pokémon used in Battle Factory
| Debut | Numero Uno Articuno |
|---|---|
| Voice actors | |
| Japanese | Katsuyuki Konishi |
| English | Katsuyuki Konishi |
- Main article: Noland's Articuno
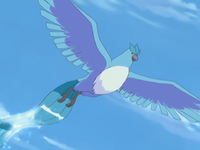
While on their way to the Battle Factory, Ash and his friends spotted Articuno flying through the night sky, accompanied by a biplane. After meeting up with Noland, he explains that he'd been cruising with Articuno the previous night. Max was impressed on how Noland caught such a powerful Pokémon, but Noland further explains that Articuno is wild, and a friend of his.
Noland revealed that on his biplane's maiden voyage, Noland was surprised to find an Articuno flying beside him and it had trouble flying due to an injured wing. The Factory Head got the Pokémon to land on top of his plane and brought it down. Noland helped it to heal, and ever since then Articuno had been regularly visiting him.
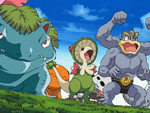 Venusaur |
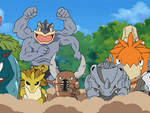 Machamp |
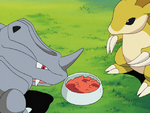 Rhyhorn |
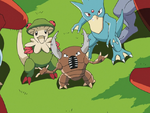 Breloom |
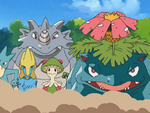 Rhydon |
 Lairon |
 Pinsir |
 Camerupt |
 Sandslash |
 Golduck |
 Manectric |
 Trapinch |
Battle Pyramid
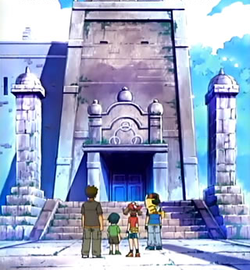
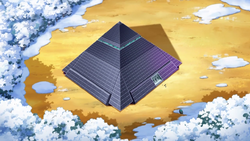
In the anime, the Battle Pyramid was located near Pewter City, but has hovercraft-like turbines installed in its underside, thus giving it the ability to move around anywhere. The location of the Battle Pyramid is only revealed to those who have defeated the other six Frontier Brains, and so it was the seventh and final facility challenged by Ash, doing so three times between Battling the Enemy Within! and Pace - The Final Frontier! before finally managing to win.
In A Pyramiding Rage!, the Battle Pyramid traveled to Snowpoint City. Here, Brandon battled and defeated Paul. In the following episode, the Battle Pyramid was used in defending the Snowpoint Temple from Pokémon Hunter J.
Pokémon used in Battle Pyramid
| Debut | Battling the Enemy Within! |
|---|---|
| Voice actors | |
| Japanese | Katsuyuki Konishi |
| English | Katsuyuki Konishi |
- Main article: Brandon's Regirock
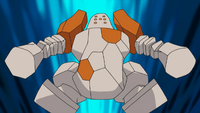
Brandon used Regirock against Ash during their unofficial battle while Ash was possessed by the King of Pokélantis. Regirock went up against Sceptile and won despite the type-disadvantage. Regirock later sent Team Rocket blasting off along with Registeel during Ash and Brandon's rematch.
Regirock was used in the Full Battle against Paul and was able to easily defeat his Hariyama, Electabuzz, Ursaring, and Magmar.
| Debut | Overjoyed! |
|---|---|
| Voice actors | |
| Japanese | Tomoe Hanba |
| English | Tomoe Hanba |
- Main article: Brandon's Registeel
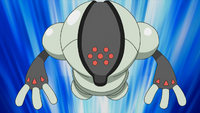
After the Kanto Grand Festival, Ash was finally allowed an official battle against Brandon in another one-on-one battle. Brandon used Registeel, while Ash used his Torkoal. The two fought hard, and although Registeel was left extremely weak after the battle, it was Torkoal who was defeated. Registeel later sent Team Rocket blasting off alongside Regirock during Ash and Brandon's rematch.
During the Full Battle against Paul, it was easily able to stand up to his Magmar's Fire-type moves, despite the type weakness. It also managed to defeat Paul's Nidoking despite taking damage from its Ground-type and Fighting-type attacks.
| Debut | Gathering the Gang of Four! |
|---|---|
| Voice actors | |
| Japanese | |
| English | Bill Rogers |
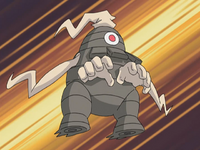
Dusclops was the first Pokémon used by Brandon during his rematch and proved to be very powerful, being able to take down Ash's Charizard before being defeated by Bulbasaur's Solar Beam.
Dusclops's known moves are Will-O-Wisp, Shadow Punch, Mean Look, and Confuse Ray.
| Debut | Pace - The Final Frontier! |
|---|---|
| Voice actors | |
| Japanese | Daisuke Sakaguchi |
| English | Billy Beach |
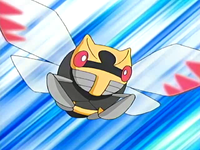
Ninjask was the second Pokémon used by Brandon during his rematch against Ash, where it went up against his Squirtle. Despite a closely fought battle, Ninjask couldn't stand up to Squirtle's Skull Bash and was defeated.
Ninjask's known moves are Aerial Ace, Sandstorm, Double Team, and Sand Attack.
| Debut | Pace - The Final Frontier! |
|---|---|
| Voice actors | |
| Japanese | Megumi Hayashibara |
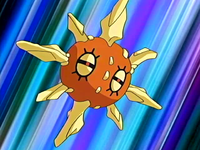
Brandon used Solrock third in the rematch against Ash, and it was able to defeat his Squirtle. After knocking the Tiny Turtle Pokémon out of the match, it then went up against Bulbasaur. The two fought hard for their Trainers, eventually knocking each other out of the battle.
Solrock's known moves are Psywave, Confusion, Shadow Ball, and Solar Beam.
| Debut | Pace - The Final Frontier! |
|---|---|
| Voice actors | |
| Japanese | Tomoe Hanba |
| English | Tomoe Hanba |
- Main article: Brandon's Regice
After his first three Pokémon were defeated in Pace - The Final Frontier!, Brandon sent out his newly-caught Regice against Pikachu. Regice fought its hardest against the Electric type and looked poised to win, but Pikachu was able to whittle down its strength with Iron Tail and Volt Tackle to claim victory.
During the Full Battle against Paul, Regice battled Ursaring, and was able to defeat his Lairon with no trouble.
Battle Dome
In the anime, Ash challenged the Battle Dome, which is located near Lavender Town, in Tactics Theatrics!!, as his third facility. In the Battle Dome, the challenger is given the possibility of swapping their party Pokémon with the ones they have in storage after the Frontier Brain has revealed his Pokémon.
Pokémon used in Battle Dome
| Debut | Tactics Theatrics!! |
|---|---|
| Voice actors | |
| Japanese | Kōichi Sakaguchi |
| English | Bill Rogers |
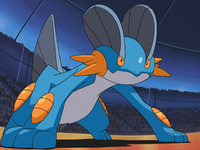
Swampert was one of the two Pokémon that battled against Ash's Corphish and Ash's Swellow, and gave Ash a run for his money. Swampert and Arcanine seemed like a perfect combination, taking advantage of Arcanine's speed and its defense as stated by Brock in the episode. In the Double Battle, Swampert's main target was Corphish. Even though it looked bad for Ash, after Tucker used the Fusion of Fire and Water, Corphish and Swellow gained their fighting spirit and came back to win the match for Ash. Swampert was defeated by a devastating Aerial Ace from Swellow.
Swampert's known moves are Protect, Mud Shot, Dynamic Punch, Water Gun, and Water Pulse.
| Debut | Tactics Theatrics!! |
|---|---|
| Voice actors | |
| Japanese | Chie Satō |
| English | Chie Satō |
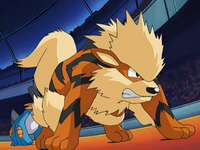
The other Pokémon Tucker used was Arcanine. Swampert and Arcanine were a perfect combination, taking advantage of Arcanine's speed and Swampert's defense. Even though it looked bad for Ash, after Tucker's Fusion of Fire and Water, Corphish and Swellow gained their fighting spirit and with the help of some strategy of Ash's, they were able to win the match. Arcanine was defeated by a devastating Crabhammer from Ash's Corphish.
Arcanine's known moves are Extreme Speed, Flamethrower, Fire Blast, and Aerial Ace.
Battle Arena
In the anime, Ash challenged the Battle Arena, located near Saffron City, as his second facility, in Wheel of Frontier!. Before the match begins, a special wheel machine is used to determine if the match is 1-vs-1, 2-vs-2, or 3-vs-3.
Pokémon used in Battle Arena
| Debut | Wheel of Frontier |
|---|---|
| Voice actors | |
| Japanese | Unshō Ishizuka |
| English | Bill Rogers |
Hariyama was the first Pokémon used by Greta in her battle with Ash, where it first battled with Ash's Grovyle. Despite that Grovyle managed to outmatch Hariyama in speed and deal some damage on it, Greta was finally able to use Grovyle's momentum as her own advantage, and land a critical hit on the Wood Gecko Pokémon, knocking it out.
Ash next used his Snorlax against the Arm Thrust Pokémon. Despite having disadvantage in type, Snorlax was able to keep itself safe from Hariyama's attacks by using Harden. Eventually, Hariyama was knocked out with an Ice Punch.
Hariyama's known moves are Arm Thrust and Focus Punch.
| Debut | Wheel of Frontier |
|---|---|
| Voice actors | |
| Japanese | Megumi Hayashibara |
| English | Sarah Natochenny |
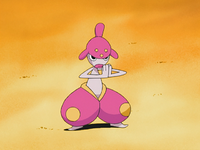
Greta chose Medicham, along with her Hariyama to battle Ash in Wheel of Frontier. It was the second to go up after Hariyama was defeated by Ash's Snorlax. Medicham overwhelmed Snorlax with its astounding speed and agility. With Ice Punch, Medicham was able to freeze Snorlax giving Greta a huge advantage.
Ash then commanded Snorlax to use Rest, and Greta told Medicham to attack Snorlax with repeated Focus Punches in order to break the ice. Greta told Medicham to use High Jump Kick but Snorlax managed to dodge it, causing Medicham to take some damage. Snorlax then tried to attack it with a Hyper Beam, but Medicham dodged it and hit it with Focus Punch.
Just when it seemed it was all over for Ash, he commanded Snorlax to use Hyper Beam on the ground which catapulted it into the air. Using its altitude to his advantage, Ash told it to attack with a full-on Body Slam, defeating Medicham and earning Ash the Guts Symbol.
Battle Pike
In the anime, the Battle Pike is located near Fuchsia City, and Ash challenged it as his fourth facility in Queen of the Serpentine!.
Pokémon used in Battle Pike
| Debut | Queen of the Serpentine! |
|---|---|
| Voice actors | |
| Japanese | Megumi Hayashibara |
| English | Bill Rogers |
- Main article: Lucy's Seviper
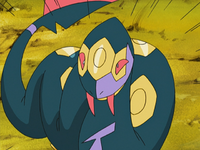
Lucy's signature Pokémon is Seviper. It appeared for the first time fighting Jessie's Seviper and later battled Ash's Donphan.
| Debut | Queen of the Serpentine! |
|---|---|
| Voice actors | |
| Japanese | Chie Satō |
| English | Michele Knotz |
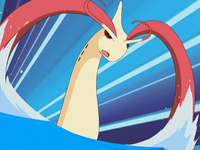
Milotic was Lucy's second choice after defeating Seviper, where, with a single Hydro Pump it was able to defeat Donphan. In the fight against Ash's Pikachu, Milotic managed to deal severe damage to Pikachu, but Pikachu won after using Volt Tackle in one of Milotic's Twisters.
Milotic's known moves are Hydro Pump, Twister, Iron Tail, and Facade.
In the manga
In the Ash & Pikachu manga
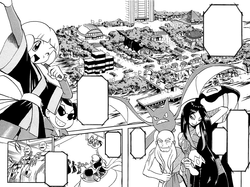
The Battle Frontier first appeared in Off To The Battle Frontier!!. Unlike the anime, only the Battle Factory, Battle Arena, and Battle Pike appeared.
In the Pokémon Adventures manga
In the Emerald arc, a Pokédex holder named Emerald challenged the Battle Frontier during its seven-day opening ceremony. Eventually it was revealed that he had been sent to the Battle Frontier by Professor Oak in order to catch Jirachi, which he had predicted to be awake at the site during the same seven days that the Battle Frontier opening ceremony would take place. It turned out that an armored villain named Guile Hideout was also planning to catch Jirachi for his own evil ambitions, even stealing all the rental Pokémon from the Battle Factory to be used against anyone getting in his way.
During his Battle Factory challenge, Emerald rented a Sceptile, which turned out to be on a higher level than the other rental Pokémon. This made Emerald realize that Sceptile was not a rental Pokémon to begin with, but had been snuck into the facility by someone. Thus, he decided to take it with him. During Emerald's Battle Dome challenge, Ruby revealed that Sceptile was actually the very same Treecko that Emerald had once been supposed to receive from Professor Birch.
Despite Emerald and the Frontier Brains' best efforts, Jirachi was eventually caught by Guile Hideout. Using Jirachi's wish, he summoned a giant Kyogre-shaped mass of water to sink the Battle Frontier into the ocean. However, thanks to Emerald's own wish to Jirachi, Red, Blue, Green, Yellow, and Silver were freed from their petrified states, and all ten Pokédex holders and their Pokémon united their strengths to defeat Guile Hideout and save the Battle Frontier. Shortly before Jirachi fell asleep again, Scott used the last one of its three wishes to summon thousands of people to visit the Battle Frontier.
Accompanying Emerald during his Battle Frontier challenge were also reporter Todd Snap, as well as Latios and Latias, Emerald's close friends.
In the Pokémon Battle Frontier manga
The Pokémon Battle Frontier manga featured a boy named Enta being invited to the Battle Frontier by Scott. Once there, he was tutored by Pokémon League Champion Rald, and begun to challenge the Frontier Brains. In the end, he managed to defeat six of the seven facilities.
The manga concluded with Enta's battle with Anabel, which ended in a draw. Despite Enta's challenge of the Frontier Brains being a major focus, Noland, Greta, and Brandon didn't appear within the actual series, only appearing on the title page of the fourth chapter.
In the Pokémon Pocket Monsters manga
The Battle Frontier appeared in The Selected Trainer?!.
In the TCG
The EX Emerald expansion for the Pokémon Trading Card Game featured two Battle Frontier-related cards:
| Card | Type | Rarity | Expansion | Set No. |
|---|---|---|---|---|
| Scott | T | EX Emerald | 84/106 | |
| Battle Frontier | T | EX Emerald | 75/106 |
Trivia
- A girl inside the Battle Pike says "I've completed the challenge 10 times now, but I've never had to battle a Trainer once." This information would be false, because after two straight wins and again at ten straight wins, she would have to battle Lucy. However, it should be noted that she did not state whether or not she beat the Battle Pike ten times in a row, so this might not necessarily be an error.
- It's possible for the Trainers fought in the Battle Frontier to have Shiny Pokémon.
- If, by cheating, players enter through the Battle Palace's Single Battle Halls, the game will then randomly choose Lv. 50 or Open Level, and they will be able to battle Trainers with all six Pokémon they have in their party. When they battle the second Trainer, only the first three Pokémon in their party may be used, and their only move will be Sketch.
- All enemy Trainers in the Battle Frontier, except the Frontier Brains, greet the player character before battle with a string of up to six preset words, phrases, or characters from the easy chat system. After the battle, the enemy gives out another message of the same format which depends on whether they have won or lost. This is also the case for all enemies in the Battle Tents or Trainer Hill.
- However, this is not the case for the greetings of any Apprentices that have been mentored by the player or other individuals. When greeting the player prior to battling in the Battle Tower, the Apprentice will typically state the name of his or her mentor, as well as his or her numerical position in the line of all Apprentices tutored by someone (such as being the 7th apprentice tutored by the player).
- Messages are also altered for enemy Trainers present within the Battle Pyramid. After a battle, they provide the player with contextual hints on certain aspects of the challenge, such as the location of a given floor's exit, the number of remaining Trainers to be fought on a floor, or the number of remaining items on a given floor.
- According to an interview with Junichi Masuda, the Battle Frontier did not make a return in Pokémon Omega Ruby and Alpha Sapphire for the following reason: "Put simply, the Battle Frontier wasn't included because only a tiny number of players would have appreciated and used this game feature. Players get fed up more easily than they did in the past and aren't attracted by these 'demanding' challenges."[1]
References
In other languages
| ||||||||||||||||||||||||||||||||||||||||||||||||||||||||||
|
Battle Palace
|
Battle Factory
|
Battle Pyramid
| ||||||||||||||||||||||||||||||||||||||||||||||||||||||||||||||||||||||||||||||||||||||||||||||||||||||||||||||||||||||||||||||||||||||||||||||||||||||
|
Battle Dome
|
Battle Arena
|
Battle Pike
| ||||||||||||||||||||||||||||||||||||||||||||||||||||||||||||||||||||||||||||||||||||||||||||||||||||||||||||||||||||||||||||||||||||||||||||||||||||||

|
This article is part of Project Locations, a Bulbapedia project that aims to write comprehensive articles on every location in the Pokémon world. |
