Ultra Ball: Difference between revisions
No edit summary |
|||
| (119 intermediate revisions by 40 users not shown) | |||
| Line 1: | Line 1: | ||
{{ | {{search|modern incarnation of the Ultra Ball|the Ultra Ball from {{pkmn|Legends: Arceus}}|Ultra Ball (Hisui)}} ''For the Poké Ball with the Japanese name of "Ultra Ball", see [[Beast Ball]].'' | ||
---- | ---- | ||
{{ItemInfobox/head | {{ItemInfobox/head | ||
| Line 15: | Line 15: | ||
{{ItemInfobox/BagRow|V|Items|group=Poké Balls|colorscheme=Poké Balls}} | {{ItemInfobox/BagRow|V|Items|group=Poké Balls|colorscheme=Poké Balls}} | ||
{{ItemInfobox/BagRow|VI|Items|colorscheme=Poké Balls}} | {{ItemInfobox/BagRow|VI|Items|colorscheme=Poké Balls}} | ||
{{ItemInfobox/ | {{ItemInfobox/BagRow|VII|Items|colorscheme=Poké Balls|group=Catching Pocket{{sup/7|PE}}}} | ||
{{ItemInfobox/BagRow|VIII|Poké Balls}} | |||
{{ItemInfobox/BagRowBottom|IX|Poké Balls}} | |||
|} | |} | ||
| Line 22: | Line 24: | ||
==In the core series games== | ==In the core series games== | ||
===Price=== | ===Price=== | ||
{{ItemPrice/ | {{ItemPrice/head|Poké Balls}} | ||
{{ItemPrice|{{gameabbrev1|RGBY}}/{{gameabbrev1|RBY}}<br>{{gameabbrev2|GSC}}<br>{{gameabbrev3|RSEFRLG}}<br>{{gameabbrev4|DPPtHGSS}}<br>{{gameabbrev5|BWB2W2}}<br>{{gameabbrev6|XYORAS}} | {{ItemPrice|{{gameabbrev1|RGBY}}/{{gameabbrev1|RBY}}<br>{{gameabbrev2|GSC}}<br>{{gameabbrev3|RSEFRLG}}<br>{{gameabbrev4|DPPtHGSS}}<br>{{gameabbrev5|BWB2W2}}<br>{{gameabbrev6|XYORAS}}<br>{{gameabbrev8|BDSP}} | ||
|{{PDollar}} | |{{PDollar}}1,200|{{PDollar}}600}} | ||
|- | |- | ||
|{{gameabbrev7|SMUSUM}} | |{{gameabbrev7|SMUSUM}}<br>{{gameabbrev8|SwSh}} | ||
|{{PDollar}}800||{{PDollar}}400 | |{{PDollar}}800||{{PDollar}}400 | ||
|- | |- | ||
|{{gameabbrev7|PE}} | |{{gameabbrev7|PE}} | ||
|{{PDollar}}500||{{PDollar}}250 | |{{PDollar}}500||{{PDollar}}250 | ||
|- | |||
|{{gameabbrev9|SV}} | |||
|{{PDollar}}800||{{PDollar}}200 | |||
|} | |} | ||
|} | |} | ||
| Line 39: | Line 44: | ||
When used from the [[Bag]] in a [[wild Pokémon]] encounter, it will attempt to catch the wild Pokémon with a [[catch rate]] modifier of 2×. | When used from the [[Bag]] in a [[wild Pokémon]] encounter, it will attempt to catch the wild Pokémon with a [[catch rate]] modifier of 2×. | ||
If used on an [[Ultra Beast]], the catch rate modifier is instead set to 0.1×. | If used on an [[Ultra Beast]], the catch rate modifier is instead set to 410/4096× (~0.1×). | ||
The Ultra Ball cannot be used in situations in which Poké Balls cannot be used, such as in wild battles with two or more opponents currently present or against a [[Island challenge|trial]] Pokémon. If used in a Trainer battle (except if used as a [[Snag Ball]] on a [[Shadow Pokémon]]), the opposing Trainer will deflect it, wasting the ball. If used on the [[Marowak (ghost)|ghost Marowak]], it will dodge it, wasting the ball. | The Ultra Ball cannot be used in situations in which Poké Balls cannot be used, such as in wild battles with two or more opponents currently present or against a [[Island challenge|trial]] Pokémon. If used in a Trainer battle (except if used as a [[Snag Ball]] on a [[Shadow Pokémon]]), the opposing Trainer will deflect it, wasting the ball (in [[Generation III]] and earlier) or only the player's turn (from [[Generation IV]] onward). If used on the [[Marowak (ghost)|ghost Marowak]], it will dodge it, wasting the ball. | ||
====Held item==== | ====Held item==== | ||
| Line 54: | Line 59: | ||
{{movedescentry|{{gameabbrev4|DPPtHGSS}}<br>{{gameabbrev5|BWB2W2}}|An ultra-performance Ball that provides a higher Pokémon catch rate than a Great Ball.}} | {{movedescentry|{{gameabbrev4|DPPtHGSS}}<br>{{gameabbrev5|BWB2W2}}|An ultra-performance Ball that provides a higher Pokémon catch rate than a Great Ball.}} | ||
{{movedescentry|{{gameabbrev6|XYORAS}}<br>{{gameabbrev7|SMUSUMPE}}|An ultra-high performance Poké Ball that provides a higher success rate for catching Pokémon than a Great Ball.}} | {{movedescentry|{{gameabbrev6|XYORAS}}<br>{{gameabbrev7|SMUSUMPE}}|An ultra-high performance Poké Ball that provides a higher success rate for catching Pokémon than a Great Ball.}} | ||
{{movedescentry|{{gameabbrev8|SwShBDSP}}<br>{{gameabbrev9|SV}}|An ultra-high-performance Poké Ball that provides a higher success rate for catching Pokémon than a Great Ball.}} | |||
|} | |} | ||
|} | |} | ||
===Acquisition=== | ===Acquisition=== | ||
{{ItemAvailability/ | {{ItemAvailability/head|Poké Balls}} | ||
|- | |- | ||
| {{gameabbrev1|RBY}}<br>{{gameabbrev1|RGBY}} | | {{gameabbrev1|RBY}}<br>{{gameabbrev1|RGBY}} | ||
| Line 65: | Line 71: | ||
|- | |- | ||
| {{gameabbrev2|GSC}} | | {{gameabbrev2|GSC}} | ||
| [[Route]]s {{rtn|4|Kanto}}, {{rtn|42|Johto}}, and {{rtn|44|Johto}}, [[Goldenrod Department Store]], [[Burned Tower]], [[Mt. Mortar]]{{sup/2|C}}, [[Team Rocket HQ|Team Rocket's Hideout]]{{sup/2|C}}, [[Goldenrod Radio Tower]]{{sup/2|C}}, [[Goldenrod Tunnel]]{{sup/2|C}}, [[Bell Tower|Tin Tower]], [[Whirl Islands]], [[Mt. Silver]] | | [[Route]]s {{rtn|4|Kanto}}, {{rtn|42|Johto}}, and {{rtn|44|Johto}}, [[Goldenrod Department Store]], [[Burned Tower]], [[Mt. Mortar]]{{sup/2|C}}, [[Team Rocket HQ|Team Rocket's Hideout]]{{sup/2|C}}, [[Goldenrod Radio Tower]]{{sup/2|C}}, [[Goldenrod Tunnel]]{{sup/2|C}}, [[Bell Tower|Tin Tower]], [[Whirl Islands]], [[Mt. Silver Cave]] | ||
| {{ci|Blackthorn}}, [[Indigo Plateau]], {{ci|Viridian}}, {{ci|Cerulean}}, {{ci|Vermilion}}, {{ci|Saffron}}, and {{ci|Fuchsia}} [[Poké Mart]]s, [[Celadon Department Store]]<br/>[[Goldenrod Department Store]] | | {{ci|Blackthorn}}, [[Indigo Plateau]], {{ci|Viridian}}, {{ci|Cerulean}}, {{ci|Vermilion}}, {{ci|Saffron}}, and {{ci|Fuchsia}} [[Poké Mart]]s, [[Celadon Department Store]]<br/>[[Goldenrod Department Store]] [[Goldenrod Department Store#Rooftop|rooftop sale]] (after becoming Champion){{sup/2|C}}<br>{{rt|44|Johto}} (random gift from {{tc|Fisherman|Fisher}} [[Wilton]]){{sup/2|C}}<br/>[[Goldenrod Radio Tower]] (2 [[Blue Card]] points){{sup/2|C}} | ||
|- | |- | ||
| {{gameabbrev3|RSE}} | | {{gameabbrev3|RSE}} | ||
| [[Route]]s {{rtn|119|Hoenn}}, {{rtn|123|Hoenn}}, and {{rtn|126|Hoenn}}, [[New Mauville]], [[Mt. Pyre]] | | [[Route]]s {{rtn|119|Hoenn}}, {{rtn|123|Hoenn}}, and {{rtn|126|Hoenn}}, [[New Mauville]], [[Mt. Pyre]] | ||
| {{ci|Fortree}}, {{ci|Mossdeep}}, {{ci|Sootopolis}}, {{ci|Ever Grande}}, and {{gdis|Battle Frontier|III}}{{sup/3|E}} [[Poké Mart]]s, [[Lilycove Department Store]]<br>{{a|Pickup}} ( | | {{ci|Fortree}}, {{ci|Mossdeep}}, {{ci|Sootopolis}}, {{ci|Ever Grande}}, and {{gdis|Battle Frontier|III}}{{sup/3|E}} [[Poké Mart]]s, [[Lilycove Department Store]]<br>{{a|Pickup}} ([[Level|Lv.]] 1-90{{sup/3|E}}) | ||
|- | |- | ||
| {{gameabbrev3|FRLG}} | | {{gameabbrev3|FRLG}} | ||
| {{rt|23|Kanto}}, [[Silph Co.]], [[Seafoam Islands]], [[Mt. Ember]], {{ka|Victory Road | | {{rt|23|Kanto}}, [[Silph Co.]], [[Seafoam Islands]], [[Mt. Ember]], {{ka|Victory Road}}, [[Icefall Cave]], [[Cerulean Cave]] | ||
| {{ci|Fuchsia}}, {{isl|Cinnabar}}, {{ | | {{ci|Fuchsia}}, {{isl|Cinnabar}}, {{OBP|Three Island|town}}, [[Indigo Plateau]], {{OBP|Four Island|town}}, {{OBP|Six Island|town}}, {{OBP|Seven Island|town}}, and [[Trainer Tower]] [[Poké Mart]]s, {{OBP|Two Island|town}} vendor (after saving [[Lostelle]])<br>Hidden [[recurring item]] ([[Treasure Beach]], {{OBP|Four Island|town}}, [[Green Path]]) | ||
|- | |- | ||
| {{gameabbrevss|Colo}} | | {{gameabbrevss|Colo}} | ||
| [[Pyrite Cave]], [[Agate Village]], [[The Under Subway]], [[Snagem Hideout]] | | [[Pyrite Cave]], [[Agate Village]], [[The Under Subway]], [[Snagem Hideout]] | ||
| [[Outskirt Stand]] (after [[Duking]]'s first email)<br>{{a|Pickup}} | | [[Outskirt Stand]] (after [[Duking]]'s first email)<br>{{a|Pickup}} | ||
|- | |- | ||
| {{gameabbrevss|XD}} | | {{gameabbrevss|XD}} | ||
| [[Phenac City]], [[Realgam Tower]], [[Snagem Hideout]], [[Cipher Key Lair]], [[Citadark Isle]]<br>[[Realgam Tower]] ([[Battle CD]] [[Battle CDs 11-20#Battle CD 13|13]], [[Battle CDs 21-30#Battle CD 26|26]], and [[Battle CDs 21-30#Battle CD 30|30]] completion prizes) | | [[Phenac City]], [[Realgam Tower]], [[Snagem Hideout]], [[Cipher Key Lair]], [[Citadark Isle]]<br>[[Realgam Tower]] ([[Battle CD]] [[Battle CDs 11-20#Battle CD 13|13]], [[Battle CDs 21-30#Battle CD 26|26]], and [[Battle CDs 21-30#Battle CD 30|30]] completion prizes) | ||
| [[Gateon Port|Gateon]], [[Agate Village|Agate]], {{to|Pyrite}}, and {{ci|Phenac}} [[Poké Mart]]s, [[Outskirt Stand]]<br>{{a|Pickup}} ( | | [[Gateon Port|Gateon]], [[Agate Village|Agate]], {{to|Pyrite}}, and {{ci|Phenac}} [[Poké Mart]]s, [[Outskirt Stand]]<br>{{a|Pickup}} ([[Level|Lv.]] 1-90) | ||
|- | |- | ||
| {{gameabbrev4|DPPt}} | | {{gameabbrev4|DPPt}} | ||
| [[Route]]s {{rtn|210|Sinnoh}}, {{rtn|212|Sinnoh}}{{sup/4|Pt}}, {{rtn|215|Sinnoh}}, {{rtn|217|Sinnoh}}, {{rtn|221|Sinnoh}}, {{rtn|222|Sinnoh}}, {{rtn|223|Sinnoh}}{{sup/4|Pt}}, {{rtn|224|Sinnoh}}{{sup/4|Pt}}, {{rtn|225|Sinnoh}}, {{rtn|228|Sinnoh}}{{sup/4|DP}}, and {{rtn|230|Sinnoh}}{{sup/4|Pt}}, [[Mt. Coronet]], [[Valor Lakefront]], [[Great Marsh]]{{sup/4|DP}}, [[Floaroma Meadow]], [[Fuego Ironworks]], [[Iron Island]], [[Team Galactic HQ]], [[Acuity Lakefront]], {{si|Victory Road}}, [[Stark Mountain]] | | [[Route]]s {{rtn|210|Sinnoh}}, {{rtn|212|Sinnoh}}{{sup/4|Pt}}, {{rtn|215|Sinnoh}}{{sup/4|Pt}}, {{rtn|217|Sinnoh}}, {{rtn|221|Sinnoh}}, {{rtn|222|Sinnoh}}, {{rtn|223|Sinnoh}}{{sup/4|Pt}}, {{rtn|224|Sinnoh}}{{sup/4|Pt}}, {{rtn|225|Sinnoh}}, {{rtn|228|Sinnoh}}{{sup/4|DP}}, and {{rtn|230|Sinnoh}}{{sup/4|Pt}}, [[Mount Coronet|Mt. Coronet]], [[Valor Lakefront]]{{sup/4|Pt}}, [[Great Marsh]]{{sup/4|DP}}, [[Floaroma Meadow]]{{sup/4|Pt}}, [[Fuego Ironworks]], [[Iron Island]], [[Team Galactic HQ]]{{sup/4|DP}}, [[Acuity Lakefront]], {{si|Victory Road}}, [[Stark Mountain]] | ||
| All [[Poké Mart]]s (after earning 5 [[Badge]]s), [[Veilstone Department Store]] | | All [[Poké Mart]]s (after earning 5 [[Badge]]s), [[Veilstone Department Store]]<br/>[[Jubilife TV]] [[Pokémon Lottery Corner]] (1 digit){{sup/4|Pt}}<br/>[[Pokémon News Press]]<br>{{a|Pickup}} ([[Level|Lv.]] 1-90) | ||
|- | |- | ||
| {{gameabbrev4|HGSS}} | | {{gameabbrev4|HGSS}} | ||
| {{rt|4|Kanto}}, [[Goldenrod Department Store]], [[Ecruteak City]], [[Burned Tower]], [[Cliff Cave]], [[Union Cave]], [[Team Rocket HQ]], [[Goldenrod Radio Tower]], [[Goldenrod Tunnel]], [[Mt. Mortar]], [[Bell Tower]], [[Whirl Islands]], {{ka|Victory Road}}, [[Seafoam Islands]], [[Cerulean Cave]], [[Mt. Silver]] | | {{rt|4|Kanto}}, [[Goldenrod Department Store]], [[Ecruteak City]], [[Burned Tower]], [[Cliff Cave]], [[Union Cave]], [[Team Rocket HQ]], [[Goldenrod Radio Tower]], [[Goldenrod Tunnel]], [[Mt. Mortar]], [[Bell Tower]], [[Whirl Islands]], {{ka|Victory Road}}, [[Seafoam Islands]], [[Cerulean Cave]], [[Mt. Silver Cave]] | ||
|All [[Poké Mart]]s (after earning 5 [[Badge]]s), [[Goldenrod Department Store]], [[Celadon Department Store]]<!--<br>{{rt|44|Johto}} (random gift from {{tc|Fisherman|Fisher}} [[Wilton]])--><br>[[Goldenrod Radio Tower]] [[Pokémon Lottery Corner]] (1 digit)<br>{{a|Pickup}} ( | |All [[Poké Mart]]s (after earning 5 [[Badge]]s), [[Goldenrod Department Store]], [[Celadon Department Store]]<!--<br>{{rt|44|Johto}} (random gift from {{tc|Fisherman|Fisher}} [[Wilton]])--><br>[[Goldenrod Radio Tower]] [[Pokémon Lottery Corner]] (1 digit)<br>{{a|Pickup}} ([[Level|Lv.]] 1-90) | ||
|- | |- | ||
| {{gameabbrevss|PW}} | | {{gameabbrevss|PW}} | ||
| Line 98: | Line 104: | ||
| {{gameabbrev5|BW}} | | {{gameabbrev5|BW}} | ||
| [[Route]]s {{rtn|4|Unova}}, {{rtn|7|Unova}}, {{rtn|8|Unova}}, {{rtn|14|Unova}}, and {{rtn|15|Unova}}, [[Dreamyard]], [[Nacrene City]], [[Liberty Garden]] (requires [[Liberty Pass]]), [[Anville Town]], [[Driftveil City]], [[Mistralton Cave]], [[Twist Mountain]], [[Icirrus City]], [[Moor of Icirrus]], [[Opelucid City]], {{OBP|Victory Road|Black and White}}, [[Village Bridge]] | | [[Route]]s {{rtn|4|Unova}}, {{rtn|7|Unova}}, {{rtn|8|Unova}}, {{rtn|14|Unova}}, and {{rtn|15|Unova}}, [[Dreamyard]], [[Nacrene City]], [[Liberty Garden]] (requires [[Liberty Pass]]), [[Anville Town]], [[Driftveil City]], [[Mistralton Cave]], [[Twist Mountain]], [[Icirrus City]], [[Moor of Icirrus]], [[Opelucid City]], {{OBP|Victory Road|Black and White}}, [[Village Bridge]] | ||
| All [[Poké Mart]]s (after earning 5 [[Badge]]s), [[Shopping Mall Nine]]<br/>[[White Forest]]{{sup/5|W}} (Miho)<br/>[[Big Stadium and Small Court]] ( | | All [[Poké Mart]]s (after earning 5 [[Badge]]s), [[Shopping Mall Nine]]<br/>[[White Forest]]{{sup/5|W}} (Miho)<br/>[[Big Stadium and Small Court]] (defeat {{tc|Youngster}} Kevin or {{tc|Lass}} Dana)<br>{{a|Pickup}} ([[Level|Lv.]] 1-90)<br>[[N's Castle]] (repeatable if the {{player}} has no [[Poké Ball]]s to catch {{p|Reshiram}}{{sup/5|B}}/{{p|Zekrom}}{{sup/5|W}}) | ||
|- | |- | ||
| {{gameabbrev5|B2W2}} | | {{gameabbrev5|B2W2}} | ||
| [[Route]]s {{rtn|1|Unova}}, {{rtn|2|Unova}}, {{rtn|6|Unova}}, {{rtn|12|Unova}}, {{rtn|13|Unova}}, {{rtn|15|Unova}}, and {{rtn|23|Unova}}, [[Aspertia City]], [[Castelia Sewers]]{{sup/s|Sp}}{{sup/s|Su}}, [[Driftveil City]], [[Relic Passage]], [[Relic Castle]], [[Lostlorn Forest]], [[Mistralton Cave]], [[Chargestone Cave]], [[Village Bridge]], [[Giant Chasm]], {{OBP|Victory Road|Black 2 and White 2}}, [[Dragonspiral Tower]], [[Twist Mountain]], [[Pinwheel Forest]], [[Wellspring Cave]], [[Dreamyard]] | | [[Route]]s {{rtn|1|Unova}}, {{rtn|2|Unova}}, {{rtn|6|Unova}}, {{rtn|12|Unova}}, {{rtn|13|Unova}}, {{rtn|15|Unova}}, and {{rtn|23|Unova}}, [[Aspertia City]], [[Castelia Sewers]]{{sup/s|Sp}}{{sup/s|Su}}, [[Driftveil City]], [[Relic Passage]], [[Relic Castle]], [[Lostlorn Forest]], [[Mistralton Cave]], [[Chargestone Cave]], [[Village Bridge]], [[Giant Chasm]], {{OBP|Victory Road|Black 2 and White 2}}, [[Dragonspiral Tower]], [[Twist Mountain]], [[Pinwheel Forest]], [[Wellspring Cave]], [[Dreamyard]] | ||
| All [[Poké Mart]]s (after earning 5 [[Badge]]s), [[Shopping Mall Nine]], [[Join Avenue]] ({{DL|Join Avenue|Antique Shop}}, {{DL|Join Avenue|Raffle Shop}}, {{DL|Join Avenue|Souvenirs|souvenir}})<br>[[Hidden Grotto]] (2% chance)<br>[[Big Stadium and Small Court]] ( | | All [[Poké Mart]]s (after earning 5 [[Badge]]s), [[Shopping Mall Nine]], [[Join Avenue]] ({{DL|Join Avenue|Antique Shop}}, {{DL|Join Avenue|Raffle Shop}}, {{DL|Join Avenue|Souvenirs|souvenir}})<br>[[Hidden Grotto]] (2% chance)<br>[[Big Stadium and Small Court]] (defeat [[Big Stadium and Small Court#Items|various Trainers]])<br>{{a|Pickup}} ([[Level|Lv.]] 1-90) | ||
|- | |||
| {{gameabbrevss|DW}}{{tt|*|No longer in service}} | |||
| | |||
| {{dwa|Windswept Sky}} | |||
|- | |- | ||
| {{gameabbrev6|XY}} | | {{gameabbrev6|XY}} | ||
| [[Route]]s {{rtn|6|Kalos}} and {{rtn|8|Kalos}}, [[Camphrier Town]], [[Laverre City]], {{ka|Victory Road}} | | [[Route]]s {{rtn|6|Kalos}} and {{rtn|8|Kalos}}, [[Camphrier Town]], [[Laverre City]], {{ka|Victory Road}} | ||
| All [[Poké Mart]]s (after earning 3 [[Badge]]s)<br>[[Lumiose City]] {{DL| | | All [[Poké Mart]]s (after earning 3 [[Badge]]s)<br>[[Lumiose City]] {{DL|South Boulevard|Poké Miles|South Boulevard Pokémon Center}} (60 [[Poké Mile|PM]])<br>[[Lumiose City]] ({{DL|South Boulevard|Sycamore Pokémon Lab}}, for a [[Poké Radar]] chain of 1-10 of a specified Pokémon)<br>{{a|Pickup}} ([[Level|Lv.]] 1-90) | ||
|- | |- | ||
| {{gameabbrev6|ORAS}} | | {{gameabbrev6|ORAS}} | ||
| [[Route]]s {{rtn|119|Hoenn}}, {{rtn|123|Hoenn}}, and {{rtn|126|Hoenn}}, [[New Mauville]], {{safari|Hoenn}}, [[Mt. Pyre]], {{ho|Victory Road}} | | [[Route]]s {{rtn|119|Hoenn}}, {{rtn|123|Hoenn}}, and {{rtn|126|Hoenn}}, [[New Mauville]], {{safari|Hoenn}}, [[Mt. Pyre]], {{ho|Victory Road}} | ||
| All [[Poké Mart]]s (after earning 3 [[Badge]]s), [[Lilycove Department Store]]<br>[[Mauville City]] {{DL|Mauville City|PokéMileage Center}} (60 [[Poké Mile|PM]])<br>[[Secret Base]] ("Pick something up" with [[Secret Base#Secret Pals|Secret Pal]])<br>[[Route]]s {{rtn|102|Hoenn}}, {{rtn|104|Hoenn}}, {{rtn|117|Hoenn}} (20% chance after | | All [[Poké Mart]]s (after earning 3 [[Badge]]s), [[Lilycove Department Store]]<br>[[Mauville City]] {{DL|Mauville City|PokéMileage Center}} (60 [[Poké Mile|PM]])<br>[[Secret Base]] ("Pick something up" with [[Secret Base#Secret Pals|Secret Pal]])<br>[[Route]]s {{rtn|102|Hoenn}}, {{rtn|104|Hoenn}}, {{rtn|117|Hoenn}} (20% chance after [[rematch]]es with {{tc|Youngster}} Calvin, {{tc|Lass}} Haley, and {{tc|Teammates}} Anna & Meg, respectively)<br>{{a|Pickup}} ([[Level|Lv.]] 1-90)<br>[[Sky Pillar]] ([[Delta Episode]]; repeatable if the {{player}} has no [[Poké Ball]]s to catch {{p|Rayquaza}}) | ||
|- | |- | ||
| {{gameabbrevss|PMC}} | | {{gameabbrevss|PMC}}{{tt|*|No longer in service}} | ||
| | | | ||
| {{DL|PokéMileage Club|Mine Cart Adventure}} (all levels) | | {{DL|PokéMileage Club|Mine Cart Adventure}} (all levels) | ||
| Line 118: | Line 128: | ||
| {{gameabbrev7|SMUSUM}} | | {{gameabbrev7|SMUSUM}} | ||
| {{rt|8|Alola}}, [[Hau'oli City]], [[Ten Carat Hill]], [[Royal Avenue]] | | {{rt|8|Alola}}, [[Hau'oli City]], [[Ten Carat Hill]], [[Royal Avenue]] | ||
| All [[Poké Mart]]s (after clearing 4 [[island challenge|trials]])<br>[[Festival Plaza]] ([[Festival Plaza#Lottery shops|Lottery shop]]: eighth prize, [[Festival Plaza#Haunted houses|Confuse Ray Haunted houses]], [[Festival Plaza#Goody shops|Ball Shop]]{{sup/7|MUM}} and [[Festival Plaza#Goody shops|General Store]]{{sup/7|M}})<br>{{a|Pickup}} ( | | All [[Poké Mart]]s (after clearing 4 [[island challenge|trials]])<br>[[Festival Plaza]] ([[Festival Plaza#Lottery shops|Lottery shop]]: eighth prize, [[Festival Plaza#Haunted houses|Confuse Ray Haunted houses]], [[Festival Plaza#Goody shops|Ball Shop]]{{sup/7|MUM}} and [[Festival Plaza#Goody shops|General Store]]{{sup/7|M}})<br>{{a|Pickup}} ([[Level|Lv.]] 1-90) | ||
|- | |- | ||
| {{gameabbrev7|PE}} | | {{gameabbrev7|PE}} | ||
| [[Route]]s {{rtn|12|Kanto}}, {{rtn|15|Kanto}}, {{rtn|16|Kanto}}, and {{rtn|20|Kanto}}, [[Team Rocket Hideout]], [[Pokémon Tower]], [[Silph Co.]], [[Seafoam Islands]], {{ka|Pokémon Mansion}}, {{ka|Victory Road}}, [[Cerulean Cave]]<br> | | [[Route]]s {{rtn|12|Kanto}}, {{rtn|15|Kanto}}, {{rtn|16|Kanto}}, and {{rtn|20|Kanto}}, [[Team Rocket Hideout]], [[Pokémon Tower]], [[Silph Co.]], [[Seafoam Islands]], {{ka|Pokémon Mansion}}, {{ka|Victory Road}}, [[Cerulean Cave]]<br>Reward for defeating {{tc|Ace Trainer}}s (except in [[Gym]]s) | ||
| All [[Poké Mart]]s (after earning 4 [[Badge]]s)<br>[[Cerulean Cave]] | | All [[Poké Mart]]s (after earning 4 [[Badge]]s)<br>[[Cerulean Cave]] | ||
|- | |||
| {{gameabbrev8|SwSh}} | |||
| {{rt|6|Galar}} | |||
| All [[Poké Mart]]s (after earning 5 [[Badge]]s)<br>Hidden [[recurring item]] ([[Giant's Seat]], [[Bridge Field]], [[Stony Wilderness]], [[Dusty Bowl]], [[Giant's Mirror]], [[Hammerlocke Hills]], [[Giant's Cap]]) | |||
|- | |||
| {{gameabbrev8|SwSh}}{{gameabbrev8|IA}} | |||
| | |||
| {{DL|Fields of Honor|Armor Station}} [[Poké Mart]] (after earning 5 [[Badge]]s), [[Fields of Honor]] [[Watt Trader]]<br>Hidden [[recurring item]] ([[Brawlers' Cave]], [[Courageous Cavern]], [[Potbottom Desert]])<br>[[Cram-o-matic]] (all [[Apricorn]]s except Black, Blue and White) | |||
|- | |||
| {{gameabbrev8|SwSh}}{{gameabbrev8|CT}} | |||
| [[Slippery Slope]] | |||
| {{DL|Slippery Slope|Crown Tundra Station}} [[Poké Mart]] (after earning 5 [[Badge]]s), [[Freezington]] Peddler<br>Hidden [[recurring item]] ([[Frostpoint Field]], [[Giant's Bed]], [[Snowslide Slope]], [[Giant's Foot]], [[Roaring-Sea Caves]], [[Three-Point Pass]], [[Ballimere Lake]]) | |||
|- | |||
| {{gameabbrev8|BDSP}} | |||
| [[Route]]s {{rtn|210|Sinnoh}}, {{rtn|217|Sinnoh}}, {{rtn|221|Sinnoh}}, {{rtn|222|Sinnoh}}, {{rtn|225|Sinnoh}}, and {{rtn|228|Sinnoh}}, [[Mount Coronet]], [[Great Marsh]], [[Fuego Ironworks]], [[Iron Island]], [[Team Galactic HQ]], [[Acuity Lakefront]], {{si|Victory Road}}, [[Stark Mountain]] | |||
| All [[Poké Mart]]s (after earning 5 [[Badge]]s), [[Veilstone Department Store]]<br/>[[Pokémon News Press]] | |||
|- | |||
| {{gameabbrev9|SV}} | |||
| [[Alfornada]], [[Cascarrafa]], [[Levincia]], [[Alfornada Cavern]], [[Caph Squad's Base]], [[Casseroya Lake]], [[Dalizapa Passage]], [[Glaseado Mountain]], [[Inlet Grotto]], [[Socarrat Trail]], [[East Province (Area One)]], [[East Province (Area Two)]], [[East Province (Area Three)]], [[North Province (Area One)]], [[North Province (Area Two)]], [[North Province (Area Three)]], [[South Province (Area One)]], [[South Province (Area Two)]], [[South Province (Area Three)]], [[South Province (Area Four)]], [[South Province (Area Five)]], [[South Province (Area Six)]], [[West Province (Area One)]]<br>Reward for registering 40 Pokémon in the [[List of Pokémon by Paldea Pokédex number|Paldea Pokédex]] (×10)<br>[[Naranja Academy]]{{sup/9|S}}/[[Uva Academy]]{{sup/9|V}} (×20; from [[Jacq]] after registering 100 Pokémon species in the [[List of Pokémon by Paldea Pokédex number|Paldea Pokédex]]) | |||
| All [[Poké Mart]]s (after earning 5 [[Badge|Gym Badges]]), [[Porto Marinada Market|Porto Marinada auction]]<br>Sparkling overworld item ([[Glaseado Mountain]]) | |||
|- | |||
| {{gameabbrev9|SV}}{{gameabbrev9|TM}} | |||
| [[Apple Hills]], [[Kitakami Wilds]], [[Mossfell Confluence]], [[Oni Mountain]], [[Timeless Woods]], [[Wistful Fields]] | |||
| {{DL|Mossui Town|Peachy's}} (after earning 5 [[Badge|Gym Badges]])<br>Sparkling overworld item ([[Crystal Pool]], [[Infernal Pass]], [[Oni Mountain]]) | |||
|- | |||
| {{gameabbrev9|SV}}{{gameabbrev9|ID}} | |||
| [[Canyon Biome]], [[Central Plaza]], [[Coastal Biome]], [[Polar Biome]], [[Savanna Biome]] | |||
| [[Vending machine]]s ([[Terarium]])<br>[[Item Printer]] (Poké Ball Lotto) | |||
|} | |} | ||
|} | |} | ||
=== | ====Distribution==== | ||
==== | {| class="roundy" style="background: #{{Poké Balls color light}}; border: 5px solid #{{Poké Balls color}}" | ||
|- | |||
| | |||
{| border=1 style="background:#FFF; border:1px solid #{{Poké Balls color light}}; border-collapse:collapse" | |||
|- | |||
! style="background:#FFF; {{roundytl|5px}}" | Games | |||
! style="background:#FFF" | Event | |||
! style="background:#FFF" | Language/Region | |||
! style="background:#FFF; {{roundytr|5px}}" | Distribution period | |||
|- style="background:#FFF;" | |||
| {{gameabbrev9|SV}} | |||
| {{DL|List of other event distributions (Generation IX)|Japanese 7-11 Onigiri Balls}} | |||
| Japan | |||
| November 18, 2022 to January 10, 2023 | |||
|} | |||
|} | |||
===NPC usage=== | |||
====Pokémon Sun, Moon, Ultra Sun, and Ultra Moon==== | ====Pokémon Sun, Moon, Ultra Sun, and Ultra Moon==== | ||
[[Lusamine]], [[Faba]], [[Guzma]], [[Plumeria]], [[Ryuki]], [[Molayne]], [[Sina]], [[Dexio]], [[Grimsley]], [[Anabel]], [[Wally]], [[Colress]], and [[Cynthia]] keep their Pokémon in Ultra Balls. | |||
The following {{DL|Pokémon Trainer|Trainer class}}es keep their Pokémon in Ultra Balls: | |||
* {{tc|Black Belt}} | * {{tc|Black Belt}} | ||
| Line 139: | Line 194: | ||
* {{tc|Veteran}} | * {{tc|Veteran}} | ||
* [[Trial Captain|Captain]] (except [[Lana]]) | * [[Trial Captain|Captain]] (except [[Lana]]) | ||
* [[Island | * [[Island kahuna]] | ||
* [[Elite Four]] | * [[Elite Four]] | ||
* Trainers who share the same model as any of the above (e.g. [[Eevee users#Eevee User Kategora|Eevee User]] and {{tc|Principal}}) | * Trainers who share the same model as any of the above (e.g. [[Eevee users#Eevee User Kategora|Eevee User]] and {{tc|Principal}}) | ||
====Pokémon Sword and Shield==== | |||
[[Rose]], [[Leon]] (outside the [[Battle Tower (Galar)|Battle Tower]]), [[Mustard]], {{gal|Honey}}, [[Peony]], and [[Peonia]] keep their Pokémon in Ultra Balls. | |||
The following Trainer classes keep their Pokémon in Ultra Balls: | |||
* {{tc|Dancer}} | |||
* {{tc|Hiker}} | |||
* {{tc|Gym Trainer}} ([[Hammerlocke Stadium|Hammerlocke]]) | |||
* [[Gym Leader]]{{tt|*|The ones the player can earn a Badge from}} (excluding [[Nessa]], [[Allister]]{{sup/8|Sh}}, and [[Piers]]) | |||
====Pokémon Scarlet and Violet==== | |||
Trainers considered "strong" (denoted by a black background on their overworld text bubble) keep their Pokémon in Ultra Balls. | |||
===Cameo appearances=== | |||
====Pokémon X and Y==== | |||
An Ultra Ball appears in the {{DL|Autumnal Avenue|Poké Ball Boutique}} in [[Lumiose City]]. | |||
==In the side series games== | |||
===Pokémon Stadium 2=== | |||
In [[Pokémon Stadium 2]], Ultra Balls appear in the mini-game {{p|Furret}}'s Frolic. They are worth three points each. | |||
==In the spin-off games== | |||
[[File:GO Ultra Ball.png|thumb|150px|An Ultra Ball in Pokémon GO]] | |||
==={{g|GO}}=== | |||
Ultra Balls can be used during wild Pokémon encounters to attempt to capture a wild Pokémon with a {{OBP|catch rate|GO}} modifier of 2×. | |||
====Description==== | |||
{{movedesc|Poké Balls}} | |||
{{movedescentry|{{gameabbrevss|GO}}|An ultra-performance ball with a higher catch rate than a Great Ball.}} | |||
|} | |||
|} | |||
====Acquisition==== | |||
The player is awarded Ultra Balls for [[Trainer level|leveling up]] to any level starting from 20. They may also be obtained by completing certain [[Special Research]] tasks. | |||
Ultra Balls can also be repeatably obtained by | |||
* Spinning the Photo Disc of [[PokéStop]]s or {{OBP|Gym|GO}}s (Lv. 20+) | |||
* Opening a [[Gift]] (Lv. 20+) | |||
* [[Field Research]] | |||
Ultra Balls are also sometimes available in limited-time boxes sold in the [[PokéCoin|Shop]]. | |||
===Pokémon Pinball series=== | |||
In [[Pokémon Pinball]] and [[Pokémon Pinball: Ruby & Sapphire]], the Ultra Ball multiplies bonus points by ×3. | |||
====Gallery==== | |||
{| style="margin:auto; text-align:center; {{roundy|10px}} border: 2px solid #{{Poké Balls color dark}}; background: #{{Poké Balls color}}" | |||
| style="{{roundy|10px}} border: 2px solid #{{Poké Balls color dark}}; background: #{{Poké Balls color light}}; width:80px; height:20px" | [[File:Pinball Ultra Ball.png]] | |||
| style="{{roundy|10px}} border: 2px solid #{{Poké Balls color dark}}; background: #{{Poké Balls color light}}; width:80px; height:20px" | [[File:Pinball RS Ultra Ball.png]] | |||
|- style="font-size:80%" | |||
| Sprite from<br/>{{color2|000|Pokémon Pinball|Pinball}} | |||
| Sprite from<br/>{{color2|000|Pokémon Pinball: Ruby & Sapphire|Pinball: Ruby & Sapphire}} | |||
|} | |||
== | ==Gallery== | ||
===Artwork=== | ===Artwork=== | ||
{| style="margin:auto; text-align:center; {{roundy|20px}} border: 2px solid #{{Poké Balls color dark}}; background: #{{Poké Balls color}}; font-size: 80%" | {| style="margin:auto; text-align:center; {{roundy|20px}} border: 2px solid #{{Poké Balls color dark}}; background: #{{Poké Balls color}}; font-size: 80%" | ||
|- | |- | ||
|style="{{roundy|80px}} border: 2px solid #{{Poké Balls color dark}}; background: #{{Poké Balls color light}}"| [[File:SugimoriUltraBall.png|100px]] | |style="{{roundy|80px}} border: 2px solid #{{Poké Balls color dark}}; background: #{{Poké Balls color light}}"| [[File:SugimoriUltraBall.png|100px]] | ||
|style="{{roundy|80px}} border: 2px solid #{{Poké Balls color dark}}; background: #{{Poké Balls color light}}"| [[File:Bag Ultra Ball SV Sprite.png|100px]] | |||
|- | |- | ||
| Artwork by<br>{{color2|000|Ken Sugimori}} | | Artwork by<br>{{color2|000|Ken Sugimori}} | ||
| Artwork from<br>{{color2|000|Pokémon Scarlet and Violet|Scarlet and Violet}} | |||
|} | |} | ||
| Line 159: | Line 268: | ||
|style="{{roundy|80px}} border: 2px solid #{{Poké Balls color dark}}; background: #{{Poké Balls color light}}"| [[File:Ultra Ball Friend Ball battle II.png]] | |style="{{roundy|80px}} border: 2px solid #{{Poké Balls color dark}}; background: #{{Poké Balls color light}}"| [[File:Ultra Ball Friend Ball battle II.png]] | ||
|style="{{roundy|80px}} border: 2px solid #{{Poké Balls color dark}}; background: #{{Poké Balls color light}}"| [[File:Furret Frolic Ultra Ball instructions.png]] | |style="{{roundy|80px}} border: 2px solid #{{Poké Balls color dark}}; background: #{{Poké Balls color light}}"| [[File:Furret Frolic Ultra Ball instructions.png]] | ||
|style="{{roundy|80px}} border: 2px solid #{{Poké Balls color dark}}; background: #{{Poké Balls color light}}"| [[File:Ultra Ball III.png]] | |style="{{roundy|80px}} border: 2px solid #{{Poké Balls color dark}}; background: #{{Poké Balls color light}}"| [[File:Ultra Ball III RS.png]] | ||
|style="{{roundy|80px}} border: 2px solid #{{Poké Balls color dark}}; background: #{{Poké Balls color light}}"| [[File:Ultra Ball III FRLGE.png]] | |||
|style="{{roundy|80px}} border: 2px solid #{{Poké Balls color dark}}; background: #{{Poké Balls color light}}"| [[File:Ultra Ball summary Colo.png]] | |style="{{roundy|80px}} border: 2px solid #{{Poké Balls color dark}}; background: #{{Poké Balls color light}}"| [[File:Ultra Ball summary Colo.png]] | ||
|- | |- | ||
| In-battle sprite in<br>{{color2|000|Generation II}} | | In-battle sprite in<br>{{color2|000|Generation II}} | ||
| Sprite from<br>{{color2|000|Pokémon Stadium series mini-games|Furret Frolic}}'s<br>instruction screen in<br>{{color2|000|Pokémon Stadium 2|Stadium 2}} | | Sprite from<br>{{color2|000|Pokémon Stadium series mini-games|Furret Frolic}}'s<br>instruction screen in<br>{{color2|000|Pokémon Stadium 2|Stadium 2}} | ||
| In-battle and<br> | | In-battle and<br>summary sprite from<br>{{color2|000|Pokémon Ruby and Sapphire Versions|Ruby and Sapphire}} | ||
| In-battle and<br>summary sprite from<br>{{color2|000|Pokémon FireRed and LeafGreen Versions|FireRed, LeafGreen}},<br>and {{color2|000|Pokémon Emerald Version|Emerald}} | |||
| Summary sprite from<br>{{color2|000|Pokémon Colosseum|Colosseum}} | | Summary sprite from<br>{{color2|000|Pokémon Colosseum|Colosseum}} | ||
|- | |- | ||
| Line 170: | Line 281: | ||
|style="{{roundy|80px}} border: 2px solid #{{Poké Balls color dark}}; background: #{{Poké Balls color light}}"| [[File:Ultra Ball summary IV.png]] | |style="{{roundy|80px}} border: 2px solid #{{Poké Balls color dark}}; background: #{{Poké Balls color light}}"| [[File:Ultra Ball summary IV.png]] | ||
|style="{{roundy|80px}} border: 2px solid #{{Poké Balls color dark}}; background: #{{Poké Balls color light}}"| [[File:Ultra Ball battle IV.png]] | |style="{{roundy|80px}} border: 2px solid #{{Poké Balls color dark}}; background: #{{Poké Balls color light}}"| [[File:Ultra Ball battle IV.png]] | ||
|style="{{roundy|80px}} border: 2px solid #{{Poké Balls color dark}}; background: #{{Poké Balls color light}}"| [[File:Ultra Ball summary PBR.png]] | |||
|style="{{roundy|80px}} border: 2px solid #{{Poké Balls color dark}}; background: #{{Poké Balls color light}}"| [[File:Ultra Ball battle V.png]] | |style="{{roundy|80px}} border: 2px solid #{{Poké Balls color dark}}; background: #{{Poké Balls color light}}"| [[File:Ultra Ball battle V.png]] | ||
|- | |- | ||
| Line 175: | Line 287: | ||
| Summary sprite from<br>{{color2|000|Generation IV|Generations IV}} and {{color2|000|Generation V|V}} | | Summary sprite from<br>{{color2|000|Generation IV|Generations IV}} and {{color2|000|Generation V|V}} | ||
| In-battle sprite in<br>{{color2|000|Generation IV}} | | In-battle sprite in<br>{{color2|000|Generation IV}} | ||
| Summary sprite from<BR>{{color2|000|Pokémon Battle Revolution|Battle Revolution}} | |||
| In-battle sprite in<br>{{color2|000|Generation V}} | | In-battle sprite in<br>{{color2|000|Generation V}} | ||
|} | |} | ||
| Line 184: | Line 297: | ||
|style="{{roundy|80px}} border: 2px solid #{{Poké Balls color dark}}; background: #{{Poké Balls color light}}"| [[File:Ultra Ball battle 3DS.png|100px]] | |style="{{roundy|80px}} border: 2px solid #{{Poké Balls color dark}}; background: #{{Poké Balls color light}}"| [[File:Ultra Ball battle 3DS.png|100px]] | ||
|style="{{roundy|80px}} border: 2px solid #{{Poké Balls color dark}}; background: #{{Poké Balls color light}}"| [[File:Ultra Ball PE.png|100px]] | |style="{{roundy|80px}} border: 2px solid #{{Poké Balls color dark}}; background: #{{Poké Balls color light}}"| [[File:Ultra Ball PE.png|100px]] | ||
|style="{{roundy|80px}} border: 2px solid #{{Poké Balls color dark}}; background: #{{Poké Balls color light}}"| [[File:Ultra Ball VIII.png|100px]] | |||
|- | |- | ||
| Model from<br>{{color2|000|Pokémon Stadium series mini-games|Furret Frolic}} in<br>{{color2|000|Pokémon Stadium 2|Stadium 2}} | | Model from<br>{{color2|000|Pokémon Stadium series mini-games|Furret Frolic}} in<br>{{color2|000|Pokémon Stadium 2|Stadium 2}} | ||
| In-battle model<br>{{color2|000|Pokémon X and Y|X, Y}}, {{color2|000|Pokémon Omega Ruby and Alpha Sapphire|Omega Ruby,<br>Alpha Sapphire}}, {{color2|000|Pokémon Sun and Moon|Sun, Moon}},<br>{{color2|000|Pokémon Ultra Sun and Ultra Moon|Ultra Sun, and Ultra Moon}} | | In-battle model<br>{{color2|000|Pokémon X and Y|X, Y}}, {{color2|000|Pokémon Omega Ruby and Alpha Sapphire|Omega Ruby,<br>Alpha Sapphire}}, {{color2|000|Pokémon Sun and Moon|Sun, Moon}},<br>{{color2|000|Pokémon Ultra Sun and Ultra Moon|Ultra Sun, and Ultra Moon}} | ||
| Model from<br>{{color2|000|Pokémon: Let's Go, Pikachu! and Let's Go, Eevee!|Let's Go, Pikachu! and<br>Let's Go, Eevee!}} | | Model from<br>{{color2|000|Pokémon: Let's Go, Pikachu! and Let's Go, Eevee!|Let's Go, Pikachu! and<br>Let's Go, Eevee!}} | ||
| | | Model from<br>{{color2|000|Generation VIII}} | ||
|} | |} | ||
==In the anime== | ==In the anime== | ||
[[File:Ultra Ball anime.png|thumb|250px|Ultra | ===Main series=== | ||
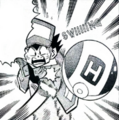
[[File:Ultra Ball anime.png|thumb|250px|An Ultra Ball in the {{pkmn|anime}}]] | |||
An Ultra Ball appeared in [[Which One ~ Is It?]], a Japanese ending theme from the | An Ultra Ball appeared in [[Which One ~ Is It?]], a Japanese ending theme from ''[[Pokémon the Series: Diamond and Pearl]]''. | ||
In ''[[XY079|A Frenzied Factory Fiasco!]]'', multiple Ultra Balls were seen at the [[Poké Ball Factory]]. | In ''[[XY079|A Frenzied Factory Fiasco!]]'', multiple Ultra Balls were seen at the [[Poké Ball Factory]]. | ||
| Line 236: | Line 318: | ||
In ''[[SM062|Acting True to Form!]]'', an Ultra Ball appeared as a part of [[James]]'s Poké Ball collection. | In ''[[SM062|Acting True to Form!]]'', an Ultra Ball appeared as a part of [[James]]'s Poké Ball collection. | ||
[[ | In ''[[JN045|Sword and Shield... The Legends Awaken!]]'', {{an|Leon}} used an Ultra Ball in an attempt to catch {{TP|Leon|Eternatus}}, only for it to break out. | ||
=== | |||
In ''[[JN113|Chasing to the Finish!]]'', [[Quillon]] used an Ultra Ball to catch a {{p|Registeel}} and was revealed to have also done the same with a {{p|Regice}} and a {{p|Regirock}}. | |||
In [[HZ033]], [[Amethio]] brandished an Ultra Ball when declaring his intention to catch the [[Black Rayquaza]]. | |||
In [[HZ044]], [[Chalce]] attempted to capture the Black Rayquaza with an Ultra Ball, but it was deflected by [[Roy's Wattrel]]. | |||
===Pokémon Origins=== | |||
In ''[[PO03|File 3: Giovanni]]'', [[Giovanni]] was shown to keep his strongest Pokémon, {{p|Rhyhorn}} and {{p|Rhydon}}, within Ultra Balls. | In ''[[PO03|File 3: Giovanni]]'', [[Giovanni]] was shown to keep his strongest Pokémon, {{p|Rhyhorn}} and {{p|Rhydon}}, within Ultra Balls. | ||
In ''[[PO04|File 4: Charizard]]'', {{OBP|Red|Origins}} used Ultra Balls to {{pkmn2|caught|catch}} the [[Legendary Pokémon]] {{p|Articuno}}, {{p|Zapdos}}, {{p|Moltres}}, and {{p|Mewtwo}}. | In ''[[PO04|File 4: Charizard]]'', {{OBP|Red|Origins}} used Ultra Balls to {{pkmn2|caught|catch}} the [[Legendary Pokémon]] {{p|Articuno}}, {{p|Zapdos}}, {{p|Moltres}}, and {{p|Mewtwo}}. | ||
===Pokémon Generations=== | |||
=== | |||
In ''[[PG09|The Scoop]]'', an Ultra Ball was used by {{player|a Trainer}} to catch a {{p|Deoxys}} in outer space. | In ''[[PG09|The Scoop]]'', an Ultra Ball was used by {{player|a Trainer}} to catch a {{p|Deoxys}} in outer space. | ||
{{ | |||
===Pokémon: Twilight Wings=== | |||
[[Leon]] was seen holding an Ultra Ball near the end of ''[[TW01|Letter]]''. | |||
Three Ultra Balls containing [[Bea]]'s Pokémon appeared in ''[[TW02|Training]]''. | |||
In ''[[TW08|The Gathering of Stars]]'', [[Mustard]] was shown to keep his {{p|Mienshao}} in an Ultra Ball. | |||
===Pokémon Evolutions=== | |||
In ''[[PE01|The Champion]]'', [[Leon]]'s {{p|Aegislash}} and {{TP|Leon|Charizard}} were shown to be kept in Ultra Balls. | |||
In ''[[PE06|The Wish]]'', [[Zinnia]] was shown to keep her {{TP|Zinnia|Salamence}} in an Ultra Ball. In the same episode, {{ga|May}} used an Ultra Ball to catch {{p|Rayquaza}}. | |||
In ''[[PE08|The Discovery]]'', {{ga|Elaine}} was revealed to have caught {{p|Mewtwo}} with an Ultra Ball. Two other Ultra Balls also appeared later in the episode, one belonging to {{ga|Green}} and another one being held by an {{tc|Ace Trainer}}. | |||
===Gallery=== | |||
<gallery> | |||
Ultra Ball PO.png|An Ultra Ball in [[Pokémon Origins]] | |||
Ultra Ball PG.png|An Ultra Ball in [[Pokémon Generations]] | |||
Ultra Ball TW.png|An Ultra Ball in [[Pokémon: Twilight Wings]] | |||
Ultra Ball Evolutions.png|An Ultra Ball in [[Pokémon Evolutions]] | |||
</gallery> | |||
==In the manga== | ==In the manga== | ||
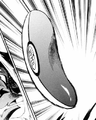
[[File:Ultra Ball Adventures.png|thumb|230px|An Ultra Ball in | [[File:Ultra Ball Adventures.png|thumb|230px|An Ultra Ball in [[Pokémon Adventures]]]] | ||
===The Electric Tale of Pikachu=== | |||
=== | In ''[[ET04|Haunting My Dreams]]'', {{OBP|Ash Ketchum|EToP|Ash}} attempted to catch a {{pkmn2|giant}} {{p|Haunter}} known as [[Black Fog]] with an Ultra Ball, but the {{t|Ghost}} Pokémon used {{m|Self-Destruct}} just before the ball could hit it, choosing to kill itself rather than be caught by a human. | ||
In ''[[ET04|Haunting My Dreams]]'', {{OBP|Ash Ketchum|EToP|Ash}} attempted to catch a {{pkmn2|giant}} {{p|Haunter}} known as | |||
===Pokémon Adventures=== | |||
In the Pokémon Adventures manga, [[Elite Four]] members keep their Pokémon in Ultra Balls. | |||
===={{MangaArc|Red, Green & Blue}}==== | |||
In ''[[PS026|Holy Moltres]]'', [[Team Rocket]] was shown to have caught the {{adv|legendary birds}} in Ultra Balls. | |||
===={{MangaArc|Sword & Shield}}==== | |||
In ''[[PASS19|Crunch!! Snowy Battle]]'', [[Gordie]] and [[Melony]] were revealed to keep their Pokémon in Ultra Balls. | |||
In [[PASS32]], [[Peony]] was shown to keep his {{p|Copperajah}} in an Ultra Ball. | |||
In | In [[PASS36]], [[Mustard]] was revealed to keep his {{p|Urshifu}} in an Ultra Ball. | ||
===Gallery=== | |||
<gallery> | |||
Ultra Ball EToP.png|An Ultra Ball in [[The Electric Tale of Pikachu]] | |||
Ultra Ball PM.png|An Ultra Ball in [[Pokémon Pocket Monsters]] | |||
</gallery> | |||
==In the TCG== | ==In the TCG== | ||
[[File:UltraBallSunMoon135.jpg|200px|thumb|The Ultra Ball]] | [[File:UltraBallSunMoon135.jpg|200px|thumb|The Ultra Ball]] | ||
[[File:Rocket Sneak Attack artwork.png|thumb|left|250px|An Ultra Ball in {{TCG ID|Team Rocket|Rocket's Sneak Attack|16}}]] | |||
{{main|Ultra Ball (Dark Explorers 102)}} | {{main|Ultra Ball (Dark Explorers 102)}} | ||
The '''Ultra Ball''', debuting in {{TCG|Dark Explorers}} with artwork by [[5ban Graphics]], has the player discard two cards from their hand to search the deck for a Pokémon. | |||
Before being printed as its own card, an Ultra Ball can be seen in the artwork of {{TCG ID|Team Rocket|Rocket's Sneak Attack|16}} from the {{TCG|Team Rocket}} expansion. | |||
{{-}} | {{-}} | ||
==Trivia== | ==Trivia== | ||
* The Ultra Ball includes a stylized H in its design. This is due to its Japanese name, Hyper Ball. | * The Ultra Ball includes a stylized H in its design. This is due to its Japanese name, Hyper Ball. | ||
* Its English name is the same as the [[Beast Ball]] in Japanese. "Ultra" in Beast Ball's Japanese name refers to "[[Ultra Beast]]s". The Japanese name of Beast Ball was likely changed due to the localization conflict with Ultra Ball, with "Beast" being used to refer to the Ultra Beasts instead. | |||
* The Ultra Ball appears to have gone through a short-lived design change early on in [[Generation III]]. Its in-game design in [[Pokémon Ruby and Sapphire Versions|Ruby and Sapphire]] and [[Pokémon Pinball: Ruby & Sapphire]] features a single thick yellow stripe down the middle of the upper half of the Ball, while all other games in the generation use the standard large upper-case H shape for the yellow pattern instead. | |||
==In other languages== | ==In other languages== | ||
| Line 279: | Line 402: | ||
|de=Hyperball | |de=Hyperball | ||
|hi=अल्ट्रा बॉल ''Ultra Ball'' | |hi=अल्ट्रा बॉल ''Ultra Ball'' | ||
|id=Bola Ultra | |||
|it=Ultra Ball | |it=Ultra Ball | ||
|ko=하이퍼볼 ''Hyper Ball'' | |ko=하이퍼볼 ''Hyper Ball'' | ||
|pl=Ultraball | |pl=Ultraball | ||
|pt_br=Ultra Bola{{tt|*|games, anime, TCG, Pokémon Characters Guidebook}}<br>Ultra Ball{{tt|*|manga}}<br>Ultrabola{{tt|*|The Official Pokémon Handbook}} | |pt_br=Ultra Bola{{tt|*|games, anime, TCG, manga (Adventures volume 13-present), Pokémon Characters Guidebook}}<br>Ultra Ball{{tt|*|manga (PS081)}}<br>Ultrabola{{tt|*|The Official Pokémon Handbook}} | ||
|pt_eu=Bola Ultra | |pt_eu=Bola Ultra | ||
|ru=Ультра-Болл ''Ul'tra-Boll'' | |ru=Ультра-Болл ''Ul'tra-Boll'' | ||
| Line 290: | Line 414: | ||
|ta=அல்ட்ரா பால் ''Ultra Ball'' | |ta=அல்ட்ரா பால் ''Ultra Ball'' | ||
|te=అల్ట్రా బాల్ ''Ultra Ball'' | |te=అల్ట్రా బాల్ ''Ultra Ball'' | ||
|th=ไฮเปอร์บอล ''Hyper Ball''<br>อัลตร้าบอล ''Ultra Ball'' {{tt|*| | |th=ไฮเปอร์บอล ''Hyper Ball''<br>อัลตร้าบอล ''Ultra Ball'' {{tt|*|Medallion}} | ||
|vi=Bóng Hyper | |vi=Bóng Hyper | ||
}} | }} | ||
| Line 303: | Line 427: | ||
[[es:Ultra Ball]] | [[es:Ultra Ball]] | ||
[[fr:Hyper Ball]] | [[fr:Hyper Ball]] | ||
[[it: | [[it:Ultra Ball]] | ||
[[ja:ハイパーボール]] | [[ja:ハイパーボール]] | ||
[[zh:高级球(道具)]] | [[zh:高级球(道具)]] | ||
Latest revision as of 11:26, 26 March 2024
- This article is about the modern incarnation of the Ultra Ball. For the Ultra Ball from Legends: Arceus, see Ultra Ball (Hisui). For the Poké Ball with the Japanese name of "Ultra Ball", see Beast Ball.
| |||||||||||||||||||||
| |||||||||||||||||||||
| |||||||||||||||||||||
The Ultra Ball (Japanese: ハイパーボール Hyper Ball) is a type of Poké Ball introduced in Generation I. It is an improved variant of the Great Ball that can be used to catch wild Pokémon.
In the core series games
Price
|
In Pokémon Crystal, an Ultra Ball costs $1000 during the Goldenrod Department Store rooftop sale.
Effect
Manual activation
When used from the Bag in a wild Pokémon encounter, it will attempt to catch the wild Pokémon with a catch rate modifier of 2×.
If used on an Ultra Beast, the catch rate modifier is instead set to 410/4096× (~0.1×).
The Ultra Ball cannot be used in situations in which Poké Balls cannot be used, such as in wild battles with two or more opponents currently present or against a trial Pokémon. If used in a Trainer battle (except if used as a Snag Ball on a Shadow Pokémon), the opposing Trainer will deflect it, wasting the ball (in Generation III and earlier) or only the player's turn (from Generation IV onward). If used on the ghost Marowak, it will dodge it, wasting the ball.
Held item
Fling fails if the user is holding an Ultra Ball.
Description
|
Acquisition
Distribution
|
NPC usage
Pokémon Sun, Moon, Ultra Sun, and Ultra Moon
Lusamine, Faba, Guzma, Plumeria, Ryuki, Molayne, Sina, Dexio, Grimsley, Anabel, Wally, Colress, and Cynthia keep their Pokémon in Ultra Balls.
The following Trainer classes keep their Pokémon in Ultra Balls:
- Black Belt
- Firefighter
- Ace Trainer
- Police Officer
- Veteran
- Captain (except Lana)
- Island kahuna
- Elite Four
- Trainers who share the same model as any of the above (e.g. Eevee User and Principal)
Pokémon Sword and Shield
Rose, Leon (outside the Battle Tower), Mustard, Honey, Peony, and Peonia keep their Pokémon in Ultra Balls.
The following Trainer classes keep their Pokémon in Ultra Balls:
- Dancer
- Hiker
- Gym Trainer (Hammerlocke)
- Gym Leader* (excluding Nessa, AllisterSh, and Piers)
Pokémon Scarlet and Violet
Trainers considered "strong" (denoted by a black background on their overworld text bubble) keep their Pokémon in Ultra Balls.
Cameo appearances
Pokémon X and Y
An Ultra Ball appears in the Poké Ball Boutique in Lumiose City.
In the side series games
Pokémon Stadium 2
In Pokémon Stadium 2, Ultra Balls appear in the mini-game Furret's Frolic. They are worth three points each.
In the spin-off games

Pokémon GO
Ultra Balls can be used during wild Pokémon encounters to attempt to capture a wild Pokémon with a catch rate modifier of 2×.
Description
|
Acquisition
The player is awarded Ultra Balls for leveling up to any level starting from 20. They may also be obtained by completing certain Special Research tasks.
Ultra Balls can also be repeatably obtained by
- Spinning the Photo Disc of PokéStops or Gyms (Lv. 20+)
- Opening a Gift (Lv. 20+)
- Field Research
Ultra Balls are also sometimes available in limited-time boxes sold in the Shop.
Pokémon Pinball series
In Pokémon Pinball and Pokémon Pinball: Ruby & Sapphire, the Ultra Ball multiplies bonus points by ×3.
Gallery
| Sprite from Pinball |
Sprite from Pinball: Ruby & Sapphire |
Gallery
Artwork

|
|
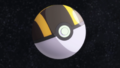
| Artwork by Ken Sugimori |
Artwork from Scarlet and Violet |
Sprites
| In-battle sprite in Generation II |
Sprite from Furret Frolic's instruction screen in Stadium 2 |
In-battle and summary sprite from Ruby and Sapphire |
In-battle and summary sprite from FireRed, LeafGreen, and Emerald |
Summary sprite from Colosseum |
| Summary sprite from XD: Gale of Darkness |
Summary sprite from Generations IV and V |
In-battle sprite in Generation IV |
Summary sprite from Battle Revolution |
In-battle sprite in Generation V |
Models

|

|

|

|
| Model from Furret Frolic in Stadium 2 |
In-battle model X, Y, Omega Ruby, Alpha Sapphire, Sun, Moon, Ultra Sun, and Ultra Moon |
Model from Let's Go, Pikachu! and Let's Go, Eevee! |
Model from Generation VIII |
In the anime
Main series

An Ultra Ball appeared in Which One ~ Is It?, a Japanese ending theme from Pokémon the Series: Diamond and Pearl.
In A Frenzied Factory Fiasco!, multiple Ultra Balls were seen at the Poké Ball Factory.
In A Glaring Rivalry!, Gladion was revealed to keep his Lycanroc in an Ultra Ball.
A pair of Ultra Balls appeared in Team Rocket's boss fantasy in Let Sleeping Pokémon Lie!.
In Acting True to Form!, an Ultra Ball appeared as a part of James's Poké Ball collection.
In Sword and Shield... The Legends Awaken!, Leon used an Ultra Ball in an attempt to catch Eternatus, only for it to break out.
In Chasing to the Finish!, Quillon used an Ultra Ball to catch a Registeel and was revealed to have also done the same with a Regice and a Regirock.
In HZ033, Amethio brandished an Ultra Ball when declaring his intention to catch the Black Rayquaza.
In HZ044, Chalce attempted to capture the Black Rayquaza with an Ultra Ball, but it was deflected by Roy's Wattrel.
Pokémon Origins
In File 3: Giovanni, Giovanni was shown to keep his strongest Pokémon, Rhyhorn and Rhydon, within Ultra Balls.
In File 4: Charizard, Red used Ultra Balls to catch the Legendary Pokémon Articuno, Zapdos, Moltres, and Mewtwo.
Pokémon Generations
In The Scoop, an Ultra Ball was used by a Trainer to catch a Deoxys in outer space.
Pokémon: Twilight Wings
Leon was seen holding an Ultra Ball near the end of Letter.
Three Ultra Balls containing Bea's Pokémon appeared in Training.
In The Gathering of Stars, Mustard was shown to keep his Mienshao in an Ultra Ball.
Pokémon Evolutions
In The Champion, Leon's Aegislash and Charizard were shown to be kept in Ultra Balls.
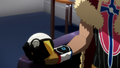
In The Wish, Zinnia was shown to keep her Salamence in an Ultra Ball. In the same episode, May used an Ultra Ball to catch Rayquaza.
In The Discovery, Elaine was revealed to have caught Mewtwo with an Ultra Ball. Two other Ultra Balls also appeared later in the episode, one belonging to Green and another one being held by an Ace Trainer.
Gallery
An Ultra Ball in Pokémon Origins
An Ultra Ball in Pokémon Generations
An Ultra Ball in Pokémon: Twilight Wings

An Ultra Ball in Pokémon Evolutions


In the manga

The Electric Tale of Pikachu
In Haunting My Dreams, Ash attempted to catch a giant Haunter known as Black Fog with an Ultra Ball, but the Ghost Pokémon used Self-Destruct just before the ball could hit it, choosing to kill itself rather than be caught by a human.
Pokémon Adventures
In the Pokémon Adventures manga, Elite Four members keep their Pokémon in Ultra Balls.
Red, Green & Blue arc
In Holy Moltres, Team Rocket was shown to have caught the legendary birds in Ultra Balls.
Sword & Shield arc
In Crunch!! Snowy Battle, Gordie and Melony were revealed to keep their Pokémon in Ultra Balls.
In PASS32, Peony was shown to keep his Copperajah in an Ultra Ball.
In PASS36, Mustard was revealed to keep his Urshifu in an Ultra Ball.
Gallery
An Ultra Ball in The Electric Tale of Pikachu
An Ultra Ball in Pokémon Pocket Monsters


In the TCG


- Main article: Ultra Ball (Dark Explorers 102)
The Ultra Ball, debuting in Dark Explorers with artwork by 5ban Graphics, has the player discard two cards from their hand to search the deck for a Pokémon.
Before being printed as its own card, an Ultra Ball can be seen in the artwork of Rocket's Sneak Attack from the Team Rocket expansion.
Trivia
- The Ultra Ball includes a stylized H in its design. This is due to its Japanese name, Hyper Ball.
- Its English name is the same as the Beast Ball in Japanese. "Ultra" in Beast Ball's Japanese name refers to "Ultra Beasts". The Japanese name of Beast Ball was likely changed due to the localization conflict with Ultra Ball, with "Beast" being used to refer to the Ultra Beasts instead.
- The Ultra Ball appears to have gone through a short-lived design change early on in Generation III. Its in-game design in Ruby and Sapphire and Pokémon Pinball: Ruby & Sapphire features a single thick yellow stripe down the middle of the upper half of the Ball, while all other games in the generation use the standard large upper-case H shape for the yellow pattern instead.
In other languages
| |||||||||||||||||||||||||||||||||||||||||||||||||||||||||||||||
| This item article is part of Project ItemDex, a Bulbapedia project that aims to write comprehensive articles on all items. |