Area Zero Underdepths: Difference between revisions
(→Geography: Rewrote section, added more information from Sada/Turo’s notes) Tags: Mobile edit Mobile web edit |
|||
| (58 intermediate revisions by 26 users not shown) | |||
| Line 1: | Line 1: | ||
{{Infobox location | {{Infobox location | ||
|image=Area Zero Underdepths.png | |image=Area Zero Underdepths.png | ||
|type= | |type=cave | ||
|location_name=Area Zero Underdepths | |location_name=Area Zero Underdepths | ||
|japanese_name=ゼロの大空洞 | |japanese_name=ゼロの大空洞 | ||
|translated_name=Great Zero Hollow | |translated_name=Great Zero Hollow | ||
|location=Great Crater of Paldea | |location=[[Great Crater of Paldea]]<br>Beneath [[Area Zero]] | ||
|region=Paldea | |region=Paldea | ||
|generation={{gen|IX}} | |generation={{gen|IX}} | ||
| Line 12: | Line 12: | ||
}} | }} | ||
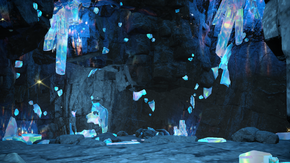
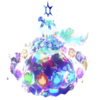
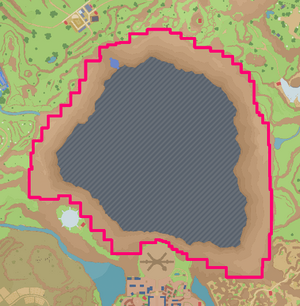
The '''Area Zero Underdepths''' (Japanese: '''ゼロの大空洞''' ''Great Zero Hollow'') is an area located within the [[Great Crater of Paldea]] at the center of the [[Paldea]] [[region]]. | The '''Area Zero Underdepths''' (Japanese: '''ゼロの大空洞''' ''Great Zero Hollow'') is an area located within the [[Great Crater of Paldea]] at the center of the [[Paldea]] [[region]], but even deeper than [[Area Zero]]. | ||
==Geography== | ==Geography== | ||
The Area Zero Underdepths is a large cavern, roughly 3,300 feet below the surface, located beneath [[Area Zero]]. It is only accessible via the elevator in | The Area Zero Underdepths is a large cavern, roughly 3,300 feet below the surface, located beneath [[Area Zero]]. It is only accessible via the elevator in [[Professor Sada]]{{sup/9|S}}/[[Professor Turo]]{{sup/9|V}}'s [[Zero Lab]] and only unlocked by using the [[Indigo Disk]]. | ||
From the composition of the rock, the underdepths likely formed approximately 2 million years ago, predating even the formation of the [[Great Crater of Paldea]]. It experienced numerous cave-ins in the past, likely due to erosion and tectonic activity, but has remained stable since the last major cave-in. There are also indications that many objects or creatures filled the space prior to the current cavern's formation. | |||
The Area Zero Underdepths consist of several large chambers connected by tunnels. It is filled with large Terastal crystals, similar to those found at the bottom of Area Zero. These crystals increase with depth until the deepest tunnel is made from solid crystal. Also near the bottom of the Underdepths is a subterranean lake. On an island in this lake is a large tree, seemingly covered in or made from crystal. | The Area Zero Underdepths consist of several large chambers connected by tunnels. It is filled with large Terastal crystals, similar to those found at the bottom of Area Zero. These crystals increase with depth until the deepest tunnel is made from solid crystal. Also near the bottom of the Underdepths is a subterranean lake. On an island in this lake is a large tree, seemingly covered in or made from crystal. | ||
Several Pokémon species also inhabit the Underdepths | Several Pokémon species also inhabit the Underdepths, primarily Rock- or Ground-type Pokémon. Prior to certain seismic shifts, {{p|Terapagos}} supposedly lived there before becoming nearly extinct. | ||
==Places of interest== | |||
[[File:Terapagos cave.png|thumb|200px|{{ga|Terapagos}} slumbering in the deepest cavern of Area Zero Underdepths]] | |||
===Tera crystal clusters=== | |||
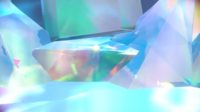
There're several clusters of Tera crystals blocking paths all over the Area Zero Underdepths. These crystals are theorized to be guardians "watching" over the hidden treasure of Area Zero. According to [[Briar]], they're likely a manifestation of pure [[Terastal energy]]. She also also has no idea what might happen if they're destroyed with brute force. For that reason, the [[Player character|player]] has to defeat a {{t|Stellar}} [[Terastal phenomenon|Tera type]] Pokémon near it, which causes the cluster to be desintegrated, allowing they, Briar, [[Carmine]] and [[Kieran]] to continue their expedition. | |||
===Crystal tree=== | |||
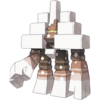
A cavern flooded with water and with an island in center where a large, crystallized tree is located in. This tree is similar to others up in [[Area Zero]], however unlike them, it is completly crystallized and way bigger than the others. The [[Player character|player]] has to go there and defeat a Stellar Tera type {{p|Garganacl}} so they, [[Briar]], [[Carmine]], and [[Kieran]] can progress further into the underdepths. | |||
===Secret cavern=== | |||
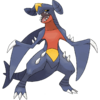
A secret cavern filled with different items that is blocked by one of the Tera crystals clusters until the optional Stellar Tera type {{p|Garchomp}} is defeated. | |||
===Terapagos's cavern=== | |||
The cavern where the [[Legendary Pokémon]] {{p|Terapagos}} has slumbers in the form of a crystal. {{ga|Terapagos|This Terapagos}} appears to be the last one of its kind after seismic shifts brought the species to the brink of extinction. The cavern is located at the very bottom of the Underdepths. | |||
There, the [[Player character|player]], [[Briar]], [[Carmine]], and [[Kieran]] find Terapagos and Kieran is the one to catch it, but after losing to the player one more time, Briar advises him to [[Terastal phenomenon|Terastallize]] it into its Stellar Form, which causes it to go out of control. However, the player and Kieran defeat it, allowing the player to catch it for good. | |||
==Items== | ==Items== | ||
{{incomplete|section}} | |||
{{itlisth}} | |||
{{itemlist|Stellar Tera Shard SV|Overworld|Sc=yes|V=yes|display=[[Stellar Tera Shard]]}} | |||
{{itemlist|Star Piece SV|Overworld|Sc=yes|V=yes|display=[[Star Piece]]}} | |||
{{itemlist|Hard Stone SV|Overworld|Sc=yes|V=yes|display=[[Hard Stone]]}} | |||
{{itemlist|Stardust SV|Overworld|Sc=yes|V=yes|display=[[Stardust]]}} | |||
{{itlistfoot}} | |||
== | == Pokémon == | ||
All Pokémon that appear in this zone area considered [[wanderer]] encounters internally, (rather than spawning randomly), and therefore always appear in the same locations, have the standard 1/4096 chance to be {{Shiny}} and ignore any typical bonuses applied, and are additionally ineligible for naturally generating [[Mark]]s, (except for the Jumbo and Mini marks).<ref>https://twitter.com/Sibuna_Switch/status/1753874296772935729</ref> <ref>https://twitter.com/Sibuna_Switch/status/1601990353564966915</ref> | |||
{| | {| class="roundy sortable mw-collapsible mw-collapsed" style="margin:left; text-align:center; background:#{{paldea color}}; border: 3px solid #{{paldea color light}}" cellpadding="3px" | ||
|- style="color:#fff" | |||
! | ! style="background:#{{paldea color light}}; {{roundytl|5px}}" | Species | ||
! | ! style="background:#{{paldea color light}}" | Level | ||
|- style="background:#fff;" | |||
| {{MSP/9|0703|Carbink}}{{p|Carbink}} | |||
|- style=" | | 65 | ||
|{{ | |- style="background:#fff;" | ||
| | | {{MSP/9|0703|Carbink}}{{p|Carbink}} | ||
| | | 66 | ||
| | |- style="background:#fff;" | ||
| | | {{MSP/9|0970|Glimmora}}{{p|Glimmora}} | ||
| | | 69 | ||
| | |- style="background:#fff;" | ||
| | | {{MSP/9|0970|Glimmora}}{{p|Glimmora}} | ||
| | | 69 | ||
| | |- style="background:#fff;" | ||
| | | {{MSP/9|0970|Glimmora}}{{p|Glimmora}} | ||
| | | 70 | ||
| | |- style="background:#fff;" | ||
|{{ | | {{MSP/9|0970|Glimmora}}{{p|Glimmora}} | ||
| | | 69 | ||
| | |- style="background:#fff;" | ||
| | | {{MSP/9|0969|Glimmet}}{{p|Glimmet}} | ||
| | | 63 | ||
| | |- style="background:#fff;" | ||
| | | {{MSP/9|0703|Carbink}}{{p|Carbink}} | ||
| | | 65 | ||
| | |- style="background:#fff;" | ||
| | | {{MSP/9|0703|Carbink}}{{p|Carbink}} | ||
| | | 65 | ||
| | |- style="background:#fff;" | ||
| | | {{MSP/9|0969|Glimmet}}{{p|Glimmet}} | ||
|{{ | | 63 | ||
| | |- style="background:#fff;" | ||
| | | {{MSP/9|0969|Glimmet}}{{p|Glimmet}} | ||
| | | 65 | ||
| | |- style="background:#fff;" | ||
| | | {{MSP/9|0970|Glimmora}}{{p|Glimmora}} | ||
| | | 68 | ||
| | |- style="background:#fff;" | ||
| | | {{MSP/9|0970|Glimmora}}{{p|Glimmora}} | ||
| | | 71 | ||
| | |- style="background:#fff;" | ||
| | | {{MSP/9|0970|Glimmora}}{{p|Glimmora}} | ||
|{{ | | 68 | ||
| | |- style="background:#fff;" | ||
| | | {{MSP/9|0969|Glimmet}}{{p|Glimmet}} | ||
| | | 67 | ||
| | |- style="background:#fff;" | ||
| | | {{MSP/9|0969|Glimmet}}{{p|Glimmet}} | ||
| | | 65 | ||
| | |- style="background:#fff;" | ||
| | | {{MSP/9|0969|Glimmet}}{{p|Glimmet}} | ||
| | | 67 | ||
| | |- style="background:#fff;" | ||
| | | {{MSP/9|0703|Carbink}}{{p|Carbink}} | ||
|{{ | | 65 | ||
| | |- style="background:#fff;" | ||
| | | {{MSP/9|0970|Glimmora}}{{p|Glimmora}} | ||
| | | 75 | ||
| | |- style="background:#fff;" | ||
| | | {{MSP/9|0970|Glimmora}}{{p|Glimmora}} | ||
| | | 75 | ||
| | |- style="background:#fff;" | ||
| | | {{MSP/9|0970|Glimmora}}{{p|Glimmora}} | ||
| | | 75 | ||
| | |- style="background:#fff;" | ||
| | | {{MSP/9|0703|Carbink}}{{p|Carbink}} | ||
| 67 | |||
|- style="background:#fff;" | |||
| {{MSP/9|0703|Carbink}}{{p|Carbink}} | |||
| 69 | |||
|} | |} | ||
==Special encounters== | |||
=== Mandatory Stellar Tera Pokémon=== | |||
A variety of {{t|Stellar}} Tera Pokémon must be defeated in order to shrink the crystals blocking the way during the events of [[The Indigo Disk]], allowing the player, [[Carmine]], [[Kieran]], and [[Briar]] to progress further into the Underdepths. None of them can be {{pkmn2|caught}}, and they are coded to never be {{Shiny}}. | |||
{{Flexheader|justify-content=space-evenly}} | |||
{{Pokémon/9 | |||
| caption = Scarlet and Violet | |||
| ndex = 970 | |||
| pokemon = Glimmora | |||
| gender = male | |||
| level = 78 | |||
| tera = Stellar | |||
| type1 = Rock | |||
| type2 = Poison | |||
| ability = Toxic Debris | |||
| move1 = Rock Slide | |||
| move1type = Rock | |||
| move1cat = Physical | |||
| move2 = Power Gem | |||
| move2type = Rock | |||
| move2cat = Special | |||
| move3 = Acid Armor | |||
| move3type = Poison | |||
| move3cat = Status | |||
| move4 = Sludge Wave | |||
| move4type = Poison | |||
| move4cat = Special | |||
}} | |||
{{Pokémon/9 | |||
| caption = Scarlet and Violet | |||
| ndex = 715 | |||
| pokemon = Noivern | |||
| gender = male | |||
| level = 78 | |||
| tera = Stellar | |||
| type1 = Flying | |||
| type2 = Dragon | |||
| ability = Frisk | |||
| move1 = Roost | |||
| move1type = Flying | |||
| move1cat = Status | |||
| move2 = Tailwind | |||
| move2type = Flying | |||
| move2cat = Status | |||
| move3 = Hurricane | |||
| move3type = Flying | |||
| move3cat = Special | |||
| move4 = Boomburst | |||
| move4type = Normal | |||
| move4cat = Special | |||
}} | |||
{{Pokémon/9 | |||
| caption = Scarlet | |||
| ndex = 989 | |||
| pokemon = Sandy Shocks | |||
| level = 79 | |||
| tera = Stellar | |||
| type1 = Electric | |||
| type2 = Ground | |||
| ability = Protosynthesis | |||
| move1 = Discharge | |||
| move1type = Electric | |||
| move1cat = Special | |||
| move2 = Earth Power | |||
| move2type = Ground | |||
| move2cat = Special | |||
| move3 = Mirror Coat | |||
| move3type = Psychic | |||
| move3cat = Special | |||
| move4 = Gravity | |||
| move4type = Psychic | |||
| move4cat = Status | |||
}} | |||
{{Pokémon/9 | |||
| caption = Violet | |||
| ndex = 995 | |||
| pokemon = Iron Thorns | |||
| level = 79 | |||
| tera = Stellar | |||
| type1 = Rock | |||
| type2 = Electric | |||
| ability = Quark Drive | |||
| move1 = Wild Charge | |||
| move1type = Electric | |||
| move1cat = Physical | |||
| move2 = Pin Missile | |||
| move2type = Bug | |||
| move2cat = Physical | |||
| move3 = Earthquake | |||
| move3type = Ground | |||
| move3cat = Physical | |||
| move4 = Stealth Rock | |||
| move4type = Rock | |||
| move4cat = Status | |||
}} | |||
{{Pokémon/9 | |||
| caption = Scarlet and Violet | |||
| ndex = 934 | |||
| pokemon = Garganacl | |||
| gender = male | |||
| level = 80 | |||
| tera = Stellar | |||
| type1 = Rock | |||
| ability = Purifying Salt | |||
| move1 = Hammer Arm | |||
| move1type = Fighting | |||
| move1cat = Physical | |||
| move2 = Heavy Slam | |||
| move2type = Steel | |||
| move2cat = Physical | |||
| move3 = Earthquake | |||
| move3type = Ground | |||
| move3cat = Physical | |||
| move4 = Stone Edge | |||
| move4type = Rock | |||
| move4cat = Physical | |||
}} | |||
{{flexfooter}} | |||
===Optional Stellar Tera Pokémon=== | ===Optional Stellar Tera Pokémon=== | ||
| Line 113: | Line 250: | ||
{{Pokémon/9 | {{Pokémon/9 | ||
|ndex=445 | | ndex = 445 | ||
|pokemon=Garchomp | | pokemon = Garchomp | ||
|gender=male | | gender = male | ||
|level=80 | | level = 80 | ||
|tera=Stellar | | tera = Stellar | ||
|type1=Dragon | | type1 = Dragon | ||
|type2=Ground | | type2 = Ground | ||
|ability=Sand Veil | | ability = Sand Veil | ||
|move1=Dragon Claw|move1type=Dragon|move1cat=Physical | | move1 = Dragon Claw | ||
|move2=Dig|move2type=Ground|move2cat=Physical | | move1type = Dragon | ||
|move3=Sandstorm|move3type=Rock|move3cat=Status | | move1cat = Physical | ||
|move4=Take Down|move4type=Normal|move4cat=Physical}} | | move2 = Dig | ||
| move2type = Ground | |||
| move2cat = Physical | |||
| move3 = Sandstorm | |||
| move3type = Rock | |||
| move3cat = Status | |||
| move4 = Take Down | |||
| move4type = Normal | |||
| move4cat = Physical | |||
}} | |||
===Terapagos=== | ===Terapagos === | ||
[[File:SV VS Stellar Form Terapagos.png|thumb|230px|Battling | [[File:SV VS Stellar Form Terapagos.png|thumb|230px|Battling Stellar Form Terapagos]] | ||
After [[Kieran]] has been defeated, he will attempt to | After [[Kieran]] has been defeated, he will attempt to Terastallize Terapagos, causing it to become uncontrollable. The player must battle it with no opportunity to change teams or heal from the end of the previous battle; losing this battle will revert the game back to before the player's battle against Kieran. It must be caught by the player upon its defeat, and is coded to never be {{Shiny}}. Additionally, this Terapagos is always coded to be male, despite it having a [[gender]] ratio of one male to one female. | ||
In the battle against Stellar Form Terapagos, it has four times the usual amount of health (with a large health bar across the top of the screen in a similar fashion to [[Titan Pokémon]] and [[Starmobile]]s, which identifies it as '''Terapagos, the Hidden Treasure of Area Zero'''), and unlimited PP for all of its moves, but its {{a|Teraform Zero}} ability does not function. Similar to a [[Tera Raid Battle]], it can put up a shield to become immune to many status moves and reduce the damage it takes from attacking moves, and the player will be unable to Terastallize their Pokémon until they charge the Tera Orb by hitting with a certain number of damaging moves, but only two attacks are required to charge it, instead of the three from standard Tera Raid Battles. Unlike Tera Raid Battles, there is no time limit and no cheering, and the player can switch Pokémon and use items from the Bag. | In the battle against Stellar Form Terapagos, it has four times the usual amount of health (with a large health bar across the top of the screen in a similar fashion to [[Titan Pokémon]] and [[Starmobile]]s, which identifies it as '''Terapagos, the Hidden Treasure of Area Zero'''), and unlimited PP for all of its moves, but its {{a|Teraform Zero}} ability does not function. Similar to a [[Tera Raid Battle]], it can put up a shield to become immune to many status moves and reduce the damage it takes from attacking moves, and the player will be unable to Terastallize their Pokémon until they charge the Tera Orb by hitting with a certain number of damaging moves, but only two attacks are required to charge it, instead of the three from standard Tera Raid Battles. Unlike Tera Raid Battles, there is no time limit and no cheering, and the player can switch Pokémon and use items from the Bag. | ||
Terapagos will put up three shields over the course of the battle: one at the beginning, and the others immediately after the previous shield is broken. Each shield covers 27% of Terapagos's health bar, and if any attack deals enough damage to break the shield, all further damage from that attack (including from [[ | Terapagos will put up three shields over the course of the battle: one at the beginning, and the others immediately after the previous shield is broken. Each shield covers 27% of Terapagos's health bar, and if any attack deals enough damage to break the shield, all further damage from that attack (including from [[multistrike move]]s) is prevented, similar to {{g|Sword and Shield}}'s [[Max Raid Battle]]s. When a new shield is put up, Terapagos is cured of any status condition, all stat modifiers to any Pokémon are erased (but other field effects such as [[weather]] and {{m|Light Screen}} remain in place), and if any of the player's Pokémon have been Terastallized, they lose that status. The Tera Orb must be recharged before the player can Terastallize a Pokémon again. | ||
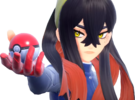
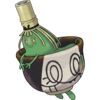
* In the first phase of the battle, Terapagos is {{t|Normal}} type, and Carmine participates as a partner using her Sinistcha. If Sinistcha faints, the player must continue the remainder of the phase alone. If Sinistcha has not yet fainted when the shield breaks, Terapagos | *In the first phase of the battle, Terapagos is {{t|Normal}} type, and Carmine participates as a partner using her Sinistcha. If Sinistcha faints, the player must continue the remainder of the phase alone. If Sinistcha has not yet fainted when the shield breaks, Terapagos uses {{m|Zen Headbutt}} on Sinistcha at that time, even if an effect such as {{m|Imprison}} would normally prevent the move from being used. This extra move ignores the usual accuracy and damage formulas and is configured to deal 9999 damage; then, if Sinistcha somehow has any HP remaining afterwards, its HP will be forcefully set to 0 anyway, ensuring that Sinistcha faints and does not participate in later phases.<ref>[https://twitter.com/Sibuna_Switch/status/1753849078943723899 Sibuna_Switch on Twitter]</ref><ref>[https://www.youtube.com/watch?v=bLS2WyCaDIM When the game says, in no uncertain terms, "no tea for you"]</ref> | ||
* In the second phase, Terapagos changes to a {{t|Psychic}} type, and the player must face it alone. | * In the second phase, Terapagos changes to a {{t|Psychic}} type, and the player must face it alone. | ||
* In the third phase, Terapagos changes to a {{t|Water}} type, and Kieran joins as a partner using his remaining five Pokémon. Terapagos will remain Water type after the final shield is broken. | *In the third phase, Terapagos changes to a {{t|Water}} type, and Kieran joins as a partner using his remaining five Pokémon. Terapagos will remain Water type after the final shield is broken. | ||
{{Party/Single | {{Party/Single | ||
|color={{ | |color={{Indigo Disk color light}} | ||
|bordercolor={{scarlet color dark}} | |bordercolor={{scarlet color dark}} | ||
|headcolor={{scarlet color light}} | |headcolor={{scarlet color light}} | ||
|sprite=VSCarmine.png | |sprite=VSCarmine.png | ||
|size=x100px | |size=x100px|width=160px | ||
|prize=none | |prize=none | ||
|class=Pokémon Trainer | |class=Pokémon Trainer | ||
| Line 152: | Line 298: | ||
|pokemon=1}} | |pokemon=1}} | ||
| style="margin:auto" |{{Pokémon/9 | | style="margin:auto" |{{Pokémon/9 | ||
|ndex=1013 | | ndex = 1013 | ||
|pokemon=Sinistcha | | pokemon = Sinistcha | ||
|level=75 | | level = 75 | ||
|type1=Grass | | type1 = Grass | ||
|type2=Ghost | | type2 = Ghost | ||
|ability=Hospitality | | ability = Hospitality | ||
|move1=Matcha Gotcha|move1type=Grass|move1cat=Special | | move1 = Matcha Gotcha | ||
|move2=Life Dew|move2type=Water|move2cat=Status | | move1type = Grass | ||
|move3=Shadow Ball|move3type=Ghost|move3cat=Special | | move1cat = Special | ||
|move4=Rage Powder|move4type=Bug|move4cat=Status}} | | move2 = Life Dew | ||
| move2type = Water | |||
| move2cat = Status | |||
| move3 = Shadow Ball | |||
| move3type = Ghost | |||
| move3cat = Special | |||
| move4 = Rage Powder | |||
| move4type = Bug | |||
| move4cat = Status | |||
}} | |||
{{Party/Footer}} | {{Party/Footer}} | ||
{{-}} | {{-}} | ||
{{Party/Single | {{Party/Single | ||
|color={{ | |color={{Indigo Disk color light}} | ||
|bordercolor={{violet color dark}} | |bordercolor={{violet color dark}} | ||
|headcolor={{violet color light}} | |headcolor={{violet color light}} | ||
|sprite=VSKieran | |sprite=VSKieran 5.png | ||
|size=x100px | |size=x100px|width=160px | ||
|prize=none | |prize=none | ||
|class= | |class=Pokémon Trainer | ||
|classlink= | |classlink=Pokémon Trainer | ||
|name={{color2|000|Kieran}} | |name={{color2|000|Kieran}} | ||
|game=SV | |game=SV | ||
| Line 178: | Line 333: | ||
|pokemon=5}} | |pokemon=5}} | ||
|{{Pokémon/9 | |{{Pokémon/9 | ||
|ndex=1019 | | ndex = 1019 | ||
|pokemon=Hydrapple | | pokemon = Hydrapple | ||
|gender=male | | gender = male | ||
|level=82 | | level = 82 | ||
|type1=Grass|type2=Dragon | | type1 = Grass | ||
|ability=Supersweet Syrup | | type2 = Dragon | ||
|move1=Syrup Bomb|move1type=Grass|move1cat=Special | | ability = Supersweet Syrup | ||
|move2=Fickle Beam|move2type=Dragon|move2cat=Special | | move1 = Syrup Bomb | ||
|move3=Dragon Cheer|move3type=Dragon|move3cat=Status | | move1type = Grass | ||
|move4=Body Press|move4type=Fighting|move4cat=Physical}} | | move1cat = Special | ||
| move2 = Fickle Beam | |||
| move2type = Dragon | |||
| move2cat = Special | |||
| move3 = Dragon Cheer | |||
| move3type = Dragon | |||
| move3cat = Status | |||
| move4 = Body Press | |||
| move4type = Fighting | |||
| move4cat = Physical | |||
}} | |||
|{{Pokémon/9 | |{{Pokémon/9 | ||
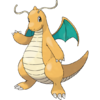
|ndex=149 | | ndex = 149 | ||
|pokemon=Dragonite | | pokemon = Dragonite | ||
|gender=male | | gender = male | ||
|level=80 | | level = 80 | ||
|type1=Dragon|type2=Flying | | type1 = Dragon | ||
|ability=Multiscale | | type2 = Flying | ||
|move1=Hurricane|move1type=Flying|move1cat=Special | | ability = Multiscale | ||
|move2=Thunder|move2type=Electric|move2cat=Special | | move1 = Hurricane | ||
|move3=Extreme Speed|move3type=Normal|move3cat=Physical | | move1type = Flying | ||
|move4=Breaking Swipe|move4type=Dragon|move4cat=Physical}} | | move1cat = Special | ||
| move2 = Thunder | |||
| move2type = Electric | |||
| move2cat = Special | |||
| move3 = Extreme Speed | |||
| move3type = Normal | |||
| move3cat = Physical | |||
| move4 = Breaking Swipe | |||
| move4type = Dragon | |||
| move4cat = Physical | |||
}} | |||
|{{Pokémon/9 | |{{Pokémon/9 | ||
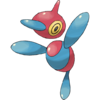
|ndex=474 | | ndex = 474 | ||
|pokemon=Porygon-Z | | pokemon = Porygon-Z | ||
|level=81 | | level = 81 | ||
|type1=Normal | | type1 = Normal | ||
|ability=Adaptability | | ability = Adaptability | ||
|move1=Hyper Beam|move1type=Normal|move1cat=Special | | move1 = Hyper Beam | ||
|move2=Shadow Ball|move2type=Ghost|move2cat=Special | | move1type = Normal | ||
|move3=Thunderbolt|move3type=Electric|move3cat=Special | | move1cat = Special | ||
|move4=Ice Beam|move4type=Ice|move4cat=Special}} | | move2 = Shadow Ball | ||
{{Party/Div|color={{ | | move2type = Ghost | ||
| move2cat = Special | |||
| move3 = Thunderbolt | |||
| move3type = Electric | |||
| move3cat = Special | |||
| move4 = Ice Beam | |||
| move4type = Ice | |||
| move4cat = Special | |||
}} | |||
{{Party/Div|color={{Indigo Disk color light}}}} | |||
| style="margin:auto" |{{Pokémon/9 | | style="margin:auto" |{{Pokémon/9 | ||
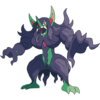
|ndex=861 | | ndex = 861 | ||
|pokemon=Grimmsnarl | | pokemon = Grimmsnarl | ||
|gender=male | | gender = male | ||
|level=81 | | level = 81 | ||
|type1=Dark|type2=Fairy | | type1 = Dark | ||
|ability=Prankster | | type2 = Fairy | ||
|move1=Sucker Punch|move1type=Dark|move1cat=Physical | | ability = Prankster | ||
|move2=Spirit Break|move2type=Fairy|move2cat=Physical | | move1 = Sucker Punch | ||
|move3=Reflect|move3type=Psychic|move3cat=Status | | move1type = Dark | ||
|move4=Light Screen|move4type=Psychic|move4cat=Status}} | | move1cat = Physical | ||
| move2 = Spirit Break | |||
| move2type = Fairy | |||
| move2cat = Physical | |||
| move3 = Reflect | |||
| move3type = Psychic | |||
| move3cat = Status | |||
| move4 = Light Screen | |||
| move4type = Psychic | |||
| move4cat = Status | |||
}} | |||
| style="margin:auto" |{{Pokémon/9 | | style="margin:auto" |{{Pokémon/9 | ||
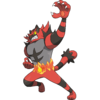
|ndex=727 | | ndex = 727 | ||
|pokemon=Incineroar | | pokemon = Incineroar | ||
|gender=male | | gender = male | ||
|level=81 | | level = 81 | ||
|type1=Fire|type2=Dark | | type1 = Fire | ||
|ability=Intimidate | | type2 = Dark | ||
|move1=Flare Blitz|move1type=Fire|move1cat=Physical | | ability = Intimidate | ||
|move2=Darkest Lariat|move2type=Dark|move2cat=Physical | | move1 = Flare Blitz | ||
|move3=Fake Out|move3type=Normal|move3cat=Physical | | move1type = Fire | ||
|move4=Brick Break|move4type=Fighting|move4cat=Physical}} | | move1cat = Physical | ||
| move2 = Darkest Lariat | |||
| move2type = Dark | |||
| move2cat = Physical | |||
| move3 = Fake Out | |||
| move3type = Normal | |||
| move3cat = Physical | |||
| move4 = Brick Break | |||
| move4type = Fighting | |||
| move4cat = Physical | |||
}} | |||
{{Party/Footer}} | {{Party/Footer}} | ||
{{-}} | {{-}} | ||
{{Pokémon/9 | {{Pokémon/9 | ||
|ndex=1024 | | ndex = 1024 | ||
|pokemon=Terapagos | | pokemon = Terapagos | ||
|gender=male | | gender = male | ||
|img=HOME1024S | | img = HOME1024S | ||
|type1=Normal | | type1 = Normal | ||
|tera=Stellar | | tera = Stellar | ||
|ability=Tera Shift | | ability = Tera Shift | ||
|level=85 | | level = 85 | ||
|move1=Tera Starstorm|move1type= | | move1 = Tera Starstorm | ||
|move2=Zen Headbutt|move2type=Psychic|move2cat=Physical | | move1type = Stellar | ||
|move3=Earth Power|move3type=Ground|move3cat=Special | | move1cat = Special | ||
|move4=Water Pulse|move4type=Water|move4cat=Special}} | | move2 = Zen Headbutt | ||
| move2type = Psychic | |||
| move2cat = Physical | |||
| move3 = Earth Power | |||
| move3type = Ground | |||
| move3cat = Special | |||
| move4 = Water Pulse | |||
| move4type = Water | |||
| move4cat = Special | |||
}} | |||
==Trainers== | ==Trainers== | ||
When Kieran is controlling Terapagos, it possesses twice the usual amount of [[HP]] and has a large HP bar at the top of the screen that identifies it as '''Terapagos, the Indigo Disk'''. | When Kieran is controlling Terapagos, it possesses twice the usual amount of [[HP]] and has a large HP bar at the top of the screen that identifies it as '''Terapagos, the Indigo Disk'''. | ||
{{Party/Single | {{Party/Single | ||
|color={{ | |color={{Indigo Disk color light}} | ||
|bordercolor={{violet color dark}} | |bordercolor={{violet color dark}} | ||
|headcolor={{violet color light}} | |headcolor={{violet color light}} | ||
|sprite=VSKieran 4.png | |sprite=VSKieran 4.png | ||
|size=x100px | |size=x100px|width=160px | ||
|prize=none | |prize=none | ||
|class= | |class=Pokémon Trainer | ||
|classlink= | |classlink=Pokémon Trainer | ||
|name={{color2|000|Kieran}} | |name={{color2|000|Kieran}} | ||
|game=SV | |game=SV | ||
| Line 264: | Line 477: | ||
|pokemon=1}} | |pokemon=1}} | ||
| style="margin:auto" |{{Pokémon/9 | | style="margin:auto" |{{Pokémon/9 | ||
|ndex=1024 | | ndex = 1024 | ||
|pokemon=Terapagos | | pokemon = Terapagos | ||
|form=-Terastal | | form = -Terastal | ||
|gender=male | | gender = male | ||
|level=85 | | level = 85 | ||
|type1=Normal | | type1 = Normal | ||
|ability=Tera Shell | | ability = Tera Shell | ||
|move1=Zen Headbutt|move1type=Psychic|move1cat=Physical | | move1 = Zen Headbutt | ||
|move2=Earth Power|move2type=Ground|move2cat=Special | | move1type = Psychic | ||
|move3=Water Pulse|move3type=Water|move3cat=Special}} | | move1cat = Physical | ||
| move2 = Earth Power | |||
| move2type = Ground | |||
| move2cat = Special | |||
| move3 = Water Pulse | |||
| move3type = Water | |||
| move3cat = Special | |||
}} | |||
{{Party/Footer}} | {{Party/Footer}} | ||
==Music== | ==Music== | ||
{| class="roundtable" style="margin:auto; text-align: center; background: #{{locationcolor/med| | {| class="roundtable" style="margin:auto; text-align: center; background: #{{locationcolor/med|cave}}; border: 3px solid #{{locationcolor/dark|cave}}" | ||
|- style="background:#{{locationcolor/light| | |- style="background:#{{locationcolor/light|cave}}" | ||
! Games | !Games | ||
! Location | !Location | ||
! Song name | !Song name (Japanese) | ||
! Composition | !Song name (English Translation) | ||
! Arrangement | !Composition | ||
!Arrangement | |||
|- style="background:#FFF" | |- style="background:#FFF" | ||
! rowspan=" | ! rowspan="8" |{{GameIcon|Sc}}{{GameIcon|Vi}} | ||
| When in the Underdepths | |When in the Underdepths | ||
| Area Zero Underdepths | |ゼロの大空洞 | ||
| [[Toby Fox]]< | |Area Zero Underdepths | ||
|[[Toby Fox]] | |||
|[[Hitomi_Satō|Hitomi Sato]] | |||
|- | |||
|During a wild <br>Pokémon battle | |||
|戦闘!エリアゼロのポケモン | |||
|Battle! (Pokémon in Area Zero) | |||
| [[Toby Fox]] | |||
|[[Go Ichinose]] | |||
|- | |- | ||
| | |When Terapagos awakens from its gem | ||
| | |蘇ったテラパゴス | ||
| [[Toby Fox]]<br>[[Go Ichinose]] | |Terapagos Comes Back to Life | ||
| | |[[Toby Fox]]<br>Rei Murayama<br>[[Go Ichinose]] | ||
|Hiromitsu Maeba | |||
|- | |- | ||
| When Terapagos | |When battling Kieran's <br> Terapagos in the Underdepths | ||
| Terapagos | | 戦闘!テラパゴス | ||
| | |Battle! (Terapagos) | ||
| | |Rei Murayama<br>[[Go Ichinose]] | ||
|[[Go Ichinose]] | |||
|- | |- | ||
| When | |When Briar prompts Kieran <br> to Terastallize Terapagos | ||
| | |秘宝の条件 | ||
| | |Conditions of the Hidden Treasure | ||
| | |[[Toby Fox]] | ||
|Hiromitsu Maeba | |||
|- | |- | ||
| When | |When Kieran attempts to <br> recall Terapagos to its Poké Ball | ||
| | |テラパゴスの暴走 | ||
| | |Terapagos's Rampage | ||
| | |[[Toby Fox]]<br>Rei Murayama<br>[[Go Ichinose]] | ||
|Hiromitsu Maeba | |||
|- | |- | ||
| When | |When battling Stellar Form Terapagos | ||
| | |戦闘!ゼロの秘宝 テラパゴス | ||
| | |Battle! (Terapagos - The Hidden Treasure of Area Zero) | ||
| | |Rei Murayama<br>[[Toby Fox]]<br>[[Go Ichinose]] | ||
|[[Go Ichinose]] | |||
|- | |- | ||
| | |Upon Terapagos being captured | ||
| | |テラパゴスを捕まえた! | ||
| Toby Fox | |Caught the Terapagos! | ||
| | |[[Toby Fox]] | ||
|Hiromitsu Maeba | |||
|- | |- | ||
|} | |} | ||
== | ==In the TCG == | ||
== | [[File:AreaZeroUnderdepthsStellarCrown131.jpg|200px|thumb|Area Zero Underdepths in the TCG]] | ||
{{main|Area Zero Underdepths (Stellar Crown 131)}} | |||
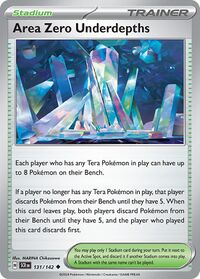
'''Area Zero Underdepths''' is introduced as a {{TCG|Stadium card}} in the [[Pokémon Trading Card Game]] during the English Scarlet & Violet Series (the Japanese Scarlet & Violet Era). It was first released in the Japanese {{TCG|Stellar Miracle}} expansion and the English {{TCG|Stellar Crown}} expansion, with artwork by [[MARINA Chikazawa]]. A gold-etched {{TCG|hyper rare}} version with artwork by the same illustrator was released in the same sets. As long as this Stadium is in play, each player may have up to 8 Benched Pokémon (an increased amount from the normal limit of 5) if they have any {{DL|Pokémon ex (TCG)|Tera Pokémon ex|Tera Pokémon}} in play. If a player no longer has any Tera Pokémon in play, they discard Benched Pokémon until they have 5 remaining. If this Stadium is removed from play, both players discard Benched Pokémon until they have 5 remaining, and the player who played the Stadium discards first. | |||
{{-}} | |||
<!-- | |||
==Trivia==--> | |||
==In other languages== | ==In other languages== | ||
{{langtable|color={{locationcolor/light| | {{langtable|color={{locationcolor/light|cave}}|bordercolor={{locationcolor/dark|cave}} | ||
|zh_cmn=零之大空洞 ''{{tt|Líng zhī Dàkōngdòng|Great Zero Hollow}}'' | |zh_cmn=零之大空洞 ''{{tt|Líng zhī Dàkōngdòng|Great Zero Hollow}}'' | ||
|zh_yue=零之大空洞 ''{{tt|Lìhng jī Daaihhūngduhng|Great Zero Hollow}}'' | |zh_yue=零之大空洞 ''{{tt|Lìhng jī Daaihhūngduhng|Great Zero Hollow}}'' | ||
|fr=Abîme Zéro | |fr=Abîme Zéro | ||
|de=Höhlensystem Null | |de=Höhlensystem Null | ||
|id=Gua Besar Zero | |||
|it=Grande Abisso Zero | |it=Grande Abisso Zero | ||
|ko=제로의 대공동 ''{{tt|Zero-ui Daegongdong|Great Zero Hollow}}'' | |ko=제로의 대공동 ''{{tt|Zero-ui Daegongdong|Great Zero Hollow}}'' | ||
|pt_br=Abismo da Área Zero | |||
|es=Caverna Abisal Cero | |es=Caverna Abisal Cero | ||
}} | }} | ||
==Related articles== | ==Related articles== | ||
* [[The Hidden Treasure of Area Zero]] | *[[The Hidden Treasure of Area Zero]] | ||
* [[Professor Sada]] | *[[Professor Sada]] | ||
* [[Professor Turo]] | *[[Professor Turo]] | ||
* [[Area Zero]] | *[[Area Zero]] | ||
* {{p|Terapagos}} | *{{p|Terapagos}} | ||
*[[Paradox Pokémon]] | |||
*[[Stellar (type)]] | |||
==References== | ==References== | ||
{{reflist}} | {{reflist}} | ||
{{Paldea}} | {{Paldea}} | ||
{{legendarylocations|paldea}} | |||
{{-}} | {{-}} | ||
{{Project Locations notice}} | {{Project Locations notice}} | ||
| Line 353: | Line 596: | ||
[[Category:Scarlet and Violet locations]] | [[Category:Scarlet and Violet locations]] | ||
[[de:Höhlensystem Null]] | |||
[[es:Caverna Abisal Cero]] | |||
[[fr:Abîme Zéro]] | [[fr:Abîme Zéro]] | ||
[[it:Grande Abisso Zero]] | [[it:Grande Abisso Zero]] | ||
[[ja:ゼロの大空洞]] | |||
[[zh:零之大空洞]] | |||
Latest revision as of 05:30, 19 September 2024
| ||||
| ||||
| Location: | Great Crater of Paldea Beneath Area Zero | |||
|---|---|---|---|---|
| Region: | Paldea | |||
| Generations: | IX | |||
 Location of Area Zero Underdepths in Paldea. | ||||
| Pokémon world locations | ||||
The Area Zero Underdepths (Japanese: ゼロの大空洞 Great Zero Hollow) is an area located within the Great Crater of Paldea at the center of the Paldea region, but even deeper than Area Zero.
Geography
The Area Zero Underdepths is a large cavern, roughly 3,300 feet below the surface, located beneath Area Zero. It is only accessible via the elevator in Professor SadaS/Professor TuroV's Zero Lab and only unlocked by using the Indigo Disk.
From the composition of the rock, the underdepths likely formed approximately 2 million years ago, predating even the formation of the Great Crater of Paldea. It experienced numerous cave-ins in the past, likely due to erosion and tectonic activity, but has remained stable since the last major cave-in. There are also indications that many objects or creatures filled the space prior to the current cavern's formation.
The Area Zero Underdepths consist of several large chambers connected by tunnels. It is filled with large Terastal crystals, similar to those found at the bottom of Area Zero. These crystals increase with depth until the deepest tunnel is made from solid crystal. Also near the bottom of the Underdepths is a subterranean lake. On an island in this lake is a large tree, seemingly covered in or made from crystal.
Several Pokémon species also inhabit the Underdepths, primarily Rock- or Ground-type Pokémon. Prior to certain seismic shifts, Terapagos supposedly lived there before becoming nearly extinct.
Places of interest
Tera crystal clusters
There're several clusters of Tera crystals blocking paths all over the Area Zero Underdepths. These crystals are theorized to be guardians "watching" over the hidden treasure of Area Zero. According to Briar, they're likely a manifestation of pure Terastal energy. She also also has no idea what might happen if they're destroyed with brute force. For that reason, the player has to defeat a Stellar Tera type Pokémon near it, which causes the cluster to be desintegrated, allowing they, Briar, Carmine and Kieran to continue their expedition.
Crystal tree
A cavern flooded with water and with an island in center where a large, crystallized tree is located in. This tree is similar to others up in Area Zero, however unlike them, it is completly crystallized and way bigger than the others. The player has to go there and defeat a Stellar Tera type Garganacl so they, Briar, Carmine, and Kieran can progress further into the underdepths.
Secret cavern
A secret cavern filled with different items that is blocked by one of the Tera crystals clusters until the optional Stellar Tera type Garchomp is defeated.
Terapagos's cavern
The cavern where the Legendary Pokémon Terapagos has slumbers in the form of a crystal. This Terapagos appears to be the last one of its kind after seismic shifts brought the species to the brink of extinction. The cavern is located at the very bottom of the Underdepths.
There, the player, Briar, Carmine, and Kieran find Terapagos and Kieran is the one to catch it, but after losing to the player one more time, Briar advises him to Terastallize it into its Stellar Form, which causes it to go out of control. However, the player and Kieran defeat it, allowing the player to catch it for good.
Items

|
This section is incomplete. Please feel free to edit this section to add missing information and complete it. |
| Item | Location | Games | |
|---|---|---|---|
| Stellar Tera Shard | Overworld | S V | |
| Star Piece | Overworld | S V | |
| Hard Stone | Overworld | S V | |
| Stardust | Overworld | S V | |
Pokémon
All Pokémon that appear in this zone area considered wanderer encounters internally, (rather than spawning randomly), and therefore always appear in the same locations, have the standard 1/4096 chance to be Shiny and ignore any typical bonuses applied, and are additionally ineligible for naturally generating Marks, (except for the Jumbo and Mini marks).[1] [2]
| Species | Level |
|---|---|
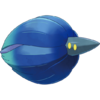
 Carbink Carbink
|
65 |
 Carbink Carbink
|
66 |
 Glimmora Glimmora
|
69 |
 Glimmora Glimmora
|
69 |
 Glimmora Glimmora
|
70 |
 Glimmora Glimmora
|
69 |
 Glimmet Glimmet
|
63 |
 Carbink Carbink
|
65 |
 Carbink Carbink
|
65 |
 Glimmet Glimmet
|
63 |
 Glimmet Glimmet
|
65 |
 Glimmora Glimmora
|
68 |
 Glimmora Glimmora
|
71 |
 Glimmora Glimmora
|
68 |
 Glimmet Glimmet
|
67 |
 Glimmet Glimmet
|
65 |
 Glimmet Glimmet
|
67 |
 Carbink Carbink
|
65 |
 Glimmora Glimmora
|
75 |
 Glimmora Glimmora
|
75 |
 Glimmora Glimmora
|
75 |
 Carbink Carbink
|
67 |
 Carbink Carbink
|
69 |
Special encounters
Mandatory Stellar Tera Pokémon
A variety of Stellar Tera Pokémon must be defeated in order to shrink the crystals blocking the way during the events of The Indigo Disk, allowing the player, Carmine, Kieran, and Briar to progress further into the Underdepths. None of them can be caught, and they are coded to never be Shiny.
|
| ||||||||||||||||||||
| Glimmora♂ Lv.78 | |||||||||||||||||||||
| |||||||||||||||||||||
|
| ||||||||||||||||||||
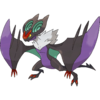
| Noivern♂ Lv.78 | |||||||||||||||||||||
| |||||||||||||||||||||
|
| ||||||||||||||||||||
| Sandy Shocks Lv.79 | |||||||||||||||||||||
| |||||||||||||||||||||
|
| ||||||||||||||||||||
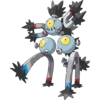
| Iron Thorns Lv.79 | |||||||||||||||||||||
| |||||||||||||||||||||
|
| ||||||||||||||||||||
| Garganacl♂ Lv.80 | |||||||||||||||||||||
| |||||||||||||||||||||
Optional Stellar Tera Pokémon
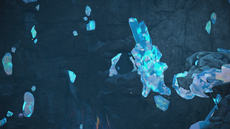
A Garchomp can be encountered and subsequently defeated in order to shrink a crystal in the room prior to one that wraps downwards in a staircase. It cannot be caught, and is coded to never be Shiny.
|
| ||||||||||||||||||||
| Garchomp♂ Lv.80 | |||||||||||||||||||||
| |||||||||||||||||||||
Terapagos
After Kieran has been defeated, he will attempt to Terastallize Terapagos, causing it to become uncontrollable. The player must battle it with no opportunity to change teams or heal from the end of the previous battle; losing this battle will revert the game back to before the player's battle against Kieran. It must be caught by the player upon its defeat, and is coded to never be Shiny. Additionally, this Terapagos is always coded to be male, despite it having a gender ratio of one male to one female.
In the battle against Stellar Form Terapagos, it has four times the usual amount of health (with a large health bar across the top of the screen in a similar fashion to Titan Pokémon and Starmobiles, which identifies it as Terapagos, the Hidden Treasure of Area Zero), and unlimited PP for all of its moves, but its Teraform Zero ability does not function. Similar to a Tera Raid Battle, it can put up a shield to become immune to many status moves and reduce the damage it takes from attacking moves, and the player will be unable to Terastallize their Pokémon until they charge the Tera Orb by hitting with a certain number of damaging moves, but only two attacks are required to charge it, instead of the three from standard Tera Raid Battles. Unlike Tera Raid Battles, there is no time limit and no cheering, and the player can switch Pokémon and use items from the Bag.
Terapagos will put up three shields over the course of the battle: one at the beginning, and the others immediately after the previous shield is broken. Each shield covers 27% of Terapagos's health bar, and if any attack deals enough damage to break the shield, all further damage from that attack (including from multistrike moves) is prevented, similar to Pokémon Sword and Shield's Max Raid Battles. When a new shield is put up, Terapagos is cured of any status condition, all stat modifiers to any Pokémon are erased (but other field effects such as weather and Light Screen remain in place), and if any of the player's Pokémon have been Terastallized, they lose that status. The Tera Orb must be recharged before the player can Terastallize a Pokémon again.
- In the first phase of the battle, Terapagos is Normal type, and Carmine participates as a partner using her Sinistcha. If Sinistcha faints, the player must continue the remainder of the phase alone. If Sinistcha has not yet fainted when the shield breaks, Terapagos uses Zen Headbutt on Sinistcha at that time, even if an effect such as Imprison would normally prevent the move from being used. This extra move ignores the usual accuracy and damage formulas and is configured to deal 9999 damage; then, if Sinistcha somehow has any HP remaining afterwards, its HP will be forcefully set to 0 anyway, ensuring that Sinistcha faints and does not participate in later phases.[3][4]
- In the second phase, Terapagos changes to a Psychic type, and the player must face it alone.
- In the third phase, Terapagos changes to a Water type, and Kieran joins as a partner using his remaining five Pokémon. Terapagos will remain Water type after the final shield is broken.
|
||||||||||||||||||||||||||||||||||||
| ||||||||||||||||||||||||||||||||||||
|
||||||||||||||||||||||||||||||||||||||||||||||||||||||||||||||||||||||||||||||||||||||||||||||||||||||||||||||||||||||||||||||||||||||||||||||||||||||||||||||||||||||||||||||
| ||||||||||||||||||||||||||||||||||||||||||||||||||||||||||||||||||||||||||||||||||||||||||||||||||||||||||||||||||||||||||||||||||||||||||||||||||||||||||||||||||||||||||||||
|
| ||||||||||||||||||||
| Terapagos♂ Lv.85 | |||||||||||||||||||||
| |||||||||||||||||||||
Trainers
When Kieran is controlling Terapagos, it possesses twice the usual amount of HP and has a large HP bar at the top of the screen that identifies it as Terapagos, the Indigo Disk.
|
|||||||||||||||||||||||||||||||||||
| |||||||||||||||||||||||||||||||||||
Music
| Games | Location | Song name (Japanese) | Song name (English Translation) | Composition | Arrangement |
|---|---|---|---|---|---|
| S V | When in the Underdepths | ゼロの大空洞 | Area Zero Underdepths | Toby Fox | Hitomi Sato |
| During a wild Pokémon battle |
戦闘!エリアゼロのポケモン | Battle! (Pokémon in Area Zero) | Toby Fox | Go Ichinose | |
| When Terapagos awakens from its gem | 蘇ったテラパゴス | Terapagos Comes Back to Life | Toby Fox Rei Murayama Go Ichinose |
Hiromitsu Maeba | |
| When battling Kieran's Terapagos in the Underdepths |
戦闘!テラパゴス | Battle! (Terapagos) | Rei Murayama Go Ichinose |
Go Ichinose | |
| When Briar prompts Kieran to Terastallize Terapagos |
秘宝の条件 | Conditions of the Hidden Treasure | Toby Fox | Hiromitsu Maeba | |
| When Kieran attempts to recall Terapagos to its Poké Ball |
テラパゴスの暴走 | Terapagos's Rampage | Toby Fox Rei Murayama Go Ichinose |
Hiromitsu Maeba | |
| When battling Stellar Form Terapagos | 戦闘!ゼロの秘宝 テラパゴス | Battle! (Terapagos - The Hidden Treasure of Area Zero) | Rei Murayama Toby Fox Go Ichinose |
Go Ichinose | |
| Upon Terapagos being captured | テラパゴスを捕まえた! | Caught the Terapagos! | Toby Fox | Hiromitsu Maeba |
In the TCG
- Main article: Area Zero Underdepths (Stellar Crown 131)
Area Zero Underdepths is introduced as a Stadium card in the Pokémon Trading Card Game during the English Scarlet & Violet Series (the Japanese Scarlet & Violet Era). It was first released in the Japanese Stellar Miracle expansion and the English Stellar Crown expansion, with artwork by MARINA Chikazawa. A gold-etched hyper rare version with artwork by the same illustrator was released in the same sets. As long as this Stadium is in play, each player may have up to 8 Benched Pokémon (an increased amount from the normal limit of 5) if they have any Tera Pokémon in play. If a player no longer has any Tera Pokémon in play, they discard Benched Pokémon until they have 5 remaining. If this Stadium is removed from play, both players discard Benched Pokémon until they have 5 remaining, and the player who played the Stadium discards first.
In other languages
| ||||||||||||||||||||||||||||||||
Related articles
- The Hidden Treasure of Area Zero
- Professor Sada
- Professor Turo
- Area Zero
- Terapagos
- Paradox Pokémon
- Stellar (type)
References
| Paldea | ||||||||||
|---|---|---|---|---|---|---|---|---|---|---|
|
| ||||||||||
| ||||||||||
|
|

|
This article is part of Project Locations, a Bulbapedia project that aims to write comprehensive articles on every location in the Pokémon world. |
