Worker (Trainer class): Difference between revisions
No edit summary |
|||
| (39 intermediate revisions by 21 users not shown) | |||
| Line 4: | Line 4: | ||
|bordercolor={{ground color dark}} | |bordercolor={{ground color dark}} | ||
|name=Worker | |name=Worker | ||
|jpname= | |jpname=作業員 | ||
|jptranslit=Sagyōin | |jptranslit=Sagyōin | ||
|jptrans=Laborer | |jptrans=Laborer | ||
|image=VSWorker | |image=VSWorker SV.png | ||
|caption=VS model from {{pkmn| | |caption=VS model from {{pkmn|Scarlet and Violet|Scarlet and Violet}} | ||
|altnames='''{{tt|はたらくおじさん|Hataraku Ojisan}}''' ''Working Man'' (Japanese [[Generation III]]) | |altnames='''{{tt|はたらくおじさん|Hataraku Ojisan}}''' ''Working Man'' (Japanese [[Generation III]]) | ||
|intro=[[Generation III]] | |intro=[[Generation III]] | ||
|games={{5v2|Diamond|Pearl|Platinum|HeartGold|SoulSilver}}<br/>{{4v|Black|White}}<br/>{{pkmn|X and Y|X, Y}}, {{pkmn|Omega Ruby and Alpha Sapphire|Omega Ruby, and Alpha Sapphire}}<br>{{pkmn|Sun and Moon|Sun, Moon}}, {{pkmn|Ultra Sun and Ultra Moon|Ultra Sun, and Ultra Moon}}<br>{{pkmn|Sword and Shield|Sword, Shield}}, {{pkmn|Brilliant Diamond and Shining Pearl|Brilliant Diamond, and Shining Pearl}}<br>{{pkmn|Colosseum}}, {{XD}} | |games={{5v2|Diamond|Pearl|Platinum|HeartGold|SoulSilver}}<br/>{{4v|Black|White}}<br/>{{pkmn|X and Y|X, Y}}, {{pkmn|Omega Ruby and Alpha Sapphire|Omega Ruby, and Alpha Sapphire}}<br>{{pkmn|Sun and Moon|Sun, Moon}}, {{pkmn|Ultra Sun and Ultra Moon|Ultra Sun, and Ultra Moon}}<br>{{pkmn|Sword and Shield|Sword, Shield}}, {{pkmn|Brilliant Diamond and Shining Pearl|Brilliant Diamond, and Shining Pearl}}<br>{{pkmn|Scarlet and Violet|Scarlet and Violet}}<br>{{pkmn|Colosseum}}, {{XD}} | ||
|gender=Both | |gender=Both{{tt|*|Male only in Genarions IV-VII, BDSP and Generation IX}} | ||
|anime= | |anime=''[[M16|Genesect and the Legend Awakened]]'' | ||
|manga=''[[PS481|Sandstorm]]'' ({{pkmn|Adventures}}) | |manga=''[[PS481|Sandstorm]]'' ({{pkmn|Adventures}}) | ||
}} | }} | ||
A '''Worker''' (Japanese: '''はたらくおじさん''' ''Working Man'' in Generation III, '''さぎょういん''' ''Laborer'' in Generation IV onwards) is a type of [[Pokémon Trainer]] that debuted in the [[Generation III]] games, where they appeared in {{g|Colosseum}} and {{g|XD: Gale of Darkness}}. They later appeared in {{game2|Diamond|Pearl|Platinum}}. Workers can also appear in Johto's {{gdis|Battle Frontier|IV}}. | A '''Worker''' (Japanese: '''はたらくおじさん''' ''Working Man'' in Generation III, '''{{ruby|作業員|さぎょういん}}''' ''Laborer'' in Generation IV onwards) is a type of [[Pokémon Trainer]] that debuted in the [[Generation III]] games, where they appeared in {{g|Colosseum}} and {{g|XD: Gale of Darkness}}. They later appeared in {{game2|Diamond|Pearl|Platinum}}. Workers can also appear in Johto's {{gdis|Battle Frontier|IV}}. | ||
They are generally depicted as young-to-middle-aged men with hardhats and tools. They appear to be similar to the {{tc|Engineer}} class, but they use different Pokémon. They use {{t|Rock}}-, {{t|Fighting}}-, {{t|Steel}}-, and {{type|Ground}} Pokémon. In the [[Battle Subway]] and [[Battle Maison]], they specialize in Pokémon benefiting from {{weather|sandstorm}}. | They are generally depicted as young-to-middle-aged men with hardhats and tools, with female Workers debuting in {{pkmn|Sword and Shield}} as tall blond women. They appear to be similar to the {{tc|Engineer}} class, but they use different Pokémon. They use {{t|Rock}}-, {{t|Fighting}}-, {{t|Steel}}-, and {{type|Ground}} Pokémon. In the [[Battle Subway]] and [[Battle Maison]], they specialize in Pokémon benefiting from {{weather|sandstorm}}. | ||
In {{2v2|Black|White}}, some Workers dress in warmer clothing for colder climates, similar to the {{tc|Ace Trainer}}s that are on {{rt|217|Sinnoh}} and in [[Snowpoint Gym]]. They are mainly found in [[Cold Storage]]; they still use mainly {{type|Fighting}} Pokémon, but several also use {{type|Ice}} Pokémon. While the Cold Storage is no longer accessible in {{2v2|Black|White|2}}, bundled-up Workers can still be found in places such as [[Twist Mountain]]. In the [[Battle Subway]], these specialize in Ice-type Pokémon. | In {{2v2|Black|White}}, some Workers dress in warmer clothing for colder climates, similar to the {{tc|Ace Trainer}}s that are on {{rt|217|Sinnoh}} and in [[Snowpoint Gym]]. They are mainly found in [[Cold Storage]]; they still use mainly {{type|Fighting}} Pokémon, but several also use {{type|Ice}} Pokémon. While the Cold Storage is no longer accessible in {{2v2|Black|White|2}}, bundled-up Workers can still be found in places such as [[Twist Mountain]]. In the [[Battle Subway]], these specialize in Ice-type Pokémon. | ||
== | [[File:Company Icon Timburr Builders.png|thumb|150px|Logo of Timburr Builders, as seen on Galar Worker helmets]] | ||
===Sprites=== | |||
==Gallery== | |||
===Artwork=== | |||
{| style="margin:auto; text-align:center; {{roundy|20px}} border:2px solid #{{ground color dark}}; background:#{{rock color}}; font-size:80%" | |||
|- | |||
|style="{{roundy|20px}} border:2px solid #{{fighting color dark}}; background:#{{steel color light}}" | [[File:XY Worker A.png|x280px]][[File:XY Worker B.png|x280px]] | |||
|- | |||
|Art from {{color2|000|Pokémon X and Y|X and Y}} | |||
|} | |||
===Sprites and models=== | |||
====In the [[core series]]==== | ====In the [[core series]]==== | ||
{| style="margin:auto; text-align:center; {{roundy|20px}} border:2px solid #{{ground color dark}}; background:#{{rock color}}; font-size:80%" | {| style="margin:auto; text-align:center; {{roundy|20px}} border:2px solid #{{ground color dark}}; background:#{{rock color}}; font-size:80%" | ||
|- | |- | ||
|style="{{roundy|80px}} border:2px solid #{{fighting color dark}}; background:#{{steel color light}}; width:80px" | [[File:Spr DP Proto Worker.png]] | |||
|style="{{roundy|80px}} border:2px solid #{{fighting color dark}}; background:#{{steel color light}}; width:80px" | [[File:Spr DP Worker.png]] | |style="{{roundy|80px}} border:2px solid #{{fighting color dark}}; background:#{{steel color light}}; width:80px" | [[File:Spr DP Worker.png]] | ||
|style="{{roundy|80px}} border:2px solid #{{fighting color dark}}; background:#{{steel color light}}; width: | |style="{{roundy|80px}} border:2px solid #{{fighting color dark}}; background:#{{steel color light}}; width:155px" | [[File:Spr BW Worker.png]] | ||
|style="{{roundy|80px}} border:2px solid #{{fighting color dark}}; background:#{{steel color light}}; width: | |style="{{roundy|80px}} border:2px solid #{{fighting color dark}}; background:#{{steel color light}}; width:155px" | [[File:Spr B2W2 Worker.png]] | ||
|style="{{roundy|80px}} border:2px solid #{{fighting color dark}}; background:#{{locationcolor/light|snow}}" | [[File:Spr BW WorkerIce.png]] | |style="{{roundy|80px}} border:2px solid #{{fighting color dark}}; background:#{{locationcolor/light|snow}}; width:80px" | [[File:Spr BW WorkerIce.png]] | ||
|style="{{roundy|80px}} border:2px solid #{{fighting color dark}}; background:#{{locationcolor/light|snow}}" | [[File:Spr B2W2 WorkerIce.png]] | |style="{{roundy|80px}} border:2px solid #{{fighting color dark}}; background:#{{locationcolor/light|snow}}; width:80px" | [[File:Spr B2W2 WorkerIce.png]] | ||
|style="{{roundy|20px}} border:2px solid #{{fighting color dark}}; background:#{{steel color light}}; width: | |style="{{roundy|20px}} border:2px solid #{{fighting color dark}}; background:#{{steel color light}}; width:300px" | [[File:VSWorker A.png|150px]][[File:VSWorker B.png|150px]] | ||
|- | |- | ||
| Prototype sprite from<br>{{color2|000|Pokémon Diamond and Pearl Versions|Diamond and Pearl}} March 26 build | |||
| Sprite from<br>{{color2|000|Generation IV}}{{tt|*|In HGSS, Battle Frontier only}} | | Sprite from<br>{{color2|000|Generation IV}}{{tt|*|In HGSS, Battle Frontier only}} | ||
| Sprite from<br>{{color2|000|Pokémon Black and White Versions|Black and White}} | | Sprite from<br>{{color2|000|Pokémon Black and White Versions|Black and White}} | ||
| Line 42: | Line 52: | ||
| Sprite from<br>{{color2|000|Pokémon Black and White Versions 2|Black 2 and White 2}}<br>(Snow) | | Sprite from<br>{{color2|000|Pokémon Black and White Versions 2|Black 2 and White 2}}<br>(Snow) | ||
| VS portraits from<br>{{color2|000|Generation VI}}{{tt|*|In ORAS, Battle Maison only}} | | VS portraits from<br>{{color2|000|Generation VI}}{{tt|*|In ORAS, Battle Maison only}} | ||
|- | |- | ||
| style="{{roundy|80px}} border:2px solid #{{fighting color dark}}; background:#{{steel color light}}" | [[File:Worker IV OD.png]] | | colspan="2" style="{{roundy|80px}} border:2px solid #{{fighting color dark}}; background:#{{steel color light}}" | [[File:Worker IV OD.png]] | ||
| colspan="2" style="{{roundy|80px}} border:2px solid #{{fighting color dark}}; background:#{{steel color light}}" | [[File:Worker OD.png]] | | colspan="2" style="{{roundy|80px}} border:2px solid #{{fighting color dark}}; background:#{{steel color light}}" | [[File:Worker OD.png]] | ||
| colspan="2" style="{{roundy|80px}} border:2px solid #{{fighting color dark}}; background:#{{locationcolor/light|snow}}" | [[File:WorkerIce OD.png]] | | colspan="2" style="{{roundy|80px}} border:2px solid #{{fighting color dark}}; background:#{{locationcolor/light|snow}}" | [[File:WorkerIce OD.png]] | ||
| style="{{roundy|20px}} border:2px solid #{{fighting color dark}}; background:#{{steel color light}}" | [[File:Worker A XY OD.png|100px]][[File:Worker B XY OD.png|100px]] | | style="{{roundy|20px}} border:2px solid #{{fighting color dark}}; background:#{{steel color light}}" | [[File:Worker A XY OD.png|100px]][[File:Worker B XY OD.png|100px]] | ||
|- | |- | ||
| Overworld sprite from<br>{{color2|000|Generation IV}}{{tt|*|In HGSS, Battle Frontier only}} | | colspan="2" | Overworld sprite from<br>{{color2|000|Generation IV}}{{tt|*|In HGSS, Battle Frontier only}} | ||
| colspan="2" | Overworld sprite from<br>{{color2|000|Generation V}} | | colspan="2" | Overworld sprite from<br>{{color2|000|Generation V}} | ||
| colspan="2" | Overworld sprite from<br>{{color2|000|Generation V}}<br>(Snow) | | colspan="2" | Overworld sprite from<br>{{color2|000|Generation V}}<br>(Snow) | ||
| Overworld models from<br>{{color2|000|Generation VI}}{{tt|*|In ORAS, Battle Maison only}} | | Overworld models from<br>{{color2|000|Generation VI}}{{tt|*|In ORAS, Battle Maison only}} | ||
|- | |- | ||
| | | style="{{roundy|80px}} border:2px solid #{{fighting color dark}}; background:#{{steel color light}}" | [[File:Spr SM Worker.png|100px]] | ||
| colspan=" | | style="{{roundy|20px}} border:2px solid #{{fighting color dark}}; background:#{{steel color light}}" | [[File:VSWorker SM.png|175px]] | ||
| style="{{roundy|80px}} border:2px solid #{{fighting color dark}}; background:#{{steel color light}}" | [[File:VSWorker BDSP.png| | |colspan="2" style="{{roundy|80px}} border:2px solid #{{fighting color dark}}; background:#{{steel color light}}; "width:310px" | [[File:VSWorker F.png|155px]][[File:VSWorker M.png|155px]] | ||
| style="{{roundy|80px}} border:2px solid #{{fighting color dark}}; background:#{{steel color light}}" | [[File:VSWorker BDSP.png|100px]] | |||
| style="{{roundy|80px}} border:2px solid #{{fighting color dark}}; background:#{{steel color light}}" | [[File:VSWorker SV.png|100px]] | |||
|- | |- | ||
| | | In-battle model from<br>{{color2|000|Pokémon Sun and Moon|Sun, Moon}}, {{color2|000|Pokémon Ultra Sun and Ultra Moon|Ultra Sun,<br>and Ultra Moon}} | ||
| colspan=" | | VS model from<br>{{color2|000|Pokémon Sun and Moon|Sun, Moon}}, {{color2|000|Pokémon Ultra Sun and Ultra Moon|Ultra Sun,<br>and Ultra Moon}} | ||
| VS model from {{color2|000|Pokémon Brilliant Diamond and Shining Pearl|Brilliant Diamond and Shining Pearl}} | | colspan="2" | VS models from<br>{{color2|000|Pokémon Sword and Shield|Sword and Shield}} | ||
| | | VS model from<br>{{color2|000|Pokémon Brilliant Diamond and Shining Pearl|Brilliant Diamond and Shining Pearl}} | ||
| VS model from<br>{{color2|000|Pokémon Scarlet and Violet|Scarlet and Violet|}} | |||
{| | |||
|- | |- | ||
|style="{{roundy| | |colspan="2" style="{{roundy|80px}} border:2px solid #{{fighting color dark}}; background:#{{steel color light}}" | [[File:Worker SM OD.png|100px]] | ||
|style="{{roundy| | |colspan="2" style="{{roundy|80px}} border:2px solid #{{fighting color dark}}; background:#{{steel color light}}; "width:300px" | [[File:Y-Comm Profile Worker F.png|100px]][[File:Y-Comm Profile Worker M.png|100px]] | ||
| style="{{roundy|80px}} border:2px solid #{{fighting color dark}}; background:#{{steel color light}}" | [[File:Worker BDSP OD.png|100px]] | |||
|- | |- | ||
| | | colspan="2" | Overworld model from<br>{{color2|000|Pokémon Sun and Moon|Sun, Moon}}, {{color2|000|Pokémon Ultra Sun and Ultra Moon|Ultra Sun, and Ultra Moon}} | ||
| | | colspan="2" | {{color2|000|Y-Comm}} profile images from<br>{{color2|000|Pokémon Sword and Shield|Sword and Shield}} | ||
| Overworld model from<br>{{color2|000|Pokémon Brilliant Diamond and Shining Pearl|Brilliant Diamond and Shining Pearl}} | |||
|} | |} | ||
=== | ====In other games==== | ||
{| style="margin:auto; text-align:center; {{roundy|20px}} border:2px solid #{{ground color dark}}; background:#{{rock color}}; font-size:80%" | {| style="margin:auto; text-align:center; {{roundy|20px}} border:2px solid #{{ground color dark}}; background:#{{rock color}}; font-size:80%" | ||
|- | |- | ||
|style="{{roundy|20px}} border:2px solid #{{fighting color dark}}; background:#{{steel color light}}" | [[File: | |style="{{roundy|20px}} border:2px solid #{{fighting color dark}}; background:#{{steel color light}}; width:100px" | [[File:Colo Worker.png|100px]] | ||
|style="{{roundy|20px}} border:2px solid #{{fighting color dark}}; background:#{{steel color light}}" | [[File:XD Worker.png|100px]] | |||
|- | |- | ||
| | | VS sprite from<br>{{color2|000|Pokémon Colosseum|Colosseum}} | ||
| VS sprite from<br>{{color2|000|Pokémon XD: Gale of Darkness|XD: Gale of Darkness}} | |||
|} | |} | ||
| Line 88: | Line 98: | ||
{{Trainerlist/h|2|diamond|pearl}} | {{Trainerlist/h|2|diamond|pearl}} | ||
{{Trainerlist/e|1|Worker [[Iron Island|Braden]]}} | {{Trainerlist/e|1|Worker [[Iron Island|Braden]]}} | ||
{{Trainerlist/b|1|1320|1|075|Graveler|33}} | {{Trainerlist/b|game=4|1|1320|1|075|Graveler|33}} | ||
{{Trainerlist/e|1|Worker [[Iron Island|Brendon]]}} | {{Trainerlist/e|1|Worker [[Iron Island|Brendon]]}} | ||
{{Trainerlist/b|1|1320|2|095|Onix|29|208|Steelix|33}} | {{Trainerlist/b|game=4|1|1320|2|095|Onix|29|208|Steelix|33}} | ||
{{Trainerlist/e|1|Worker [[Oreburgh Mine|Colin]]}} | {{Trainerlist/e|1|Worker [[Oreburgh Mine|Colin]]}} | ||
{{Trainerlist/b|1|280|2|074|Geodude|7|095|Onix|7}} | {{Trainerlist/b|game=4|1|280|2|074|Geodude|7|095|Onix|7}} | ||
{{Trainerlist/e|1|Worker [[Fuego Ironworks|Conrad]]}} | {{Trainerlist/e|1|Worker [[Fuego Ironworks|Conrad]]}} | ||
{{Trainerlist/b|1|1320|1|078|Rapidash|33}} | {{Trainerlist/b|game=4|1|1320|1|078|Rapidash|33}} | ||
{{Trainerlist/e|1|Worker [[Fuego Ironworks|Dillan]]}} | {{Trainerlist/e|1|Worker [[Fuego Ironworks|Dillan]]}} | ||
{{Trainerlist/b|1|1240|2|066|Machop|31|067|Machoke|31}} | {{Trainerlist/b|game=4|1|1240|2|066|Machop|31|067|Machoke|31}} | ||
{{Trainerlist/e|1|Worker [[Canalave Gym|Gary]]}} | {{Trainerlist/e|1|Worker [[Canalave Gym|Gary]]}} | ||
{{Trainerlist/b|1|1240|1|095|Onix|31}} | {{Trainerlist/b|game=4|1|1240|1|095|Onix|31}} | ||
{{Trainerlist/e|1|Worker [[Canalave Gym|Gerardo]]}} | {{Trainerlist/e|1|Worker [[Canalave Gym|Gerardo]]}} | ||
{{Trainerlist/b|1|1160|2|095|Onix|29|095|Onix|29}} | {{Trainerlist/b|game=4|1|1160|2|095|Onix|29|095|Onix|29}} | ||
{{Trainerlist/e|1|Worker [[Fuego Ironworks|Holden]]}} | {{Trainerlist/e|1|Worker [[Fuego Ironworks|Holden]]}} | ||
{{Trainerlist/b|1|1320|1|208|Steelix|33}} | {{Trainerlist/b|game=4|1|1320|1|208|Steelix|33}} | ||
{{Trainerlist/e|1|Worker [[Canalave Gym|Jackson]]}} | {{Trainerlist/e|1|Worker [[Canalave Gym|Jackson]]}} | ||
{{Trainerlist/b|1|1120|3|095|Onix|28|095|Onix|28|095|Onix|28}} | {{Trainerlist/b|game=4|1|1120|3|095|Onix|28|095|Onix|28|095|Onix|28}} | ||
{{Trainerlist/e|1|Worker [[Oreburgh Mine|Mason]]}} | {{Trainerlist/e|1|Worker [[Oreburgh Mine|Mason]]}} | ||
{{Trainerlist/b|1|360|1|066|Machop|9}} | {{Trainerlist/b|game=4|1|360|1|066|Machop|9}} | ||
{{Trainerlist/e|1|Worker [[Iron Island|Quentin]]}} | {{Trainerlist/e|1|Worker [[Iron Island|Quentin]]}} | ||
{{Trainerlist/b|1|1240|3|074|Geodude|27|075|Graveler|31|095|Onix|31}} | {{Trainerlist/b|game=4|1|1240|3|074|Geodude|27|075|Graveler|31|095|Onix|31}} | ||
{{Trainerlist/e|1|Worker [[Iron Island|Willy]]}} | {{Trainerlist/e|1|Worker [[Iron Island|Willy]]}} | ||
{{Trainerlist/b|1|1240|2|095|Onix|31|075|Graveler|31}} | {{Trainerlist/b|game=4|1|1240|2|095|Onix|31|075|Graveler|31}} | ||
{{Trainerlist/f|pearl}} | {{Trainerlist/f|pearl}} | ||
:''See more: [[List of Battle Tower Trainers | :''See more: [[List of Battle Tower Trainers in Pokémon Diamond and Pearl/Worker]]'' | ||
===Pokémon Platinum=== | ===Pokémon Platinum=== | ||
{{Trainerlist/h|1|platinum}} | {{Trainerlist/h|1|platinum}} | ||
{{Trainerlist/e|1|Worker [[Iron Island|Braden]]}} | {{Trainerlist/e|1|Worker [[Iron Island|Braden]]}} | ||
{{Trainerlist/b|1|1480|1|208|Steelix|37}} | {{Trainerlist/b|game=4|1|1480|1|208|Steelix|37}} | ||
{{Trainerlist/e|1|Worker [[Iron Island|Brendon]]}} | {{Trainerlist/e|1|Worker [[Iron Island|Brendon]]}} | ||
{{Trainerlist/b|1|1440|3|074|Geodude|33|074|Geodude|33|067|Machoke|36}} | {{Trainerlist/b|game=4|1|1440|3|074|Geodude|33|074|Geodude|33|067|Machoke|36}} | ||
{{Trainerlist/e|1|Worker [[Oreburgh Mine|Colin]]}} | {{Trainerlist/e|1|Worker [[Oreburgh Mine|Colin]]}} | ||
{{Trainerlist/b|1|320|2|074|Geodude|6|066|Machop|8}} | {{Trainerlist/b|game=4|1|320|2|074|Geodude|6|066|Machop|8}} | ||
{{Trainerlist/e|1|Worker [[Fuego Ironworks|Conrad]]}} | {{Trainerlist/e|1|Worker [[Fuego Ironworks|Conrad]]}} | ||
{{Trainerlist/b|1|1400|1|126|Magmar|35}} | {{Trainerlist/b|game=4|1|1400|1|126|Magmar|35}} | ||
{{Trainerlist/e|1|Worker [[Fuego Ironworks|Dillan]]}} | {{Trainerlist/e|1|Worker [[Fuego Ironworks|Dillan]]}} | ||
{{Trainerlist/b|1|1320|2|066|Machop|33|067|Machoke|33}} | {{Trainerlist/b|game=4|1|1320|2|066|Machop|33|067|Machoke|33}} | ||
{{Trainerlist/e|1|Worker [[Canalave Gym|Gary]]}} | {{Trainerlist/e|1|Worker [[Canalave Gym|Gary]]}} | ||
{{Trainerlist/b|1|1480|1|081|Magnemite|37}} | {{Trainerlist/b|game=4|1|1480|1|081|Magnemite|37}} | ||
{{Trainerlist/e|1|Worker [[Canalave Gym|Gerardo]]}} | {{Trainerlist/e|1|Worker [[Canalave Gym|Gerardo]]}} | ||
{{Trainerlist/b|1|1400|2|081|Magnemite|35|081|Magnemite|35}} | {{Trainerlist/b|game=4|1|1400|2|081|Magnemite|35|081|Magnemite|35}} | ||
{{Trainerlist/e|1|Worker [[Fuego Ironworks|Holden]]}} | {{Trainerlist/e|1|Worker [[Fuego Ironworks|Holden]]}} | ||
{{Trainerlist/b|1|1280|3|081|Magnemite|32|081|Magnemite|32|081|Magnemite|32}} | {{Trainerlist/b|game=4|1|1280|3|081|Magnemite|32|081|Magnemite|32|081|Magnemite|32}} | ||
{{Trainerlist/e|1|Worker [[Canalave Gym|Jackson]]}} | {{Trainerlist/e|1|Worker [[Canalave Gym|Jackson]]}} | ||
{{Trainerlist/b|1|1360|3|081|Magnemite|34|081|Magnemite|34|081|Magnemite|34}} | {{Trainerlist/b|game=4|1|1360|3|081|Magnemite|34|081|Magnemite|34|081|Magnemite|34}} | ||
{{Trainerlist/e|1|Worker [[Oreburgh Mine|Mason]]}} | {{Trainerlist/e|1|Worker [[Oreburgh Mine|Mason]]}} | ||
{{Trainerlist/b|1|360|1|074|Geodude|9}} | {{Trainerlist/b|game=4|1|360|1|074|Geodude|9}} | ||
{{Trainerlist/e|1|Worker [[Iron Island|Noel]]}} | {{Trainerlist/e|1|Worker [[Iron Island|Noel]]}} | ||
{{Trainerlist/b|1|1440|2|081|Magnemite|34|081|Magnemite|36}} | {{Trainerlist/b|game=4|1|1440|2|081|Magnemite|34|081|Magnemite|36}} | ||
{{Trainerlist/e|1|Worker [[Iron Island|Quentin]]}} | {{Trainerlist/e|1|Worker [[Iron Island|Quentin]]}} | ||
{{Trainerlist/b|1|1360|3|081|Magnemite|34|075|Graveler|34|066|Machop|34}} | {{Trainerlist/b|game=4|1|1360|3|081|Magnemite|34|075|Graveler|34|066|Machop|34}} | ||
{{Trainerlist/f|platinum}} | {{Trainerlist/f|platinum}} | ||
:''See more: [[List of Battle Frontier Trainers | :''See more: [[List of Battle Frontier Trainers in Generation IV/Worker]]'' | ||
===Pokémon Black and White=== | ===Pokémon Black and White=== | ||
{{Trainerlist/h|2|black|white}} | {{Trainerlist/h|2|black|white}} | ||
{{Trainerlist/e|1|Worker [[Mistralton Gym|Arnold]]}} | {{Trainerlist/e|1|Worker [[Mistralton Gym|Arnold]]}} | ||
{{Trainerlist/b|1|1320|1|528|Swoobat|33}} | {{Trainerlist/b|game=5|1|1320|1|528|Swoobat|33}} | ||
{{Trainerlist/e|1|Worker [[Mistralton Gym|Brady]]}} | {{Trainerlist/e|1|Worker [[Mistralton Gym|Brady]]}} | ||
{{Trainerlist/b|1|1280|2|580|Ducklett|32|527|Woobat|32}} | {{Trainerlist/b|game=5|1|1280|2|580|Ducklett|32|527|Woobat|32}} | ||
{{Trainerlist/e|1|Worker [[Twist Mountain|Brand]]}} | {{Trainerlist/e|1|Worker [[Twist Mountain|Brand]]}} | ||
{{Trainerlist/b|1|1360|2|525|Boldore|34|530|Excadrill|34}} | {{Trainerlist/b|game=5|1|1360|2|525|Boldore|34|530|Excadrill|34}} | ||
{{Trainerlist/e|1|Worker [[Twist Mountain|Cairn]]}} | {{Trainerlist/e|1|Worker [[Twist Mountain|Cairn]]}} | ||
{{Trainerlist/b|1|1400|1|530|Excadrill|35}} | {{Trainerlist/b|game=5|1|1400|1|530|Excadrill|35}} | ||
{{Trainerlist/e|1|Worker [[Mistralton Gym|Cliff]]}} | {{Trainerlist/e|1|Worker [[Mistralton Gym|Cliff]]}} | ||
{{Trainerlist/b|1|1280|2|520|Tranquill|32|520|Tranquill|32}} | {{Trainerlist/b|game=5|1|1280|2|520|Tranquill|32|520|Tranquill|32}} | ||
{{Trainerlist/e|1|Worker [[Driftveil Gym|Don]]}} | {{Trainerlist/e|1|Worker [[Driftveil Gym|Don]]}} | ||
{{Trainerlist/b|1|1160|1|552|Krokorok|29}} | {{Trainerlist/b|game=5|1|1160|1|552|Krokorok|29}} | ||
{{Trainerlist/e|1|{{tt|Worker|Cold area}} [[Cold Storage|Eddie]]}} | {{Trainerlist/e|1|{{tt|Worker|Cold area}} [[Cold Storage|Eddie]]}} | ||
{{Trainerlist/b|1|960|2|511|Pansage|24|532|Timburr|24}} | {{Trainerlist/b|game=5|1|960|2|511|Pansage|24|532|Timburr|24}} | ||
{{Trainerlist/e|1|Worker [[Driftveil Gym|Felix]]}} | {{Trainerlist/e|1|Worker [[Driftveil Gym|Felix]]}} | ||
{{Trainerlist/b|1|1120|2|536|Palpitoad|28|529|Drilbur|28}} | {{Trainerlist/b|game=5|1|1120|2|536|Palpitoad|28|529|Drilbur|28}} | ||
{{Trainerlist/e|1|{{tt|Worker|Cold area}} [[Cold Storage|Filipe]]}} | {{Trainerlist/e|1|{{tt|Worker|Cold area}} [[Cold Storage|Filipe]]}} | ||
{{Trainerlist/b|1|1000|1|533|Gurdurr|25}} | {{Trainerlist/b|game=5|1|1000|1|533|Gurdurr|25}} | ||
{{Trainerlist/e|1|{{tt|Worker|Cold area}} [[Cold Storage|Glenn]]}} | {{Trainerlist/e|1|{{tt|Worker|Cold area}} [[Cold Storage|Glenn]]}} | ||
{{Trainerlist/b|1|960|2|515|Panpour|24|532|Timburr|24}} | {{Trainerlist/b|game=5|1|960|2|515|Panpour|24|532|Timburr|24}} | ||
{{Trainerlist/e|1|Worker {{rt|4|Unova|Gus}}}} | {{Trainerlist/e|1|Worker {{rt|4|Unova|Gus}}}} | ||
{{Trainerlist/b|1|680|3|524|Roggenrola|17|524|Roggenrola|17|532|Timburr|17}} | {{Trainerlist/b|game=5|1|680|3|524|Roggenrola|17|524|Roggenrola|17|532|Timburr|17}} | ||
{{Trainerlist/e|1|Worker [[Twist Mountain|Heath]]}} | {{Trainerlist/e|1|Worker [[Twist Mountain|Heath]]}} | ||
{{Trainerlist/b|1|1400|1|528|Swoobat|35}} | {{Trainerlist/b|game=5|1|1400|1|528|Swoobat|35}} | ||
{{Trainerlist/e|1|{{tt|Worker|Cold area}} [[Big Stadium and Small Court/Black and White|Matthew]]}} | {{Trainerlist/e|1|{{tt|Worker|Cold area}} [[Big Stadium and Small Court/Black and White|Matthew]]}} | ||
{{Trainerlist/b|1|2560|2|364|Sealeo|64|362|Glalie|64}} | {{Trainerlist/b|game=5|1|2560|2|364|Sealeo|64|362|Glalie|64}} | ||
{{Trainerlist/e|1|{{tt|Worker|Cold area}} [[Cold Storage|Patton]]}} | {{Trainerlist/e|1|{{tt|Worker|Cold area}} [[Cold Storage|Patton]]}} | ||
{{Trainerlist/b|1|960|2|582|Vanillite|24|532|Timburr|24}} | {{Trainerlist/b|game=5|1|960|2|582|Vanillite|24|532|Timburr|24}} | ||
{{Trainerlist/e|1|Worker [[Twist Mountain|Rich]]}} | {{Trainerlist/e|1|Worker [[Twist Mountain|Rich]]}} | ||
{{Trainerlist/b|1|1360|2|533|Gurdurr|34|525|Boldore|34}} | {{Trainerlist/b|game=5|1|1360|2|533|Gurdurr|34|525|Boldore|34}} | ||
{{Trainerlist/e|1|Worker [[Twist Mountain|Rob]]}} | {{Trainerlist/e|1|Worker [[Twist Mountain|Rob]]}} | ||
{{Trainerlist/b|1|1320|3|525|Boldore|33|525|Boldore|33|525|Boldore|33}} | {{Trainerlist/b|game=5|1|1320|3|525|Boldore|33|525|Boldore|33|525|Boldore|33}} | ||
{{Trainerlist/e|1|{{tt|Worker|Cold area}} [[Cold Storage|Ryan]]}} | {{Trainerlist/e|1|{{tt|Worker|Cold area}} [[Cold Storage|Ryan]]}} | ||
{{Trainerlist/b|1|960|3|532|Timburr|24|532|Timburr|24|582|Vanillite|24}} | {{Trainerlist/b|game=5|1|960|3|532|Timburr|24|532|Timburr|24|582|Vanillite|24}} | ||
{{Trainerlist/e|1|Worker {{rt|4|Unova|Scott}}}} | {{Trainerlist/e|1|Worker {{rt|4|Unova|Scott}}}} | ||
{{Trainerlist/b|1|720|2|524|Roggenrola|18|532|Timburr|18}} | {{Trainerlist/b|game=5|1|720|2|524|Roggenrola|18|532|Timburr|18}} | ||
{{Trainerlist/e|1|Worker {{rt|4|Unova|Shelby}}}} | {{Trainerlist/e|1|Worker {{rt|4|Unova|Shelby}}}} | ||
{{Trainerlist/b|1|760|1|532|Timburr|19}} | {{Trainerlist/b|game=5|1|760|1|532|Timburr|19}} | ||
{{Trainerlist/e|1|Worker [[Driftveil Gym|Sterling]]}} | {{Trainerlist/e|1|Worker [[Driftveil Gym|Sterling]]}} | ||
{{Trainerlist/b|1|1120|2|551|Sandile|28|529|Drilbur|28}} | {{Trainerlist/b|game=5|1|1120|2|551|Sandile|28|529|Drilbur|28}} | ||
{{Trainerlist/e|1|Worker [[Big Stadium and Small Court/Black and White|Tyler]]}} | {{Trainerlist/e|1|Worker [[Big Stadium and Small Court/Black and White|Tyler]]}} | ||
{{Trainerlist/b|1|2560|2|303|Mawile|64|530|Excadrill|64}} | {{Trainerlist/b|game=5|1|2560|2|303|Mawile|64|530|Excadrill|64}} | ||
{{Trainerlist/e|1|{{tt|Worker|Cold area}} [[Cold Storage|Victor]]}} | {{Trainerlist/e|1|{{tt|Worker|Cold area}} [[Cold Storage|Victor]]}} | ||
{{Trainerlist/b|1|960|2|513|Pansear|24|532|Timburr|24}} | {{Trainerlist/b|game=5|1|960|2|513|Pansear|24|532|Timburr|24}} | ||
{{Trainerlist/e|1|Worker {{rt|4|Unova|Zack}}}} | {{Trainerlist/e|1|Worker {{rt|4|Unova|Zack}}}} | ||
{{Trainerlist/b|1|760|1|532|Timburr|19}} | {{Trainerlist/b|game=5|1|760|1|532|Timburr|19}} | ||
{{Trainerlist/f|white}} | {{Trainerlist/f|white}} | ||
| Line 200: | Line 210: | ||
{{Trainerlist/h|2|black 2|white 2}} | {{Trainerlist/h|2|black 2|white 2}} | ||
{{Trainerlist/e|1|Worker [[Clay Tunnel|Brand]]}} | {{Trainerlist/e|1|Worker [[Clay Tunnel|Brand]]}} | ||
{{Trainerlist/b|1|2400|3|075|Graveler|60|095|Onix|60|076|Golem|60}} | {{Trainerlist/b|game=5|1|2400|3|075|Graveler|60|095|Onix|60|076|Golem|60}} | ||
{{Trainerlist/e|1|Worker [[Twist Mountain|Cairn]]}} | {{Trainerlist/e|1|Worker [[Twist Mountain|Cairn]]}} | ||
{{Trainerlist/b|1|2400|3|524|Roggenrola|60|075|Graveler|60|530|Excadrill|60}} | {{Trainerlist/b|game=5|1|2400|3|524|Roggenrola|60|075|Graveler|60|530|Excadrill|60}} | ||
{{Trainerlist/e|1|Worker [[Twist Mountain|Cliff]]}} | {{Trainerlist/e|1|Worker [[Twist Mountain|Cliff]]}} | ||
{{Trainerlist/b|1|2480|1|561|Sigilyph|62}} | {{Trainerlist/b|game=5|1|2480|1|561|Sigilyph|62}} | ||
{{Trainerlist/e|1|Worker [[Driftveil Gym|Friedrich]]}} | {{Trainerlist/e|1|Worker [[Driftveil Gym|Friedrich]]}} | ||
{{Trainerlist/b|1|1240|1|551|Sandile|31}} | {{Trainerlist/b|game=5|1|1240|1|551|Sandile|31}} | ||
{{Trainerlist/e|1|Worker [[Twist Mountain|Gus]]}} | {{Trainerlist/e|1|Worker [[Twist Mountain|Gus]]}} | ||
{{Trainerlist/b|1|2400|3|074|Geodude|60|208|Steelix|60|525|Boldore|60}} | {{Trainerlist/b|game=5|1|2400|3|074|Geodude|60|208|Steelix|60|525|Boldore|60}} | ||
{{Trainerlist/e|1|Worker [[Clay Tunnel|Herman]]}} | {{Trainerlist/e|1|Worker [[Clay Tunnel|Herman]]}} | ||
{{Trainerlist/b|1|2440|2|050|Diglett|61|068|Machamp|61}} | {{Trainerlist/b|game=5|1|2440|2|050|Diglett|61|068|Machamp|61}} | ||
{{Trainerlist/e|1|Worker [[Virbank Complex|Isaac]]}} | {{Trainerlist/e|1|Worker [[Virbank Complex|Isaac]]}} | ||
{{Trainerlist/b|1|480|2|240|Magby|12|109|Koffing|12}} | {{Trainerlist/b|game=5|1|480|2|240|Magby|12|109|Koffing|12}} | ||
{{Trainerlist/e|1|Worker [[Clay Tunnel|Leo]]}} | {{Trainerlist/e|1|Worker [[Clay Tunnel|Leo]]}} | ||
{{Trainerlist/b|1|2400|3|075|Graveler|60|095|Onix|60|208|Steelix|60}} | {{Trainerlist/b|game=5|1|2400|3|075|Graveler|60|095|Onix|60|208|Steelix|60}} | ||
{{Trainerlist/e|1|{{tt|Worker|Cold area}} [[Big Stadium and Small Court|Matthew]]}} | {{Trainerlist/e|1|{{tt|Worker|Cold area}} [[Big Stadium and Small Court|Matthew]]}} | ||
{{Trainerlist/b|1|2440| | {{Trainerlist/b|game=5|1|2440|2|364|Sealeo|61|362|Glalie|61|}} | ||
{{Trainerlist/e|1|Worker [[Driftveil Gym|Maynard]]}} | {{Trainerlist/e|1|Worker [[Driftveil Gym|Maynard]]}} | ||
{{Trainerlist/b|1|1240|1|529|Drilbur|31}} | {{Trainerlist/b|game=5|1|1240|1|529|Drilbur|31}} | ||
{{Trainerlist/e|1|Worker [[Virbank Complex|Mitchell]]}} | {{Trainerlist/e|1|Worker [[Virbank Complex|Mitchell]]}} | ||
{{Trainerlist/b|1|480|2|504|Patrat|12|239|Elekid|12}} | {{Trainerlist/b|game=5|1|480|2|504|Patrat|12|239|Elekid|12}} | ||
{{Trainerlist/e|1|Worker [[Clay Tunnel|Morgann]]}} | {{Trainerlist/e|1|Worker [[Clay Tunnel|Morgann]]}} | ||
{{Trainerlist/b|1|2440|2|302|Sableye|61|051|Dugtrio|61}} | {{Trainerlist/b|game=5|1|2440|2|302|Sableye|61|051|Dugtrio|61}} | ||
{{Trainerlist/e|1|Worker [[Virbank Complex|Nathan]]}} | {{Trainerlist/e|1|Worker [[Virbank Complex|Nathan]]}} | ||
{{Trainerlist/b|1|480|2|447|Riolu|12|506|Lillipup|12}} | {{Trainerlist/b|game=5|1|480|2|447|Riolu|12|506|Lillipup|12}} | ||
{{Trainerlist/e|1|Worker [[Driftveil Gym|Niel]]}} | {{Trainerlist/e|1|Worker [[Driftveil Gym|Niel]]}} | ||
{{Trainerlist/b|1|1200|2|343|Baltoy|30|551|Sandile|30}} | {{Trainerlist/b|game=5|1|1200|2|343|Baltoy|30|551|Sandile|30}} | ||
{{Trainerlist/e|1|Worker [[Driftveil Gym|Noel]]}} | {{Trainerlist/e|1|Worker [[Driftveil Gym|Noel]]}} | ||
{{Trainerlist/b|1|1240|1|343|Baltoy|31}} | {{Trainerlist/b|game=5|1|1240|1|343|Baltoy|31}} | ||
{{Trainerlist/e|1|Worker [[Driftveil Gym|Pasqual]]}} | {{Trainerlist/e|1|Worker [[Driftveil Gym|Pasqual]]}} | ||
{{Trainerlist/b|1|1200|2|529|Drilbur|30|343|Baltoy|30}} | {{Trainerlist/b|game=5|1|1200|2|529|Drilbur|30|343|Baltoy|30}} | ||
{{Trainerlist/e|1|{{tt|Worker|Cold area}} [[Twist Mountain|Patton]]}} | {{Trainerlist/e|1|{{tt|Worker|Cold area}} [[Twist Mountain|Patton]]}} | ||
{{Trainerlist/b|1|2440|2|067|Machoke|61|460|Abomasnow|61}} | {{Trainerlist/b|game=5|1|2440|2|067|Machoke|61|460|Abomasnow|61}} | ||
{{Trainerlist/e|1|Worker [[Clay Tunnel|Paul]]}} | {{Trainerlist/e|1|Worker [[Clay Tunnel|Paul]]}} | ||
{{Trainerlist/b|1|2400|3|530|Excadrill|60|034|Nidoking|60|112|Rhydon|60}} | {{Trainerlist/b|game=5|1|2400|3|530|Excadrill|60|034|Nidoking|60|112|Rhydon|60}} | ||
{{Trainerlist/e|1|{{tt|Worker|Cold area}} [[Twist Mountain|Ryan]]{{tt|*|Winter only}}}} | {{Trainerlist/e|1|{{tt|Worker|Cold area}} [[Twist Mountain|Ryan]]{{tt|*|Winter only}}}} | ||
{{Trainerlist/b|1|2400|3|238|Smoochum|60|344|Claydol|60|064|Kadabra|60}} | {{Trainerlist/b|game=5|1|2400|3|238|Smoochum|60|344|Claydol|60|064|Kadabra|60}} | ||
{{Trainerlist/e|1|Worker [[Castelia Sewers|Scott]]}} | {{Trainerlist/e|1|Worker [[Castelia Sewers|Scott]]}} | ||
{{Trainerlist/b|1|640|1|532|Timburr|17}} | {{Trainerlist/b|game=5|1|640|1|532|Timburr|17}} | ||
{{Trainerlist/e|1|Worker [[Driftveil Gym|Tavarius]]}} | {{Trainerlist/e|1|Worker [[Driftveil Gym|Tavarius]]}} | ||
{{Trainerlist/b|1|1160|3|529|Drilbur|29|343|Baltoy|29|551|Sandile|29}} | {{Trainerlist/b|game=5|1|1160|3|529|Drilbur|29|343|Baltoy|29|551|Sandile|29}} | ||
{{Trainerlist/e|1|Worker [[Driftveil Gym|Tibor]]}} | {{Trainerlist/e|1|Worker [[Driftveil Gym|Tibor]]}} | ||
{{Trainerlist/b|1|1200|2|551|Sandile|30|529|Drilbur|30}} | {{Trainerlist/b|game=5|1|1200|2|551|Sandile|30|529|Drilbur|30}} | ||
{{Trainerlist/e|1|Worker [[Big Stadium and Small Court|Tyler]]}} | {{Trainerlist/e|1|Worker [[Big Stadium and Small Court|Tyler]]}} | ||
{{Trainerlist/b|1|2440|2|303|Mawile|61|530|Excadrill|61}} | {{Trainerlist/b|game=5|1|2440|2|303|Mawile|61|530|Excadrill|61}} | ||
{{Trainerlist/e|1|{{tt|Worker|Cold area}} [[Twist Mountain|Victor]]{{tt|*|Spring, Summer, Autumn only}}}} | {{Trainerlist/e|1|{{tt|Worker|Cold area}} [[Twist Mountain|Victor]]{{tt|*|Spring, Summer, Autumn only}}}} | ||
{{Trainerlist/b|1|2440|2|362|Glalie|61|614|Beartic|61}} | {{Trainerlist/b|game=5|1|2440|2|362|Glalie|61|614|Beartic|61}} | ||
{{Trainerlist/e|1|Worker [[Castelia Sewers|Zack]]}} | {{Trainerlist/e|1|Worker [[Castelia Sewers|Zack]]}} | ||
{{Trainerlist/b|1|680|1|529|Drilbur|17}} | {{Trainerlist/b|game=5|1|680|1|529|Drilbur|17}} | ||
{{Trainerlist/f|white 2}} | {{Trainerlist/f|white 2}} | ||
| Line 256: | Line 266: | ||
{{Trainerlist/h|2|x|y}} | {{Trainerlist/h|2|x|y}} | ||
{{Trainerlist/e|1|Worker [[Terminus Cave|Dimitri]]}} | {{Trainerlist/e|1|Worker [[Terminus Cave|Dimitri]]}} | ||
{{Trainerlist/b|1|3,200|1|224|Octillery|50}} | {{Trainerlist/b|game=6|1|3,200|1|224|Octillery|50}} | ||
{{Trainerlist/e|1|Worker [[Terminus Cave|Narek]]}} | {{Trainerlist/e|1|Worker [[Terminus Cave|Narek]]}} | ||
{{Trainerlist/b|1|3,072|3|075|Graveler|46|075|Graveler|47|076|Golem|48}} | {{Trainerlist/b|game=6|1|3,072|3|075|Graveler|46|075|Graveler|47|076|Golem|48}} | ||
{{Trainerlist/e|1|{{tt|Worker|White-helmet design}} [[Terminus Cave|Yusif]]}} | {{Trainerlist/e|1|{{tt|Worker|White-helmet design}} [[Terminus Cave|Yusif]]}} | ||
{{Trainerlist/b|1|3,200|1|476|Probopass|50}} | {{Trainerlist/b|game=6|1|3,200|1|476|Probopass|50}} | ||
{{Trainerlist/f|y}} | {{Trainerlist/f|y}} | ||
| Line 268: | Line 278: | ||
{{Trainerlist/h|2|sun|moon}} | {{Trainerlist/h|2|sun|moon}} | ||
{{Trainerlist/e|1|Worker [[Diglett's Tunnel|Frank]]}} | {{Trainerlist/e|1|Worker [[Diglett's Tunnel|Frank]]}} | ||
{{Trainerlist/b|1|880|1|050A|Diglett|22}} | {{Trainerlist/b|game=7|1|880|1|050A|Diglett|22}} | ||
{{Trainerlist/e|1|Worker [[Diglett's Tunnel|Jeff]]}} | {{Trainerlist/e|1|Worker [[Diglett's Tunnel|Jeff]]}} | ||
{{Trainerlist/b|1|880|2|524|Roggenrola|21|749|Mudbray|22}} | {{Trainerlist/b|game=7|1|880|2|524|Roggenrola|21|749|Mudbray|22}} | ||
{{Trainerlist/e|1|Worker [[Diglett's Tunnel|Vaclav]]}} | {{Trainerlist/e|1|Worker [[Diglett's Tunnel|Vaclav]]}} | ||
{{Trainerlist/b|1|880|1|066|Machop|22}} | {{Trainerlist/b|game=7|1|880|1|066|Machop|22}} | ||
{{Trainerlist/f|moon}} | {{Trainerlist/f|moon}} | ||
| Line 282: | Line 292: | ||
{{Trainerlist/h|2|ultra sun|ultra moon}} | {{Trainerlist/h|2|ultra sun|ultra moon}} | ||
{{Trainerlist/e|1|Worker [[Diglett's Tunnel|Frank]]}} | {{Trainerlist/e|1|Worker [[Diglett's Tunnel|Frank]]}} | ||
{{Trainerlist/b|1|880|1|410|Shieldon|22}} | {{Trainerlist/b|game=7|1|880|1|410|Shieldon|22}} | ||
{{Trainerlist/e|1|Worker [[Diglett's Tunnel|Jeff]]}} | {{Trainerlist/e|1|Worker [[Diglett's Tunnel|Jeff]]}} | ||
{{Trainerlist/b|1|880|2|050A|Diglett|22|050A|Diglett|22}} | {{Trainerlist/b|game=7|1|880|2|050A|Diglett|22|050A|Diglett|22}} | ||
{{Trainerlist/e|1|Worker [[Mount Lanakila|Ovid]]}} | {{Trainerlist/e|1|Worker [[Mount Lanakila|Ovid]]}} | ||
{{Trainerlist/b|1|2,000|1|369|Relicanth|50}} | {{Trainerlist/b|game=7|1|2,000|1|369|Relicanth|50}} | ||
{{Trainerlist/e|1|Worker [[Diglett's Tunnel|Vaclav]]}} | {{Trainerlist/e|1|Worker [[Diglett's Tunnel|Vaclav]]}} | ||
{{Trainerlist/b|1|880|1|566|Archen|22}} | {{Trainerlist/b|game=7|1|880|1|566|Archen|22}} | ||
{{Trainerlist/f|ultra moon}} | {{Trainerlist/f|ultra moon}} | ||
| Line 298: | Line 308: | ||
{{Trainerlist/h|2|sword|shield}} | {{Trainerlist/h|2|sword|shield}} | ||
{{Trainerlist/e|1|Worker{{male}} [[Galar Mine No. 2|Francis]]}} | {{Trainerlist/e|1|Worker{{male}} [[Galar Mine No. 2|Francis]]}} | ||
{{Trainerlist/b|1|2,100|1|838|Carkol|21}} | {{Trainerlist/b|game=8|1|2,100|1|838|Carkol|21}} | ||
{{Trainerlist/e|1|Worker{{male}} [[Galar Mine|Keith]]}} | {{Trainerlist/e|1|Worker{{male}} [[Galar Mine|Keith]]}} | ||
{{Trainerlist/b|1|1,400|1|524|Roggenrola|14}} | {{Trainerlist/b|game=8|1|1,400|1|524|Roggenrola|14}} | ||
{{Trainerlist/e|1|Worker{{female}} [[Galar Mine|Georgia]]}} | {{Trainerlist/e|1|Worker{{female}} [[Galar Mine|Georgia]]}} | ||
{{Trainerlist/b|1|1,400|3|532|Timburr|14|532|Timburr|14|532|Timburr|14}} | {{Trainerlist/b|game=8|1|1,400|3|532|Timburr|14|532|Timburr|14|532|Timburr|14}} | ||
{{Trainerlist/e|1|Worker{{male}} [[Galar Mine|Russel]]}} | {{Trainerlist/e|1|Worker{{male}} [[Galar Mine|Russel]]}} | ||
{{Trainerlist/b|1|1,500|1|837|Rolycoly|15}} | {{Trainerlist/b|game=8|1|1,500|1|837|Rolycoly|15}} | ||
{{Trainerlist/e|1|Worker{{female}} [[Galar Mine|Sandra]]}} | {{Trainerlist/e|1|Worker{{female}} [[Galar Mine|Sandra]]}} | ||
{{Trainerlist/b|1|1,500|2|050|Diglett|14|529|Drilbur|15}} | {{Trainerlist/b|game=8|1|1,500|2|050|Diglett|14|529|Drilbur|15}} | ||
{{Trainerlist/e|1|Worker{{female}} [[Galar Mine No. 2|Yvonne]]}} | {{Trainerlist/e|1|Worker{{female}} [[Galar Mine No. 2|Yvonne]]}} | ||
{{Trainerlist/b|1|2,100|2|524|Roggenrola|20|532|Timburr|21}} | {{Trainerlist/b|game=8|1|2,100|2|524|Roggenrola|20|532|Timburr|21}} | ||
{{Trainerlist/f|shield}} | {{Trainerlist/f|shield}} | ||
:''See more: [[List of Battle Tower Trainers | :''See more: [[List of Battle Tower Trainers in Pokémon Sword and Shield/Worker]]'' | ||
===Pokémon Brilliant Diamond and Shining Pearl=== | ===Pokémon Brilliant Diamond and Shining Pearl=== | ||
{{Trainerlist/h|2|brilliant diamond|shining pearl}} | {{Trainerlist/h|2|brilliant diamond|shining pearl}} | ||
{{Trainerlist/e|1|Worker [[Iron Island|Braden]]}} | {{Trainerlist/e|1|Worker [[Iron Island|Braden]]}} | ||
{{Trainerlist/b|1|1,584|1|075|Graveler|33}} | {{Trainerlist/b|game=BDSP|1|1,584|1|075|Graveler|33}} | ||
{{Trainerlist/e|1|Worker [[Iron Island|Brendon]]}} | {{Trainerlist/e|1|Worker [[Iron Island|Brendon]]}} | ||
{{Trainerlist/b|1|1,584|2|095|Onix|29|208|Steelix|33}} | {{Trainerlist/b|game=BDSP|1|1,584|2|095|Onix|29|208|Steelix|33}} | ||
{{Trainerlist/e|1|Worker [[Oreburgh Mine|Colin]]}} | {{Trainerlist/e|1|Worker [[Oreburgh Mine|Colin]]}} | ||
{{Trainerlist/b|1|560|2|074|Geodude|7|095|Onix|7}} | {{Trainerlist/b|game=BDSP|1|560|2|074|Geodude|7|095|Onix|7}} | ||
{{Trainerlist/e|1|Worker [[Fuego Ironworks|Conrad]]}} | {{Trainerlist/e|1|Worker [[Fuego Ironworks|Conrad]]}} | ||
{{Trainerlist/b|1|1,584|1|078|Rapidash|33}} | {{Trainerlist/b|game=BDSP|1|1,584|1|078|Rapidash|33}} | ||
{{Trainerlist/e|1|Worker [[Fuego Ironworks|Dillan]]}} | {{Trainerlist/e|1|Worker [[Fuego Ironworks|Dillan]]}} | ||
{{Trainerlist/b|1|1,488|2|066|Machop|31|067|Machoke|31}} | {{Trainerlist/b|game=BDSP|1|1,488|2|066|Machop|31|067|Machoke|31}} | ||
{{Trainerlist/e|1|Worker [[Canalave Gym|Gary]]}} | {{Trainerlist/e|1|Worker [[Canalave Gym|Gary]]}} | ||
{{Trainerlist/b|1|1,488|1|095|Onix|31}} | {{Trainerlist/b|game=BDSP|1|1,488|1|095|Onix|31}} | ||
{{Trainerlist/e|1|Worker [[Canalave Gym|Gerardo]]}} | {{Trainerlist/e|1|Worker [[Canalave Gym|Gerardo]]}} | ||
{{Trainerlist/b|1|1,392|2|095|Onix|29|095|Onix|29}} | {{Trainerlist/b|game=BDSP|1|1,392|2|095|Onix|29|095|Onix|29}} | ||
{{Trainerlist/e|1|Worker [[Fuego Ironworks|Holden]]}} | {{Trainerlist/e|1|Worker [[Fuego Ironworks|Holden]]}} | ||
{{Trainerlist/b|1|1,584|1|208|Steelix|33}} | {{Trainerlist/b|game=BDSP|1|1,584|1|208|Steelix|33}} | ||
{{Trainerlist/e|1|Worker [[Canalave Gym|Jackson]]}} | {{Trainerlist/e|1|Worker [[Canalave Gym|Jackson]]}} | ||
{{Trainerlist/b|1|1,344|3|095|Onix|28|095|Onix|28|095|Onix|28}} | {{Trainerlist/b|game=BDSP|1|1,344|3|095|Onix|28|095|Onix|28|095|Onix|28}} | ||
{{Trainerlist/e|1|Worker [[Oreburgh Mine|Mason]]}} | {{Trainerlist/e|1|Worker [[Oreburgh Mine|Mason]]}} | ||
{{Trainerlist/b|1|648|1|066|Machop|9}} | {{Trainerlist/b|game=BDSP|1|648|1|066|Machop|9}} | ||
{{Trainerlist/e|1|Worker [[Iron Island|Quentin]]}} | {{Trainerlist/e|1|Worker [[Iron Island|Quentin]]}} | ||
{{Trainerlist/b|1|1,488|3|074|Geodude|27|075|Graveler|31|095|Onix|31}} | {{Trainerlist/b|game=BDSP|1|1,488|3|074|Geodude|27|075|Graveler|31|095|Onix|31}} | ||
{{Trainerlist/e|1|Worker [[Iron Island|Willy]]}} | {{Trainerlist/e|1|Worker [[Iron Island|Willy]]}} | ||
{{Trainerlist/b|1|1,488|2|095|Onix|31|075|Graveler|31}} | {{Trainerlist/b|game=BDSP|1|1,488|2|095|Onix|31|075|Graveler|31}} | ||
{{Trainerlist/f|shining pearl}} | {{Trainerlist/f|shining pearl}} | ||
:''See more: [[List of Battle Tower Trainers | :''See more: [[List of Battle Tower Trainers in Pokémon Brilliant Diamond and Shining Pearl/Worker]]'' | ||
===Pokémon Scarlet and Violet=== | |||
{{trainerlist/h|2|scarlet|violet}} | |||
{{trainerlist/e|1|[[East Province (Area One)|Abel]] the Worker}} | |||
{{trainerlist/b|game=9|1|2,024|1|0924|Tandemaus|17}} | |||
{{trainerlist/e|1|[[South Province (Area One)|Alberto]] the Worker}} | |||
{{trainerlist/b|game=9|1|664|1|0403|Shinx|7}} | |||
{{trainerlist/e|1|[[East Province (Area Three)|Cristobal]] the Worker}} | |||
{{trainerlist/b|game=9|1|2,484|1|0097|Hypno|27}} | |||
{{trainerlist/e|1|[[East Province (Area Three)|Efren]] the Worker}} | |||
{{trainerlist/b|game=9|1|2,116|1|0874|Stonjourner|23}} | |||
{{trainerlist/e|1|[[South Province (Area Six)|Eric]] the Worker}} | |||
{{trainerlist/b|game=9|1|7,040|3|0026|Raichu|43|0405|Luxray|43|0604|Eelektross|44}} | |||
{{trainerlist/e|1|[[East Province (Area One)|Javier]] the Worker}} | |||
{{trainerlist/b|game=9|1|1,932|1|0479|Rotom|21}} | |||
{{trainerlist/e|1|[[South Province (Area Five)|Marius]] the Worker}} | |||
{{trainerlist/b|game=9|1|1,564|2|0100|Voltorb|17|0081|Magnemite|17}} | |||
{{trainerlist/e|1|[[East Province (Area Three)|Oliver]] the Worker}} | |||
{{trainerlist/b|game=9|1|2,116|1|0965|Varoom|23}} | |||
{{Trainerlist/f|violet}} | |||
===Pokémon Colosseum=== | ===Pokémon Colosseum=== | ||
| Line 393: | Line 423: | ||
{{Trainerlist/f|XD}} | {{Trainerlist/f|XD}} | ||
==In | ==In animation== | ||
[[File:Workers JN.png|thumb|250px| | [[File:Workers JN.png|thumb|250px|Workers in {{aniseries|JN}}]] | ||
=== | ===''Pokémon the Series''=== | ||
===={{aniseries|DP}}==== | |||
A group of Workers (referred to here as miners) appeared in ''[[DP015|Shapes of Things to Come!]]'', where they and their Pokémon were working in the [[Oreburgh Mine]]. | A group of Workers (referred to here as miners) appeared in ''[[DP015|Shapes of Things to Come!]]'', where they and their Pokémon were working in the [[Oreburgh Mine]]. | ||
A group of Workers appeared in ''[[M16|Genesect and the Legend Awakened]]''. Their work was interfered by flickering streetlights, caused by the [[Genesect Army]]'s actions at [[Pokémon Hills]]. Fortunately, their {{p|Ampharos}} was able to give them light with its tail, allowing the men to continue their work. | ====''[[M16|Genesect and the Legend Awakened]]''==== | ||
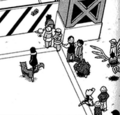
A group of Workers appeared in the {{pkmn|movie}} ''[[M16|Genesect and the Legend Awakened]]''. Their work was interfered by flickering streetlights, caused by the [[Genesect Army]]'s actions at [[Pokémon Hills]]. Fortunately, their {{p|Ampharos}} was able to give them light with its tail, allowing the men to continue their work. | |||
===={{aniseries|JN}}==== | |||
A Worker appeared in an image in ''[[JN003|Ivysaur's Mysterious Tower!]]'', where he and a group of {{p|Machop}} were seen working on the construction of a new {{OBP|Gym|GO}} in [[Vermilion City]]. | A Worker appeared in an image in ''[[JN003|Ivysaur's Mysterious Tower!]]'', where he and a group of {{p|Machop}} were seen working on the construction of a new {{OBP|Gym|GO}} in [[Vermilion City]]. | ||
| Line 512: | Line 545: | ||
|epnum=TW05 | |epnum=TW05 | ||
|epname=Assistant | |epname=Assistant | ||
|desc=A {{p|Copperajah}} was seen at a construction site that | |desc=A {{p|Copperajah}} was seen at a construction site that Oleana visited. | ||
None of Copperajah's moves are known.}} | None of Copperajah's moves are known.}} | ||
| Line 524: | Line 557: | ||
|epnum=TW05 | |epnum=TW05 | ||
|epname=Assistant | |epname=Assistant | ||
|desc=A {{p|Carkol}} was seen at a construction site that | |desc=A {{p|Carkol}} was seen at a construction site that Oleana visited. | ||
None of Carkol's moves are known.}} | None of Carkol's moves are known.}} | ||
| Line 532: | Line 565: | ||
[[File:Workers Adventures.png|200px|thumb|Two Workers in [[Pokémon Adventures]]]] | [[File:Workers Adventures.png|200px|thumb|Two Workers in [[Pokémon Adventures]]]] | ||
====History==== | ====History==== | ||
====={{ | ====={{MangaArc|Diamond & Pearl}}===== | ||
In ''[[PS341|Putting a Crimp in Kricketot]]'', a Worker in [[Oreburgh City]] is seen loudly scolding his Psyduck, [[nickname]]d "Yeller" (Japanese: '''きいろ''' ''Yellow''), for playing with the controls of a bulldozer. Psyduck had caused the machine to roll down the hill, putting {{adv|Diamond}}, {{adv|Pearl}}, and {{adv|Platinum}} in danger. The Worker apologizes to them, and Platinum asks him for a tour of the [[Oreburgh Mine]] as repayment, hoping to dig for coals. Diamond and Pearl initially let her go by herself with the Worker. However, they go after her as soon as [[Chatler]] tells the location of the mine to the boys by repeating the Worker's voice. After [[Platinum's Piplup]] defeats a swarm of {{p|Kricketune}}, the Worker mentions that [[Roark]] envisioned the mine as a place to dig for coal, and for training Pokémon as well. Piplup's pride is hurt because she has not participated in the past few battles together with Diamond and Pearl's Pokémon, so the Worker suggests Platinum to go challenge the [[Oreburgh Gym]] to help Piplup regain her confidence. In ''[[PS374|Brash Bronzong I]]'', the Worker who owns a Psyduck is seen again. He and Roark talk about [[Byron]] investigating [[Team Galactic]] in [[Canalave City]]. | In ''[[PS341|Putting a Crimp in Kricketot]]'', a Worker in [[Oreburgh City]] is seen loudly scolding his Psyduck, [[nickname]]d "Yeller" (Japanese: '''きいろ''' ''Yellow''), for playing with the controls of a bulldozer. Psyduck had caused the machine to roll down the hill, putting {{adv|Diamond}}, {{adv|Pearl}}, and {{adv|Platinum}} in danger. The Worker apologizes to them, and Platinum asks him for a tour of the [[Oreburgh Mine]] as repayment, hoping to dig for coals. Diamond and Pearl initially let her go by herself with the Worker. However, they go after her as soon as [[Chatler]] tells the location of the mine to the boys by repeating the Worker's voice. After [[Platinum's Piplup]] defeats a swarm of {{p|Kricketune}}, the Worker mentions that [[Roark]] envisioned the mine as a place to dig for coal, and for training Pokémon as well. Piplup's pride is hurt because she has not participated in the past few battles together with Diamond and Pearl's Pokémon, so the Worker suggests Platinum to go challenge the [[Oreburgh Gym]] to help Piplup regain her confidence. In ''[[PS374|Brash Bronzong I]]'', the Worker who owns a Psyduck is seen again. He and Roark talk about [[Byron]] investigating [[Team Galactic]] in [[Canalave City]]. | ||
In ''[[PS342|A Conk on Cranidos's Cranium]]'', [[Roark]] is seen talking to some friendly Workers at the [[Oreburgh Mine]]. Roark tells them about some of the [[Fossil]]s he dug out from [[ | In ''[[PS342|A Conk on Cranidos's Cranium]]'', [[Roark]] is seen talking to some friendly Workers at the [[Oreburgh Mine]]. Roark tells them about some of the [[Fossil]]s he dug out from the [[Underground]]. The Workers introduce Roark to Platinum and tell him that Platinum intends to challenge the [[Oreburgh Gym]]. | ||
====={{ | ====={{MangaArc|Black & White}}===== | ||
Workers Felix (Japanese: '''カンキチ''' ''Kankichi''), Rich (Japanese: '''リイチ''' ''Rīchi''), Sterling (Japanese: '''ギンジ''' ''Ginji''), Don (Japanese: '''タモツ''' ''Tamotsu''), and Heath (Japanese: '''タイゾウ''' '' | Workers Felix (Japanese: '''カンキチ''' ''Kankichi''), Rich (Japanese: '''リイチ''' ''Rīchi''), Sterling (Japanese: '''ギンジ''' ''Ginji''), Don (Japanese: '''タモツ''' ''Tamotsu''), and Heath (Japanese: '''タイゾウ''' ''Taizō'') work as miners for [[Clay]]. They were first seen in ''[[PS465|Lights, Camera...Action]]'', where they and Clay unearthed a [[Dark Stone|mysterious stone]] at the [[Desert Resort]]. Later, in ''[[PS492|Mine Mayhem]]'', Heath was ordered to bring {{adv|Black}} to the [[Driftveil Gym]] so that he and Clay could have their Gym battle. All of the Workers here are based on the Workers found either in the [[Driftveil Gym]] or [[Twist Mountain]] in {{2v2|Black|White}}. | ||
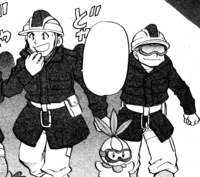
Several Workers made an appearance at {{rt|4|Unova}} in ''[[PS481|Sandstorm]]''. They were playing a game of [[card flip]] during their break. However, one of the Workers turned out to be a disguised {{tc|Team Plasma Grunt}}. The Grunt was exposed and beaten by [[Grimsley]]. | Several Workers made an appearance at {{rt|4|Unova}} in ''[[PS481|Sandstorm]]''. They were playing a game of [[card flip]] during their break. However, one of the Workers turned out to be a disguised {{tc|Team Plasma Grunt}}. The Grunt was exposed and beaten by [[Grimsley]]. | ||
| Line 544: | Line 577: | ||
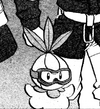
A group of Workers, some of them in their winter clothes, was seen in ''[[PS489|Drawing Bridges]]'' amongst the Trainers waiting to get to cross the [[Driftveil Drawbridge]]. | A group of Workers, some of them in their winter clothes, was seen in ''[[PS489|Drawing Bridges]]'' amongst the Trainers waiting to get to cross the [[Driftveil Drawbridge]]. | ||
====={{ | ====={{MangaArc|Black 2 & White 2}}===== | ||
Another group of miners working for Clay, named Tavarius (Japanese: '''タケオ ''' ''Takeo''), Tibor (Japanese: '''ツナシロウ''' ''Tsunashirō''), Pasqual (Japanese: '''トオル''' ''Tooru''), and Friedrich (Japanese: '''フンボルト''' ''Humboldt'') appeared in ''[[PS546|Giant Chasm]]''. They were seen helping Clay free the people trapped in the ice in [[Opelucid City]]. Like the workers seen in ''Lights, Camera...Action'', they could be found in the Driftveil Gym in {{2v2|Black 2|White 2}}. | Another group of miners working for Clay, named Tavarius (Japanese: '''タケオ ''' ''Takeo''), Tibor (Japanese: '''ツナシロウ''' ''Tsunashirō''), Pasqual (Japanese: '''トオル''' ''Tooru''), and Friedrich (Japanese: '''フンボルト''' ''Humboldt'') appeared in ''[[PS546|Giant Chasm]]''. They were seen helping Clay free the people trapped in the ice in [[Opelucid City]]. Like the workers seen in ''Lights, Camera...Action'', they could be found in the Driftveil Gym in {{2v2|Black 2|White 2}}. | ||
====={{ | ====={{MangaArc|Sword & Shield}}===== | ||
In ''[[PASS02|Crackle!! Practice Battle]]'', a Worker in a X & Y design watched as [[Leon]] attempted to herd the {{p|Wooloo}} away from the [[Wedgehurst|Wedgehurst Station]], but to no avail. | In ''[[PASS02|Crackle!! Practice Battle]]'', a Worker in a X & Y design watched as [[Leon]] attempted to herd the {{p|Wooloo}} away from the [[Wedgehurst|Wedgehurst Station]], but to no avail. | ||
| Line 652: | Line 685: | ||
None of Sandile's moves are known.}} | None of Sandile's moves are known.}} | ||
==In the TCG== | |||
[[File:WorkerSilverTempest195.jpg|200px|thumb|Full Art print of Worker]] | |||
{{main|Worker (Silver Tempest 167)}} | |||
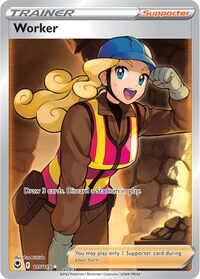
'''Worker''' was introduced as a {{TCG|Supporter card}} in the [[Pokémon Trading Card Game]] during the English Sword & Shield Series (the Japanese Sword & Shield Era). It was first released in the Japanese {{TCG|Paradigm Trigger}} expansion and the English {{TCG|Silver Tempest}} expansion, with artwork by [[Sanosuke Sakuma]]. It was also released as a {{TCG|Full Art card}} and {{TCG|Secret card}} in the same Japanese and English expansions, with artwork by [[Yuu Nishida]]. It allows the player to draw three cards, then discard a {{TCG|Stadium card}} in play. | |||
{{-}} | {{-}} | ||
| Line 660: | Line 698: | ||
|fr=Ouvrier ({{male}})<br>Ouvrière ({{female}}) | |fr=Ouvrier ({{male}})<br>Ouvrière ({{female}}) | ||
|de=Arbeiter ({{male}})<br>Arbeiterin ({{female}}) | |de=Arbeiter ({{male}})<br>Arbeiterin ({{female}}) | ||
|id=Pekerja | |||
|it=Lavoratore ({{male}}, Colo, {{gen|IV}}+)<br>Operaio ({{male}}, XD)<br>Lavoratrice ({{female}}) | |it=Lavoratore ({{male}}, Colo, {{gen|IV}}+)<br>Operaio ({{male}}, XD)<br>Lavoratrice ({{female}}) | ||
|ko=작업원 ''{{tt|Jag'eopwon|Worker}}'' | |ko=작업원 ''{{tt|Jag'eopwon|Worker}}'' | ||
|pt_br=Operário | |pt_br=Operário ({{male}})<br>Trabalhadora ({{female}}) | ||
|es=Obrero ({{male}}, {{gen|IV}})<br>Operario ({{male}}, {{gen|V}}+)<br>Trabajador ({{male}}, Colo, XD)<br>Operaria ({{female}}) | |es=Obrero ({{male}}, {{gen|IV}})<br>Operario ({{male}}, {{gen|V}}+)<br>Trabajador ({{male}}, Colo, XD)<br>Operaria ({{female}}) | ||
|vi=Công nhân | |vi=Công nhân | ||
}} | }} | ||
{{TrainerNav|Rock|johto=yes|sinnoh=yes|unova=yes|kalos=yes|hoenn=yes|alola=yes|galar=yes}} | {{TrainerNav|Rock|johto=yes|sinnoh=yes|unova=yes|kalos=yes|hoenn=yes|alola=yes|galar=yes|paldea=yes}} | ||
{{Orre trainers}} | {{Orre trainers}} | ||
{{Project CharacterDex notice|tc}} | {{Project CharacterDex notice|tc}} | ||
[[Category:Pokémon Adventures characters]] | [[Category:Pokémon Adventures characters]] | ||
[[Category: | [[Category:Animation characters]] | ||
[[Category:Pokémon: Twilight Wings characters]] | [[Category:Pokémon: Twilight Wings characters]] | ||
[[Category:Rock-type Trainers]] | [[Category:Rock-type Trainers]] | ||
Latest revision as of 17:04, 23 October 2024
| Worker 作業員 Laborer | |
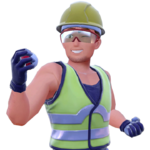 VS model from Scarlet and Violet | |
| Other names | はたらくおじさん Working Man (Japanese Generation III) |
|---|---|
| Introduced in | Generation III |
| Appears in | Diamond, Pearl, Platinum, HeartGold, and SoulSilver Black, White, Black 2, and White 2 X, Y, Omega Ruby, and Alpha Sapphire Sun, Moon, Ultra Sun, and Ultra Moon Sword, Shield, Brilliant Diamond, and Shining Pearl Scarlet and Violet Colosseum, XD |
| Gender | Both* |
| Animated debut | Genesect and the Legend Awakened |
| Manga debut | Sandstorm (Adventures) |
A Worker (Japanese: はたらくおじさん Working Man in Generation III, 作業員 Laborer in Generation IV onwards) is a type of Pokémon Trainer that debuted in the Generation III games, where they appeared in Pokémon Colosseum and Pokémon XD: Gale of Darkness. They later appeared in Pokémon Diamond, Pearl, and Platinum. Workers can also appear in Johto's Battle Frontier.
They are generally depicted as young-to-middle-aged men with hardhats and tools, with female Workers debuting in Sword and Shield as tall blond women. They appear to be similar to the Engineer class, but they use different Pokémon. They use Rock-, Fighting-, Steel-, and Ground-type Pokémon. In the Battle Subway and Battle Maison, they specialize in Pokémon benefiting from sandstorm.
In Black and White, some Workers dress in warmer clothing for colder climates, similar to the Ace Trainers that are on Route 217 and in Snowpoint Gym. They are mainly found in Cold Storage; they still use mainly Fighting-type Pokémon, but several also use Ice-type Pokémon. While the Cold Storage is no longer accessible in Black 2 and White 2, bundled-up Workers can still be found in places such as Twist Mountain. In the Battle Subway, these specialize in Ice-type Pokémon.
Gallery
Artwork
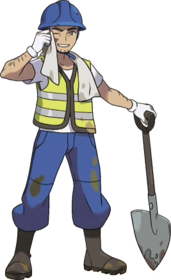 
|
| Art from X and Y |
Sprites and models
In the core series

|

|

|

|

|

|
 
|
| Prototype sprite from Diamond and Pearl March 26 build |
Sprite from Generation IV* |
Sprite from Black and White |
Sprite from Black 2 and White 2 |
Sprite from Black and White (Snow) |
Sprite from Black 2 and White 2 (Snow) |
VS portraits from Generation VI* |
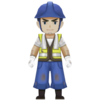 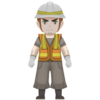
| ||||||
| Overworld sprite from Generation IV* |
Overworld sprite from Generation V |
Overworld sprite from Generation V (Snow) |
Overworld models from Generation VI* | |||
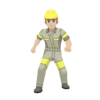
|
|
 
|
|

| ||
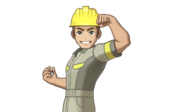
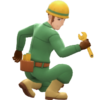
| In-battle model from Sun, Moon, Ultra Sun, and Ultra Moon |
VS model from Sun, Moon, Ultra Sun, and Ultra Moon |
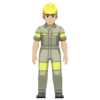
VS models from Sword and Shield |
VS model from Brilliant Diamond and Shining Pearl |
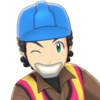
VS model from Scarlet and Violet | ||
|
|
| ||||
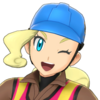
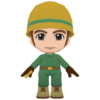
| Overworld model from Sun, Moon, Ultra Sun, and Ultra Moon |
Y-Comm profile images from Sword and Shield |
Overworld model from Brilliant Diamond and Shining Pearl | ||||
In other games

|

|
| VS sprite from Colosseum |
VS sprite from XD: Gale of Darkness |
Trainer list
Pokémon Diamond and Pearl
| Trainer name | Battle | Winnings | Pokémon | |||||
|---|---|---|---|---|---|---|---|---|
| Worker Braden | Initial battle | $1320 | Lv.33 |
------- | ------- | ------- | ------- | ------- |
| Worker Brendon | Initial battle | $1320 | Lv.29 |
Lv.33 |
------- | ------- | ------- | ------- |
| Worker Colin | Initial battle | $280 | Lv.7 |
Lv.7 |
------- | ------- | ------- | ------- |
| Worker Conrad | Initial battle | $1320 | Lv.33 |
------- | ------- | ------- | ------- | ------- |
| Worker Dillan | Initial battle | $1240 | Lv.31 |
Lv.31 |
------- | ------- | ------- | ------- |
| Worker Gary | Initial battle | $1240 | Lv.31 |
------- | ------- | ------- | ------- | ------- |
| Worker Gerardo | Initial battle | $1160 | Lv.29 |
Lv.29 |
------- | ------- | ------- | ------- |
| Worker Holden | Initial battle | $1320 | Lv.33 |
------- | ------- | ------- | ------- | ------- |
| Worker Jackson | Initial battle | $1120 | Lv.28 |
Lv.28 |
Lv.28 |
------- | ------- | ------- |
| Worker Mason | Initial battle | $360 | Lv.9 |
------- | ------- | ------- | ------- | ------- |
| Worker Quentin | Initial battle | $1240 | Lv.27 |
Lv.31 |
Lv.31 |
------- | ------- | ------- |
| Worker Willy | Initial battle | $1240 | Lv.31 |
Lv.31 |
------- | ------- | ------- | ------- |
Pokémon Platinum
| Trainer name | Battle | Winnings | Pokémon | |||||
|---|---|---|---|---|---|---|---|---|
| Worker Braden | Initial battle | $1480 | Lv.37 |
------- | ------- | ------- | ------- | ------- |
| Worker Brendon | Initial battle | $1440 | Lv.33 |
Lv.33 |
Lv.36 |
------- | ------- | ------- |
| Worker Colin | Initial battle | $320 | Lv.6 |
Lv.8 |
------- | ------- | ------- | ------- |
| Worker Conrad | Initial battle | $1400 | Lv.35 |
------- | ------- | ------- | ------- | ------- |
| Worker Dillan | Initial battle | $1320 | Lv.33 |
Lv.33 |
------- | ------- | ------- | ------- |
| Worker Gary | Initial battle | $1480 | Lv.37 |
------- | ------- | ------- | ------- | ------- |
| Worker Gerardo | Initial battle | $1400 | Lv.35 |
Lv.35 |
------- | ------- | ------- | ------- |
| Worker Holden | Initial battle | $1280 | Lv.32 |
Lv.32 |
Lv.32 |
------- | ------- | ------- |
| Worker Jackson | Initial battle | $1360 | Lv.34 |
Lv.34 |
Lv.34 |
------- | ------- | ------- |
| Worker Mason | Initial battle | $360 | Lv.9 |
------- | ------- | ------- | ------- | ------- |
| Worker Noel | Initial battle | $1440 | Lv.34 |
Lv.36 |
------- | ------- | ------- | ------- |
| Worker Quentin | Initial battle | $1360 | Lv.34 |
Lv.34 |
Lv.34 |
------- | ------- | ------- |
Pokémon Black and White
| Trainer name | Battle | Winnings | Pokémon | |||||
|---|---|---|---|---|---|---|---|---|
| Worker Arnold | Initial battle | $1320 | Lv.33 |
------- | ------- | ------- | ------- | ------- |
| Worker Brady | Initial battle | $1280 | Lv.32 |
Lv.32 |
------- | ------- | ------- | ------- |
| Worker Brand | Initial battle | $1360 | Lv.34 |
Lv.34 |
------- | ------- | ------- | ------- |
| Worker Cairn | Initial battle | $1400 | Lv.35 |
------- | ------- | ------- | ------- | ------- |
| Worker Cliff | Initial battle | $1280 | Lv.32 |
Lv.32 |
------- | ------- | ------- | ------- |
| Worker Don | Initial battle | $1160 | Lv.29 |
------- | ------- | ------- | ------- | ------- |
| Worker Eddie | Initial battle | $960 | Lv.24 |
Lv.24 |
------- | ------- | ------- | ------- |
| Worker Felix | Initial battle | $1120 | Lv.28 |
Lv.28 |
------- | ------- | ------- | ------- |
| Worker Filipe | Initial battle | $1000 | Lv.25 |
------- | ------- | ------- | ------- | ------- |
| Worker Glenn | Initial battle | $960 | Lv.24 |
Lv.24 |
------- | ------- | ------- | ------- |
| Worker Gus | Initial battle | $680 | Lv.17 |
Lv.17 |
Lv.17 |
------- | ------- | ------- |
| Worker Heath | Initial battle | $1400 | Lv.35 |
------- | ------- | ------- | ------- | ------- |
| Worker Matthew | Initial battle | $2560 | Lv.64 |
Lv.64 |
------- | ------- | ------- | ------- |
| Worker Patton | Initial battle | $960 | Lv.24 |
Lv.24 |
------- | ------- | ------- | ------- |
| Worker Rich | Initial battle | $1360 | Lv.34 |
Lv.34 |
------- | ------- | ------- | ------- |
| Worker Rob | Initial battle | $1320 | Lv.33 |
Lv.33 |
Lv.33 |
------- | ------- | ------- |
| Worker Ryan | Initial battle | $960 | Lv.24 |
Lv.24 |
Lv.24 |
------- | ------- | ------- |
| Worker Scott | Initial battle | $720 | Lv.18 |
Lv.18 |
------- | ------- | ------- | ------- |
| Worker Shelby | Initial battle | $760 | Lv.19 |
------- | ------- | ------- | ------- | ------- |
| Worker Sterling | Initial battle | $1120 | Lv.28 |
Lv.28 |
------- | ------- | ------- | ------- |
| Worker Tyler | Initial battle | $2560 | Lv.64 |
Lv.64 |
------- | ------- | ------- | ------- |
| Worker Victor | Initial battle | $960 | Lv.24 |
Lv.24 |
------- | ------- | ------- | ------- |
| Worker Zack | Initial battle | $760 | Lv.19 |
------- | ------- | ------- | ------- | ------- |
- See more: List of Battle Subway Trainers/Worker
Pokémon Black 2 and White 2
| Trainer name | Battle | Winnings | Pokémon | |||||
|---|---|---|---|---|---|---|---|---|
| Worker Brand | Initial battle | $2400 | Lv.60 |
Lv.60 |
Lv.60 |
------- | ------- | ------- |
| Worker Cairn | Initial battle | $2400 | Lv.60 |
Lv.60 |
Lv.60 |
------- | ------- | ------- |
| Worker Cliff | Initial battle | $2480 | Lv.62 |
------- | ------- | ------- | ------- | ------- |
| Worker Friedrich | Initial battle | $1240 | Lv.31 |
------- | ------- | ------- | ------- | ------- |
| Worker Gus | Initial battle | $2400 | Lv.60 |
Lv.60 |
Lv.60 |
------- | ------- | ------- |
| Worker Herman | Initial battle | $2440 | Lv.61 |
Lv.61 |
------- | ------- | ------- | ------- |
| Worker Isaac | Initial battle | $480 | Lv.12 |
Lv.12 |
------- | ------- | ------- | ------- |
| Worker Leo | Initial battle | $2400 | Lv.60 |
Lv.60 |
Lv.60 |
------- | ------- | ------- |
| Worker Matthew | Initial battle | $2440 | Lv.61 |
Lv.61 |
------- | ------- | ------- | ------- |
| Worker Maynard | Initial battle | $1240 | Lv.31 |
------- | ------- | ------- | ------- | ------- |
| Worker Mitchell | Initial battle | $480 | Lv.12 |
Lv.12 |
------- | ------- | ------- | ------- |
| Worker Morgann | Initial battle | $2440 | Lv.61 |
Lv.61 |
------- | ------- | ------- | ------- |
| Worker Nathan | Initial battle | $480 | Lv.12 |
Lv.12 |
------- | ------- | ------- | ------- |
| Worker Niel | Initial battle | $1200 | Lv.30 |
Lv.30 |
------- | ------- | ------- | ------- |
| Worker Noel | Initial battle | $1240 | Lv.31 |
------- | ------- | ------- | ------- | ------- |
| Worker Pasqual | Initial battle | $1200 | Lv.30 |
Lv.30 |
------- | ------- | ------- | ------- |
| Worker Patton | Initial battle | $2440 | Lv.61 |
Lv.61 |
------- | ------- | ------- | ------- |
| Worker Paul | Initial battle | $2400 | Lv.60 |
Lv.60 |
Lv.60 |
------- | ------- | ------- |
| Worker Ryan* | Initial battle | $2400 | Lv.60 |
Lv.60 |
Lv.60 |
------- | ------- | ------- |
| Worker Scott | Initial battle | $640 | Lv.17 |
------- | ------- | ------- | ------- | ------- |
| Worker Tavarius | Initial battle | $1160 | Lv.29 |
Lv.29 |
Lv.29 |
------- | ------- | ------- |
| Worker Tibor | Initial battle | $1200 | Lv.30 |
Lv.30 |
------- | ------- | ------- | ------- |
| Worker Tyler | Initial battle | $2440 | Lv.61 |
Lv.61 |
------- | ------- | ------- | ------- |
| Worker Victor* | Initial battle | $2440 | Lv.61 |
Lv.61 |
------- | ------- | ------- | ------- |
| Worker Zack | Initial battle | $680 | Lv.17 |
------- | ------- | ------- | ------- | ------- |
- See more: List of Battle Subway Trainers/Worker
Pokémon X and Y
| Trainer name | Battle | Winnings | Pokémon | |||||
|---|---|---|---|---|---|---|---|---|
| Worker Dimitri | Initial battle | $3,200 | Lv.50 |
------- | ------- | ------- | ------- | ------- |
| Worker Narek | Initial battle | $3,072 | Lv.46 |
Lv.47 |
Lv.48 |
------- | ------- | ------- |
| Worker Yusif | Initial battle | $3,200 | Lv.50 |
------- | ------- | ------- | ------- | ------- |
- See more: List of Battle Maison Trainers/Worker
Pokémon Sun and Moon
| Trainer name | Battle | Winnings | Pokémon | |||||
|---|---|---|---|---|---|---|---|---|
| Worker Frank | Initial battle | $880 | Lv.22 |
------- | ------- | ------- | ------- | ------- |
| Worker Jeff | Initial battle | $880 | Lv.21 |
Lv.22 |
------- | ------- | ------- | ------- |
| Worker Vaclav | Initial battle | $880 | Lv.22 |
------- | ------- | ------- | ------- | ------- |
Pokémon Ultra Sun and Ultra Moon
| Trainer name | Battle | Winnings | Pokémon | |||||
|---|---|---|---|---|---|---|---|---|
| Worker Frank | Initial battle | $880 | Lv.22 |
------- | ------- | ------- | ------- | ------- |
| Worker Jeff | Initial battle | $880 | Lv.22 |
Lv.22 |
------- | ------- | ------- | ------- |
| Worker Ovid | Initial battle | $2,000 | Lv.50 |
------- | ------- | ------- | ------- | ------- |
| Worker Vaclav | Initial battle | $880 | Lv.22 |
------- | ------- | ------- | ------- | ------- |
Pokémon Sword and Shield
| Trainer name | Battle | Winnings | Pokémon | |||||
|---|---|---|---|---|---|---|---|---|
| Worker♂ Francis | Initial battle | $2,100 |  Lv.21 |
------- | ------- | ------- | ------- | ------- |
| Worker♂ Keith | Initial battle | $1,400 |  Lv.14 |
------- | ------- | ------- | ------- | ------- |
| Worker♀ Georgia | Initial battle | $1,400 |  Lv.14 |
 Lv.14 |
 Lv.14 |
------- | ------- | ------- |
| Worker♂ Russel | Initial battle | $1,500 |  Lv.15 |
------- | ------- | ------- | ------- | ------- |
| Worker♀ Sandra | Initial battle | $1,500 |  Lv.14 |
 Lv.15 |
------- | ------- | ------- | ------- |
| Worker♀ Yvonne | Initial battle | $2,100 |  Lv.20 |
 Lv.21 |
------- | ------- | ------- | ------- |
Pokémon Brilliant Diamond and Shining Pearl
| Trainer name | Battle | Winnings | Pokémon | |||||
|---|---|---|---|---|---|---|---|---|
| Worker Braden | Initial battle | $1,584 |  Lv.33 |
------- | ------- | ------- | ------- | ------- |
| Worker Brendon | Initial battle | $1,584 |  Lv.29 |
 Lv.33 |
------- | ------- | ------- | ------- |
| Worker Colin | Initial battle | $560 |  Lv.7 |
 Lv.7 |
------- | ------- | ------- | ------- |
| Worker Conrad | Initial battle | $1,584 |  Lv.33 |
------- | ------- | ------- | ------- | ------- |
| Worker Dillan | Initial battle | $1,488 |  Lv.31 |
 Lv.31 |
------- | ------- | ------- | ------- |
| Worker Gary | Initial battle | $1,488 |  Lv.31 |
------- | ------- | ------- | ------- | ------- |
| Worker Gerardo | Initial battle | $1,392 |  Lv.29 |
 Lv.29 |
------- | ------- | ------- | ------- |
| Worker Holden | Initial battle | $1,584 |  Lv.33 |
------- | ------- | ------- | ------- | ------- |
| Worker Jackson | Initial battle | $1,344 |  Lv.28 |
 Lv.28 |
 Lv.28 |
------- | ------- | ------- |
| Worker Mason | Initial battle | $648 |  Lv.9 |
------- | ------- | ------- | ------- | ------- |
| Worker Quentin | Initial battle | $1,488 |  Lv.27 |
 Lv.31 |
 Lv.31 |
------- | ------- | ------- |
| Worker Willy | Initial battle | $1,488 |  Lv.31 |
 Lv.31 |
------- | ------- | ------- | ------- |
Pokémon Scarlet and Violet
| Trainer name | Battle | Winnings | Pokémon | |||||
|---|---|---|---|---|---|---|---|---|
| Abel the Worker | Initial battle | $2,024 |  Lv.17 |
------- | ------- | ------- | ------- | ------- |
| Alberto the Worker | Initial battle | $664 |  Lv.7 |
------- | ------- | ------- | ------- | ------- |
| Cristobal the Worker | Initial battle | $2,484 |  Lv.27 |
------- | ------- | ------- | ------- | ------- |
| Efren the Worker | Initial battle | $2,116 |  Lv.23 |
------- | ------- | ------- | ------- | ------- |
| Eric the Worker | Initial battle | $7,040 |  Lv.43 |
 Lv.43 |
 Lv.44 |
------- | ------- | ------- |
| Javier the Worker | Initial battle | $1,932 |  Lv.21 |
------- | ------- | ------- | ------- | ------- |
| Marius the Worker | Initial battle | $1,564 |  Lv.17 |
 Lv.17 |
------- | ------- | ------- | ------- |
| Oliver the Worker | Initial battle | $2,116 |  Lv.23 |
------- | ------- | ------- | ------- | ------- |
Pokémon Colosseum
Story Mode
| Trainer name | Battle | Pokémon | ||||||
|---|---|---|---|---|---|---|---|---|
| Worker Sangon | Initial battle | Lv.58 |
Lv.58 |
Lv.57 |
------- | ------- | ------- | |
| Worker Toway | Initial battle | Lv.62 |
Lv.62 |
Lv.63 |
Lv.62 |
------- | ------- | |
Battle Mode
| Trainer name | Battle | Pokémon | ||||||
|---|---|---|---|---|---|---|---|---|
| Worker Bomber | Initial battle | Lv.100 |
Lv.100 |
Lv.100 |
Lv.100 |
Lv.100 |
Lv.100 | |
| Worker Chean | Initial battle | Lv.50-100 |
Lv.50-100 |
Lv.50-100 |
Lv.50-100 |
Lv.50-100 |
Lv.50-100 | |
| Worker Demit | Initial battle | Lv.50-100 |
Lv.50-100 |
Lv.50-100 |
Lv.50-100 |
Lv.50-100 |
Lv.50-100 | |
| Worker Hubor | Initial battle | Lv.50-100 |
Lv.50-100 |
Lv.50-100 |
Lv.50-100 |
Lv.50-100 |
Lv.50-100 | |
| Worker Kebile | Initial battle | Lv.50-100 |
Lv.50-100 |
Lv.50-100 |
Lv.50-100 |
Lv.50-100 |
Lv.50-100 | |
| Worker Laber | Initial battle | Lv.50 |
Lv.50 |
Lv.50 |
Lv.50 |
Lv.50 |
Lv.50 | |
| Worker Ordo | Initial battle | Lv.50-100 |
Lv.50-100 |
Lv.50-100 |
Lv.50-100 |
Lv.50-100 |
Lv.50-100 | |
| Worker Retay | Initial battle | Lv.50 |
Lv.50 |
Lv.50 |
Lv.50 |
Lv.50 |
Lv.50 | |
| Worker Ronix | Initial battle | Lv.50-100 |
Lv.50-100 |
Lv.50-100 |
Lv.50-100 |
Lv.50-100 |
Lv.50-100 | |
| Worker Wagel | Initial battle | Lv.50-100 |
Lv.50-100 |
Lv.50-100 |
Lv.50-100 |
Lv.50-100 |
Lv.50-100 | |
Pokémon XD: Gale of Darkness
| Trainer name | Battle | Winnings | Pokémon | |||||
|---|---|---|---|---|---|---|---|---|
| Worker Dobit | Initial battle | $320 | Lv.16 |
Lv.16 |
Lv.16 |
------- | ------- | ------- |
| First rematch | $1,000 | Lv.50 |
Lv.50 |
Lv.50 |
------- | ------- | ------- | |
| Worker Kaster | Initial battle | N/A | Lv.100 |
Lv.100 |
------- | ------- | ------- | ------- |
| Worker Lobel | Initial battle | N/A | Lv.60+ |
Lv.60+ |
Lv.60+ |
Lv.60+ |
Lv.60+ |
Lv.60+ |
| Worker Releo | Initial battle | N/A | Lv.60 |
Lv.60 |
Lv.61 |
------- | ------- | ------- |
| Worker Saken | Initial battle | N/A | Lv.68 |
Lv.68 |
Lv.68 |
Lv.68 |
Lv.68 |
------- |
| Worker Rustix | Initial battle | N/A | Lv.30 |
Lv.30 |
------- | ------- | ------- | ------- |
In animation

Pokémon the Series
Pokémon the Series: Diamond and Pearl
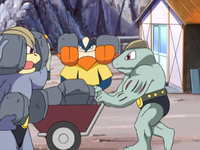
A group of Workers (referred to here as miners) appeared in Shapes of Things to Come!, where they and their Pokémon were working in the Oreburgh Mine.
Genesect and the Legend Awakened
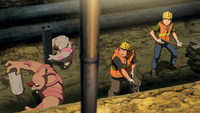
A group of Workers appeared in the movie Genesect and the Legend Awakened. Their work was interfered by flickering streetlights, caused by the Genesect Army's actions at Pokémon Hills. Fortunately, their Ampharos was able to give them light with its tail, allowing the men to continue their work.
Pokémon Journeys: The Series
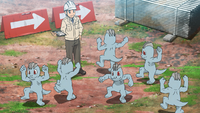
A Worker appeared in an image in Ivysaur's Mysterious Tower!, where he and a group of Machop were seen working on the construction of a new Gym in Vermilion City.
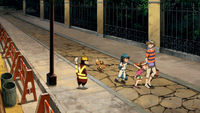
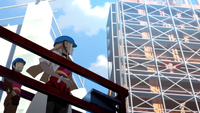
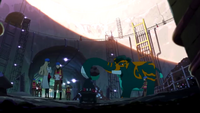
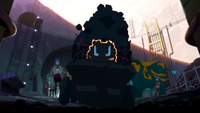
A group of Workers appeared in Sword and Shield: The Darkest Day!. They were working at a mine in Galar when a stray beam of Dynamax energy caused a nearby Coalossal to Gigantamax and go on a rampage. Ash and Leon were able to stop it, but the Workers threw rocks at Coalossal, only to be stopped by Ash before leaving.
Pokémon
DP015
Machoke was seen working in the Oreburgh Mine.
None of Machoke's moves are known.
Machamp was seen working in the Oreburgh Mine.
None of Machamp's moves are known.
Hariyama was seen working in the Oreburgh Mine.
None of Hariyama's moves are known.
M16
Gurdurr and Conkeldurr were seen helping their owners in their work.
None of Gurdurr and Conkeldurr's moves are known.
Watchog was seen guarding the Workers' work-site.
None of Watchog's moves are known.
JN003
Multiple Machop were seen in an image with a Worker, where they were working on the construction of a new Gym in Vermilion City.
None of Machop's moves are known.
Pokémon: Twilight Wings

In Assistant, a group of Workers were at a construction site visited by Oleana.
Two Workers appeared in The Gathering of Stars.
Pokémon
| Debut | Assistant |
|---|
A Timburr, a Gurdurr, and a Conkeldurr were seen at a construction site that Oleana visited.
None of their moves are known.
| Debut | Assistant |
|---|
A Copperajah was seen at a construction site that Oleana visited.
None of Copperajah's moves are known.
| Debut | Assistant |
|---|
A Carkol was seen at a construction site that Oleana visited.
None of Carkol's moves are known.
In the manga
Pokémon Adventures
History
Diamond & Pearl arc
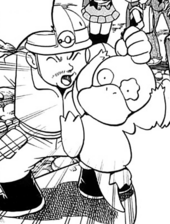
In Putting a Crimp in Kricketot, a Worker in Oreburgh City is seen loudly scolding his Psyduck, nicknamed "Yeller" (Japanese: きいろ Yellow), for playing with the controls of a bulldozer. Psyduck had caused the machine to roll down the hill, putting Diamond, Pearl, and Platinum in danger. The Worker apologizes to them, and Platinum asks him for a tour of the Oreburgh Mine as repayment, hoping to dig for coals. Diamond and Pearl initially let her go by herself with the Worker. However, they go after her as soon as Chatler tells the location of the mine to the boys by repeating the Worker's voice. After Platinum's Piplup defeats a swarm of Kricketune, the Worker mentions that Roark envisioned the mine as a place to dig for coal, and for training Pokémon as well. Piplup's pride is hurt because she has not participated in the past few battles together with Diamond and Pearl's Pokémon, so the Worker suggests Platinum to go challenge the Oreburgh Gym to help Piplup regain her confidence. In Brash Bronzong I, the Worker who owns a Psyduck is seen again. He and Roark talk about Byron investigating Team Galactic in Canalave City.
In A Conk on Cranidos's Cranium, Roark is seen talking to some friendly Workers at the Oreburgh Mine. Roark tells them about some of the Fossils he dug out from the Underground. The Workers introduce Roark to Platinum and tell him that Platinum intends to challenge the Oreburgh Gym.
Black & White arc
Workers Felix (Japanese: カンキチ Kankichi), Rich (Japanese: リイチ Rīchi), Sterling (Japanese: ギンジ Ginji), Don (Japanese: タモツ Tamotsu), and Heath (Japanese: タイゾウ Taizō) work as miners for Clay. They were first seen in Lights, Camera...Action, where they and Clay unearthed a mysterious stone at the Desert Resort. Later, in Mine Mayhem, Heath was ordered to bring Black to the Driftveil Gym so that he and Clay could have their Gym battle. All of the Workers here are based on the Workers found either in the Driftveil Gym or Twist Mountain in Black and White.
Several Workers made an appearance at Route 4 in Sandstorm. They were playing a game of card flip during their break. However, one of the Workers turned out to be a disguised Team Plasma Grunt. The Grunt was exposed and beaten by Grimsley.
A group of Workers, some of them in their winter clothes, was seen in Drawing Bridges amongst the Trainers waiting to get to cross the Driftveil Drawbridge.
Black 2 & White 2 arc
Another group of miners working for Clay, named Tavarius (Japanese: タケオ Takeo), Tibor (Japanese: ツナシロウ Tsunashirō), Pasqual (Japanese: トオル Tooru), and Friedrich (Japanese: フンボルト Humboldt) appeared in Giant Chasm. They were seen helping Clay free the people trapped in the ice in Opelucid City. Like the workers seen in Lights, Camera...Action, they could be found in the Driftveil Gym in Black 2 and White 2.
Sword & Shield arc
In Crackle!! Practice Battle, a Worker in a X & Y design watched as Leon attempted to herd the Wooloo away from the Wedgehurst Station, but to no avail.
Pokémon
A Psyduck named Yeller was first seen driving a bulldozer, almost running over Platinum, and being scolded by its Trainer. It is frequently shown to take interest in driving a bulldozer, much to its Trainer's chagrin. It was later revealed to have been used by Team Galactic to blockade Route 210 along with other Psyduck, who were subsequently cured of their headache by Cynthia.
None of Yeller's moves are known.
| Debut | Sandstorm |
|---|
Petilil was one of the Pokemon seen with their Trainers entering the Route 4 gate for a break.
None of Petilil's moves are known.
| Debut | Sandstorm |
|---|
Swadloon was one of the Pokemon seen with their Trainers entering the Route 4 gate for a break.
None of Swadloon's moves are known.
| Debut | Drawing Bridges |
|---|
Cottonee was seen with its Trainer, waiting for the Driftveil Drawbridge to lower.
None of Cottonee's moves are known.
| Debut | Drawing Bridges |
|---|
Krokorok was seen with its Trainer in their winter clothes, waiting for the Driftveil Drawbridge to lower.
None of Krokorok's moves are known.
| Debut | Giant Chasm |
|---|
2 Drilbur was seen with their Trainers, working to free the people trapped in the ice in Opelucid City.
None of Drilbur's moves are known.
| Debut | Giant Chasm |
|---|
Baltoy was seen with their Trainers, working to free the people trapped in the ice in Opelucid City.
None of Baltoy's moves are known.
| Debut | Giant Chasm |
|---|
Sandile was seen with their Trainers, working to free the people trapped in the ice in Opelucid City.
None of Sandile's moves are known.
In the TCG
- Main article: Worker (Silver Tempest 167)
Worker was introduced as a Supporter card in the Pokémon Trading Card Game during the English Sword & Shield Series (the Japanese Sword & Shield Era). It was first released in the Japanese Paradigm Trigger expansion and the English Silver Tempest expansion, with artwork by Sanosuke Sakuma. It was also released as a Full Art card and Secret card in the same Japanese and English expansions, with artwork by Yuu Nishida. It allows the player to draw three cards, then discard a Stadium card in play.
In other languages
| |||||||||||||||||||||||||||||||||||
| Orre Trainer classes | |||||
|---|---|---|---|---|---|
|

|
This Trainer Class article is part of Project CharacterDex, a Bulbapedia project that aims to write comprehensive articles on each character found in the Pokémon games. |
