Temple of Sinnoh: Difference between revisions
(→Pokémon: Maybe notes aren't included to table, but could fit a requirement to mainspacing) |
m (→Shops) |
||
| (15 intermediate revisions by 9 users not shown) | |||
| Line 9: | Line 9: | ||
|region=Hisui | |region=Hisui | ||
|generation={{Gen|VIII}} | |generation={{Gen|VIII}} | ||
| | |mapsize=400px | ||
}} | }} | ||
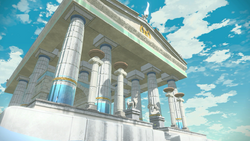
The '''Temple of Sinnoh''' (Japanese: '''シンオウ{{tt|神殿|しんでん}}''' ''Sinnoh Temple'') is a location at the peak of [[Mount Coronet]] in the [[Coronet Highlands]] of [[Hisui]], built as a monument to {{p|Arceus}}, also known as almighty Sinnoh. At the entrance of the temple are statues of the ancient hero's Pokémon: {{p|Wyrdeer}}, {{p|Kleavor}}, {{p|Ursaluna}}, {{rf|Hisuian}} {{p|Lilligant}}, {{p|Basculegion}}, Hisuian {{p|Arcanine}}, {{p|Sneasler}}, Hisuian {{p|Electrode}}, Hisuian {{p|Braviary}}, and Hisuian {{p|Avalugg}}. | The '''Temple of Sinnoh''' (Japanese: '''シンオウ{{tt|神殿|しんでん}}''' ''Sinnoh Temple'') is a location at the peak of [[Mount Coronet]] in the [[Coronet Highlands]] of [[Hisui]], built as a monument to {{p|Arceus}}, also known as almighty Sinnoh. At the entrance of the temple are statues of the ancient hero's Pokémon: {{p|Wyrdeer}}, {{p|Kleavor}}, {{p|Ursaluna}}, {{rf|Hisuian}} {{p|Lilligant}}, {{p|Basculegion}}, Hisuian {{p|Arcanine}}, {{p|Sneasler}}, Hisuian {{p|Electrode}}, Hisuian {{p|Braviary}}, and Hisuian {{p|Avalugg}}. | ||
Fixtures modeled after Arceus's likeness such as | Fixtures modeled after Arceus's likeness such as its golden cross-like wheel and head are emblazoned on the temple's structure. | ||
In present-day [[Sinnoh]], the temple's ruins are known as the [[Spear Pillar]]. | In present-day [[Sinnoh]], the temple's ruins are known as the [[Spear Pillar]]. | ||
| Line 23: | Line 23: | ||
After the player has caught the Legendary Pokémon, its counterpart will appear and force the player to retreat. Once the player has obtained the [[Origin Ball]], they return to the temple to face it, accompanied by the Legendary Pokémon captured earlier. The opposing Legendary Pokémon transforms into its {{form|Dialga and Palkia|Origin Forme}}, destroying the temple and all its statues in the process, and must be quelled using balms before the player can use the [[Origin Ball]] to catch it. | After the player has caught the Legendary Pokémon, its counterpart will appear and force the player to retreat. Once the player has obtained the [[Origin Ball]], they return to the temple to face it, accompanied by the Legendary Pokémon captured earlier. The opposing Legendary Pokémon transforms into its {{form|Dialga and Palkia|Origin Forme}}, destroying the temple and all its statues in the process, and must be quelled using balms before the player can use the [[Origin Ball]] to catch it. | ||
During the post-game, the player returns to the ruins of the temple, where [[Volo]] reveals that he was the one who sought out {{p|Giratina}} and had it tear open the space-time rift to anger Dialga/Palkia, ultimately causing the player's arrival in Hisui. Holding the last | During the post-game, the player returns to the ruins of the temple, where [[Volo]] reveals that he was the one who sought out {{p|Giratina}} and had it tear open the space-time rift to anger Dialga/Palkia, ultimately causing the player's arrival in Hisui. Holding the last of the 18 [[Plate]]s, he challenges the player to get the other 17 Plates from them so he can meet {{p|Arceus}} and use its power to recreate the world. After being defeated, he summons Giratina to his aid, forcing the player to defeat it as well. Once Giratina is defeated, Volo hands the player the last Plate and leaves, swearing to create his new world [[Pokémon Brilliant Diamond and Shining Pearl|no matter how many centuries it will take]]. | ||
Once the player has caught at least one of every non-{{pkmn2|Mythical}} Pokémon in Hisui, they return to the temple once again and play the [[Azure Flute]], revealing a glowing stairway to the [[Hall of Origin]], where Arceus awaits them. | Once the player has caught at least one of every non-{{pkmn2|Mythical}} Pokémon in Hisui, they return to the temple once again and play the [[Azure Flute]], revealing a glowing stairway to the [[Hall of Origin]], where Arceus awaits them. | ||
| Line 34: | Line 34: | ||
The Temple of Sinnoh is located at the very peak of [[Mount Coronet]], although the north side of the temple stands above a vast snowy valley surrounded by mountain ranges of nearly equal height. It stands in the northwest corner of the [[Coronet Highlands]], completely surrounded by [[Cloudcap Pass]]. Since the northern section of Cloudcap Pass is completely impassable, the only known entrance to the Temple is through the [[Stone Portal]], a small straight tunnel that passes underneath it. After exiting the Stone Portal, there is a single straight trail upwards to the south side of the Temple. The path widens twice, once halfway up the trail and again at the base of the Temple itself. | The Temple of Sinnoh is located at the very peak of [[Mount Coronet]], although the north side of the temple stands above a vast snowy valley surrounded by mountain ranges of nearly equal height. It stands in the northwest corner of the [[Coronet Highlands]], completely surrounded by [[Cloudcap Pass]]. Since the northern section of Cloudcap Pass is completely impassable, the only known entrance to the Temple is through the [[Stone Portal]], a small straight tunnel that passes underneath it. After exiting the Stone Portal, there is a single straight trail upwards to the south side of the Temple. The path widens twice, once halfway up the trail and again at the base of the Temple itself. | ||
== | ==Shop== | ||
During Mission 17: "Atop Mount Coronet", [[Volo]] can be found here as a temporary shopkeeper halfway up the trail to the Temple of Sinnoh. Volo cannot be found here to sell items again after completing the mission. | |||
{{shop|Volo}} | {{shop|Volo}} | ||
{{shoprow|{{shopitem|Poké Ball (Hisui)|100|5=Poké Ball LA|size=40px|display=Poké Ball}}|{{shopitem|Great Ball (Hisui)|300|5=Great Ball LA|size=40px|display=Great Ball}}}} | {{shoprow|{{shopitem|Poké Ball (Hisui)|100|5=Poké Ball LA|size=40px|display=Poké Ball}}|{{shopitem|Great Ball (Hisui)|300|5=Great Ball LA|size=40px|display=Great Ball}}}} | ||
| Line 47: | Line 47: | ||
==Items== | ==Items== | ||
{{itlisth|space}} | {{itlisth|space}} | ||
{{Itemlist|Old Verse LA|size=32px|To the right of the stairs at the entrance of the temple '' | {{Itemlist|Old Verse LA|size=32px|To the right of the stairs at the entrance of the temple (''hidden'', requires {{DL|Ride Pokémon (Hisui)|Ursaluna}})|LA=yes|display=[[Old Verse|Old Verse 11]]}} | ||
{{Itemlist|Ultra Ball LA|size=32px|Given by [[Kamado]] before battling the first [[Legendary Pokémon]]|LA=yes|display={{hi|Ultra Ball}} ×10}} | {{Itemlist|Ultra Ball LA|size=32px|Given by [[Kamado]] before battling the first [[Legendary Pokémon]]|LA=yes|display={{hi|Ultra Ball}} ×10}} | ||
{{Itemlist|Time Balm LA|size=32px|Automatically obtained during the first battle and subsequent rematches with {{form|Dialga and Palkia|Origin Forme}} {{p|Dialga}}|LA=yes|display=[[Time Balm]]}} | {{Itemlist|Time Balm LA|size=32px|Automatically obtained during the first battle and subsequent rematches with {{form|Dialga and Palkia|Origin Forme}} {{p|Dialga}}|LA=yes|display=[[Time Balm]]}} | ||
| Line 55: | Line 55: | ||
{{itlistfoot|space}} | {{itlistfoot|space}} | ||
== | ==Special encounters== | ||
{{p|Dialga}} and {{p|Palkia}} are coded to never be {{Shiny}}. | |||
{{ | |||
;If [[Adaman]] was chosen | |||
{{ | |||
| | The following applies if the player picked [[Adaman]] during [[Task#Missions|Mission]] 13: "Disaster Looming". | ||
Dialga can be caught during Mission 17: "Atop Mount Coronet", which becomes available after the player forges the [[Red Chain]] from the materials obtained during the trials of the [[lake guardians]]. | |||
{{Pokémon/7/LG | |||
|ndex=483 | |||
|pokemon=Dialga | |||
|level=65 | |||
|type1=Steel | |||
|type2=Dragon | |||
|ability=None | |||
|move1=Earth Power|move1type=Ground|move1cat=Special | |||
|move2=Iron Tail|move2type=Steel|move2cat=Physical | |||
|move3=Flash Cannon|move3type=Steel|move3cat=Special | |||
|move4=Roar of Time|move4type=Dragon|move4cat=Special}} | |||
Palkia can be caught in its [[List of Pokémon with form differences#Pokémon of Myth|Origin Forme]] during Mission 18: "The Counterpart" after the players catches Dialga. It reverts to its normal form after being caught. | |||
{{Pokémon/7/LG | |||
|ndex=484 | |||
|pokemon=Palkia | |||
|form=-Origin | |||
|level=65 | |||
|type1=Water | |||
|type2=Dragon | |||
|ability=None | |||
|move1=Earth Power|move1type=Ground|move1cat=Special | |||
|move2=Aqua Tail|move2type=Water|move2cat=Physical | |||
|move3=Hydro Pump|move3type=Water|move3cat=Special | |||
|move4=Spacial Rend|move4type=Dragon|move4cat=Special}} | |||
;If [[Irida]] was chosen | |||
The following applies if the player picked [[Irida]] during [[Task#Missions|Mission]] 13: "Disaster Looming". | |||
Palkia can be caught during Mission 17: "Atop Mount Coronet", which becomes available after the player forges the [[Red Chain]] from the materials obtained during the trials of the [[lake guardians]]. | |||
{{Pokémon/7/LG | |||
|ndex=484 | |||
|pokemon=Palkia | |||
|level=65 | |||
|type1=Water | |||
|type2=Dragon | |||
|ability=None | |||
|move1=Earth Power|move1type=Ground|move1cat=Special | |||
|move2=Aqua Tail|move2type=Water|move2cat=Physical | |||
|move3=Hydro Pump|move3type=Water|move3cat=Special | |||
|move4=Spacial Rend|move4type=Dragon|move4cat=Special}} | |||
Dialga can be caught in its [[List of Pokémon with form differences#Pokémon of Myth|Origin Forme]] during Mission 18: "The Counterpart" after the player catches Palkia. It reverts to its normal form after being caught. | |||
{{Pokémon/7/LG | |||
|ndex=483 | |||
|pokemon=Dialga | |||
|form=-Origin | |||
|level=65 | |||
|type1=Steel | |||
|type2=Dragon | |||
|ability=None | |||
|move1=Earth Power|move1type=Ground|move1cat=Special | |||
|move2=Iron Tail|move2type=Steel|move2cat=Physical | |||
|move3=Flash Cannon|move3type=Steel|move3cat=Special | |||
|move4=Roar of Time|move4type=Dragon|move4cat=Special}} | |||
;Rematch | |||
Both [[Pokémon of Myth]] can be rematched in their [[List of Pokémon with form differences#Pokémon of Myth|Origin Forme]]s at any point after the player catches {{p|Arceus}}. They cannot be caught and must be defeated. | |||
= | {| | ||
{{ | |- style="vertical-align:top" | ||
|{{Pokémon/7/LG | |||
{{ | |ndex=483 | ||
|pokemon=Dialga | |||
|form=-Origin | |||
|level=85 | |||
|type1=Steel | |||
|type2=Dragon | |||
|ability=None | |||
|move1=Earth Power|move1type=Ground|move1cat=Special | |||
|move2=Iron Tail|move2type=Steel|move2cat=Physical | |||
|move3=Flash Cannon|move3type=Steel|move3cat=Special | |||
|move4=Roar of Time|move4type=Dragon|move4cat=Special}} | |||
|{{Pokémon/7/LG | |||
|ndex=484 | |||
|pokemon=Palkia | |||
|form=-Origin | |||
|level=85 | |||
|type1=Water | |||
|type2=Dragon | |||
|ability=None | |||
|move1=Earth Power|move1type=Ground|move1cat=Special | |||
|move2=Aqua Tail|move2type=Water|move2cat=Physical | |||
|move3=Hydro Pump|move3type=Water|move3cat=Special | |||
|move4=Spacial Rend|move4type=Dragon|move4cat=Special}} | |||
|} | |} | ||
==Trainers== | ==Trainers== | ||
| Line 77: | Line 161: | ||
|color={{gold color}} | |color={{gold color}} | ||
|headcolor={{gold color light}} | |headcolor={{gold color light}} | ||
|bordercolor={{ | |bordercolor={{black color}} | ||
|sprite=VSKamado.png | |sprite=VSKamado.png | ||
|size=150px | |size=150px | ||
| Line 131: | Line 215: | ||
===Mission 26: "Seeking the Remaining Plates"=== | ===Mission 26: "Seeking the Remaining Plates"=== | ||
Volo summons {{p|Giratina}} in its {{form|Giratina|Altered Forme}} immediately after his main team is defeated. [[Experience]] is awarded, but the player is not given a chance to heal. During this battle, Giratina is filled with terrible might, which | Volo summons {{p|Giratina}} in its {{form|Giratina|Altered Forme}} immediately after his main team is defeated. [[Experience]] is awarded for battling his main team before Volo summons Giratina, and temporary in-battle conditions wear off, but the player is not given a chance to heal. If the player is defeated by Giratina, they must also battle Volo's initial team again. During this battle, Giratina is filled with '''terrible might''' (Japanese: '''すさまじい力''' ''Tremendous Strength''), which boosts all of its stats and causes it to take reduced indirect damage (such as from {{status|poison}} and [[Status condition#Splinters|splinters]]). Upon being defeated, Giratina changes into its Origin Forme and heals itself completely, effectively making the second part of the battle against two Pokémon, and the entire battle against eight. Giratina's two phases are treated as part of the same battle, so experience is not awarded in between and temporary in-battle conditions do not change. | ||
;Part 1 | ;Part 1 | ||
{{Party/Single | {{Party/Single | ||
|color={{ | |color={{gold color light}} | ||
|headcolor={{ | |headcolor={{alpha sapphire color light}} | ||
|bordercolor={{ | |bordercolor={{gold color dark}} | ||
|sprite=VSVolo 2.png | |sprite=VSVolo 2.png | ||
|size=150px | |size=150px | ||
| Line 157: | Line 240: | ||
|move2=Dark Pulse|move2type=Dark|move2cat=Special | |move2=Dark Pulse|move2type=Dark|move2cat=Special | ||
|move3=Hypnosis|move3type=Psychic|move3cat=Status | |move3=Hypnosis|move3type=Psychic|move3cat=Status | ||
|move4=Extrasensory|move4type=Psychic|move4cat=Special}} | |move4=Extrasensory|move4type=Psychic|move4cat=Special | ||
|caption-side=bottom|caption=<small> </small>}} | |||
|{{Pokémon/7/LG | |{{Pokémon/7/LG | ||
|ndex=407 | |ndex=407 | ||
| Line 166: | Line 250: | ||
|move1=Petal Dance|move1type=Grass|move1cat=Special | |move1=Petal Dance|move1type=Grass|move1cat=Special | ||
|move2=Spikes|move2type=Ground|move2cat=Physical | |move2=Spikes|move2type=Ground|move2cat=Physical | ||
|move3=Poison Jab|move3type=Poison|move3cat=Physical}} | |move3=Poison Jab|move3type=Poison|move3cat=Physical | ||
|caption-side=bottom|caption=<small> </small>}} | |||
|{{Pokémon/7/LG | |{{Pokémon/7/LG | ||
|ndex=468 | |ndex=468 | ||
| Line 176: | Line 261: | ||
|move2=Calm Mind|move2type=Psychic|move2cat=Status | |move2=Calm Mind|move2type=Psychic|move2cat=Status | ||
|move3=Moonblast|move3type=Fairy|move3cat=Special | |move3=Moonblast|move3type=Fairy|move3cat=Special | ||
|move4=Extrasensory|move4type=Psychic|move4cat=Special}} | |move4=Extrasensory|move4type=Psychic|move4cat=Special | ||
{{Party/Div|color={{ | |caption-side=bottom|caption=<small>Effort level 1 in its stats.</small>}} | ||
{{Party/Div|color={{gold color light}}}} | |||
|{{Pokémon/7/LG | |{{Pokémon/7/LG | ||
|ndex=059 | |ndex=059 | ||
| Line 187: | Line 273: | ||
|move1=Raging Fury|move1type=Fire|move1cat=Physical | |move1=Raging Fury|move1type=Fire|move1cat=Physical | ||
|move2=Crunch|move2type=Dark|move2cat=Physical | |move2=Crunch|move2type=Dark|move2cat=Physical | ||
|move3=Rock Slide|move3type=Rock|move3cat=Physical}} | |move3=Rock Slide|move3type=Rock|move3cat=Physical | ||
|caption-side=bottom|caption=<small> </small>}} | |||
|{{Pokémon/7/LG | |{{Pokémon/7/LG | ||
|ndex=448 | |ndex=448 | ||
| Line 197: | Line 284: | ||
|move2=Close Combat|move2type=Fighting|move2cat=Physical | |move2=Close Combat|move2type=Fighting|move2cat=Physical | ||
|move3=Bulk Up|move3type=Fighting|move3cat=Status | |move3=Bulk Up|move3type=Fighting|move3cat=Status | ||
|move4=Crunch|move4type=Dark|move4cat=Physical}} | |move4=Crunch|move4type=Dark|move4cat=Physical | ||
|caption-side=bottom|caption=<small> </small>}} | |||
|{{Pokémon/7/LG | |{{Pokémon/7/LG | ||
|ndex=445 | |ndex=445 | ||
|pokemon=Garchomp | |pokemon=Garchomp | ||
|level=68 | |level=68 | ||
|gender=male | |gender=male | ||
| Line 208: | Line 295: | ||
|move2=Dragon Claw|move2type=Dragon|move2cat=Physical | |move2=Dragon Claw|move2type=Dragon|move2cat=Physical | ||
|move3=Slash|move3type=Normal|move3cat=Physical | |move3=Slash|move3type=Normal|move3cat=Physical | ||
|move4=Iron Head|move4type=Steel|move4cat=Physical}} | |move4=Iron Head|move4type=Steel|move4cat=Physical | ||
|caption-side=bottom|caption=<small> </small>}} | |||
{{Party/Footer}} | {{Party/Footer}} | ||
;Part 2 | ;Part 2 | ||
{{Party/Single | {{Party/Single | ||
|color={{ | |color={{gold color light}} | ||
|headcolor={{ | |headcolor={{alpha sapphire color light}} | ||
|bordercolor={{ | |bordercolor={{gold color dark}} | ||
|sprite=VSVolo 2.png | |sprite=VSVolo 2.png | ||
|size=150px | |size=150px | ||
| Line 252: | Line 340: | ||
'''Temple of Sinnoh''' was introduced as a {{TCG|Stadium card}} in the [[Pokémon Trading Card Game]] during the English Sword & Shield Series (the Japanese Sword & Shield Era). It was first released in the Japanese {{TCG|Space Juggler}} expansion and the English {{TCG|Astral Radiance}} expansion, with artwork by [[Oswaldo KATO]]. It was also released as a {{TCG|Secret card}} in the same Japanese and English expansions, with artwork by the same artist. It makes all {{TCG|Special Energy card}}s attached to all Pokémon provide {{TCG|Colorless}} Energy with no other effect. | '''Temple of Sinnoh''' was introduced as a {{TCG|Stadium card}} in the [[Pokémon Trading Card Game]] during the English Sword & Shield Series (the Japanese Sword & Shield Era). It was first released in the Japanese {{TCG|Space Juggler}} expansion and the English {{TCG|Astral Radiance}} expansion, with artwork by [[Oswaldo KATO]]. It was also released as a {{TCG|Secret card}} in the same Japanese and English expansions, with artwork by the same artist. It makes all {{TCG|Special Energy card}}s attached to all Pokémon provide {{TCG|Colorless}} Energy with no other effect. | ||
{{-}} | {{-}} | ||
==Gallery== | |||
{|style="margin:auto; text-align:center; border:3px solid #{{hisui color dark}}; background:#{{hisui color}}; font-size:80%; border-radius: 10px" | |||
|- | |||
| style="{{roundy|20px}} border:2px solid #{{hisui color dark}}; background:#{{hisui color light}}; overflow:hidden" | [[File:Temple of Sinnoh LA Concept Art.png|x250px]] | |||
|- | |||
| style="color:white" | '''{{GameIcon|LA}}''' <br> Concept art | |||
|} | |||
==Trivia== | ==Trivia== | ||
Latest revision as of 03:17, 13 May 2024
| ||||
| ||||
| Location: | Northwest Coronet Highlands | |||
|---|---|---|---|---|
| Region: | Hisui | |||
| Generations: | VIII | |||
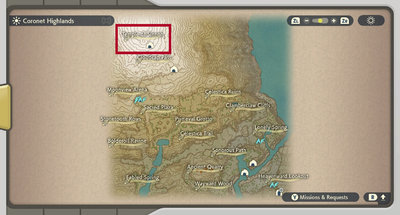 Location of Temple of Sinnoh in Hisui. | ||||
| Pokémon world locations | ||||
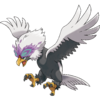
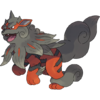
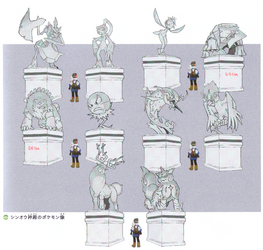
The Temple of Sinnoh (Japanese: シンオウ神殿 Sinnoh Temple) is a location at the peak of Mount Coronet in the Coronet Highlands of Hisui, built as a monument to Arceus, also known as almighty Sinnoh. At the entrance of the temple are statues of the ancient hero's Pokémon: Wyrdeer, Kleavor, Ursaluna, Hisuian Lilligant, Basculegion, Hisuian Arcanine, Sneasler, Hisuian Electrode, Hisuian Braviary, and Hisuian Avalugg.
Fixtures modeled after Arceus's likeness such as its golden cross-like wheel and head are emblazoned on the temple's structure.
In present-day Sinnoh, the temple's ruins are known as the Spear Pillar.
In the games
The player first travels to the Temple of Sinnoh to prevent Galaxy Team Commander Kamado from recklessly trying to deal with the Pokémon sighted at the space-time rift above Mount Coronet. After being defeated in battle, Kamado sees the error of his ways and apologizes for banishing the player from Jubilife Village. At the end of the temple, either Dialga (if the player chose Adaman during Mission 14) or Palkia (if the player chose Irida during Mission 14) will then emerge from the space-time rift. The player will try to subdue the Legendary Pokémon with the Red Chain created by the lake guardians, but fails, forcing them to fight and catch it.
After the player has caught the Legendary Pokémon, its counterpart will appear and force the player to retreat. Once the player has obtained the Origin Ball, they return to the temple to face it, accompanied by the Legendary Pokémon captured earlier. The opposing Legendary Pokémon transforms into its Origin Forme, destroying the temple and all its statues in the process, and must be quelled using balms before the player can use the Origin Ball to catch it.
During the post-game, the player returns to the ruins of the temple, where Volo reveals that he was the one who sought out Giratina and had it tear open the space-time rift to anger Dialga/Palkia, ultimately causing the player's arrival in Hisui. Holding the last of the 18 Plates, he challenges the player to get the other 17 Plates from them so he can meet Arceus and use its power to recreate the world. After being defeated, he summons Giratina to his aid, forcing the player to defeat it as well. Once Giratina is defeated, Volo hands the player the last Plate and leaves, swearing to create his new world no matter how many centuries it will take.
Once the player has caught at least one of every non-Mythical Pokémon in Hisui, they return to the temple once again and play the Azure Flute, revealing a glowing stairway to the Hall of Origin, where Arceus awaits them.
After defeating Arceus, the player can return to the Temple of Sinnoh for rematches with Arceus, as well as Origin Forme Dialga or Palkia.
According to Ingo, the temple was built a long time ago using stone mined out of the Ancient Quarry. According to Old Verse 11, both people and Pokémon worked together to mine the stone, but humans were ultimately responsible for carving the statues of the ancient hero's Pokémon.
Geography
The Temple of Sinnoh is located at the very peak of Mount Coronet, although the north side of the temple stands above a vast snowy valley surrounded by mountain ranges of nearly equal height. It stands in the northwest corner of the Coronet Highlands, completely surrounded by Cloudcap Pass. Since the northern section of Cloudcap Pass is completely impassable, the only known entrance to the Temple is through the Stone Portal, a small straight tunnel that passes underneath it. After exiting the Stone Portal, there is a single straight trail upwards to the south side of the Temple. The path widens twice, once halfway up the trail and again at the base of the Temple itself.
Shop
During Mission 17: "Atop Mount Coronet", Volo can be found here as a temporary shopkeeper halfway up the trail to the Temple of Sinnoh. Volo cannot be found here to sell items again after completing the mission.
| Volo | |||||||
|---|---|---|---|---|---|---|---|
|
| ||||||
|
| ||||||
|
| ||||||
|
| ||||||
|
| ||||||
|
|||||||
Items
| Item | Location | Games | |
|---|---|---|---|
| Old Verse 11 | To the right of the stairs at the entrance of the temple (hidden, requires Ursaluna) | LA | |
| Ultra Ball ×10 | Given by Kamado before battling the first Legendary Pokémon | LA | |
| Time Balm | Automatically obtained during the first battle and subsequent rematches with Origin Forme Dialga | LA | |
| Space Balm | Automatically obtained during the first battle and subsequent rematches with Origin Forme Palkia | LA | |
| Spooky Plate | Given by Volo after defeating him and Giratina | LA | |
| Azure Flute | Replaces the Celestica Flute after obtaining the Spooky Plate | LA | |
Special encounters
Dialga and Palkia are coded to never be Shiny.
- If Adaman was chosen
The following applies if the player picked Adaman during Mission 13: "Disaster Looming".
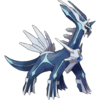
Dialga can be caught during Mission 17: "Atop Mount Coronet", which becomes available after the player forges the Red Chain from the materials obtained during the trials of the lake guardians.
|
| ||||||||||||||||||||
| Dialga Lv.65 | |||||||||||||||||||||
| |||||||||||||||||||||
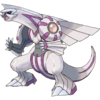
Palkia can be caught in its Origin Forme during Mission 18: "The Counterpart" after the players catches Dialga. It reverts to its normal form after being caught.
|
| ||||||||||||||||||||
| Palkia Lv.65 | |||||||||||||||||||||
| |||||||||||||||||||||
- If Irida was chosen
The following applies if the player picked Irida during Mission 13: "Disaster Looming".
Palkia can be caught during Mission 17: "Atop Mount Coronet", which becomes available after the player forges the Red Chain from the materials obtained during the trials of the lake guardians.
|
| ||||||||||||||||||||
| Palkia Lv.65 | |||||||||||||||||||||
| |||||||||||||||||||||
Dialga can be caught in its Origin Forme during Mission 18: "The Counterpart" after the player catches Palkia. It reverts to its normal form after being caught.
|
| ||||||||||||||||||||
| Dialga Lv.65 | |||||||||||||||||||||
| |||||||||||||||||||||
- Rematch
Both Pokémon of Myth can be rematched in their Origin Formes at any point after the player catches Arceus. They cannot be caught and must be defeated.
Trainers
Mission 17: "Atop Mount Coronet"
|
||||||||||||||||||||||||||||||||||||||||||||||||||||||||||||||||||||||||||||||||||||||||||||||||||||||||||||||||||||||||||||
| ||||||||||||||||||||||||||||||||||||||||||||||||||||||||||||||||||||||||||||||||||||||||||||||||||||||||||||||||||||||||||||
Mission 26: "Seeking the Remaining Plates"
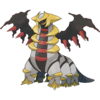
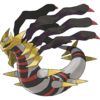
Volo summons Giratina in its Altered Forme immediately after his main team is defeated. Experience is awarded for battling his main team before Volo summons Giratina, and temporary in-battle conditions wear off, but the player is not given a chance to heal. If the player is defeated by Giratina, they must also battle Volo's initial team again. During this battle, Giratina is filled with terrible might (Japanese: すさまじい力 Tremendous Strength), which boosts all of its stats and causes it to take reduced indirect damage (such as from poison and splinters). Upon being defeated, Giratina changes into its Origin Forme and heals itself completely, effectively making the second part of the battle against two Pokémon, and the entire battle against eight. Giratina's two phases are treated as part of the same battle, so experience is not awarded in between and temporary in-battle conditions do not change.
- Part 1
|
|||||||||||||||||||||||||||||||||||||||||||||||||||||||||||||||||||||||||||||||||||||||||||||||||||||||||||||||||||||||||||||||||||||||||||||||||||||||||||||||||||||||||||||||||||||||||||||
| |||||||||||||||||||||||||||||||||||||||||||||||||||||||||||||||||||||||||||||||||||||||||||||||||||||||||||||||||||||||||||||||||||||||||||||||||||||||||||||||||||||||||||||||||||||||||||||
- Part 2
|
|||||||||||||||||||||||||||||||||||||||||||||||||||||||||||||||
| |||||||||||||||||||||||||||||||||||||||||||||||||||||||||||||||
In the TCG
- Main article: Temple of Sinnoh (Astral Radiance 155)
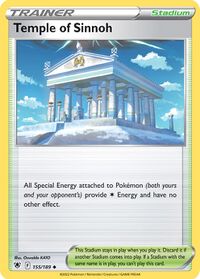
Temple of Sinnoh was introduced as a Stadium card in the Pokémon Trading Card Game during the English Sword & Shield Series (the Japanese Sword & Shield Era). It was first released in the Japanese Space Juggler expansion and the English Astral Radiance expansion, with artwork by Oswaldo KATO. It was also released as a Secret card in the same Japanese and English expansions, with artwork by the same artist. It makes all Special Energy cards attached to all Pokémon provide Colorless Energy with no other effect.
Gallery
| LA Concept art |
Trivia
- After the Temple of Sinnoh is destroyed, the ruins resemble the version of Spear Pillar found in Pokémon Diamond and Brilliant Diamond, regardless of which Pokémon is responsible for destroying it.
- Volo alludes to its present-day name by describing the ruins as "pillars now turned into spears, stabbing into the heavens."
In other languages
| ||||||||||||||||||||||||||||||||
| Hisui | |||||||
|---|---|---|---|---|---|---|---|
|
| |||||||
|
| Game locations of Legendary and Mythical Pokémon | ||||||||||||||||||||||||||
|---|---|---|---|---|---|---|---|---|---|---|---|---|---|---|---|---|---|---|---|---|---|---|---|---|---|---|
| ||||||||||||||||||||||||||

|
This article is part of Project Locations, a Bulbapedia project that aims to write comprehensive articles on every location in the Pokémon world. |
