Badge: Difference between revisions
(→Trivia) |
|||
| (46 intermediate revisions by 25 users not shown) | |||
| Line 48: | Line 48: | ||
|} | |} | ||
Note that in Generation I the game states that the Thunder Badge raises Speed and the Soul Badge raises Defense, but these are not the actual effects caused. | Note that in Generation I, the game states that the Thunder Badge raises Speed and the Soul Badge raises Defense, but these are not the actual effects caused. | ||
===Type boost=== | ===Type boost=== | ||
| Line 57: | Line 57: | ||
===Obedience=== | ===Obedience=== | ||
{{main|Obedience}} | {{main|Obedience}} | ||
Badges affect a {{OBP|Pokémon|species}}'s behavior. [[Outsider Pokémon]] over a certain [[level]] will refuse to obey the player without the appropriate Badge. In {{game2|Diamond|Pearl|Platinum}} | Badges affect a {{OBP|Pokémon|species}}'s behavior. [[Outsider Pokémon]] over a certain [[level]] will refuse to obey the player without the appropriate Badge. In {{game2|Diamond|Pearl|Platinum}} and [[Pokémon: Let's Go, Pikachu! and Let's Go, Eevee!]], obedience is determined by the number of Badges, not which specific Badges the player has. | ||
In the anime episode ''[[EP044|The Problem with Paras]]'', {{OBP|Lacy|EP044}} mentioned this when [[Ash's Charmeleon]] refused to obey him. | In the anime episode ''[[EP044|The Problem with Paras]]'', {{OBP|Lacy|EP044}} mentioned this when [[Ash's Charmeleon]] refused to obey him. | ||
| Line 63: | Line 63: | ||
{| class="roundy" style="margin:auto; text-align:center; background:#{{arceus color light}}; border:3px solid #{{arceus color dark}}" | {| class="roundy" style="margin:auto; text-align:center; background:#{{arceus color light}}; border:3px solid #{{arceus color dark}}" | ||
|- | |- | ||
! colspan= | ! colspan=8 | Badges by obedience level | ||
|- | |- | ||
! style="background:#{{arceus color}}" | Level | ! style="background:#{{arceus color}}" | Level | ||
| Line 72: | Line 72: | ||
! style="background:#{{unova color}}" | {{color2|000|Unova League}} | ! style="background:#{{unova color}}" | {{color2|000|Unova League}} | ||
! style="background:#{{kalos color}}" | {{color2|000|Kalos League}} | ! style="background:#{{kalos color}}" | {{color2|000|Kalos League}} | ||
! style="background:#{{galar color}}" | {{color2|000|Galar League}} | |||
|- style="background:#fff" | |- style="background:#fff" | ||
! Up to Lv. 20 | ! Up to Lv. 20 | ||
| | | 1 Badge{{sup/7|PE}} | ||
| Zephyr Badge{{sup/4|HGSS}} | | Zephyr Badge{{sup/4|HGSS}} | ||
| Stone Badge{{sup/6|ORAS}} | | Stone Badge{{sup/6|ORAS}} | ||
| | | | ||
| Trio Badge{{sup/5|BW}}<br>Basic Badge{{sup/5|B2W2}} | | Trio Badge{{sup/5|BW}}<br>Basic Badge{{sup/5|B2W2}} | ||
| | |||
| | | | ||
|- style="background:#fff" | |- style="background:#fff" | ||
! Up to Lv. 30 | ! Up to Lv. 30 | ||
| Cascade Badge | | Cascade Badge<br>2 Badges{{sup/7|PE}} | ||
| Hive Badge | | Hive Badge | ||
| Knuckle Badge | | Knuckle Badge | ||
| Line 88: | Line 90: | ||
| Basic Badge{{sup/5|BW}}<br>Toxic Badge{{sup/5|B2W2}} | | Basic Badge{{sup/5|BW}}<br>Toxic Badge{{sup/5|B2W2}} | ||
| Bug Badge | | Bug Badge | ||
| Grass Badge | |||
|- style="background:#fff" | |- style="background:#fff" | ||
! Up to Lv. 40 | ! Up to Lv. 40 | ||
| | | 3 Badges{{sup/7|PE}} | ||
| | | | ||
| Dynamo Badge{{sup/6|ORAS}} | | Dynamo Badge{{sup/6|ORAS}} | ||
| Line 96: | Line 99: | ||
| Insect Badge | | Insect Badge | ||
| Cliff Badge | | Cliff Badge | ||
| Water Badge | |||
|- style="background:#fff" | |- style="background:#fff" | ||
! Up to Lv. 50 | ! Up to Lv. 50 | ||
| Rainbow Badge | | Rainbow Badge<br>4 Badges{{sup/7|PE}} | ||
| Fog Badge | | Fog Badge | ||
| Heat Badge | | Heat Badge | ||
| Line 104: | Line 108: | ||
| Bolt Badge | | Bolt Badge | ||
| Rumble Badge | | Rumble Badge | ||
| Fire Badge | |||
|- style="background:#fff" | |- style="background:#fff" | ||
! Up to Lv. 60 | ! Up to Lv. 60 | ||
| | | 5 Badges{{sup/7|PE}} | ||
| | | | ||
| Balance Badge{{sup/6|ORAS}} | | Balance Badge{{sup/6|ORAS}} | ||
| Line 112: | Line 117: | ||
| Quake Badge | | Quake Badge | ||
| Plant Badge | | Plant Badge | ||
| Fighting Badge{{sup/8|Sw}}<br>Ghost Badge{{sup/8|Sh}} | |||
|- style="background:#fff" | |- style="background:#fff" | ||
! Up to Lv. 70 | ! Up to Lv. 70 | ||
| Marsh Badge | | Marsh Badge<br>6 Badges{{sup/7|PE}} | ||
| Storm Badge{{sup/2|GSC}}<br>Mineral Badge{{sup/4|HGSS}} | | Storm Badge{{sup/2|GSC}}<br>Mineral Badge{{sup/4|HGSS}} | ||
| Feather Badge | | Feather Badge | ||
| Line 120: | Line 126: | ||
| Jet Badge | | Jet Badge | ||
| Voltage Badge | | Voltage Badge | ||
| Fairy Badge | |||
|- style="background:#fff" | |- style="background:#fff" | ||
! Up to Lv. 80 | ! Up to Lv. 80 | ||
| | | 7 Badges{{sup/7|PE}} | ||
| | | | ||
| Mind Badge{{sup/6|ORAS}} | | Mind Badge{{sup/6|ORAS}} | ||
| Line 128: | Line 135: | ||
| Freeze Badge{{sup/5|BW}}<br>Legend Badge{{sup/5|B2W2}} | | Freeze Badge{{sup/5|BW}}<br>Legend Badge{{sup/5|B2W2}} | ||
| Fairy Badge | | Fairy Badge | ||
| Rock Badge{{sup/8|Sw}}<br>Ice Badge{{sup/8|Sh}} | |||
|- style="background:#fff" | |- style="background:#fff" | ||
! Up to Lv. 90 | ! Up to Lv. 90 | ||
| Line 136: | Line 144: | ||
| | | | ||
| Psychic Badge | | Psychic Badge | ||
| Dark Badge | |||
|- | |- | ||
! style="background:#fff; {{roundybl|5px}}" | All Pokémon | ! style="background:#fff; {{roundybl|5px}}" | All Pokémon | ||
| style="background:#fff" | Earth Badge | | style="background:#fff" | Earth Badge<br>8 Badges{{sup/7|PE}} | ||
| style="background:#fff" | Rising Badge | | style="background:#fff" | Rising Badge | ||
| style="background:#fff" | Rain Badge | | style="background:#fff" | Rain Badge | ||
| style="background:#fff" | 8 Badges | | style="background:#fff" | 8 Badges | ||
| style="background:#fff" | Legend Badge{{sup/5|BW}}<br>Wave Badge{{sup/5|B2W2}} | | style="background:#fff" | Legend Badge{{sup/5|BW}}<br>Wave Badge{{sup/5|B2W2}} | ||
| style="background:#fff; {{roundybr|5px}}" | | | style="background:#fff" | Iceberg Badge | ||
| style="background:#fff; {{roundybr|5px}}" | Dragon Badge | |||
|} | |} | ||
| Line 154: | Line 164: | ||
{{shop|Generation IV}} | {{shop|Generation IV}} | ||
{{shoprow|{{shopitem|Poké Ball (item)|5=Poké Ball|display=Poké Ball|200|note=<br><small>{{gameabbrev4|HGSS}}: After catching tutorial on {{ | {{shoprow|{{shopitem|Poké Ball (item)|5=Poké Ball|display=Poké Ball|200|note=<br><small>{{gameabbrev4|HGSS}}: After catching tutorial on {{color2|000|Johto Route 29|Route 29}}}}|{{shopitem|Great Ball|600|note=<sup>3 Badges</sup>}}}} | ||
{{shoprow|{{shopitem|Ultra Ball|1200|note=<sup>5 Badges</sup>}}|{{shopitem|Potion|300}}}} | {{shoprow|{{shopitem|Ultra Ball|1200|note=<sup>5 Badges</sup>}}|{{shopitem|Potion|300}}}} | ||
{{shoprow|{{shopitem|Super Potion|700|note=<sup>1 Badge</sup>}}|{{shopitem|Hyper Potion|1200|note=<sup>5 Badges</sup>}}}} | {{shoprow|{{shopitem|Super Potion|700|note=<sup>1 Badge</sup>}}|{{shopitem|Hyper Potion|1200|note=<sup>5 Badges</sup>}}}} | ||
| Line 178: | Line 188: | ||
{{shopfooter|multiple=yes}} | {{shopfooter|multiple=yes}} | ||
{{shop|Generation VI}} | {{shop|Generation VI}} | ||
{{shoprow|{{shopitem|Poké Ball (item)|200|5=Poké Ball|display=Poké Ball|note=<br><small>{{gameabbrev6|ORAS}}: after obtaining | {{shoprow|{{shopitem|Poké Ball (item)|200|5=Poké Ball|display=Poké Ball|note=<br><small>{{gameabbrev6|ORAS}}: after obtaining {{color2|000|Pokédex}}</small>}}|{{shopitem|Great Ball|600|note=<sup>1 Badge</sup>}}}} | ||
{{shoprow|{{shopitem|Ultra Ball|1,200|note=<sup>3 Badges</sup>}}|{{shopitem|Potion|300}}}} | {{shoprow|{{shopitem|Ultra Ball|1,200|note=<sup>3 Badges</sup>}}|{{shopitem|Potion|300}}}} | ||
{{shoprow|{{shopitem|Super Potion|700|note=<sup>1 Badge</sup>}}|{{shopitem|Hyper Potion|1,200|note=<sup>2 Badges</sup>}}}} | {{shoprow|{{shopitem|Super Potion|700|note=<sup>1 Badge</sup>}}|{{shopitem|Hyper Potion|1,200|note=<sup>2 Badges</sup>}}}} | ||
{{shoprow|{{shopitem|Max Potion|2,500|note=<sup>4 Badges</sup>}}|{{shopitem|Full Restore|3,000|note=<sup>5 Badges</sup>}}}} | {{shoprow|{{shopitem|Max Potion|2,500|note=<sup>4 Badges</sup>}}|{{shopitem|Full Restore|3,000|note=<sup>5 Badges</sup>}}}} | ||
{{shoprow|{{shopitem|Revive|1,500|note=<sup>2 Badges</sup>}}|{{shopitem|Antidote|100|note=<br><small>{{gameabbrev6|XY}}: 1 Badge, {{gameabbrev6|ORAS}}: after obtaining | {{shoprow|{{shopitem|Revive|1,500|note=<sup>2 Badges</sup>}}|{{shopitem|Antidote|100|note=<br><small>{{gameabbrev6|XY}}: 1 Badge, {{gameabbrev6|ORAS}}: after obtaining {{color2|000|Pokédex}}</small>}}}} | ||
{{shoprow|{{shopitem|Paralyze Heal|200|note=<sup>1 Badge</sup>}}|{{shopitem|Awakening|250|note=<sup>1 Badge</sup>}}}} | {{shoprow|{{shopitem|Paralyze Heal|200|note=<sup>1 Badge</sup>}}|{{shopitem|Awakening|250|note=<sup>1 Badge</sup>}}}} | ||
{{shoprow|{{shopitem|Burn Heal|250|note=<sup>1 Badge</sup>}}|{{shopitem|Ice Heal|250|note=<sup>1 Badge</sup>}}}} | {{shoprow|{{shopitem|Burn Heal|250|note=<sup>1 Badge</sup>}}|{{shopitem|Ice Heal|250|note=<sup>1 Badge</sup>}}}} | ||
| Line 205: | Line 215: | ||
{{shoprow|{{shopitem|X Speed|350|note=<sup>1 Badge</sup>}}|{{shopitem|X Accuracy|950|note=<sup>1 Badge</sup>}}}} | {{shoprow|{{shopitem|X Speed|350|note=<sup>1 Badge</sup>}}|{{shopitem|X Accuracy|950|note=<sup>1 Badge</sup>}}}} | ||
{{shoprow|{{shopitem|Dire Hit|650|note=<sup>1 Badge</sup>}}|{{shopitem|Guard Spec.|700|note=<sup>1 Badge</sup>}}}} | {{shoprow|{{shopitem|Dire Hit|650|note=<sup>1 Badge</sup>}}|{{shopitem|Guard Spec.|700|note=<sup>1 Badge</sup>}}}} | ||
{{shopfooter | {{shopfooter|multiple=yes}} | ||
{{shop|Generation VIII}} | |||
{{shoprow|{{shopitem|Poké Ball (item)| | {{shoprow|{{shopitem|Poké Ball (item)|200|5=Poké Ball|display=Poké Ball|note=<br><small>After meeting {{color2|000|Leon}} on {{color2|000|Galar Route 2|Route 2}}</small>}}|{{shopitem|Great Ball|600|note=<sup>1 Badge</sup>}}}} | ||
{{ | {{shoprow|{{shopitem|Ultra Ball|800|note=<sup>5 Badges</sup>}}|{{shopitem|Potion|200}}}} | ||
{{shoprow|{{shopitem|Super Potion|700|note=<sup>1 Badge</sup>}}|{{shopitem|Hyper Potion|1,500|note=<sup>4 Badges</sup>}}}} | |||
{{shoprow|{{shopitem|Max Potion|2,500|note=<sup>7 Badge</sup>}}|{{shopitem|Full Restore|3,000|note=<sup>8 Badges</sup>}}}} | |||
{{shoprow|{{shopitem|Antidote|200}}|{{shopitem|Burn Heal|200}}}} | |||
{{shoprow|{{shopitem|Ice Heal|200}}|{{shopitem|Awakening|200}}}} | |||
{{shoprow|{{shopitem|Paralyze Heal|200}}|{{shopitem|Full Heal|400|note=<sup>6 Badges</sup>}}}} | |||
{{shoprow|{{shopitem|Revive|2,000}}|{{shopitem|Repel|400|note=<sup>3 Badges</sup>}}}} | |||
{{shoprow|{{shopitem|Super Repel|700|note=<sup>5 Badges</sup>}}|{{shopitem|Max Repel|900|note=<sup>7 Badges</sup>}}}} | |||
{{shoprow|{{shopitem|Poké Doll|300|note=<sup>2 Badges</sup>}}}} | |||
{{shopfooter}} | |||
===Pokémon League=== | ===Pokémon League=== | ||
In the games, in order to enter the [[Pokémon League]] and challenge the [[Elite Four]] and {{pkmn|Champion}}, the player must have all eight Badges from that region (or in the case of the [[Indigo Plateau]], either [[Kanto]] or [[Johto]]). In [[Unova]], [[Kalos]], and Generation I | In the games, in order to enter the [[Pokémon League]] and challenge the [[Elite Four]] and {{pkmn|Champion}}, the player must have all eight Badges from that region (or in the case of the [[Indigo Plateau]], either [[Kanto]] or [[Johto]]). In [[Unova]], [[Kalos]], and Generation I, III, and VII Kanto, Badges are checked individually through a series of Badge Check Gates; in [[Hoenn]], [[Sinnoh]], and Generation II/IV Kanto, Badges are checked all at once. | ||
==List of Badges== | ==List of Badges== | ||
| Line 219: | Line 238: | ||
{{bdg|rock|Boulder|グレーバッジ|Gray|Brock|Pewter City|oa=[[Lola]], {{ka|Flint}}, and [[Forrest]]|hm={{m|Flash}}{{sup/1|RBY}}{{sup/3|FRLG}}|stat=Attack|It is a simple gray octagon.}} | {{bdg|rock|Boulder|グレーバッジ|Gray|Brock|Pewter City|oa=[[Lola]], {{ka|Flint}}, and [[Forrest]]|hm={{m|Flash}}{{sup/1|RBY}}{{sup/3|FRLG}}|stat=Attack|It is a simple gray octagon.}} | ||
{{bdg|water|Cascade|ブルーバッジ|Blue|Misty|Cerulean City|oa={{ka|Lily}}, {{an|Daisy}}, and [[Violet]]|hm={{m|Cut}}{{sup/1|RBY}}{{sup/3|FRLG}}|lvl=30|It is in the shape of a light blue raindrop.}} | {{bdg|water|Cascade|ブルーバッジ|Blue|Misty|Cerulean City|oa={{ka|Lily}}, {{an|Daisy}}, and [[Violet]]|hm={{m|Cut}}{{sup/1|RBY}}{{sup/3|FRLG}}|lvl=30|It is in the shape of a light blue raindrop.}} | ||
{{bdg|electric|Thunder|オレンジバッジ|Orange|Lt. Surge|Vermilion City|hm={{m|Fly}}{{sup/1|RBY}}{{sup/3|FRLG}}|stat=Defense{{sup/1|RBY}}, Speed{{sup/3|FRLG}}|It is in the shape of an eight-pointed gold star with an orange octagon in the center.}} | {{bdg|electric|Thunder|オレンジバッジ|Orange|Lt. Surge|Vermilion City|oa=[[Visquez]]|hm={{m|Fly}}{{sup/1|RBY}}{{sup/3|FRLG}}|stat=Defense{{sup/1|RBY}}, Speed{{sup/3|FRLG}}|It is in the shape of an eight-pointed gold star with an orange octagon in the center.}} | ||
{{bdg|grass|Rainbow|レインボーバッジ|Rainbow|Erika|Celadon City|hm={{m|Strength}}{{sup/1|RBY}}{{sup/3|FRLG}}|lvl=50|It is shaped like a flower, showing grass, with rainbow colored petals.}} | {{bdg|grass|Rainbow|レインボーバッジ|Rainbow|Erika|Celadon City|hm={{m|Strength}}{{sup/1|RBY}}{{sup/3|FRLG}}|lvl=50|It is shaped like a flower, showing grass, with rainbow colored petals.}} | ||
{{bdg|poison|Soul|ピンクバッジ|Pink|Koga|Fuchsia City|og=[[Janine]]{{sup/2|GSC}}{{sup/4|HGSS}}|hm={{m|Surf}}{{sup/1|RBY}}{{sup/3|FRLG}}|stat=Speed{{sup/1|RBY}}, Defense{{sup/3|FRLG}}|It is in the shape of a fuchsia heart.}} | {{bdg|poison|Soul|ピンクバッジ|Pink|Koga|Fuchsia City|og=[[Janine]]{{sup/2|GSC}}{{sup/4|HGSS}}|hm={{m|Surf}}{{sup/1|RBY}}{{sup/3|FRLG}}|stat=Speed{{sup/1|RBY}}, Defense{{sup/3|FRLG}}|It is in the shape of a fuchsia heart.}} | ||
| Line 226: | Line 245: | ||
{{bdg|ground|Earth|グリーンバッジ|Green|Giovanni|Viridian City|og={{ga|Blue}}{{sup/2|GSC}}{{sup/4|HGSS}}|oa=[[Jessie]], [[James]], {{MTR}}, and [[Agatha]]|lvl=100|hm={{m|Rock Climb}}{{sup/4|HGSS}}|It is shaped like a plant, possibly a {{wp|Cleyera japonica|Sakaki tree}}, which is identical to the Japanese name of the Gym Leader.}} | {{bdg|ground|Earth|グリーンバッジ|Green|Giovanni|Viridian City|og={{ga|Blue}}{{sup/2|GSC}}{{sup/4|HGSS}}|oa=[[Jessie]], [[James]], {{MTR}}, and [[Agatha]]|lvl=100|hm={{m|Rock Climb}}{{sup/4|HGSS}}|It is shaped like a plant, possibly a {{wp|Cleyera japonica|Sakaki tree}}, which is identical to the Japanese name of the Gym Leader.}} | ||
|} | |} | ||
===Johto League=== | ===Johto League=== | ||
| Line 233: | Line 251: | ||
{{bdg/h|Johto|8|Johto}} | {{bdg/h|Johto|8|Johto}} | ||
{{bdg|flying|Zephyr|ウイングバッジ|Wing|Falkner|Violet City|hm={{m|Flash}}{{sup/2|GSC}}, {{m|Rock Smash}}{{sup/4|HGSS}}|lvl=20{{sup/4|HGSS}}|stat=Attack|It is shaped like a pair of wings.|The Badge is named after the {{wp|Anemoi#Zephyrus|Greek god of the west wind}}.}} | {{bdg|flying|Zephyr|ウイングバッジ|Wing|Falkner|Violet City|hm={{m|Flash}}{{sup/2|GSC}}, {{m|Rock Smash}}{{sup/4|HGSS}}|lvl=20{{sup/4|HGSS}}|stat=Attack|It is shaped like a pair of wings.|The Badge is named after the {{wp|Anemoi#Zephyrus|Greek god of the west wind}}.}} | ||
{{bdg|bug|Hive|インセクトバッジ|Insect|Bugsy|Azalea Town|hm={{m|Cut}}|lvl=30|It | {{bdg|bug|Hive|インセクトバッジ|Insect|Bugsy|Azalea Town|hm={{m|Cut}}|lvl=30|It is shaped like a ladybug viewed from above.}} | ||
{{bdg|normal|Plain|レギュラーバッジ|Regular|Whitney|Goldenrod City|hm={{m|Strength}}|stat=Speed|It is a plain diamond.|This Badge is not obtainable until after the player talks to Whitney a second time.}} | {{bdg|normal|Plain|レギュラーバッジ|Regular|Whitney|Goldenrod City|hm={{m|Strength}}|stat=Speed|It is a plain diamond.|This Badge is not obtainable until after the player talks to Whitney a second time.}} | ||
{{bdg|ghost|Fog|ファントムバッジ|Phantom|Morty|Ecruteak City|hm={{m|Surf}}|lvl=50|It is shaped like a wispy ghost.}} | {{bdg|ghost|Fog|ファントムバッジ|Phantom|Morty|Ecruteak City|hm={{m|Surf}}|lvl=50|It is shaped like a wispy ghost.}} | ||
{{bdg|fighting|Storm|ショックバッジ|Shock|Chuck|Cianwood City|hm={{m|Fly}}|lvl=70{{sup/2|GSC}}|It is shaped like a fist.}} | {{bdg|fighting|Storm|ショックバッジ|Shock|Chuck|Cianwood City|hm={{m|Fly}}|lvl=70{{sup/2|GSC}}|It is shaped like a fist.}} | ||
{{bdg|steel|Mineral|スチールバッジ|Steel|Jasmine|Olivine City|hm=None|stat=Defense|lvl=70{{sup/4|HGSS}}|It is a steel-colored octagon.|oa=Jasmine's colleague}} | {{bdg|steel|Mineral|スチールバッジ|Steel|Jasmine|Olivine City|hm=None|stat=Defense|lvl=70{{sup/4|HGSS}}|It is a steel-colored octagon.|oa=Jasmine's colleague}} | ||
{{bdg|ice|Glacier|アイスバッジ|Ice|Pryce|Mahogany Town|hm={{m|Whirlpool}}|stat=Special Attack & Special Defense|It is a hexagon with a snowflake design.|This Badge is not obtainable until the player has cleared out [[Team Rocket HQ]].}} | {{bdg|ice|Glacier|アイスバッジ|Ice|Pryce|Mahogany Town|hm={{m|Whirlpool}}|stat=Special Attack & Special Defense|It is a hexagon with a snowflake design.|This Badge is not obtainable until the player has cleared out [[Team Rocket HQ]].<br>In [[Generation II]], due to a bug, the Special Defense boost is not applied if the (pre-boost) Special Attack stat is in between 206 and 433 (inclusive).<!--see talk-->}} | ||
{{bdg|dragon|Rising|ライジングバッジ|Rising|Clair|Blackthorn City|hm={{m|Waterfall}}|lvl=100|It is shaped like a dragon's face.|This Badge is not obtainable until the player has explored the [[Dragon's Den]].}} | {{bdg|dragon|Rising|ライジングバッジ|Rising|Clair|Blackthorn City|hm={{m|Waterfall}}|lvl=100|It is shaped like a dragon's face.|This Badge is not obtainable until the player has explored the [[Dragon's Den]].}} | ||
| | |} | ||
===Hoenn League=== | ===Hoenn League=== | ||
In Generation VI, these Badges do not affect stats. | In Generation VI, these Badges do not affect stats. | ||
{{bdg/h|Hoenn|8|Hoenn}} | {{bdg/h|Hoenn|8|Hoenn}} | ||
{{bdg|rock|Stone|ストーンバッジ|Stone|Roxanne|Rustboro City|hm={{m|Cut}}|stat=Attack|lvl=20{{sup/6|ORAS}}|It is shaped like a rectangle with two of its corners more emphasized than the others.}} | {{bdg|rock|Stone|ストーンバッジ|Stone|Roxanne|Rustboro City|hm={{m|Cut}}|stat=Attack|lvl=20{{sup/6|ORAS}}|It is shaped like a rectangle with two of its corners more emphasized than the others.}} | ||
| Line 254: | Line 273: | ||
{{bdg|water|Rain|レインバッジ|Rain|Wallace|Sootopolis City|og=[[Juan]]{{sup/3|E}}|oa=[[Juan]]|hm={{m|Waterfall}}|lvl=100|It is shaped like three raindrops arranged in a triangle.}} | {{bdg|water|Rain|レインバッジ|Rain|Wallace|Sootopolis City|og=[[Juan]]{{sup/3|E}}|oa=[[Juan]]|hm={{m|Waterfall}}|lvl=100|It is shaped like three raindrops arranged in a triangle.}} | ||
|} | |} | ||
===Sinnoh League=== | ===Sinnoh League=== | ||
When Badges are touched in the games, they play a single note, and will make a musical {{wp|C major|C major scale}} when all eight Badges are collected. When a player rubs the stylus across them numerous times to polish them (as they gradually tarnish), they will begin to shine. This process can be continued until four sparkles are visible. The musical notes are also the most clearly defined and accurately tuned when there are four sparkles. | When Badges are touched in the games, they play a single note, and will make a musical {{wp|C major|C major scale}} when all eight Badges are collected. When a player rubs the stylus across them numerous times to polish them (as they gradually tarnish), they will begin to shine. This process can be continued until four sparkles are visible. The musical notes are also the most clearly defined and accurately tuned when there are four sparkles. | ||
Unlike other generations, it is the number of Badges that determines which [[outsider Pokémon]] [[Obedience | Unlike other generations, it is the number of Badges that determines which [[outsider Pokémon]] [[Obedience|obey]] the Trainer, rather than the Badges themselves (this distinction is important owing to the fact that the order of obtaining the Cobble, Fen, and Relic Badges can differ). For every second Badge the maximum level of obeying Pokémon increases (0 Badges—level 10; 2 Badges—level 30; 4 Badges—level 50; 6 Badges—level 70; 8 Badges—level 100). The number of Badges collected also affects the items that the player can purchase in [[Poké Mart]]s. | ||
{{bdg/h|Sinnoh|8|Sinnoh}} | {{bdg/h|Sinnoh|8|Sinnoh}} | ||
| Line 271: | Line 289: | ||
{{bdg|electric|Beacon|ビーコンバッジ|Beacon|Volkner|Sunyshore City|hm={{m|Waterfall}}|It is shaped like a lighthouse.}} | {{bdg|electric|Beacon|ビーコンバッジ|Beacon|Volkner|Sunyshore City|hm={{m|Waterfall}}|It is shaped like a lighthouse.}} | ||
|} | |} | ||
===Unova League=== | ===Unova League=== | ||
| Line 311: | Line 328: | ||
{{bdg|grass|Plant|プラントバッジ|Plant|Ramos|Coumarine City|lvl=60|hm={{m|Fly}}|It is shaped like a leaf, with the veins forming the shape of a plant.}} | {{bdg|grass|Plant|プラントバッジ|Plant|Ramos|Coumarine City|lvl=60|hm={{m|Fly}}|It is shaped like a leaf, with the veins forming the shape of a plant.}} | ||
{{bdg|electric|Voltage|ボルテージバッジ|Voltage|Clemont|Lumiose City|oa={{color2|000|Clembot}}|lvl=70|hm=None|It is shaped like a shield with bolts shooting out of it.}} | {{bdg|electric|Voltage|ボルテージバッジ|Voltage|Clemont|Lumiose City|oa={{color2|000|Clembot}}|lvl=70|hm=None|It is shaped like a shield with bolts shooting out of it.}} | ||
{{bdg|fairy|Fairy|フェアリーバッジ|Fairy|Valerie|Laverre City|lvl=80|hm=None|It is shaped like | {{bdg|fairy|Fairy|フェアリーバッジ|Fairy|Valerie|Laverre City|lvl=80|hm=None|It is shaped like a {{wp|Stained glass|vitrail}} with motifs of fairy or butterfly.}} | ||
{{bdg|psychic|Psychic|サイキックバッジ|Psychic|Olympia|Anistar City|lvl=90|hm=None|It is shaped like a crystal ball emanating smoke.}} | {{bdg|psychic|Psychic|サイキックバッジ|Psychic|Olympia|Anistar City|lvl=90|hm=None|It is shaped like a crystal ball emanating smoke.}} | ||
{{bdg|ice|Iceberg|アイスバーグバッジ|Iceberg|Wulfric|Snowbelle City|lvl=100|hm={{m|Waterfall}}|It is shaped like a snowflake with an iceberg in the center.}} | {{bdg|ice|Iceberg|アイスバーグバッジ|Iceberg|Wulfric|Snowbelle City|lvl=100|hm={{m|Waterfall}}|It is shaped like a snowflake with an iceberg in the center.}} | ||
| Line 317: | Line 334: | ||
===Galar League=== | ===Galar League=== | ||
Unlike previous Badges, these Badges are not pins or kept in a case, but pieces of a gold-colored medallion placed into a metal ring to stay in place. Once all Badges are set, the completed reverse side shows the Gym Challenge logo. | |||
{{bdg/h|Galar|10|Galar}} | {{bdg/h|Galar|10|Galar}} | ||
{{bdg|Grass|Grass|くさバッジ|Grass|Milo|Turffield|lvl=30<br>Can capture Pokémon up to Lv. 25| | {{bdg|Grass|Grass|くさバッジ|Grass|Milo|Turffield|lvl=30<br>Can capture Pokémon up to Lv. 25|On it is a design shaped like a stylized leaf of spinach or a leaf floating in the wind.}} | ||
{{bdg|Water|Water|みずバッジ|Water|Nessa|Hulbury|lvl=40<br>Can capture Pokémon up to Lv. 30 | {{bdg|Water|Water|みずバッジ|Water|Nessa|Hulbury|lvl=40<br>Can capture Pokémon up to Lv. 30|On it is a design shaped like three water droplets in the shape of a {{wp|Tomoe|Tomoe}} or a splash.}} | ||
{{bdg|Fire|Fire|ほのおバッジ|Fire|Kabu|Motostoke|lvl= | {{bdg|Fire|Fire|ほのおバッジ|Fire|Kabu|Motostoke|lvl=50<br>Can capture Pokémon up to Lv. 35|On it is a design shaped like a flame.}} | ||
{{bdg|Fighting|Fighting|かくとうバッジ|Fighting|Bea|Stow-on-Side|lvl= | {{bdg|Fighting|Fighting|かくとうバッジ|Fighting|Bea|Stow-on-Side|lvl=60<br>Can capture Pokémon up to Lv. 40|On it is a design shaped like a fist with a trail indicating a punching motion.|Exclusive to [[Pokémon Sword and Shield|Pokémon Sword]].}} | ||
{{bdg|Ghost|Ghost|ゴーストバッジ|Ghost|Allister|Stow-on-Side|lvl= | {{bdg|Ghost|Ghost|ゴーストバッジ|Ghost|Allister|Stow-on-Side|lvl=60<br>Can capture Pokémon up to Lv. 40|On it is a design shaped like a {{wp|will-o'-the-wisp}}.|Exclusive to [[Pokémon Sword and Shield|Pokémon Shield]].}} | ||
{{bdg|Fairy|Fairy|フェアリーバッジ|Fairy|Opal|Ballonlea|og={{color2|000|Bede}}|lvl= | {{bdg|Fairy|Fairy|フェアリーバッジ|Fairy|Opal|Ballonlea|og={{color2|000|Bede}}|lvl=70<br>Can capture Pokémon up to Lv. 45|On it is a design shaped like a stylized fairy or butterfly.|region=Galar|anchor=GalarFairy Badge}} | ||
{{bdg|Rock|Rock|いわバッジ|Rock|Gordie|Circhester|lvl= | {{bdg|Rock|Rock|いわバッジ|Rock|Gordie|Circhester|lvl=80<br>Can capture Pokémon up to Lv. 50|On it is a design shaped like a boulder with cracks in it.|Exclusive to [[Pokémon Sword and Shield|Pokémon Sword]].}} | ||
{{bdg|Ice|Ice|こおりバッジ|Ice|Melony|Circhester|lvl= | {{bdg|Ice|Ice|こおりバッジ|Ice|Melony|Circhester|lvl=80<br>Can capture Pokémon up to Lv. 50|On it is a design shaped like an ice cube.|Exclusive to [[Pokémon Sword and Shield|Pokémon Shield]].}} | ||
{{bdg|Dark|Dark|あくバッジ|Evil|Piers|Spikemuth|og={{color2|000|Marnie}}|lvl= | {{bdg|Dark|Dark|あくバッジ|Evil|Piers|Spikemuth|og={{color2|000|Marnie}}|lvl=90<br>Can capture Pokémon up to Lv. 55|On it is a design shaped like a demonic face with horns and a wide, toothy grin.}} | ||
{{bdg|Dragon|Dragon|ドラゴンバッジ|Dragon|Raihan|Hammerlocke|lvl=100<br>Can capture Pokémon up to Lv. 100| | {{bdg|Dragon|Dragon|ドラゴンバッジ|Dragon|Raihan|Hammerlocke|lvl=100<br>Can capture Pokémon up to Lv. 100|On it is a design shaped like a dragon's face and neck when viewed from the side.}} | ||
|} | |} | ||
| Line 339: | Line 357: | ||
{{bdg|grass|Spike Shell|リンボウバッジ|Rinbō|Rudy|Trovita Island|It is shaped like a {{wp|Guildfordia triumphans|triumphant star turban}} with a small gemstone on it.|Its Japanese name refers to the triumphant star turban (白波貝 ''rinbōgai'').}} | {{bdg|grass|Spike Shell|リンボウバッジ|Rinbō|Rudy|Trovita Island|It is shaped like a {{wp|Guildfordia triumphans|triumphant star turban}} with a small gemstone on it.|Its Japanese name refers to the triumphant star turban (白波貝 ''rinbōgai'').}} | ||
{{bdg|psychic|Jade Star|ルリバッジ|Ruri|Luana|Kumquat Island|It is shaped like a {{wp|Janthinidae|purple snail}} shell with a small gemstone on it.|Its Japanese name refers to the {{wp|Janthina umbilicata|elongate janthina}} (瑠璃貝 ''rurigai''), a species of sea snails.}} | {{bdg|psychic|Jade Star|ルリバッジ|Ruri|Luana|Kumquat Island|It is shaped like a {{wp|Janthinidae|purple snail}} shell with a small gemstone on it.|Its Japanese name refers to the {{wp|Janthina umbilicata|elongate janthina}} (瑠璃貝 ''rurigai''), a species of sea snails.}} | ||
| | |} | ||
==In spin-off games== | ==In spin-off games== | ||
| Line 346: | Line 364: | ||
===Pokémon Masters=== | ===Pokémon Masters=== | ||
In [[Pokémon Masters]], players must earn five badges from PML Leaders across [[Pasio]] before they can qualify for the [[Pokémon Masters League]] tournament. | In [[Pokémon Masters]], players must earn five badges from PML Leaders across [[Pasio]] before they can qualify for the [[Pokémon Masters League]] tournament. According to Erika, each PML Badge is handed out by more than one different PML Leader, though the identities of these Leaders are unknown. | ||
{{bdg/h|Pokémon Masters|5|Pasio}} | {{bdg/h|Pokémon Masters|5|Pasio}} | ||
| Line 353: | Line 371: | ||
{{bdg|normal|Patience|ペイシェントバッジ|Patient|Norman|Pasio|Resembles a {{wp|tatami}} door, something seen in [[Petalburg Gym]].}} | {{bdg|normal|Patience|ペイシェントバッジ|Patient|Norman|Pasio|Resembles a {{wp|tatami}} door, something seen in [[Petalburg Gym]].}} | ||
{{bdg|ice|Harmony|ユニティバッジ|Unity|Pryce|Pasio|It is shaped like a stylized snowflake, referencing Pryce's {{type|Ice}} specialty.}} | {{bdg|ice|Harmony|ユニティバッジ|Unity|Pryce|Pasio|It is shaped like a stylized snowflake, referencing Pryce's {{type|Ice}} specialty.}} | ||
{{bdg|ground|Pride|プラウドバッジ|Proud|Hapu|Pasio|It is shaped like a tall mountain, in reference to the mountainous [[Poni Island]] where Hapu comes from.}} | {{bdg|ground|Pride|プラウドバッジ|Proud|Hapu|Pasio|It is shaped like a tall volcano or mountain, in reference to the mountainous [[Poni Island]] where Hapu comes from.}} | ||
| | |} | ||
==In the anime== | ==In the anime== | ||
[[File:Kanto Gym Badges anime.png|thumb|left|250px|The Kanto Gym Badges in the anime]] | |||
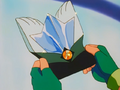
[[File:Ash Fen Badge.png|thumb|220px|Ash holding the Fen Badge]] | [[File:Ash Fen Badge.png|thumb|220px|Ash holding the Fen Badge]] | ||
In the {{pkmn|anime}}, Badges signify that a {{pkmn|Trainer}} has succeeded at a particular [[Gym]]. If a Trainer earns eight Gym Badges in one [[region]], they are eligible to enter that region's [[Pokémon League Conference]]. | In the {{pkmn|anime}}, Badges signify that a {{pkmn|Trainer}} has succeeded at a particular [[Gym]]. If a Trainer earns eight Gym Badges in one [[region]], they are eligible to enter that region's [[Pokémon League Conference]]. | ||
| Line 385: | Line 404: | ||
====Morrison==== | ====Morrison==== | ||
At the Hoenn Pokémon League Championship in ''[[AG126|Saved by the Beldum!]]'', [[Morrison]] | At the Hoenn Pokémon League Championship in ''[[AG126|Saved by the Beldum!]]'', [[Morrison]] was shown to have an eighth Badge different from Ash's, suggesting that there are at least nine Gyms in Hoenn. | ||
====Mismagius==== | ====Mismagius==== | ||
| Line 403: | Line 422: | ||
====Sawyer==== | ====Sawyer==== | ||
In ''[[XY073|A Fashionable Battle!]]'', [[Sawyer]] stated that he had earned one Badge. Later, in ''[[XY094|From A to Z!]]'', he was revealed to have earned four more Badges, including three unknown ones. This means there are at least 11 Gyms in Kalos. | In ''[[XY073|A Fashionable Battle!]]'', [[Sawyer]] stated that he had earned one Badge. Later, in ''[[XY094|From A to Z!]]'', he was revealed to have earned four more Badges, including three unknown ones, respectively resembling a flame, three bubbles, and a pair of wings. This means there are at least 11 Gyms in Kalos. | ||
====Gallery of unidentified Badges==== | ====Gallery of unidentified Badges==== | ||
| Line 422: | Line 441: | ||
Several Badges have appeared in the anime that are not official Gym Badges. | Several Badges have appeared in the anime that are not official Gym Badges. | ||
In the [[Indigo League]], Trainers can take the [[Pokémon League Admissions Exam]], which awards a single Badge that | In the [[Indigo League]], Trainers can take the [[Pokémon League Admissions Exam]], which awards a single Badge that can grant them entry into Indigo Plateau Conference on its own, thus replacing the requirement to collect Gym Badges. It is convenient for people whose age, health, or work keeps them from traveling around to collect Badges. | ||
During the closing ceremony of [[Indigo Plateau Conference]], all participants are awarded the Pokémon League Badge. | During the closing ceremony of [[Indigo Plateau Conference]], all participants are awarded the Pokémon League Badge. However, it is only referred to as a Badge in the [[dub]]. | ||
For helping the [[band of Diglett thieves]] with their facade, the [[mayor of Diglett Village]] awarded Ash and his friends with the [[Silver Wing]] Badge. | For helping the [[band of Diglett thieves]] with their facade, the [[mayor of Diglett Village]] awarded Ash and his friends with the [[Silver Wing]] Badge. | ||
| Line 433: | Line 452: | ||
File:EP056.png|Pokémon League Admissions Exam Badge | File:EP056.png|Pokémon League Admissions Exam Badge | ||
File:Pokemon League Badge.png|Pokémon League Badge | File:Pokemon League Badge.png|Pokémon League Badge | ||
File:Silver Wing | File:Silver Wing Badge.png|Silver Wing Badge | ||
File:Ash Kantonian Gym Badge.png|Kantonian Gym Badge | File:Ash Kantonian Gym Badge.png|Kantonian Gym Badge | ||
</gallery> | </gallery> | ||
| Line 462: | Line 481: | ||
==In Pokémon Live!== | ==In Pokémon Live!== | ||
[[File:Diamond Badge.png|thumb|The Diamond Badge from [[Pokémon Live!]]]] | [[File:Diamond Badge.png|thumb|The Diamond Badge from [[Pokémon Live!]]]] | ||
In [[Pokémon Live!]], {{an|Giovanni}} offers the ''Diamond Badge'' to Trainers who defeat his [[MechaMew2]]. He gives {{Ash}} the Diamond Badge prior to the battle, believing that Ash will never win. However, Ash defeats Giovanni with {{OBP|Mewtwo| | In [[Pokémon Live!]], {{an|Giovanni}} offers the ''Diamond Badge'' to Trainers who defeat his [[MechaMew2]]. He gives {{Ash}} the Diamond Badge prior to the battle, believing that Ash will never win. However, Ash defeats Giovanni with {{OBP|Mewtwo|M01}}'s assistance, proceeding to give the Diamond Badge to {{an|Misty}} as a belated birthday gift. Pokémon Live! is not in continuity with the {{pkmn|anime}}, and the Diamond Badge is not mentioned elsewhere in the series; however, it is the inspiration for [[DiamondShipping]]'s name. | ||
{{-}} | {{-}} | ||
==In the TCG== | |||
This listing is of cards mentioning or featuring Gym Badges in the [[Pokémon Trading Card Game]]. | |||
{{cardlist/header|Gym Badge|Rainbow|char=yes}} | |||
{{cardlist/entry|cardname={{TCG ID|Gym Heroes|Brock|15}}|type=Trainer|enset=Gym Heroes|enrarity=Rare Holo|ennum=15/132|jpset=Nivi City Gym|enset2=Gym Heroes|enrarity2=Rare|ennum2=98/132|jpset2=Leaders' Stadium|jprarity2=Rare}} | |||
{{cardlist/entry|cardname={{TCG ID|Gym Heroes|Erika|16}}|type=Trainer|enset=Gym Heroes|enrarity=Rare Holo|ennum=16/132|jpset=Tamamushi City Gym|enset2=Gym Heroes|enrarity2=Rare|ennum2=100/132|jpsetlink2=Gym Heroes|jpset2=Leaders' Stadium|jprarity2=Rare}} | |||
{{cardlist/entry|cardname={{TCG ID|Gym Heroes|Lt. Surge|17}}|type=Trainer|enset=Gym Heroes|enrarity=Rare Holo|ennum=17/132|jpset=Kuchiba City Gym|enset2=Gym Heroes|enrarity2=Rare|ennum2=101/132|jpsetlink2=Gym Heroes|jpset2=Leaders' Stadium|jprarity2=Rare}} | |||
{{cardlist/entry|cardname={{TCG ID|Gym Heroes|Misty|18}}|type=Trainer|enset=Gym Heroes|enrarity=Rare Holo|ennum=18/132|jpset=Hanada City Gym|enset2=Gym Heroes|enrarity2=Rare|ennum2=102/132|jpset2=Leaders' Stadium|jprarity2=Rare}} | |||
{{cardlist/entry|cardname={{TCG ID|Gym Challenge|Blaine|17}}|type=Trainer|enset=Gym Challenge|enrarity=Rare Holo|ennum=17/132|jpset=Guren Town Gym|enset2=Gym Challenge|enrarity2=Rare|ennum2=100/132|jpsetlink2=Gym Challenge|jpset2=Challenge from the Darkness|jprarity2=Rare}} | |||
{{cardlist/entry|cardname={{TCG ID|Gym Challenge|Giovanni|18}}|type=Trainer|enset=Gym Challenge|enrarity=Rare Holo|ennum=18/132|jpsetlink=Gym Challenge|jpset=Challenge from the Darkness|jprarity=Rare Holo|enset2=Gym Challenge|enrarity2=Rare|ennum2=104/132}} | |||
{{cardlist/entry|cardname={{TCG ID|Gym Challenge|Koga|19}}|type=Trainer|enset=Gym Challenge|enrarity=Rare Holo|ennum=19/132|enset2=Gym Challenge|enrarity2=Rare|ennum2=106/132|jpsetlink2=Gym Challenge|jpset2=Challenge from the Darkness|jprarity2=Rare}} | |||
{{cardlist/entry|cardname={{TCG ID|Gym Challenge|Sabrina|20}}|type=Trainer|enset=Gym Challenge|enrarity=Rare Holo|ennum=20/132|jpset=Yamabuki City Gym|enset2=Gym Challenge|enrarity2=Rare|ennum2=110/132|jpsetlink2=Gym Challenge|jpset2=Challenge from the Darkness|jprarity2=Rare}} | |||
{{cardlist/entry|cardname={{TCG ID|XY Promo|Gym Badge|203}}|expanded=yes|type=Item|jpset=XY-P Promotional cards|enset2=XY Black Star Promos|ennum2=XY203|jpset2=XY-P Promotional cards|enset3=XY Black Star Promos|ennum3=XY204|jpset3=XY-P Promotional cards|enset4=XY Black Star Promos|ennum4=XY205|jpset4=XY-P Promotional cards|enset5=XY Black Star Promos|ennum5=XY206|jpset5=XY-P Promotional cards|enset6=XY Black Star Promos|ennum6=XY207|jpset6=XY-P Promotional cards|enset7=XY Black Star Promos|ennum7=XY208|jpset7=XY-P Promotional cards|enset8=XY Black Star Promos|ennum8=XY209|jpset8=XY-P Promotional cards|enset9=XY Black Star Promos|ennum9=XY210|jpset9=XY-P Promotional cards}} | |||
{{cardlist/footer|Rainbow}} | |||
==Trivia== | ==Trivia== | ||
| Line 479: | Line 513: | ||
* The Rainbow Badge's colors correspond with the colors of all the other Kanto Badges, explaining the colors in its design. | * The Rainbow Badge's colors correspond with the colors of all the other Kanto Badges, explaining the colors in its design. | ||
* In the code of the [[Generation I]] games, [[List of unobtainable items|items]] named for each Badge can be found. The items named '''BoulderBadge''' and '''CascadeBadge''' allow players to throw bait and rocks, respectively, at Pokémon outside of the {{safari|Kanto}} when used in battle. The other "Badge Items" have no known purpose, simply displaying Professor Oak's "This isn't the time to use that!" message when trying to use them. | * In the code of the [[Generation I]] games, [[List of unobtainable items|items]] named for each Badge can be found. The items named '''BoulderBadge''' and '''CascadeBadge''' allow players to throw bait and rocks, respectively, at Pokémon outside of the {{safari|Kanto}} when used in battle. The other "Badge Items" have no known purpose, simply displaying Professor Oak's "This isn't the time to use that!" message when trying to use them. | ||
* The Basic Badge is the only | * The Basic Badge is the only badge to be given out by multiple gyms. | ||
* The Rising Badge is the only Badge the player receives outside of its respective Gym. | * The Rising Badge is the only Badge the player receives outside of its respective Gym. | ||
* The Legend Badge is the only Badge from | * The Legend Badge is the only Badge from a completed [[generation]] of games that has not appeared in the anime. | ||
** When Ash initially got his Unova Badge case in ''[[BW013|Minccino—Neat and Tidy!]]'', the slots in it were made to fit each Badge in Pokémon Black and White, but they later became circular to accommodate the Toxic Badge. | ** When Ash initially got his Unova Badge case in ''[[BW013|Minccino—Neat and Tidy!]]'', the slots in it were made to fit each Badge in Pokémon Black and White, but they later became circular to accommodate the Toxic Badge. | ||
* Ash has not won a Badge in the same episode as his first encounter with its respective Gym Leader since earning the Dynamo Badge from [[Wattson]] in ''[[AG040|Watts with Wattson?]]''. | * Ash has not won a Badge in the same episode as his first encounter with its respective Gym Leader since earning the Dynamo Badge from [[Wattson]] in ''[[AG040|Watts with Wattson?]]''. | ||
| Line 491: | Line 525: | ||
** The Japanese names of the [[Kanto]] Badges are all colors, following the color pattern for the town and city names. | ** The Japanese names of the [[Kanto]] Badges are all colors, following the color pattern for the town and city names. | ||
** The Trio and Insect Badges are the first Badges since the Glacier Badge in Generation II to get renamed in the English version of the games, without there being a localization conflict between the Japanese and English versions. | ** The Trio and Insect Badges are the first Badges since the Glacier Badge in Generation II to get renamed in the English version of the games, without there being a localization conflict between the Japanese and English versions. | ||
* The Storm Badge's English name may | ** All Badges in [[Galar]] are named directly after their corresponding [[Type|types]]. | ||
*** Consequentially, both Galar and [[Kalos]] have a Fairy Badge (フェアリーバッジ), making them the only Badges to share a name with each other in both English and Japanese. | |||
* The Storm Badge's English name may be derived from the {{wp|lucha libre}} wrestler {{wp|Fray Tormenta}}—also the inspiration for [[Crasher Wake]]—whose name translates as "Friar Storm". | |||
==In other languages== | ==In other languages== | ||
| Line 504: | Line 540: | ||
|fr_eu=Badge | |fr_eu=Badge | ||
|de=Orden | |de=Orden | ||
|el=Έμβλημα ''Émvlima'' | |||
|he=תג ''Tag'' | |he=תג ''Tag'' | ||
|id=Lencana | |id=Lencana | ||
Revision as of 22:30, 9 August 2020
- This article is about the Gym Badges. For the element in the Pokémon Trading Card Game, see Pokémon League (TCG). For Badges from Nintendo Badge Arcade, see Nintendo Badge Arcade.
A Badge (Japanese: バッジ Badge) is an item which denotes a Pokémon Trainer as having defeated a Gym Leader.
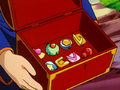
Trainers need to collect a certain number of Gym Badges in order to qualify for a region's Pokémon League. Young Trainers usually begin their initial Pokémon journey by traveling from city to city in order to collect them. Badges are small enough to fit easily between one's thumb and index finger and can be pinned to a shirt or kept in a Badge case.
Development

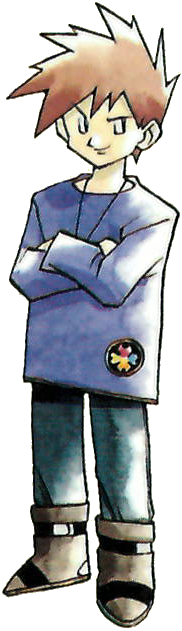
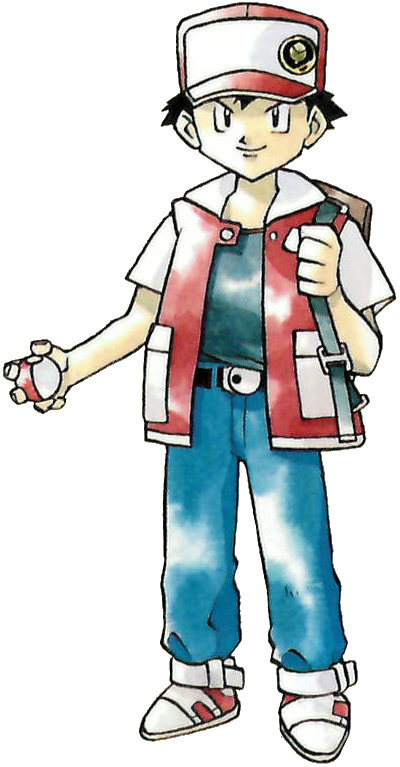
A selection of familiar and unfamiliar Badges can be seen in early character artwork by Ken Sugimori. It appears that the original concept of Badges was more similar to an embroidered patch than the pinned badge they are portrayed as in the anime and subsequent game entries. While some of these patches do resemble Badges seen in the final game like the Cascade Badge, the Volcano Badge or even the Rainbow Badge, others don't appear to be based on anything, and may have only been made for the sake of aesthetics, much like real-life embroidered patches, such as Red's "Leaf Badge" or Silver's "Artsy Badge".
Other instances of embroidered "Badges" can be seen in the cover art for the Games That Stand Out Collection magazine, with the male Trainer's rock or diamond badge and the female Trainer's teardrop badge, which shares a resemblance to the Cascade Badge. However, given the nature of this illustration (the designs were made specifically for this cover and weren't intended to be used in the franchise[1]), it is likely that these designs were chosen randomly. The latter Badge's resemblance to the Cascade Badge was most likely a coincidence, given it is a stylized drop of water.
Effects
Stat boost
In Generations I-III, some Badges boost a certain stat or stats of the player's Pokémon. This boost is applied only in internal battles, not link battles. In Generations I and II, the stat or stats are increased by 12.5%; in Generation III, the stat or stats are increased by 10%. This boost does not exist from Generation IV onward.
In Generation I, this boost is reapplied whenever the player's Pokémon's stats are raised or lowered, allowing boosts to be stacked (this stacking effect is lost if the Pokémon levels up). In Generation II, if the attack is a critical hit and the attacker's used offensive stat stage is less than or equal to the opponent's defensive stat stage, all Badge boosts are ignored.
| Badges by stat boosted | |||
|---|---|---|---|
| Stat | Indigo League | Johto League | Hoenn League |
| Attack | Boulder Badge | Zephyr Badge | Stone Badge |
| Defense | Thunder BadgeRBY Soul BadgeFRLG |
Mineral Badge | Balance Badge |
| Special Attack and Special Defense* |
Volcano Badge | Glacier Badge | Mind Badge |
| Speed | Soul BadgeRBY Thunder BadgeFRLG |
Plain Badge | Dynamo Badge |
Note that in Generation I, the game states that the Thunder Badge raises Speed and the Soul Badge raises Defense, but these are not the actual effects caused.
Type boost
In Generation II, every Badge boosts the power of the moves of a certain type by 12.5% (1/8), despite never being referenced in the games. The type strengthened matches the type theme of the Gym (for example, Zephyr Badge boosts the Flying-type). These boosts work similarly to the way same-type attack bonus (STAB) boosts work, and are, in fact, calculated in-between weather modifiers and STAB.
Just like stat boosts, type boosts are not applied in link battles.
Obedience
- Main article: Obedience
Badges affect a Pokémon's behavior. Outsider Pokémon over a certain level will refuse to obey the player without the appropriate Badge. In Pokémon Diamond, Pearl, and Platinum and Pokémon: Let's Go, Pikachu! and Let's Go, Eevee!, obedience is determined by the number of Badges, not which specific Badges the player has.
In the anime episode The Problem with Paras, Lacy mentioned this when Ash's Charmeleon refused to obey him.
| Badges by obedience level | |||||||
|---|---|---|---|---|---|---|---|
| Level | Indigo League | Johto League | Hoenn League | Sinnoh League | Unova League | Kalos League | Galar League |
| Up to Lv. 20 | 1 BadgePE | Zephyr BadgeHGSS | Stone BadgeORAS | Trio BadgeBW Basic BadgeB2W2 |
|||
| Up to Lv. 30 | Cascade Badge 2 BadgesPE |
Hive Badge | Knuckle Badge | 2 Badges | Basic BadgeBW Toxic BadgeB2W2 |
Bug Badge | Grass Badge |
| Up to Lv. 40 | 3 BadgesPE | Dynamo BadgeORAS | Insect Badge | Cliff Badge | Water Badge | ||
| Up to Lv. 50 | Rainbow Badge 4 BadgesPE |
Fog Badge | Heat Badge | 4 Badges | Bolt Badge | Rumble Badge | Fire Badge |
| Up to Lv. 60 | 5 BadgesPE | Balance BadgeORAS | Quake Badge | Plant Badge | Fighting BadgeSw Ghost BadgeSh | ||
| Up to Lv. 70 | Marsh Badge 6 BadgesPE |
Storm BadgeGSC Mineral BadgeHGSS |
Feather Badge | 6 Badges | Jet Badge | Voltage Badge | Fairy Badge |
| Up to Lv. 80 | 7 BadgesPE | Mind BadgeORAS | Freeze BadgeBW Legend BadgeB2W2 |
Fairy Badge | Rock BadgeSw Ice BadgeSh | ||
| Up to Lv. 90 | Psychic Badge | Dark Badge | |||||
| All Pokémon | Earth Badge 8 BadgesPE |
Rising Badge | Rain Badge | 8 Badges | Legend BadgeBW Wave BadgeB2W2 |
Iceberg Badge | Dragon Badge |
HM moves
- Main article: HM
While Trainers can teach their Pokémon HM moves and use them in battle, Trainers require the appropriate Badge to use them in the overworld in Generations I through IV as well as Generation VI. In Generation V only, Badges are not needed to use HM moves in the overworld.
Poké Mart stock
From Generation IV onwards, the number of Badges a Trainer possesses affects which items Poké Marts sell. The more Badges, the more items that become available for purchase, with more expensive items generally appearing after more Badges are obtained.
| Generation IV | |||||||
|---|---|---|---|---|---|---|---|
|
| ||||||
|
| ||||||
|
| ||||||
|
| ||||||
|
| ||||||
|
| ||||||
|
| ||||||
|
| ||||||
|
| ||||||
|
|||||||
| Generation V | |||||||
|---|---|---|---|---|---|---|---|
|
| ||||||
|
| ||||||
|
| ||||||
|
| ||||||
|
| ||||||
|
| ||||||
|
| ||||||
|
| ||||||
|
| ||||||
|
|||||||
| Generation VI | |||||||
|---|---|---|---|---|---|---|---|
|
| ||||||
|
| ||||||
|
| ||||||
|
| ||||||
|
| ||||||
|
| ||||||
|
| ||||||
|
| ||||||
|
| ||||||
|
|||||||
| Let's Go, Pikachu! and Let's Go, Eevee! | |||||||
|---|---|---|---|---|---|---|---|
|
| ||||||
|
| ||||||
|
| ||||||
|
| ||||||
|
| ||||||
|
| ||||||
|
| ||||||
|
| ||||||
|
| ||||||
|
| ||||||
|
| ||||||
|
| ||||||
|
| ||||||
|
| ||||||
|
| ||||||
| Generation VIII | |||||||
|---|---|---|---|---|---|---|---|
|
| ||||||
|
| ||||||
|
| ||||||
|
| ||||||
|
| ||||||
|
| ||||||
|
| ||||||
|
| ||||||
|
| ||||||
|
|||||||
Pokémon League
In the games, in order to enter the Pokémon League and challenge the Elite Four and Champion, the player must have all eight Badges from that region (or in the case of the Indigo Plateau, either Kanto or Johto). In Unova, Kalos, and Generation I, III, and VII Kanto, Badges are checked individually through a series of Badge Check Gates; in Hoenn, Sinnoh, and Generation II/IV Kanto, Badges are checked all at once.
List of Badges
Indigo League
In Generation IV, these badges do not affect stats.
| Indigo League | ||||||||||||||||||||||||||||||||||||||||||||||
|---|---|---|---|---|---|---|---|---|---|---|---|---|---|---|---|---|---|---|---|---|---|---|---|---|---|---|---|---|---|---|---|---|---|---|---|---|---|---|---|---|---|---|---|---|---|---|
| Badges: 8 | Region: Kanto | |||||||||||||||||||||||||||||||||||||||||||||
| ||||||||||||||||||||||||||||||||||||||||||||||
| ||||||||||||||||||||||||||||||||||||||||||||||
| ||||||||||||||||||||||||||||||||||||||||||||||
| ||||||||||||||||||||||||||||||||||||||||||||||
| ||||||||||||||||||||||||||||||||||||||||||||||
| ||||||||||||||||||||||||||||||||||||||||||||||
| ||||||||||||||||||||||||||||||||||||||||||||||
| ||||||||||||||||||||||||||||||||||||||||||||||
Johto League
In Generation IV, these Badges do not affect stats.
| Johto League | ||||||||||||||||||||||||||||||||||||||||||||||
|---|---|---|---|---|---|---|---|---|---|---|---|---|---|---|---|---|---|---|---|---|---|---|---|---|---|---|---|---|---|---|---|---|---|---|---|---|---|---|---|---|---|---|---|---|---|---|
| Badges: 8 | Region: Johto | |||||||||||||||||||||||||||||||||||||||||||||
| ||||||||||||||||||||||||||||||||||||||||||||||
| ||||||||||||||||||||||||||||||||||||||||||||||
| ||||||||||||||||||||||||||||||||||||||||||||||
| ||||||||||||||||||||||||||||||||||||||||||||||
| ||||||||||||||||||||||||||||||||||||||||||||||
| ||||||||||||||||||||||||||||||||||||||||||||||
| ||||||||||||||||||||||||||||||||||||||||||||||
| ||||||||||||||||||||||||||||||||||||||||||||||
Hoenn League
In Generation VI, these Badges do not affect stats.
| Hoenn League | ||||||||||||||||||||||||||||||||||||||||||||||
|---|---|---|---|---|---|---|---|---|---|---|---|---|---|---|---|---|---|---|---|---|---|---|---|---|---|---|---|---|---|---|---|---|---|---|---|---|---|---|---|---|---|---|---|---|---|---|
| Badges: 8 | Region: Hoenn | |||||||||||||||||||||||||||||||||||||||||||||
| ||||||||||||||||||||||||||||||||||||||||||||||
| ||||||||||||||||||||||||||||||||||||||||||||||
| ||||||||||||||||||||||||||||||||||||||||||||||
| ||||||||||||||||||||||||||||||||||||||||||||||
| ||||||||||||||||||||||||||||||||||||||||||||||
| ||||||||||||||||||||||||||||||||||||||||||||||
| ||||||||||||||||||||||||||||||||||||||||||||||
| ||||||||||||||||||||||||||||||||||||||||||||||
Sinnoh League
When Badges are touched in the games, they play a single note, and will make a musical C major scale when all eight Badges are collected. When a player rubs the stylus across them numerous times to polish them (as they gradually tarnish), they will begin to shine. This process can be continued until four sparkles are visible. The musical notes are also the most clearly defined and accurately tuned when there are four sparkles.
Unlike other generations, it is the number of Badges that determines which outsider Pokémon obey the Trainer, rather than the Badges themselves (this distinction is important owing to the fact that the order of obtaining the Cobble, Fen, and Relic Badges can differ). For every second Badge the maximum level of obeying Pokémon increases (0 Badges—level 10; 2 Badges—level 30; 4 Badges—level 50; 6 Badges—level 70; 8 Badges—level 100). The number of Badges collected also affects the items that the player can purchase in Poké Marts.
| Sinnoh League | ||||||||||||||||||||||||||||||||||||||||||||||
|---|---|---|---|---|---|---|---|---|---|---|---|---|---|---|---|---|---|---|---|---|---|---|---|---|---|---|---|---|---|---|---|---|---|---|---|---|---|---|---|---|---|---|---|---|---|---|
| Badges: 8 | Region: Sinnoh | |||||||||||||||||||||||||||||||||||||||||||||
| ||||||||||||||||||||||||||||||||||||||||||||||
| ||||||||||||||||||||||||||||||||||||||||||||||
| ||||||||||||||||||||||||||||||||||||||||||||||
| ||||||||||||||||||||||||||||||||||||||||||||||
| ||||||||||||||||||||||||||||||||||||||||||||||
| ||||||||||||||||||||||||||||||||||||||||||||||
| ||||||||||||||||||||||||||||||||||||||||||||||
| ||||||||||||||||||||||||||||||||||||||||||||||
Unova League
Unlike previous Badges, the level at which traded Pokémon will obey the player goes up by ten per Badge, rather than the previous system of rising twenty levels after every even-numbered Badge. They can be polished like Sinnoh's Badges, although they do not make different notes when polished at the same level. Instead, the picture of the Gym Leader from whom the Badge was earned gets grayer.
In Black 2 and White 2 the Badges no longer dull over a period of time, and Sinnoh's notes were reintegrated into the Badge screen.
Although Badges are not required to use any of the HMs outside of battle, some HMs cannot be obtained until after obtaining certain Badges. However, as they are not required, traded Pokémon that have learned an HM move in another game can still use the HM move before acquiring any Badges.
Black and White
| Unova League | ||||||||||||||||||||||||||||||||||||||||||||||
|---|---|---|---|---|---|---|---|---|---|---|---|---|---|---|---|---|---|---|---|---|---|---|---|---|---|---|---|---|---|---|---|---|---|---|---|---|---|---|---|---|---|---|---|---|---|---|
| Badges: 8 | Region: Unova | |||||||||||||||||||||||||||||||||||||||||||||
| ||||||||||||||||||||||||||||||||||||||||||||||
| ||||||||||||||||||||||||||||||||||||||||||||||
| ||||||||||||||||||||||||||||||||||||||||||||||
| ||||||||||||||||||||||||||||||||||||||||||||||
| ||||||||||||||||||||||||||||||||||||||||||||||
| ||||||||||||||||||||||||||||||||||||||||||||||
| ||||||||||||||||||||||||||||||||||||||||||||||
| ||||||||||||||||||||||||||||||||||||||||||||||
Black 2 and White 2
| Unova League | ||||||||||||||||||||||||||||||||||||||||||||||
|---|---|---|---|---|---|---|---|---|---|---|---|---|---|---|---|---|---|---|---|---|---|---|---|---|---|---|---|---|---|---|---|---|---|---|---|---|---|---|---|---|---|---|---|---|---|---|
| Badges: 8 | Region: Unova | |||||||||||||||||||||||||||||||||||||||||||||
| ||||||||||||||||||||||||||||||||||||||||||||||
| ||||||||||||||||||||||||||||||||||||||||||||||
| ||||||||||||||||||||||||||||||||||||||||||||||
| ||||||||||||||||||||||||||||||||||||||||||||||
| ||||||||||||||||||||||||||||||||||||||||||||||
| ||||||||||||||||||||||||||||||||||||||||||||||
| ||||||||||||||||||||||||||||||||||||||||||||||
| ||||||||||||||||||||||||||||||||||||||||||||||
Kalos League
| Kalos League | ||||||||||||||||||||||||||||||||||||||||||||||
|---|---|---|---|---|---|---|---|---|---|---|---|---|---|---|---|---|---|---|---|---|---|---|---|---|---|---|---|---|---|---|---|---|---|---|---|---|---|---|---|---|---|---|---|---|---|---|
| Badges: 8 | Region: Kalos | |||||||||||||||||||||||||||||||||||||||||||||
| ||||||||||||||||||||||||||||||||||||||||||||||
| ||||||||||||||||||||||||||||||||||||||||||||||
| ||||||||||||||||||||||||||||||||||||||||||||||
| ||||||||||||||||||||||||||||||||||||||||||||||
| ||||||||||||||||||||||||||||||||||||||||||||||
| ||||||||||||||||||||||||||||||||||||||||||||||
| ||||||||||||||||||||||||||||||||||||||||||||||
| ||||||||||||||||||||||||||||||||||||||||||||||
Galar League
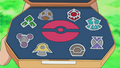
Unlike previous Badges, these Badges are not pins or kept in a case, but pieces of a gold-colored medallion placed into a metal ring to stay in place. Once all Badges are set, the completed reverse side shows the Gym Challenge logo.
| Galar League | ||||||||||||||||||||||||||||||||||||||||||||||
|---|---|---|---|---|---|---|---|---|---|---|---|---|---|---|---|---|---|---|---|---|---|---|---|---|---|---|---|---|---|---|---|---|---|---|---|---|---|---|---|---|---|---|---|---|---|---|
| Badges: 10 | Region: Galar | |||||||||||||||||||||||||||||||||||||||||||||
| ||||||||||||||||||||||||||||||||||||||||||||||
| ||||||||||||||||||||||||||||||||||||||||||||||
| ||||||||||||||||||||||||||||||||||||||||||||||
| ||||||||||||||||||||||||||||||||||||||||||||||
| ||||||||||||||||||||||||||||||||||||||||||||||
| ||||||||||||||||||||||||||||||||||||||||||||||
| ||||||||||||||||||||||||||||||||||||||||||||||
| ||||||||||||||||||||||||||||||||||||||||||||||
| ||||||||||||||||||||||||||||||||||||||||||||||
| ||||||||||||||||||||||||||||||||||||||||||||||
Orange League
These sets of Badges only appear in the anime. Trainers must receive these Badges from the Orange Crew.
| Orange League | ||||||||||||||||||||||||||||||||||||||||||||||
|---|---|---|---|---|---|---|---|---|---|---|---|---|---|---|---|---|---|---|---|---|---|---|---|---|---|---|---|---|---|---|---|---|---|---|---|---|---|---|---|---|---|---|---|---|---|---|
| Badges: 4 | Region: Orange Archipelago | |||||||||||||||||||||||||||||||||||||||||||||
| ||||||||||||||||||||||||||||||||||||||||||||||
| ||||||||||||||||||||||||||||||||||||||||||||||
| ||||||||||||||||||||||||||||||||||||||||||||||
| ||||||||||||||||||||||||||||||||||||||||||||||
In spin-off games
Pokémon GO
- Main article: Gym (GO) → Gym Badges
Pokémon Masters
In Pokémon Masters, players must earn five badges from PML Leaders across Pasio before they can qualify for the Pokémon Masters League tournament. According to Erika, each PML Badge is handed out by more than one different PML Leader, though the identities of these Leaders are unknown.
| Pokémon Masters League | ||||||||||||||||||||||||||||||||||||||||||||||
|---|---|---|---|---|---|---|---|---|---|---|---|---|---|---|---|---|---|---|---|---|---|---|---|---|---|---|---|---|---|---|---|---|---|---|---|---|---|---|---|---|---|---|---|---|---|---|
| Badges: 5 | Region: Pasio | |||||||||||||||||||||||||||||||||||||||||||||
| ||||||||||||||||||||||||||||||||||||||||||||||
| ||||||||||||||||||||||||||||||||||||||||||||||
| ||||||||||||||||||||||||||||||||||||||||||||||
| ||||||||||||||||||||||||||||||||||||||||||||||
| ||||||||||||||||||||||||||||||||||||||||||||||
In the anime

In the anime, Badges signify that a Trainer has succeeded at a particular Gym. If a Trainer earns eight Gym Badges in one region, they are eligible to enter that region's Pokémon League Conference.
Trainers do not necessarily have to win a battle with the Gym Leader in order to earn a Badge, and Gym Leaders can be quite lenient about giving out Badges. For example, Ash was awarded several Badges during the original series because of his kind heart and determination; Misty has berated Ash on several occasions because he did not properly earn all of his Kanto Badges, arguing that he really only earned three Badges (the Thunder, Soul, and Volcano Badges) and the other five Badges were given to him on technicalities. In Flint Sparks the Fire!, the Sunyshore Gym was shown to be handing out free Beacon Badges. The Orange Crew all have entire Gym matches devoted to unconventional battling styles.
In The Problem with Paras, Lacy mentioned that some Pokémon will not obey their Trainer if they do not respect them, due to their Trainer lacking in Badges. For example, after evolving into Charmeleon, Ash's Charmander began to disobey him, which was only exacerbated upon evolving again into Charizard.
In Kalos, due to Clemont's perception of an ideal challenger of the Lumiose Gym, he programmed the Clembot—the substitute Gym Leader—to throw out challengers who did not have four Kalos League Badges. As a result, when Ash attempted to challenge the Gym shortly after arriving in the Kalos region, Clembot acted according to its programming and threw him out. After Clemont reprogrammed the Clembot, he removed the Badge restriction, but Ash indicated he would still collect four Badges before challenging Clemont himself at the Gym.
Many fellow Trainers that Ash has encountered have been shown to have Badges that do not exist in the games, such as Gary earning ten Badges in Kanto, indicating that there are more than eight Gyms in each region. Other Badges observed in the anime which do not correspond to known Badges suggest that there are at least nine Gyms in Hoenn, 11 in Sinnoh, 14 in Unova, and 11 in Kalos. Despite this, Ash's Badge case has frequently had indents specifically shaped for the Badges that appear in the games. However, Trainers only need eight to qualify
It is also implied in the anime that a Gym Badge serves as a primary ID for a Gym Leader (and probably a secondary ID for a Trainer). Brock has used his Boulder Badge to identify himself in order to clear his name from any accusations of stealing parts from a machine shop in Cerulean City.
Additionally, Badges are not the only way to enter the Indigo Plateau Conference. Pokémon Tech, a boarding school for Pokémon Trainers, is an expensive school for children, where moving up a grade is the equivalent of winning two Gym Badges. Upon graduation, students may immediately apply for entry in Kanto's League Conference. Alternatively, Trainers can take the Pokémon League Admissions Exam, which awards a single Badge that grants entry to the Indigo Plateau Conference on its own; it is convenient for people whose age, health, or work keeps them from traveling around to collect Badges.
Alternative Badges in the anime

So far, Ash has only obtained Badges that are obtainable in the games, with the notable exception of those he obtained in the Orange Archipelago. Several unknown Badges can be seen at the beginning of Mystery at the Lighthouse, while many Trainers Ash has met have had Badges that differ from those that are obtainable in the games. This suggests that there are Gyms in locations which do not appear in the games and therefore more than eight Gyms in each region. Trainers with Badges not seen in the games include:
Gary
Gary acquired more than the standard eight Kanto League Badges, thus leading to confusion as to whether or not there is a fixed number of Badges that can be given out in a particular region. By The Battle of the Badge, he is shown to have at least ten Badges, only three of which correspond to known Kanto Badges, suggesting there are at least fifteen Gyms in Kanto. Incidentally, this would provide one Gym for each of the 15 types at the time.
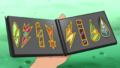
Otoshi
In addition, before Ash competes in the Indigo League, a Trainer named Otoshi is shown in the episode Bad to the Bone; he owns eight Badges, but only shares four in common with Ash; later in the episode another Trainer is seen with eight other completely different Badges altogether. In total, Ash, Gary, Otoshi, and the other Trainer display 27 different types of Badges, so there must be at least this number of Gyms in Kanto at the time, assuming they are all from the same region. However, Sakura, a Trainer on her journey, was shown to be collecting Badges from both Kanto and Johto, so it is unclear what the specific rules are for competing in championship tournaments.
On closer inspection, Otoshi's Badges each look somewhat similar to Ash's Badges and only differ in size and shape. Similarly, what can be identified as a Soul Badge, Thunder Badge, Marsh Badge, and Volcano Badge slide across the screen every time his Marowak knocks out a Pokémon in his flashback. His Badges are in this order from upper-left to bottom-right: Thunder, ? (Rainbow), Cascade, Volcano, Marsh, Soul, Boulder, and Earth. This hints that there may be different varieties of the same Badge.
Morrison
At the Hoenn Pokémon League Championship in Saved by the Beldum!, Morrison was shown to have an eighth Badge different from Ash's, suggesting that there are at least nine Gyms in Hoenn.
Mismagius
In Ash's dream in Malice in Wonderland, Ash has many Badges that haven't been on-screen before, as well as some older Badges. Considering it was only a dream, it is possible that some of the Badges seen don't exist at all.
Barry
In Barry's Busting Out All Over!, Barry was shown to have three Badges. While the Forest Badge and the Mine Badge are no different, Barry has a third Badge that is different from the eight Sinnoh Badges. In Fighting Ire with Fire!, Barry was revealed to have obtained eight Badges already, two more of which are different. This means that there are at least 11 Gyms in Sinnoh. The same unknown red Badge that Barry owns is shown at the end of An Old Family Blend!.
Nando
In Last Call, First Round!, Nando was revealed to have acquired seven Badges, two of which are unknown. These two Badges are the same as two of Barry's unknown Badges.
Trip
In Ash Versus the Champion!, Trip revealed all five of the Badges he had collected, three of which are unknown and not seen in-game.
Cameron
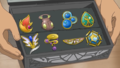
In Goodbye, Junior Cup - Hello Adventure!, Cameron revealed all seven of the Badges he collected, four of which are known and three of which are unknown. Two of those unknown Badges are the same as Trip's. Since there are 10 Badges in Unova in the games (due to two of them being replaced in Black 2 and White 2), this means that there are at least 14 Gyms in Unova.
Sawyer
In A Fashionable Battle!, Sawyer stated that he had earned one Badge. Later, in From A to Z!, he was revealed to have earned four more Badges, including three unknown ones, respectively resembling a flame, three bubbles, and a pair of wings. This means there are at least 11 Gyms in Kalos.
Gallery of unidentified Badges
- Gary Ten Badges.png
Gary's ten Badges

Otoshi's eight Badges
An unnamed Trainer's eight unidentified Badges

Morrison's eighth Badge
Ash's Badges in the dream
Barry's eight Badges
Nando's seven Badges

Trip's five Badges
Cameron's Badges
Sawyer's Badges


Non-Gym Badges
Several Badges have appeared in the anime that are not official Gym Badges.
In the Indigo League, Trainers can take the Pokémon League Admissions Exam, which awards a single Badge that can grant them entry into Indigo Plateau Conference on its own, thus replacing the requirement to collect Gym Badges. It is convenient for people whose age, health, or work keeps them from traveling around to collect Badges.
During the closing ceremony of Indigo Plateau Conference, all participants are awarded the Pokémon League Badge. However, it is only referred to as a Badge in the dub.
For helping the band of Diglett thieves with their facade, the mayor of Diglett Village awarded Ash and his friends with the Silver Wing Badge.
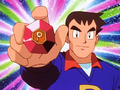
The Trainers who defeat Ryuki, the Leader of the unofficial Kantonian Gym, get a novelty Badge featuring his face.
Pokémon League Admissions Exam Badge
Pokémon League Badge

Silver Wing Badge

Kantonian Gym Badge

In the manga
In the Pokémon Adventures manga

In Pokémon Adventures, Badges have mystical and mysterious qualities that can somehow increase the power of the Pokémon owned by the Trainer who wields the Badges, just as the Boulder Badge increases the Pokémon's Attack stat in the games. In addition, Badges that don't allow higher leveled Pokémon to obey, such as the Soul Badge, do indeed allow the wearer to control even Legendary Pokémon such as Articuno.
It is not known what sort of material Badges are made of, but it has been confirmed that the Gym Leaders each own a Badge made of different material than the kind given out to normal Trainers, as that is how the Masked Man's identity was narrowed down to among the 16 known Gym Leaders when Aibo scraped off a part of his hidden Badge with his Scratch attack.
Team Rocket used seven Kanto Gym Badges to power a machine that combined Articuno, Zapdos, and Moltres into a single beast. The machine also had a secret slot for the Earth Badge, which Lance manipulated to further his own goals by turning Cerise Island into a giant Badge energy amplifier to fuel Lugia with.
Badges are not required to enter the Pokémon League tournament; however, without eight Badges corresponding to their home region, a Trainer must battle their way in to qualify for the finals. This ruling was introduced during a Pokémon Association meeting in the Gold, Silver & Crystal arc, to give Trainers incentive to challenge Gym Leaders, and remove the perception of Badges being seen as tools for evil. In the Black & White arc, a last-minute advancement of the date of the Unova League tournament also restricted the eligible challengers to those with all eight of the region's Badges.
Four main characters have actively been collecting Gym Badges: Red, who managed to collect seven Kanto Badges (missing the Earth Badge); and Sapphire, Platinum and Black, all of whom managed to collect all of the Badges in their respective regions. Other characters have also gathered Badges, such as Cheren and Silver.
In The Electric Tale of Pikachu manga


In The Electric Tale of Pikachu, Badges work in a way similar to the anime, but there are some minor differences. All Badges have the Pokémon League logo printed on them.
In addition, Pokémon Trainers are organized by class, much like Pokémon Tech ("Class D", "Class C", and so forth). Badges increase the rank of the Trainer who owns them. Ash once believed that he could increase his rank by capturing rare wild Pokémon, but this was not the case.
Ash has obtained eight Badges from Kanto, but only three (Boulder, Cascade, Earth) actually matching known Badges, and another three lookalike Badges (resembling the Soul, Marsh, and Volcano). Ash also obtained four Badges from the Orange Islands, but none of them match any known Badges.
In Pokémon Live!
In Pokémon Live!, Giovanni offers the Diamond Badge to Trainers who defeat his MechaMew2. He gives Ash the Diamond Badge prior to the battle, believing that Ash will never win. However, Ash defeats Giovanni with Mewtwo's assistance, proceeding to give the Diamond Badge to Misty as a belated birthday gift. Pokémon Live! is not in continuity with the anime, and the Diamond Badge is not mentioned elsewhere in the series; however, it is the inspiration for DiamondShipping's name.
In the TCG
This listing is of cards mentioning or featuring Gym Badges in the Pokémon Trading Card Game.
Trivia
- In the Pokémon Project Studio Red and Blue computer programs, the Soul and Marsh Badges' names are reversed, with the pink heart-shaped Badge being the Marsh Badge and the yellow circular Badge being the Soul Badge. Several anime and game handbooks also make this same switch. This appears to be because of an initial error in naming the Badges in Pokémon Red and Blue. A soul would be more attuned to psychic abilities and one finds poisonous gases in a marsh.
- Official artwork of the Earth Badge (featured in media such as Pokémon Project Studio Red and Blue and Extreme Pokémon: The Guide for the Ultimate Fan) differs significantly from its appearance in the games, anime, manga, and TCG. The design in its official artwork resembles a plant, whereas its other design resembles a feather.
- The Orange League is the only known Pokémon League with fewer than eight Badges.
- It is possible to obtain certain Badges in a non-linear order. The most notable example of this are the Badges in the Kanto region.
- In Generation II and IV, the Badges can be obtained in virtually any order, although in Generation IV the player cannot obtain the Earth Badge until obtaining the other seven.
- In Generation VII, the Boulder and Cascade Badges must each be obtained to progress to the next Gym, and Viridian Gym (Earth Badge) is closed until the player has obtained all seven other Badges. Other than these restrictions, the Badges can be obtained in any order.
- In Generation III, the only Gym that can be skipped entirely is the Fortree Gym. The player can get to the point in the game where the guards at the Pokémon League check to see if the player has received all eight Badges. This is not the case with the Dewford Gym as it must be defeated in order for the player to fight Norman, though it can be put off until after Flannery has been defeated.
- In Pokémon FireRed and LeafGreen, the Earth Badge is the only Badge that doesn't allow the use of an HM outside of battle, while in Pokémon HeartGold and SoulSilver it is the only Kanto Badge that does.
- The Rainbow Badge's colors correspond with the colors of all the other Kanto Badges, explaining the colors in its design.
- In the code of the Generation I games, items named for each Badge can be found. The items named BoulderBadge and CascadeBadge allow players to throw bait and rocks, respectively, at Pokémon outside of the Safari Zone when used in battle. The other "Badge Items" have no known purpose, simply displaying Professor Oak's "This isn't the time to use that!" message when trying to use them.
- The Basic Badge is the only badge to be given out by multiple gyms.
- The Rising Badge is the only Badge the player receives outside of its respective Gym.
- The Legend Badge is the only Badge from a completed generation of games that has not appeared in the anime.
- When Ash initially got his Unova Badge case in Minccino—Neat and Tidy!, the slots in it were made to fit each Badge in Pokémon Black and White, but they later became circular to accommodate the Toxic Badge.
- Ash has not won a Badge in the same episode as his first encounter with its respective Gym Leader since earning the Dynamo Badge from Wattson in Watts with Wattson?.
- In Alola, Gyms and Badges are not present. Instead, the player receives Z-Crystals for completing their trials and grand trials, which replace Badges on the save file and for unlocking new items at the Poké Mart (the latter for Z-Crystals from trials only). Additionally, grand trial completion Stamps are used to ensure obedience.
- However, in Pokémon Ultra Sun and Ultra Moon, the player can receive an unofficial Badge known as the Surge Badge by defeating the leader of the Kantonian Gym in Malie City. Although it is purely a novelty item and serves no practical purpose, its design and Japanese name are direct references to the Thunder Badge.
Name origin
- With the exception of the Rainbow and Rising Badges, all Badges in Kanto and Johto were renamed for audiences outside of Japan. All Hoenn League Badges keep their Japanese names, as do Sinnoh League Badges, with the exception of the Icicle Badge, due to its name originally being the Glacier Badge in Japanese. In English, the Glacier Badge is the Mahogany Gym's Badge, which was originally called the Ice Badge in Japanese. This naming conflict continued in Generation V, with the Icirrus Gym's Badge being the Icicle Badge in Japanese, where it was renamed the Freeze Badge in English.
- The Japanese names of the Kanto Badges are all colors, following the color pattern for the town and city names.
- The Trio and Insect Badges are the first Badges since the Glacier Badge in Generation II to get renamed in the English version of the games, without there being a localization conflict between the Japanese and English versions.
- All Badges in Galar are named directly after their corresponding types.
- Consequentially, both Galar and Kalos have a Fairy Badge (フェアリーバッジ), making them the only Badges to share a name with each other in both English and Japanese.
- The Storm Badge's English name may be derived from the lucha libre wrestler Fray Tormenta—also the inspiration for Crasher Wake—whose name translates as "Friar Storm".
In other languages
| |||||||||||||||||||||||||||||||||||||||||||||||||||||||||||||||||||||||||||||
See also
References

|
The Pokémon League | 
| |
|---|---|---|---|
| Participation Trainer • Battle • Gym Leaders Gyms • Badges • Referee Championship matches Elite Four • Orange League Champion League Pokémon League Conferences Indigo • Silver • Ever Grande • Lily of the Valley Vertress • Lumiose • Manalo |
Regional Pokémon Leagues Indigo • Orange* • Johto • Hoenn • Sinnoh Unova • Kalos • Alola • Galar • Paldea Areas of jurisdiction Pokémon League Reception Gate • Hall of Fame Palace of Victory • Cerulean Cave Others Pokémon Association • PIA World Coronation Series (Masters Eight Tournament) | ||
| This item article is part of Project ItemDex, a Bulbapedia project that aims to write comprehensive articles on all items. |