Battle Pyramid: Difference between revisions
mNo edit summary |
m (→Wild Pokémon: Use blacklinks for better contrast) |
||
| (20 intermediate revisions by 9 users not shown) | |||
| Line 26: | Line 26: | ||
===Restrictions=== | ===Restrictions=== | ||
No Pokémon may enter if it is holding an item. Any Pokémon can be entered for battle, except for the following Pokémon: | No Pokémon may enter if it is holding an item. Any Pokémon can be entered for battle, except for the following Pokémon: | ||
{{-}} | |||
{{ResponsiveList/h|frontier}} | |||
{{Pokeli|150|Mewtwo|msp=MSP/3}} | |||
{{Pokeli|151|Mew|msp=MSP/3}} | |||
| | {{Pokeli|249|Lugia|msp=MSP/3}} | ||
{{Pokeli|250|Ho-Oh|msp=MSP/3}} | |||
| | {{Pokeli|251|Celebi|msp=MSP/3}} | ||
{{Pokeli|382|Kyogre|msp=MSP/3}} | |||
| | {{Pokeli|383|Groudon|msp=MSP/3}} | ||
{{Pokeli|384|Rayquaza|msp=MSP/3}} | |||
| | {{Pokeli|385|Jirachi|msp=MSP/3}} | ||
{{Pokeli|386|Deoxys|msp=MSP/3}} | |||
| | {{Pokeli|Egg|Egg|msp=MSP/3}} | ||
{{ResponsiveList/f}} | |||
| | |||
| | |||
| | |||
| | |||
| | |||
===Wild Pokémon=== | ===Wild Pokémon=== | ||
| Line 68: | Line 47: | ||
[[Wild Pokémon]] are encountered within the Battle Pyramid, with strategies differing depending on how many floors the player has ventured through. Several of the wild Pokémon have high base Speed, making them difficult to [[escape]] from. A {{tc|Hex Maniac}} next to the PC will tell the player what to expect in their next attempt. The tactics used by the wild Pokémon will progress as follows (note that after the list has been completed, it will restart from the beginning): | [[Wild Pokémon]] are encountered within the Battle Pyramid, with strategies differing depending on how many floors the player has ventured through. Several of the wild Pokémon have high base Speed, making them difficult to [[escape]] from. A {{tc|Hex Maniac}} next to the PC will tell the player what to expect in their next attempt. The tactics used by the wild Pokémon will progress as follows (note that after the list has been completed, it will restart from the beginning): | ||
{| class="roundy" style="background: #{{frontier color light}}; border: 3px solid #{{frontier color}}" | {| class="roundy blacklinks" style="background: #{{frontier color light}}; border: 3px solid #{{frontier color}}" | ||
|- | |- | ||
! Category | ! Category | ||
| Line 78: | Line 57: | ||
| style="white-space:nowrap" | I see a shower of sparks…<br>…And in it, I see your POKéMON<br>struggling with paralysis… | | style="white-space:nowrap" | I see a shower of sparks…<br>…And in it, I see your POKéMON<br>struggling with paralysis… | ||
| Pokémon with moves that {{status|paralyze}} | | Pokémon with moves that {{status|paralyze}} | ||
| {{p|Plusle}}, {{p|Minun}}, {{p|Pikachu}}, {{p|Electabuzz}}, {{p|Vileplume}}, {{p|Manectric}}, {{p|Breloom}} and {{p|Jolteon}} | | {{p|Plusle}}, {{p|Minun}}, {{p|Pikachu}}, {{p|Electabuzz}}, {{p|Vileplume}}, {{p|Manectric}}, {{p|Breloom}}, and {{p|Jolteon}} | ||
|- style="background:#{{poison color light}}" | |- style="background:#{{poison color light}}" | ||
| style="text-align:center" | 2 | | style="text-align:center" | 2 | ||
| style="white-space:nowrap" | I see poison…<br>…And, I see your POKéMON suffering<br>from the effects of poison… | | style="white-space:nowrap" | I see poison…<br>…And, I see your POKéMON suffering<br>from the effects of poison… | ||
| Pokémon with moves that {{status|poison}} | | Pokémon with moves that {{status|poison}} | ||
| {{p|Gulpin}}, {{p|Roselia}}, {{p|Butterfree}}, {{p|Seviper}}, {{p|Skarmory}}, {{p|Ludicolo}}, {{p|Crobat}} and {{p|Gengar}} | | {{p|Gulpin}}, {{p|Roselia}}, {{p|Butterfree}}, {{p|Seviper}}, {{p|Skarmory}}, {{p|Ludicolo}}, {{p|Crobat}}, and {{p|Gengar}} | ||
|- style="background:#{{fire color light}}" | |- style="background:#{{fire color light}}" | ||
| style="text-align:center" | 3 | | style="text-align:center" | 3 | ||
| style="white-space:nowrap" | I see bright red flames…<br>…And, I see your POKéMON suffering<br>from burns… | | style="white-space:nowrap" | I see bright red flames…<br>…And, I see your POKéMON suffering<br>from burns… | ||
| Pokémon with moves that {{status|burn}} | | Pokémon with moves that {{status|burn}} | ||
| {{p|Growlithe}}, {{p|Vulpix}}, {{p|Magcargo}}, {{p|Ninetales}}, {{p|Medicham}}, {{p|Weezing}}, {{p|Dusclops}} and {{p|Houndoom}} | | {{p|Growlithe}}, {{p|Vulpix}}, {{p|Magcargo}}, {{p|Ninetales}}, {{p|Medicham}}, {{p|Weezing}}, {{p|Dusclops}}, and {{p|Houndoom}} | ||
|- style="background:#{{status color light}}" | |- style="background:#{{status color light}}" | ||
| style="text-align:center" | 4 | | style="text-align:center" | 4 | ||
| style="white-space:nowrap" | I sense the tremendous pressure of<br>unrequited anger…<br>It is a curse…<br>…And, I see your POKéMON drained of<br>Power Points and having no recourse<br>but to use STRUGGLE… | | style="white-space:nowrap" | I sense the tremendous pressure of<br>unrequited anger…<br>It is a curse…<br>…And, I see your POKéMON drained of<br>Power Points and having no recourse<br>but to use STRUGGLE… | ||
| Pokémon with moves or Abilities that waste | | Pokémon with moves or Abilities that waste [[PP]] | ||
| {{p|Dunsparce}}, {{p|Banette}}, {{p|Misdreavus}}, {{p|Ninetales}}, {{p|Absol}}, {{p|Dusclops}}, {{p|Shedinja}} and {{p|Gengar}} | | {{p|Dunsparce}}, {{p|Banette}}, {{p|Misdreavus}}, {{p|Ninetales}}, {{p|Absol}}, {{p|Dusclops}}, {{p|Shedinja}}, and {{p|Gengar}} | ||
|- style="background:#{{flying color light}}" | |- style="background:#{{flying color light}}" | ||
| style="text-align:center" | 5 | | style="text-align:center" | 5 | ||
| style="white-space:nowrap" | I see POKéMON loftily airborne…<br>…And, I see your POKéMON frustrated<br>by powerless GROUND-type moves… | | style="white-space:nowrap" | I see POKéMON loftily airborne…<br>…And, I see your POKéMON frustrated<br>by powerless GROUND-type moves… | ||
| Pokémon with {{a|Levitate}} | | Pokémon with {{a|Levitate}} | ||
| {{p|Haunter}}, {{p|Chimecho}}, {{p|Solrock}}, {{p|Misdreavus}}, {{p|Claydol}}, {{p|Weezing}}, {{p|Flygon}} and {{p|Gengar}} | | {{p|Haunter}}, {{p|Chimecho}}, {{p|Solrock}}, {{p|Misdreavus}}, {{p|Claydol}}, {{p|Weezing}}, {{p|Flygon}}, and {{p|Gengar}} | ||
|- style="background:#{{tcg psychic color light}}" | |- style="background:#{{tcg psychic color light}}" | ||
| style="text-align:center" | 6 | | style="text-align:center" | 6 | ||
| style="white-space:nowrap" | I sense terrific energy rising from<br>the ground below…<br>…And, I see your POKéMON unable to<br>escape the power's clutches… | | style="white-space:nowrap" | I sense terrific energy rising from<br>the ground below…<br>…And, I see your POKéMON unable to<br>escape the power's clutches… | ||
| Pokémon with {{cat|trapping Abilities}} | | Pokémon with {{cat|trapping Abilities}} | ||
| {{p|Diglett}}, {{p|Trapinch}}, {{p|Wynaut}}, {{p|Wobbuffet}} and {{p|Dugtrio}} | | {{p|Diglett}}, {{p|Trapinch}}, {{p|Wynaut}}, {{p|Wobbuffet}}, and {{p|Dugtrio}} | ||
|- style="background:#{{ice color light}}" | |- style="background:#{{ice color light}}" | ||
| style="text-align:center" | 7 | | style="text-align:center" | 7 | ||
| style="white-space:nowrap" | I see ICE-type POKéMON…<br>…And, I see your POKéMON fighting<br>the freezing effects of ice… | | style="white-space:nowrap" | I see ICE-type POKéMON…<br>…And, I see your POKéMON fighting<br>the freezing effects of ice… | ||
| {{type|Ice}} Pokémon | | {{type|Ice}} Pokémon | ||
| {{p|Glalie}}, {{p|Sneasel}}, {{p|Dewgong}}, {{p|Piloswine}}, {{p|Jynx}}, {{p|Cloyster}}, {{p|Walrein}} and {{p|Lapras}} | | {{p|Glalie}}, {{p|Sneasel}}, {{p|Dewgong}}, {{p|Piloswine}}, {{p|Jynx}}, {{p|Cloyster}}, {{p|Walrein}}, and {{p|Lapras}} | ||
|- style="background:#{{normal color light}}" | |- style="background:#{{normal color light}}" | ||
| style="text-align:center" | 8 | | style="text-align:center" | 8 | ||
| style="white-space:nowrap" | I see a flurry of moves that imperil<br>the user…<br>…And, I see your POKéMON falling<br>to them… | | style="white-space:nowrap" | I see a flurry of moves that imperil<br>the user…<br>…And, I see your POKéMON falling<br>to them… | ||
| Pokémon with {{m|Self-Destruct|Selfdestruct}} or {{m|Explosion}} | | Pokémon with {{m|Self-Destruct|Selfdestruct}} or {{m|Explosion}} | ||
| {{p|Weezing}}, {{p|Electrode}}, {{p|Gengar}}, {{p|Golem}}, {{p|Pineco}}, {{p|Solrock}}, {{p|Forretress}} and {{p|Shiftry}} | | {{p|Weezing}}, {{p|Electrode}}, {{p|Gengar}}, {{p|Golem}}, {{p|Pineco}}, {{p|Solrock}}, {{p|Forretress}}, and {{p|Shiftry}} | ||
|- style="background:#{{psychic color light}}" | |- style="background:#{{psychic color light}}" | ||
| style="text-align:center" | 9 | | style="text-align:center" | 9 | ||
| style="white-space:nowrap" | I see PSYCHIC-type POKéMON…<br>…And, I see your POKéMON in torment<br>from PSYCHIC moves… | | style="white-space:nowrap" | I see PSYCHIC-type POKéMON…<br>…And, I see your POKéMON in torment<br>from PSYCHIC moves… | ||
| {{type|Psychic}} Pokémon | | {{type|Psychic}} Pokémon | ||
| {{p|Wobbuffet}}, {{p|Metang}}, {{p|Exeggutor}}, {{p|Slowking}}, {{p|Xatu}}, {{p|Alakazam}}, {{p|Starmie}} and {{p|Espeon}} | | {{p|Wobbuffet}}, {{p|Metang}}, {{p|Exeggutor}}, {{p|Slowking}}, {{p|Xatu}}, {{p|Alakazam}}, {{p|Starmie}}, and {{p|Espeon}} | ||
|- style="background:#{{rock color light}}" | |- style="background:#{{rock color light}}" | ||
| style="text-align:center" | 10 | | style="text-align:center" | 10 | ||
| style="white-space:nowrap" | I see ROCK-type POKéMON…<br>…And, I see your POKéMON suffering<br>from ROCK moves… | | style="white-space:nowrap" | I see ROCK-type POKéMON…<br>…And, I see your POKéMON suffering<br>from ROCK moves… | ||
| {{type|Rock}} Pokémon | | {{type|Rock}} Pokémon | ||
| {{p|Golem}}, {{p|Steelix}}, {{p|Omastar}}, {{p|Lunatone}}, {{p|Shuckle}}, {{p|Armaldo}}, {{p|Cradily}} and {{p|Aerodactyl}} | | {{p|Golem}}, {{p|Steelix}}, {{p|Omastar}}, {{p|Lunatone}}, {{p|Shuckle}}, {{p|Armaldo}}, {{p|Cradily}}, and {{p|Aerodactyl}} | ||
|- style="background:#{{fighting color light}}" | |- style="background:#{{fighting color light}}" | ||
| style="text-align:center" | 11 | | style="text-align:center" | 11 | ||
| style="white-space:nowrap" | I see FIGHTING-type POKéMON…<br>…And, I see your POKéMON pummeled<br>by FIGHTING moves… | | style="white-space:nowrap" | I see FIGHTING-type POKéMON…<br>…And, I see your POKéMON pummeled<br>by FIGHTING moves… | ||
| {{type|Fighting}} Pokémon | | {{type|Fighting}} Pokémon | ||
| {{p|Poliwrath}}, {{p|Hariyama}}, {{p|Breloom}}, {{p|Medicham}}, {{p|Hitmonchan}}, {{p|Hitmonlee}}, {{p|Heracross}} and {{p|Machamp}} | | {{p|Poliwrath}}, {{p|Hariyama}}, {{p|Breloom}}, {{p|Medicham}}, {{p|Hitmonchan}}, {{p|Hitmonlee}}, {{p|Heracross}}, and {{p|Machamp}} | ||
|- style="background:#{{unknown color light}}" | |- style="background:#{{unknown color light}}" | ||
| style="text-align:center" | 12 | | style="text-align:center" | 12 | ||
| style="white-space:nowrap" | RAIN DANCE… SUNNY DAY…<br>SANDSTORM… HAIL…<br>I see POKéMON that become stronger<br>with the weather…<br>…And, I see your POKéMON confounded<br>by different types of moves… | | style="white-space:nowrap" | RAIN DANCE… SUNNY DAY…<br>SANDSTORM… HAIL…<br>I see POKéMON that become stronger<br>with the weather…<br>…And, I see your POKéMON confounded<br>by different types of moves… | ||
| Pokémon with moves that alter the [[weather]] | | Pokémon with moves that alter the [[weather]] | ||
| {{p|Quagsire}}, {{p|Tropius}}, {{p|Pupitar}}, {{p|Lapras}}, {{p|Cacturne}}, {{p|Flareon}}, {{p|Walrein}} and {{p|Gyarados}} | | {{p|Quagsire}}, {{p|Tropius}}, {{p|Pupitar}}, {{p|Lapras}}, {{p|Cacturne}}, {{p|Flareon}}, {{p|Walrein}}, and {{p|Gyarados}} | ||
|- style="background:#{{bug color light}}" | |- style="background:#{{bug color light}}" | ||
| style="text-align:center" | 13 | | style="text-align:center" | 13 | ||
| style="white-space:nowrap" | I see BUG-type POKéMON…<br>…And, I see your POKéMON suffering<br>from different kinds of attacks… | | style="white-space:nowrap" | I see BUG-type POKéMON…<br>…And, I see your POKéMON suffering<br>from different kinds of attacks… | ||
| {{type|Bug}} Pokémon | | {{type|Bug}} Pokémon | ||
| {{p|Pineco}}, {{p|Shuckle}}, {{p|Venomoth}}, {{p|Scizor}}, {{p|Heracross}}, {{p|Forretress}}, {{p|Armaldo}} and {{p|Shedinja}} | | {{p|Pineco}}, {{p|Shuckle}}, {{p|Venomoth}}, {{p|Scizor}}, {{p|Heracross}}, {{p|Forretress}}, {{p|Armaldo}}, and {{p|Shedinja}} | ||
|- style="background:#{{dark color light}}" | |- style="background:#{{dark color light}}" | ||
| style="text-align:center" | 14 | | style="text-align:center" | 14 | ||
| style="white-space:nowrap" | I see DARK-type POKéMON…<br>…And, I see your POKéMON suffering<br>from DARK-type moves… | | style="white-space:nowrap" | I see DARK-type POKéMON…<br>…And, I see your POKéMON suffering<br>from DARK-type moves… | ||
| {{type|Dark}} Pokémon | | {{type|Dark}} Pokémon | ||
| {{p|Sableye}}, {{p|Sneasel}}, {{p|Crawdaunt}}, {{p|Shiftry}}, {{p|Cacturne}}, {{p|Absol}}, {{p|Houndoom}} and {{p|Umbreon}} | | {{p|Sableye}}, {{p|Sneasel}}, {{p|Crawdaunt}}, {{p|Shiftry}}, {{p|Cacturne}}, {{p|Absol}}, {{p|Houndoom}}, and {{p|Umbreon}} | ||
|- style="background:#{{water color light}}" | |- style="background:#{{water color light}}" | ||
| style="text-align:center" | 15 | | style="text-align:center" | 15 | ||
| style="white-space:nowrap" | I see WATER-type POKéMON…<br>…And, I see your POKéMON suffering<br>from WATER-type moves… | | style="white-space:nowrap" | I see WATER-type POKéMON…<br>…And, I see your POKéMON suffering<br>from WATER-type moves… | ||
| {{type|Water}} Pokémon | | {{type|Water}} Pokémon | ||
| {{p|Octillery}}, {{p|Dewgong}}, {{p|Pelipper}}, {{p|Quagsire}}, {{p|Ludicolo}}, {{p|Slowking}}, {{p|Starmie}} and {{p|Blastoise}} | | {{p|Octillery}}, {{p|Dewgong}}, {{p|Pelipper}}, {{p|Quagsire}}, {{p|Ludicolo}}, {{p|Slowking}}, {{p|Starmie}}, and {{p|Blastoise}} | ||
|- style="background:#{{ghost color light}}" | |- style="background:#{{ghost color light}}" | ||
| style="text-align:center" | 16 | | style="text-align:center" | 16 | ||
| style="white-space:nowrap" | I see GHOST-type POKéMON…<br>…And, I see your POKéMON suffering<br>from GHOST-type moves… | | style="white-space:nowrap" | I see GHOST-type POKéMON…<br>…And, I see your POKéMON suffering<br>from GHOST-type moves… | ||
| {{type|Ghost}} Pokémon | | {{type|Ghost}} Pokémon | ||
| {{p|Duskull}}, {{p|Haunter}}, {{p|Banette}}, {{p|Misdreavus}}, {{p|Sableye}}, {{p|Dusclops}}, {{p|Shedinja}} and {{p|Gengar}} | | {{p|Duskull}}, {{p|Haunter}}, {{p|Banette}}, {{p|Misdreavus}}, {{p|Sableye}}, {{p|Dusclops}}, {{p|Shedinja}}, and {{p|Gengar}} | ||
|- style="background:#{{steel color light}}" | |- style="background:#{{steel color light}}" | ||
| style="text-align:center" | 17 | | style="text-align:center" | 17 | ||
| style="white-space:nowrap" | I see STEEL-type POKéMON…<br>…And, I see your POKéMON suffering<br>from enormously powerful moves… | | style="white-space:nowrap" | I see STEEL-type POKéMON…<br>…And, I see your POKéMON suffering<br>from enormously powerful moves… | ||
| {{type|Steel}} Pokémon | | {{type|Steel}} Pokémon | ||
| {{p|Mawile}}, {{p|Magneton}}, {{p|Steelix}}, {{p|Scizor}}, {{p|Forretress}}, {{p|Skarmory}}, {{p|Aggron}} and {{p|Metagross}} | | {{p|Mawile}}, {{p|Magneton}}, {{p|Steelix}}, {{p|Scizor}}, {{p|Forretress}}, {{p|Skarmory}}, {{p|Aggron}}, and {{p|Metagross}} | ||
|- style="background:#{{dragon color light}}" | |- style="background:#{{dragon color light}}" | ||
| style="text-align:center" | 18 | | style="text-align:center" | 18 | ||
| style="white-space:nowrap" | I see flying POKéMON…<br>…And, I see your POKéMON suffering<br>from enormously powerful moves… | | style="white-space:nowrap" | I see flying POKéMON…<br>…And, I see your POKéMON suffering<br>from enormously powerful moves… | ||
| {{t|Flying}}- and {{type|Dragon}} Pokémon | | {{t|Flying}}- and {{type|Dragon}} Pokémon | ||
| {{p|Dragonair}}, {{p|Vibrava}}, {{p|Altaria}}, {{p|Flygon}}, {{p|Aerodactyl}}, {{p|Gyarados}}, {{p|Kingdra}} and {{p|Charizard}} | | {{p|Dragonair}}, {{p|Vibrava}}, {{p|Altaria}}, {{p|Flygon}}, {{p|Aerodactyl}}, {{p|Gyarados}}, {{p|Kingdra}}, and {{p|Charizard}} | ||
|- style="background:#{{hoenn color light}}" | |- style="background:#{{hoenn color light}}" | ||
| style="text-align:center" | 19 | | style="text-align:center" | 19 | ||
| style="white-space:nowrap" | I see those that have evolved from<br>the power of stones…<br>I also sense fire, water,<br>and electricity…<br>…And, I see your POKéMON suffering<br>from those three powers… | | style="white-space:nowrap" | I see those that have evolved from<br>the power of stones…<br>I also sense fire, water,<br>and electricity…<br>…And, I see your POKéMON suffering<br>from those three powers… | ||
| Pokémon that have evolved by [[Water Stone|Water]], [[Thunder Stone|Thunder]], or [[Fire Stone]] | | Pokémon that have evolved by [[Water Stone|Water]], [[Thunder Stone|Thunder]], or [[Fire Stone]] | ||
| {{p|Arcanine}}, {{p|Poliwrath}}, {{p|Raichu}}, {{p|Vaporeon}}, {{p|Jolteon}}, {{p|Flareon}}, {{p|Ninetales}} and {{p|Starmie}} | | {{p|Arcanine}}, {{p|Poliwrath}}, {{p|Raichu}}, {{p|Vaporeon}}, {{p|Jolteon}}, {{p|Flareon}}, {{p|Ninetales}}, and {{p|Starmie}} | ||
|- | |- | ||
| style="background:#{{normal color light}}; {{roundybl|5px}} text-align:center" | 20 | | style="background:#{{normal color light}}; {{roundybl|5px}} text-align:center" | 20 | ||
| style="background:#{{normal color light}}; white-space:nowrap" | I see NORMAL-type POKéMON…<br>…And, I see your POKéMON suffering<br>from enormously powerful moves… | | style="background:#{{normal color light}}; white-space:nowrap" | I see NORMAL-type POKéMON…<br>…And, I see your POKéMON suffering<br>from enormously powerful moves… | ||
| style="background:#{{normal color light}}" | {{type|Normal}} Pokémon | | style="background:#{{normal color light}}" | {{type|Normal}} Pokémon that know {{m|Hyper Beam}} | ||
| style="background:#{{normal color light}}; {{roundybr|5px}}" | {{p|Kangaskhan}}, {{p|Swellow}}, {{p|Ursaring}}, {{p|Porygon2}}, {{p|Tauros}}, | | style="background:#{{normal color light}}; {{roundybr|5px}}" | {{p|Kangaskhan}}, {{p|Swellow}}, {{p|Ursaring}}, {{p|Porygon2}}, {{p|Tauros}}, {{p|Fearow}}, {{p|Snorlax}}, and {{p|Slaking}} | ||
|} | |} | ||
| Line 791: | Line 770: | ||
===Battle Points=== | ===Battle Points=== | ||
{ | {| class="wikitable" style="text-align:center" | ||
! BP per round !! 1 !! 2 !! 3 !! 4 !! 5 !! 6 !! 7 !! 8 !! 9 !! 10 !! 11 !! 12 !! 13 !! 14 !! 15 !! 16 !! 17 !! 18 !! 19 !! 20 !! 21 !! 22 !! 23 !! 24 !! 25 | |||
|- | |||
| Any level mode || 5 || 5 || 16 || 6 || 7 || 7 || 8 || 8 || 9 || 19 || 10 || 10 || 11 || 11 || 22 || 12 || 13 || 13 || 14 || 24 || 15 || 15 || 15 || 15 || 25 | |||
|} | |||
===Pyramid King=== | ===Pyramid King=== | ||
| Line 805: | Line 788: | ||
|class=Pyramid King | |class=Pyramid King | ||
|classlink=Brandon | |classlink=Brandon | ||
|name=Brandon | |name={{color2|000|Brandon}} | ||
|game=E | |game=E | ||
|location=Battle Pyramid | |location=Battle Pyramid | ||
|pokemon=3}} | |pokemon=3}} | ||
|{{ | {{lop/facility/head|{{frontier color light}}|{{frontier color}}|{{frontier color}}}} | ||
|game= | {{lop/facility|game=3|377|Regirock|Quick Claw|Explosion|Normal|Superpower|Fighting|Earthquake|Ground|AncientPower|Rock|Adamant|152|152||106|100}} | ||
| | {{lop/facility|game=3|379|Registeel|Leftovers|Earthquake|Ground|Metal Claw|Steel|Toxic|Poison|Iron Defense|Steel|Adamant|152|152||6|200}} | ||
| | {{lop/facility|game=3|378|Regice|Chesto Berry|Ice Beam|Ice|Amnesia|Psychic|Thunder|Electric|Rest|Psychic|Modest|106||152|100|152}} | ||
| | |||
| | |||
| | |||
| | |||
| | |||
| | |||
| | |||
|game= | |||
| | |||
| | |||
| | |||
| | |||
| | |||
| | |||
| | |||
| | |||
| | |||
|game= | |||
| | |||
| | |||
| | |||
| | |||
| | |||
| | |||
{{Party/Footer}} | {{Party/Footer}} | ||
| Line 856: | Line 807: | ||
|class=Pyramid King | |class=Pyramid King | ||
|classlink=Brandon | |classlink=Brandon | ||
|name=Brandon | |name={{color2|000|Brandon}} | ||
|game=E | |game=E | ||
|location=Battle Pyramid | |location=Battle Pyramid | ||
|pokemon=3}} | |pokemon=3}} | ||
{{lop/facility/head|{{frontier color light}}|{{frontier color}}|{{frontier color}}}} | |||
| | {{lop/facility|game=3|144|Articuno|Scope Lens|Blizzard|Ice|Water Pulse|Water|Aerial Ace|Flying|Reflect|Psychic|Mild|6||252|||252}} | ||
{{lop/facility|game=3|145|Zapdos|Lum Berry|Thunder|Electric|Detect|Fighting|Drill Peck|Flying|Light Screen|Psychic|Mild|6||252|||252}} | |||
{{lop/facility|game=3|146|Moltres|BrightPowder|Fire Blast|Fire|Hyper Beam|Normal|Aerial Ace|Flying|Safeguard|Normal|Mild|6||252|||252}} | |||
| | |||
| | |||
| | |||
| | |||
| | |||
| | |||
| | |||
| | |||
| | |||
| | |||
| | |||
| | |||
| | |||
| | |||
| | |||
| | |||
| | |||
| | |||
| | |||
| | |||
| | |||
| | |||
| | |||
| | |||
| | |||
| | |||
| | |||
| | |||
| | |||
{{Party/Footer}} | {{Party/Footer}} | ||
| Line 918: | Line 837: | ||
====''[[Pokémon the Series: Ruby and Sapphire]]''==== | ====''[[Pokémon the Series: Ruby and Sapphire]]''==== | ||
The Battle Pyramid debuted in ''[[AG178|Battling the Enemy Within!]]'', where {{Ash}} and {{ashfr}} arrived to it its then-current location near [[Pewter City]], which they had learned in ''[[AG170|Second Time's the Charm!]]'', following Ash's victory against [[Anabel]] at the {{gdis|Battle Tower|III}}. However, while exploring the ancient ruins of [[Pokélantis]], where the group also encountered Brandon for the first time, Ash ended up getting possessed by the evil spirit of the [[King of Pokélantis]]. Brandon challenged the king to a battle to save Ash, and was finally able to defeat [[Ash's Sceptile]] with his {{DL|Brandon's | The Battle Pyramid debuted in ''[[AG178|Battling the Enemy Within!]]'', where {{Ash}} and {{ashfr}} arrived to it its then-current location near [[Pewter City]], which they had learned in ''[[AG170|Second Time's the Charm!]]'', following Ash's victory against [[Anabel]] at the {{gdis|Battle Tower|III}}. However, while exploring the ancient ruins of [[Pokélantis]], where the group also encountered Brandon for the first time, Ash ended up getting possessed by the evil spirit of the [[King of Pokélantis]]. Brandon challenged the king to a battle to save Ash, and was finally able to defeat [[Ash's Sceptile]] with his {{DL|Brandon's legendary giants|Regirock}} before sealing the king's spirit away again. The match was declared unofficial and Brandon agreed to have an official battle with Ash later, before flying off to explore some ruins elsewhere. | ||
In ''[[AG182|Channeling the Battle Zone!]]'', the group learned about the Battle Pyramid's new location in [[Fennel Valley]], where they arrived in ''[[AG186|Overjoyed!]]''. On the night before the battle, Brandon told Ash that he'd be using a {{DL|Brandon's | In ''[[AG182|Channeling the Battle Zone!]]'', the group learned about the Battle Pyramid's new location in [[Fennel Valley]], where they arrived in ''[[AG186|Overjoyed!]]''. On the night before the battle, Brandon told Ash that he'd be using a {{DL|Brandon's legendary giants|Registeel}}, prompting Ash to call back his {{AP|Torkoal}} from [[Professor Oak's Laboratory]]. However, despite Ash having the type advantage, he was still defeated. Brandon subsequently left the pyramid to {{pkmn2|caught|catch}} a new Pokémon, promising to return once he had done so. | ||
Brandon returned to the Battle Pyramid in ''[[AG189|Gathering the Gang of Four!]]'', allowing Ash to start his [[rematch]] with him. The match continued in ''[[AG190|Pace - The Final Frontier!]]'', eventually coming down to a face-off between [[Ash's Pikachu]] and {{DL|Brandon's | Brandon returned to the Battle Pyramid in ''[[AG189|Gathering the Gang of Four!]]'', allowing Ash to start his [[rematch]] with him. The match continued in ''[[AG190|Pace - The Final Frontier!]]'', eventually coming down to a face-off between [[Ash's Pikachu]] and {{DL|Brandon's legendary giants|Regice|Brandon's Regice}}, the Pokémon that Brandon had left to catch. This time, Ash was finally able to emerge victorious against Brandon's [[Legendary Pokémon]], earning him the [[Symbol|Brave Symbol]] and a place in the Battle Frontier [[Hall of Fame]]. | ||
====''[[Pokémon the Series: Diamond and Pearl]]''==== | ====''[[Pokémon the Series: Diamond and Pearl]]''==== | ||
| Line 939: | Line 858: | ||
|vajp=Katsuyuki Konishi | |vajp=Katsuyuki Konishi | ||
|vaen=Katsuyuki Konishi | |vaen=Katsuyuki Konishi | ||
|desc={{main|Brandon's | |desc={{main|Brandon's legendary giants#Regirock|Brandon's Regirock}} | ||
Brandon used {{p|Regirock}} against Ash during [[AG178|their unofficial battle]] while Ash was possessed by the [[King of Pokélantis]]. Regirock went up against {{AP|Sceptile}} and won despite the type-disadvantage. Regirock later sent {{TRT}} blasting off along with Registeel during Ash and Brandon's [[AG189|rematch]]. | Brandon used {{p|Regirock}} against Ash during [[AG178|their unofficial battle]] while Ash was possessed by the [[King of Pokélantis]]. Regirock went up against {{AP|Sceptile}} and won despite the type-disadvantage. Regirock later sent {{TRT}} blasting off along with Registeel during Ash and Brandon's [[AG189|rematch]]. | ||
| Line 954: | Line 873: | ||
|vajp=Tomoe Hanba | |vajp=Tomoe Hanba | ||
|vaen=Tomoe Hanba | |vaen=Tomoe Hanba | ||
|desc={{main|Brandon's | |desc={{main|Brandon's legendary giants#Registeel|Brandon's Registeel}} | ||
After the [[Kanto Grand Festival]], Ash was finally allowed [[AG186|an official battle]] against Brandon in another one-on-one battle. Brandon used {{p|Registeel}}, while Ash used his {{AP|Torkoal}}. The two fought hard, and although Registeel was left extremely weak after the battle, it was Torkoal who was defeated. Registeel later sent Team Rocket blasting off alongside Regirock during Ash and Brandon's rematch. | After the [[Kanto Grand Festival]], Ash was finally allowed [[AG186|an official battle]] against Brandon in another one-on-one battle. Brandon used {{p|Registeel}}, while Ash used his {{AP|Torkoal}}. The two fought hard, and although Registeel was left extremely weak after the battle, it was Torkoal who was defeated. Registeel later sent Team Rocket blasting off alongside Regirock during Ash and Brandon's rematch. | ||
During the Full Battle against Paul, it was easily able to stand up to his Magmar's {{type|Fire}} moves, despite the type weakness. It also managed to defeat Paul's {{p|Nidoking}} despite taking damage from its {{ | During the Full Battle against Paul, it was easily able to stand up to his Magmar's {{type|Fire}} moves, despite the type weakness. It also managed to defeat Paul's {{p|Nidoking}} despite taking damage from its {{t|Ground}}- and {{type|Fighting}} attacks.}} | ||
{{TrainerPoké | {{TrainerPoké | ||
| Line 1,009: | Line 928: | ||
|vajp=Tomoe Hanba | |vajp=Tomoe Hanba | ||
|vaen=Tomoe Hanba | |vaen=Tomoe Hanba | ||
|desc={{main|Brandon's | |desc={{main|Brandon's legendary giants#Regice|Brandon's Regice}} | ||
After his first three Pokémon were defeated in ''[[AG190|Pace - The Final Frontier!]]'', Brandon sent out his newly-caught {{p|Regice}} against {{AP|Pikachu}}. Regice fought its hardest against the {{t|Electric}} type and looked poised to win, but Pikachu was able to whittle down its strength with {{m|Iron Tail}} and {{m|Volt Tackle}} to claim victory. | After his first three Pokémon were defeated in ''[[AG190|Pace - The Final Frontier!]]'', Brandon sent out his newly-caught {{p|Regice}} against {{AP|Pikachu}}. Regice fought its hardest against the {{t|Electric}} type and looked poised to win, but Pikachu was able to whittle down its strength with {{m|Iron Tail}} and {{m|Volt Tackle}} to claim victory. | ||
| Line 1,016: | Line 935: | ||
==In the manga== | ==In the manga== | ||
[[File:Battle Pyramid Adventures.png|thumb| | [[File:Battle Pyramid Adventures.png|thumb|230px|The Battle Pyramid in [[Pokémon Adventures]]]] | ||
=== | ===Pokémon Adventures=== | ||
===={{MangaArc|Emerald}}==== | |||
The Battle Pyramid first appeared in ''[[PS311|Dust-Up With Dusclops]]'', where Brandon invited {{adv|Emerald}} to challenge it immediately after his victory at the [[Battle Pike]], saying that if Emerald intended to challenge all seven Battle Frontier facilities within the Battle Frontier's seven-day opening ceremony, he should challenge the pyramid right away, as even the fastest clearing of the challenge would take more than 24 hours. Emerald accepted this and started his Battle Pyramid challenge immediately. | The Battle Pyramid first appeared in ''[[PS311|Dust-Up With Dusclops]]'', where Brandon invited {{adv|Emerald}} to challenge it immediately after his victory at the [[Battle Pike]], saying that if Emerald intended to challenge all seven Battle Frontier facilities within the Battle Frontier's seven-day opening ceremony, he should challenge the pyramid right away, as even the fastest clearing of the challenge would take more than 24 hours. Emerald accepted this and started his Battle Pyramid challenge immediately. | ||
[[File:Battle Pyramid CBF.png|thumb|left|150px|The Battle Pyramid in Pokémon Battle Frontier]] | [[File:Battle Pyramid CBF.png|thumb|left|150px|The Battle Pyramid in [[Pokémon Battle Frontier]]]] | ||
In ''[[PS312|Chipping Away at Regirock]]'', Emerald cleared the pyramid for the tenth time, allowing him to challenge Brandon and his | In ''[[PS312|Chipping Away at Regirock]]'', Emerald cleared the pyramid for the tenth time, allowing him to challenge Brandon and his [[Brandon's legendary giants#Pokémon Adventures|trio of Legendary Pokémon]] at the top. Although Brandon seemed to be emerging victorious at the end, Emerald secretly used a [[Revive]] he had found during his challenge to restore his fainted {{TP|Emerald|Sceptile}}, allowing it to land a surprise attack on Brandon's {{p|Regice}} and defeat it, winning the match for Emerald and earning him the [[Symbol|Brave Symbol]]. | ||
=== | ===Pokémon Battle Frontier=== | ||
The Battle Pyramid appeared in ''[[CBF2|Aim for the Top!]]'', where {{OBP|Enta|CBF}} tried to climb to the top, but failed. He asked help from his mentor [[Rald]], but despite his advice, he failed his second attempt as well. After talking with Rald again and learning to work as a team with his Pokémon, Enta finally managed to reach the top of the pyramid. | The Battle Pyramid appeared in ''[[CBF2|Aim for the Top!]]'', where {{OBP|Enta|CBF}} tried to climb to the top, but failed. He asked help from his mentor [[Rald]], but despite his advice, he failed his second attempt as well. After talking with Rald again and learning to work as a team with his Pokémon, Enta finally managed to reach the top of the pyramid. | ||
{{-}} | {{-}} | ||
Latest revision as of 03:48, 24 March 2024
| Battle Pyramid バトルピラミッド Battle Pyramid | |||||||||||||||||||||
| |||||||||||||||||||||
| "Advance through the Battle Quest!" | |||||||||||||||||||||
| |||||||||||||||||||||
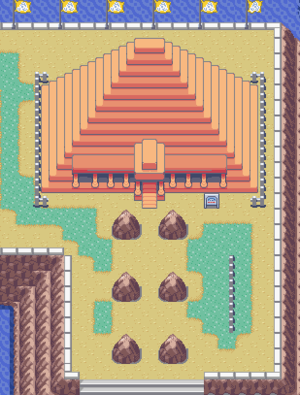
The Battle Pyramid (Japanese: バトルピラミッド Battle Pyramid) is a facility located within the Hoenn Battle Frontier in Pokémon Emerald.
Challenges
As a battle facility, battles conducted here do not award experience or prize money.
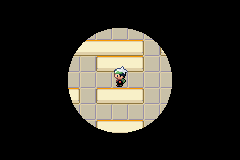
The Battle Pyramid is a 7-layer pyramid where challengers must advance from one level to the next by stepping on a blue tile. Each floor is shrouded in darkness, and can only be lit up by defeating opponents on the level. After a battle, a defeated Trainer may provide the player with contextual hints on certain aspects of the challenge, such as the location of a given floor's exit, the number of remaining Trainers to be fought on a floor, or the number of remaining items on a given floor. The Ability Run Away does not guarantee escape here, but will be credited if the player does successfully escape with a Pokémon with the Ability.
Trainers cannot take any items into the Battle Quest; items found during the Battle Quest are stored in the Battle Bag, which can only be accessed during the challenge. The Battle Bag has 10 different slots, each capable of holding up to 99 of one type of item. When the player starts a new streak, they start with one Hyper Potion and one Ether in their Battle Bag. If the player successfully completes the Battle Quest (clearing all seven floors), the items in their Battle Bag are carried over for their next challenge (items that were held by Pokémon at the end of the challenge are placed in the Battle Bag). When the player successfully completes a round, if they have more than 10 different types of item between their Battle Bag and their Pokémon's held items, they must discard items so that they only have 10 types.
Restrictions
No Pokémon may enter if it is holding an item. Any Pokémon can be entered for battle, except for the following Pokémon:
Wild Pokémon
- Main article: List of wild Pokémon in the Battle Pyramid
Wild Pokémon are encountered within the Battle Pyramid, with strategies differing depending on how many floors the player has ventured through. Several of the wild Pokémon have high base Speed, making them difficult to escape from. A Hex Maniac next to the PC will tell the player what to expect in their next attempt. The tactics used by the wild Pokémon will progress as follows (note that after the list has been completed, it will restart from the beginning):
| Category | Description | Tactic | Wild Pokémon |
|---|---|---|---|
| 1 | I see a shower of sparks… …And in it, I see your POKéMON struggling with paralysis… |
Pokémon with moves that paralyze | Plusle, Minun, Pikachu, Electabuzz, Vileplume, Manectric, Breloom, and Jolteon |
| 2 | I see poison… …And, I see your POKéMON suffering from the effects of poison… |
Pokémon with moves that poison | Gulpin, Roselia, Butterfree, Seviper, Skarmory, Ludicolo, Crobat, and Gengar |
| 3 | I see bright red flames… …And, I see your POKéMON suffering from burns… |
Pokémon with moves that burn | Growlithe, Vulpix, Magcargo, Ninetales, Medicham, Weezing, Dusclops, and Houndoom |
| 4 | I sense the tremendous pressure of unrequited anger… It is a curse… …And, I see your POKéMON drained of Power Points and having no recourse but to use STRUGGLE… |
Pokémon with moves or Abilities that waste PP | Dunsparce, Banette, Misdreavus, Ninetales, Absol, Dusclops, Shedinja, and Gengar |
| 5 | I see POKéMON loftily airborne… …And, I see your POKéMON frustrated by powerless GROUND-type moves… |
Pokémon with Levitate | Haunter, Chimecho, Solrock, Misdreavus, Claydol, Weezing, Flygon, and Gengar |
| 6 | I sense terrific energy rising from the ground below… …And, I see your POKéMON unable to escape the power's clutches… |
Pokémon with trapping Abilities | Diglett, Trapinch, Wynaut, Wobbuffet, and Dugtrio |
| 7 | I see ICE-type POKéMON… …And, I see your POKéMON fighting the freezing effects of ice… |
Ice-type Pokémon | Glalie, Sneasel, Dewgong, Piloswine, Jynx, Cloyster, Walrein, and Lapras |
| 8 | I see a flurry of moves that imperil the user… …And, I see your POKéMON falling to them… |
Pokémon with Selfdestruct or Explosion | Weezing, Electrode, Gengar, Golem, Pineco, Solrock, Forretress, and Shiftry |
| 9 | I see PSYCHIC-type POKéMON… …And, I see your POKéMON in torment from PSYCHIC moves… |
Psychic-type Pokémon | Wobbuffet, Metang, Exeggutor, Slowking, Xatu, Alakazam, Starmie, and Espeon |
| 10 | I see ROCK-type POKéMON… …And, I see your POKéMON suffering from ROCK moves… |
Rock-type Pokémon | Golem, Steelix, Omastar, Lunatone, Shuckle, Armaldo, Cradily, and Aerodactyl |
| 11 | I see FIGHTING-type POKéMON… …And, I see your POKéMON pummeled by FIGHTING moves… |
Fighting-type Pokémon | Poliwrath, Hariyama, Breloom, Medicham, Hitmonchan, Hitmonlee, Heracross, and Machamp |
| 12 | RAIN DANCE… SUNNY DAY… SANDSTORM… HAIL… I see POKéMON that become stronger with the weather… …And, I see your POKéMON confounded by different types of moves… |
Pokémon with moves that alter the weather | Quagsire, Tropius, Pupitar, Lapras, Cacturne, Flareon, Walrein, and Gyarados |
| 13 | I see BUG-type POKéMON… …And, I see your POKéMON suffering from different kinds of attacks… |
Bug-type Pokémon | Pineco, Shuckle, Venomoth, Scizor, Heracross, Forretress, Armaldo, and Shedinja |
| 14 | I see DARK-type POKéMON… …And, I see your POKéMON suffering from DARK-type moves… |
Dark-type Pokémon | Sableye, Sneasel, Crawdaunt, Shiftry, Cacturne, Absol, Houndoom, and Umbreon |
| 15 | I see WATER-type POKéMON… …And, I see your POKéMON suffering from WATER-type moves… |
Water-type Pokémon | Octillery, Dewgong, Pelipper, Quagsire, Ludicolo, Slowking, Starmie, and Blastoise |
| 16 | I see GHOST-type POKéMON… …And, I see your POKéMON suffering from GHOST-type moves… |
Ghost-type Pokémon | Duskull, Haunter, Banette, Misdreavus, Sableye, Dusclops, Shedinja, and Gengar |
| 17 | I see STEEL-type POKéMON… …And, I see your POKéMON suffering from enormously powerful moves… |
Steel-type Pokémon | Mawile, Magneton, Steelix, Scizor, Forretress, Skarmory, Aggron, and Metagross |
| 18 | I see flying POKéMON… …And, I see your POKéMON suffering from enormously powerful moves… |
Flying- and Dragon-type Pokémon | Dragonair, Vibrava, Altaria, Flygon, Aerodactyl, Gyarados, Kingdra, and Charizard |
| 19 | I see those that have evolved from the power of stones… I also sense fire, water, and electricity… …And, I see your POKéMON suffering from those three powers… |
Pokémon that have evolved by Water, Thunder, or Fire Stone | Arcanine, Poliwrath, Raichu, Vaporeon, Jolteon, Flareon, Ninetales, and Starmie |
| 20 | I see NORMAL-type POKéMON… …And, I see your POKéMON suffering from enormously powerful moves… |
Normal-type Pokémon that know Hyper Beam | Kangaskhan, Swellow, Ursaring, Porygon2, Tauros, Fearow, Snorlax, and Slaking |
Items
The items available change each round (every 7 floors). The probablility of each item changes depending on the floor the player is on. The first table below gives the probablility of each available item appearing, and the second gives the pool of available items. While Pickup uses the same pool of items, the probabilities for items appearing using Pickup remain the same for all floors.
| % chance of item no.: | ||||||||||
|---|---|---|---|---|---|---|---|---|---|---|
| 1 | 2 | 3 | 4 | 5 | 6 | 7 | 8 | 9 | 10 | |
| Floor 1 | 31 | 15 | 15 | 10 | 10 | 10 | 3 | 3 | 3 | 0 |
| Floor 2 | 15 | 31 | 15 | 10 | 10 | 10 | 3 | 0 | 3 | 3 |
| Floor 3 | 15 | 15 | 31 | 10 | 10 | 10 | 3 | 3 | 3 | 0 |
| Floor 4 | 28 | 15 | 15 | 10 | 10 | 10 | 0 | 4 | 4 | 4 |
| Floor 5 | 15 | 28 | 15 | 10 | 10 | 10 | 4 | 4 | 0 | 4 |
| Floor 6 | 15 | 15 | 28 | 10 | 10 | 10 | 4 | 4 | 4 | 0 |
| Floor 7 | 28 | 15 | 15 | 10 | 10 | 10 | 4 | 0 | 4 | 4 |
| Pickup | 30 | 10 | 10 | 10 | 10 | 10 | 5 | 5 | 5 | 5 |
| Round | Item No. | |||||||||
|---|---|---|---|---|---|---|---|---|---|---|
| 1 | 2 | 3 | 4 | 5 | 6 | 7 | 8 | 9 | 10 | |
| 1 | ||||||||||
| 2 | ||||||||||
| 3 | ||||||||||
| 4 | ||||||||||
| 5 | ||||||||||
| 6 | ||||||||||
| 7 | ||||||||||
| 8 | ||||||||||
| 9 | ||||||||||
| 10 | ||||||||||
| 11 | ||||||||||
| 12 | ||||||||||
| 13 | ||||||||||
| 14 | ||||||||||
| 15 | ||||||||||
| 16 | ||||||||||
| 17 | ||||||||||
| 18 | ||||||||||
| 19 | ||||||||||
| 20 | ||||||||||
| 21 | ||||||||||
| 22 | ||||||||||
| 23 | ||||||||||
| 24 | ||||||||||
| 25 | ||||||||||
| 26 | ||||||||||
| 27 | ||||||||||
| 28 | ||||||||||
| 29 | ||||||||||
| 30 | ||||||||||
| 31 | ||||||||||
| 32 | ||||||||||
| 33 | ||||||||||
| 34 | ||||||||||
| 35 | ||||||||||
| 36 | ||||||||||
| 37 | ||||||||||
| 38 | ||||||||||
| 39 | ||||||||||
| 40 | ||||||||||
Battle Points
| BP per round | 1 | 2 | 3 | 4 | 5 | 6 | 7 | 8 | 9 | 10 | 11 | 12 | 13 | 14 | 15 | 16 | 17 | 18 | 19 | 20 | 21 | 22 | 23 | 24 | 25 |
|---|---|---|---|---|---|---|---|---|---|---|---|---|---|---|---|---|---|---|---|---|---|---|---|---|---|
| Any level mode | 5 | 5 | 16 | 6 | 7 | 7 | 8 | 8 | 9 | 19 | 10 | 10 | 11 | 11 | 22 | 12 | 13 | 13 | 14 | 24 | 15 | 15 | 15 | 15 | 25 |
Pyramid King
After clearing 21 floors (three rounds) and 70 floors (ten rounds), Brandon appears at the top to challenge the player. If he is defeated, he awards the Brave Symbol.
Silver Symbol challenge
|
|||||||||||||||||||||||||||||||||||||||||||||||||||||||||||||||||||
| |||||||||||||||||||||||||||||||||||||||||||||||||||||||||||||||||||
Gold Symbol challenge
|
|||||||||||||||||||||||||||||||||||||||||||||||||||||||||||||||||||
| |||||||||||||||||||||||||||||||||||||||||||||||||||||||||||||||||||
Layout
|
|
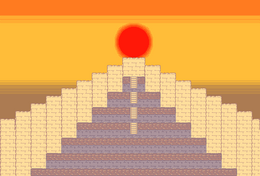
|
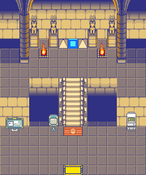
| Inside the Battle Pyramid | A dark maze | Top of the Battle Pyramid |
In the anime
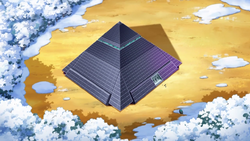
History
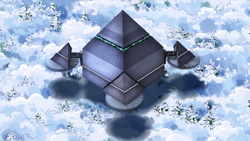
In the anime, the Battle Pyramid is the final facility in the Kanto Battle Frontier, and its location is only revealed to those who have managed to defeat the six other facilities. Moreover, it is capable of flying, meaning that it has no set location. It is run by Brandon and the battles are refereed by Samuel.
Pokémon the Series: Ruby and Sapphire
The Battle Pyramid debuted in Battling the Enemy Within!, where Ash and his friends arrived to it its then-current location near Pewter City, which they had learned in Second Time's the Charm!, following Ash's victory against Anabel at the Battle Tower. However, while exploring the ancient ruins of Pokélantis, where the group also encountered Brandon for the first time, Ash ended up getting possessed by the evil spirit of the King of Pokélantis. Brandon challenged the king to a battle to save Ash, and was finally able to defeat Ash's Sceptile with his Regirock before sealing the king's spirit away again. The match was declared unofficial and Brandon agreed to have an official battle with Ash later, before flying off to explore some ruins elsewhere.
In Channeling the Battle Zone!, the group learned about the Battle Pyramid's new location in Fennel Valley, where they arrived in Overjoyed!. On the night before the battle, Brandon told Ash that he'd be using a Registeel, prompting Ash to call back his Torkoal from Professor Oak's Laboratory. However, despite Ash having the type advantage, he was still defeated. Brandon subsequently left the pyramid to catch a new Pokémon, promising to return once he had done so.
Brandon returned to the Battle Pyramid in Gathering the Gang of Four!, allowing Ash to start his rematch with him. The match continued in Pace - The Final Frontier!, eventually coming down to a face-off between Ash's Pikachu and Brandon's Regice, the Pokémon that Brandon had left to catch. This time, Ash was finally able to emerge victorious against Brandon's Legendary Pokémon, earning him the Brave Symbol and a place in the Battle Frontier Hall of Fame.
Pokémon the Series: Diamond and Pearl
In A Pyramiding Rage!, the Battle Pyramid traveled to Snowpoint City in order for Brandon to investigate the Snowpoint Temple. Paul challenged Brandon to a battle, intending to accomplish what his brother Reggie had failed to achieve, as Reggie had once lost to Brandon, causing him to abandon his career as a Trainer and become a Pokémon Breeder instead. However, like his brother before him, Paul was defeated without defeating a single one of Brandon's Pokémon.
In Pillars of Friendship!, after learning of Pokémon Hunter J's attack on the Snowpoint Temple, Brandon flew the Battle Pyramid to the site, only to be attacked by J's henchmen's Pokémon army, damaging one of the pyramid's rotors and forcing it to make an emergency landing.
Pokémon used in Battle Pyramid
|
||
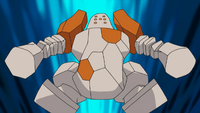
Brandon used Regirock against Ash during their unofficial battle while Ash was possessed by the King of Pokélantis. Regirock went up against Sceptile and won despite the type-disadvantage. Regirock later sent Team Rocket blasting off along with Registeel during Ash and Brandon's rematch. Regirock was used in the Full Battle against Paul and was able to easily defeat his Hariyama, Electabuzz, Ursaring, and Magmar. | ||
| Debut | Battling the Enemy Within! | |
|---|---|---|
| Voice actors | ||
| Japanese | Katsuyuki Konishi | |
| English | Katsuyuki Konishi | |
|
||
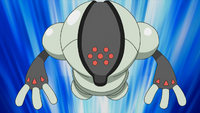
After the Kanto Grand Festival, Ash was finally allowed an official battle against Brandon in another one-on-one battle. Brandon used Registeel, while Ash used his Torkoal. The two fought hard, and although Registeel was left extremely weak after the battle, it was Torkoal who was defeated. Registeel later sent Team Rocket blasting off alongside Regirock during Ash and Brandon's rematch. During the Full Battle against Paul, it was easily able to stand up to his Magmar's Fire-type moves, despite the type weakness. It also managed to defeat Paul's Nidoking despite taking damage from its Ground- and Fighting-type attacks. | ||
| Debut | Overjoyed! | |
|---|---|---|
| Voice actors | ||
| Japanese | Tomoe Hanba | |
| English | Tomoe Hanba | |
|
||
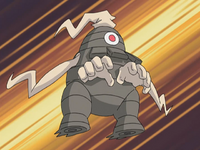
| Dusclops was the first Pokémon used by Brandon during his rematch and proved to be very powerful, being able to take down Ash's Charizard before being defeated by Bulbasaur's Solar Beam.
Dusclops's known moves are Will-O-Wisp, Shadow Punch, Mean Look, and Confuse Ray. | ||
| Debut | Gathering the Gang of Four! | |
|---|---|---|
| Voice actors | ||
| Japanese | ||
| English | Bill Rogers | |
|
||
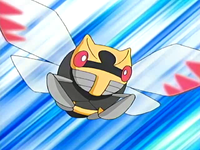
| Ninjask was the second Pokémon used by Brandon during his rematch against Ash, where it went up against his Squirtle. Despite a closely fought battle, Ninjask couldn't stand up to Squirtle's Skull Bash and was defeated.
Ninjask's known moves are Aerial Ace, Sandstorm, Double Team, and Sand Attack. | ||
| Debut | Pace - The Final Frontier! | |
|---|---|---|
| Voice actors | ||
| Japanese | Daisuke Sakaguchi | |
| English | Billy Beach | |
|
||
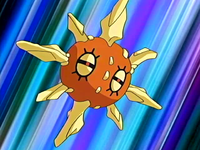
| Brandon used Solrock third in the rematch against Ash, and it was able to defeat his Squirtle. After knocking the Tiny Turtle Pokémon out of the match, it then went up against Bulbasaur. The two fought hard for their Trainers, eventually knocking each other out of the battle.
Solrock's known moves are Psywave, Confusion, Shadow Ball, and Solar Beam. | ||
| Debut | Pace - The Final Frontier! | |
|---|---|---|
| Voice actors | ||
| Japanese | Megumi Hayashibara | |

|
||
After his first three Pokémon were defeated in Pace - The Final Frontier!, Brandon sent out his newly-caught Regice against Pikachu. Regice fought its hardest against the Electric type and looked poised to win, but Pikachu was able to whittle down its strength with Iron Tail and Volt Tackle to claim victory. During the Full Battle against Paul, Regice battled Ursaring, and was able to defeat his Lairon with no trouble. | ||
| Debut | Pace - The Final Frontier! | |
|---|---|---|
| Voice actors | ||
| Japanese | Tomoe Hanba | |
| English | Tomoe Hanba | |
In the manga
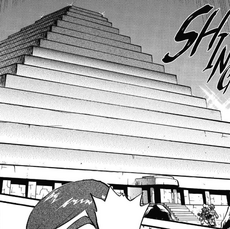
Pokémon Adventures
Emerald arc
The Battle Pyramid first appeared in Dust-Up With Dusclops, where Brandon invited Emerald to challenge it immediately after his victory at the Battle Pike, saying that if Emerald intended to challenge all seven Battle Frontier facilities within the Battle Frontier's seven-day opening ceremony, he should challenge the pyramid right away, as even the fastest clearing of the challenge would take more than 24 hours. Emerald accepted this and started his Battle Pyramid challenge immediately.

In Chipping Away at Regirock, Emerald cleared the pyramid for the tenth time, allowing him to challenge Brandon and his trio of Legendary Pokémon at the top. Although Brandon seemed to be emerging victorious at the end, Emerald secretly used a Revive he had found during his challenge to restore his fainted Sceptile, allowing it to land a surprise attack on Brandon's Regice and defeat it, winning the match for Emerald and earning him the Brave Symbol.
Pokémon Battle Frontier
The Battle Pyramid appeared in Aim for the Top!, where Enta tried to climb to the top, but failed. He asked help from his mentor Rald, but despite his advice, he failed his second attempt as well. After talking with Rald again and learning to work as a team with his Pokémon, Enta finally managed to reach the top of the pyramid.
In other languages
| |||||||||||||||||||||||||||||||||||||||||||||||||||||||
| Hoenn | ||||||||
|---|---|---|---|---|---|---|---|---|
|
| ||||||||
|

|
This article is part of Project Locations, a Bulbapedia project that aims to write comprehensive articles on every location in the Pokémon world. |


