Timer Ball: Difference between revisions
m (→In the manga) |
m (Text replacement - "" to "") |
||
| (64 intermediate revisions by 34 users not shown) | |||
| Line 11: | Line 11: | ||
{{ItemInfobox/BagRow|V|Items|group=Poké Balls|colorscheme=Poké Balls}} | {{ItemInfobox/BagRow|V|Items|group=Poké Balls|colorscheme=Poké Balls}} | ||
{{ItemInfobox/BagRow|VI|Items|colorscheme=Poké Balls}} | {{ItemInfobox/BagRow|VI|Items|colorscheme=Poké Balls}} | ||
{{ItemInfobox/ | {{ItemInfobox/BagRow|VII|Items|colorscheme=Poké Balls}} | ||
{{ItemInfobox/BagRow|VIII|Poké Balls}} | |||
{{ItemInfobox/BagRowBottom|IX|Poké Balls}} | |||
|} | |} | ||
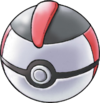
The '''Timer Ball''' (Japanese: '''タイマーボール''' ''Timer Ball'') is a type of [[Poké Ball]] introduced in [[Generation III]]. It can be used to catch a [[wild Pokémon]], being more likely to succeed the longer it has been since the start of the {{pkmn|battle}}. | The '''Timer Ball''' (Japanese: '''タイマーボール''' ''Timer Ball'') is a type of [[Poké Ball]] introduced in [[Generation III]]. It can be used to catch a [[wild Pokémon]], being more likely to succeed the longer it has been since the start of the {{pkmn|battle}}. It was developed by the [[Devon Corporation]]. | ||
==In the core series games== | ==In the core series games== | ||
===Price=== | ===Price=== | ||
{{ItemPrice/ | {{ItemPrice/head|Poké Balls}} | ||
{{ItemPrice|{{gameabbrev3|RSEFRLG}}<br>{{gameabbrev4|DPPtHGSS}}<br>{{gameabbrev5|BWB2W2}}<br>{{gameabbrev6|XYORAS}}<br>{{gameabbrev7|SMUSUM}} | {{ItemPrice|{{gameabbrev3|RSEFRLG}}<br>{{gameabbrev4|DPPtHGSS}}<br>{{gameabbrev5|BWB2W2}}<br>{{gameabbrev6|XYORAS}}<br>{{gameabbrev7|SMUSUM}}<br>{{gameabbrev8|SwShBDSP}} | ||
|{{PDollar}} | |{{PDollar}}1,000|{{PDollar}}500}} | ||
{{ItemPrice|{{gameabbrev9|SV}} | |||
|{{PDollar}}1,000|{{PDollar}}250}} | |||
|} | |} | ||
|} | |} | ||
| Line 28: | Line 32: | ||
When used from the [[Bag]] in a {{pkmn2|wild}} encounter, it attempts to catch the wild Pokémon. It has a [[catch rate]] modifier that increases with the number of turns that have passed in the encounter (so this counter is 0 on the first turn), calculated as follows: | When used from the [[Bag]] in a {{pkmn2|wild}} encounter, it attempts to catch the wild Pokémon. It has a [[catch rate]] modifier that increases with the number of turns that have passed in the encounter (so this counter is 0 on the first turn), calculated as follows: | ||
From | From Generations III to IV: | ||
<math>modifier = \min\left({turns + 10 \over 10}, 4\right)</math> | |||
From Generation V onward: | From Generation V onward: | ||
<math>modifier = \min\left(1 + turns \times {1229 \over 4096}, 4\right)</math> | |||
{| class=" | {| class="roundtable expandable" style="background:#{{Poké Balls color light}}; border:5px solid #{{Poké Balls color}}" | ||
! rowspan=2 | Turns passed | ! rowspan=2 | Turns passed | ||
! colspan=3 | Catch rate modifier | ! colspan=3 | Catch rate modifier | ||
|- | |- | ||
! Gen. | ! Gen. III-IV | ||
! Gen. | ! Gen. V+ | ||
|- | |- | ||
|0 || 1 || 1 | |0 || 1 || 1 | ||
|- | |- | ||
|1 || 1.1 || | |1 || 1.1 || 5325/4096 (~1.3) | ||
|- | |- | ||
|2 || 1.2 || | |2 || 1.2 || 6554/4096 (~1.6) | ||
|- | |- | ||
|3 || 1.3 || | |3 || 1.3 || 7783/4096 (~1.9) | ||
|- | |- | ||
|4 || 1.4 || | |4 || 1.4 || 9012/4096 (~2.2) | ||
|- | |- | ||
|5 || 1.5 || | |5 || 1.5 || 10241/4096 (~2.5) | ||
|- | |- | ||
|6 || 1.6 || | |6 || 1.6 || 11470/4096 (~2.8) | ||
|- | |- | ||
|7 || 1.7 || | |7 || 1.7 || 12699/4096 (~3.1) | ||
|- | |- | ||
|8 || 1.8 || | |8 || 1.8 || 13928/4096 (~3.4) | ||
|- | |- | ||
|9 || 1.9 || | |9 || 1.9 || 15157/4096 (~3.7) | ||
|- | |- | ||
|10 || 2 || 4 | |10 || 2 || 4 | ||
| Line 105: | Line 106: | ||
|- | |- | ||
|30+ || 4 || 4 | |30+ || 4 || 4 | ||
|} | |} | ||
If used on an [[Ultra Beast]], the catch rate modifier is instead always set to 0.1×. | If used on an [[Ultra Beast]], the catch rate modifier is instead always set to 410/4096× (~0.1×). | ||
The Timer Ball cannot be used in situations in which Poké Balls cannot be used, such as in wild battles with two or more opponents currently present or against a [[Island challenge|trial]] Pokémon. If used in a Trainer battle (except if used as a [[Snag Ball]] on a [[Shadow Pokémon]]), the opposing Trainer will deflect it, wasting the ball. If used on the [[Marowak (ghost)|ghost Marowak]], it will dodge it, wasting the ball. | The Timer Ball cannot be used in situations in which Poké Balls cannot be used, such as in wild battles with two or more opponents currently present or against a [[Island challenge|trial]] Pokémon. If used in a Trainer battle (except if used as a [[Snag Ball]] on a [[Shadow Pokémon]]), the opposing Trainer will deflect it, wasting the ball. If used on the [[Marowak (ghost)|ghost Marowak]], it will dodge it, wasting the ball. | ||
| Line 122: | Line 122: | ||
{{movedescentry|{{gameabbrev4|DPPtHGSS}}<br>{{gameabbrev5|BWB2W2}}|A somewhat different Ball that becomes progressively better the more turns there are in a battle.}} | {{movedescentry|{{gameabbrev4|DPPtHGSS}}<br>{{gameabbrev5|BWB2W2}}|A somewhat different Ball that becomes progressively better the more turns there are in a battle.}} | ||
{{movedescentry|{{gameabbrev6|XYORAS}}<br>{{gameabbrev7|SMUSUMPE}}|A somewhat different Poké Ball that becomes progressively more effective the more turns that are taken in battle.}} | {{movedescentry|{{gameabbrev6|XYORAS}}<br>{{gameabbrev7|SMUSUMPE}}|A somewhat different Poké Ball that becomes progressively more effective the more turns that are taken in battle.}} | ||
{{movedescentry|{{gameabbrev8|SwShBDSP}}|A somewhat different Poké Ball that becomes progressively more effective at catching Pokémon the more turns that are taken in battle.}} | |||
{{movedescentry|{{gameabbrev9|SV}}|A somewhat different Poké Ball that becomes more effective at catching Pokémon the more turns that are taken in battle.}} | |||
|} | |} | ||
|} | |} | ||
===Acquisition=== | ===Acquisition=== | ||
{{ItemAvailability/ | {{ItemAvailability/head|Poké Balls}} | ||
|- | |- | ||
| {{gameabbrev3|RSE}} | | {{gameabbrev3|RSE}} | ||
| Line 141: | Line 143: | ||
|- | |- | ||
| {{gameabbrevss|XD}} | | {{gameabbrevss|XD}} | ||
| [[Citadark Isle]] | | [[Citadark Isle]]<br>[[Realgam Tower]] ([[Battle CD]] [[Battle CDs 21-30#Battle CD 27|27]] and [[Battle CDs 21-30#Battle CD 28|28]] completion prizes) | ||
| [[Outskirt Stand]] | | [[Outskirt Stand]] | ||
|- | |- | ||
| {{gameabbrev4|DPPt}} | | {{gameabbrev4|DPPt}} | ||
| {{rt|207|Sinnoh}}{{sup/4|Pt}} | | {{rt|207|Sinnoh}}{{sup/4|Pt}} | ||
| | | {{ci|Canalave}}, {{ci|Snowpoint}}, and {{si|Pokémon League}} [[Poké Mart]]s, [[Celestic Town]] shop<br/>[[Pokémon News Press]] | ||
|- | |- | ||
| {{gameabbrev4|HGSS}} | | {{gameabbrev4|HGSS}} | ||
| Line 157: | Line 159: | ||
|- | |- | ||
| {{gameabbrev5|BW}} | | {{gameabbrev5|BW}} | ||
| [[Castelia City]], [[Chargestone Cave]], [[Icirrus City]], [[Challenger's Cave]] | | [[Castelia City]], [[Chargestone Cave]], [[Icirrus City]], [[Challenger's Cave]]<br>[[Passerby Analytics HQ]] (complete "How long have you been playing?" survey) | ||
| {{ci|Opelucid}} and {{un|Pokémon League}} [[Poké Mart]]s; [[Shopping Mall Nine]] | | {{ci|Opelucid}} and {{un|Pokémon League}} [[Poké Mart]]s; [[Shopping Mall Nine]] | ||
|- | |- | ||
| {{gameabbrev5|B2W2}} | | {{gameabbrev5|B2W2}} | ||
| {{rt|12|Unova}}, [[Castelia City]], [[Striaton City]] | | {{rt|12|Unova}}, [[Castelia City]], [[Striaton City]]<br>[[Passerby Analytics HQ]] (complete "How long have you been playing?" survey) | ||
| {{ci|Opelucid}}, {{OBP|Victory Road|Black 2 and White 2}}, and {{ci|Icirrus}} [[Poké Mart]]s; [[Shopping Mall Nine]] | | {{ci|Opelucid}}, {{OBP|Victory Road|Black 2 and White 2}}, and {{ci|Icirrus}} [[Poké Mart]]s; [[Shopping Mall Nine]] | ||
|- | |||
| {{gameabbrevss|DW}}{{tt|*|No longer in service}} | |||
| | |||
| {{dwa|Rugged Mountain}} | |||
|- | |- | ||
| {{gameabbrev6|XY}} | | {{gameabbrev6|XY}} | ||
| [[Route]]s {{rtn|19|Kalos}} and {{rtn|17|Kalos}}; [[Geosenge Town]], [[Poké Ball Factory]] | | [[Route]]s {{rtn|19|Kalos}} and {{rtn|17|Kalos}}; [[Geosenge Town]], [[Poké Ball Factory]] | ||
| {{ci|Coumarine}}, {{ci|Snowbelle}}, and {{ci|Lumiose}} (South Boulevard) [[Poké Mart]]s; {{DL| | | {{ci|Coumarine}}, {{ci|Snowbelle}}, and {{ci|Lumiose}} ([[South Boulevard]]) [[Poké Mart]]s; {{DL|Autumnal Avenue|Poké Ball Boutique}} | ||
|- | |- | ||
| {{gameabbrev6|ORAS}} | | {{gameabbrev6|ORAS}} | ||
| | | | ||
| {{ci|Rustboro}} [[Poké Mart]] (after speaking to | | {{ci|Rustboro}} [[Poké Mart]] (after speaking to the {{tc|Scientist}} on {{rt|116|Hoenn}})<br/>{{rt|119|Hoenn}} (20% chance after a [[rematch]] with {{tc|Pokémon Ranger}} Catherine and Pokémon Ranger Jackson) | ||
|- | |- | ||
| {{gameabbrevss|PMC}} | | {{gameabbrevss|PMC}}{{tt|*|No longer in service}} | ||
| | | | ||
| {{DL|PokéMileage Club|Mine Cart Adventure}} (all levels) | | {{DL|PokéMileage Club|Mine Cart Adventure}} (all levels) | ||
| Line 179: | Line 185: | ||
| [[Blush Mountain]] | | [[Blush Mountain]] | ||
| {{to|Paniola}} [[Poké Mart]], {{DL|Royal Avenue|Thrifty Megamart}}<br>[[Festival Plaza]] ([[Festival Plaza#Goody shops|Ball Shop]]){{sup/7|MUM}} | | {{to|Paniola}} [[Poké Mart]], {{DL|Royal Avenue|Thrifty Megamart}}<br>[[Festival Plaza]] ([[Festival Plaza#Goody shops|Ball Shop]]){{sup/7|MUM}} | ||
|- | |||
| {{gameabbrev8|SwSh}} | |||
| | |||
| All [[Wild Area]] [[Watt Trader]]s (50 {{Watt}})<br>[[Hammerlocke]] [[Poké Mart]] (Southern [[Pokémon Center]])<br>[[Wyndon Stadium]] | |||
|- | |||
| {{gameabbrev8|SwSh}}{{gameabbrev8|IA}} | |||
| | |||
| Hidden [[recurring item]] ([[Brawlers' Cave]])<br>[[Cram-o-matic]] ([[White Apricorn]]) | |||
|- | |||
| {{gameabbrev8|SwSh}}{{gameabbrev8|CT}} | |||
| | |||
| [[Snowslide Slope]] [[Watt Trader]] (50 {{Watt}})<br>Hidden [[recurring item]] ([[Frostpoint Field]], [[Giant's Bed]], [[Ballimere Lake]]) | |||
|- | |||
| {{gameabbrev8|BDSP}} | |||
| | |||
| {{ci|Canalave}}, {{ci|Snowpoint}}, and {{si|Pokémon League}} [[Poké Mart]]s, [[Celestic Town]] shop<br/>[[Pokémon News Press]] | |||
|- | |||
| {{gameabbrev9|SV}} | |||
| [[Area Zero]], [[Asado Desert]], [[Casseroya Lake]], [[Glaseado Mountain]], [[East Province (Area Three)]], [[North Province (Area Two)]], [[West Province (Area One)]]<br>Reward for registering 220 Pokémon in the [[List of Pokémon by Paldea Pokédex number|Paldea Pokédex]] (×10) | |||
| All [[Poké Mart]]s (after earning 8 [[Badge|Gym Badges]]), [[Porto Marinada Market|Porto Marinada auction]] | |||
|- | |||
| {{gameabbrev9|SV}}{{gameabbrev9|TM}} | |||
| [[Reveler's Road]] | |||
| {{DL|Mossui Town|Peachy's}} (after earning 8 [[Badge|Gym Badge]]s) | |||
|- | |||
| {{gameabbrev9|SV}}{{gameabbrev9|ID}} | |||
| [[Polar Biome]] | |||
| [[Vending machine]]s ([[Terarium]])<br>[[Item Printer]] (Poké Ball Lotto) | |||
|} | |} | ||
|} | |} | ||
== | ====Distribution==== | ||
{| style=" | {| class="roundy" style="background: #{{Poké Balls color light}}; border: 5px solid #{{Poké Balls color}}" | ||
|- | |- | ||
|style="{{roundy|80px}} border: 2px solid #{{Poké Balls color dark}}; background: #{{Poké Balls color light}}"| [[File:SugimoriTimerBall.png|100px]] | | | ||
{| border=1 style="background:#FFF; border:1px solid #{{Poké Balls color light}}; border-collapse:collapse" | |||
|- | |||
! style="background:#FFF; {{roundytl|5px}}" | Games | |||
! style="background:#FFF" | Event | |||
! style="background:#FFF" | Language/Region | |||
! style="background:#FFF; {{roundytr|5px}}" | Distribution period | |||
|- style="background:#FFF;" | |||
| rowspan=2 | {{gameabbrev9|SV}} | |||
| {{DL|List of other event distributions (Generation IX)|Variety Ball Sets}} | |||
| Japan | |||
| November 18, 2022 to March 7, 2023 | |||
|- style="background:#FFF;" | |||
| {{DL|List of other event distributions (Generation IX)|Miscellaneous items: Rare Candies, Max Revives and variety ball set}} | |||
| Japanese | |||
| April 13 to October 2, 2023 | |||
|} | |||
|} | |||
===NPC usage=== | |||
====Pokémon Scarlet and Violet==== | |||
[[Giacomo]] keeps his Pokémon in Timer Balls. | |||
==Gallery== | |||
===Artwork=== | |||
{| style="margin:auto; text-align:center; {{roundy|20px}} border:2px solid #{{Poké Balls color dark}}; background:#{{Poké Balls color}}; font-size:80%" | |||
|- | |||
|style="{{roundy|80px}} border:2px solid #{{Poké Balls color dark}}; background:#{{Poké Balls color light}}"| [[File:SugimoriTimerBall.png|100px]] | |||
|style="{{roundy|80px}} border: 2px solid #{{Poké Balls color dark}}; background: #{{Poké Balls color light}}"| [[File:Bag Timer Ball SV Sprite.png|100px]] | |||
|- | |- | ||
| Artwork by<br>{{color2|000|Ken Sugimori}} | | Artwork by<br>{{color2|000|Ken Sugimori}} | ||
| Artwork from<br>{{color2|000|Pokémon Scarlet and Violet|Scarlet and Violet}} | |||
|} | |} | ||
===Sprites=== | ===Sprites=== | ||
{| style="margin:auto; text-align:center; {{roundy|20px}} border: 2px solid #{{Poké Balls color dark}}; background: #{{Poké Balls color}}; font-size: 80%" | {| style="margin:auto; text-align:center; {{roundy|20px}} border:2px solid #{{Poké Balls color dark}}; background:#{{Poké Balls color}}; font-size: 80%" | ||
|- | |- | ||
|style="{{roundy|80px}} border: 2px solid #{{Poké Balls color dark}}; background: #{{Poké Balls color light}}"| [[File:Timer Ball III.png]] | |style="{{roundy|80px}} border:2px solid #{{Poké Balls color dark}}; background:#{{Poké Balls color light}}"| [[File:Timer Ball III.png]] | ||
|style="{{roundy|80px}} border: 2px solid #{{Poké Balls color dark}}; background: #{{Poké Balls color light}}"| [[File:Timer Ball summary Colo.png]] | |style="{{roundy|80px}} border:2px solid #{{Poké Balls color dark}}; background:#{{Poké Balls color light}}"| [[File:Timer Ball summary Colo.png]] | ||
|style="{{roundy|80px}} border: 2px solid #{{Poké Balls color dark}}; background: #{{Poké Balls color light}}"| [[File:Timer Ball summary XD.png]] | |style="{{roundy|80px}} border:2px solid #{{Poké Balls color dark}}; background:#{{Poké Balls color light}}"| [[File:Timer Ball summary XD.png]] | ||
|style="{{roundy|80px}} border:2px solid #{{Poké Balls color dark}}; background:#{{Poké Balls color light}}"| [[File:Timer Ball summary IV.png]] | |||
|- | |- | ||
| In-battle and<br>Summary sprite from<br>{{color2|000|Generation III}} | | In-battle and<br>Summary sprite from<br>{{color2|000|Generation III}} | ||
| Summary sprite from<br>{{color2|000|Pokémon Colosseum|Colosseum}} | | Summary sprite from<br>{{color2|000|Pokémon Colosseum|Colosseum}} | ||
| Summary sprite from<br>{{color2|000|Pokémon XD: Gale of Darkness|XD: Gale of Darkness}} | | Summary sprite from<br>{{color2|000|Pokémon XD: Gale of Darkness|XD: Gale of Darkness}} | ||
| Summary sprite from<br>{{color2|000|Generation IV|Generations IV}} and {{color2|000|Generation V|V}} | |||
|- | |- | ||
|style="{{roundy|80px}} border: 2px solid #{{Poké Balls color dark}}; background: #{{Poké Balls color light}}"| [[File:Timer Ball | |style="{{roundy|80px}} border:2px solid #{{Poké Balls color dark}}; background:#{{Poké Balls color light}}"| [[File:Timer Ball battle IV.png]] | ||
|style="{{roundy|80px}} border: 2px solid #{{Poké Balls color dark}}; background: #{{Poké Balls color light}}"| [[File:Timer Ball | |style="{{roundy|80px}} border:2px solid #{{Poké Balls color dark}}; background:#{{Poké Balls color light}}"| [[File:Timer Ball summary PBR.png]] | ||
|style="{{roundy|80px}} border: 2px solid #{{Poké Balls color dark}}; background: #{{Poké Balls color light}}"| [[File:Timer Ball battle V.png]] | |style="{{roundy|80px}} border:2px solid #{{Poké Balls color dark}}; background:#{{Poké Balls color light}}"| [[File:Timer Ball battle V.png]] | ||
|- | |- | ||
| In-battle sprite in<br>{{color2|000|Generation IV}} | | In-battle sprite in<br>{{color2|000|Generation IV}} | ||
| Summary sprite from<BR>{{color2|000|Pokémon Battle Revolution|Battle Revolution}} | |||
| In-battle sprite in<br>{{color2|000|Generation V}} | | In-battle sprite in<br>{{color2|000|Generation V}} | ||
|} | |} | ||
===Models=== | ===Models=== | ||
{| style="margin:auto; text-align:center; {{roundy|20px}} border: 2px solid #{{Poké Balls color dark}}; background: #{{Poké Balls color}}; font-size: 80%" | {| style="margin:auto; text-align:center; {{roundy|20px}} border:2px solid #{{Poké Balls color dark}}; background:#{{Poké Balls color}}; font-size: 80%" | ||
|- | |- | ||
|style="{{roundy|80px}} border: 2px solid #{{Poké Balls color dark}}; background: #{{Poké Balls color light}}"| [[File:Timer Ball battle 3DS.png|100px]] | |style="{{roundy|80px}} border:2px solid #{{Poké Balls color dark}}; background:#{{Poké Balls color light}}"| [[File:Timer Ball battle 3DS.png|100px]] | ||
|style="{{roundy|80px}} border:2px solid #{{Poké Balls color dark}}; background:#{{Poké Balls color light}}"| [[File:Timer Ball VIII.png|100px]] | |||
|- | |- | ||
| In-battle model<br>{{color2|000|Pokémon X and Y|X, Y}}, {{color2|000|Pokémon Omega Ruby and Alpha Sapphire|Omega Ruby,<br>Alpha Sapphire}}, {{color2|000|Pokémon Sun and Moon|Sun, Moon}},<br>{{color2|000|Pokémon Ultra Sun and Ultra Moon|Ultra Sun, and Ultra Moon}} | | In-battle model from<br>{{color2|000|Pokémon X and Y|X, Y}}, {{color2|000|Pokémon Omega Ruby and Alpha Sapphire|Omega Ruby,<br>Alpha Sapphire}}, {{color2|000|Pokémon Sun and Moon|Sun, Moon}},<br>{{color2|000|Pokémon Ultra Sun and Ultra Moon|Ultra Sun, and Ultra Moon}} | ||
| Model from<br>{{color2|000|Generation VIII}} | |||
|} | |} | ||
==In the anime== | ==In the anime== | ||
[[File:DotchiNyo Poké Balls 4.png|thumb|250px|A Timer Ball in the {{pkmn|anime}}]] | [[File:DotchiNyo Poké Balls 4.png|thumb|250px|A Timer Ball in the {{pkmn|anime}}]] | ||
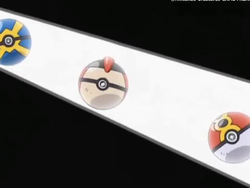
A Timer Ball appeared in [[Which One ~ Is It?]], a Japanese ending theme from the | A Timer Ball appeared in [[Which One ~ Is It?]], a Japanese ending theme from ''[[Pokémon the Series: Diamond and Pearl]]''. | ||
{{-}} | {{-}} | ||
==In the manga== | ==In the manga== | ||
[[File:Generation III Poké Balls Adventures.png|thumb|250px|A Timer Ball in Pokémon Adventures]] | [[File:Generation III Poké Balls Adventures.png|thumb|250px|A Timer Ball in [[Pokémon Adventures]]]] | ||
=== | ===Pokémon Adventures=== | ||
A Timer Ball first appeared in ''[[PS314|A Sketchy Smattering of Smeargle]]'' and ''[[PS315|Skirting Around Surskit I]]'', where {{adv|Emerald}} tried to use one to {{pkmn2|caught|catch}} {{adv|Jirachi}}. However, [[Guile Hideout]], seeking to catch Jirachi himself, used his sword to slice the Ball in two before it could hit its target. | ===={{MangaArc|Emerald}}==== | ||
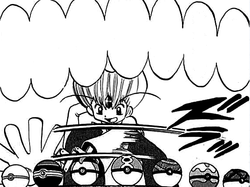
A Timer Ball first appeared in ''[[PS314|A Sketchy Smattering of Smeargle]]'' and ''[[PS315|Skirting Around Surskit I]]'', where {{adv|Emerald}} tried to use one to {{pkmn2|caught|catch}} {{adv|Jirachi}}. However, [[Guile Hideout]], seeking to catch Jirachi for himself, used his sword to slice the Ball in two before it could hit its target. | |||
More of Emerald's Timer Balls were seen in ''[[PS318|Sneaky Like Shedinja II]]'', ''[[PS330|The Final Battle III]]'', and ''[[PS332|The Final Battle V]]''. | |||
{{-}} | {{-}} | ||
==In the TCG== | ==In the TCG== | ||
[[File: | [[File:TimerBallSunMoon134.jpg|180px|thumb|Timer Ball]] | ||
{{main|Timer Ball (Sun & Moon 134)}} | {{main|Timer Ball (Sun & Moon 134)}} | ||
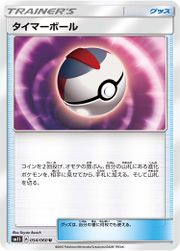
The {{TCG | The '''Timer Ball''' was introduced as an {{TCG|Item card}} in the [[Pokémon Trading Card Game]] during the English Sun & Moon Series (the Japanese Sun & Moon Era). It was first released in the Japanese {{TCG|Sun & Moon|Collection Sun}} expansion and the English {{TCG|Sun & Moon}} expansion, with artwork by [[Toyste Beach]]. It allows the player to flip two {{TCG|Coin}}s, search their deck for an Evolution Pokémon for each heads flipped, reveal them to the other player, and add them to their hand. | ||
{{-}} | {{-}} | ||
==Trivia== | |||
* Timer Balls can achieve one of the highest catch rates of any Poké Ball other than the [[Master Ball]]. | |||
** From [[Generation]] {{Gen|III}} to {{Gen|IV}}, Timer Balls have a better catch rate than [[Ultra Ball]]s after 11 turns, and better than [[Dusk Ball]]s after 26 turns. | |||
** From Generation V to VI, Timer Balls have a better catch rate than Ultra Balls after 4 turns, and better than Dusk Balls after 9 turns. | |||
** From [[Generation VII]] onward, Timer Balls have a better catch rate than Ultra Balls after 4 turns, and better than Dusk Balls after 7 turns. | |||
==In other languages== | ==In other languages== | ||
| Line 241: | Line 317: | ||
|fr=Chrono Ball | |fr=Chrono Ball | ||
|de=Timerball | |de=Timerball | ||
|id=Bola Timer | |||
|it=Timer Ball | |it=Timer Ball | ||
|ko=타이마볼 ''Timer Ball'' | |ko=타이마볼 ''Timer Ball'' | ||
|pt_br=Bola Tempo | |pt_br=Bola Tempo | ||
|pt_eu=Bola Tempo | |||
|ru=Хроно-Болл ''Khrono-Boll'' | |ru=Хроно-Болл ''Khrono-Boll'' | ||
|es=Turno Ball | |es=Turno Ball | ||
| Line 257: | Line 335: | ||
[[es:Turno Ball]] | [[es:Turno Ball]] | ||
[[fr:Chrono Ball]] | [[fr:Chrono Ball]] | ||
[[it: | [[it:Timer Ball]] | ||
[[ja:タイマーボール]] | [[ja:タイマーボール]] | ||
[[zh:计时球(道具)]] | [[zh:计时球(道具)]] | ||
Latest revision as of 11:53, 11 March 2024
| |||||||||||||||||
| |||||||||||||||||
| |||||||||||||||||
The Timer Ball (Japanese: タイマーボール Timer Ball) is a type of Poké Ball introduced in Generation III. It can be used to catch a wild Pokémon, being more likely to succeed the longer it has been since the start of the battle. It was developed by the Devon Corporation.
In the core series games
Price
|
Effect
Manual activation
When used from the Bag in a wild encounter, it attempts to catch the wild Pokémon. It has a catch rate modifier that increases with the number of turns that have passed in the encounter (so this counter is 0 on the first turn), calculated as follows:
From Generations III to IV:
From Generation V onward:
| Turns passed | Catch rate modifier | ||
|---|---|---|---|
| Gen. III-IV | Gen. V+ | ||
| 0 | 1 | 1 | |
| 1 | 1.1 | 5325/4096 (~1.3) | |
| 2 | 1.2 | 6554/4096 (~1.6) | |
| 3 | 1.3 | 7783/4096 (~1.9) | |
| 4 | 1.4 | 9012/4096 (~2.2) | |
| 5 | 1.5 | 10241/4096 (~2.5) | |
| 6 | 1.6 | 11470/4096 (~2.8) | |
| 7 | 1.7 | 12699/4096 (~3.1) | |
| 8 | 1.8 | 13928/4096 (~3.4) | |
| 9 | 1.9 | 15157/4096 (~3.7) | |
| 10 | 2 | 4 | |
| 11 | 2.1 | 4 | |
| 12 | 2.2 | 4 | |
| 13 | 2.3 | 4 | |
| 14 | 2.4 | 4 | |
| 15 | 2.5 | 4 | |
| 16 | 2.6 | 4 | |
| 17 | 2.7 | 4 | |
| 18 | 2.8 | 4 | |
| 19 | 2.9 | 4 | |
| 20 | 3 | 4 | |
| 21 | 3.1 | 4 | |
| 22 | 3.2 | 4 | |
| 23 | 3.3 | 4 | |
| 24 | 3.4 | 4 | |
| 25 | 3.5 | 4 | |
| 26 | 3.6 | 4 | |
| 27 | 3.7 | 4 | |
| 28 | 3.8 | 4 | |
| 29 | 3.9 | 4 | |
| 30+ | 4 | 4 | |
If used on an Ultra Beast, the catch rate modifier is instead always set to 410/4096× (~0.1×).
The Timer Ball cannot be used in situations in which Poké Balls cannot be used, such as in wild battles with two or more opponents currently present or against a trial Pokémon. If used in a Trainer battle (except if used as a Snag Ball on a Shadow Pokémon), the opposing Trainer will deflect it, wasting the ball. If used on the ghost Marowak, it will dodge it, wasting the ball.
Held item
Fling fails if the user is holding a Timer Ball.
Description
|
Acquisition
Distribution
|
NPC usage
Pokémon Scarlet and Violet
Giacomo keeps his Pokémon in Timer Balls.
Gallery
Artwork
|
|
| Artwork by Ken Sugimori |
Artwork from Scarlet and Violet |
Sprites
| In-battle and Summary sprite from Generation III |
Summary sprite from Colosseum |
Summary sprite from XD: Gale of Darkness |
Summary sprite from Generations IV and V |
| In-battle sprite in Generation IV |
Summary sprite from Battle Revolution |
In-battle sprite in Generation V |
Models

|

|
| In-battle model from X, Y, Omega Ruby, Alpha Sapphire, Sun, Moon, Ultra Sun, and Ultra Moon |
Model from Generation VIII |
In the anime
A Timer Ball appeared in Which One ~ Is It?, a Japanese ending theme from Pokémon the Series: Diamond and Pearl.
In the manga
Pokémon Adventures
Emerald arc
A Timer Ball first appeared in A Sketchy Smattering of Smeargle and Skirting Around Surskit I, where Emerald tried to use one to catch Jirachi. However, Guile Hideout, seeking to catch Jirachi for himself, used his sword to slice the Ball in two before it could hit its target.
More of Emerald's Timer Balls were seen in Sneaky Like Shedinja II, The Final Battle III, and The Final Battle V.
In the TCG
- Main article: Timer Ball (Sun & Moon 134)
The Timer Ball was introduced as an Item card in the Pokémon Trading Card Game during the English Sun & Moon Series (the Japanese Sun & Moon Era). It was first released in the Japanese Collection Sun expansion and the English Sun & Moon expansion, with artwork by Toyste Beach. It allows the player to flip two Coins, search their deck for an Evolution Pokémon for each heads flipped, reveal them to the other player, and add them to their hand.
Trivia
- Timer Balls can achieve one of the highest catch rates of any Poké Ball other than the Master Ball.
- From Generation III to IV, Timer Balls have a better catch rate than Ultra Balls after 11 turns, and better than Dusk Balls after 26 turns.
- From Generation V to VI, Timer Balls have a better catch rate than Ultra Balls after 4 turns, and better than Dusk Balls after 9 turns.
- From Generation VII onward, Timer Balls have a better catch rate than Ultra Balls after 4 turns, and better than Dusk Balls after 7 turns.
In other languages
| ||||||||||||||||||||||||||||||||||||||||

|
This item article is part of Project ItemDex, a Bulbapedia project that aims to write comprehensive articles on all items. |


