Appendix:Emerald walkthrough/Section 21: Difference between revisions
mNo edit summary |
|||
| (18 intermediate revisions by 8 users not shown) | |||
| Line 1: | Line 1: | ||
==Slateport City/Lilycove City== | ==Slateport City/Lilycove City== | ||
That [[S.S. Ticket]] is burning a hole in your Bag! Fly to either {{ci|Slateport}} or {{ci|Lilycove}}, then head to the harbor building. Present your ticket to the woman near the ferry, and she'll ask where you'd like to go. | That [[S.S. Ticket]] is burning a hole in your Bag! Fly to either {{ci|Slateport}} or {{ci|Lilycove}}, then head to the harbor building. Present your ticket to the woman near the ferry, and she'll ask where you'd like to go. | ||
==S.S. Tidal== | ==S.S. Tidal== | ||
| Line 23: | Line 23: | ||
{{Trainerentry|Spr RS Pokéfan M.png|Pokéfan|Colton|3360|6|300|Skitty|♀|22|Oran Berry|300|Skitty|♀|36|Oran Berry|300|Skitty|♀|40|Oran Berry|300|Skitty|♀|12|Oran Berry|300|Skitty|♀|30|Oran Berry|301|Delcatty|♀|42|Oran Berry}} | {{Trainerentry|Spr RS Pokéfan M.png|Pokéfan|Colton|3360|6|300|Skitty|♀|22|Oran Berry|300|Skitty|♀|36|Oran Berry|300|Skitty|♀|40|Oran Berry|300|Skitty|♀|12|Oran Berry|300|Skitty|♀|30|Oran Berry|301|Delcatty|♀|42|Oran Berry}} | ||
{{Trainerdiv|water}} | {{Trainerdiv|water}} | ||
{{Trainerentry|Spr RS Lady.png|Lady| | {{Trainerentry|Spr RS Lady.png|Lady|Naomi{{sup/3|E}}|9000|1|315|Roselia|♀|45|Nugget}} | ||
{{Trainerdiv|water}} | {{Trainerdiv|water}} | ||
{{Trainerentry|Spr RS Gentleman.png|Gentleman|Thomas|3600|1|335|Zangoose|♂|45|}} | {{Trainerentry|Spr RS Gentleman.png|Gentleman|Thomas|3600|1|335|Zangoose|♂|45|}} | ||
| Line 39: | Line 39: | ||
{{itlisth|water}} | {{itlisth|water}} | ||
{{itemlist|TM Dark|From a man in the top-right cabin|E=yes|display={{TM|49|Snatch}}}} | {{itemlist|TM Dark|From a man in the top-right cabin|E=yes|display={{TM|49|Snatch}}}} | ||
{{itemlist|Leftovers|In the northwest trash can on the basement floor (hidden)|E=yes | {{itemlist|Leftovers|In the northwest trash can on the basement floor (hidden)|E=yes}} | ||
{{itlistfoot|water}} | {{itlistfoot|water}} | ||
|} | |} | ||
===1F=== | ===1F=== | ||
After you climb aboard, you find [[Mr. Briney]] and [[Peeko]] on the north side of the ship. The two are happy to be back out on the seas, and even more so now that Briney has been made the ship's honorary captain! | After you climb aboard, [[Scott]] will come and tell you that someone like you should visit the Battle Frontier and he's already made arrangements with the ship's captain to let you visit there anytime. After that, you can find [[Mr. Briney]] and [[Peeko]] on the north side of the ship. The two are happy to be back out on the seas, and even more so now that Briney has been made the ship's honorary captain! | ||
There are eight cabins on the main floor | There are eight cabins on the main floor with three cabins on each side holding Trainers who are anxious to battle. On the south side, the second cabin from the left is your own, with a bed where you can rest your Pokémon. If you're going from Slateport to Lilycove, the ship will reach its destination after you sleep once, but if you're going from Lilycove to Slateport you'll need two rests until you arrive. On the north side, the farthest cabin to the right holds a Poké Maniac who gives you {{TM|49|Snatch}}. | ||
===Basement=== | ===Basement=== | ||
Head downstairs to visit the ship's spacious storage. There's plenty of room for Pokémon battles to play out, and the two hardworking Sailors here will happily oblige. Be sure to search the trash cans to discover some | Head downstairs to visit the ship's spacious storage. There's plenty of room for Pokémon battles to play out, and the two hardworking Sailors here will happily oblige. Be sure to search the trash cans to discover some [[Leftovers]], as well. | ||
===The Battle Frontier beckons!=== | |||
After you reach your destination, exit the ship and board it once again. This time, choose to go to the Battle Frontier! | |||
==Battle Frontier== | ==Battle Frontier== | ||
[[File:Battle Frontier E.png|thumb|300px|Battle Frontier]] | [[File:Battle Frontier E.png|thumb|300px|Battle Frontier]] | ||
[[File:Battle Factory arena E.png|thumb|Inside the Battle Factory]] | [[File:Battle Factory arena E.png|thumb|Inside the Battle Factory]] | ||
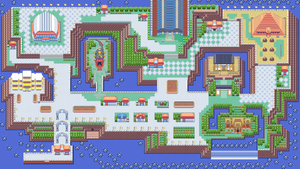
The great {{gdis|Battle Frontier|III}} was built to provide a challenge to all those able to defeat the Pokémon League, with the best and brightest Trainers from across the region competing here to determine who among them is the strongest. The small island that once held only the {{gdis|Battle Tower|III}} has been developed to include seven facilities in all. These are, from west to east: the Battle Factory, Battle Dome, Battle Pike, Battle Tower, Battle Arena, Battle Palace, and Battle Pyramid. Each facility is headed by a [[Frontier Brain]], elite Trainers who have mastered the art of battling under their respective rule sets. | The great {{gdis|Battle Frontier|III}} was built to provide a challenge to all those able to defeat the Pokémon League, with the best and brightest Trainers from across the region competing here to determine who among them is the strongest. The small island that once held only the {{gdis|Battle Tower|III}} has been developed to include seven facilities in all. These are, from west to east: the Battle Factory, Battle Dome, Battle Pike, Battle Tower, Battle Arena, Battle Palace, and Battle Pyramid. Each facility is headed by a [[Frontier Brain]], elite Trainers who have mastered the art of battling under their respective rule sets. | ||
{| class="expandable" style="margin: auto; background: #{{locationcolor/med| | {| class="expandable" style="margin: auto; background: #{{locationcolor/med|road}}; {{roundy}}; border: 5px solid #{{locationcolor/light|road}};" | ||
|- align="center" | |- align="center" | ||
! Available Pokémon | ! Available Pokémon | ||
|- | |- | ||
| | | | ||
{{Catch/header| | {{Catch/header|road|no}} | ||
{{Catch/div| | {{Catch/div|road|Special}} | ||
{{Catch/entry3|052|Meowth|no|no|yes|Trade|The same as the Traded Pokémon|One|tradenum=300|tradename=Skitty|type1=Normal}} | {{Catch/entry3|052|Meowth|no|no|yes|Trade|The same as the Traded Pokémon|One|tradenum=300|tradename=Skitty|type1=Normal}} | ||
{{Catch/entry3|185|Sudowoodo|no|no|yes|Special|40|One|type1=Rock}} | {{Catch/entry3|185|Sudowoodo|no|no|yes|Special|40|One|type1=Rock}} | ||
{{Catch/footer| | {{Catch/footer|road}} | ||
|} | |} | ||
{| class="expandable" style="margin: auto; background: #{{locationcolor/med| | {| class="expandable" style="margin: auto; background: #{{locationcolor/med|road}}; {{roundy}}; border: 5px solid #{{locationcolor/light|road}};" | ||
|- align="center" | |- align="center" | ||
! Items | ! Items | ||
|- | |- | ||
| | | | ||
{{itlisth| | {{itlisth|road}} | ||
{{ | {{Itemlist|None|Gift from a guide in the front [[gate]] upon first entering|E=yes|display={{DL|Trainer Card (game)|Frontier Pass}}}} | ||
{{Itemlist|None|Gift from [[Scott]] when first talked to at his house|E=yes|display={{tt|1-3|Depending on how many times Scott was met throughout the game}} [[Battle Point|BP]]}} | |||
{{itemlist|Retro Mail|Held by Meowow, the traded {{p|Meowth}}|E=yes}} | |||
{{itemlist|None|From Scott, after winning 50 consecutive battles in the Battle Tower|E=yes|display=[[Ornament|Silver Shield]]|sprite=SilverShieldSprite}} | {{itemlist|None|From Scott, after winning 50 consecutive battles in the Battle Tower|E=yes|display=[[Ornament|Silver Shield]]|sprite=SilverShieldSprite}} | ||
{{itemlist|None|From Scott, after winning 100 consecutive battles in the Battle Tower|E=yes|display=[[Ornament|Gold Shield]]|sprite=GoldShieldSprite}} | {{itemlist|None|From Scott, after winning 100 consecutive battles in the Battle Tower|E=yes|display=[[Ornament|Gold Shield]]|sprite=GoldShieldSprite}} | ||
{{itemlist|Lansat Berry|From Scott, after winning all seven Silver Symbols|E=yes}} | {{itemlist|Lansat Berry|From Scott, after winning all seven Silver Symbols|E=yes}} | ||
{{itemlist|Starf Berry|From Scott, after winning all seven Gold Symbols|E=yes}} | {{itemlist|Starf Berry|From Scott, after winning all seven Gold Symbols|E=yes}} | ||
{{itlistfoot| | {{itlistfoot|road}} | ||
|} | |} | ||
| Line 92: | Line 95: | ||
====Restrictions==== | ====Restrictions==== | ||
No two Pokémon may hold the same item, and items may not be used from the [[Bag]] during battle (except in the [[Battle Pyramid]]). Battles conducted in the Frontier do not award any experience or prize money. The following Pokémon cannot be entered for battle: {{p|Mewtwo}}, {{p|Mew}}, {{p|Lugia}}, {{p|Ho-Oh}}, {{p|Celebi}}, {{p|Kyogre}}, {{p|Groudon}}, {{p|Rayquaza}}, {{p|Jirachi}}, {{p|Deoxys}} (Speed Forme) and {{pkmn|Egg}}. | |||
===Scott's House=== | |||
Scott resides in a house located between the Battle Dome and Battle Tower, and will give you various rewards as you progress through the Battle Frontier. When you first arrive at the Battle Frontier, Scott will award you with 1, 2, or 3 BP depending on the how many times you spoke (11 in total) throughout the game. | |||
===Battle Factory=== | ===Battle Factory=== | ||
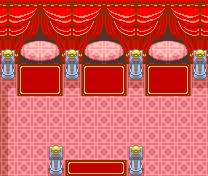
The {{ | The {{gdis|Battle Factory|III}} stands in the southwest corner of the island. Unlike the other facilities, the Battle Factory is less interested about a Trainer's ability to battle and more interested in researching a Trainer's capacity to use [[rental Pokémon]]. The Battle Factory functions the same way as the [[Battle Tent]] in [[Slateport City]]. Before each battle, challengers learn a bit of info about the upcoming opponent, and may switch one of their rental Pokémon with one used by the previous opponent. | ||
A Trainer's battle style is based on the moves of his or her Pokémon. Certain moves fall under {{DL|Battle Frontier (Generation III)|Battle style 2|one of seven categories}}. Depending on the number of moves from each category a Trainer's team has, his or her battle style will be described differently. | A Trainer's battle style is based on the moves of his or her Pokémon. Certain moves fall under {{DL|Battle Frontier (Generation III)|Battle style 2|one of seven categories}}. Depending on the number of moves from each category a Trainer's team has, his or her battle style will be described differently. | ||
Upon reaching the 21st and 42nd battle in a streak, [[ | Upon reaching the 21st and 42nd battle in a streak, [[Noland]] will appear and challenge you to a battle. Like all other Trainers here, his rental Pokémon are completely random. Defeat him to earn the [[Symbol|Knowledge Symbol]]. | ||
===Battle Dome=== | ===Battle Dome=== | ||
[[File:Battle Dome arena E.png|thumb|Inside the Battle Dome]] | |||
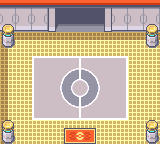
The [[Battle Dome]] is located in the island's northwest corner. Inside, tournaments between 16 Trainers are held. Before each battle, Trainers learn a bit about their opponent, including their Pokémon, battle style, and how they train. Then, both Trainers choose two Pokémon from their three-Pokémon party to use in battle. Competitors can learn who was eliminated in each round by viewing the tournament bracket. | |||
Upon winning five and ten championships, [[ | Upon winning five and ten championships, [[Tucker]] will appear and challenge you to a battle. Defeat him to earn the [[Symbol|Tactics Symbol]]. | ||
====VS Tucker (Silver Challenge)==== | ====VS Tucker (Silver Challenge)==== | ||
| Line 112: | Line 120: | ||
|sprite=Spr E Tucker.png | |sprite=Spr E Tucker.png | ||
|prize=13{{color2|000|Battle Point|BP}} | |prize=13{{color2|000|Battle Point|BP}} | ||
|class=Dome Ace|classlink= | |class=Dome Ace|classlink=Tucker|name=Tucker | ||
|game=E|location | |game=E|location=Battle Dome | ||
|pokemon=3}} | |pokemon=3}} | ||
| Line 158: | Line 166: | ||
|sprite=Spr E Tucker.png | |sprite=Spr E Tucker.png | ||
|prize=15{{color2|000|Battle Point|BP}} | |prize=15{{color2|000|Battle Point|BP}} | ||
|class=Dome Ace|classlink= | |class=Dome Ace|classlink=Tucker|name=Tucker | ||
|game=E|location | |game=E|location=Battle Dome | ||
|pokemon=3}} | |pokemon=3}} | ||
| Line 196: | Line 204: | ||
{{Party/Footer}} | {{Party/Footer}} | ||
|} | |} | ||
===Battle Pike=== | ===Battle Pike=== | ||
[[File:Battle Pike rooms E.png|thumb|Inside the Battle Pike]] | [[File:Battle Pike rooms E.png|thumb|Inside the Battle Pike]] | ||
The outside of the | The outside of the [[Battle Pike]] is designed like a {{p|Seviper}}. There are 21 rooms inside, in seven sets of three. Challengers may choose any of the three in a set to continue through, and in each room, any one of eight events may occur. A woman standing outside each room hints as to what is in one of the three rooms. | ||
* Single battle: A Trainer walks up to the challenger and battles. | * Single battle: A Trainer with 3 Pokémon walks up to the challenger and battles. | ||
* Double battle: Two Trainers | * Double battle: Two Trainers with 1 Pokémon each will team up and battle the player. This room will not appear if the player already has two fainted Pokémon. | ||
* | * Hard single battle and healing: 3 Pokémon per side against a higher-tier opponent; winner's Pokémon are completely healed. | ||
* Wild Pokémon: Wild {{p|Seviper}}, {{p|Milotic}}, {{p|Dusclops}}, {{p|Electrode}}, {{p|Breloom}}, and {{p|Wobbuffet}} appear. | * Wild Pokémon: Wild {{p|Seviper}}, {{p|Milotic}}, {{p|Dusclops}}, {{p|Electrode}}, {{p|Breloom}}, and {{p|Wobbuffet}} appear. | ||
* No event: A person who is not a Trainer stands in the room and does nothing. | * No event: A person who is not a Trainer stands in the room and does nothing. | ||
* Status effect: A surprise attack will inflict a status on one or more of the challenger's Pokémon. The status includes {{p|Kirlia}}'s {{status|burn}}, {{status| | * Status effect: A surprise attack will inflict a status on one or more of the challenger's Pokémon. The status includes {{p|Kirlia}}'s {{status|burn}}, {{status|poison}}, {{status|paralysis}}, or {{status|sleep}} and Dusclops's {{status|burn}} or {{status|freeze}}. | ||
* One or two recovery: One or two of the challenger's Pokémon will be healed. | * One or two recovery: One or two of the challenger's Pokémon will be healed. | ||
* Full recovery: All of the challenger's Pokémon will be healed. | * Full recovery: All of the challenger's Pokémon will be healed. | ||
Upon completing two and ten passes through the building, [[ | Upon completing two and ten passes through the building, [[Lucy]] will appear and challenge you to a battle. Defeat her to earn the [[Symbol|Luck Symbol]]. | ||
====VS Lucy (Silver Challenge)==== | ====VS Lucy (Silver Challenge)==== | ||
| Line 220: | Line 227: | ||
|sprite=Spr E Lucy.png | |sprite=Spr E Lucy.png | ||
|prize=11{{color2|000|Battle Point|BP}} | |prize=11{{color2|000|Battle Point|BP}} | ||
|class=Pike Queen|classlink= | |class=Pike Queen|classlink=Lucy|name=Lucy | ||
|game=E|location | |game=E|location=Battle Pike | ||
|pokemon=3}} | |pokemon=3}} | ||
| Line 267: | Line 274: | ||
|sprite=Spr E Lucy.png | |sprite=Spr E Lucy.png | ||
|prize=18{{color2|000|Battle Point|BP}} | |prize=18{{color2|000|Battle Point|BP}} | ||
|class=Pike Queen|classlink= | |class=Pike Queen|classlink=Lucy|name=Lucy | ||
|game=E|location | |game=E|location=Battle Pike | ||
|pokemon=3}} | |pokemon=3}} | ||
| Line 310: | Line 317: | ||
[[File:Battle Tower arena E.png|thumb|Inside the Battle Tower]] | [[File:Battle Tower arena E.png|thumb|Inside the Battle Tower]] | ||
The {{ | The {{gdis|Battle Tower|III}} stands tall on the north-central part of the island. It features 3-vs-3 Single Battle and 4-vs-4 Double Battle formats, and each round consists of seven opposing Trainers who increase in difficulty as the challenger progresses. | ||
Upon completing five and ten runs through the tower, [[ | Upon completing five and ten runs through the tower, [[Anabel]] will appear and challenge you to a battle. Defeat her to earn the [[Symbol|Ability Symbol]]. | ||
====VS Anabel (Silver Challenge)==== | ====VS Anabel (Silver Challenge)==== | ||
| Line 322: | Line 329: | ||
|prize=15{{color2|000|Battle Point|BP}} | |prize=15{{color2|000|Battle Point|BP}} | ||
|class=Salon Maiden|classlink=Tower Tycoon (Trainer class)|name=Anabel | |class=Salon Maiden|classlink=Tower Tycoon (Trainer class)|name=Anabel | ||
|game=E|location=Battle | |game=E|location=Battle Tower (Generation III)|locationname=Battle Tower | ||
|pokemon=3}} | |pokemon=3}} | ||
| Line 369: | Line 376: | ||
|prize=20{{color2|000|Battle Point|BP}} | |prize=20{{color2|000|Battle Point|BP}} | ||
|class=Salon Maiden|classlink=Tower Tycoon (Trainer class)|name=Anabel | |class=Salon Maiden|classlink=Tower Tycoon (Trainer class)|name=Anabel | ||
|game=E|location=Battle | |game=E|location=Battle Tower (Generation III)|locationname=Battle Tower| | ||
|pokemon=3}} | |pokemon=3}} | ||
| Line 411: | Line 418: | ||
[[File:Battle Arena battlefield E.png|thumb|Inside the Battle Arena]] | [[File:Battle Arena battlefield E.png|thumb|Inside the Battle Arena]] | ||
The | The [[Battle Arena]] is located to the southeast of the Battle Tower. Inside, two Pokémon are pitted against each other for three rounds. If neither Pokémon was defeated in that time, they are then rated on their battle proficiency in three categories. The Pokémon with the higher score wins, and the Pokémon with the lower score leaves the battlefield. A tie results in both Pokémon leaving the battlefield. A knockout means an automatic win for the Pokémon still standing. | ||
Similar to the [[Battle Tent]] in [[Fallarbor Town]], Pokémon are rated on their Mind, Skill, and Body. The Pokémon with the better rating in each category earns two points, while a tie earns a single point for each Pokémon. | Similar to the [[Battle Tent]] in [[Fallarbor Town]], Pokémon are rated on their Mind, Skill, and Body. The Pokémon with the better rating in each category earns two points, while a tie earns a single point for each Pokémon. | ||
* Mind highlights a Pokémon's offensive style. One point is earned for each damage-dealing attack chosen, and a single point is lost if either {{m|Protect}}, {{m|Detect}}, or {{m|Endure}} is chosen. No other moves award points. The Pokémon with the higher rating earns an additional two points for the overall judgment. | * Mind highlights a Pokémon's offensive style. One point is earned for each damage-dealing attack chosen (except {{m|Counter}}, {{m|Mirror Coat}}, and {{m|Bide}}), and a single point is lost if either {{m|Protect}}, {{m|Detect}}, or {{m|Endure}} is chosen. No other moves award points. Only the move selection matters; even if the Pokémon does not actually use the move (due to an effect such as {{status|paralysis}}), it will still score in this category. The Pokémon with the higher rating earns an additional two points for the overall judgment. | ||
* Skill focuses on a Pokémon's accuracy. One point is earned for each attack that lands successfully, while two points are deducted | * Skill focuses on a Pokémon's accuracy. One point is earned for each attack that lands successfully, while two points are deducted if the move misses, fails, or is prevented from executing due to an effect such as paralysis. If the move was caused to fail by {{m|Protect}}, {{m|Detect}}, or flinching from {{m|Fake Out}}, however, no points are deducted. Hitting a move [[Type#Type_effectiveness|super effectively]] rewards two points rather than one, but dealing not very effective damage instead deducts one point. The Pokémon with the higher rating earns an additional two points for the overall judgment. | ||
* Body focuses on the amount of HP remaining after three rounds compared to the total HP at the beginning. The Pokémon with the better ratio earns an additional two points for the overall judgment. | * Body focuses on the amount of HP remaining after three rounds compared to the total HP at the beginning. The Pokémon with the better ratio earns an additional two points for the overall judgment. | ||
Upon reaching 28 and 56 wins, [[ | Upon reaching 28 and 56 wins, [[Greta]] will appear and challenge you to a battle. Defeat her to earn the [[Symbol|Guts Symbol]]. | ||
====VS Greta (Silver Challenge)==== | ====VS Greta (Silver Challenge)==== | ||
| Line 426: | Line 433: | ||
|sprite=Spr E Greta.png | |sprite=Spr E Greta.png | ||
|prize=12{{color2|000|Battle Point|BP}} | |prize=12{{color2|000|Battle Point|BP}} | ||
|class=Arena Tycoon|classlink= | |class=Arena Tycoon|classlink=Greta|name=Greta | ||
|game=E|location | |game=E|location=Battle Arena | ||
|pokemon=3}} | |pokemon=3}} | ||
| Line 472: | Line 479: | ||
|sprite=Spr E Greta.png | |sprite=Spr E Greta.png | ||
|prize=13{{color2|000|Battle Point|BP}} | |prize=13{{color2|000|Battle Point|BP}} | ||
|class=Arena Tycoon|classlink= | |class=Arena Tycoon|classlink=Greta|name=Greta | ||
|game=E|location | |game=E|location=Battle Arena | ||
|pokemon=3}} | |pokemon=3}} | ||
| Line 515: | Line 522: | ||
[[File:Battle Palace arena E.png|thumb|Inside the Battle Palace]] | [[File:Battle Palace arena E.png|thumb|Inside the Battle Palace]] | ||
The | The [[Battle Palace]] stands in the southeast corner of the island. Like the {{to|Verdanturf}} [[Battle Tent]], Pokémon battles conducted here see Pokémon left to their own devices, with no outside commands from their Trainers. A Pokémon's battle style depends on its [[Nature]], and may change when its HP gets low. | ||
All moves belong to one of three categories: Attack, Defense, or Support. Defense moves are all moves that target the user. Support moves are all non-damaging moves that don't fall in the Defense category. Attack moves are all moves not listed under Defense or Support. | All moves belong to one of three categories: Attack, Defense, or Support. Defense moves are all moves that target the user. Support moves are all non-damaging moves that don't fall in the Defense category. Attack moves are all moves not listed under Defense or Support. | ||
| Line 521: | Line 528: | ||
Each Nature has a different ratios that determine how often a Pokémon with that Nature is likely to use Attack, Defense, or Support moves. These ratios change when the Pokémon's HP falls below 50%. During each turn of battle, a category is selected, and a random attack of that category is chosen from the Pokémon's moveset. If no such move exists, the Pokémon will appear "incapable of using its power", and skip its turn. | Each Nature has a different ratios that determine how often a Pokémon with that Nature is likely to use Attack, Defense, or Support moves. These ratios change when the Pokémon's HP falls below 50%. During each turn of battle, a category is selected, and a random attack of that category is chosen from the Pokémon's moveset. If no such move exists, the Pokémon will appear "incapable of using its power", and skip its turn. | ||
Upon completing a winning streak of 21 and 42 battles, [[ | Upon completing a winning streak of 21 and 42 battles, [[Spenser]] will appear and challenge you to a battle. Defeat him to earn the [[Symbol|Spirits Symbol]]. | ||
====VS Spenser (Silver Challenge)==== | ====VS Spenser (Silver Challenge)==== | ||
| Line 530: | Line 537: | ||
|sprite=Spr E Spenser.png | |sprite=Spr E Spenser.png | ||
|prize=15{{color2|000|Battle Point|BP}} | |prize=15{{color2|000|Battle Point|BP}} | ||
|class=Palace Maven|classlink= | |class=Palace Maven|classlink=Spenser|name=Spenser | ||
|game=E|location | |game=E|location=Battle Palace | ||
|pokemon=3}} | |pokemon=3}} | ||
| Line 577: | Line 584: | ||
|sprite=Spr E Spenser.png | |sprite=Spr E Spenser.png | ||
|prize=16{{color2|000|Battle Point|BP}} | |prize=16{{color2|000|Battle Point|BP}} | ||
|class=Palace Maven|classlink= | |class=Palace Maven|classlink=Spenser|name=Spenser | ||
|game=E|location | |game=E|location=Battle Palace | ||
|pokemon=3}} | |pokemon=3}} | ||
| Line 620: | Line 627: | ||
[[File:Battle Pyramid interior E.png|thumb|Inside the Battle Pyramid]] | [[File:Battle Pyramid interior E.png|thumb|Inside the Battle Pyramid]] | ||
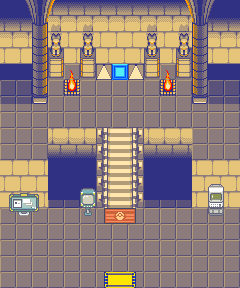
The | The [[Battle Pyramid]] stands tall on the island's northeast corner. There are seven floors, each one shrouded in darkness that can only be dispelled by defeating opponents on each floor. Challengers cannot take any items into the pyramid, and items found inside can only be used inside. These items are stored in a special Bag, the Battle Bag, that is loaned to each challenger at the entrance. The Battle Bag has enough room for ten different items, and up to 99 of each. If the challenger is victorious, the Battle Bag stores these items for the next battle; upon defeat, the Battle Bag's contents return to one [[Hyper Potion]] and one [[Ether]]. If at any point the challenger acquires more than 10 different items, extra items must be discarded. | ||
Wild Pokémon may be encountered within the pyramid, with strategies differing depending on how many floors the challenger has ventured through. A Hex Maniac next to the PC will tell challengers what to expect from the upcoming floor. These themes range from certain types of Pokémon, Pokémon with moves that inflict status ailments, and Pokémon with certain Abilities. | Wild Pokémon may be encountered within the pyramid, with strategies differing depending on how many floors the challenger has ventured through. A Hex Maniac next to the PC will tell challengers what to expect from the upcoming floor. These themes range from certain types of Pokémon, Pokémon with moves that inflict status ailments, and Pokémon with certain Abilities. | ||
After completing 21 floors and 70 floors, [[ | After completing 21 floors and 70 floors, [[Brandon]] appears at the peak and challenges you to a battle. Defeat him to earn the [[Symbol|Brave Symbol]]. | ||
====VS Brandon (Silver Challenge)==== | ====VS Brandon (Silver Challenge)==== | ||
| Line 633: | Line 640: | ||
|sprite=Spr E Brandon.png | |sprite=Spr E Brandon.png | ||
|prize=16{{color2|000|Battle Point|BP}} | |prize=16{{color2|000|Battle Point|BP}} | ||
|class=Pyramid King|classlink= | |class=Pyramid King|classlink=Brandon|name=Brandon | ||
|game=E|location | |game=E|location=Battle Pyramid | ||
|pokemon=3}} | |pokemon=3}} | ||
| Line 680: | Line 687: | ||
|sprite=Spr E Brandon.png | |sprite=Spr E Brandon.png | ||
|prize=19{{color2|000|Battle Point|BP}} | |prize=19{{color2|000|Battle Point|BP}} | ||
|class=Pyramid King|classlink= | |class=Pyramid King|classlink=Brandon|name=Brandon | ||
|game=E|location | |game=E|location=Battle Pyramid | ||
|pokemon=3}} | |pokemon=3}} | ||
| Line 725: | Line 732: | ||
====Artisan Cave==== | ====Artisan Cave==== | ||
[[File:Artisan_Cave_entrance_E.png|thumb|left|200px|Artisan Cave entrance]] | |||
[[File:Artisan Cave B1F E.png|thumb|Artisan Cave, B1F]] | [[File:Artisan Cave B1F E.png|thumb|Artisan Cave, B1F]] | ||
[[File:Artisan Cave 1F E.png|thumb|Artisan Cave, 1F]] | |||
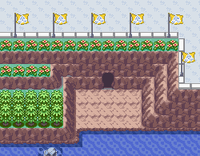
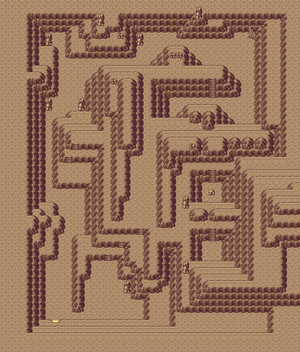
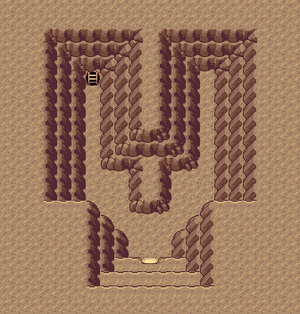
[[Artisan Cave]] is a network of tunnels that link one end of the island to the other. The entrance is located to the south, and | [[Artisan Cave]] is a network of tunnels that link one end of the island to the other. The entrance is located to the south, and is accesible after defeat Sudowoodo or catch it, you'll have access to the water behind it, surf on it, go down the waterfall, and go all the way to the west. The exit leads to a ledge just east of the Battle Tower. Only {{p|Smeargle}} can be found inside, and its [[signature move]], {{m|Sketch}}, lets it copy nearly any other move permanently. When paired with a compatible female, this allows a male Smeargle to pass on nearly any move to the resulting offspring. | ||
{| class="expandable" style="margin: auto; background: #{{locationcolor/med|cave}}; {{roundy}}; border: 5px solid #{{locationcolor/light|cave}};" | {| class="expandable" style="margin: auto; background: #{{locationcolor/med|cave}}; {{roundy}}; border: 5px solid #{{locationcolor/light|cave}};" | ||
| Line 745: | Line 754: | ||
{{itlisth|cave}} | {{itlisth|cave}} | ||
{{catch/div|cave|B1F}} | {{catch/div|cave|B1F}} | ||
{{itemlist|Iron|Northeast of the entrance, on the northern of two rocks (hidden)|E=yes | {{itemlist|Iron|Northeast of the entrance, on the northern of two rocks (hidden)|E=yes}} | ||
{{itemlist|HP Up|In the southeast pit|E=yes | {{itemlist|HP Up|In the southeast pit|E=yes}} | ||
{{itemlist|Zinc|On a rock in the eastern pit (hidden)|E=yes | {{itemlist|Zinc|On a rock in the eastern pit (hidden)|E=yes}} | ||
{{itemlist|Calcium|North-northeast area, on the right-most of two rocks near the stairway (hidden)|E=yes | {{itemlist|Calcium|North-northeast area, on the right-most of two rocks near the stairway (hidden)|E=yes}} | ||
{{itemlist|Protein|Northwest corner, on the north-most of two rocks (hidden)|E=yes | {{itemlist|Protein|Northwest corner, on the north-most of two rocks (hidden)|E=yes}} | ||
{{catch/div|cave|1F}} | {{catch/div|cave|1F}} | ||
{{itemlist|Carbos|At the end of the eastern path|E=yes | {{itemlist|Carbos|At the end of the eastern path|E=yes}} | ||
{{itlistfoot|cave}} | {{itlistfoot|cave}} | ||
|} | |} | ||
====Time for a Trade==== | ====Time for a Trade==== | ||
| Line 772: | Line 780: | ||
====Move Tutors==== | ====Move Tutors==== | ||
Southwest of the Battle Dome is a building with two elderly women inside. Both women are {{DL|Battle Frontier (Generation III)|Move Tutors}}, and each one offers to teach any of ten different moves to a Pokémon. Prices range from 16 to 48 [[Battle Point]]s. | Southwest of the Battle Dome is a building with two elderly women inside. Both women are {{DL|Battle Frontier (Generation III)|Move Tutors}}, and each one offers to teach any of ten different moves to a Pokémon. Prices range from 16 to 48 [[Battle Point]]s. | ||
{| | |||
| | |||
{{tutormv/header|emerald|BP|no|disp=Left Tutor}} | |||
{{tutormv|Softboiled|Normal|bp=16}} | |||
{{tutormv|Seismic Toss|Fighting|bp=24}} | |||
{{tutormv|Dream Eater|Psychic|bp=24}} | |||
{{tutormv|Mega Punch|Normal|bp=24}} | |||
{{tutormv|Mega Kick|Normal|bp=48}} | |||
{{tutormv|Body Slam|Normal|bp=48}} | |||
{{tutormv|Rock Slide|Rock|bp=48}} | |||
{{tutormv|Counter|Fighting|bp=48}} | |||
{{tutormv|Thunder Wave|Electric|bp=48}} | |||
{{tutormv|Swords Dance|Normal|bp=48}} | |||
|} | |||
|} | |||
| | |||
{{tutormv/header|emerald|BP|no|disp=Right Tutor}} | |||
{{tutormv|Defense Curl|Normal|bp=16}} | |||
{{tutormv|Snore|Normal|bp=24}} | |||
{{tutormv|Mud-Slap|Ground|bp=24}} | |||
{{tutormv|Swift|Normal|bp=24}} | |||
{{tutormv|Icy Wind|Ice|bp=24}} | |||
{{tutormv|Endure|Normal|bp=48}} | |||
{{tutormv|Psych Up|Normal|bp=48}} | |||
{{tutormv|Ice Punch|Ice|bp=48}} | |||
{{tutormv|ThunderPunch|Electric|bp=48}} | |||
{{tutormv|Fire Punch|Fire|bp=48}} | |||
|} | |||
|} | |||
|} | |||
====Exchange Service Corner==== | ====Exchange Service Corner==== | ||
[[File:Battle Point Exchange Service Corner E.png|thumb|Exchange Service Corner]] | [[File:Battle Point Exchange Service Corner E.png|thumb|Exchange Service Corner]] | ||
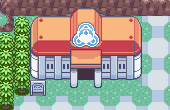
The {{DL|Battle Frontier (Generation III)|Battle Point Exchange Service Corner|Exchange Service Corner}} is located in front of the Battle Tower. Inside, Battle Points earned on the island may be redeemed for various prizes, including [[Secret Base]] goods, [[Vitamin]]s, and [[Held item]]s for Pokémon. | The {{DL|Battle Frontier (Generation III)|Battle Point Exchange Service Corner|Exchange Service Corner}} is located in front of the Battle Tower. Inside, Battle Points earned on the island may be redeemed for various prizes, including [[Secret Base]] goods, [[Vitamin]]s, and [[Held item]]s for Pokémon. | ||
*The held items that cost 48 BP are {{bag|Leftovers}} [[Leftovers]], {{bag|White Herb}} [[White Herb]], {{bag|Quick Claw}} [[Quick Claw]], and {{bag|Mental Herb}} [[Mental Herb]]. | |||
*The held items that cost 64 BP are {{bag|Bright Powder|display=BrightPowder}} [[BrightPowder]], {{bag|Choice Band}} [[Choice Band]], {{bag|King's Rock}} [[King's Rock]], {{bag|Focus Band}} [[Focus Band]], and {{bag|Scope Lens}} [[Scope Lens]]. | |||
{{-}} | |||
After completing the Battle Frontier by earning Silver and Gold Symbols for each facility, your final mission is to complete the Pokédex. The discovery of Hoenn-native Pokémon has brought the total number of species to 386, so there is still plenty to keep you busy! | After completing the Battle Frontier by earning Silver and Gold Symbols for each facility, your final mission is to complete the Pokédex. The discovery of Hoenn-native Pokémon has brought the total number of species to 386, so there is still plenty to keep you busy! | ||
| Line 785: | Line 827: | ||
|gamename=Emerald | |gamename=Emerald | ||
|prevsection=20 | |prevsection=20 | ||
|prevname=Terra Cave, Marine Cave, | |prevname=Littleroot Town, Safari Zone, Altering Cave, Desert Underpass, Terra Cave, Marine Cave, Meteor Falls, Trainer Hill | ||
|next=no | |next=no | ||
}} | }} | ||
Revision as of 02:18, 22 April 2024
Slateport City/Lilycove City
That S.S. Ticket is burning a hole in your Bag! Fly to either Slateport or Lilycove, then head to the harbor building. Present your ticket to the woman near the ferry, and she'll ask where you'd like to go.
S.S. Tidal
Captain Stern's mighty vessel, the S.S. Tidal, ferries people between Slateport City, Lilycove City, and the Battle Frontier.
| Trainers | ||||||||||||||||||||||||||||||||||||||||||||||||||||||||||||||||||||||||||||||||||||||||||||||||||||||||||||||||||||||||||||||||||||||||||||||||||||||||||||||||||||||||||||||||||||||||||||||||||||||||||||||||||
|---|---|---|---|---|---|---|---|---|---|---|---|---|---|---|---|---|---|---|---|---|---|---|---|---|---|---|---|---|---|---|---|---|---|---|---|---|---|---|---|---|---|---|---|---|---|---|---|---|---|---|---|---|---|---|---|---|---|---|---|---|---|---|---|---|---|---|---|---|---|---|---|---|---|---|---|---|---|---|---|---|---|---|---|---|---|---|---|---|---|---|---|---|---|---|---|---|---|---|---|---|---|---|---|---|---|---|---|---|---|---|---|---|---|---|---|---|---|---|---|---|---|---|---|---|---|---|---|---|---|---|---|---|---|---|---|---|---|---|---|---|---|---|---|---|---|---|---|---|---|---|---|---|---|---|---|---|---|---|---|---|---|---|---|---|---|---|---|---|---|---|---|---|---|---|---|---|---|---|---|---|---|---|---|---|---|---|---|---|---|---|---|---|---|---|---|---|---|---|---|---|---|---|---|---|---|---|---|---|---|---|
| ||||||||||||||||||||||||||||||||||||||||||||||||||||||||||||||||||||||||||||||||||||||||||||||||||||||||||||||||||||||||||||||||||||||||||||||||||||||||||||||||||||||||||||||||||||||||||||||||||||||||||||||||||
| Items | ||||||||||||||||
|---|---|---|---|---|---|---|---|---|---|---|---|---|---|---|---|---|
| ||||||||||||||||
1F
After you climb aboard, Scott will come and tell you that someone like you should visit the Battle Frontier and he's already made arrangements with the ship's captain to let you visit there anytime. After that, you can find Mr. Briney and Peeko on the north side of the ship. The two are happy to be back out on the seas, and even more so now that Briney has been made the ship's honorary captain!
There are eight cabins on the main floor with three cabins on each side holding Trainers who are anxious to battle. On the south side, the second cabin from the left is your own, with a bed where you can rest your Pokémon. If you're going from Slateport to Lilycove, the ship will reach its destination after you sleep once, but if you're going from Lilycove to Slateport you'll need two rests until you arrive. On the north side, the farthest cabin to the right holds a Poké Maniac who gives you TM49 (Snatch).
Basement
Head downstairs to visit the ship's spacious storage. There's plenty of room for Pokémon battles to play out, and the two hardworking Sailors here will happily oblige. Be sure to search the trash cans to discover some Leftovers, as well.
The Battle Frontier beckons!
After you reach your destination, exit the ship and board it once again. This time, choose to go to the Battle Frontier!
Battle Frontier
The great Battle Frontier was built to provide a challenge to all those able to defeat the Pokémon League, with the best and brightest Trainers from across the region competing here to determine who among them is the strongest. The small island that once held only the Battle Tower has been developed to include seven facilities in all. These are, from west to east: the Battle Factory, Battle Dome, Battle Pike, Battle Tower, Battle Arena, Battle Palace, and Battle Pyramid. Each facility is headed by a Frontier Brain, elite Trainers who have mastered the art of battling under their respective rule sets.
| Available Pokémon | |||||||||||||||||||||||||||||||||||||||||||||||||||||||||||||||||||||||||
|---|---|---|---|---|---|---|---|---|---|---|---|---|---|---|---|---|---|---|---|---|---|---|---|---|---|---|---|---|---|---|---|---|---|---|---|---|---|---|---|---|---|---|---|---|---|---|---|---|---|---|---|---|---|---|---|---|---|---|---|---|---|---|---|---|---|---|---|---|---|---|---|---|---|
| |||||||||||||||||||||||||||||||||||||||||||||||||||||||||||||||||||||||||
| Items | ||||||||||||||||||||||||||||||||||||
|---|---|---|---|---|---|---|---|---|---|---|---|---|---|---|---|---|---|---|---|---|---|---|---|---|---|---|---|---|---|---|---|---|---|---|---|---|
| ||||||||||||||||||||||||||||||||||||
Entrance
Overview
When you first enter the Battle Frontier, a woman at the entrance issues you a Frontier Pass. This pass holds your Trainer Card, a small map of the Frontier, and all records of your exploits here; this includes the number of accumulated Battle Points earned, and any of the seven Frontier Symbols won. One battle from any facility may be recorded and stored on the Frontier Pass to be viewed or overwritten at any time.
Battle Points are earned by winning a set number of battles in any facility, usually in small amounts, but gradually growing through each consecutive streak. Defeating the Frontier Brain for the first time earns challengers the Silver Symbol of that facility, as well as 10BP. The second defeat of the same Brain earns the challenger the facility's Gold Symbol and another 10BP. The Frontier Brain will only appear in 3-vs-3 Single Battle mode.
Restrictions
No two Pokémon may hold the same item, and items may not be used from the Bag during battle (except in the Battle Pyramid). Battles conducted in the Frontier do not award any experience or prize money. The following Pokémon cannot be entered for battle: Mewtwo, Mew, Lugia, Ho-Oh, Celebi, Kyogre, Groudon, Rayquaza, Jirachi, Deoxys (Speed Forme) and Egg.
Scott's House
Scott resides in a house located between the Battle Dome and Battle Tower, and will give you various rewards as you progress through the Battle Frontier. When you first arrive at the Battle Frontier, Scott will award you with 1, 2, or 3 BP depending on the how many times you spoke (11 in total) throughout the game.
Battle Factory
The Battle Factory stands in the southwest corner of the island. Unlike the other facilities, the Battle Factory is less interested about a Trainer's ability to battle and more interested in researching a Trainer's capacity to use rental Pokémon. The Battle Factory functions the same way as the Battle Tent in Slateport City. Before each battle, challengers learn a bit of info about the upcoming opponent, and may switch one of their rental Pokémon with one used by the previous opponent.
A Trainer's battle style is based on the moves of his or her Pokémon. Certain moves fall under one of seven categories. Depending on the number of moves from each category a Trainer's team has, his or her battle style will be described differently.
Upon reaching the 21st and 42nd battle in a streak, Noland will appear and challenge you to a battle. Like all other Trainers here, his rental Pokémon are completely random. Defeat him to earn the Knowledge Symbol.
Battle Dome
The Battle Dome is located in the island's northwest corner. Inside, tournaments between 16 Trainers are held. Before each battle, Trainers learn a bit about their opponent, including their Pokémon, battle style, and how they train. Then, both Trainers choose two Pokémon from their three-Pokémon party to use in battle. Competitors can learn who was eliminated in each round by viewing the tournament bracket.
Upon winning five and ten championships, Tucker will appear and challenge you to a battle. Defeat him to earn the Tactics Symbol.
VS Tucker (Silver Challenge)
| |||||||||||||||||||||||||||||||||||||||||||||||||||||||||||||||||||||||||||||||||||||||||||||
VS Tucker (Gold Challenge)
| |||||||||||||||||||||||||||||||||||||||||||||||||||||||||||||||||||||||||||||||||||||||||||||
Battle Pike
The outside of the Battle Pike is designed like a Seviper. There are 21 rooms inside, in seven sets of three. Challengers may choose any of the three in a set to continue through, and in each room, any one of eight events may occur. A woman standing outside each room hints as to what is in one of the three rooms.
- Single battle: A Trainer with 3 Pokémon walks up to the challenger and battles.
- Double battle: Two Trainers with 1 Pokémon each will team up and battle the player. This room will not appear if the player already has two fainted Pokémon.
- Hard single battle and healing: 3 Pokémon per side against a higher-tier opponent; winner's Pokémon are completely healed.
- Wild Pokémon: Wild Seviper, Milotic, Dusclops, Electrode, Breloom, and Wobbuffet appear.
- No event: A person who is not a Trainer stands in the room and does nothing.
- Status effect: A surprise attack will inflict a status on one or more of the challenger's Pokémon. The status includes Kirlia's burn, poison, paralysis, or sleep and Dusclops's burn or freeze.
- One or two recovery: One or two of the challenger's Pokémon will be healed.
- Full recovery: All of the challenger's Pokémon will be healed.
Upon completing two and ten passes through the building, Lucy will appear and challenge you to a battle. Defeat her to earn the Luck Symbol.
VS Lucy (Silver Challenge)
| |||||||||||||||||||||||||||||||||||||||||||||||||||||||||||||||||||||||||||||||||||||||||
VS Lucy (Gold Challenge)
| |||||||||||||||||||||||||||||||||||||||||||||||||||||||||||||||||||||||||||||||||||||||||||
Battle Tower
The Battle Tower stands tall on the north-central part of the island. It features 3-vs-3 Single Battle and 4-vs-4 Double Battle formats, and each round consists of seven opposing Trainers who increase in difficulty as the challenger progresses.
Upon completing five and ten runs through the tower, Anabel will appear and challenge you to a battle. Defeat her to earn the Ability Symbol.
VS Anabel (Silver Challenge)
| |||||||||||||||||||||||||||||||||||||||||||||||||||||||||||||||||||||||||||||||||||||||
VS Anabel (Gold Challenge)
| |||||||||||||||||||||||||||||||||||||||||||||||||||||||||||||||||||||||||||||||||||||||||
Battle Arena
The Battle Arena is located to the southeast of the Battle Tower. Inside, two Pokémon are pitted against each other for three rounds. If neither Pokémon was defeated in that time, they are then rated on their battle proficiency in three categories. The Pokémon with the higher score wins, and the Pokémon with the lower score leaves the battlefield. A tie results in both Pokémon leaving the battlefield. A knockout means an automatic win for the Pokémon still standing.
Similar to the Battle Tent in Fallarbor Town, Pokémon are rated on their Mind, Skill, and Body. The Pokémon with the better rating in each category earns two points, while a tie earns a single point for each Pokémon.
- Mind highlights a Pokémon's offensive style. One point is earned for each damage-dealing attack chosen (except Counter, Mirror Coat, and Bide), and a single point is lost if either Protect, Detect, or Endure is chosen. No other moves award points. Only the move selection matters; even if the Pokémon does not actually use the move (due to an effect such as paralysis), it will still score in this category. The Pokémon with the higher rating earns an additional two points for the overall judgment.
- Skill focuses on a Pokémon's accuracy. One point is earned for each attack that lands successfully, while two points are deducted if the move misses, fails, or is prevented from executing due to an effect such as paralysis. If the move was caused to fail by Protect, Detect, or flinching from Fake Out, however, no points are deducted. Hitting a move super effectively rewards two points rather than one, but dealing not very effective damage instead deducts one point. The Pokémon with the higher rating earns an additional two points for the overall judgment.
- Body focuses on the amount of HP remaining after three rounds compared to the total HP at the beginning. The Pokémon with the better ratio earns an additional two points for the overall judgment.
Upon reaching 28 and 56 wins, Greta will appear and challenge you to a battle. Defeat her to earn the Guts Symbol.
VS Greta (Silver Challenge)
| |||||||||||||||||||||||||||||||||||||||||||||||||||||||||||||||||||||||||||||||||||||||||||
VS Greta (Gold Challenge)
| |||||||||||||||||||||||||||||||||||||||||||||||||||||||||||||||||||||||||||||||||||||||||||
Battle Palace
The Battle Palace stands in the southeast corner of the island. Like the Verdanturf Battle Tent, Pokémon battles conducted here see Pokémon left to their own devices, with no outside commands from their Trainers. A Pokémon's battle style depends on its Nature, and may change when its HP gets low.
All moves belong to one of three categories: Attack, Defense, or Support. Defense moves are all moves that target the user. Support moves are all non-damaging moves that don't fall in the Defense category. Attack moves are all moves not listed under Defense or Support.
Each Nature has a different ratios that determine how often a Pokémon with that Nature is likely to use Attack, Defense, or Support moves. These ratios change when the Pokémon's HP falls below 50%. During each turn of battle, a category is selected, and a random attack of that category is chosen from the Pokémon's moveset. If no such move exists, the Pokémon will appear "incapable of using its power", and skip its turn.
Upon completing a winning streak of 21 and 42 battles, Spenser will appear and challenge you to a battle. Defeat him to earn the Spirits Symbol.
VS Spenser (Silver Challenge)
| |||||||||||||||||||||||||||||||||||||||||||||||||||||||||||||||||||||||||||||||||||||||||||
VS Spenser (Gold Challenge)
| |||||||||||||||||||||||||||||||||||||||||||||||||||||||||||||||||||||||||||||||||||||||
Battle Pyramid
The Battle Pyramid stands tall on the island's northeast corner. There are seven floors, each one shrouded in darkness that can only be dispelled by defeating opponents on each floor. Challengers cannot take any items into the pyramid, and items found inside can only be used inside. These items are stored in a special Bag, the Battle Bag, that is loaned to each challenger at the entrance. The Battle Bag has enough room for ten different items, and up to 99 of each. If the challenger is victorious, the Battle Bag stores these items for the next battle; upon defeat, the Battle Bag's contents return to one Hyper Potion and one Ether. If at any point the challenger acquires more than 10 different items, extra items must be discarded.
Wild Pokémon may be encountered within the pyramid, with strategies differing depending on how many floors the challenger has ventured through. A Hex Maniac next to the PC will tell challengers what to expect from the upcoming floor. These themes range from certain types of Pokémon, Pokémon with moves that inflict status ailments, and Pokémon with certain Abilities.
After completing 21 floors and 70 floors, Brandon appears at the peak and challenges you to a battle. Defeat him to earn the Brave Symbol.
VS Brandon (Silver Challenge)
| |||||||||||||||||||||||||||||||||||||||||||||||||||||||||||||||||||||||||||||||||||||||
VS Brandon (Gold Challenge)
| |||||||||||||||||||||||||||||||||||||||||||||||||||||||||||||||||||||||||||||||||||||||||||||
Other Areas
The Odd Tree
Southeast of the Battle Palace, there is an odd tree standing atop the waterfall that actually moves to avoid water. Use the Wailmer Pail to disturb it, and the tree attacks! It turns out to be a Sudowoodo, a Pokémon more akin to a rock than a tree.
Artisan Cave
Artisan Cave is a network of tunnels that link one end of the island to the other. The entrance is located to the south, and is accesible after defeat Sudowoodo or catch it, you'll have access to the water behind it, surf on it, go down the waterfall, and go all the way to the west. The exit leads to a ledge just east of the Battle Tower. Only Smeargle can be found inside, and its signature move, Sketch, lets it copy nearly any other move permanently. When paired with a compatible female, this allows a male Smeargle to pass on nearly any move to the resulting offspring.
| Available Pokémon | ||||||||||||||||||||||||||||||||||||||||||
|---|---|---|---|---|---|---|---|---|---|---|---|---|---|---|---|---|---|---|---|---|---|---|---|---|---|---|---|---|---|---|---|---|---|---|---|---|---|---|---|---|---|---|
| ||||||||||||||||||||||||||||||||||||||||||
| Items | ||||||||||||||||||||||||||||||||||||||||||||||||||||||||||||||
|---|---|---|---|---|---|---|---|---|---|---|---|---|---|---|---|---|---|---|---|---|---|---|---|---|---|---|---|---|---|---|---|---|---|---|---|---|---|---|---|---|---|---|---|---|---|---|---|---|---|---|---|---|---|---|---|---|---|---|---|---|---|---|
| ||||||||||||||||||||||||||||||||||||||||||||||||||||||||||||||
Time for a Trade
A small building stands just west of the Battle Tower. Speak to the woman inside, and she asks to trade her Meowth for your Skitty. Meowth cannot be found anywhere in the wild, while Skitty are found on Route 116.
Ranking Hall
The Ranking Hall is located on the island's north side, between the Battle Tower and Battle Pyramid. There are three rooms inside. Records for the Battle Factory, Battle Dome, and Battle Pike are displayed in the left room. The center room holds records for the Battle Tower. Records for the Battle Arena, Battle Palace, and Battle Pyramid are displayed in the right room.
Double or Nothing
In the building to the south of the Battle Pyramid, there are several people placing bets on which challengers they expect to clear certain facilities. After earning three Silver Symbols, one of the men will ask that you compete in a random facility, which changes daily. He then asks that you chip in some Battle Points—either 5, 10, or 15—and if you emerge victorious, he pays you back with twice that amount. If not, the Battle Points you gave him are lost.
Stats Judge
In the building behind the Pokémon Center is an old man who can judge one of your Pokémon's stats. He first describes the Pokémon's overall ability, which is based on the sum of its six IVs. He then indicates which stat is highest, and which range it falls under.
Move Tutors
Southwest of the Battle Dome is a building with two elderly women inside. Both women are Move Tutors, and each one offers to teach any of ten different moves to a Pokémon. Prices range from 16 to 48 Battle Points.
|
| ||||||||||||||||||||||||||||||||||||||||||||||||||||||||||||||||||||||||||||||||||
Exchange Service Corner
The Exchange Service Corner is located in front of the Battle Tower. Inside, Battle Points earned on the island may be redeemed for various prizes, including Secret Base goods, Vitamins, and Held items for Pokémon.
- The held items that cost 48 BP are
 Leftovers,
  White Herb,
  Quick Claw, and
  Mental Herb.
 - The held items that cost 64 BP are
 BrightPowder,
  Choice Band,
  King's Rock,
  Focus Band, and
  Scope Lens.
After completing the Battle Frontier by earning Silver and Gold Symbols for each facility, your final mission is to complete the Pokédex. The discovery of Hoenn-native Pokémon has brought the total number of species to 386, so there is still plenty to keep you busy!
|
Emerald walkthrough |

|
This article is part of Project Walkthroughs, a Bulbapedia project that aims to write comprehensive step-by-step guides on each Pokémon game. |


