Triple Battle: Difference between revisions
m (r2.7.6) (Robot: Modifying it:Lotta in Triplo to it:Lotta Pokémon#Lotta in triplo) |
|||
| (20 intermediate revisions by 14 users not shown) | |||
| Line 1: | Line 1: | ||
[[File:Triple Battle VI.png|thumb|250px|A Triple Battle]] | |||
[[File:Triple | |||
A '''Triple Battle''' (Japanese: '''トリプルバトル''' ''Triple Battle'') is a type of [[Pokémon battle]] featuring up to six Pokémon, with three Pokémon from each side battling at a time. It was introduced in {{game|Black and White|s}} and was predominately showcased in White. | A '''Triple Battle''' (Japanese: '''トリプルバトル''' ''Triple Battle'') is a type of [[Pokémon battle]] featuring up to six Pokémon, with three Pokémon from each side battling at a time. It was introduced in {{game|Black and White|s}} and was predominately showcased in White. | ||
| Line 16: | Line 14: | ||
===Shifting=== | ===Shifting=== | ||
{{redirect|Shift|bringing Pokémon back into their [[Poké Ball]] to send out another Pokémon|Recall}} | {{redirect|Shift|bringing Pokémon back into their [[Poké Ball]] to send out another Pokémon|Recall}} | ||
The Pokémon on the left and right have the option to 'shift'. This option allows the user to switch with the Pokémon currently in the middle. Shifting has no [[priority]] and none of the effects of switching apply to shifting. A Pokémon can move even if it is the last Pokémon on its team, | The Pokémon on the left and right have the option to 'shift'. This option allows the user to switch with the Pokémon currently in the middle. Shifting has no [[priority]] and none of the effects of switching apply to shifting. A Pokémon can move even if it is the last Pokémon on its team, as long as it is not in the center. | ||
If a Pokémon is readying to use a move on a certain target, but is then shifted before using its move, its attack will fail if the target is then outside of its range. If a Pokémon targeted an ally with a move, but as a result of shifting the Pokémon is now targeting itself when it would execute the move, the move will fail (even if the move is {{m|Acupressure}}). | |||
If there are only two Pokémon left on the field and they are non-adjacent to each other, both Pokémon will automatically be shifted to the center of the field at the end of the turn. | |||
===Effect on moves=== | ===Effect on moves=== | ||
Most [[move]]s have the same effect in Triple Battles as with single and Double Battles, except that they can only affect adjacent Pokémon. Moves that hit both opponents or all Pokémon in Double Battles only affect adjacent Pokémon in Triple Battles. All damage-dealing Flying-type moves | Most [[move]]s have the same effect in Triple Battles as with single and Double Battles, except that they can only affect adjacent Pokémon. Moves that hit both opponents or all Pokémon in Double Battles only affect adjacent Pokémon in Triple Battles. All single-target damage-dealing Flying-type moves, {{m|Flying Press}}, and all single-target {{cat|aura and pulse moves}} can hit any Pokémon on the battlefield; this targeting is based on the original type of the move, so moves being changed to or from Flying-type (including moves that change their own type like {{m|Hidden Power}}) does not affect targeting. Moves that hit multiple Pokémon will have their damage reduced by 25%, unless there is only one target at the time the move is executed. | ||
The moves {{m|After You}}, {{m|Quash}}, {{m|Helping Hand}}, {{m|Ally Switch}}, {{m|Follow Me}}, {{m|Rage Powder}}, {{m|Aromatic Mist}}, and {{m|Hold Hands}} <!--maybe others--> | The moves {{m|After You}}, {{m|Quash}}, {{m|Helping Hand}}, {{m|Ally Switch}}, {{m|Follow Me}}, {{m|Rage Powder}}, {{m|Aromatic Mist}}, and {{m|Hold Hands}} <!--maybe others--> have no effect in Single Battles, but do in Triple Battles. | ||
The moves {{m|Bide}}, {{m|Counter}}, {{m|Mirror Coat}}, {{m|Metal Burst}}, {{m|Destiny Bond}}, and {{m|Grudge}} all can be activated by, and attack, a non-adjacent opponent. | The moves {{m|Bide}}, {{m|Counter}}, {{m|Mirror Coat}}, {{m|Metal Burst}}, {{m|Destiny Bond}}, and {{m|Grudge}} all can be activated by, and attack, a non-adjacent opponent. | ||
| Line 31: | Line 33: | ||
The following moves act differently when used in a Triple Battle, as opposed to a Single or Double Battle. | The following moves act differently when used in a Triple Battle, as opposed to a Single or Double Battle. | ||
{| style="margin:auto; | {| class="roundy" style="margin:auto; text-align:center; background:#{{cynthia color light}}; border:3px solid #{{cynthia color dark}}" | ||
|- | |- | ||
! colspan=10 style=" | ! colspan=10 style="background:#{{cynthia color}}; {{roundytop|5px}}" | Move targets | ||
|- style="background:#{{cynthia color light}}" | |- style="background:#{{cynthia color light}}" | ||
! width=10% style=vertical-align:top | | ! width=10% style="vertical-align:top" | | ||
{| width="100%" style="margin:auto; text-align:center; background:# | {| width="100%" style="margin:auto; text-align:center; background:#FFF; border-collapse:collapse" | ||
| style="background: #FF4500; border: 1px solid # | | style="background:#FF4500; border:1px solid #000; line-height:6px" | | ||
| style="background: #FF4500; border: 1px solid # | | style="background:#FF4500; border:1px solid #000; line-height:6px" | | ||
| style="background: #709AD1; border: 1px solid # | | style="background:#709AD1; border:1px solid #000; line-height:6px" | | ||
|- | |- | ||
| style="background: #709AD1; border: 1px solid # | | style="background:#709AD1; border:1px solid #000; line-height:6px" | | ||
| style="background: #709AD1; border: 1px solid # | | style="background:#709AD1; border:1px solid #000; line-height:6px" | | ||
| style="background: #709AD1; border: 1px solid # | | style="background:#709AD1; border:1px solid #000; line-height:6px" | | ||
|} | |} | ||
Any adjacent foe | Any adjacent foe | ||
! width=10% style=vertical-align:top | | ! width=10% style="vertical-align:top" | | ||
{| width="100%" style="margin:auto; text-align:center; background:# | {| width="100%" style="margin:auto; text-align:center; background:#FFF; border-collapse:collapse" | ||
| style="background: #ED1C24; border: 1px solid # | | style="background:#ED1C24; border:1px solid #000; line-height:6px" | | ||
| style="background: #ED1C24; border: 1px solid # | | style="background:#ED1C24; border:1px solid #000; line-height:6px" | | ||
| style="background: #709AD1; border: 1px solid # | | style="background:#709AD1; border:1px solid #000; line-height:6px" | | ||
|- | |- | ||
| style="background: #709AD1; border: 1px solid # | | style="background:#709AD1; border:1px solid #000; line-height:6px" | | ||
| style="background: #709AD1; border: 1px solid # | | style="background:#709AD1; border:1px solid #000; line-height:6px" | | ||
| style="background: #709AD1; border: 1px solid # | | style="background:#709AD1; border:1px solid #000; line-height:6px" | | ||
|} | |} | ||
All adjacent foes | All adjacent foes | ||
! width=10% style=vertical-align:top | | ! width=10% style="vertical-align:top" | | ||
{| width="100%" style="margin:auto; text-align:center; background:# | {| width="100%" style="margin:auto; text-align:center; background:#FFF; border-collapse:collapse" | ||
| style="background: #ED1C24; border: 1px solid # | | style="background:#ED1C24; border:1px solid #000; line-height:6px" | | ||
| style="background: #ED1C24; border: 1px solid # | | style="background:#ED1C24; border:1px solid #000; line-height:6px" | | ||
| style="background: #ED1C24; border: 1px solid # | | style="background:#ED1C24; border:1px solid #000; line-height:6px" | | ||
|- | |- | ||
| style="background: #709AD1; border: 1px solid # | | style="background:#709AD1; border:1px solid #000; line-height:6px" | | ||
| style="background: #709AD1; border: 1px solid # | | style="background:#709AD1; border:1px solid #000; line-height:6px" | | ||
| style="background: #709AD1; border: 1px solid # | | style="background:#709AD1; border:1px solid #000; line-height:6px" | | ||
|} | |} | ||
All foes | All foes | ||
! width=10% style=vertical-align:top | | ! width=10% style="vertical-align:top" | | ||
{| width="100%" style="margin:auto; text-align:center; background:# | {| width="100%" style="margin:auto; text-align:center; background:#FFF; border-collapse:collapse" | ||
| style="background: #FF4500; border: 1px solid # | | style="background:#FF4500; border:1px solid #000; line-height:6px" | | ||
| style="background: #FF4500; border: 1px solid # | | style="background:#FF4500; border:1px solid #000; line-height:6px" | | ||
| style="background: #FF4500; border: 1px solid # | | style="background:#FF4500; border:1px solid #000; line-height:6px" | | ||
|- | |- | ||
| style="background: #709AD1; border: 1px solid # | | style="background:#709AD1; border:1px solid #000; line-height:6px" | | ||
| style="background: #FF4500; border: 1px solid # | | style="background:#FF4500; border:1px solid #000; line-height:6px" | | ||
| style="background: #FF4500; border: 1px solid # | | style="background:#FF4500; border:1px solid #000; line-height:6px" | | ||
|} | |} | ||
Any Pokémon | Any other Pokémon | ||
! width=10% style=vertical-align:top | | ! width=10% style="vertical-align:top" | | ||
{| width="100%" style="margin:auto; text-align:center; background:# | {| width="100%" style="margin:auto; text-align:center; background:#FFF; border-collapse:collapse" | ||
| style="background: #ED1C24; border: 1px solid # | | style="background:#ED1C24; border:1px solid #000; line-height:6px" | | ||
| style="background: #ED1C24; border: 1px solid # | | style="background:#ED1C24; border:1px solid #000; line-height:6px" | | ||
| style="background: #709AD1; border: 1px solid # | | style="background:#709AD1; border:1px solid #000; line-height:6px" | | ||
|- | |- | ||
| style="background: #709AD1; border: 1px solid # | | style="background:#709AD1; border:1px solid #000; line-height:6px" | | ||
| style="background: #ED1C24; border: 1px solid # | | style="background:#ED1C24; border:1px solid #000; line-height:6px" | | ||
| style="background: #709AD1; border: 1px solid # | | style="background:#709AD1; border:1px solid #000; line-height:6px" | | ||
|} | |} | ||
All adjacent Pokémon | All adjacent Pokémon | ||
! width=10% style=vertical-align:top | | ! width=10% style="vertical-align:top" | | ||
{| width="100%" style="margin:auto; text-align:center; background:# | {| width="100%" style="margin:auto; text-align:center; background:#FFF; border-collapse:collapse" | ||
| style="background: #ED1C24; border: 1px solid # | | style="background:#ED1C24; border:1px solid #000; line-height:6px" | | ||
| style="background: #ED1C24; border: 1px solid # | | style="background:#ED1C24; border:1px solid #000; line-height:6px" | | ||
| style="background: #ED1C24; border: 1px solid # | | style="background:#ED1C24; border:1px solid #000; line-height:6px" | | ||
|- | |- | ||
| style="background: #ED1C24; border: 1px solid # | | style="background:#ED1C24; border:1px solid #000; line-height:6px" | | ||
| style="background: #ED1C24; border: 1px solid # | | style="background:#ED1C24; border:1px solid #000; line-height:6px" | | ||
| style="background: #ED1C24; border: 1px solid # | | style="background:#ED1C24; border:1px solid #000; line-height:6px" | | ||
|} | |} | ||
All Pokémon | All Pokémon | ||
! width=10% style=vertical-align:top | | ! width=10% style="vertical-align:top" | | ||
{| width="100%" style="margin:auto; text-align:center; background:# | {| width="100%" style="margin:auto; text-align:center; background:#FFF; border-collapse:collapse" | ||
| style="background: #709AD1; border: 1px solid # | | style="background:#709AD1; border:1px solid #000; line-height:6px" | | ||
| style="background: #709AD1; border: 1px solid # | | style="background:#709AD1; border:1px solid #000; line-height:6px" | | ||
| style="background: #709AD1; border: 1px solid # | | style="background:#709AD1; border:1px solid #000; line-height:6px" | | ||
|- | |- | ||
| style="background: #ED1C24; border: 1px solid # | | style="background:#ED1C24; border:1px solid #000; line-height:6px" | | ||
| style="background: #709AD1; border: 1px solid # | | style="background:#709AD1; border:1px solid #000; line-height:6px" | | ||
| style="background: #709AD1; border: 1px solid # | | style="background:#709AD1; border:1px solid #000; line-height:6px" | | ||
|} | |} | ||
Self | Self | ||
! width=10% style=vertical-align:top | | ! width=10% style="vertical-align:top" | | ||
{| width="100%" style="margin:auto; text-align:center; background:# | {| width="100%" style="margin:auto; text-align:center; background:#FFF; border-collapse:collapse" | ||
| style="background: #709AD1; border: 1px solid # | | style="background:#709AD1; border:1px solid #000; line-height:6px" | | ||
| style="background: #709AD1; border: 1px solid # | | style="background:#709AD1; border:1px solid #000; line-height:6px" | | ||
| style="background: #709AD1; border: 1px solid # | | style="background:#709AD1; border:1px solid #000; line-height:6px" | | ||
|- | |- | ||
| style="background: #FF4500; border: 1px solid # | | style="background:#FF4500; border:1px solid #000; line-height:6px" | | ||
| style="background: #FF4500; border: 1px solid # | | style="background:#FF4500; border:1px solid #000; line-height:6px" | | ||
| style="background: #709AD1; border: 1px solid # | | style="background:#709AD1; border:1px solid #000; line-height:6px" | | ||
|} | |} | ||
Self or adjacent ally | Self or adjacent ally | ||
! width=10% style=vertical-align:top | | ! width=10% style="vertical-align:top" | | ||
{| width="100%" style="margin:auto; text-align:center; background:# | {| width="100%" style="margin:auto; text-align:center; background:#FFF; border-collapse:collapse" | ||
| style="background: #709AD1; border: 1px solid # | | style="background:#709AD1; border:1px solid #000; line-height:6px" | | ||
| style="background: #709AD1; border: 1px solid # | | style="background:#709AD1; border:1px solid #000; line-height:6px" | | ||
| style="background: #709AD1; border: 1px solid # | | style="background:#709AD1; border:1px solid #000; line-height:6px" | | ||
|- | |- | ||
| style="background: #709AD1; border: 1px solid # | | style="background:#709AD1; border:1px solid #000; line-height:6px" | | ||
| style="background: #FF4500; border: 1px solid # | | style="background:#FF4500; border:1px solid #000; line-height:6px" | | ||
| style="background: #709AD1; border: 1px solid # | | style="background:#709AD1; border:1px solid #000; line-height:6px" | | ||
|} | |} | ||
Adjacent ally | Adjacent ally | ||
! width=10% style=vertical-align:top | | ! width=10% style="vertical-align:top" | | ||
{| width="100%" style="margin:auto; text-align:center; background:# | {| width="100%" style="margin:auto; text-align:center; background:#FFF; border-collapse:collapse" | ||
| style="background: #709AD1; border: 1px solid # | | style="background:#709AD1; border:1px solid #000; line-height:6px" | | ||
| style="background: #709AD1; border: 1px solid # | | style="background:#709AD1; border:1px solid #000; line-height:6px" | | ||
| style="background: #709AD1; border: 1px solid # | | style="background:#709AD1; border:1px solid #000; line-height:6px" | | ||
|- | |- | ||
| style="background: #ED1C24; border: 1px solid # | | style="background:#ED1C24; border:1px solid #000; line-height:6px" | | ||
| style="background: #ED1C24; border: 1px solid # | | style="background:#ED1C24; border:1px solid #000; line-height:6px" | | ||
| style="background: #ED1C24; border: 1px solid # | | style="background:#ED1C24; border:1px solid #000; line-height:6px" | | ||
|} | |} | ||
Whole team | Whole team | ||
| Line 148: | Line 150: | ||
| style="background:#{{normal color}}" | {{mcolor|Me First|f8f8f8}} | | style="background:#{{normal color}}" | {{mcolor|Me First|f8f8f8}} | ||
| style="background:#{{poison color}}" | {{mcolor|Acid|f8f8f8}} | | style="background:#{{poison color}}" | {{mcolor|Acid|f8f8f8}} | ||
| style="background:#{{ | | style="background:#{{ground color}}" | {{mcolor|Spikes|f8f8f8}} | ||
| style="background:#{{flying color}}" | {{mcolor|Acrobatics|f8f8f8}} | | style="background:#{{flying color}}" | {{mcolor|Acrobatics|f8f8f8}} | ||
| style="background:#{{normal color}}" | {{mcolor|Boomburst|f8f8f8}} | | style="background:#{{normal color}}" | {{mcolor|Boomburst|f8f8f8}} | ||
| Line 159: | Line 161: | ||
| style="background:#{{dragon color}}" | {{mcolor|Outrage|f8f8f8}} | | style="background:#{{dragon color}}" | {{mcolor|Outrage|f8f8f8}} | ||
| style="background:#{{flying color}}" | {{mcolor|Air Cutter|f8f8f8}} | | style="background:#{{flying color}}" | {{mcolor|Air Cutter|f8f8f8}} | ||
| style="background:#{{ | | style="background:#{{rock color}}" | {{mcolor|Stealth Rock|f8f8f8}} | ||
| style="background:#{{flying color}}" | {{mcolor|Aerial Ace|f8f8f8}} | | style="background:#{{flying color}}" | {{mcolor|Aerial Ace|f8f8f8}} | ||
| style="background:#{{ground color}}" | {{mcolor|Bulldoze|f8f8f8}} | | style="background:#{{ground color}}" | {{mcolor|Bulldoze|f8f8f8}} | ||
| Line 170: | Line 172: | ||
| style="background:#{{grass color}}" | {{mcolor|Petal Dance|f8f8f8}} | | style="background:#{{grass color}}" | {{mcolor|Petal Dance|f8f8f8}} | ||
| style="background:#{{ice color}}" | {{mcolor|Blizzard|f8f8f8}} | | style="background:#{{ice color}}" | {{mcolor|Blizzard|f8f8f8}} | ||
| style="background:#{{ | | style="background:#{{bug color}}" | {{mcolor|Sticky Web|f8f8f8}} | ||
| style="background:#{{flying color}}" | {{mcolor|Aeroblast|f8f8f8}} | | style="background:#{{flying color}}" | {{mcolor|Aeroblast|f8f8f8}} | ||
| style="background:#{{electric color}}" | {{mcolor|Discharge|f8f8f8}} | | style="background:#{{electric color}}" | {{mcolor|Discharge|f8f8f8}} | ||
| Line 181: | Line 183: | ||
| style="background:#{{normal color}}" | {{mcolor|Struggle|f8f8f8}} | | style="background:#{{normal color}}" | {{mcolor|Struggle|f8f8f8}} | ||
| style="background:#{{water color}}" | {{mcolor|Bubble|f8f8f8}} | | style="background:#{{water color}}" | {{mcolor|Bubble|f8f8f8}} | ||
| style="background:#{{ | | style="background:#{{poison color}}" | {{mcolor|Toxic Spikes|f8f8f8}} | ||
| style="background:#{{flying color}}" | {{mcolor|Air Slash|f8f8f8}} | | style="background:#{{flying color}}" | {{mcolor|Air Slash|f8f8f8}} | ||
| style="background:#{{ground color}}" | {{mcolor|Earthquake|f8f8f8}} | | style="background:#{{ground color}}" | {{mcolor|Earthquake|f8f8f8}} | ||
| Line 192: | Line 194: | ||
| style="background:#{{normal color}}" | {{mcolor|Thrash|f8f8f8}} | | style="background:#{{normal color}}" | {{mcolor|Thrash|f8f8f8}} | ||
| style="background:#{{normal color}}" | {{mcolor|Captivate|f8f8f8}} | | style="background:#{{normal color}}" | {{mcolor|Captivate|f8f8f8}} | ||
| | | | ||
| style="background:#{{fighting color}}" | {{mcolor|Aura Sphere|f8f8f8}} | | style="background:#{{fighting color}}" | {{mcolor|Aura Sphere|f8f8f8}} | ||
| style="background:#{{normal color}}" | {{mcolor|Explosion|f8f8f8}} | | style="background:#{{normal color}}" | {{mcolor|Explosion|f8f8f8}} | ||
| Line 203: | Line 205: | ||
| style="background:#{{normal color}}" | {{mcolor|Uproar|f8f8f8}} | | style="background:#{{normal color}}" | {{mcolor|Uproar|f8f8f8}} | ||
| style="background:#{{grass color}}" | {{mcolor|Cotton Spore|f8f8f8}} {{tt2|*|Generation VI onwards|f8f8f8}} | | style="background:#{{grass color}}" | {{mcolor|Cotton Spore|f8f8f8}} {{tt2|*|Generation VI onwards|f8f8f8}} | ||
| | | | ||
| style="background:#{{flying color}}" | {{mcolor|Bounce|f8f8f8}} | | style="background:#{{flying color}}" | {{mcolor|Bounce|f8f8f8}} | ||
| style="background:#{{fire color}}" | {{mcolor|Lava Plume|f8f8f8}} | | style="background:#{{fire color}}" | {{mcolor|Lava Plume|f8f8f8}} | ||
| style="background:#{{ice color}}" | {{mcolor|Hail|f8f8f8}} | | style="background:#{{ice color}}" | {{mcolor|Hail|f8f8f8}} | ||
| | | | ||
| | | | ||
| | | | ||
| style="background:#{{normal color}}" | {{mcolor|Lucky Chant|f8f8f8}} | | style="background:#{{normal color}}" | {{mcolor|Lucky Chant|f8f8f8}} | ||
| Line 219: | Line 221: | ||
| style="background:#{{ice color}}" | {{mcolor|Haze|f8f8f8}} | | style="background:#{{ice color}}" | {{mcolor|Haze|f8f8f8}} | ||
| | | | ||
| | | | ||
| | | | ||
| style="background:#{{electric color}}" | {{mcolor|Magnetic Flux|f8f8f8}} | | style="background:#{{electric color}}" | {{mcolor|Magnetic Flux|f8f8f8}} | ||
|- | |- | ||
| | | | ||
| style="background:#{{fairy color}}" | {{mcolor|Dazzling Gleam|f8f8f8}} | | style="background:#{{fairy color}}" | {{mcolor|Dazzling Gleam|f8f8f8}} | ||
| | | | ||
| Line 230: | Line 232: | ||
| style="background:#{{electric color}}" | {{mcolor|Ion Deluge|f8f8f8}} | | style="background:#{{electric color}}" | {{mcolor|Ion Deluge|f8f8f8}} | ||
| | | | ||
| | | | ||
| | | | ||
| style="background:#{{fighting color}}" | {{mcolor|Mat Block|f8f8f8}} | | style="background:#{{fighting color}}" | {{mcolor|Mat Block|f8f8f8}} | ||
|- | |- | ||
| | | | ||
| style="background:#{{fairy color}}" | {{mcolor|Disarming Voice|f8f8f8}} | | style="background:#{{fairy color}}" | {{mcolor|Disarming Voice|f8f8f8}} | ||
| | | | ||
| style="background:#{{dark color}}" | {{mcolor|Dark Pulse|f8f8f8}} | | style="background:#{{dark color}}" | {{mcolor|Dark Pulse|f8f8f8}} | ||
| style="background:#{{grass color}}" | {{mcolor|Petal Blizzard|f8f8f8}} | | style="background:#{{grass color}}" | {{mcolor|Petal Blizzard|f8f8f8}} | ||
| style="background:#{{psychic color}}" | {{mcolor|Magic Room|f8f8f8}} | | style="background:#{{psychic color}}" | {{mcolor|Magic Room|f8f8f8}} | ||
| | | | ||
| | | | ||
| | | | ||
| style="background:#{{ice color}}" | {{mcolor|Mist|f8f8f8}} | | style="background:#{{ice color}}" | {{mcolor|Mist|f8f8f8}} | ||
|- | |- | ||
| | | | ||
| style="background:#{{electric color}}" | {{mcolor|Electroweb|f8f8f8}} | | style="background:#{{electric color}}" | {{mcolor|Electroweb|f8f8f8}} | ||
| | | | ||
| style="background:#{{flying color}}" | {{mcolor|Dragon Ascent|f8f8f8}} | | style="background:#{{flying color}}" | {{mcolor|Dragon Ascent|f8f8f8}} | ||
| style="background:#{{fire color}}" | {{mcolor|Searing Shot|f8f8f8}} | | style="background:#{{fire color}}" | {{mcolor|Searing Shot|f8f8f8}} | ||
| Line 256: | Line 258: | ||
| style="background:#{{fighting color}}" | {{mcolor|Quick Guard|f8f8f8}} | | style="background:#{{fighting color}}" | {{mcolor|Quick Guard|f8f8f8}} | ||
|- | |- | ||
| | | | ||
| style="background:#{{fire color}}" | {{mcolor|Eruption|f8f8f8}} | | style="background:#{{fire color}}" | {{mcolor|Eruption|f8f8f8}} | ||
| | | | ||
| style="background:#{{dragon color}}" | {{mcolor|Dragon Pulse|f8f8f8}} | | style="background:#{{dragon color}}" | {{mcolor|Dragon Pulse|f8f8f8}} | ||
| style="background:#{{normal color}}" | {{mcolor|Self-Destruct|f8f8f8}} | | style="background:#{{normal color}}" | {{mcolor|Self-Destruct|f8f8f8}} | ||
| Line 267: | Line 269: | ||
| style="background:#{{psychic color}}" | {{mcolor|Reflect|f8f8f8}} | | style="background:#{{psychic color}}" | {{mcolor|Reflect|f8f8f8}} | ||
|- | |- | ||
| | | | ||
| style="background:#{{ice color}}" | {{mcolor|Glaciate|f8f8f8}} | | style="background:#{{ice color}}" | {{mcolor|Glaciate|f8f8f8}} | ||
| | | | ||
| style="background:#{{flying color}}" | {{mcolor|Drill Peck|f8f8f8}} | | style="background:#{{flying color}}" | {{mcolor|Drill Peck|f8f8f8}} | ||
| style="background:#{{poison color}}" | {{mcolor|Sludge Wave|f8f8f8}} | | style="background:#{{poison color}}" | {{mcolor|Sludge Wave|f8f8f8}} | ||
| Line 278: | Line 280: | ||
| style="background:#{{normal color}}" | {{mcolor|Safeguard|f8f8f8}} | | style="background:#{{normal color}}" | {{mcolor|Safeguard|f8f8f8}} | ||
|- | |- | ||
| | | | ||
| style="background:#{{normal color}}" | {{mcolor|Growl|f8f8f8}} | | style="background:#{{normal color}}" | {{mcolor|Growl|f8f8f8}} | ||
| | | | ||
| style="background:#{{flying color}}" | {{mcolor|Fly|f8f8f8}} | | style="background:#{{flying color}}" | {{mcolor|Fly|f8f8f8}} | ||
| style="background:#{{water color}}" | {{mcolor|Surf|f8f8f8}} | | style="background:#{{water color}}" | {{mcolor|Surf|f8f8f8}} | ||
| Line 289: | Line 291: | ||
| style="background:#{{flying color}}" | {{mcolor|Tailwind|f8f8f8}} | | style="background:#{{flying color}}" | {{mcolor|Tailwind|f8f8f8}} | ||
|- | |- | ||
| | | | ||
| style="background:#{{ | | style="background:#{{psychic color}}" | {{mcolor|Heal Block|f8f8f8}} | ||
| | | | ||
| style="background:#{{fighting color}}" | {{mcolor|Flying Press|f8f8f8}} | | style="background:#{{fighting color}}" | {{mcolor|Flying Press|f8f8f8}} | ||
| style="background:#{{psychic color}}" | {{mcolor|Synchronoise|f8f8f8}} | | style="background:#{{psychic color}}" | {{mcolor|Synchronoise|f8f8f8}} | ||
| Line 300: | Line 302: | ||
| style="background:#{{rock color}}" | {{mcolor|Wide Guard|f8f8f8}} | | style="background:#{{rock color}}" | {{mcolor|Wide Guard|f8f8f8}} | ||
|- | |- | ||
| | | | ||
| style="background:#{{ | | style="background:#{{fire color}}" | {{mcolor|Heat Wave|f8f8f8}} | ||
| | | | ||
| style="background:#{{flying color}}" | {{mcolor|Gust|f8f8f8}} | | style="background:#{{flying color}}" | {{mcolor|Gust|f8f8f8}} | ||
| style="background:#{{normal color}}" | {{mcolor|Teeter Dance|f8f8f8}} | | style="background:#{{normal color}}" | {{mcolor|Teeter Dance|f8f8f8}} | ||
| Line 311: | Line 313: | ||
| | | | ||
|- | |- | ||
| | | | ||
| style="background:#{{ | | style="background:#{{normal color}}" | {{mcolor|Hyper Voice|f8f8f8}} | ||
| | | | ||
| style="background:#{{psychic color}}" | {{mcolor|Heal Pulse|f8f8f8}} | | style="background:#{{psychic color}}" | {{mcolor|Heal Pulse|f8f8f8}} | ||
| | | | ||
| Line 322: | Line 324: | ||
| | | | ||
|- | |- | ||
| | | | ||
| style="background:#{{ | | style="background:#{{ice color}}" | {{mcolor|Icy Wind|f8f8f8}} | ||
| | | | ||
| style="background:#{{flying color}}" | {{mcolor|Hurricane|f8f8f8}} | | style="background:#{{flying color}}" | {{mcolor|Hurricane|f8f8f8}} | ||
| | | | ||
| Line 333: | Line 335: | ||
| | | | ||
|- | |- | ||
| | | | ||
| style="background:#{{ | | style="background:#{{fire color}}" | {{mcolor|Incinerate|f8f8f8}} | ||
| | | | ||
| style="background:#{{flying color}}" | {{mcolor|Oblivion Wing|f8f8f8}} | | style="background:#{{flying color}}" | {{mcolor|Oblivion Wing|f8f8f8}} | ||
| | | | ||
| Line 344: | Line 346: | ||
| | | | ||
|- | |- | ||
| | | | ||
| style="background:#{{ | | style="background:#{{ground color}}" | {{mcolor|Land's Wrath|f8f8f8}} | ||
| | | | ||
| style="background:#{{flying color}}" | {{mcolor|Peck|f8f8f8}} | | style="background:#{{flying color}}" | {{mcolor|Peck|f8f8f8}} | ||
| | | | ||
| Line 355: | Line 357: | ||
| | | | ||
|- | |- | ||
| | | | ||
| style="background:#{{ | | style="background:#{{normal color}}" | {{mcolor|Leer|f8f8f8}} | ||
| | | | ||
| style="background:#{{flying color}}" | {{mcolor|Pluck|f8f8f8}} | | style="background:#{{flying color}}" | {{mcolor|Pluck|f8f8f8}} | ||
| | | | ||
| | | | ||
| | | | ||
| | | | ||
| Line 366: | Line 368: | ||
| | | | ||
|- | |- | ||
| | | | ||
| style="background:#{{water color}}" | {{mcolor| | | style="background:#{{water color}}" | {{mcolor|Muddy Water|f8f8f8}} | ||
| | | | ||
| style="background:#{{flying color}}" | {{mcolor|Sky Attack|f8f8f8}} | | style="background:#{{flying color}}" | {{mcolor|Sky Attack|f8f8f8}} | ||
| | | | ||
| | | | ||
| | | | ||
| | | | ||
| Line 377: | Line 379: | ||
| | | | ||
|- | |- | ||
| | | | ||
| style="background:#{{ | | style="background:#{{water color}}" | {{mcolor|Origin Pulse|f8f8f8}} | ||
| | | | ||
| style="background:#{{flying color}}" | {{mcolor|Sky Drop|f8f8f8}} | | style="background:#{{flying color}}" | {{mcolor|Sky Drop|f8f8f8}} | ||
| | | | ||
| | | | ||
| | | | ||
| | | | ||
| Line 389: | Line 391: | ||
|- | |- | ||
| | | | ||
| style="background:#{{ | | style="background:#{{poison color}}" | {{mcolor|Poison Gas|f8f8f8}} | ||
| | | | ||
| style="background:#{{water color}}" | {{mcolor|Water Pulse|f8f8f8}} | | style="background:#{{water color}}" | {{mcolor|Water Pulse|f8f8f8}} | ||
| | |||
| | |||
| | | | ||
| | | | ||
| Line 398: | Line 402: | ||
|- | |- | ||
| | | | ||
| style="background:#{{ | | style="background:#{{ice color}}" | {{mcolor|Powder Snow|f8f8f8}} | ||
| | | | ||
| style="background:#{{flying color}}" | {{mcolor|Wing Attack|f8f8f8}} | | style="background:#{{flying color}}" | {{mcolor|Wing Attack|f8f8f8}} | ||
| | |||
| | |||
| | | | ||
| | | | ||
| Line 406: | Line 412: | ||
| | | | ||
|- | |- | ||
| | |||
| style="background:#{{ground color}}" | {{mcolor|Precipice Blades|f8f8f8}} | |||
| | |||
| | |||
| | |||
| | | | ||
| | |||
| | |||
| | |||
| | |||
|- | |||
| | |||
| style="background:#{{grass color}}" | {{mcolor|Razor Leaf|f8f8f8}} | | style="background:#{{grass color}}" | {{mcolor|Razor Leaf|f8f8f8}} | ||
| | | | ||
| | | | ||
| | | | ||
| | | | ||
| Line 417: | Line 434: | ||
| | | | ||
|- | |- | ||
| | | | ||
| style="background:#{{normal color}}" | {{mcolor|Razor Wind|f8f8f8}} | | style="background:#{{normal color}}" | {{mcolor|Razor Wind|f8f8f8}} | ||
| | | | ||
| | | | ||
| | | | ||
| | |||
| | | | ||
| | | | ||
| Line 428: | Line 445: | ||
| | | | ||
|- | |- | ||
| | | | ||
| style="background:#{{normal color}}" | {{mcolor|Relic Song|f8f8f8}} | | style="background:#{{normal color}}" | {{mcolor|Relic Song|f8f8f8}} | ||
| | | | ||
| | | | ||
| | | | ||
| | |||
| | | | ||
| | | | ||
| Line 439: | Line 456: | ||
| | | | ||
|- | |- | ||
| | | | ||
| | | style="background:#{{rock color}}" | {{mcolor|Rock Slide|f8f8f8}} | ||
| | |||
| | |||
| | |||
| | | | ||
| | | | ||
| | | | ||
| Line 450: | Line 467: | ||
| | | | ||
|- | |- | ||
| | | | ||
| style="background:#{{dark color}}" | {{mcolor|Snarl|f8f8f8}} | | style="background:#{{dark color}}" | {{mcolor|Snarl|f8f8f8}} | ||
| | | | ||
| | | | ||
| | | | ||
| | |||
| | | | ||
| | | | ||
| Line 461: | Line 478: | ||
| | | | ||
|- | |- | ||
| | | | ||
| style="background:#{{bug color}}" | {{mcolor|String Shot|f8f8f8}} | | style="background:#{{bug color}}" | {{mcolor|String Shot|f8f8f8}} | ||
| | | | ||
| | | | ||
| | | | ||
| | |||
| | | | ||
| | | | ||
| Line 472: | Line 489: | ||
| | | | ||
|- | |- | ||
| | | | ||
| style="background:#{{bug color}}" | {{mcolor|Struggle Bug|f8f8f8}} | | style="background:#{{bug color}}" | {{mcolor|Struggle Bug|f8f8f8}} | ||
| | | | ||
| | | | ||
| | | | ||
| | |||
| | | | ||
| | | | ||
| Line 483: | Line 500: | ||
| | | | ||
|- | |- | ||
| | | | ||
| style="background:#{{normal color}}" | {{mcolor|Sweet Scent|f8f8f8}} | | style="background:#{{normal color}}" | {{mcolor|Sweet Scent|f8f8f8}} | ||
| | | | ||
| | | | ||
| | | | ||
| | |||
| | | | ||
| | | | ||
| Line 494: | Line 511: | ||
| | | | ||
|- | |- | ||
| | | | ||
| style="background:#{{normal color}}" | {{mcolor|Swift|f8f8f8}} | | style="background:#{{normal color}}" | {{mcolor|Swift|f8f8f8}} | ||
| | | | ||
| | | | ||
| | | | ||
| | |||
| | | | ||
| | | | ||
| Line 505: | Line 522: | ||
| | | | ||
|- | |- | ||
| | | | ||
| style="background:#{{normal color}}" | {{mcolor|Tail Whip|f8f8f8}} | | style="background:#{{normal color}}" | {{mcolor|Tail Whip|f8f8f8}} | ||
| | | | ||
| | | | ||
| | | | ||
| | |||
| | | | ||
| | | | ||
| Line 516: | Line 533: | ||
| | | | ||
|- | |- | ||
| | | | ||
| style="background:#{{dragon color}}" | {{mcolor|Twister|f8f8f8}} | | style="background:#{{dragon color}}" | {{mcolor|Twister|f8f8f8}} | ||
| | | | ||
| | | | ||
| | |||
| | |||
| | | | ||
| | | | ||
| Line 530: | Line 548: | ||
| | | | ||
| | | | ||
| | | | ||
| | | | ||
| | | | ||
| | | | ||
| Line 545: | Line 562: | ||
However, some Abilities are affected by a Pokémon's placement, for example, {{a|Intimidate}} will only lower the {{stat|Attack}} of opposing, adjacent Pokémon on the field. | However, some Abilities are affected by a Pokémon's placement, for example, {{a|Intimidate}} will only lower the {{stat|Attack}} of opposing, adjacent Pokémon on the field. | ||
===Locations=== | ===Locations=== | ||
[[File:Triple Battle V.png|thumb|A Triple Battle in [[Generation V]]]] | |||
====In Pokémon Black==== | ====In Pokémon Black==== | ||
{{trainerheader|black}} | {{trainerheader|black}} | ||
{{trainerdiv|road|{{color2|FFF|Marvelous Bridge}}}} | {{trainerdiv|road|{{color2|FFF|Marvelous Bridge}}}} | ||
| Line 556: | Line 572: | ||
====In Pokémon White==== | ====In Pokémon White==== | ||
{{Party/Single | {{Party/Single | ||
|color={{black color}} | |color={{black color}} | ||
| Line 564: | Line 579: | ||
|prize={{pdollar}}864 | |prize={{pdollar}}864 | ||
|class=Motorcyclist | |class=Motorcyclist | ||
|name={{color2| | |name={{color2|000|Charles}} | ||
|game=BW | |game=BW | ||
|location=Driftveil City | |location=Driftveil City | ||
| Line 613: | Line 628: | ||
{{trainerdiv|building}} | {{trainerdiv|building}} | ||
{{Trainerentry|Spr BW Ace Trainer F.png|Ace Trainer|Eileen|2340<br><small>{{color2|000|Triple Battle}}</small>|3|624|Pawniard|♀|39|None|605|Elgyem|♀|39|None|619|Mienfoo|♀|39|None||36=エリナ|37=Erina}} | {{Trainerentry|Spr BW Ace Trainer F.png|Ace Trainer|Eileen|2340<br><small>{{color2|000|Triple Battle}}</small>|3|624|Pawniard|♀|39|None|605|Elgyem|♀|39|None|619|Mienfoo|♀|39|None||36=エリナ|37=Erina}} | ||
{{trainerdiv|white|{{color2| | {{trainerdiv|white|{{color2|000|White Forest}}}} | ||
{{Trainerentry|Spr BW School Kid M.png|School Kid|Shayne|1300|3|560|Scrafty|♂|65|None|563|Cofagrigus|♂|65|None|579|Reuniclus|♂|65|None|36=シンジ|37=Shinji}} | {{Trainerentry|Spr BW School Kid M.png|School Kid|Shayne|1300|3|560|Scrafty|♂|65|None|563|Cofagrigus|♂|65|None|579|Reuniclus|♂|65|None|36=シンジ|37=Shinji}} | ||
{{Trainerdiv|white}} | {{Trainerdiv|white}} | ||
| Line 620: | Line 635: | ||
====In Pokémon Black 2 and White 2==== | ====In Pokémon Black 2 and White 2==== | ||
{{Party/Single | {{Party/Single | ||
|color={{black 2 color}} | |color={{black 2 color}} | ||
| Line 675: | Line 689: | ||
{{trainerheader|white 2}} | {{trainerheader|white 2}} | ||
{{Trainerdiv|cave|{{color2|FFF|Chargestone Cave}} 1F}} | {{Trainerdiv|cave|{{color2|FFF|Chargestone Cave}} 1F}} | ||
{{Trainerentry|Spr B2W2 Ace Trainer M.png|Ace Trainer|Corky|{{tt|1980|1800 in Easy Mode, 2160 in Challenge Mode}}<br><small>Triple Battle</small>|3|599|Klink||{{tt|33|30 in Easy Mode, 36 in Challenge Mode}}|None|521|Unfezant|♂|{{tt|33|30 in Easy Mode, 36 in Challenge Mode}}|None|028|Sandslash|♂|{{tt|33|30 in Easy Mode, 36 in Challenge Mode}}|None|36=ナオト|37=Naoto}} | {{Trainerentry|Spr B2W2 Ace Trainer M.png|Ace Trainer|Corky|{{tt|1980|1800 in Easy Mode, 2160 in Challenge Mode}}<br><small>Triple Battle</small>|3|599|Klink||{{tt|33|30 in Easy Mode, 36 in Challenge Mode}}|None|521|Unfezant|♂|{{tt|33|30 in Easy Mode, 36 in Challenge Mode}}|None|028|Sandslash|♂|{{tt|33|30 in Easy Mode, 36 in Challenge Mode}}|None|36=ナオト|37=Naoto}} | ||
| Line 702: | Line 715: | ||
{{Trainerdiv|forest|{{color2|FFF|Pokémon World Tournament}}}} | {{Trainerdiv|forest|{{color2|FFF|Pokémon World Tournament}}}} | ||
|- | |- | ||
| colspan="2" style="background:# | | colspan="2" style="background:#FFF; text-align:center" | See {{color2|000|Pokémon World Tournament}} | ||
|- | |- | ||
{{Trainerfooter|black 2|5}} | {{Trainerfooter|black 2|5}} | ||
====In Pokémon X and Y==== | ====In Pokémon X and Y==== | ||
{{trainerheader|X}} | {{trainerheader|X}} | ||
{{trainerdiv|building|{{color2|FFF|Lumiose City#Restaurant Le Yeah|Restaurant Le Yeah}}}} | {{trainerdiv|building|{{color2|FFF|Lumiose City#Restaurant Le Yeah|Restaurant Le Yeah}}}} | ||
| Line 737: | Line 749: | ||
{{trainerdiv|building}} | {{trainerdiv|building}} | ||
{{Trainerentry|VSOwner.png{{!}}150px|Owner|Kazu|10400|3|199|Slowking|♂|65|None|437|Bronzong|None|65|None|563|Cofagrigus|♂|65|None|36=アガリ|37=Agari}} | {{Trainerentry|VSOwner.png{{!}}150px|Owner|Kazu|10400|3|199|Slowking|♂|65|None|437|Bronzong|None|65|None|563|Cofagrigus|♂|65|None|36=アガリ|37=Agari}} | ||
{{trainerdiv|building|{{color2|FFF|Battle Maison}}}} | |||
|- | |||
| colspan="2" style="background:#FFF; text-align:center" | See {{color2|000|Battle Maison}} | |||
{{trainerfooter|X|6}} | {{trainerfooter|X|6}} | ||
==== In Pokémon Omega Ruby and Alpha Sapphire ==== | |||
{{trainerheader|Omega Ruby}} | |||
{{trainerdiv|building|{{color2|FFF|Mauville Food Court}}}} | |||
{{trainerentry|VSStreet Thug.png{{!}}150px|Street Thug|Alfredo|2,080|3|463|Lickilicky|♂|65|Wide Lens|549|Lilligant|♀|65|Choice Scarf|463|Lickilicky|♂|65|Wide Lens|36=ゴモクロウ|37=Gomokurō}} | |||
{{trainerdiv|building}} | |||
{{trainerentry|VSStreet Thug.png{{!}}150px|Street Thug|Barley|2,080|3|528|Swoobat|♂|65|Bright Powder|528|Swoobat|♂|65|Bright Powder|528|Swoobat|♂|65|Bright Powder|36=ツケロウ|37=Tsukerō}} | |||
{{trainerdiv|building}} | |||
{{trainerentry|VSStreet Thug.png{{!}}150px|Street Thug|Wellington|2,080|3|553|Krookodile|♂|65|Sitrus Berry|059|Arcanine|♂|65|Sitrus Berry|560|Scrafty|♂|65|Sitrus Berry|36=ソウジロウ|37=Sōjirō}} | |||
{{trainerdiv|building}} | |||
{{trainerentry|VSStreet Thug.png{{!}}150px|Street Thug|Bass|2,080|3|036|Clefable|♀|65|Metronome|036|Clefable|♀|65|Metronome|036|Clefable|♀|65|Metronome|36=パコヒコ|37=Pakohiko}} | |||
{{trainerdiv|building}} | |||
{{trainerentry|VSStreet Thug.png{{!}}150px|Street Thug|Soyer|2,080|3|334|Altaria|♂|65|Salac Berry|357|Tropius|♂|65|Salac Berry|142|Aerodactyl|♂|65|Salac Berry|36=ミソキチ|37=Misokichi}} | |||
{{trainerdiv|building}} | |||
{{trainerentry|VSStreet Thug.png{{!}}150px|Street Thug|Pitaha|2,080|3|547|Whimsicott|♂|65|Wide Lens|547|Whimsicott|♂|65|Wide Lens|547|Whimsicott|♂|65|Wide Lens|36=ワンタン|37=Wonton}} | |||
{{trainerdiv|building}} | |||
{{trainerentry|VSStreet Thug.png{{!}}150px|Street Thug|Rice|2,080|3|132|Ditto||65|Iron Ball|132|Ditto||65|Iron Ball|132|Ditto||65|Iron Ball|36=キシノシン|37=Kishinoshin}} | |||
{{trainerdiv|building}} | |||
{{trainerentry|VSSchoolkid M.png{{!}}150px|Fare Prince|Trencherman|6,000|3|448|Lucario|♂|75|King's Rock|468|Togekiss|♂|75|King's Rock|448|Lucario|♂|75|King's Rock|36=ストマック|37=Stomach}} | |||
{{trainerdiv|building}} | |||
{{trainerentry|VSBlack Belt.png{{!}}150px|Black Belt|Banting|2,080|3|034|Nidoking|♂|65|Life Orb|306|Aggron|♂|65|Life Orb|409|Rampardos|♂|65|Life Orb|36=パンクレアス|37=Pancreas}} | |||
{{trainerdiv|building|{{color2|FFF|Battle Maison}}}} | |||
{{trainerfooter|Omega Ruby|6}} | |||
==In Pokémon Battrio== | ==In Pokémon Battrio== | ||
| Line 744: | Line 782: | ||
==In the anime== | ==In the anime== | ||
[[File: | [[File:Triple Battle anime.png|thumb|240px|A Triple Battle in the anime]] | ||
The first official Triple Battle was seen in the anime in episode ''[[BW053|A Maractus Musical!]]'', where {{Ash}} battled against [[Toby]]'s three {{p|Maractus}} with his {{AP|Pikachu}}, {{AP|Tepig}} and {{AP|Snivy}}. | The first official Triple Battle was seen in the anime in episode ''[[BW053|A Maractus Musical!]]'', where {{Ash}} battled against [[Toby]]'s three {{p|Maractus}} with his {{AP|Pikachu}}, {{AP|Tepig}}, and {{AP|Snivy}}. | ||
{{-}} | |||
==In the manga== | ==In the manga== | ||
[[File:Triple Battle Adventures.png|thumb|200px|A Triple Battle in Pokémon Adventures]] | |||
===In the Pokémon Adventures manga=== | ===In the Pokémon Adventures manga=== | ||
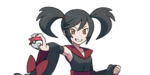
In ''[[PS464|Black's First Trainer Battle]]'', {{adv|Black}} participates in a Triple Battle with a {{tc|Hiker}} named Andy. | In ''[[PS464|Black's First Trainer Battle]]'', {{adv|Black}} participates in a Triple Battle with a {{tc|Hiker}} named Andy, using his [[Tep]], [[Brav]], and [[Musha]] against Andy's {{p|Cottonee}}, {{p|Roggenrola}}, and {{p|Blitzle}}. | ||
===In the Be the Best! Pokémon B+W manga=== | ===In the Be the Best! Pokémon B+W manga=== | ||
In the [[PBW2|second chapter]], [[Monta]] was shown in a Triple Battle with [[Cheren]], using {{ | In the [[PBW2|second chapter]], [[Monta]] was shown in a Triple Battle with [[Cheren]], using {{TP|Monta|Snivy}}, {{p|Panpour}}, and Roggenrola against Cheren's {{p|Basculin}}, {{p|Tepig}}, and {{p|Pansage}}. | ||
{{-}} | |||
==Trivia== | ==Trivia== | ||
| Line 768: | Line 807: | ||
|es=Combate Triple | |es=Combate Triple | ||
|ko=트리플배틀 ''Triple Battle'' | |ko=트리플배틀 ''Triple Battle'' | ||
|pl=Potrójna Bitwa | |||
|pt=Batalha Tripla | |pt=Batalha Tripla | ||
}} | }} | ||
Revision as of 08:36, 23 September 2016

A Triple Battle (Japanese: トリプルバトル Triple Battle) is a type of Pokémon battle featuring up to six Pokémon, with three Pokémon from each side battling at a time. It was introduced in Pokémon Black and White and was predominately showcased in White.
As the name suggests, Triple Battles are a type of battle where each Trainer sends out three Pokémon at once. Due to this, they can be considered the successor to Double Battles, with the only difference seemingly being the number of Pokémon. However, there are some restrictions that differentiate the Triple Battle from its predecessor other than the amount of Pokémon, such as placement.
In the games
When a Triple Battle begins, Pokémon will be sent out in order. The first Pokémon able to battle in the party becomes the leftmost Pokémon on the field, the second becomes the center Pokémon, and the third becomes the Pokémon on the far right.
Placement
The placement of the Pokémon is a major attribute of Triple Battles, as a Pokémon's positioning affects how certain moves and Abilities work. Generally, Pokémon on the left-side of the field cannot attack any one on the right-side (including allies), and vice versa. This also means a Pokémon in the center is free to hit any Pokémon on the field, but at a cost of being vulnerable to every other Pokémon.
There are some moves, however, that allow non-adjacent Pokémon to attack each other.
Shifting
- Shift redirects here. For bringing Pokémon back into their Poké Ball to send out another Pokémon, see Recall.
The Pokémon on the left and right have the option to 'shift'. This option allows the user to switch with the Pokémon currently in the middle. Shifting has no priority and none of the effects of switching apply to shifting. A Pokémon can move even if it is the last Pokémon on its team, as long as it is not in the center.
If a Pokémon is readying to use a move on a certain target, but is then shifted before using its move, its attack will fail if the target is then outside of its range. If a Pokémon targeted an ally with a move, but as a result of shifting the Pokémon is now targeting itself when it would execute the move, the move will fail (even if the move is Acupressure).
If there are only two Pokémon left on the field and they are non-adjacent to each other, both Pokémon will automatically be shifted to the center of the field at the end of the turn.
Effect on moves
Most moves have the same effect in Triple Battles as with single and Double Battles, except that they can only affect adjacent Pokémon. Moves that hit both opponents or all Pokémon in Double Battles only affect adjacent Pokémon in Triple Battles. All single-target damage-dealing Flying-type moves, Flying Press, and all single-target aura and pulse moves can hit any Pokémon on the battlefield; this targeting is based on the original type of the move, so moves being changed to or from Flying-type (including moves that change their own type like Hidden Power) does not affect targeting. Moves that hit multiple Pokémon will have their damage reduced by 25%, unless there is only one target at the time the move is executed.
The moves After You, Quash, Helping Hand, Ally Switch, Follow Me, Rage Powder, Aromatic Mist, and Hold Hands have no effect in Single Battles, but do in Triple Battles.
The moves Bide, Counter, Mirror Coat, Metal Burst, Destiny Bond, and Grudge all can be activated by, and attack, a non-adjacent opponent.
The move Flame Burst takes away 1/16 of the maximum HP of all adjacent allies of the target Pokémon. This damage is not treated as an attack.
The move Acupressure, while in a Triple Battle, can target an adjacent ally instead of the user.
The following moves act differently when used in a Triple Battle, as opposed to a Single or Double Battle.
Effect on Abilities
Most Abilities' effect remain the same and are not affected by the Pokémon's placement. For example, a Mold Breaker Pokémon on the left-side of the field which used Water Pulse can still damage a Pokémon with Wonder Guard on the right-side of the field. A Magic Bounce Pokémon can still reflect entry hazards even if the user of the entry hazard and itself are at opposite corners of the field because entry hazards affect the entire team.
However, some Abilities are affected by a Pokémon's placement, for example, Intimidate will only lower the Attack of opposing, adjacent Pokémon on the field.
Locations

In Pokémon Black
| Trainer | Pokémon | |||||||||||
|---|---|---|---|---|---|---|---|---|---|---|---|---|
| Marvelous Bridge | ||||||||||||
|
| |||||||||||
| ||||||||||||
| ||||||||||||

In Pokémon White
|
||||||||||||||||||||||||||||||||||||||||||||||||||||||||||||||||||||||||||||||||||||||||||||||||||||||
| ||||||||||||||||||||||||||||||||||||||||||||||||||||||||||||||||||||||||||||||||||||||||||||||||||||||


| Trainer | Pokémon | |||||||||||
|---|---|---|---|---|---|---|---|---|---|---|---|---|
| Route 7 | ||||||||||||
|
| |||||||||||
| ||||||||||||
| ||||||||||||
| Opelucid City | ||||||||||||
|
| |||||||||||
| ||||||||||||
| ||||||||||||
|
| |||||||||||
| ||||||||||||
| ||||||||||||
| White Forest | ||||||||||||
|
| |||||||||||
| ||||||||||||
| ||||||||||||
|
| |||||||||||
| ||||||||||||
| ||||||||||||


In Pokémon Black 2 and White 2
|
||||||||||||||||||||||||||||||||||||||||||||||||||||||||||||||||||||||||||||||||||||||||||||||||||||||||||
| ||||||||||||||||||||||||||||||||||||||||||||||||||||||||||||||||||||||||||||||||||||||||||||||||||||||||||


| Trainer | Pokémon | |||||||||||
|---|---|---|---|---|---|---|---|---|---|---|---|---|
| Chargestone Cave 1F | ||||||||||||
|
| |||||||||||
| ||||||||||||
| ||||||||||||
| Route 7 | ||||||||||||
|
| |||||||||||
| ||||||||||||
| ||||||||||||
| Reversal Mountain | ||||||||||||
|
| |||||||||||
| ||||||||||||
| ||||||||||||
| Route 14 | ||||||||||||
|
| |||||||||||
| ||||||||||||
| ||||||||||||
| Route 13 | ||||||||||||
|
| |||||||||||
| ||||||||||||
| ||||||||||||
| Village Bridge | ||||||||||||
|
| |||||||||||
| ||||||||||||
| ||||||||||||
|
| |||||||||||
| ||||||||||||
| ||||||||||||
| Opelucid Gym | ||||||||||||
|
| |||||||||||
| ||||||||||||
| ||||||||||||
| Twist Mountain outside | ||||||||||||
|
| |||||||||||
| ||||||||||||
| ||||||||||||
| Route 8 | ||||||||||||
|
| |||||||||||
| ||||||||||||
| ||||||||||||
| Route 3 | ||||||||||||
|
| |||||||||||
| ||||||||||||
| ||||||||||||
| Route 18 | ||||||||||||
|
| |||||||||||
| ||||||||||||
| ||||||||||||
| Pokémon World Tournament | ||||||||||||
| See Pokémon World Tournament | ||||||||||||


In Pokémon X and Y
| Trainer | Pokémon | |||||||||||
|---|---|---|---|---|---|---|---|---|---|---|---|---|
| Restaurant Le Yeah | ||||||||||||
|
| |||||||||||
| ||||||||||||
| ||||||||||||
|
| |||||||||||
| ||||||||||||
| ||||||||||||
|
| |||||||||||
| ||||||||||||
| ||||||||||||
|
| |||||||||||
| ||||||||||||
| ||||||||||||
| Restaurant Le Wow | ||||||||||||
|
| |||||||||||
| ||||||||||||
| ||||||||||||
|
| |||||||||||
| ||||||||||||
| ||||||||||||
|
| |||||||||||
| ||||||||||||
| ||||||||||||
|
| |||||||||||
| ||||||||||||
| ||||||||||||
|
| |||||||||||
| ||||||||||||
| ||||||||||||
| Sushi High Roller | ||||||||||||
|
| |||||||||||
| ||||||||||||
| ||||||||||||
|
| |||||||||||
| ||||||||||||
| ||||||||||||
|
| |||||||||||
| ||||||||||||
| ||||||||||||
|
| |||||||||||
| ||||||||||||
| ||||||||||||
|
| |||||||||||
| ||||||||||||
| ||||||||||||
| Battle Maison | ||||||||||||
| See Battle Maison | ||||||||||||


In Pokémon Omega Ruby and Alpha Sapphire
| Trainer | Pokémon | |||||||||||
|---|---|---|---|---|---|---|---|---|---|---|---|---|
| Mauville Food Court | ||||||||||||
|
| |||||||||||
| ||||||||||||
| ||||||||||||
|
| |||||||||||
| ||||||||||||
| ||||||||||||
|
| |||||||||||
| ||||||||||||
| ||||||||||||
|
| |||||||||||
| ||||||||||||
| ||||||||||||
|
| |||||||||||
| ||||||||||||
| ||||||||||||
|
| |||||||||||
| ||||||||||||
| ||||||||||||
|
| |||||||||||
| ||||||||||||
| ||||||||||||
|
| |||||||||||
| ||||||||||||
| ||||||||||||
|
| |||||||||||
| ||||||||||||
| ||||||||||||
| Battle Maison | ||||||||||||
In Pokémon Battrio

|
This section is incomplete. Please feel free to edit this section to add missing information and complete it. |
Triple Battling as a mechanic was introduced in Pokémon Battrio, an arcade game using three Pokémon pucks on each side.
In the anime

The first official Triple Battle was seen in the anime in episode A Maractus Musical!, where Ash battled against Toby's three Maractus with his Pikachu, Tepig, and Snivy.
In the manga

In the Pokémon Adventures manga
In Black's First Trainer Battle, Black participates in a Triple Battle with a Hiker named Andy, using his Tep, Brav, and Musha against Andy's Cottonee, Roggenrola, and Blitzle.
In the Be the Best! Pokémon B+W manga
In the second chapter, Monta was shown in a Triple Battle with Cheren, using Snivy, Panpour, and Roggenrola against Cheren's Basculin, Tepig, and Pansage.
Trivia
- Air Cutter is the only Flying-type damage-dealing move that cannot hit a non-adjacent Pokémon.
- In The Battle of the Badge, Jessie and James send out three Pokémon at once to battle Ash, the first unofficial Triple Battle in the anime series.
In other languages
| ||||||||||||||||||||||||||||||
| Pokémon battle variations | |
|---|---|
| Double Battle • Multi Battle • Triple Battle • Rotation Battle • Horde Encounter • SOS Battle • Support Play • Max Raid Battle • Full Battle Contest Battle • Launcher Battle • Sky Battle • Inverse Battle • Battle Royal • Dynamax Adventure • Auto Battle • Tera Raid Battle • Scripted battle Battle modes | |
| This game mechanic article is part of Project Games, a Bulbapedia project that aims to write comprehensive articles on the Pokémon games. |