Appendix:Emerald walkthrough/Section 5: Difference between revisions
NeoCrimson (talk | contribs) No edit summary |
m (Relink Coin (Game Corner), replaced: Coin → {{OBP|Coin|Game Corner}} (2)) |
||
| (3 intermediate revisions by 3 users not shown) | |||
| Line 23: | Line 23: | ||
| align="left" | From a girl in the Game Corner, to match the player's starter Pokémon | | align="left" | From a girl in the Game Corner, to match the player's starter Pokémon | ||
| align="center" | '''<span style="background: #{{emerald color}}">{{color2|FFF|Pokémon Emerald Version| E }}</span>''' | | align="center" | '''<span style="background: #{{emerald color}}">{{color2|FFF|Pokémon Emerald Version| E }}</span>''' | ||
{{itemlist|Coin Case|From a man to the right of the Game Corner's service desk|E=yes|display=20 | {{itemlist|Coin Case|From a man to the right of the Game Corner's service desk|E=yes|display=20 {{OBP|Coin|Game Corner}}s}} | ||
{{catch/div|road|After defeating the Mauville Gym}} | {{catch/div|road|After defeating the Mauville Gym}} | ||
{{itemlist|TM Electric|From Wattson upon his defeat|E=yes|display={{TM|34|Shock Wave}}}} | {{itemlist|TM Electric|From Wattson upon his defeat|E=yes|display={{TM|34|Shock Wave}}}} | ||
| Line 37: | Line 37: | ||
[[File:Pokemon Game Corner Roulette.png|thumb|Roulette]] | [[File:Pokemon Game Corner Roulette.png|thumb|Roulette]] | ||
The [[Mauville Game Corner|Game Corner]] features sixteen [[slot machine]]s, four of which are in use by other patrons, and two [[roulette]] tables. A [[Coin Case]] is needed to participate. | The [[Mauville Game Corner|Game Corner]] features sixteen [[slot machine]]s, four of which are in use by other patrons, and two [[roulette]] tables. A [[Coin Case]] is needed to participate. {{OBP|Coin|Game Corner}}s may be purchased from the woman at the left side of the service desk, available at 50 for {{pdollar}}1,000 and 500 for {{pdollar}}10,000. | ||
====Prizes==== | ====Prizes==== | ||
| Line 207: | Line 207: | ||
{{itlistfoot|cave}} | {{itlistfoot|cave}} | ||
|} | |} | ||
You can also find Nosepass in Granite Cave (B2F) now by using the HM move Rock Smash on the rocks. | You can also find {{p|Nosepass}} in Granite Cave (B2F) now by using the [[HM]] move {{m|Rock Smash}} on the rocks. The rocks reset each time you leave and re-enter the floor. | ||
===Route 110=== | ===Route 110=== | ||
| Line 240: | Line 240: | ||
==Trick House - Puzzle 2 (optional)== | ==Trick House - Puzzle 2 (optional)== | ||
In [[Trick House]] now you can complete the puzzle 2. | In [[Trick House]] now you can complete the puzzle 2. | ||
==Route 117 (optional)== | ==Route 117 (optional)== | ||
| Line 410: | Line 361: | ||
The {{DL|Battle Tent|Verdanturf Site|Verdanturf Battle Tent}} stands in the northwest corner of town, and is the second of three scattered throughout [[Hoenn]]. At this location, challengers select three of their Pokémon to battle three opposing Trainers. These Trainers' Pokémon will either be level 30, or match the highest-leveled Pokémon in your party, whichever is higher. Trainers take a backseat here, while their Pokémon battle on their own, using moves most suited to their [[Nature]]s. All moves are grouped into three categories; Attack, Defense, and Support. Each Nature has a ratio of Attack, Defense, and Support moves that Pokémon with that Nature will prefer to use, but these ratios may change when a Pokémon's HP falls below 50%. During battle, a Pokémon chooses one of these categories, then selects a random attack from its moveset that matches that category. If no such attack exists, the Pokémon will "appear incapable of using its power" and skip its turn. The reward for winning three consecutive battles here is a [[Nest Ball]]. | The {{DL|Battle Tent|Verdanturf Site|Verdanturf Battle Tent}} stands in the northwest corner of town, and is the second of three scattered throughout [[Hoenn]]. At this location, challengers select three of their Pokémon to battle three opposing Trainers. These Trainers' Pokémon will either be level 30, or match the highest-leveled Pokémon in your party, whichever is higher. Trainers take a backseat here, while their Pokémon battle on their own, using moves most suited to their [[Nature]]s. All moves are grouped into three categories; Attack, Defense, and Support. Each Nature has a ratio of Attack, Defense, and Support moves that Pokémon with that Nature will prefer to use, but these ratios may change when a Pokémon's HP falls below 50%. During battle, a Pokémon chooses one of these categories, then selects a random attack from its moveset that matches that category. If no such attack exists, the Pokémon will "appear incapable of using its power" and skip its turn. The reward for winning three consecutive battles here is a [[Nest Ball]]. | ||
[[Scott]] can be found in the entry hall, in which he only appear in this place if you have the {{badge|Dynamo}}, requirement we fulfill. He claims that a Battle Tent is a great place to meet tough Trainers, and expects you to do your best here. | [[Scott]] can be found in the entry hall, in which he only appear in this place if you have the {{badge|Dynamo}}, a requirement we fulfill. He claims that a Battle Tent is a great place to meet tough Trainers, and expects you to do your best here. | ||
===Wanda's House=== | ===Wanda's House=== | ||
| Line 468: | Line 419: | ||
If you leave the tunnel through the middle exit, then you enter a new area on {{rt|116|Hoenn}}. You can pick up a [[Black Glasses]] and [[HP Up]] here. Additionally, you can talk to a [[Devon Corporation]] employee anytime after delivering the Devon Goods, and he will give you a free [[Repeat Ball]] and allow you to buy more Repeat Balls and [[Timer Ball]]s at [[Rustboro City]]. | If you leave the tunnel through the middle exit, then you enter a new area on {{rt|116|Hoenn}}. You can pick up a [[Black Glasses]] and [[HP Up]] here. Additionally, you can talk to a [[Devon Corporation]] employee anytime after delivering the Devon Goods, and he will give you a free [[Repeat Ball]] and allow you to buy more Repeat Balls and [[Timer Ball]]s at [[Rustboro City]]. | ||
==Route | ==Route 118 (optional)== | ||
We're going to head right, from Mauville City to Route 118. This is the western side of the route. You can't explore most of it, but the experience is valuable. | |||
{| class="expandable" style="margin: auto; background: #{{locationcolor/med|land}}; {{roundy}}; border: 5px solid #{{locationcolor/light|land}};" | {| class="expandable" style="margin: auto; background: #{{locationcolor/med|land}}; {{roundy}}; border: 5px solid #{{locationcolor/light|land}};" | ||
| Line 479: | Line 428: | ||
| | | | ||
{{trainerheader|land}} | {{trainerheader|land}} | ||
{{catch/div|land| | {{catch/div|land|Western side}} | ||
{{trainerentry|Spr RS | {{trainerentry|Spr RS Aroma Lady.png|Aroma Lady|Rose|560<br><small>Potential [[Double Battle]] with Deandre</small>|3|315|Roselia|♀|14||285|Shroomish|♀|14||315|Roselia|♀|14||38=Nav}} | ||
{{trainerentry|Spr RS Youngster.png|Youngster|Deandre|224<br><small>Potential [[Double Battle]] with Rose</small>|3|263|Zigzagoon|♂|14||304|Aron|♂|14||309|Electrike|♂|14|}} | |||
{{trainerdiv|land}} | {{trainerdiv|land}} | ||
{{trainerentry|Spr RS | {{trainerentry|Spr RS Fisherman.png|Fisherman|Wade|640|1|072|Tentacool|♂|16|}} | ||
{{trainerdiv|land}} | {{trainerdiv|land}} | ||
{{trainerentry|Spr RS | {{trainerentry|Spr RS Guitarist.png|Guitarist|Dalton|480|2|081|Magnemite||15||293|Whismur|♂|15||38=Nav}} | ||
{{catch/div|land|Rematch}} | |||
{{trainerentry|Spr RS Aroma Lady.png|Aroma Lady|Rose{{tt|*|First rematch}}|1040|2|285|Shroomish|♀|26||315|Roselia|♀|26||38=Nav}} | |||
{{trainerentry|Spr RS Aroma Lady.png|Aroma Lady|Rose{{tt|*|Second and third rematch}}|{{tt|1120|Second rematch}}/{{tt|1240|Third rematch}}|3|285|Shroomish|♀|{{tt|28|Second rematch}}/{{tt|31|Third rematch}}||044|Gloom|♀|{{tt|28|Second rematch}}/{{tt|31|Third rematch}}||315|Roselia|♀|{{tt|28|Second rematch}}/{{tt|31|Third rematch}}||38=Nav}} | |||
{{trainerentry|Spr RS Aroma Lady.png|Aroma Lady|Rose{{tt|*|Fourth rematch onwards}}|1360|3|286|Breloom|♀|34||044|Gloom|♀|34||315|Roselia|♀|34||38=Nav}} | |||
{{trainerdiv|land}} | {{trainerdiv|land}} | ||
{{trainerentry|Spr RS | {{trainerentry|Spr RS Guitarist.png|Guitarist|Dalton{{tt|*|First rematch}}|800|3|081|Magnemite||25||293|Whismur|♂|25||081|Magnemite||25||38=Nav}} | ||
{{trainerentry|Spr RS Guitarist.png|Guitarist|Dalton{{tt|*|Second rematch}}|896|3|081|Magnemite||28||294|Loudred|♂|28||081|Magnemite||28||38=Nav}} | |||
{{trainerentry|Spr RS | {{trainerentry|Spr RS Guitarist.png|Guitarist|Dalton{{tt|*|Third rematch}}|992|3|082|Magneton||31||294|Loudred|♂|31||082|Magneton||31||38=Nav}} | ||
{{trainerentry|Spr RS Guitarist.png|Guitarist|Dalton{{tt|*|Fourth rematch onwards}}|1088|3|082|Magneton||34||295|Exploud|♂|34||082|Magneton||34||38=Nav}} | |||
{{trainerentry|Spr RS | |||
{{trainerentry|Spr RS | |||
{{trainerfooter|land|3}} | {{trainerfooter|land|3}} | ||
|} | |} | ||
| Line 500: | Line 451: | ||
|- | |- | ||
| | | | ||
{{ | {{Catch/header|land|no}} | ||
{{catch/div|water|Fishing}} | {{catch/div|water|Fishing}} | ||
{{ | {{Catch/entry3|129|Magikarp|no|no|yes|Fish Old|5-10|70%|type1=Water}} | ||
{{ | {{Catch/entry3|072|Tentacool|no|no|yes|Fish Old|5-10|30%|type1=Water|type2=Poison}} | ||
{{ | {{Catch/footer|land}} | ||
|} | |} | ||
{| class="expandable" style="margin: auto; background: #{{locationcolor/med|land}}; {{roundy}}; border: 5px solid #{{locationcolor/light|land}};" | {| class="expandable" style="margin: auto; background: #{{locationcolor/med|land}}; {{roundy}}; border: 5px solid #{{locationcolor/light|land}};" | ||
| Line 514: | Line 463: | ||
| | | | ||
{{itlisth|land}} | {{itlisth|land}} | ||
{{ | {{catch/div|land|West side}} | ||
{{itemlist| | {{itemlist|Heart Scale|On the beach, on a rock near Fisherman Wade (hidden)|E=yes}} | ||
{{itlistfoot|land}} | {{itlistfoot|land}} | ||
|} | |} | ||
{{WalkthroughPrevNext | {{WalkthroughPrevNext | ||
| Line 636: | Line 472: | ||
|gamename=Emerald | |gamename=Emerald | ||
|prevsection=4 | |prevsection=4 | ||
|prevname=Route 110, Route 103 | |prevname=Route 110, Trick House, Route 103 | ||
|nextsection=6 | |nextsection=6 | ||
|nextname=Route 112 (south), Fiery Path, Route 112 (north), Route 111 (north), Route 113, Fallarbor Town, Route 114 | |nextname=Route 111 (south), Route 112 (south), Fiery Path, Route 112 (north), Route 111 (north), Route 113, Fallarbor Town, Route 114 | ||
}} | }} | ||
Revision as of 14:31, 4 September 2023
Mauville City
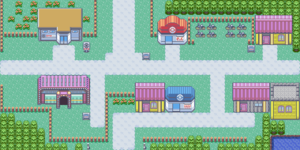
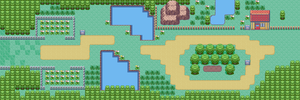
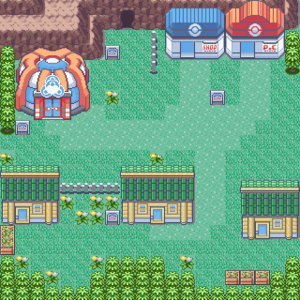
Mauville City is located in central Hoenn, situated between Routes 110, 111, 117, and 118. Tourist hotspots include the Mauville Gym, Game Corner, and Rydel's Cycles.
| Items | |||||||||||||||||||||||||||||||||||||||||||||||||||
|---|---|---|---|---|---|---|---|---|---|---|---|---|---|---|---|---|---|---|---|---|---|---|---|---|---|---|---|---|---|---|---|---|---|---|---|---|---|---|---|---|---|---|---|---|---|---|---|---|---|---|---|
| |||||||||||||||||||||||||||||||||||||||||||||||||||
Rydel's Cycles
Rydel's Cycles is located near the city's east exit. Spotting your dirty Running Shoes, the shop owner, Rydel, realizes that you've done a lot of traveling. He offers you a free bicycle, and gives you the choice between two models. The Mach Bike is faster and is able to ride up muddy slopes, which is useful for exploring places like Granite Cave. The Acro Bike is slower which allows for more precise control and the ability to perform tricks. After choosing a bike, you can speak to Rydel at any time to swap it for the other model.
Game Corner
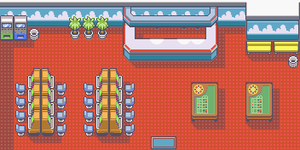
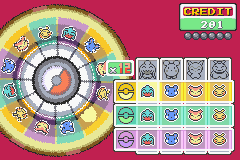
The Game Corner features sixteen slot machines, four of which are in use by other patrons, and two roulette tables. A Coin Case is needed to participate. Coins may be purchased from the woman at the left side of the service desk, available at 50 for $1,000 and 500 for $10,000.
Prizes
Collect enough coins and they can be exchanged for valuable prizes. To do so, speak to either of the two women at the right side of the service desk.
| ||||||||||||||||||||||||||||||||||||||
Move Tutor
Another Move Tutor can be found outside the Gym. This man offers to teach the move Rollout to a Pokémon, one time only.
Wally's Challenge
When you approach the Gym, you find Wally and his uncle talking outside the building. He desperately wants to challenge the Gym, but his uncle has reservations. He challenges you to a quick battle to test his skills.
| |||||||||||||||||||||||||||||||||||||
After being defeated, he decides to return to Verdanturf Town. As they turn to leave, his uncle recognizes you as the Trainer who helped Wally catch his Ralts, and invites you to visit them in Verdanturf.
Scott arrives after they leave. He was watching the match, and was impressed that you didn't hold anything back, even when battling a friend. He lets you know that he'll be cheering for you, and heads west to Route 117. Soon after that, you receive a call from Wally. His uncle has just bought him a PokéNav, and he's excited that he can contact you anytime.
Mauville Gym
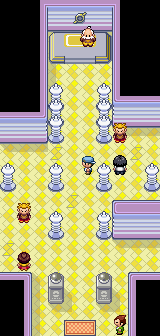
The Mauville Gym specializes in Electric-type Pokémon. While most Pokémon of this type are only vulnerable to Ground-type attacks, the other Pokémon inside make Fire and Fighting moves useful as well. Keep your Water- and Flying-type Pokémon on the sidelines for now. The Gym features several electrical barriers, which can be turned on and off by stepping on thunderbolt-shaped switches. To reach the Gym Leader, simply step on the southwest switch.
Wattson leads with his Voltorb. Though its Attack is low, its Selfdestruct may unexpectedly knock out one of your Pokémon. His Electrike is not much of a threat, but it can strike first with Quick Attack. Pokémon that use contact moves against Electrike also risk becoming paralyzed due to its Static Ability. Magneton likes to start with Supersonic to confuse its foe. Its Special Attack is dangerously high, which allows it to deal serious damage with the unavoidable Shock Wave move; fortunately, it also sustains quadruple damage from Ground moves. His Manectric can use Howl to raise its Attack, which boosts the damage dealt by Quick Attack. It can also actively paralyze the foe with Thunder Wave, and like Electrike, has the Static Ability.
| ||||||||||||||||||||||||||||||||||||||||||||||||||||||||||||||||||||||||||||||||||||||||||||||||||||||||||||||||||||||||||||||||||||||||||||||||||||||||||||||||||||||||||||||||||||||||||||||||||||||||||||||||||||||||||||||||||
After the battle, Wattson awards you the Dynamo Badge, which boosts your Pokémon's Speed by 10% and enables the use of Rock Smash in the field. He also hands out TM34 (Shock Wave) as a prize, and registers himself in your PokéNav.
Now that you have the Mach Bike and Dynamo Badge (optional)
There are items on Route 104 and Granite Cave B2F that you can pick up.
Route 104 (north)
| Route 104 | ||||||||||||
|---|---|---|---|---|---|---|---|---|---|---|---|---|
| ||||||||||||
Granite Cave
| Granite Cave (B2F) | ||||||||||||||||||||
|---|---|---|---|---|---|---|---|---|---|---|---|---|---|---|---|---|---|---|---|---|
| ||||||||||||||||||||
You can also find Nosepass in Granite Cave (B2F) now by using the HM move Rock Smash on the rocks. The rocks reset each time you leave and re-enter the floor.
Route 110
While riding your bicycle, you can enter Route 110's Seaside Cycling Road and battle the trainers there.
| Trainers | |||||||||||||||||||||||||||||||||||||||||||||||||||||||||||||||||||||||||||||||||||||||||||||||||||||||||||||||||||||||||||||||||||||||||||||||||||||||||||||||||||||||||||||||||||||||||||||||||
|---|---|---|---|---|---|---|---|---|---|---|---|---|---|---|---|---|---|---|---|---|---|---|---|---|---|---|---|---|---|---|---|---|---|---|---|---|---|---|---|---|---|---|---|---|---|---|---|---|---|---|---|---|---|---|---|---|---|---|---|---|---|---|---|---|---|---|---|---|---|---|---|---|---|---|---|---|---|---|---|---|---|---|---|---|---|---|---|---|---|---|---|---|---|---|---|---|---|---|---|---|---|---|---|---|---|---|---|---|---|---|---|---|---|---|---|---|---|---|---|---|---|---|---|---|---|---|---|---|---|---|---|---|---|---|---|---|---|---|---|---|---|---|---|---|---|---|---|---|---|---|---|---|---|---|---|---|---|---|---|---|---|---|---|---|---|---|---|---|---|---|---|---|---|---|---|---|---|---|---|---|---|---|---|---|---|---|---|---|---|---|---|---|---|
| |||||||||||||||||||||||||||||||||||||||||||||||||||||||||||||||||||||||||||||||||||||||||||||||||||||||||||||||||||||||||||||||||||||||||||||||||||||||||||||||||||||||||||||||||||||||||||||||||
Trick House - Puzzle 2 (optional)
In Trick House now you can complete the puzzle 2.
Route 117 (optional)
Route 117 stretches west from Mauville City. The optional path serves as a shortcut back to western Hoenn, by way of Verdanturf Town and Rusturf Tunnel. A Pokémon Day Care is located just outside the city.
| Trainers | |||||||||||||||||||||||||||||||||||||||||||||||||||||||||||||||||||||||||||||||||||||||||||||||||||||||||||||||||||||||||||||||||||||||||||||||||||||||||||||||||||||||||||||||||||||||||||||||||||||||||||||||||||||||||||||||||||||||||||||||||||||||||||||||||||||||||||||||||||||||||||||||||||||||||||||||||||||||||||||||||||||||||||||||||||||||||||||||||||||||||||||||||||||||||||||||||||||||||||||||||||||||||||||||||||||||||||||||||||||||||||||||||||||||||||||||||||||||||||||||||||||||||||||||||||||||||||||||||||||||||||||||||||||||||||||||||||||||||||||||||||||||||||||||||||||||||||||||||||
|---|---|---|---|---|---|---|---|---|---|---|---|---|---|---|---|---|---|---|---|---|---|---|---|---|---|---|---|---|---|---|---|---|---|---|---|---|---|---|---|---|---|---|---|---|---|---|---|---|---|---|---|---|---|---|---|---|---|---|---|---|---|---|---|---|---|---|---|---|---|---|---|---|---|---|---|---|---|---|---|---|---|---|---|---|---|---|---|---|---|---|---|---|---|---|---|---|---|---|---|---|---|---|---|---|---|---|---|---|---|---|---|---|---|---|---|---|---|---|---|---|---|---|---|---|---|---|---|---|---|---|---|---|---|---|---|---|---|---|---|---|---|---|---|---|---|---|---|---|---|---|---|---|---|---|---|---|---|---|---|---|---|---|---|---|---|---|---|---|---|---|---|---|---|---|---|---|---|---|---|---|---|---|---|---|---|---|---|---|---|---|---|---|---|---|---|---|---|---|---|---|---|---|---|---|---|---|---|---|---|---|---|---|---|---|---|---|---|---|---|---|---|---|---|---|---|---|---|---|---|---|---|---|---|---|---|---|---|---|---|---|---|---|---|---|---|---|---|---|---|---|---|---|---|---|---|---|---|---|---|---|---|---|---|---|---|---|---|---|---|---|---|---|---|---|---|---|---|---|---|---|---|---|---|---|---|---|---|---|---|---|---|---|---|---|---|---|---|---|---|---|---|---|---|---|---|---|---|---|---|---|---|---|---|---|---|---|---|---|---|---|---|---|---|---|---|---|---|---|---|---|---|---|---|---|---|---|---|---|---|---|---|---|---|---|---|---|---|---|---|---|---|---|---|---|---|---|---|---|---|---|---|---|---|---|---|---|---|---|---|---|---|---|---|---|---|---|---|---|---|---|---|---|---|---|---|---|---|---|---|---|---|---|---|---|---|---|---|---|---|---|---|---|---|---|---|---|---|---|---|---|---|---|---|---|---|---|---|---|---|---|---|---|---|---|---|---|---|---|---|---|---|---|---|---|---|---|---|---|---|---|---|---|---|---|---|---|---|---|---|---|---|---|---|---|---|---|---|---|---|---|---|---|---|---|---|---|---|---|---|---|---|---|---|---|---|---|---|---|---|---|---|---|---|---|---|---|---|---|---|---|---|---|---|---|---|---|---|---|---|---|---|---|---|---|---|---|---|---|---|---|---|---|---|---|---|---|---|---|---|---|---|---|---|---|---|---|---|---|---|---|---|---|---|---|---|---|---|---|---|---|---|---|---|---|---|---|---|---|---|---|---|---|---|---|---|---|---|---|---|---|---|---|---|---|---|---|---|---|---|---|---|---|---|---|---|---|---|---|---|---|---|---|---|---|---|---|---|---|---|---|---|---|---|---|---|
| |||||||||||||||||||||||||||||||||||||||||||||||||||||||||||||||||||||||||||||||||||||||||||||||||||||||||||||||||||||||||||||||||||||||||||||||||||||||||||||||||||||||||||||||||||||||||||||||||||||||||||||||||||||||||||||||||||||||||||||||||||||||||||||||||||||||||||||||||||||||||||||||||||||||||||||||||||||||||||||||||||||||||||||||||||||||||||||||||||||||||||||||||||||||||||||||||||||||||||||||||||||||||||||||||||||||||||||||||||||||||||||||||||||||||||||||||||||||||||||||||||||||||||||||||||||||||||||||||||||||||||||||||||||||||||||||||||||||||||||||||||||||||||||||||||||||||||||||||||
| Available Pokémon | ||||||||||||||||||||||||||||||||||||||||||||||||||||||||||||||||||||||||||||||||||||||||||||||||||||||||||||||||||||||||||||||||||||||||||||||||||||||||||||||||||||||||||||||||||||||||||||||||||||||||
|---|---|---|---|---|---|---|---|---|---|---|---|---|---|---|---|---|---|---|---|---|---|---|---|---|---|---|---|---|---|---|---|---|---|---|---|---|---|---|---|---|---|---|---|---|---|---|---|---|---|---|---|---|---|---|---|---|---|---|---|---|---|---|---|---|---|---|---|---|---|---|---|---|---|---|---|---|---|---|---|---|---|---|---|---|---|---|---|---|---|---|---|---|---|---|---|---|---|---|---|---|---|---|---|---|---|---|---|---|---|---|---|---|---|---|---|---|---|---|---|---|---|---|---|---|---|---|---|---|---|---|---|---|---|---|---|---|---|---|---|---|---|---|---|---|---|---|---|---|---|---|---|---|---|---|---|---|---|---|---|---|---|---|---|---|---|---|---|---|---|---|---|---|---|---|---|---|---|---|---|---|---|---|---|---|---|---|---|---|---|---|---|---|---|---|---|---|---|---|---|---|
| ||||||||||||||||||||||||||||||||||||||||||||||||||||||||||||||||||||||||||||||||||||||||||||||||||||||||||||||||||||||||||||||||||||||||||||||||||||||||||||||||||||||||||||||||||||||||||||||||||||||||
| Items | ||||||||||||||||||||||||
|---|---|---|---|---|---|---|---|---|---|---|---|---|---|---|---|---|---|---|---|---|---|---|---|---|
| ||||||||||||||||||||||||
Pokémon Day Care
The Pokémon Day Care is a facility that raises Pokémon for busy Trainers. For a small fee, up to two Pokémon can be left here to be raised by the Day Care staff. During their stay, Pokémon will gradually level up and learn new moves. When two compatible Pokémon are left at the same time, you may return to find an Egg! Speak to the Day-Care Man and he will hint at the odds of finding one.
| Quote | Chance for Egg |
|---|---|
| "The two seem to get along very well." | |
| "The two seem to get along." | |
| "The two don't seem to like each other much." | |
| "The two prefer to play with other Pokémon more than each other." |
Whenever an Egg is found, the Day-Care Man will be standing farther away from the fence, eager to talk to you. Speak to him to receive the Egg, and carry it with you on your journey. The more you travel with an Egg, the faster the Pokémon inside will hatch.
Verdanturf Town (optional)
Verdanturf is a small town just west of Route 117, at the foot of the mountains. Due to the prevailing wind pattern, the area is always kept clear of falling volcanic ash. Wally is visiting with his uncle's family here, in the hopes that the fresh, clean air will improve his health.
| Items | ||||||||||||||||
|---|---|---|---|---|---|---|---|---|---|---|---|---|---|---|---|---|
| ||||||||||||||||
Move Tutor
Another Move Tutor can be found inside the Pokémon Center. This young boy offers to teach the move Fury Cutter to a Pokémon, one time only.
Battle Tent
The Verdanturf Battle Tent stands in the northwest corner of town, and is the second of three scattered throughout Hoenn. At this location, challengers select three of their Pokémon to battle three opposing Trainers. These Trainers' Pokémon will either be level 30, or match the highest-leveled Pokémon in your party, whichever is higher. Trainers take a backseat here, while their Pokémon battle on their own, using moves most suited to their Natures. All moves are grouped into three categories; Attack, Defense, and Support. Each Nature has a ratio of Attack, Defense, and Support moves that Pokémon with that Nature will prefer to use, but these ratios may change when a Pokémon's HP falls below 50%. During battle, a Pokémon chooses one of these categories, then selects a random attack from its moveset that matches that category. If no such attack exists, the Pokémon will "appear incapable of using its power" and skip its turn. The reward for winning three consecutive battles here is a Nest Ball.
Scott can be found in the entry hall, in which he only appear in this place if you have the Dynamo Badge, a requirement we fulfill. He claims that a Battle Tent is a great place to meet tough Trainers, and expects you to do your best here.
Wanda's House
The middle home on the south side belongs to Wanda, who happens to be Wally's cousin. This is where Wally is staying for now, but it seems that he's run off to train his Pokémon. According to Wanda's mother, Wanda is concerned about her boyfriend, who is working non-stop to complete the construction of Rusturf Tunnel. She often goes there to visit him.
Friendship Rater
In the house situated to the left of Wanda's house, there is a woman who rates the friendship of Pokémon.
Rusturf Tunnel
| Trainers | |||||||||||||||||||||||||||||
|---|---|---|---|---|---|---|---|---|---|---|---|---|---|---|---|---|---|---|---|---|---|---|---|---|---|---|---|---|---|
| |||||||||||||||||||||||||||||
| Available Pokémon | ||||||||||||||||||||||||||||||||||||||||||
|---|---|---|---|---|---|---|---|---|---|---|---|---|---|---|---|---|---|---|---|---|---|---|---|---|---|---|---|---|---|---|---|---|---|---|---|---|---|---|---|---|---|---|
| ||||||||||||||||||||||||||||||||||||||||||
| Items | ||||||||||||||||
|---|---|---|---|---|---|---|---|---|---|---|---|---|---|---|---|---|
| ||||||||||||||||
Reunion
Enter the cave through either Route 116 or Verdanturf Town. With the Dynamo Badge, you can finally use Rock Smash to clear a path through Rusturf Tunnel. Step inside and go northwest to reach a group of cracked rocks. Clear the debris to open the tunnel and reunite Wanda with her hardworking boyfriend. As thanks, he gives you HM04 (Strength)!
Route 116
| Items | ||||||||||||||||||||||||||||||||||||||||||||||||||
|---|---|---|---|---|---|---|---|---|---|---|---|---|---|---|---|---|---|---|---|---|---|---|---|---|---|---|---|---|---|---|---|---|---|---|---|---|---|---|---|---|---|---|---|---|---|---|---|---|---|---|
| ||||||||||||||||||||||||||||||||||||||||||||||||||
If you leave the tunnel through the middle exit, then you enter a new area on Route 116. You can pick up a Black Glasses and HP Up here. Additionally, you can talk to a Devon Corporation employee anytime after delivering the Devon Goods, and he will give you a free Repeat Ball and allow you to buy more Repeat Balls and Timer Balls at Rustboro City.
Route 118 (optional)
We're going to head right, from Mauville City to Route 118. This is the western side of the route. You can't explore most of it, but the experience is valuable.
| Trainers | |||||||||||||||||||||||||||||||||||||||||||||||||||||||||||||||||||||||||||||||||||||||||||||||||||||||||||||||||||||||||||||||||||||||||||||||||||||||||||||||||||||||||||||||||||||||||||||||||||||||||||||||||||||||||||||||||||||||||||||||||||||||||||||||||||||||||||||||||||||||||||||||||||
|---|---|---|---|---|---|---|---|---|---|---|---|---|---|---|---|---|---|---|---|---|---|---|---|---|---|---|---|---|---|---|---|---|---|---|---|---|---|---|---|---|---|---|---|---|---|---|---|---|---|---|---|---|---|---|---|---|---|---|---|---|---|---|---|---|---|---|---|---|---|---|---|---|---|---|---|---|---|---|---|---|---|---|---|---|---|---|---|---|---|---|---|---|---|---|---|---|---|---|---|---|---|---|---|---|---|---|---|---|---|---|---|---|---|---|---|---|---|---|---|---|---|---|---|---|---|---|---|---|---|---|---|---|---|---|---|---|---|---|---|---|---|---|---|---|---|---|---|---|---|---|---|---|---|---|---|---|---|---|---|---|---|---|---|---|---|---|---|---|---|---|---|---|---|---|---|---|---|---|---|---|---|---|---|---|---|---|---|---|---|---|---|---|---|---|---|---|---|---|---|---|---|---|---|---|---|---|---|---|---|---|---|---|---|---|---|---|---|---|---|---|---|---|---|---|---|---|---|---|---|---|---|---|---|---|---|---|---|---|---|---|---|---|---|---|---|---|---|---|---|---|---|---|---|---|---|---|---|---|---|---|---|---|---|---|---|---|---|---|---|---|---|---|---|---|---|---|---|---|---|---|---|---|---|---|---|---|---|---|---|---|---|
| |||||||||||||||||||||||||||||||||||||||||||||||||||||||||||||||||||||||||||||||||||||||||||||||||||||||||||||||||||||||||||||||||||||||||||||||||||||||||||||||||||||||||||||||||||||||||||||||||||||||||||||||||||||||||||||||||||||||||||||||||||||||||||||||||||||||||||||||||||||||||||||||||||
| Available Pokémon | |||||||||||||||||||||||||||||||||||||||||||||||||||||||||||||||||||||||||
|---|---|---|---|---|---|---|---|---|---|---|---|---|---|---|---|---|---|---|---|---|---|---|---|---|---|---|---|---|---|---|---|---|---|---|---|---|---|---|---|---|---|---|---|---|---|---|---|---|---|---|---|---|---|---|---|---|---|---|---|---|---|---|---|---|---|---|---|---|---|---|---|---|---|
| |||||||||||||||||||||||||||||||||||||||||||||||||||||||||||||||||||||||||
| Items | |||||||||||||||||||||||||||
|---|---|---|---|---|---|---|---|---|---|---|---|---|---|---|---|---|---|---|---|---|---|---|---|---|---|---|---|
| |||||||||||||||||||||||||||
|
Emerald walkthrough |
|

|
This article is part of Project Walkthroughs, a Bulbapedia project that aims to write comprehensive step-by-step guides on each Pokémon game. |
