Snagem Hideout: Difference between revisions
m (Is this formatting better?) |
(→First visit: this was needlessly confusing) Tag: Manual revert |
||
| (102 intermediate revisions by 38 users not shown) | |||
| Line 1: | Line 1: | ||
{{ | {{Infobox location | ||
|location_name=Snagem Hideout | |||
'''Snagem Hideout''' (Japanese: '''スナッチ団のアジト''' ''Team Snatch Hideout'') is a location in [[Orre]]. It is | |japanese_name=スナッチ団のアジト | ||
|translated_name=Team Snatch Hideout | |||
|location=Eastern Orre | |||
|mapdesc=The former base of <sc>Team Snagem</sc> that was completely destroyed in a catastrophic explosion.{{sup/ss|Colo}}<br><sc>Team Snagem</sc>'s base is apparently still in use even after it was destroyed.{{sup/ss|XD}}<br>The base where <sc>Team Snagem</sc> dreams of regaining its former glory.{{sup/ss|XD}} | |||
|image=Snagem Hideout XD.png | |||
|image_size=300px | |||
|region=Orre | |||
|generation={{gen|III}} | |||
|type=ruins | |||
|mapsize=300px | |||
}} | |||
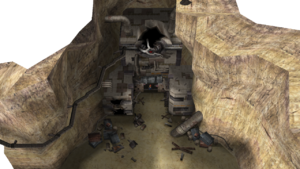
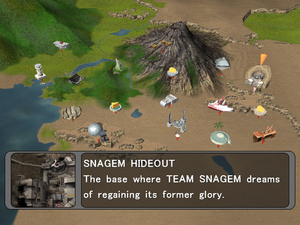
'''Snagem Hideout''' (Japanese: '''スナッチ団のアジト''' ''Team Snatch Hideout'') is a location in [[Orre]]. It is the base of the [[villainous team|villainous]] [[Team Snagem]]. According to an early news report in [[Pokémon Colosseum]], it is located in a part of Orre known as [[Eclo Canyon]]. | |||
{{spoilers}} | |||
At the start of Pokémon Colosseum, the base is heavily damaged by the {{player}} as they steal the only portable [[Snag Machine]] and destroy the bigger one, detonating several bombs placed around the building during their theft and escape. During the post-game, it acts as a gathering place for [[Shadow Pokémon]] {{pkmn|Trainer}}s who cannot be [[rematch]]ed during the main game. | |||
In [[Pokémon XD: Gale of Darkness]], the Snagem Hideout is still in severe disrepair from the sabotage five years ago, but is still in use by Team Snagem. The player must enter it in order to reclaim their stolen Snag Machine. | |||
==Role== | |||
===Pokémon Colosseum=== | |||
Despite the {{player}} leaving the Snagem Hideout at the start of the game, it cannot be visited until the post-game, where the player must visit it at least twice. The first time they visit it to follow a lead on a {{tc|Cipher Peon}} with a {{pkmn2|Shadow}} [[Johto]] [[first partner Pokémon]] that they didn't [[snagging|snag]] in [[Phenac City]]. | |||
After the Johto first partner Pokémon has been snagged, the player will soon be informed of rumors about the big Snag Machine being repaired, promoting them to revisit the hideout again. During this return visit, the player can snag two previously unavailable Shadow Pokémon, a {{p|Smeargle}} and an {{p|Ursaring}}, and rematch Snagem Head [[Gonzap]]. Battling Gonzap allows the player to claim the [[D-Disk]], which is required to access the [[Deep Colosseum]] and progress the post-game plot. It is also revealed that the big Snag Machine has been destroyed beyond repair and the fake rumors were merely a plan hatched by Gonzap to lure the player into returning to the hideout and get revenge on him for betraying the team at the start of the game. | |||
Most Shadow Pokémon Trainers who cannot be rematched during the main game also appear here, allowing the player to battle them again in case they failed to snag their Shadow Pokémon earlier. | |||
===Pokémon XD: Gale of Darkness=== | |||
The player must visit the Snagem Hideout in order to get back the Snag Machine stolen from them by [[Wakin]] at the [[S.S. Libra]]. Upon reaching Gonzap's office, the player sees Gonzap berating Wakin that the Snag Machine is too small for him, before being forced to battle Wakin and Gonzap in succession. Once Gonzap has been defeated, he will return the Snag Machine to the player, admitting that both of them are aiming for the same goal, as Team Snagem is seeking to get revenge on [[Cipher]] for abandoning their alliance with them. | |||
Gonzap will also give the player [[Gonzap's Key|a key]] to a locked [[item]] chest on 1F after being defeated, allowing the player to obtain the [[TM]] hidden inside it. | |||
{{endspoilers}} | |||
==Items== | ==Items== | ||
{{itlisth|ruins}} | {{itlisth|ruins}} | ||
{{ | {{itemlist|Max Elixir|1F, in the center of the hallway|Colo=yes}} | ||
{{ | {{itemlist|Max Revive|1F, next to Niver|Colo=yes|display=[[Max Revive]] ×2}} | ||
{{ | {{itemlist|Ultra Ball|1F, inside the big [[Snag Machine]] in the southwest room|Colo=yes|display=[[Ultra Ball]] ×5}} | ||
{{ | {{itemlist|Ultra Ball|1F, north of the healing machine|XD=yes|display=[[Ultra Ball]] ×3}} | ||
{{ | {{itemlist|TM Psychic|1F, behind the southeast staircase, near [[Biden]]|XD=yes|display={{TM|29|Psychic}}}} | ||
{{ | {{itemlist|TM Ghost|1F, near the alternate exit (requires [[Gonzap's Key]])|XD=yes|display={{TM|30|Shadow Ball}}}} | ||
{{ | {{itemlist|Elixir|2F, east of the northern staircase|Colo=yes}} | ||
{{ | {{itemlist|Max Ether|2F, in the southwest room|Colo=yes|display=[[Max Ether]] ×2}} | ||
{{itemlist|None|2F, on the table in [[Gonzap]]'s office after battling him|Colo=yes|display=[[D-Disk]]}} | |||
{{itemlist|Rare Candy|2F, in Gonzap's office|Colo=yes|display=[[Rare Candy]] ×3}} | |||
{{itemlist|PP Up|2F, inside the jail cell|XD=yes}} | |||
{{itemlist|Hyper Potion|2F, behind the northern staircase|XD=yes|display=[[Hyper Potion]] ×2}} | |||
{{itemlist||sprite=Snag Machine XD|size=40|2F, retrieved from Gonzap after defeating him|XD=yes|display=[[Snag Machine]]}} | |||
{{itemlist|None|2F, reward for defeating Gonzap|XD=yes|display=[[Gonzap's Key]]}} | |||
{{itemlist|Full Heal|2F, inside Gonzap's office|XD=yes|display=[[Full Heal]] ×2}} | |||
{{itemlist|Max Potion|3F, in the northeast room|Colo=yes|display=[[Max Potion]] ×3}} | |||
{{itemlist|PP Up|3F, in the southwest room|Colo=yes|display=[[PP Up]] ×3}} | |||
{{itemlist|Revive|3F, in the southern part of the hallway|XD=yes|display=[[Revive]] ×2}} | |||
{{itemlist|Rare Candy|3F, to the left of Golit|XD=yes}} | |||
{{itlistfoot|ruins}} | {{itlistfoot|ruins}} | ||
==Trainers== | ==Trainers== | ||
===Pokémon Colosseum=== | |||
If a Trainer's [[Shadow Pokémon]] wasn't [[snagging|snagged]] during the main game, it will replace the last Pokémon in their [[party]] here. They can be [[rematch]]ed until their Shadow Pokémon has been snagged. | |||
====Entrance==== | |||
These {{tc|Cipher Peon}}s appear in turn whenever the player enters the gap in the wall north of the [[PC]]. The next Peon will appear once the player has exited and reentered the building or battled [[Gonzap]]. | |||
{{trainerheader|ruins}} | |||
{{trainerentry|Colo Cipher Peon m.png{{!}}80px|Cipher Peon|Nore|2,200|4|267|Beautifly|F|54|None|205|Forretress|F|51|None|284|Masquerain|F|52|None|291|Ninjask|M|55|None|game=colo|36=ワイルド|37=Wild}} | |||
{{trainerdiv|ruins}} | |||
{{trainerentry|Colo Skrub.png{{!}}80px|Cipher Peon|[[Skrub]]|2,120|4|367|Huntail|F|51|None|202|Wobbuffet|F|53|None|076|Golem|M|52|None|308|Medicham|F|50|None|game=colo|36=コワップ|37=Kowappu}} | |||
{{trainerdiv|ruins}} | |||
{{trainerentry|Colo Cipher Peon f.png{{!}}80px|Cipher Peon|Kloak|2,120|3|314|Illumise|F|53|None|313|Volbeat|M|53|None|168|Ariados|F|52|None|game=colo|36=コルガ|37=Koruga}} | |||
{{trainerdiv|ruins}} | |||
{{trainerentry|Colo Cipher Peon f.png{{!}}80px|Cipher Peon|Baila|2,120|3|189|Jumpluff|F|53|None|315|Roselia|F|52|None|045|Vileplume|M|51|None|game=colo|36=ジニー|37=Ginny}} | |||
{{trainerdiv|ruins}} | |||
{{trainerentry|Colo Cipher Peon m.png{{!}}80px|Cipher Peon|Arton|2,200|3|221|Piloswine|F|55|None|362|Glalie|M|54|None|364|Sealeo|M|50|None|game=colo|36=ザイル|37=Zairu}} | |||
{{trainerdiv|ruins}} | |||
{{trainerentry|Colo Cipher Peon m.png{{!}}80px|Cipher Peon|Dioge|2,120|3|205|Forretress|M|51|None|284|Masquerain|M|53|None|269|Dustox|F|50|game=colo|36=ポトン|37=Poton}} | |||
{{trainerfooter|ruins|Colo}} | |||
====First visit==== | |||
These Trainers will be present at the Snagem Hideout since the first visit. The Cipher Peon with the [[Johto]] [[first partner Pokémon]] will disappear after his Shadow Pokémon has been snagged. | |||
{{trainerheader|ruins}} | |||
{{trainerentry|Colo Snagem 1.png{{!}}80px|Team Snagem|Driton|550|4|117|Seadra|M|55|None|279|Pelipper|M|53|None|171|Lanturn|M|50|None|121|Starmie||52|None|game=colo|36=ベイル|37=Vail}} | |||
{{trainerdiv|ruins}} | |||
{{trainerentry|Colo Bodybuilder m 1.png{{!}}80px|Bodybuilder|Colas|1,296|4|247|Pupitar|M|54|None|327|Spinda|M|51|None|372|Shelgon|F|54|None|318|Carvanha|M|51|None|game=colo|36=メンド|37=Mend}} | |||
{{trainerdiv|ruins}} | |||
{{trainerentry|Colo Bandana Guy.png{{!}}80px|Bandana Guy|Crudo|880|4|028|Sandslash|M|53|None|264|Linoone|M|55|None|110|Weezing|M|52|None|317|Swalot|M|51|None|game=colo|36=チェント|37=Chento}} | |||
{{trainerdiv|ruins}} | |||
{{trainerentry|Colo Snagem 1.png{{!}}80px|Team Snagem|Niver|530|4|253|Grovyle|M|52|None|111|Rhyhorn|M|52|None|288|Vigoroth|F|52|None|335|Zangoose|M|53|None|game=colo|36=バクサ|37=Bakusa}} | |||
{{trainerdiv|ruins}} | |||
{{trainerentry|Colo Rider m.png{{!}}80px|Rider|Rions|540|4|261|Poochyena|M|54|None|064|Kadabra|F|53|None|262|Mightyena|F|50|None|264|Linoone|M|53|None|game=colo|36=リカル|37=Rikaru}} | |||
{{trainerdiv|ruins}} | |||
{{trainerentry|Colo Snagem 1.png{{!}}80px|Team Snagem|Fuston|540|4|267|Beautifly|M|53|None|225|Delibird|M|54|None|277|Swellow|M|54|None|042|Golbat|F|53|None|game=colo|36=デジタス|37=Dejitasu}} | |||
{{trainerfooter|ruins|Colo}} | |||
{{MSP/Colo|156|Quilava}} If [[Rosso]] was battled in [[Phenac City]]: | |||
{{Party/Single | |||
|color={{green color}} | |||
|bordercolor={{green color dark}} | |||
|headcolor={{shadow color light}} | |||
|sprite=Colo Verde.png | |||
|size=80px | |||
|prize={{pdollar}}2,520 | |||
|class=Cipher Peon | |||
|name={{color2|000|Verde}} | |||
|game=Colo | |||
|location=Snagem Hideout | |||
|pokemon=4}} | |||
|{{Pokémon/3 | |||
|ndex=089 | |||
|pokemon=Muk | |||
|game=Colo | |||
|gender=male | |||
|level=55 | |||
|ability=Sticky Hold | |||
|type1=Poison | |||
|move1=Sludge Bomb|move1type=Poison | |||
|move2=Strength|move2type=Normal | |||
|move3=Dig|move3type=Ground | |||
|move4=Acid Armor|move4type=Poison}} | |||
|{{Pokémon/3 | |||
|ndex=326 | |||
|pokemon=Grumpig | |||
|game=Colo | |||
|gender=female | |||
|level=54 | |||
|ability=Thick Fat | |||
|type1=Psychic | |||
|move1=Extrasensory|move1type=Psychic | |||
|move2=Shadow Ball|move2type=Ghost | |||
|move3=Bounce|move3type=Flying | |||
|move4=Psych Up|move4type=Normal}} | |||
{{Party/Div|color={{green color}}}} | |||
|{{Pokémon/3 | |||
|ndex=319 | |||
|pokemon=Sharpedo | |||
|game=Colo | |||
|level=53 | |||
|gender=male | |||
|ability=Rough Skin | |||
|type1=Water|type2=Dark | |||
|move1=Waterfall|move1type=Water | |||
|move2=Bite|move2type=Dark | |||
|move3=Skull Bash|move3type=Normal | |||
|move4=Torment|move4type=Dark}} | |||
|{{Pokémon/3/Shadow | |||
|ndex=153 | |||
|pokemon=Bayleef | |||
|game=Colo | |||
|held=Miracle Seed | |||
|level=30 | |||
|ability=Overgrow | |||
|type1=Grass | |||
|move1=Shadow Rush|move1type=Shadow | |||
|move2=Synthesis|move2type=Grass | |||
|move3=Razor Leaf|move3type=Grass | |||
|move4=Body Slam|move4type=Normal}} | |||
{{Party/Footer}} | |||
{{MSP/Colo|159|Croconaw}} If [[Bluno]] was battled in [[Phenac City]]: | |||
{{Party/Single | |||
|color={{red color}} | |||
|headcolor={{shadow color light}} | |||
|bordercolor={{red color dark}} | |||
|sprite=Colo Rosso.png | |||
|size=80px | |||
|prize={{pdollar}}2,520 | |||
|class=Cipher Peon | |||
|name={{color2|000|Rosso}} | |||
|game=Colo | |||
|location=Snagem Hideout | |||
|pokemon=4}} | |||
|{{Pokémon/3 | |||
|ndex=089 | |||
|pokemon=Muk | |||
|game=Colo | |||
|gender=male | |||
|level=55 | |||
|ability=Sticky Hold | |||
|type1=Poison | |||
|move1=Sludge Bomb|move1type=Poison | |||
|move2=Strength|move2type=Normal | |||
|move3=Dig|move3type=Ground | |||
|move4=Acid Armor|move4type=Poison}} | |||
|{{Pokémon/3 | |||
|ndex=326 | |||
|pokemon=Grumpig | |||
|game=Colo | |||
|gender=female | |||
|level=54 | |||
|ability=Thick Fat | |||
|type1=Psychic | |||
|move1=Extrasensory|move1type=Psychic | |||
|move2=Shadow Ball|move2type=Ghost | |||
|move3=Bounce|move3type=Flying | |||
|move4=Psych Up|move4type=Normal}} | |||
{{Party/Div|color={{red color}}}} | |||
|{{Pokémon/3 | |||
|ndex=286 | |||
|pokemon=Breloom | |||
|game=Colo | |||
|gender=male | |||
|level=53 | |||
|ability=Effect Spore | |||
|type1=Grass|type2=Fighting | |||
|move1=Giga Drain|move1type=Grass | |||
|move2=Sky Uppercut|move2type=Fighting | |||
|move3=Headbutt|move3type=Normal | |||
|move4=Helping Hand|move4type=Normal}} | |||
|{{Pokémon/3/Shadow | |||
|ndex=156 | |||
|pokemon=Quilava | |||
|game=Colo | |||
|level=30 | |||
|held=Charcoal | |||
|ability=Blaze | |||
|type1=Fire | |||
|move1=Shadow Rush|move1type=Shadow | |||
|move2=SmokeScreen|move2type=Normal | |||
|move3=Dig|move3type=Ground | |||
|move4=Flame Wheel|move4type=Fire}} | |||
{{Party/Footer}} | |||
{{MSP/Colo|153|Bayleef}} If [[Verde]] was battled in [[Phenac City]]: | |||
{{Party/Single | |||
|color={{blue color}} | |||
|headcolor={{shadow color light}} | |||
|bordercolor={{blue color dark}} | |||
|sprite=Colo Bluno.png | |||
|size=80px | |||
|prize={{pdollar}}2,520 | |||
|class=Cipher Peon | |||
|name={{color2|000|Bluno}} | |||
|game=Colo | |||
|location=Snagem Hideout | |||
|pokemon=4}} | |||
|{{Pokémon/3 | |||
|ndex=089 | |||
|pokemon=Muk | |||
|game=Colo | |||
|gender=male | |||
|level=55 | |||
|ability=Sticky Hold | |||
|type1=Poison | |||
|move1=Sludge Bomb|move1type=Poison | |||
|move2=Strength|move2type=Normal | |||
|move3=Dig|move3type=Ground | |||
|move4=Acid Armor|move4type=Poison}} | |||
|{{Pokémon/3 | |||
|ndex=326 | |||
|pokemon=Grumpig | |||
|game=Colo | |||
|gender=female | |||
|level=54 | |||
|ability=Thick Fat | |||
|type1=Psychic | |||
|move1=Extrasensory|move1type=Psychic | |||
|move2=Shadow Ball|move2type=Ghost | |||
|move3=Bounce|move3type=Flying | |||
|move4=Psych Up|move4type=Normal}} | |||
{{Party/Div|color={{blue color}}}} | |||
|{{Pokémon/3 | |||
|pokemon=Camerupt | |||
|game=Colo | |||
|type1=Fire|type2=Ground | |||
|ndex=323 | |||
|level=53 | |||
|gender=male | |||
|ability=Magma Armor | |||
|move1=Flamethrower|move1type=Fire | |||
|move2=Magnitude|move2type=Ground | |||
|move3=Take Down|move3type=Normal | |||
|move4=Howl|move4type=Normal}} | |||
|{{Pokémon/3/Shadow | |||
|pokemon=Croconaw | |||
|game=Colo | |||
|type1=Water | |||
|ndex=159 | |||
|level=30 | |||
|ability=Torrent | |||
|held=Mystic Water | |||
|move1=Shadow Rush|move1type=Shadow | |||
|move2=Scary Face|move2type=Normal | |||
|move3=Bite|move3type=Dark | |||
|move4=Surf|move4type=Water}} | |||
{{Party/Footer}} | |||
====Second visit==== | |||
These Trainers appear at the Snagem Hideout once the player has received [[Bitt]]'s email about Shadow {{p|Smeargle}} and {{p|Ursaring}}. | |||
{{trainerheader|ruins}} | |||
{{trainerentry|Colo Bodybuilder f.png{{!}}80px|Bodybuilder|Lonia|1,320|4|180|Flaaffy|F|55|None|206|Dunsparce|M|51|None|224|Octillery|M|54|None|365|Walrein|F|52|None|game=colo|36=ウィス|37=Wisu}} | |||
{{trainerdiv|ruins}} | |||
{{trainerentry|Colo Rider f.png{{!}}80px|Rider|Nelis|540|4|222|Corsola|F|51|None|294|Loudred|M|54|None|336|Seviper|M|52|None|319|Sharpedo|F|50|None|game=colo|36=ラル|37=Lal}} | |||
{{trainerdiv|ruins}} | |||
{{trainerentry|Colo Hunter f.png{{!}}80px|Hunter|Frena|848|4|039|Jigglypuff|F|52|None|285|Shroomish|M|53|None|303|Mawile|F|53|None|232|Donphan|F|51|None|game=colo|36=ヘシティ|37=Heshiti}} | |||
{{trainerdiv|ruins}} | |||
{{trainerentry|Colo Chaser f 2.png{{!}}80px|Chaser|Liaks|1,080|4|044|Gloom|M|53|None|055|Golduck|F|54|None|189|Jumpluff|M|53|None|164|Noctowl|F|52|game=colo|36=シャイナ|37=Shaina}} | |||
{{trainerdiv|ruins}} | |||
{{trainerentry|Colo Snagem 2.png{{!}}80px|Team Snagem|[[Biden]]|520|4|235|Smeargle|M|52|None|235|Smeargle|M|51|None|235|Smeargle|M|50|None|235|Smeargle|B|45|None|game=colo|shadow=4|36=ザブ|37=Zabu}} | |||
{{trainerdiv|ruins}} | |||
{{trainerentry|Colo Snagem 3.png{{!}}80px|Team Snagem|[[Agrev]]|550|4|259|Marshtomp|M|55|None|067|Machoke|F|52|None|275|Shiftry|F|50|None|217|Ursaring|B|45|None|game=colo|shadow=4|36=ミサンゴ|37=Misango}} | |||
{{trainerfooter|ruins|Colo}} | |||
{{MSP/Colo|227|Skarmory}} If {{p|Skarmory}} was not snagged at [[Realgam Tower]], it will replace Gonzap's Gyarados here. Once Skarmory has been snagged, Gonzap will permanently disappear after being battled here, regardless of whether the player wins or loses. | |||
{{Party/Single | |||
|color={{cologne color}} | |||
|headcolor={{cologne color light}} | |||
|bordercolor={{cologne color dark}} | |||
|sprite=Colo Gonzap.png | |||
|size=80px | |||
|prize={{pdollar}}6,400 | |||
|class=Snagem Head | |||
|classlink=Gonzap | |||
|name={{color2|000|Gonzap}} | |||
|game=Colo | |||
|location=Snagem Hideout | |||
|pokemon=6}} | |||
|{{Pokémon/3 | |||
|ndex=286 | |||
|pokemon=Breloom | |||
|game=Colo | |||
|type1=Grass|type2=Fighting | |||
|level=64 | |||
|gender=female | |||
|ability=Effect Spore | |||
|move1=Hyper Beam|move1type=Normal | |||
|move2=Bulk Up|move2type=Fighting | |||
|move3=Sky Uppercut|move3type=Fighting | |||
|move4=Iron Tail|move4type=Steel}} | |||
|{{Pokémon/3 | |||
|ndex=342 | |||
|pokemon=Crawdaunt | |||
|game=Colo | |||
|type1=Water|type2=Dark | |||
|level=64 | |||
|gender=male | |||
|ability=Hyper Cutter | |||
|move1=Hyper Beam|move1type=Normal | |||
|move2=Swords Dance|move2type=Normal | |||
|move3=Aerial Ace|move3type=Flying | |||
|move4=Brick Break|move4type=Fighting}} | |||
|{{Pokémon/3 | |||
|ndex=210 | |||
|pokemon=Granbull | |||
|game=Colo | |||
|type1=Normal | |||
|level=64 | |||
|gender=female | |||
|ability=Intimidate | |||
|move1=Hyper Beam|move1type=Normal | |||
|move2=Bulk Up|move2type=Fighting | |||
|move3=Shadow Ball|move3type=Ghost | |||
|move4=Brick Break|move4type=Fighting}} | |||
{{Party/Div|color={{cologne color}}}} | |||
|{{Pokémon/3 | |||
|ndex=348 | |||
|pokemon=Armaldo | |||
|game=Colo | |||
|type1=Rock|type2=Bug | |||
|level=64 | |||
|gender=female | |||
|ability=Battle Armor | |||
|move1=Hyper Beam|move1type=Normal | |||
|move2=Swords Dance|move2type=Normal | |||
|move3=AncientPower|move3type=Rock | |||
|move4=Brick Break|move4type=Fighting}} | |||
|{{Pokémon/3 | |||
|ndex=068 | |||
|pokemon=Machamp | |||
|game=Colo | |||
|type1=Fighting | |||
|level=64 | |||
|gender=male | |||
|ability=Guts | |||
|move1=Hyper Beam|move1type=Normal | |||
|move2=Bulk Up|move2type=Fighting | |||
|move3=Submission|move3type=Fighting | |||
|move4=Foresight|move4type=Normal}} | |||
|{{Pokémon/3 | |||
|ndex=130 | |||
|pokemon=Gyarados | |||
|game=Colo | |||
|type1=Water|type2=Flying | |||
|level=64 | |||
|gender=male | |||
|ability=Intimidate | |||
|move1=Hyper Beam|move1type=Normal | |||
|move2=Dragon Dance|move2type=Dragon | |||
|move3=Earthquake|move3type=Ground | |||
|move4=Roar|move4type=Normal}} | |||
{{Party/Footer}} | |||
=== | ===Pokémon XD: Gale of Darkness=== | ||
{{trainerheader|ruins}} | |||
{{trainerentry|Colo Snagem 1.png{{!}}80px|Team Snagem|[[Agrev]]|540|4|198|Murkrow|F|26|None|043|Oddish|M|26|None|042|Golbat|F|26|None|359|Absol|F|27|None|game=xd|36=ミサンゴ|37=Misango}} | |||
{{trainerdiv|ruins}} | |||
{{trainerentry|Colo Snagem 1.png{{!}}80px|Team Snagem|Jedo|520|4|109|Koffing|F|26|None|043|Oddish|F|26|None|269|Dustox|M|26|None|211|Qwilfish|F|25|None|game=xd|36=チマイナ|37=Chimaina}} | |||
{{trainerdiv|ruins}} | |||
{{trainerentry|Colo Snagem 1.png{{!}}80px|Team Snagem|Hobble|560|4|203|Girafarig|F|26|None|235|Smeargle|M|27|None|279|Pelipper|F|25|None|067|Machoke|M|28|None|game=xd|36=テキラ|37=Tekira}} | |||
{{trainerdiv|ruins}} | |||
{{trainerentry|Colo Snagem 1.png{{!}}80px|Team Snagem|Golit|640|5|223|Remoraid|F|25|None|224|Octillery|F|26|None|028|Sandslash|M|27|None|294|Loudred|F|26|None|342|Crawdaunt|M|32|None|game=xd|36=ラクゼ|37=Rakuze}} | |||
{{trainerdiv|ruins}} | |||
{{trainerentry|Colo Snagem 1.png{{!}}80px|Team Snagem|Jinok|520|4|352|Kecleon|F|25|None|190|Aipom|F|26|None|313|Volbeat|M|25|None|193|Yanma|F|25|None|game=xd|36=カラト|37=Karato}} | |||
{{trainerdiv|ruins}} | |||
{{trainerentry|Colo Snagem 1.png{{!}}80px|Team Snagem|Gaply|560|5|168|Ariados|F|26|None|267|Beautifly|F|28|None|215|Sneasel|M|28|None|225|Delibird|F|28|None|178|Xatu|F|27|None|game=xd|36=ネバン|37=Neban}} | |||
{{trainerdiv|ruins}} | |||
{{trainerentry|Colo Snagem 1.png{{!}}80px|Team Snagem|Fudlo|560|5|075|Graveler|F|25|None|111|Rhyhorn|F|26|None|234|Stantler|M|28|None|200|Misdreavus|F|28|None|357|Tropius|M|27|None|game=xd|36=ラウニ|37=Rauni}} | |||
{{trainerdiv|ruins}} | |||
{{trainerentry|Colo Snagem 2.png{{!}}80px|Team Snagem|[[Biden]]|540|4|043|Oddish|F|27|None|169|Crobat|F|26|None|324|Torkoal|M|26|None|182|Bellossom|M|26|None|game=xd|36=ザブ|37=Zabu}} | |||
{{trainerdiv|ruins}} | |||
{{trainerentry|Colo Snagem 3.png{{!}}80px|Team Snagem|[[Wakin]]|640|5|044|Gloom|M|28|None|044|Gloom|F|28|None|226|Mantine|M|28|None|205|Forretress|M|31|None|326|Grumpig|F|32|None|game=xd|36=ヤッチーノ|37=Yaccino}} | |||
{{trainerfooter|ruins|XD}} | |||
{{ | {{Party/Single | ||
|color={{cologne color}} | |||
|headcolor={{cologne color light}} | |||
|bordercolor={{cologne color dark}} | |||
|sprite=XD Gonzap.png | |||
{{ | |size=80px | ||
|prize={{pdollar}}3,200 | |||
{{ | |class=Snagem Head | ||
|classlink=Gonzap | |||
|name={{color2|000|Gonzap}} | |||
|game=XD | |||
|location=Snagem Hideout | |||
|pokemon=5}} | |||
|{{Pokémon/3 | |||
|ndex=101 | |||
|pokemon=Electrode | |||
|game=XD | |||
|type1=Electric | |||
|ability=Static | |||
|level=30 | |||
|move1=SonicBoom|move1type=Normal | |||
|move2=Spark|move2type=Electric | |||
|move3=Facade|move3type=Normal | |||
|move4=Thief|move4type=Dark}} | |||
|{{Pokémon/3 | |||
|ndex=274 | |||
|pokemon=Nuzleaf | |||
|game=XD | |||
|type1=Grass|type2=Dark | |||
|ability=Early Bird | |||
|level=32 | |||
|gender=male | |||
|move1=Fake Out|move1type=Normal | |||
|move2=Faint Attack|move2type=Dark | |||
|move3=Aerial Ace|move3type=Flying | |||
|move4=Hyper Beam|move4type=Normal}} | |||
|{{Pokémon/3 | |||
|ndex=045 | |||
|pokemon=Vileplume | |||
|game=XD | |||
|ability=Chlorophyll | |||
|type1=Grass|type2=Poison | |||
|level=30|gender=male | |||
|move1=Sleep Powder|move1type=Grass | |||
|move2=Giga Drain|move2type=Grass | |||
|move3=Sweet Scent|move3type=Normal | |||
|move4=Hyper Beam|move4type=Normal}} | |||
{{Party/Div|color={{cologne color}}}} | |||
| style="margin:auto" |{{Pokémon/3 | |||
|ndex=340 | |||
|pokemon=Whiscash | |||
|game=XD | |||
|type1=Water|type2=Ground | |||
|ability=Oblivious | |||
|level=31 | |||
|gender=male | |||
|move1=Water Pulse|move1type=Water | |||
|move2=Rock Tomb|move2type=Rock | |||
|move3=Spark|move3type=Electric | |||
|move4=Hyper Beam|move4type=Normal}} | |||
| style="margin:auto" |{{Pokémon/3 | |||
|ndex=227 | |||
|pokemon=Skarmory | |||
|game=XD | |||
|type1=Steel|type2=Flying | |||
|ability=Keen Eye | |||
|level=32 | |||
|gender=female | |||
|move1=Steel Wing|move1type=Steel | |||
|move2=Swift|move2type=Normal | |||
|move3=Aerial Ace|move3type=Flying | |||
|move4=Hyper Beam|move4type=Normal}} | |||
{{Party/Footer}} | |||
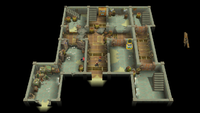
==Layout== | |||
{{incomplete|section|Missing layout images from Colosseum}} | |||
{| class="roundy" style="margin:auto; background: #000; border: 3px solid #{{Locationcolor/dark|ruins}}" | |||
|- | |||
! style="background:#{{Locationcolor/light|ruins}}; {{roundytl|5px}}" | Game | |||
! style="background:#{{Locationcolor/light|ruins}}" | Entrance | |||
! style="background:#{{Locationcolor/light|ruins}}" | 1F | |||
! style="background:#{{Locationcolor/light|ruins}}" | 2F | |||
! style="background:#{{Locationcolor/light|ruins}}; {{roundytr|5px}}" | 3F | |||
|- | |||
! style="background:#{{colo color}}" | {{color2|000|Pokémon Colosseum|Colo}} | |||
| | |||
| | |||
| | |||
| | |||
|- | |||
! style="background:#{{xd color}}" | {{color2|fff|Pokémon XD: Gale of Darkness|XD}} | |||
| [[File:Snagem Hideout XD.png|200px]] | |||
| [[File:Snagem Hideout 1F XD.png|200px]] | |||
| [[File:Snagem Hideout 2F XD.png|200px]] | |||
| [[File:Snagem Hideout 3F XD.png|200px]] | |||
|- | |||
| colspan="5" style="background:#{{Locationcolor/light|ruins}}; {{roundybottom|5px}}" | | |||
|} | |||
==Trivia== | |||
* Upon defeating Cipher Peon Baila here in Colosseum, the colon separating her name from her defeat speech is missing. | |||
==In other languages== | ==In other languages== | ||
{{langtable|color={{ | {{langtable|color={{locationcolor/light|ruins}}|bordercolor={{locationcolor/dark|ruins}} | ||
|fr_eu=Repaire Snatch | |fr_eu=Repaire Team Snatch | ||
|de=Team | |de=Team Krall-Versteck | ||
|it=Rifugio Clepto | |it=Rifugio Clepto | ||
|es_eu=Guarida del Equipo Cepo | |es_eu=Guarida de Cepo<br>Guarida del Equipo Cepo | ||
}} | }} | ||
{{Orre}}<br> | {{Orre}}<br> | ||
{{Project Locations notice}} | {{Project Locations notice}} | ||
| Line 56: | Line 529: | ||
[[Category:Colosseum locations]] | [[Category:Colosseum locations]] | ||
[[Category:XD locations]] | [[Category:XD locations]] | ||
[[Category: | [[Category:Villainous team bases]] | ||
[[Category:Team Snagem]] | [[Category:Team Snagem]] | ||
[[de:Team Krall-Versteck]] | [[de:Team Krall-Versteck]] | ||
[[fr:Repaire Snatch]] | [[es:Guarida del Equipo Cepo]] | ||
[[fr:Repaire Team Snatch]] | |||
[[it:Rifugio Clepto]] | |||
[[ja:スナッチ団アジト]] | |||
Revision as of 03:18, 4 April 2024
| ||||
| ||||
| Map description: | The former base of Team Snagem that was completely destroyed in a catastrophic explosion.Colo Team Snagem's base is apparently still in use even after it was destroyed.XD The base where Team Snagem dreams of regaining its former glory.XD | |||
|---|---|---|---|---|
| Location: | Eastern Orre | |||
| Region: | Orre | |||
| Generations: | III | |||
 Location of Snagem Hideout in Orre. | ||||
| Pokémon world locations | ||||
Snagem Hideout (Japanese: スナッチ団のアジト Team Snatch Hideout) is a location in Orre. It is the base of the villainous Team Snagem. According to an early news report in Pokémon Colosseum, it is located in a part of Orre known as Eclo Canyon.
At the start of Pokémon Colosseum, the base is heavily damaged by the player as they steal the only portable Snag Machine and destroy the bigger one, detonating several bombs placed around the building during their theft and escape. During the post-game, it acts as a gathering place for Shadow Pokémon Trainers who cannot be rematched during the main game.
In Pokémon XD: Gale of Darkness, the Snagem Hideout is still in severe disrepair from the sabotage five years ago, but is still in use by Team Snagem. The player must enter it in order to reclaim their stolen Snag Machine.
Role
Pokémon Colosseum
Despite the player leaving the Snagem Hideout at the start of the game, it cannot be visited until the post-game, where the player must visit it at least twice. The first time they visit it to follow a lead on a Cipher Peon with a Shadow Johto first partner Pokémon that they didn't snag in Phenac City.
After the Johto first partner Pokémon has been snagged, the player will soon be informed of rumors about the big Snag Machine being repaired, promoting them to revisit the hideout again. During this return visit, the player can snag two previously unavailable Shadow Pokémon, a Smeargle and an Ursaring, and rematch Snagem Head Gonzap. Battling Gonzap allows the player to claim the D-Disk, which is required to access the Deep Colosseum and progress the post-game plot. It is also revealed that the big Snag Machine has been destroyed beyond repair and the fake rumors were merely a plan hatched by Gonzap to lure the player into returning to the hideout and get revenge on him for betraying the team at the start of the game.
Most Shadow Pokémon Trainers who cannot be rematched during the main game also appear here, allowing the player to battle them again in case they failed to snag their Shadow Pokémon earlier.
Pokémon XD: Gale of Darkness
The player must visit the Snagem Hideout in order to get back the Snag Machine stolen from them by Wakin at the S.S. Libra. Upon reaching Gonzap's office, the player sees Gonzap berating Wakin that the Snag Machine is too small for him, before being forced to battle Wakin and Gonzap in succession. Once Gonzap has been defeated, he will return the Snag Machine to the player, admitting that both of them are aiming for the same goal, as Team Snagem is seeking to get revenge on Cipher for abandoning their alliance with them.
Gonzap will also give the player a key to a locked item chest on 1F after being defeated, allowing the player to obtain the TM hidden inside it.
| Spoilers end here. |
|---|
Items
| Item | Location | Games | |
|---|---|---|---|
| Max Elixir | 1F, in the center of the hallway | Colo | |
| Max Revive ×2 | 1F, next to Niver | Colo | |
| Ultra Ball ×5 | 1F, inside the big Snag Machine in the southwest room | Colo | |
| Ultra Ball ×3 | 1F, north of the healing machine | XD | |
| TM29 (Psychic) | 1F, behind the southeast staircase, near Biden | XD | |
| TM30 (Shadow Ball) | 1F, near the alternate exit (requires Gonzap's Key) | XD | |
| Elixir | 2F, east of the northern staircase | Colo | |
| Max Ether ×2 | 2F, in the southwest room | Colo | |
| D-Disk | 2F, on the table in Gonzap's office after battling him | Colo | |
| Rare Candy ×3 | 2F, in Gonzap's office | Colo | |
| PP Up | 2F, inside the jail cell | XD | |
| Hyper Potion ×2 | 2F, behind the northern staircase | XD | |
| Snag Machine | 2F, retrieved from Gonzap after defeating him | XD | |
| Gonzap's Key | 2F, reward for defeating Gonzap | XD | |
| Full Heal ×2 | 2F, inside Gonzap's office | XD | |
| Max Potion ×3 | 3F, in the northeast room | Colo | |
| PP Up ×3 | 3F, in the southwest room | Colo | |
| Revive ×2 | 3F, in the southern part of the hallway | XD | |
| Rare Candy | 3F, to the left of Golit | XD | |
Trainers
Pokémon Colosseum
If a Trainer's Shadow Pokémon wasn't snagged during the main game, it will replace the last Pokémon in their party here. They can be rematched until their Shadow Pokémon has been snagged.
Entrance
These Cipher Peons appear in turn whenever the player enters the gap in the wall north of the PC. The next Peon will appear once the player has exited and reentered the building or battled Gonzap.
| Trainer | Pokémon | |||||||||||
|---|---|---|---|---|---|---|---|---|---|---|---|---|
|
| |||||||||||
| ||||||||||||
| ||||||||||||
| ||||||||||||
|
| |||||||||||
| ||||||||||||
| ||||||||||||
| ||||||||||||
|
| |||||||||||
| ||||||||||||
| ||||||||||||
|
| |||||||||||
| ||||||||||||
| ||||||||||||
|
| |||||||||||
| ||||||||||||
| ||||||||||||
|
| |||||||||||
| ||||||||||||
| ||||||||||||
| Trainers with a Poké Ball by their names may be challenged for a rematch after defeating certain bosses. In a rematch they may have higher-level Pokémon, and any Shadow Pokémon previously caught will be replaced. | ||||||||||||
First visit
These Trainers will be present at the Snagem Hideout since the first visit. The Cipher Peon with the Johto first partner Pokémon will disappear after his Shadow Pokémon has been snagged.
| Trainer | Pokémon | |||||||||||
|---|---|---|---|---|---|---|---|---|---|---|---|---|
|
| |||||||||||
| ||||||||||||
| ||||||||||||
| ||||||||||||
|
| |||||||||||
| ||||||||||||
| ||||||||||||
| ||||||||||||
|
| |||||||||||
| ||||||||||||
| ||||||||||||
| ||||||||||||
|
| |||||||||||
| ||||||||||||
| ||||||||||||
| ||||||||||||
|
| |||||||||||
| ||||||||||||
| ||||||||||||
| ||||||||||||
|
| |||||||||||
| ||||||||||||
| ||||||||||||
| ||||||||||||
| Trainers with a Poké Ball by their names may be challenged for a rematch after defeating certain bosses. In a rematch they may have higher-level Pokémon, and any Shadow Pokémon previously caught will be replaced. | ||||||||||||
![]() If Rosso was battled in Phenac City:
If Rosso was battled in Phenac City:
|
||||||||||||||||||||||||||||||||||||||||||||||||||||||||||||||||||||||||||||||||||||||||||||||||||||||||||
| ||||||||||||||||||||||||||||||||||||||||||||||||||||||||||||||||||||||||||||||||||||||||||||||||||||||||||
![]() If Bluno was battled in Phenac City:
If Bluno was battled in Phenac City:
|
||||||||||||||||||||||||||||||||||||||||||||||||||||||||||||||||||||||||||||||||||||||||||||||||||||||||||
| ||||||||||||||||||||||||||||||||||||||||||||||||||||||||||||||||||||||||||||||||||||||||||||||||||||||||||
![]() If Verde was battled in Phenac City:
If Verde was battled in Phenac City:
|
||||||||||||||||||||||||||||||||||||||||||||||||||||||||||||||||||||||||||||||||||||||||||||||||||||||||||
| ||||||||||||||||||||||||||||||||||||||||||||||||||||||||||||||||||||||||||||||||||||||||||||||||||||||||||
Second visit
These Trainers appear at the Snagem Hideout once the player has received Bitt's email about Shadow Smeargle and Ursaring.
| Trainer | Pokémon | |||||||||||
|---|---|---|---|---|---|---|---|---|---|---|---|---|
|
| |||||||||||
| ||||||||||||
| ||||||||||||
| ||||||||||||
|
| |||||||||||
| ||||||||||||
| ||||||||||||
| ||||||||||||
|
| |||||||||||
| ||||||||||||
| ||||||||||||
| ||||||||||||
|
| |||||||||||
| ||||||||||||
| ||||||||||||
| ||||||||||||
|
| |||||||||||
| ||||||||||||
| ||||||||||||
| ||||||||||||
|
| |||||||||||
| ||||||||||||
| ||||||||||||
| ||||||||||||
| Trainers with a Poké Ball by their names may be challenged for a rematch after defeating certain bosses. In a rematch they may have higher-level Pokémon, and any Shadow Pokémon previously caught will be replaced. | ||||||||||||
![]() If Skarmory was not snagged at Realgam Tower, it will replace Gonzap's Gyarados here. Once Skarmory has been snagged, Gonzap will permanently disappear after being battled here, regardless of whether the player wins or loses.
If Skarmory was not snagged at Realgam Tower, it will replace Gonzap's Gyarados here. Once Skarmory has been snagged, Gonzap will permanently disappear after being battled here, regardless of whether the player wins or loses.
|
|||||||||||||||||||||||||||||||||||||||||||||||||||||||||||||||||||||||||||||||||||||||||||||||||||||||||||||||||||||||||||||||||||||||||||||||||||||||||||||||
| |||||||||||||||||||||||||||||||||||||||||||||||||||||||||||||||||||||||||||||||||||||||||||||||||||||||||||||||||||||||||||||||||||||||||||||||||||||||||||||||
Pokémon XD: Gale of Darkness
| Trainer | Pokémon | |||||||||||
|---|---|---|---|---|---|---|---|---|---|---|---|---|
|
| |||||||||||
| ||||||||||||
| ||||||||||||
| ||||||||||||
|
| |||||||||||
| ||||||||||||
| ||||||||||||
| ||||||||||||
|
| |||||||||||
| ||||||||||||
| ||||||||||||
| ||||||||||||
|
| |||||||||||
| ||||||||||||
| ||||||||||||
| ||||||||||||
| ||||||||||||
|
| |||||||||||
| ||||||||||||
| ||||||||||||
| ||||||||||||
|
| |||||||||||
| ||||||||||||
| ||||||||||||
| ||||||||||||
| ||||||||||||
|
| |||||||||||
| ||||||||||||
| ||||||||||||
| ||||||||||||
| ||||||||||||
|
| |||||||||||
| ||||||||||||
| ||||||||||||
| ||||||||||||
|
| |||||||||||
| ||||||||||||
| ||||||||||||
| ||||||||||||
| ||||||||||||
| Trainers with a Poké Ball by their names may be challenged for a rematch after defeating certain bosses. In a rematch they may have higher-level Pokémon, and any Shadow Pokémon previously caught will be replaced. | ||||||||||||
|
||||||||||||||||||||||||||||||||||||||||||||||||||||||||||||||||||||||||||||||||||||||||||||||||||||||||||||||||||||||||||||||||||||||
| ||||||||||||||||||||||||||||||||||||||||||||||||||||||||||||||||||||||||||||||||||||||||||||||||||||||||||||||||||||||||||||||||||||||
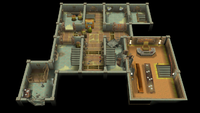
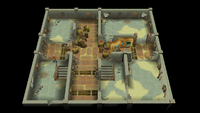
Layout

|
This section is incomplete. Please feel free to edit this section to add missing information and complete it. Reason: Missing layout images from Colosseum |
| Game | Entrance | 1F | 2F | 3F |
|---|---|---|---|---|
| Colo | ||||
| XD | 
|
|
|
|
Trivia
- Upon defeating Cipher Peon Baila here in Colosseum, the colon separating her name from her defeat speech is missing.
In other languages
| ||||||||||||||||||
| Orre | ||||
|---|---|---|---|---|
| ||||

|
This article is part of Project Locations, a Bulbapedia project that aims to write comprehensive articles on every location in the Pokémon world. |
