Viridian Gym: Difference between revisions
mNo edit summary |
|||
| (54 intermediate revisions by 19 users not shown) | |||
| Line 3: | Line 3: | ||
|characters=トキワ | |characters=トキワ | ||
|japanese=Tokiwa | |japanese=Tokiwa | ||
|image=Viridian Gym | |image=Viridian Gym Exterior LGPE.png | ||
|location=Viridian City | |location=Viridian City | ||
|leader=[[Giovanni]]{{sup/1|RBY}}{{sup/3|FRLG}}{{sup/7|PE}}<br>{{ga|Blue}}{{sup/2|GSC}}{{sup/4|HGSS}}{{sup/7|PE}}<br>[[Team Rocket trio|Jessie, James, and Meowth]] (temporary, {{pkmn|anime}} only)<br>[[Agatha]] (replacement, {{pkmn|anime}} only) | |leader=[[Giovanni]]{{sup/1|RBY}}{{sup/3|FRLG}}{{sup/7|PE}}<br>{{ga|Blue}}{{sup/2|GSC}}{{sup/4|HGSS}}{{sup/7|PE}}<br>[[Team Rocket trio|Jessie, James, and Meowth]] (temporary, {{pkmn|anime}} only)<br>[[Agatha]] (replacement, {{pkmn|anime}} only) | ||
| Line 9: | Line 9: | ||
|type=Ground | |type=Ground | ||
|region=Kanto | |region=Kanto | ||
| | |imagesize=300px | ||
|colordark=40826D | |colordark=40826D | ||
|colorlight=9FC0B5 | |colorlight=9FC0B5 | ||
|battlefield=Viridian Gym Battle Environment LGPE.png | |||
|battlefieldsize=300px | |||
}} | }} | ||
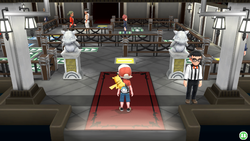
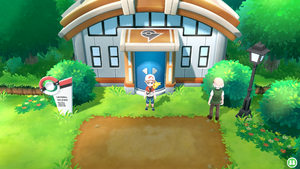
The '''Viridian Gym''' (Japanese: '''トキワジム''' ''Tokiwa Gym'') is the official [[Gym]] of [[Viridian City]]. During the events of [[Generation]]s {{gen|I}}, {{gen|III}}, and {{gen|VII}}, it is based on {{type|Ground}} {{OBP|Pokémon|species}} and the [[Gym Leader]] is [[Giovanni]], the | [[File:Viridian Gym Interior Blue LGPE.png|thumb|300px|Giovanni's/Blue's Gym Leader area]] | ||
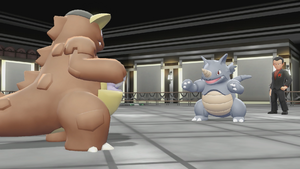
The '''Viridian Gym''' (Japanese: '''トキワジム''' ''Tokiwa Gym'') is the official [[Gym]] of [[Viridian City]]. During the events of [[Generation]]s {{gen|I}}, {{gen|III}}, and {{gen|VII}}, it is based on {{type|Ground}} {{OBP|Pokémon|species}} and the [[Gym Leader]] is [[Giovanni]], the boss of [[Team Rocket]]. After Team Rocket is disbanded at the end of Generations I, III, and VII, {{ga|Blue}} takes over as the Leader during Generations {{gen|II}}, {{gen|IV}}, and VII; under his direction, the Gym no longer concentrates on any particular [[type]]. In Generation VII, Blue takes over the Gym immediately after Giovanni leaves it, [[rematch]]ing the player in his place during the post-game. {{pkmn|Trainer}}s who earn a win at the Viridian Gym receive the {{Badge|Earth}}. | |||
[[Agatha]] of the [[Elite Four]] serves as a temporary Gym Leader | In the {{pkmn|anime}}, [[Agatha]] of the [[Elite Four]] serves as a temporary Gym Leader here following {{an|Giovanni}}'s abdication of the position to focus on leading Team Rocket. | ||
{{ | |||
==In the games== | ==In the games== | ||
===Core series games=== | |||
{{flexheader|gap=0px}} | |||
{{sign|RBY|header}} | {{sign|RBY|header}} | ||
{{sign|RBY|title|Viridian City}} | {{sign|RBY|title|Viridian City}} | ||
| Line 42: | Line 45: | ||
{{sign|DPcity|The rest of the text is illegible...}} | {{sign|DPcity|The rest of the text is illegible...}} | ||
{{sign|DPcity|footer}} | {{sign|DPcity|footer}} | ||
{{flexfooter}} | |||
Viridian Gym appears in all games set in the [[Kanto]] region. In Generations {{gen|I}}, {{gen|III}}, and {{gen|VII}}, when the player first reaches the Gym, it is locked due to the absence of the Gym Leader. With this acknowledged, the player journeys off to other Gyms to challenge them. Once the player has collected the other seven [[Badge|Gym Badges]], the Viridian Gym reopens. | Viridian Gym appears in all games set in the [[Kanto]] region. In Generations {{gen|I}}, {{gen|III}}, and {{gen|VII}}, when the player first reaches the Gym, it is locked due to the absence of the Gym Leader. With this acknowledged, the player journeys off to other Gyms to challenge them. Once the player has collected the other seven [[Badge|Gym Badges]], the Viridian Gym reopens. In [[Pokémon: Let's Go, Pikachu! and Let's Go, Eevee!]], the [[Gym guide]] declares that earning seven Badges is the prerequisite for entering the Gym, effectively meaning that the Viridian Gym, unlike most other Kanto Gyms in Generation VII, has no additional prerequisites required for entering. | ||
In Generations {{gen|II}}, {{gen|IV}}, and VII, {{ga|Blue}} takes over the Gym. In Generation II, the Gym can be challenged as soon as Blue is spoken to on [[Cinnabar Island]]. In Generation IV, however, Blue will stay on Cinnabar Island and will not return to his Gym until the player speaks to him after obtaining the other seven Kanto Gym Badges. In Generation VII, Blue can be challenged to a Gym Leader [[rematch]] at the Gym during the post-game in place of Giovanni. | In Generations {{gen|II}}, {{gen|IV}}, and VII, {{ga|Blue}} takes over the Gym. In Generation II, the Gym can be challenged as soon as Blue is spoken to on [[Cinnabar Island]]. In Generation IV, however, Blue will stay on Cinnabar Island and will not return to his Gym until the player speaks to him after obtaining the other seven Kanto Gym Badges. In Generation VII, Blue can be challenged to a Gym Leader [[rematch]] at the Gym during the post-game in place of Giovanni. | ||
| Line 49: | Line 53: | ||
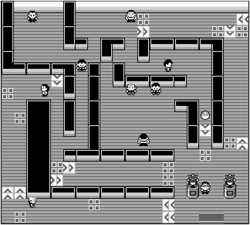
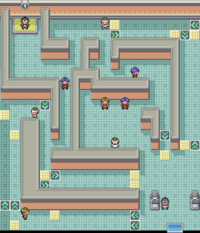
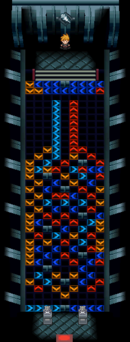
Inside the Gym, the floor uses the same [[spin tile|transporting tiles]] as are used in the [[Team Rocket Hideout]]. The player must use these tiles to navigate through the Gym to reach the Gym Leader. In Generation II, the Gym is completely remodeled and the tiles are gone; in Generation IV, the tiles are put back up, now covering almost the entire floor of the Gym. | Inside the Gym, the floor uses the same [[spin tile|transporting tiles]] as are used in the [[Team Rocket Hideout]]. The player must use these tiles to navigate through the Gym to reach the Gym Leader. In Generation II, the Gym is completely remodeled and the tiles are gone; in Generation IV, the tiles are put back up, now covering almost the entire floor of the Gym. | ||
====Appearance==== | |||
===Appearance=== | |||
{{Mapgen | {{Mapgen | ||
|hv=v | |hv=v | ||
| Line 63: | Line 65: | ||
|sizeIII=200px | |sizeIII=200px | ||
|genIV=Viridian Gym HGSS.png | |genIV=Viridian Gym HGSS.png | ||
|sizeIV=130px}} | |sizeIV=130px | ||
|genVII=Viridian Gym Entrance LGPE.png | |||
|sizeVII=250px}} | |||
====Items==== | |||
{{Itlisth|Ground}} | |||
{{Itemlist|Revive|North of the [[spin tile]] north of the entrance|R=yes|B=yes|Y=yes}} | |||
{{Itemlist|Revive|Near {{tc|Ace Trainer}} Yuji northeast of the entrance|LP=yes|LE=yes}} | |||
{{Itemlist|TM Ground|Reward for defeating Giovanni|R=yes|B=yes|Y=yes|display={{TM|27|Fissure}}}} | |||
{{Itemlist|TM Ground|Reward for defeating Giovanni|FR=yes|LG=yes|display={{TM|26|Earthquake}}}} | |||
{{Itemlist|Macho Brace|Where Giovanni stood ''({{tt|hidden|Requires using the Itemfinder on the spot, causing the item to be automatically obtained}})''|FR=yes|LG=yes}} | |||
{{Itemlist|TM Psychic|Reward for defeating Blue|HG=yes|SS=yes|display={{TM|92|Trick Room}}}} | |||
{{Itemlist|TM Ground VI|Reward for defeating Giovanni|LP=yes|LE=yes|display={{TM|41|Earthquake}}}} | |||
{{Itlistfoot|Ground}} | |||
===Trainers | ====Trainers==== | ||
====={{game2|Red|Blue|Yellow}}===== | ====={{game2|Red|Blue|Yellow}}===== | ||
{{trainerheader|Ground}} | {{trainerheader|Ground}} | ||
{{trainerentry|Spr RG Tamer.png|Tamer||1560|2|024|Arbok||39|None|128|Tauros||39|None}} | {{trainerentry|Spr RG Tamer.png|Tamer|game=1||1560|2|024|Arbok||39|None|128|Tauros||39|None}} | ||
{{trainerdiv|Ground}} | {{trainerdiv|Ground}} | ||
{{trainerentry|Spr RG Blackbelt.png|Blackbelt||1075|1|067|Machoke||43|None}} | {{trainerentry|Spr RG Blackbelt.png|Blackbelt|game=1||1075|1|067|Machoke||43|None}} | ||
{{trainerdiv|Ground}} | {{trainerdiv|Ground}} | ||
{{trainerentry|Spr RG Cooltrainer M.png|Cooltrainer||1365|2|033|Nidorino||39|None|034|Nidoking||39|None}} | {{trainerentry|Spr RG Cooltrainer M.png|Cooltrainer|game=1||1365|2|033|Nidorino||39|None|034|Nidoking||39|None}} | ||
{{trainerdiv|Ground}} | {{trainerdiv|Ground}} | ||
{{trainerentry|Spr RG Tamer.png|Tamer||1720|1|111|Rhyhorn||43|None}} | {{trainerentry|Spr RG Tamer.png|Tamer|game=1||1720|1|111|Rhyhorn||43|None}} | ||
{{trainerdiv|Ground}} | {{trainerdiv|Ground}} | ||
{{trainerentry|Spr RG Blackbelt.png|Blackbelt||1000|2|066|Machop||40|None|067|Machoke||40|None}} | {{trainerentry|Spr RG Blackbelt.png|Blackbelt|game=1||1000|2|066|Machop||40|None|067|Machoke||40|None}} | ||
{{trainerdiv|Ground}} | {{trainerdiv|Ground}} | ||
{{trainerentry|Spr RG Cooltrainer M.png|Cooltrainer||1365|2|028|Sandslash||39|None|051|Dugtrio||39|None}} | {{trainerentry|Spr RG Cooltrainer M.png|Cooltrainer|game=1||1365|2|028|Sandslash||39|None|051|Dugtrio||39|None}} | ||
{{trainerdiv|Ground}} | {{trainerdiv|Ground}} | ||
{{trainerentry|Spr RG Cooltrainer M.png|Cooltrainer||1505|1|111|Rhyhorn||43|None}} | {{trainerentry|Spr RG Cooltrainer M.png|Cooltrainer|game=1||1505|1|111|Rhyhorn||43|None}} | ||
{{trainerdiv|Ground}} | {{trainerdiv|Ground}} | ||
{{trainerentry|Spr RG Blackbelt.png|Blackbelt||950|3|067|Machoke||38|None|066|Machop||38|None|067|Machoke||38|None}} | {{trainerentry|Spr RG Blackbelt.png|Blackbelt|game=1||950|3|067|Machoke||38|None|066|Machop||38|None|067|Machoke||38|None}} | ||
{{trainerfooter|Ground|1|inside}} | {{trainerfooter|Ground|1|inside}} | ||
====={{game|Red and Blue|s}}===== | |||
Giovanni has one [[Guard Spec.]] per Pokémon, using it randomly 25% of the time. | |||
{{Party/Single | {{Party/Single | ||
|color={{ground color}} | |color={{ground color}} | ||
| Line 151: | Line 166: | ||
{{Party/Footer}} | {{Party/Footer}} | ||
====={{game|Yellow}}===== | |||
Giovanni has one [[Guard Spec.]] per Pokémon, using it randomly 25% of the time. | |||
{{Party/Single | {{Party/Single | ||
|color={{ground color}} | |color={{ground color}} | ||
| Line 217: | Line 233: | ||
====={{game2|Gold|Silver|Crystal}}===== | ====={{game2|Gold|Silver|Crystal}}===== | ||
Blue has two [[Full Restore]]s. | |||
{{Party/Single | {{Party/Single | ||
|color={{blue color}} | |color={{blue color}} | ||
| Line 304: | Line 321: | ||
{{trainerentry|Spr FRLG Black Belt.png|Black Belt|Kiyo|1032|1|067|Machoke|♂|43|Black Belt|36=タクマ|37=Takuma}} | {{trainerentry|Spr FRLG Black Belt.png|Black Belt|Kiyo|1032|1|067|Machoke|♂|43|Black Belt|36=タクマ|37=Takuma}} | ||
{{trainerdiv|Ground}} | {{trainerdiv|Ground}} | ||
{{trainerentry|Spr FRLG | {{trainerentry|Spr FRLG Cooltrainer M.png|Cooltrainer|Samuel|1404|5|028|Sandslash|♂|37|None|028|Sandslash|♂|37|None|111|Rhyhorn|♂|38|None|033|Nidorino|♂|39|None|034|Nidoking|♂|39|None|36=タクヤ|37=Takuya}} | ||
{{trainerdiv|Ground}} | |||
{{trainerentry|Spr FRLG Cooltrainer M.png|Cooltrainer|Yuji|1368|5|028|Sandslash|♂|38|None|075|Graveler|♂|38|None|095|Onix|♂|38|None|075|Graveler|♂|38|None|105|Marowak|♂|38|None|36=カズシ|37=Kazushi}} | |||
{{trainerdiv|Ground}} | {{trainerdiv|Ground}} | ||
{{trainerentry|Spr FRLG Black Belt.png|Black Belt|Atsushi|960|2|066|Machop|♂|40|Black Belt|067|Machoke|♂|40|Black Belt|36=テツヒサ|37=Tetsuhisa}} | {{trainerentry|Spr FRLG Black Belt.png|Black Belt|Atsushi|960|2|066|Machop|♂|40|Black Belt|067|Machoke|♂|40|Black Belt|36=テツヒサ|37=Tetsuhisa}} | ||
{{trainerdiv|Ground}} | {{trainerdiv|Ground}} | ||
{{trainerentry|Spr FRLG Cooltrainer M.png|Cooltrainer| | {{trainerentry|Spr FRLG Tamer.png|Tamer|Jason|1720|1|111|Rhyhorn|♂|43|None|36=ヒロ|37=Hiro}} | ||
{{trainerdiv|Ground}} | |||
{{trainerentry|Spr FRLG Cooltrainer M.png|Cooltrainer|Warren|1404|5|105|Marowak|♂|37|None|105|Marowak|♂|37|None|111|Rhyhorn|♂|38|None|030|Nidorina|♀|39|None|031|Nidoqueen|♀|39|None|36=レイジ|37=Reiji}} | |||
{{trainerdiv|Ground}} | {{trainerdiv|Ground}} | ||
{{trainerentry|Spr FRLG Black Belt.png|Black Belt|Takashi|912|3|067|Machoke|♂|38|Black Belt|066|Machop|♂|38|Black Belt|067|Machoke|♂|38|Black Belt|36=シロウ|37=Shirō}} | {{trainerentry|Spr FRLG Black Belt.png|Black Belt|Takashi|912|3|067|Machoke|♂|38|Black Belt|066|Machop|♂|38|Black Belt|067|Machoke|♂|38|Black Belt|36=シロウ|37=Shirō}} | ||
{{trainerfooter|Ground|FRLG|inside}} | {{trainerfooter|Ground|FRLG|inside}} | ||
Giovanni has two [[Hyper Potion]]s and a [[Full Heal]]. | |||
{{Party/Single | {{Party/Single | ||
|color={{ground color}} | |color={{ground color}} | ||
| Line 493: | Line 511: | ||
=====[[Pokémon: Let's Go, Pikachu! and Let's Go, Eevee!]]===== | =====[[Pokémon: Let's Go, Pikachu! and Let's Go, Eevee!]]===== | ||
{{Trainerheader|Ground}} | {{Trainerheader|Ground}} | ||
{{Trainerentry|VSAce Trainer M PE.png{{!}}90px|Ace Trainer|Samuel|4,800|1|034|Nidoking|♂|48|None|36=タクヤ|37=Takuya}} | {{Trainerentry|VSAce Trainer M PE.png{{!}}90px|game=PE|Ace Trainer|Samuel|4,800|1|034|Nidoking|♂|48|None|36=タクヤ|37=Takuya}} | ||
{{Trainerdiv|Ground}} | {{Trainerdiv|Ground}} | ||
{{Trainerentry|VSTamer PE.png{{!}}90px|Tamer|Cole|2,820|2|033|Nidorino|♂|47|None|111|Rhyhorn|♂|47|None|36=アキラ|37=Akira}} | {{Trainerentry|VSTamer PE.png{{!}}90px|game=PE|Tamer|Cole|2,820|2|033|Nidorino|♂|47|None|111|Rhyhorn|♂|47|None|36=アキラ|37=Akira}} | ||
{{Trainerdiv|Ground}} | {{Trainerdiv|Ground}} | ||
{{Trainerentry|VSAce Trainer F PE.png{{!}}90px|Ace Trainer|Kelly|4,800|1|031|Nidoqueen|♀|48|None|36=レイカ|37=Reika}} | {{Trainerentry|VSAce Trainer F PE.png{{!}}90px|game=PE|Ace Trainer|Kelly|4,800|1|031|Nidoqueen|♀|48|None|36=レイカ|37=Reika}} | ||
{{Trainerdiv|Ground}} | {{Trainerdiv|Ground}} | ||
{{Trainerentry|VSAce Trainer M PE.png{{!}}90px|Ace Trainer|Yuji|4,800|2|051|Dugtrio|♂|47|None|111|Rhyhorn|♂|48|None|36=カズシ|37=Kazushi}} | {{Trainerentry|VSAce Trainer M PE.png{{!}}90px|game=PE|Ace Trainer|Yuji|4,800|2|051|Dugtrio|♂|47|None|111|Rhyhorn|♂|48|None|36=カズシ|37=Kazushi}} | ||
{{Trainerdiv|Ground}} | {{Trainerdiv|Ground}} | ||
{{Trainerentry|VSTamer PE.png{{!}}90px|Tamer|Jason|2,820|1|028|Sandslash|♀|47|None|36=ヒロ|37=Hiro}} | {{Trainerentry|VSTamer PE.png{{!}}90px|game=PE|Tamer|Jason|2,820|1|028|Sandslash|♀|47|None|36=ヒロ|37=Hiro}} | ||
{{Trainerdiv|Ground}} | {{Trainerdiv|Ground}} | ||
{{Trainerentry|VSBlack Belt PE.png{{!}}90px|Black Belt|Takashi|1,316|1|075|Graveler|♂|47|None|36=シロウ|37=Shirō}} | {{Trainerentry|VSBlack Belt PE.png{{!}}90px|game=PE|Black Belt|Takashi|1,316|1|075|Graveler|♂|47|None|36=シロウ|37=Shirō}} | ||
{{Trainerfooter|Ground|PE}} | {{Trainerfooter|Ground|PE}} | ||
| Line 519: | Line 537: | ||
|location=Viridian Gym | |location=Viridian Gym | ||
|pokemon=4}} | |pokemon=4}} | ||
|{{Pokémon/7 | |{{Pokémon/7/LG | ||
|game=PE | |game=PE | ||
|ndex=051 | |ndex=051 | ||
| Line 529: | Line 547: | ||
|move2=Sucker Punch|move2type=Dark|move2cat=Physical | |move2=Sucker Punch|move2type=Dark|move2cat=Physical | ||
|move3=Earthquake|move3type=Ground|move3cat=Physical}} | |move3=Earthquake|move3type=Ground|move3cat=Physical}} | ||
|{{Pokémon/7 | |{{Pokémon/7/LG | ||
|game=PE | |game=PE | ||
|ndex=031 | |ndex=031 | ||
| Line 540: | Line 558: | ||
|move3=Crunch|move3type=Dark|move3cat=Physical}} | |move3=Crunch|move3type=Dark|move3cat=Physical}} | ||
{{Party/Div|color={{ground color}}}} | {{Party/Div|color={{ground color}}}} | ||
| style="margin:auto" |{{Pokémon/7 | | style="margin:auto" |{{Pokémon/7/LG | ||
|game=PE | |game=PE | ||
|ndex=034 | |ndex=034 | ||
| Line 551: | Line 569: | ||
|move3=Poison Jab|move3type=Poison|move3cat=Physical | |move3=Poison Jab|move3type=Poison|move3cat=Physical | ||
|move4=Horn Drill|move4type=Normal|move4cat=Physical}} | |move4=Horn Drill|move4type=Normal|move4cat=Physical}} | ||
| style="margin:auto" |{{Pokémon/7 | | style="margin:auto" |{{Pokémon/7/LG | ||
|game=PE | |game=PE | ||
|ndex=112 | |ndex=112 | ||
| Line 577: | Line 595: | ||
|location=Viridian Gym | |location=Viridian Gym | ||
|pokemon=6 | |pokemon=6 | ||
|style="margin:auto"}}|{{Pokémon/7 | |style="margin:auto"}}|{{Pokémon/7/LG | ||
|game=PE | |game=PE | ||
|ndex=128 | |ndex=128 | ||
| Line 588: | Line 606: | ||
|move3=Earthquake|move3type=Ground|move3cat=Physical | |move3=Earthquake|move3type=Ground|move3cat=Physical | ||
|move4=Iron Tail|move4type=Steel|move4cat=Physical}} | |move4=Iron Tail|move4type=Steel|move4cat=Physical}} | ||
|{{Pokémon/7 | |{{Pokémon/7/LG | ||
|game=PE | |game=PE | ||
|ndex=065 | |ndex=065 | ||
| Line 599: | Line 617: | ||
|move3=Reflect|move3type=Psychic|move3cat=Status | |move3=Reflect|move3type=Psychic|move3cat=Status | ||
|move4=Foul Play|move4type=Dark|move4cat=Physical}} | |move4=Foul Play|move4type=Dark|move4cat=Physical}} | ||
|{{Pokémon/7 | |{{Pokémon/7/LG | ||
|game=PE | |game=PE | ||
|ndex=130 | |ndex=130 | ||
| Line 611: | Line 629: | ||
|move4=Outrage|move4type=Dragon|move4cat=Physical}} | |move4=Outrage|move4type=Dragon|move4cat=Physical}} | ||
{{Party/Div|color={{blue color}}}} | {{Party/Div|color={{blue color}}}} | ||
|{{Pokémon/7 | |{{Pokémon/7/LG | ||
|game=PE | |game=PE | ||
|ndex=103 | |ndex=103 | ||
| Line 622: | Line 640: | ||
|move3=Stomp|move3type=Normal|move3cat=Physical | |move3=Stomp|move3type=Normal|move3cat=Physical | ||
|move4=Psychic|move4type=Psychic|move4cat=Special}} | |move4=Psychic|move4type=Psychic|move4cat=Special}} | ||
|{{Pokémon/7 | |{{Pokémon/7/LG | ||
|game=PE | |game=PE | ||
|ndex=142 | |ndex=142 | ||
| Line 633: | Line 651: | ||
|move3=Iron Tail|move3type=Steel|move3cat=Physical | |move3=Iron Tail|move3type=Steel|move3cat=Physical | ||
|move4=Crunch|move4type=Dark|move4cat=Physical}} | |move4=Crunch|move4type=Dark|move4cat=Physical}} | ||
|{{Pokémon/7 | |{{Pokémon/7/LG | ||
|game=PE | |game=PE | ||
|ndex=006 | |ndex=006 | ||
|pokemon=Charizard | |pokemon=Charizard | ||
| | |megastone=Charizardite Y | ||
|gender=male | |gender=male | ||
|level=68 | |level=68 | ||
| Line 647: | Line 665: | ||
{{Party/Footer}} | {{Party/Footer}} | ||
===Side series games=== | |||
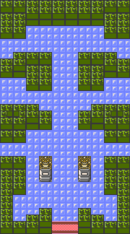
A field based on the Gym appears in {{eng|Pokémon Stadium}}'s [[Gym Leader Castle]] and {{pkmn|Stadium 2}}'s Kanto Gym Leader Castle. | |||
====Trainers==== | |||
====={{eng|Pokémon Stadium}}===== | ====={{eng|Pokémon Stadium}}===== | ||
======Round 1====== | ======Round 1====== | ||
{{Trainerheader|Ground}} | {{Trainerheader|Ground}} | ||
{{Trainerentry|SJP Rocket.png|Rocket|| | {{Trainerentry|SJP Rocket.png|Rocket|game=stad||none|6|042|Golbat||50-100|None|020|Raticate||50-100|None|053|Persian||50-100|None|146|Moltres||50-100|None|085|Dodrio||50-100|None|047|Parasect||50-100|None}} | ||
{{trainerdiv|Ground}} | {{trainerdiv|Ground}} | ||
{{Trainerentry|S2 Scientist.png|Lab Man|| | {{Trainerentry|S2 Scientist.png|Lab Man|game=stad||none|6|141|Kabutops||50-100|None|082|Magneton||50-100|None|022|Fearow||50-100|None|107|Hitmonchan||50-100|None|062|Poliwrath||50-100|None|108|Lickitung||50-100|None}} | ||
{{trainerdiv|Ground}} | {{trainerdiv|Ground}} | ||
{{Trainerentry|SJP Cool M.png|Cool♂|| | {{Trainerentry|SJP Cool M.png|Cool♂|game=stad||none|6|139|Omastar||50-100|None|085|Dodrio||50-100|None|073|Tentacruel||50-100|None|036|Clefable||50-100|None|145|Zapdos||50-100|None|127|Pinsir||50-100|None}} | ||
{{Trainerfooter|Ground|1|Inside}} | {{Trainerfooter|Ground|1|Inside}} | ||
| Line 663: | Line 684: | ||
|bordercolor={{ground color dark}} | |bordercolor={{ground color dark}} | ||
|sprite=Giovanni Stadium.png | |sprite=Giovanni Stadium.png | ||
|prize= | |prize=none | ||
<!--GEN I HAD NO CLASSES--> | <!--GEN I HAD NO CLASSES--> | ||
|name={{color2|000|Giovanni|Giovani}}<!--STADIUM 1 CHANGED HIS NAME--> | |name={{color2|000|Giovanni|Giovani}}<!--STADIUM 1 CHANGED HIS NAME--> | ||
| Line 670: | Line 691: | ||
|pokemon=6}} | |pokemon=6}} | ||
|{{Pokémon/1 | |{{Pokémon/1 | ||
|ndex= | |ndex=053MSStad | ||
|pokemon=Persian | |pokemon=Persian | ||
|level=50-100 | |level=50-100 | ||
| Line 679: | Line 700: | ||
|move4=BubbleBeam|move4type=Water}} | |move4=BubbleBeam|move4type=Water}} | ||
|{{Pokémon/1 | |{{Pokémon/1 | ||
|ndex= | |ndex=051MSStad | ||
|pokemon=Dugtrio | |pokemon=Dugtrio | ||
|level=50-100 | |level=50-100 | ||
| Line 688: | Line 709: | ||
|move4=Rock Slide|move4type=Rock}} | |move4=Rock Slide|move4type=Rock}} | ||
|{{Pokémon/1 | |{{Pokémon/1 | ||
|ndex= | |ndex=031MSStad | ||
|pokemon=Nidoqueen | |pokemon=Nidoqueen | ||
|level=50-100 | |level=50-100 | ||
| Line 698: | Line 719: | ||
{{Party/Div|color={{ground color}}}} | {{Party/Div|color={{ground color}}}} | ||
|{{Pokémon/1 | |{{Pokémon/1 | ||
|ndex= | |ndex=034MSStad | ||
|pokemon=Nidoking | |pokemon=Nidoking | ||
|level=50-100 | |level=50-100 | ||
| Line 707: | Line 728: | ||
|move4=Toxic|move4type=Poison}} | |move4=Toxic|move4type=Poison}} | ||
|{{Pokémon/1 | |{{Pokémon/1 | ||
|ndex= | |ndex=112MSStad | ||
|pokemon=Rhydon | |pokemon=Rhydon | ||
|level=50-100 | |level=50-100 | ||
| Line 716: | Line 737: | ||
|move4=Fissure|move4type=Ground}} | |move4=Fissure|move4type=Ground}} | ||
|{{Pokémon/1 | |{{Pokémon/1 | ||
|ndex= | |ndex=128MSStad | ||
|pokemon=Tauros | |pokemon=Tauros | ||
|level=50-100 | |level=50-100 | ||
| Line 728: | Line 749: | ||
======Round 2====== | ======Round 2====== | ||
{{Trainerheader|Ground}} | {{Trainerheader|Ground}} | ||
{{Trainerentry|SJP Rocket.png|Rocket|| | {{Trainerentry|SJP Rocket.png|Rocket|game=stad||none|6|042|Golbat||50-100|None|020|Raticate||50-100|None|053|Persian||50-100|None|115|Kangaskhan||50-100|None|085|Dodrio||50-100|None|047|Parasect||50-100|None}} | ||
{{trainerdiv|Ground}} | {{trainerdiv|Ground}} | ||
{{Trainerentry|S2 Scientist.png|Lab Man|| | {{Trainerentry|S2 Scientist.png|Lab Man|game=stad||none|6|141|Kabutops||50-100|None|082|Magneton||50-100|None|022|Fearow||50-100|None|107|Hitmonchan||50-100|None|062|Poliwrath||50-100|None|108|Lickitung||50-100|None}} | ||
{{trainerdiv|Ground}} | {{trainerdiv|Ground}} | ||
{{Trainerentry|SJP Cool M.png|Cool♂|| | {{Trainerentry|SJP Cool M.png|Cool♂|game=stad||none|6|139|Omastar||50-100|None|085|Dodrio||50-100|None|073|Tentacruel||50-100|None|036|Clefable||50-100|None|145|Zapdos||50-100|None|127|Pinsir||50-100|None}} | ||
{{Trainerfooter|Ground|1|Inside}} | {{Trainerfooter|Ground|1|Inside}} | ||
| Line 740: | Line 761: | ||
|bordercolor={{ground color dark}} | |bordercolor={{ground color dark}} | ||
|sprite=Giovanni Stadium.png | |sprite=Giovanni Stadium.png | ||
|prize= | |prize=none | ||
<!--GEN I HAD NO CLASSES--> | <!--GEN I HAD NO CLASSES--> | ||
|name={{color2|000|Giovanni|Giovani}}<!--STADIUM 1 CHANGED HIS NAME--> | |name={{color2|000|Giovanni|Giovani}}<!--STADIUM 1 CHANGED HIS NAME--> | ||
| Line 747: | Line 768: | ||
|pokemon=6}} | |pokemon=6}} | ||
|{{Pokémon/1 | |{{Pokémon/1 | ||
|ndex= | |ndex=053MSStad | ||
|pokemon=Persian | |pokemon=Persian | ||
|level=50-100 | |level=50-100 | ||
| Line 756: | Line 777: | ||
|move4=BubbleBeam|move4type=Water}} | |move4=BubbleBeam|move4type=Water}} | ||
|{{Pokémon/1 | |{{Pokémon/1 | ||
|ndex= | |ndex=128MSStad | ||
|pokemon=Tauros | |pokemon=Tauros | ||
|level=50-100 | |level=50-100 | ||
| Line 765: | Line 786: | ||
|move4=Earthquake|move4type=Ground}} | |move4=Earthquake|move4type=Ground}} | ||
|{{Pokémon/1 | |{{Pokémon/1 | ||
|ndex= | |ndex=031MSStad | ||
|pokemon=Nidoqueen | |pokemon=Nidoqueen | ||
|level=50-100 | |level=50-100 | ||
| Line 775: | Line 796: | ||
{{Party/Div|color={{ground color}}}} | {{Party/Div|color={{ground color}}}} | ||
|{{Pokémon/1 | |{{Pokémon/1 | ||
|ndex= | |ndex=034MSStad | ||
|pokemon=Nidoking | |pokemon=Nidoking | ||
|level=50-100 | |level=50-100 | ||
| Line 784: | Line 805: | ||
|move4=Earthquake|move4type=Ground}} | |move4=Earthquake|move4type=Ground}} | ||
|{{Pokémon/1 | |{{Pokémon/1 | ||
|ndex= | |ndex=094MSStad | ||
|pokemon=Gengar | |pokemon=Gengar | ||
|level=50-100 | |level=50-100 | ||
| Line 793: | Line 814: | ||
|move4=Explosion|move4type=Normal}} | |move4=Explosion|move4type=Normal}} | ||
|{{Pokémon/1 | |{{Pokémon/1 | ||
|ndex= | |ndex=146MSStad | ||
|pokemon=Moltres | |pokemon=Moltres | ||
|level=50-100 | |level=50-100 | ||
| Line 810: | Line 831: | ||
|bordercolor={{green color dark}} | |bordercolor={{green color dark}} | ||
|sprite=S2 Leader Blue.png | |sprite=S2 Leader Blue.png | ||
|prize= | |prize=none | ||
|class=Gym Leader | |class=Gym Leader | ||
|classlink=Gym Leader | |classlink=Gym Leader | ||
| Line 819: | Line 840: | ||
|pokemon=6}} | |pokemon=6}} | ||
|{{Pokémon/2 | |{{Pokémon/2 | ||
|ndex= | |ndex=018MSStad | ||
|pokemon=Pidgeot | |pokemon=Pidgeot | ||
|level=50-100 | |level=50-100 | ||
| Line 830: | Line 851: | ||
|move4=Mirror Move|move4type=Flying}} | |move4=Mirror Move|move4type=Flying}} | ||
|{{Pokémon/2 | |{{Pokémon/2 | ||
|ndex= | |ndex=065MSStad | ||
|pokemon=Alakazam | |pokemon=Alakazam | ||
|level=50-100 | |level=50-100 | ||
| Line 841: | Line 862: | ||
|move4=Fire Punch|move4type=Fire}} | |move4=Fire Punch|move4type=Fire}} | ||
|{{Pokémon/2 | |{{Pokémon/2 | ||
|ndex= | |ndex=112MSStad | ||
|pokemon=Rhydon | |pokemon=Rhydon | ||
|level=50-100 | |level=50-100 | ||
| Line 853: | Line 874: | ||
{{Party/Div|color={{blue color}}}} | {{Party/Div|color={{blue color}}}} | ||
|{{Pokémon/2 | |{{Pokémon/2 | ||
|ndex= | |ndex=130MSStad | ||
|pokemon=Gyarados | |pokemon=Gyarados | ||
|level=50-100 | |level=50-100 | ||
| Line 864: | Line 885: | ||
|move4=DragonBreath|move4type=Dragon}} | |move4=DragonBreath|move4type=Dragon}} | ||
|{{Pokémon/2 | |{{Pokémon/2 | ||
|ndex= | |ndex=103MSStad | ||
|pokemon=Exeggutor | |pokemon=Exeggutor | ||
|level=50-100 | |level=50-100 | ||
| Line 875: | Line 896: | ||
|move4=Nightmare|move4type=Ghost}} | |move4=Nightmare|move4type=Ghost}} | ||
|{{Pokémon/2 | |{{Pokémon/2 | ||
|ndex= | |ndex=059MSStad | ||
|pokemon=Arcanine | |pokemon=Arcanine | ||
|level=50-100 | |level=50-100 | ||
| Line 893: | Line 914: | ||
|bordercolor={{green color dark}} | |bordercolor={{green color dark}} | ||
|sprite=S2 Leader Blue.png | |sprite=S2 Leader Blue.png | ||
|prize= | |prize=none | ||
|class=Gym Leader | |class=Gym Leader | ||
|classlink=Gym Leader | |classlink=Gym Leader | ||
| Line 902: | Line 923: | ||
|pokemon=6}} | |pokemon=6}} | ||
|{{Pokémon/2 | |{{Pokémon/2 | ||
|ndex= | |ndex=123MSStad | ||
|pokemon=Scyther | |pokemon=Scyther | ||
|level=50-100 | |level=50-100 | ||
| Line 913: | Line 934: | ||
|move4=Swords Dance|move4type=Normal}} | |move4=Swords Dance|move4type=Normal}} | ||
|{{Pokémon/2 | |{{Pokémon/2 | ||
|ndex= | |ndex=241MSStad | ||
|pokemon=Miltank | |pokemon=Miltank | ||
|level=50-100 | |level=50-100 | ||
| Line 924: | Line 945: | ||
|move4=Shadow Ball|move4type=Ghost}} | |move4=Shadow Ball|move4type=Ghost}} | ||
|{{Pokémon/2 | |{{Pokémon/2 | ||
|ndex= | |ndex=094MSStad | ||
|pokemon=Gengar | |pokemon=Gengar | ||
|level=50-100 | |level=50-100 | ||
| Line 936: | Line 957: | ||
{{Party/Div|color={{blue color}}}} | {{Party/Div|color={{blue color}}}} | ||
|{{Pokémon/2 | |{{Pokémon/2 | ||
|ndex= | |ndex=229MSStad | ||
|pokemon=Houndoom | |pokemon=Houndoom | ||
|level=50-100 | |level=50-100 | ||
| Line 947: | Line 968: | ||
|move4=Reversal|move4type=Fighting}} | |move4=Reversal|move4type=Fighting}} | ||
|{{Pokémon/2 | |{{Pokémon/2 | ||
|ndex= | |ndex=221MSStad | ||
|pokemon=Piloswine | |pokemon=Piloswine | ||
|level=50-100 | |level=50-100 | ||
| Line 958: | Line 979: | ||
|move4=Rock Slide|move4type=Rock}} | |move4=Rock Slide|move4type=Rock}} | ||
|{{Pokémon/2 | |{{Pokémon/2 | ||
|ndex= | |ndex=230MSStad | ||
|pokemon=Kingdra | |pokemon=Kingdra | ||
|level=50-100 | |level=50-100 | ||
| Line 969: | Line 990: | ||
|move4=Flail|move4type=Normal}} | |move4=Flail|move4type=Normal}} | ||
{{Party/Footer}} | {{Party/Footer}} | ||
==In the anime== | ==In the anime== | ||
=== | ===Main series=== | ||
[[File:Viridian Gym | [[File:Viridian Gym AG132.png|thumb|250px|left|Viridian Gym in the {{pkmn|anime}}]] | ||
[[File:Viridian Gym Battlefield.png|thumb| | [[File:Viridian Gym Battlefield AG132.png|thumb|250px|Viridian Gym's battlefield in the anime]] | ||
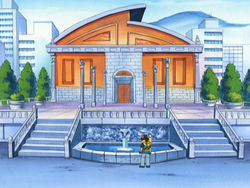
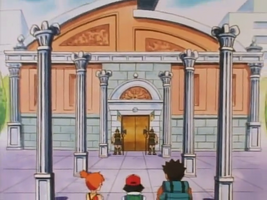
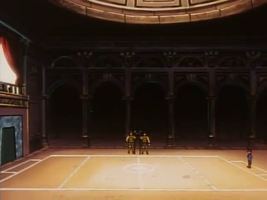
The Viridian Gym was originally led by {{an|Giovanni}}, as it was in [[Generation I]]. The Gym featured {{wp|ancient Roman architecture}}, stately pillars, and an old mural. A predominant brownish color scheme was used to represent the Gym's affiliation with the {{t|Ground}} type. Owing to this, there were also guards resembling ancient Roman soldiers posted outside. | The Viridian Gym was originally led by {{an|Giovanni}}, as it was in [[Generation I]]. The Gym featured {{wp|ancient Roman architecture}}, stately pillars, and an old mural. A predominant brownish color scheme was used to represent the Gym's affiliation with the {{t|Ground}} type. Owing to this, there were also guards resembling ancient Roman soldiers posted outside. | ||
The Viridian Gym debuted in ''[[EP063|The Battle of the Badge]]''. Before {{Ash}} could challenge the Gym, however, {{Gary}} appeared, taunting him with his ten Badges and insisting on challenging the Viridian Gym for fun. Gary faced Giovanni, though his confidence quickly eroded after Giovanni brought out {{OBP|Mewtwo| | The Viridian Gym debuted in ''[[EP063|The Battle of the Badge]]''. Before {{Ash}} could challenge the Gym, however, {{Gary}} appeared, taunting him with his ten Badges and insisting on challenging the Viridian Gym for fun. Gary faced Giovanni, though his confidence quickly eroded after Giovanni brought out {{OBP|Mewtwo|M01}}, who defeated each of Gary's Pokémon with ease, even when Giovanni allowed him to use more than one Pokémon at a time. | ||
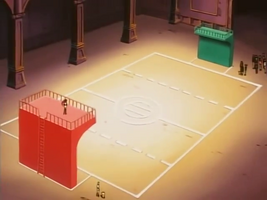
Ash challenged the Gym soon after. However, unbeknownst to him, Giovanni had unmentioned business to attend to, and thus he left the Gym in the care of [[Jessie]], [[James]], and {{MTR}}, giving them several Pokémon to use against any possible challengers. At first, Ash had a hard time beating them, as the trio had rigged the Trainer platforms to shock anyone whose Pokémon took [[damage]]. Eventually, Ash overcame the borrowed Pokémon's power and defeated all of them, causing {{TRT}} to completely ignore the Gym rules and send out their {{TP|Jessie|Arbok}} and {{TP|James|Weezing}}. Despite this, even the two additional Pokémon were quickly taken down. When {{TP|Misty|Togepi}} started playing with Meowth's remote control, it inadvertently caused the Trainer platforms to explode and send Team Rocket blasting off again. They dropped an {{badge|Earth}} in their wake, allowing Ash to get his eighth Badge. Ash, {{an|Misty}}, {{an|Brock}}, Gary, and [[Gary's cheerleaders]] then ran out of the Gym, which proceeded to collapse into ruins due to the explosion. | Ash challenged the Gym soon after. However, unbeknownst to him, Giovanni had unmentioned business to attend to, and thus he left the Gym in the care of [[Jessie]], [[James]], and {{MTR}}, giving them several Pokémon to use against any possible challengers. At first, Ash had a hard time beating them, as the trio had rigged the Trainer platforms to shock anyone whose Pokémon took [[damage]]. Eventually, Ash overcame the borrowed Pokémon's power and defeated all of them, causing {{TRT}} to completely ignore the Gym rules and send out their {{TP|Jessie|Arbok}} and {{TP|James|Weezing}}. Despite this, even the two additional Pokémon were quickly taken down. When {{TP|Misty|Togepi}} started playing with Meowth's remote control, it inadvertently caused the Trainer platforms to explode and send Team Rocket blasting off again. They dropped an {{badge|Earth}} in their wake, allowing Ash to get his eighth Badge. Ash, {{an|Misty}}, {{an|Brock}}, Gary, and [[Gary's cheerleaders]] then ran out of the Gym, which proceeded to collapse into ruins due to the explosion. | ||
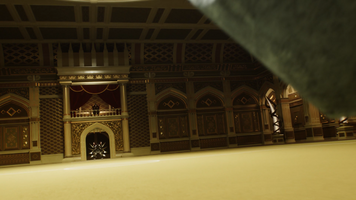
The Gym briefly reappeared in ''[[M01|Mewtwo Strikes Back]]'' and its remake ''[[M22|Mewtwo Strikes Back—Evolution]]'', depicting several instances of Giovanni using Mewtwo to defeat his challengers, including Gary in the aforementioned battle. | The Gym briefly reappeared in ''[[M01|Mewtwo Strikes Back]]'' and its remake ''[[M22|Mewtwo Strikes Back—Evolution]]'', depicting several instances of Giovanni using Mewtwo to defeat his challengers, including Gary in the aforementioned battle. | ||
The rebuilt Viridian Gym appeared when Ash returned to [[Kanto]] from [[Hoenn]] in ''[[AG132|The Scheme Team]]'', where it was revealed that [[Agatha]] of the [[Elite Four]] was | The rebuilt Viridian Gym appeared when Ash returned to [[Kanto]] from [[Hoenn]] in ''[[AG132|The Scheme Team]]'', where it was revealed that [[Agatha]] of the [[Elite Four]] was serving as the temporary Gym Leader until the official new Leader would arrive. Ash challenged her to an {{wp|exhibition game|exhibition match}}, but lost. This was also the place where Ash first met [[Scott]], who told him about the {{gdis|Battle Frontier|III}}. During its second appearance, the Gym sported a new, lighter color scheme. | ||
Giovanni abdicating his position as Gym Leader is similar to the case in the Generation I games; however, in the anime, he is still in charge of [[Team Rocket]], while he also disbands the team in the games. | Giovanni abdicating his position as Gym Leader is similar to the case in the Generation I games; however, in the anime, he is still in charge of [[Team Rocket]], while he also disbands the team in the games. | ||
{{-}} | |||
====Gallery==== | |||
{| style="margin:auto; text-align:center; background: #{{ground color}}; {{roundy}}; border: 3px solid #{{ground color dark}}" | |||
|- style="background:#{{ground color}}" | |||
! style="{{roundytl|5px}}" | Original design | |||
! Original battlefield | |||
! Battlefield with Trainer platforms raised | |||
! style="{{roundytr|5px}}" | ''{{color2|000|M22|Mewtwo Strikes Back—Evolution}}'' | |||
|- style="background:#fff" | |||
| [[File:Viridian Gym anime.png|x200px]] | |||
| [[File:Viridian Gym Battlefield.png|x200px]] | |||
| [[File:Viridian Gym battlefield platforms.png|x200px]] | |||
| [[File:Viridian Gym M22.png|x200px]] | |||
|} | |||
====Pokémon used in Gym==== | ====Pokémon used in the Gym==== | ||
=====Used by Giovanni===== | =====Used by Giovanni===== | ||
{{TrainerPoké | {{TrainerPoké | ||
|main=Mewtwo ( | |main=Mewtwo (M01) | ||
|trainer=Giovanni | |trainer=Giovanni | ||
|pkmn=Mewtwo | |pkmn=Mewtwo | ||
| Line 1,048: | Line 1,072: | ||
Kingler was also later loaned to [[Jessie]] for Ash's Gym battle. She used it to battle against {{AP|Bulbasaur}}, but lost, although not before dealing heavy damage to Bulbasaur with its Bubble attack, and by consequence, Ash experienced its pain. | Kingler was also later loaned to [[Jessie]] for Ash's Gym battle. She used it to battle against {{AP|Bulbasaur}}, but lost, although not before dealing heavy damage to Bulbasaur with its Bubble attack, and by consequence, Ash experienced its pain. | ||
Kingler was seen again in a flashback in ''[[EP073|Bad | Kingler was seen again in a flashback to Ash's Viridian Gym battle in ''[[EP073|Bad To The Bone]]''. | ||
The known moves of the Kingler Jessie used are {{m|Crabhammer}}, {{m|Harden}}, and {{m|Bubble}}.}} | The known moves of the Kingler Jessie used are {{m|Crabhammer}}, {{m|Harden}}, and {{m|Bubble}}.}} | ||
| Line 1,077: | Line 1,101: | ||
|desc=Giovanni loaned his {{p|Rhydon}} to Jessie for Ash's Gym battle. It was defeated by [[Ash's Pidgeotto]]'s {{m|Double-Edge}}. | |desc=Giovanni loaned his {{p|Rhydon}} to Jessie for Ash's Gym battle. It was defeated by [[Ash's Pidgeotto]]'s {{m|Double-Edge}}. | ||
Rhydon was seen again in a flashback in ''[[EP073|Bad | Rhydon was seen again in a flashback to Ash's Viridian Gym battle in ''[[EP073|Bad To The Bone]]''. | ||
None of Rhydon's moves are known.}} | None of Rhydon's moves are known.}} | ||
| Line 1,087: | Line 1,111: | ||
|pkmn=Arbok | |pkmn=Arbok | ||
|type1=Poison | |type1=Poison | ||
|img= | |img=Arbok Weezing Viridian Gym.png | ||
|epnum=EP002 | |epnum=EP002 | ||
|epname=Pokémon Emergency! | |epname=Pokémon Emergency! | ||
| Line 1,099: | Line 1,123: | ||
|pkmn=Weezing | |pkmn=Weezing | ||
|type1=Poison | |type1=Poison | ||
|img= | |img=Arbok Weezing Viridian Gym.png | ||
|epnum=EP002 | |epnum=EP002 | ||
|epname=Pokémon Emergency! | |epname=Pokémon Emergency! | ||
| Line 1,120: | Line 1,144: | ||
|desc={{p|Gengar}} is Agatha's main Pokémon which she used in battle against [[Ash's Pikachu]].}} | |desc={{p|Gengar}} is Agatha's main Pokémon which she used in battle against [[Ash's Pikachu]].}} | ||
=== | ===Pokémon Origins=== | ||
[[File:Viridian Gym PO.png| | [[File:Viridian Gym PO.png|thumb|left|250px|The Viridian Gym in [[Pokémon Origins]]]] | ||
[[File:Viridian Gym battlefield PO.png| | [[File:Viridian Gym battlefield PO.png|thumb|250px|The Viridian Gym battlefield in Pokémon Origins]] | ||
The Viridian Gym was featured in ''[[PO03|File 3: Giovanni]]''. Once {{OBP|Red|Origins}} arrived in Viridian City in order to challenge the Gym, he encountered {{OBP|Blue|Origins}}, who was revealed to have defeated the newly returned Gym Leader just the day before. | The Viridian Gym was featured in ''[[PO03|File 3: Giovanni]]''. Once {{OBP|Red|Origins}} arrived in Viridian City in order to challenge the Gym, he encountered {{OBP|Blue|Origins}}, who was revealed to have defeated the newly returned Gym Leader just the day before. | ||
Once Red entered the Gym, he right away noticed the different atmosphere it had compared to the other Gyms he had previously visited. The reason for this was revealed soon enough, as Red then found out that the Gym Leader was none other than the Team Rocket Boss, Giovanni. Red refused to believe that a man who treated Pokémon as tools for business, like Giovanni, could be the strongest Gym Leader of all. Giovanni, however, ignored this, simply stating that he didn't need his acceptance to make it true. As he asked whether Red wanted to battle him or not, Red replied that he ''was'' challenging him, but not as a Gym Leader, but as the enemy of all Pokémon. Seeing Red's arrogant attitude, Giovanni put away his usual Gym Leader [[party|team]] and took out two [[Ultra Ball]]s, containing his strongest Pokémon. The first one was Rhyhorn, which, surprisingly, was able to defeat four of Red's Pokémon, despite two of them ({{p|Victreebel}} and {{p|Kabutops}}) having a tremendous [[Type#Type effectiveness|type advantage]] over it. | Once Red entered the Gym, he right away noticed the different atmosphere it had compared to the other Gyms he had previously visited. The reason for this was revealed soon enough, as Red then found out that the Gym Leader was none other than the Team Rocket Boss, Giovanni. Red refused to believe that a man who treated Pokémon as tools for business, like Giovanni, could be the strongest Gym Leader of all. Giovanni, however, ignored this, simply stating that he didn't need his acceptance to make it true. As he asked whether Red wanted to battle him or not, Red replied that he ''was'' challenging him, but not as a Gym Leader, but as the enemy of all Pokémon. Seeing Red's arrogant attitude, Giovanni put away his usual Gym Leader [[party|team]] and took out two [[Ultra Ball]]s, containing his strongest Pokémon. The first one was Rhyhorn, which, surprisingly, was able to defeat four of Red's Pokémon, despite two of them ({{p|Victreebel}} and {{p|Kabutops}}) having a tremendous [[Type#Type effectiveness|type advantage]] over it. | ||
Eventually, Red's {{p|Hitmonlee}} was able to tie with the Spikes Pokémon, leaving both Trainers with one Pokémon remaining. Knowing that Red was going to use his {{TP|Red|Charizard}}, Giovanni revealed his other Pokémon being Rhydon, and said that Red made a mistake by saving Charizard as his last Pokémon. Red, however, told that he had intended it to be so right from the start, wanting to give the whole match a meaning by winning it with his Charizard. At first, Giovanni intended to crush Red's pride along with his Charizard, but when he sent out his [[ | Eventually, Red's {{p|Hitmonlee}} was able to tie with the Spikes Pokémon, leaving both Trainers with one Pokémon remaining. Knowing that Red was going to use his {{TP|Red|Charizard}}, Giovanni revealed his other Pokémon being Rhydon, and said that Red made a mistake by saving Charizard as his last Pokémon. Red, however, told that he had intended it to be so right from the start, wanting to give the whole match a meaning by winning it with his Charizard. At first, Giovanni intended to crush Red's pride along with his Charizard, but when he sent out his [[first partner Pokémon]], Giovanni realized that the pose that he had taken and the way he threw his [[Poké Ball]] reminded him of his childhood, when he had also battled just for fun and excitement. After a climactic clash between Charizard and Rhydon, which ended with Charizard defeating the Drill Pokémon with {{m|Seismic Toss}}, Giovanni was ready to give the Earth Badge as a sign of his defeat, but Red refused to take a Badge from the Boss of Team Rocket. With his childhood passion for battling revitalized, Giovanni told his {{tc|Team Rocket Grunt|minions}} that Team Rocket was now disbanded, before turning back to Red and presenting the Earth Badge to him as the Viridian Gym Leader instead of as the Boss of Team Rocket. | ||
Once Red left the Gym and headed for the [[Indigo Plateau|Pokémon League]], Giovanni decided that it was time for him to find a new path for himself and {{cat|Giovanni's Pokémon|his Pokémon}}, indicating that, much like in the games, he was going to leave the Gym and train on his own. | Once Red left the Gym and headed for the [[Indigo Plateau|Pokémon League]], Giovanni decided that it was time for him to find a new path for himself and {{cat|Giovanni's Pokémon|his Pokémon}}, indicating that, much like in the games, he was going to leave the Gym and train on his own. | ||
====Pokémon used in Gym==== | ====Pokémon used in the Gym==== | ||
{{TrainerPoké | {{TrainerPoké | ||
|trainer=Giovanni | |trainer=Giovanni | ||
| Line 1,156: | Line 1,180: | ||
Rhydon's known moves are {{m|Mega Punch}}, {{m|Fury Attack}}, and {{m|Horn Drill}}.}} | Rhydon's known moves are {{m|Mega Punch}}, {{m|Fury Attack}}, and {{m|Horn Drill}}.}} | ||
=== | ===Pokémon Generations=== | ||
[[File:Viridian Gym PG.png| | [[File:Viridian Gym PG.png|thumb|left|250px|The Viridian Gym in [[Pokémon Generations]]]] | ||
[[File:Viridian Gym battlefield PG.png| | [[File:Viridian Gym battlefield PG.png|thumb|250px|The Viridian Gym battlefield in Pokémon Generations]] | ||
Viridian Gym made an appearance in ''[[PG02|The Chase]]''. While searching for Giovanni, the [[International Police]] managed to track his location down to the Viridian Gym. A squadron of International Police {{wp|SWAT}} officers led by [[Looker]] subsequently raided the Gym in order to catch Giovanni, but came to find out that the Gym was empty, although signs of a recent battle were visible on the battlefield. | The Viridian Gym made an appearance in ''[[PG02|The Chase]]''. While searching for Giovanni, the [[International Police]] managed to track his location down to the Viridian Gym. A squadron of International Police {{wp|SWAT}} officers led by [[Looker]] subsequently raided the Gym in order to catch Giovanni, but came to find out that the Gym was empty, although signs of a recent battle were visible on the battlefield. | ||
During a follow-up investigation, the International Police was surprised to discover that Giovanni was the Viridian Gym Leader, and that he had vanished after losing to {{ga|Blue|two}} {{ga|Red|Trainers}}. | During a follow-up investigation, the International Police was surprised to discover that Giovanni was the Viridian Gym Leader, and that he had vanished after losing to {{ga|Blue|two}} {{ga|Red|Trainers}}. | ||
{{-}} | |||
===Pokémon Evolutions=== | |||
[[File:Blue Evolutions.png|thumb|250px|The Viridian Gym in [[Pokémon Evolutions]]]] | |||
The Viridian Gym made a brief appearance in ''[[PE08|The Discovery]]'', where {{ga|Blue}} was shown as its Leader, preparing to take on a challenger. | |||
{{-}} | {{-}} | ||
==In the manga== | ==In the manga== | ||
=== | ===Pokémon Adventures=== | ||
[[File:Viridian Gym battlefield Adventures.png|thumb|left|160px|Viridian Gym battlefield in Pokémon Adventures]] | [[File:Viridian Gym battlefield Adventures.png|thumb|left|160px|Viridian Gym battlefield in [[Pokémon Adventures]]]] | ||
[[File:Viridian Gym Adventures 2.png|thumb|200px|Viridian Gym in Pokémon Adventures]] | [[File:Viridian Gym Adventures 2.png|thumb|200px|Viridian Gym in Pokémon Adventures]] | ||
[[File:Viridian Gym Adventures 1.png|thumb|200px|Viridian Gym in the {{ | [[File:Viridian Gym Adventures 1.png|thumb|200px|Viridian Gym in the {{MangaArc|Red, Green & Blue}}]] | ||
===={{MangaArc|Red, Green & Blue}}==== | |||
The Viridian Gym first appeared in ''[[PS002|Bulbasaur, Come Home!]]'', where {{adv|Red}} and {{adv|Professor Oak}} entered it while following a [[Saur|Bulbasaur]] escaped from [[Professor Oak's Laboratory]]. At the Gym, they were attacked by a wild {{p|Machoke}}, but Red managed to defeat it with Bulbasaur's {{m|Solar Beam}}. Afterwards, Professor Oak let Red keep Bulbasaur. | The Viridian Gym first appeared in ''[[PS002|Bulbasaur, Come Home!]]'', where {{adv|Red}} and {{adv|Professor Oak}} entered it while following a [[Saur|Bulbasaur]] escaped from [[Professor Oak's Laboratory]]. At the Gym, they were attacked by a wild {{p|Machoke}}, but Red managed to defeat it with Bulbasaur's {{m|Solar Beam}}. Afterwards, Professor Oak let Red keep Bulbasaur. | ||
The Viridian Gym made a brief appearance in ''[[PS023|Make Way For Magmar!]]'', where citizens of Viridian City were asking questions about the missing Gym Leader. | The Viridian Gym made a brief appearance in ''[[PS023|Make Way For Magmar!]]'', where citizens of Viridian City were asking questions about the missing Gym Leader. | ||
Red revisited the Gym | Red revisited the Gym from ''[[PS036|Drat That Dratini!]]'' to ''[[PS038|Long Live the Nidoqueen?!]]'' after hearing rumors about the missing "invincible" Gym Leader. At the Gym, he met {{adv|Giovanni}}, learning that not only was he the Viridian City Gym Leader, but also the leader of [[Team Rocket]]. Giovanni then challenged Red to a battle, making a bet with him that should Red lose, he'd come to serve him as his right-hand man. During the battle, Giovanni's {{p|Nidoking}}'s {{m|Earthquake}} caused the Gym to collapse into ruins. Eventually Red emerged victorious with his [[Pika]] defeating Giovanni's {{p|Nidoqueen}} and knocking the Gym Leader himself unconscious as well. | ||
In ''[[PS115|Forretress of Solitude]]'', Red participated in [[Pokémon Association]]'s Gym Leader test for the new Viridian Gym Leader at the reconstructed Viridian Gym. Although he passed the test with flying colors, Red had to turn down the offer, as he had not yet completely recovered from the frostbites he had received after being frozen by [[Lorelei]] in the {{ | ===={{MangaArc|Gold, Silver & Crystal}}==== | ||
In ''[[PS115|Forretress of Solitude]]'', Red participated in [[Pokémon Association]]'s Gym Leader test for the new Viridian Gym Leader at the reconstructed Viridian Gym. Although he passed the test with flying colors, Red had to turn down the offer, as he had not yet completely recovered from the frostbites he had received after being frozen by [[Lorelei]] in the {{MangaArc|Yellow}}. As such, {{adv|Blue}} was appointed as the new Gym Leader instead, after he impressed the Pokémon Association by stopping and {{pkmn2|Caught|capturing}} a group of rampaging [[wild Pokémon]]. | |||
===={{MangaArc|FireRed & LeafGreen}}==== | |||
In ''[[PS287|Secrets from Sneasel]]'', {{adv|Yellow}} went to the Viridian Gym, looking for Blue, but only found his hologram, set there in case for a challenger coming while he was not present. An automated system then brought out Blue's Pokémon, which, even without their Trainer giving them commands, easily defeated Yellow's [[Chuchu]] in a battle. Soon {{adv|Silver}} arrived at the site as well, looking for his roots. | In ''[[PS287|Secrets from Sneasel]]'', {{adv|Yellow}} went to the Viridian Gym, looking for Blue, but only found his hologram, set there in case for a challenger coming while he was not present. An automated system then brought out Blue's Pokémon, which, even without their Trainer giving them commands, easily defeated Yellow's [[Chuchu]] in a battle. Soon {{adv|Silver}} arrived at the site as well, looking for his roots. | ||
====Pokémon used in Gym==== | ====Pokémon used in the Gym==== | ||
=====Used by Giovanni===== | =====Used by Giovanni===== | ||
{{TrainerPoké | {{TrainerPoké | ||
| Line 1,326: | Line 1,358: | ||
None of Arcanine's moves are known and his Ability is {{a|Intimidate}}.}} | None of Arcanine's moves are known and his Ability is {{a|Intimidate}}.}} | ||
[[File:Viridian Gym JBA.png|thumb|200px|Viridian Gym in Pocket Monsters HGSS Jō's Big Adventure]] | [[File:Viridian Gym JBA.png|thumb|200px|Viridian Gym in [[Pocket Monsters HGSS Jō's Big Adventure]]]] | ||
[[File:Viridian Gym PM.png|thumb|200px|left|Viridian Gym in Pokémon Pocket Monsters]] | [[File:Viridian Gym PM.png|thumb|200px|left|Viridian Gym in [[Pokémon Pocket Monsters]]]] | ||
=== | ===Pocket Monsters HGSS Jō's Big Adventure=== | ||
The Viridian Gym appeared in ''[[JBA6|The True Road to Becoming the Strongest!!]]'', where [[Jō]] was seen defeating Blue with his {{TP|Jō|Feraligatr}} and earning his last Kanto Badge. Afterwards, Blue told Jō about {{ga|Red|a strong Trainer}} who had traveled through Kanto three years earlier. | The Viridian Gym appeared in ''[[JBA6|The True Road to Becoming the Strongest!!]]'', where [[Jō]] was seen defeating Blue with his {{TP|Jō|Feraligatr}} and earning his last Kanto Badge. Afterwards, Blue told Jō about {{ga|Red|a strong Trainer}} who had traveled through Kanto three years earlier. | ||
=== | ===Pokémon Pocket Monsters=== | ||
The Viridian Gym appeared in ''[[PM031|Get The Last Badge!!]]'', where {{OBP|Red|Pocket Monsters}} battled {{OBP|Giovanni|Pocket Monsters}} for his final Kanto Gym Badge, eventually emerging victorious. | The Viridian Gym appeared in ''[[PM031|Get The Last Badge!!]]'', where {{OBP|Red|Pocket Monsters}} battled {{OBP|Giovanni|Pocket Monsters}} for his final Kanto Gym Badge, eventually emerging victorious. | ||
{{-}} | {{-}} | ||
=== | ===Pokémon Zensho=== | ||
[[File:Viridian Gym Zensho.png|thumb|200px|Viridian Gym in Pokémon Zensho]] | [[File:Viridian Gym Zensho.png|thumb|200px|Viridian Gym in [[Pokémon Zensho]]]] | ||
The Viridian Gym appeared in | The Viridian Gym appeared in [[PZ09]], where Satoshi entered the Gym and was surprised to find out that Giovanni was the Gym Leader. First Satoshi used his {{p|Lapras}} against Giovanni's {{p|Rhydon}}, but its {{m|Hydro Pump}} wasn't enough, so Satoshi switched out for his {{Zensho|Satoshi's Charizard|Charizard}}, who was able to beat Rhydon, ending the battle. Satoshi then gave Giovanni the object he had received from [[Mr. Fuji]] before coming to Viridian City, which turned out to be the horn of Giovanni's dead {{p|Nidoking}}. Afterwards, Giovanni gave Satoshi an {{badge|Earth}} as a sign of his victory. | ||
{{-}} | {{-}} | ||
==In the TCG== | ==In the TCG== | ||
The following is a list of cards mentioning or featuring Viridian City Gym in the [[Pokémon Trading Card Game]]. | |||
{{cardlist/header| | {{cardlist/header|Pokémon in Viridian Gym|Fighting|char=yes}} | ||
{{cardlist/entry|cardname={{TCG ID|Unbroken Bonds|Diglett|85}}|type=Fighting|expanded=Yes|enset=Unbroken Bonds|enrarity=Common|ennum=85/214|jpset=Double Blaze|jprarity=C|jpnum=043/095}} | |||
{{cardlist/entry|cardname={{TCG ID|Unbroken Bonds|Rhydon|94}}|type=Fighting|expanded=Yes|enset=Unbroken Bonds|enrarity=Uncommon|ennum=94/214|jpset=Double Blaze|jprarity=C|jpnum=049/095}} | |||
{{cardlist/div|Other related cards|Fighting}} | |||
{{cardlist/entry|cardname={{TCG ID|Gym Challenge|Viridian City Gym|123}}|type=Trainer|type2=Stadium|enset=Gym Challenge|enrarity=Uncommon|ennum=123/132|jpsetlink=Gym Challenge|jpset=Challenge from the Darkness|jprarity=Rare}} | {{cardlist/entry|cardname={{TCG ID|Gym Challenge|Viridian City Gym|123}}|type=Trainer|type2=Stadium|enset=Gym Challenge|enrarity=Uncommon|ennum=123/132|jpsetlink=Gym Challenge|jpset=Challenge from the Darkness|jprarity=Rare}} | ||
{{cardlist/footer| | {{cardlist/entry|cardname={{TCG ID|Unified Minds|Blue's Tactics|188}}|type=Supporter|expanded=yes|enset=Unified Minds|enrarity=Uncommon|ennum=188/236|jpset=Miracle Twin|jprarity=U|jpnum=087/094}} | ||
{{cardlist/footer|Fighting}} | |||
==Trivia== | ==Trivia== | ||
* In the {{pkmn|anime}}, [[Agatha]]'s temporary position as Leader of the Viridian Gym, replacing {{an|Giovanni}}, may be a reference to the games, in which Giovanni quit [[Team Rocket]] and his status as Gym Leader after being defeated by {{ga|Red}}. | [[File:Pokémon GO Safety Screen 16.png|thumb|150px|The Viridian Gym in a [[Pokémon GO]] loading screen]] | ||
* In [[Generation II]], the design of the walls | * Although the [[Gym guide]] in [[Generation I|Generations I]] and {{gen|III}} seems to be unaware of the Gym Leader's identity until the player defeats Giovanni, in Generation I, the statues near the Gym's entrance still list Giovanni as the Leader of the Gym. This oversight was removed in {{game|FireRed and LeafGreen|s}}, where the Gym Leader's name is only visible on the statues once Giovanni has been defeated. | ||
* The Viridian Gym is the only official [[Gym]] with non-hidden [[item]]s that can be picked up from the floor. | |||
** Under Blue's leadership, it is also the only official Gym to not focus on any particular type. | |||
* In the {{pkmn|anime}}, [[Agatha]]'s temporary position as Leader of the Viridian Gym, replacing {{an|Giovanni}}, may be a [[List of cross-canon references|reference]] to the games, in which Giovanni quit [[Team Rocket]] and his status as Gym Leader after being defeated by {{ga|Red}}. | |||
* In [[Generation II]], the design of the walls is possibly a [[List of references to popular culture in Pokémon|reference]] to Nintendo's discontinued N&B Blocks, which are also featured in {{wp|Super Mario Land 2: 6 Golden Coins}}. | |||
* In Generation II, it is possible to challenge Blue before beating any other Kanto Gym Leader by talking to him on [[Cinnabar Island]]. In {{game|HeartGold and SoulSilver|s}}, Blue can only be challenged when the player has seven Badges from Kanto. | * In Generation II, it is possible to challenge Blue before beating any other Kanto Gym Leader by talking to him on [[Cinnabar Island]]. In {{game|HeartGold and SoulSilver|s}}, Blue can only be challenged when the player has seven Badges from Kanto. | ||
* In {{2v2|HeartGold|SoulSilver}}, the exterior coloring of each Gym is based on the colors most associated with the type that the Gym specializes in. Viridian Gym, however, is both green and blue, possibly referring to its Gym Leader's name | * The two leaders of the Viridian Gym are coincidentally also the two Trainers that the player must defeat multiple times in {{2v2|Red|Blue}}. | ||
* In {{2v2|HeartGold|SoulSilver}}, the exterior coloring of each Gym is based on the colors most associated with the [[type]] that the Gym specializes in. Viridian Gym, however, is both green and blue, possibly referring to its Gym Leader's name. | |||
* In [[Pokémon Ultra Sun and Ultra Moon]], the player can find a bottle message at [[Ula'ula Beach]], which they can deliver to {{tc|Rising Star}} Kainoa at [[Malie City]]'s Outer Cape. He will tell the player that the message is from a friend of his named Arabella, who works as a Gym Trainer in Kanto. This is a [[List of cross-generational references|reference]] to {{tc|Ace Trainer}} Arabella, who can be battled at the Viridian Gym in Pokémon HeartGold and SoulSilver. | * In [[Pokémon Ultra Sun and Ultra Moon]], the player can find a bottle message at [[Ula'ula Beach]], which they can deliver to {{tc|Rising Star}} Kainoa at [[Malie City]]'s Outer Cape. He will tell the player that the message is from a friend of his named Arabella, who works as a Gym Trainer in Kanto. This is a [[List of cross-generational references|reference]] to {{tc|Ace Trainer}} Arabella, who can be battled at the Viridian Gym in Pokémon HeartGold and SoulSilver. | ||
* The Viridian Gym was the first Gym to change its Leader mid-game. | |||
* In the Round 2 battle of {{g|Stadium 2}}, each of Blue's Pokémon is the signature Pokémon of a Trainer battled at the end of a stage at the Johto [[Gym Leader Castle]]: {{p|Scyther}} is the signature Pokémon of [[Bugsy]], {{p|Miltank}} is the signature Pokémon of [[Whitney]], {{p|Gengar}} is the signature Pokémon of [[Morty]], {{p|Houndoom}} is the signature Pokémon of [[Archer]], {{p|Piloswine}} is the signature Pokémon of [[Pryce]], and {{p|Kingdra}} is the signature Pokémon of [[Clair]]. | |||
* The Viridian Gym, as it appears in the anime, made a cameo in a {{g|GO}} loading screen from October 2 to December 16, 2019, which featured Giovanni observing the player battling the {{tc|Team GO Rocket Leader}}s and their {{OBP|Shadow Pokémon|GO}}. | |||
* In [[Pokémon: Let's Go, Pikachu! and Let's Go, Eevee!]], next to [[Giovanni]], there is a bowl containing four [[Oran Berry|Oran Berries]], despite them not being obtainable in these games. | |||
* Conceptual art for {{game|Red and Green|s}} suggests that the Viridian Gym was going to be the first Gym to be fought, and that a different character would have acted as its Gym Leader.<ref>https://twitter.com/SUPER_32X/status/611129653110026241</ref> | |||
==References== | |||
{{Reflist}} | |||
{{-}} | {{-}} | ||
Revision as of 08:23, 15 April 2024
| Viridian Gym トキワジム Tokiwa Gym | |
| |
| Location | Viridian City |
| Gym Leader | GiovanniRBYFRLGPE BlueGSCHGSSPE Jessie, James, and Meowth (temporary, anime only) Agatha (replacement, anime only) |
| Badge | Earth Badge |
| Dominant Type | Ground |
| Region | Kanto |
| |
| Battlefield | |
The Viridian Gym (Japanese: トキワジム Tokiwa Gym) is the official Gym of Viridian City. During the events of Generations I, III, and VII, it is based on Ground-type Pokémon and the Gym Leader is Giovanni, the boss of Team Rocket. After Team Rocket is disbanded at the end of Generations I, III, and VII, Blue takes over as the Leader during Generations II, IV, and VII; under his direction, the Gym no longer concentrates on any particular type. In Generation VII, Blue takes over the Gym immediately after Giovanni leaves it, rematching the player in his place during the post-game. Trainers who earn a win at the Viridian Gym receive the Earth Badge.
In the anime, Agatha of the Elite Four serves as a temporary Gym Leader here following Giovanni's abdication of the position to focus on leading Team Rocket.
In the games
Core series games
Viridian City
Pokémon Gym
Viridian City
Pokémon Gym
Leader: ...
The rest of the
text is illegible...
Viridian Gym appears in all games set in the Kanto region. In Generations I, III, and VII, when the player first reaches the Gym, it is locked due to the absence of the Gym Leader. With this acknowledged, the player journeys off to other Gyms to challenge them. Once the player has collected the other seven Gym Badges, the Viridian Gym reopens. In Pokémon: Let's Go, Pikachu! and Let's Go, Eevee!, the Gym guide declares that earning seven Badges is the prerequisite for entering the Gym, effectively meaning that the Viridian Gym, unlike most other Kanto Gyms in Generation VII, has no additional prerequisites required for entering.
In Generations II, IV, and VII, Blue takes over the Gym. In Generation II, the Gym can be challenged as soon as Blue is spoken to on Cinnabar Island. In Generation IV, however, Blue will stay on Cinnabar Island and will not return to his Gym until the player speaks to him after obtaining the other seven Kanto Gym Badges. In Generation VII, Blue can be challenged to a Gym Leader rematch at the Gym during the post-game in place of Giovanni.
Inside the Gym, the floor uses the same transporting tiles as are used in the Team Rocket Hideout. The player must use these tiles to navigate through the Gym to reach the Gym Leader. In Generation II, the Gym is completely remodeled and the tiles are gone; in Generation IV, the tiles are put back up, now covering almost the entire floor of the Gym.
Appearance
|
Items
| Item | Location | Games | |
|---|---|---|---|
| Revive | North of the spin tile north of the entrance | R B Y | |
| Revive | Near Ace Trainer Yuji northeast of the entrance | P E | |
| TM27 (Fissure) | Reward for defeating Giovanni | R B Y | |
| TM26 (Earthquake) | Reward for defeating Giovanni | FR LG | |
| Macho Brace | Where Giovanni stood (hidden) | FR LG | |
| TM92 (Trick Room) | Reward for defeating Blue | HG SS | |
| TM41 (Earthquake) | Reward for defeating Giovanni | P E | |
Trainers
Pokémon Red, Blue, and Yellow
| Trainer | Pokémon | |||||||||
|---|---|---|---|---|---|---|---|---|---|---|
|
| |||||||||
| ||||||||||
|
| |||||||||
|
| |||||||||
| ||||||||||
|
| |||||||||
|
| |||||||||
| ||||||||||
|
| |||||||||
| ||||||||||
|
| |||||||||
|
| |||||||||
| ||||||||||
| ||||||||||
Pokémon Red and Blue
Giovanni has one Guard Spec. per Pokémon, using it randomly 25% of the time.
|
||||||||||||||||||||||||||||||||||||||||||||||||||||||||||||||||||||||||||||||||||||||||||||||||||||||||||||||||||
| ||||||||||||||||||||||||||||||||||||||||||||||||||||||||||||||||||||||||||||||||||||||||||||||||||||||||||||||||||
Pokémon Yellow
Giovanni has one Guard Spec. per Pokémon, using it randomly 25% of the time.
|
||||||||||||||||||||||||||||||||||||||||||||||||||||||||||||||||||||||||||||||||||||||||||||||||||||||||||||||||
| ||||||||||||||||||||||||||||||||||||||||||||||||||||||||||||||||||||||||||||||||||||||||||||||||||||||||||||||||
Pokémon Gold, Silver, and Crystal
Blue has two Full Restores.
|
|||||||||||||||||||||||||||||||||||||||||||||||||||||||||||||||||||||||||||||||||||||||||||||||||||||||||||||||||||||||||||||||||||||||||||||||||||
| |||||||||||||||||||||||||||||||||||||||||||||||||||||||||||||||||||||||||||||||||||||||||||||||||||||||||||||||||||||||||||||||||||||||||||||||||||
Pokémon FireRed and LeafGreen
| Trainer | Pokémon | |||||||||||
|---|---|---|---|---|---|---|---|---|---|---|---|---|
|
| |||||||||||
| ||||||||||||
|
| |||||||||||
|
| |||||||||||
| ||||||||||||
| ||||||||||||
| ||||||||||||
| ||||||||||||
|
| |||||||||||
| ||||||||||||
| ||||||||||||
| ||||||||||||
| ||||||||||||
|
| |||||||||||
| ||||||||||||
|
| |||||||||||
|
| |||||||||||
| ||||||||||||
| ||||||||||||
| ||||||||||||
| ||||||||||||
|
| |||||||||||
| ||||||||||||
| ||||||||||||
| Trainers with a Vs. Seeker by their names, when alerted for a rematch using the item, may use higher-level Pokémon. | ||||||||||||
Giovanni has two Hyper Potions and a Full Heal.
|
||||||||||||||||||||||||||||||||||||||||||||||||||||||||||||||||||||||||||||||||||||||||||||||||||||||||||||||||||||||||||||||||||||||
| ||||||||||||||||||||||||||||||||||||||||||||||||||||||||||||||||||||||||||||||||||||||||||||||||||||||||||||||||||||||||||||||||||||||
Pokémon HeartGold and SoulSilver
| Trainer | Pokémon | |||||||||||
|---|---|---|---|---|---|---|---|---|---|---|---|---|
|
| |||||||||||
| ||||||||||||
|
| |||||||||||
| ||||||||||||
|
| |||||||||||
| ||||||||||||
|
| |||||||||||
| ||||||||||||
| Trainers with a telephone symbol by their names will give their Pokégear number to the player, and may call or be called for a rematch with higher-level Pokémon. | ||||||||||||
Pokémon: Let's Go, Pikachu! and Let's Go, Eevee!
| Trainer | Pokémon | |||||||||
|---|---|---|---|---|---|---|---|---|---|---|
|
| |||||||||
|
| |||||||||
| ||||||||||
|
| |||||||||
|
| |||||||||
| ||||||||||
|
| |||||||||
|
| |||||||||
|
||||||||||||||||||||||||||||||||||||||||||||||||||||||||||||||||||||||||||||||||||||||||||||||||||||||||||||||||||||||||||||||
| ||||||||||||||||||||||||||||||||||||||||||||||||||||||||||||||||||||||||||||||||||||||||||||||||||||||||||||||||||||||||||||||
Rematch
|
|||||||||||||||||||||||||||||||||||||||||||||||||||||||||||||||||||||||||||||||||||||||||||||||||||||||||||||||||||||||||||||||||||||||||||||||||||||||||||||||||||||||||||||||||||||||||
| |||||||||||||||||||||||||||||||||||||||||||||||||||||||||||||||||||||||||||||||||||||||||||||||||||||||||||||||||||||||||||||||||||||||||||||||||||||||||||||||||||||||||||||||||||||||||
Side series games
A field based on the Gym appears in Pokémon Stadium's Gym Leader Castle and Stadium 2's Kanto Gym Leader Castle.
Trainers
Pokémon Stadium
Round 1
| Trainer | Pokémon | |||||||||
|---|---|---|---|---|---|---|---|---|---|---|
|
| |||||||||
| ||||||||||
| ||||||||||
| ||||||||||
| ||||||||||
| ||||||||||
|
| |||||||||
| ||||||||||
| ||||||||||
| ||||||||||
| ||||||||||
| ||||||||||
|
| |||||||||
| ||||||||||
| ||||||||||
| ||||||||||
| ||||||||||
| ||||||||||
|
|||||||||||||||||||||||||||||||||||||||||||||||||||||||||||||||||||||||||||||||||||||||||||||||||||||||||||||||||||||||||||||||||||||
| |||||||||||||||||||||||||||||||||||||||||||||||||||||||||||||||||||||||||||||||||||||||||||||||||||||||||||||||||||||||||||||||||||||
Round 2
| Trainer | Pokémon | |||||||||
|---|---|---|---|---|---|---|---|---|---|---|
|
| |||||||||
| ||||||||||
| ||||||||||
| ||||||||||
| ||||||||||
| ||||||||||
|
| |||||||||
| ||||||||||
| ||||||||||
| ||||||||||
| ||||||||||
| ||||||||||
|
| |||||||||
| ||||||||||
| ||||||||||
| ||||||||||
| ||||||||||
| ||||||||||
|
|||||||||||||||||||||||||||||||||||||||||||||||||||||||||||||||||||||||||||||||||||||||||||||||||||||||||||||||||||||||||||||||||||||||
| |||||||||||||||||||||||||||||||||||||||||||||||||||||||||||||||||||||||||||||||||||||||||||||||||||||||||||||||||||||||||||||||||||||||
Pokémon Stadium 2
Round 1
|
|||||||||||||||||||||||||||||||||||||||||||||||||||||||||||||||||||||||||||||||||||||||||||||||||||||||||||||||||||||||||||||||||||||||||||||||||||
| |||||||||||||||||||||||||||||||||||||||||||||||||||||||||||||||||||||||||||||||||||||||||||||||||||||||||||||||||||||||||||||||||||||||||||||||||||
Round 2
|
|||||||||||||||||||||||||||||||||||||||||||||||||||||||||||||||||||||||||||||||||||||||||||||||||||||||||||||||||||||||||||||||||||||||||||||||||||||
| |||||||||||||||||||||||||||||||||||||||||||||||||||||||||||||||||||||||||||||||||||||||||||||||||||||||||||||||||||||||||||||||||||||||||||||||||||||
In the anime
Main series
The Viridian Gym was originally led by Giovanni, as it was in Generation I. The Gym featured ancient Roman architecture, stately pillars, and an old mural. A predominant brownish color scheme was used to represent the Gym's affiliation with the Ground type. Owing to this, there were also guards resembling ancient Roman soldiers posted outside.
The Viridian Gym debuted in The Battle of the Badge. Before Ash could challenge the Gym, however, Gary appeared, taunting him with his ten Badges and insisting on challenging the Viridian Gym for fun. Gary faced Giovanni, though his confidence quickly eroded after Giovanni brought out Mewtwo, who defeated each of Gary's Pokémon with ease, even when Giovanni allowed him to use more than one Pokémon at a time.
Ash challenged the Gym soon after. However, unbeknownst to him, Giovanni had unmentioned business to attend to, and thus he left the Gym in the care of Jessie, James, and Meowth, giving them several Pokémon to use against any possible challengers. At first, Ash had a hard time beating them, as the trio had rigged the Trainer platforms to shock anyone whose Pokémon took damage. Eventually, Ash overcame the borrowed Pokémon's power and defeated all of them, causing Team Rocket to completely ignore the Gym rules and send out their Arbok and Weezing. Despite this, even the two additional Pokémon were quickly taken down. When Togepi started playing with Meowth's remote control, it inadvertently caused the Trainer platforms to explode and send Team Rocket blasting off again. They dropped an Earth Badge in their wake, allowing Ash to get his eighth Badge. Ash, Misty, Brock, Gary, and Gary's cheerleaders then ran out of the Gym, which proceeded to collapse into ruins due to the explosion.
The Gym briefly reappeared in Mewtwo Strikes Back and its remake Mewtwo Strikes Back—Evolution, depicting several instances of Giovanni using Mewtwo to defeat his challengers, including Gary in the aforementioned battle.
The rebuilt Viridian Gym appeared when Ash returned to Kanto from Hoenn in The Scheme Team, where it was revealed that Agatha of the Elite Four was serving as the temporary Gym Leader until the official new Leader would arrive. Ash challenged her to an exhibition match, but lost. This was also the place where Ash first met Scott, who told him about the Battle Frontier. During its second appearance, the Gym sported a new, lighter color scheme.
Giovanni abdicating his position as Gym Leader is similar to the case in the Generation I games; however, in the anime, he is still in charge of Team Rocket, while he also disbands the team in the games.
Gallery
| Original design | Original battlefield | Battlefield with Trainer platforms raised | Mewtwo Strikes Back—Evolution |
|---|---|---|---|
|
|
|
|
Pokémon used in the Gym
Used by Giovanni
|
||
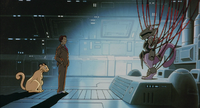
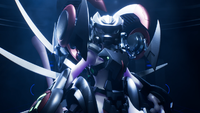
Giovanni held control of this Mewtwo created by his scientists for some time, until it learned that Giovanni had meant its purpose to be fighting for him, and escaped. While controlling Mewtwo, Giovanni used its overwhelming Psychic powers to capture new Pokémon for Team Rocket and in his Gym battles, where it defeated all of his challengers effortlessly. When Mewtwo discovered Giovanni's real intentions for it, it broke out of its bonds and escaped. | ||
| Debut | The Battle of the Badge | |
|---|---|---|
| Voice actors | ||
| Japanese | Masachika Ichimura | |
| English | Philip Bartlett (M01) Dan Green (M22) | |
|
||
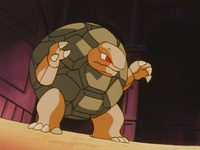
| Golem was the first Pokémon that Giovanni used in his Gym battle with Gary, sending it against Gary's Nidoking. The Megaton Pokémon was easily defeated. It was later seen in its cage while Giovanni went to see Mewtwo.
Golem's only known move is Tackle. | ||
| Debut | The Battle of the Badge | |
|---|---|---|
| Voice actors | ||
| Japanese | ||
| English | Eric Stuart | |
Used by Giovanni and the Team Rocket trio
|
||
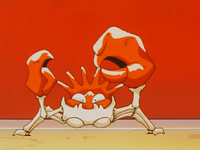
| Giovanni used his Kingler in his Gym battle with Gary, sending it to battle against Gary's Nidoking. Gary, however, quickly withdraws his Pokémon and calls out Arcanine. Despite having a type advantage, Kingler proved to be no match for the Legendary Pokémon, and was finally taken out by Arcanine's Fire Blast.
Kingler was also later loaned to Jessie for Ash's Gym battle. She used it to battle against Bulbasaur, but lost, although not before dealing heavy damage to Bulbasaur with its Bubble attack, and by consequence, Ash experienced its pain. Kingler was seen again in a flashback to Ash's Viridian Gym battle in Bad To The Bone. The known moves of the Kingler Jessie used are Crabhammer, Harden, and Bubble. | ||
| Debut | The Battle of the Badge | |
|---|---|---|
| Voice actors | ||
| Japanese | Rikako Aikawa | |
| English | Rikako Aikawa | |
|
||
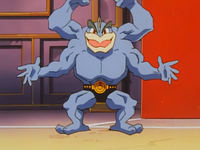
| Giovanni loaned his Machamp to Jessie for her Gym battle against Ash. It battled against Ash's Squirtle, but lost, although not before dealing heavy damage to Squirtle with its Karate Chop attack, and by consequence, Ash experienced its pain.
Machamp's only known move is Karate Chop. | ||
| Debut | The Battle of the Badge | |
|---|---|---|
| Voice actors | ||
| Japanese | ||
| English | Eric Stuart | |
|
||
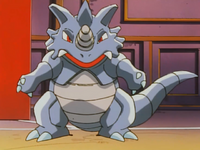
| Giovanni loaned his Rhydon to Jessie for Ash's Gym battle. It was defeated by Ash's Pidgeotto's Double-Edge.
Rhydon was seen again in a flashback to Ash's Viridian Gym battle in Bad To The Bone. None of Rhydon's moves are known. | ||
| Debut | The Battle of the Badge | |
|---|---|---|
| Voice actors | ||
| Japanese | Katsuyuki Konishi | |
| English | Katsuyuki Konishi | |
Used by Jessie and James
|
||
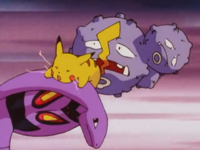
Arbok was used when Jessie and James were the temporary Gym Leaders. | ||
| Debut | Pokémon Emergency! | |
|---|---|---|
| Voice actors | ||
| Japanese | Kōichi Sakaguchi | |
| English | Kōichi Sakaguchi | |

|
||
Weezing was used when Jessie and James were the temporary Gym Leaders. | ||
| Debut | Pokémon Emergency! | |
|---|---|---|
| Voice actors | ||
| Japanese | Unshō Ishizuka | |
| English | Eric Stuart | |
Used by Agatha
|
||
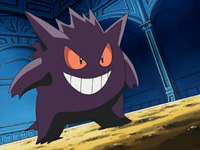
Gengar is Agatha's main Pokémon which she used in battle against Ash's Pikachu. | ||
| Debut | The Scheme Team | |
|---|---|---|
| Voice actors | ||
| Japanese | Katsuyuki Konishi | |
| English | Ed Paul | |
Pokémon Origins
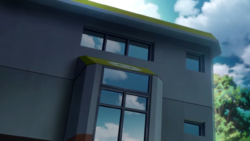
The Viridian Gym was featured in File 3: Giovanni. Once Red arrived in Viridian City in order to challenge the Gym, he encountered Blue, who was revealed to have defeated the newly returned Gym Leader just the day before.
Once Red entered the Gym, he right away noticed the different atmosphere it had compared to the other Gyms he had previously visited. The reason for this was revealed soon enough, as Red then found out that the Gym Leader was none other than the Team Rocket Boss, Giovanni. Red refused to believe that a man who treated Pokémon as tools for business, like Giovanni, could be the strongest Gym Leader of all. Giovanni, however, ignored this, simply stating that he didn't need his acceptance to make it true. As he asked whether Red wanted to battle him or not, Red replied that he was challenging him, but not as a Gym Leader, but as the enemy of all Pokémon. Seeing Red's arrogant attitude, Giovanni put away his usual Gym Leader team and took out two Ultra Balls, containing his strongest Pokémon. The first one was Rhyhorn, which, surprisingly, was able to defeat four of Red's Pokémon, despite two of them (Victreebel and Kabutops) having a tremendous type advantage over it.
Eventually, Red's Hitmonlee was able to tie with the Spikes Pokémon, leaving both Trainers with one Pokémon remaining. Knowing that Red was going to use his Charizard, Giovanni revealed his other Pokémon being Rhydon, and said that Red made a mistake by saving Charizard as his last Pokémon. Red, however, told that he had intended it to be so right from the start, wanting to give the whole match a meaning by winning it with his Charizard. At first, Giovanni intended to crush Red's pride along with his Charizard, but when he sent out his first partner Pokémon, Giovanni realized that the pose that he had taken and the way he threw his Poké Ball reminded him of his childhood, when he had also battled just for fun and excitement. After a climactic clash between Charizard and Rhydon, which ended with Charizard defeating the Drill Pokémon with Seismic Toss, Giovanni was ready to give the Earth Badge as a sign of his defeat, but Red refused to take a Badge from the Boss of Team Rocket. With his childhood passion for battling revitalized, Giovanni told his minions that Team Rocket was now disbanded, before turning back to Red and presenting the Earth Badge to him as the Viridian Gym Leader instead of as the Boss of Team Rocket.
Once Red left the Gym and headed for the Pokémon League, Giovanni decided that it was time for him to find a new path for himself and his Pokémon, indicating that, much like in the games, he was going to leave the Gym and train on his own.
Pokémon used in the Gym
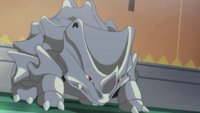
|
||
| Rhyhorn was the first Pokémon Giovanni used in his Gym battle against Red. It was able to defeat Red's Victreebel, Kabutops, Snorlax, and Jolteon, despite the former two having the type advantage. It finally drew with Red's Hitmonlee.
Rhyhorn's moves are Horn Attack, Take Down, Thunderbolt, and Horn Drill. | ||
| Debut | File 3: Giovanni | |
|---|---|---|
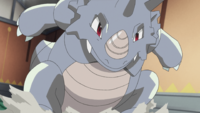
|
||
| Rhydon was the second Pokémon Giovanni used in his Gym battle against Red. It went up against Red's Charizard and lost after a tough fight, taken down by Charizard's Seismic Toss.
Rhydon's known moves are Mega Punch, Fury Attack, and Horn Drill. | ||
| Debut | File 3: Giovanni | |
|---|---|---|
Pokémon Generations
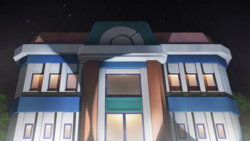
The Viridian Gym made an appearance in The Chase. While searching for Giovanni, the International Police managed to track his location down to the Viridian Gym. A squadron of International Police SWAT officers led by Looker subsequently raided the Gym in order to catch Giovanni, but came to find out that the Gym was empty, although signs of a recent battle were visible on the battlefield.
During a follow-up investigation, the International Police was surprised to discover that Giovanni was the Viridian Gym Leader, and that he had vanished after losing to two Trainers.
Pokémon Evolutions
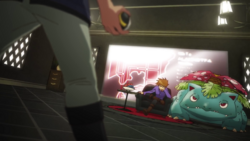
The Viridian Gym made a brief appearance in The Discovery, where Blue was shown as its Leader, preparing to take on a challenger.
In the manga
Pokémon Adventures
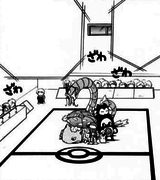
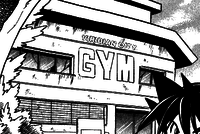
Red, Green & Blue arc
The Viridian Gym first appeared in Bulbasaur, Come Home!, where Red and Professor Oak entered it while following a Bulbasaur escaped from Professor Oak's Laboratory. At the Gym, they were attacked by a wild Machoke, but Red managed to defeat it with Bulbasaur's Solar Beam. Afterwards, Professor Oak let Red keep Bulbasaur.
The Viridian Gym made a brief appearance in Make Way For Magmar!, where citizens of Viridian City were asking questions about the missing Gym Leader.
Red revisited the Gym from Drat That Dratini! to Long Live the Nidoqueen?! after hearing rumors about the missing "invincible" Gym Leader. At the Gym, he met Giovanni, learning that not only was he the Viridian City Gym Leader, but also the leader of Team Rocket. Giovanni then challenged Red to a battle, making a bet with him that should Red lose, he'd come to serve him as his right-hand man. During the battle, Giovanni's Nidoking's Earthquake caused the Gym to collapse into ruins. Eventually Red emerged victorious with his Pika defeating Giovanni's Nidoqueen and knocking the Gym Leader himself unconscious as well.
Gold, Silver & Crystal arc
In Forretress of Solitude, Red participated in Pokémon Association's Gym Leader test for the new Viridian Gym Leader at the reconstructed Viridian Gym. Although he passed the test with flying colors, Red had to turn down the offer, as he had not yet completely recovered from the frostbites he had received after being frozen by Lorelei in the Yellow arc. As such, Blue was appointed as the new Gym Leader instead, after he impressed the Pokémon Association by stopping and capturing a group of rampaging wild Pokémon.
FireRed & LeafGreen arc
In Secrets from Sneasel, Yellow went to the Viridian Gym, looking for Blue, but only found his hologram, set there in case for a challenger coming while he was not present. An automated system then brought out Blue's Pokémon, which, even without their Trainer giving them commands, easily defeated Yellow's Chuchu in a battle. Soon Silver arrived at the site as well, looking for his roots.
Pokémon used in the Gym
Used by Giovanni
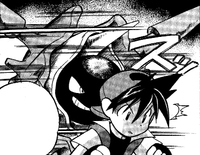
|
||
| Giovanni's Cloyster was called out to take care of two Magmar that were causing trouble after Red did not finish them off. He froze them solid before brutally shattering them to take out. Later, he was seen again during the Gym battle against Red and used the same freezing strategy on Poli to defeat him when Red lost his cool and attacked the Rocket Boss vigorously.
None of Cloyster's moves are known and his Ability is Shell Armor. | ||
| Debut | Make Way for Magmar! | |
|---|---|---|
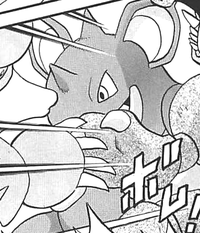
|
||
| Nidoqueen first appeared in the Viridian Gym battle against Red. She was able to heavily damage Red's Snor by countering his attack and hurling him straight for the wall with little effort. However, at the climax of the battle, she was KO'd by Pika's Thunderbolt* and lost the battle.
Nidoqueen's known moves are Counter, Poison Sting, and Scratch, and her Ability is Poison Point. | ||
| Debut | Golly, Golem! | |
|---|---|---|
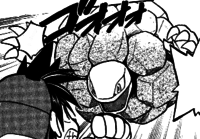
|
||
| Giovanni switched out Nidoqueen for his Golem. Golem was a very fast Pokémon as he was able to easily outmatch Red. He was crumbled by Snor's Headbutt before knocking himself out with Explosion.
Golem's known moves are Tackle, Rock Throw, and Explosion, and his Ability is Sturdy. | ||
| Debut | Golly, Golem! | |
|---|---|---|
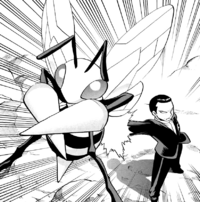
|
||
Beedrill is one of Giovanni's main Pokémon. He caught him when he was a Weedle at Viridian Forest while he was a young Pokémon Trainer. Since then, Giovanni has used Beedrill as a reliable partner in many situations as a boss of Team Rocket. He notes that while he prefers to use Pokémon of his specialty type, his origins have given him a profound significance in his heart. Beedrill debuted during Giovanni's battle with Red, where he ended up being knocked out by Aero's Hyper Beam. He later appeared when Giovanni came to help Yellow in the battle against Lance at the Cerise Island, where Giovanni used him to burst the giant bubble which Lance had been using to protect himself and his Pokémon. | ||
| Debut | Golly, Golem! | |
|---|---|---|
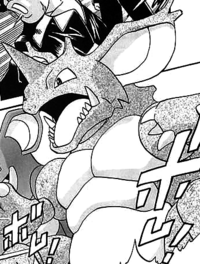
|
||
| Nidoking was one of the Pokémon used in the Viridian Gym battle but did not officially participate. Later, he was used to destroy the Gym with an Earthquake. Many years afterwards, Giovanni observed a site where Deoxys rampaged and left a gang of bikers in ruins. When one of them begged Giovanni to save his life, he promptly swatted him away, and then used Nidoking's Rock Tomb to incapacitate him and his Magmar.
Nidoking's known moves are Earthquake, Fire Punch, and Rock Tomb, and his Ability is Poison Point. | ||
| Debut | Long Live the Nidoqueen?! | |
|---|---|---|
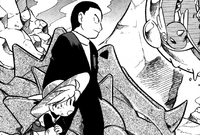
|
||
| Rhyhorn was one of the Pokémon used in the Gym battle against Red. He was very powerful as he was able to knock out Red's Aero in a single hit. During the Yellow arc, Giovanni used him to battle Lance in Cerise Island but got knocked out by Dragonair's Hyper Beam.
Rhyhorn's known moves are Tail Whip, Horn Attack, and Stomp, and his Ability is Rock Head. | ||
| Debut | Long Live the Nidoqueen?! | |
|---|---|---|
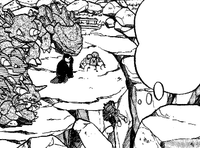
|
||
| Rhydon was seen in the Gym battle with Giovanni's other Pokémon. However, as he was only seen trying to trap Red into a fissure, little is known about him.
Rhydon's only known move is Fissure, and his Ability is Lightning Rod. | ||
| Debut | Long Live the Nidoqueen?! | |
|---|---|---|

|
||
| Giovanni's Dugtrio was only used to stop Red's Saur and Gyara from coming out of their Poké Balls by destroying their opening mechanisms.
Dugtrio's only known move is Dig and his Ability is Sand Veil. | ||
| Debut | Long Live the Nidoqueen?! | |
|---|---|---|
Used by Blue
|
||
| Pidgeot is one of Blue's original main team members. He was used to send letters to Professor Oak when they cut off communication after Blue's battle with Agatha. He was later replaced by Rhydon. He has a Hardy nature. As of The Last Battle XIV, Pidgeot is at level 76.
Pidgeot's known moves are Wing Attack and Feather Dance, and his Ability is Keen Eye. | ||
| Debut | A Tale of Ninetales | |
|---|---|---|
|
||
| Blue and Red caught this Ninetales together, but Blue succeeded in claiming him. He has also used Ninetales later against Red in the Pokémon League and against Agatha's Gengar at Cerise Island. He has a Modest nature. As of The Last Battle XIV, Ninetales is at level 68.
Ninetales's known moves are Flamethrower, Fire Blast, and Fire Spin, and his Ability is Flash Fire. | ||
| Debut | A Tale of Ninetales | |
|---|---|---|
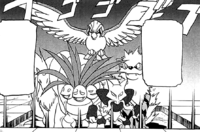
|
||
| Blue caught these Pokémon when they were rampaging due to the radio in Rock, Paper...Scizor. As of The Last Battle XIV, Exeggutor is at level 67 and has a Relaxed nature, Arcanine is at level 71 and his Characteristic is "a little quick tempered", and Alakazam is at level 64 and has a Lax nature.
Alakazam's only known move is Role Play and his Ability is Inner Focus. | ||
| Debut | Rock, Paper...Scizor | |
|---|---|---|
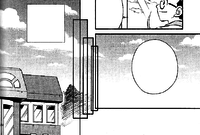

Pocket Monsters HGSS Jō's Big Adventure
The Viridian Gym appeared in The True Road to Becoming the Strongest!!, where Jō was seen defeating Blue with his Feraligatr and earning his last Kanto Badge. Afterwards, Blue told Jō about a strong Trainer who had traveled through Kanto three years earlier.
Pokémon Pocket Monsters
The Viridian Gym appeared in Get The Last Badge!!, where Red battled Giovanni for his final Kanto Gym Badge, eventually emerging victorious.
Pokémon Zensho

The Viridian Gym appeared in PZ09, where Satoshi entered the Gym and was surprised to find out that Giovanni was the Gym Leader. First Satoshi used his Lapras against Giovanni's Rhydon, but its Hydro Pump wasn't enough, so Satoshi switched out for his Charizard, who was able to beat Rhydon, ending the battle. Satoshi then gave Giovanni the object he had received from Mr. Fuji before coming to Viridian City, which turned out to be the horn of Giovanni's dead Nidoking. Afterwards, Giovanni gave Satoshi an Earth Badge as a sign of his victory.
In the TCG
The following is a list of cards mentioning or featuring Viridian City Gym in the Pokémon Trading Card Game.
| Pokémon in Viridian Gym Cards listed with a blue background are only legal to use in the current Expanded format. Cards listed with a green background are legal to use in both the current Standard and Expanded formats. | |||||||
|---|---|---|---|---|---|---|---|
| Card | Type | English Expansion |
Rarity | # | Japanese Expansion |
Rarity | # |
| Diglett | Unbroken Bonds | 85/214 | Double Blaze | 043/095 | |||
| Rhydon | Unbroken Bonds | 94/214 | Double Blaze | 049/095 | |||
| Card | Type | English Expansion |
Rarity | # | Japanese Expansion |
Rarity | # |
| Viridian City Gym | T [St] | Gym Challenge | 123/132 | Challenge from the Darkness | |||
| Blue's Tactics | Su | Unified Minds | 188/236 | Miracle Twin | 087/094 | ||
Trivia

- Although the Gym guide in Generations I and III seems to be unaware of the Gym Leader's identity until the player defeats Giovanni, in Generation I, the statues near the Gym's entrance still list Giovanni as the Leader of the Gym. This oversight was removed in Pokémon FireRed and LeafGreen, where the Gym Leader's name is only visible on the statues once Giovanni has been defeated.
- The Viridian Gym is the only official Gym with non-hidden items that can be picked up from the floor.
- Under Blue's leadership, it is also the only official Gym to not focus on any particular type.
- In the anime, Agatha's temporary position as Leader of the Viridian Gym, replacing Giovanni, may be a reference to the games, in which Giovanni quit Team Rocket and his status as Gym Leader after being defeated by Red.
- In Generation II, the design of the walls is possibly a reference to Nintendo's discontinued N&B Blocks, which are also featured in Super Mario Land 2: 6 Golden Coins.
- In Generation II, it is possible to challenge Blue before beating any other Kanto Gym Leader by talking to him on Cinnabar Island. In Pokémon HeartGold and SoulSilver, Blue can only be challenged when the player has seven Badges from Kanto.
- The two leaders of the Viridian Gym are coincidentally also the two Trainers that the player must defeat multiple times in Red and Blue.
- In HeartGold and SoulSilver, the exterior coloring of each Gym is based on the colors most associated with the type that the Gym specializes in. Viridian Gym, however, is both green and blue, possibly referring to its Gym Leader's name.
- In Pokémon Ultra Sun and Ultra Moon, the player can find a bottle message at Ula'ula Beach, which they can deliver to Rising Star Kainoa at Malie City's Outer Cape. He will tell the player that the message is from a friend of his named Arabella, who works as a Gym Trainer in Kanto. This is a reference to Ace Trainer Arabella, who can be battled at the Viridian Gym in Pokémon HeartGold and SoulSilver.
- The Viridian Gym was the first Gym to change its Leader mid-game.
- In the Round 2 battle of Pokémon Stadium 2, each of Blue's Pokémon is the signature Pokémon of a Trainer battled at the end of a stage at the Johto Gym Leader Castle: Scyther is the signature Pokémon of Bugsy, Miltank is the signature Pokémon of Whitney, Gengar is the signature Pokémon of Morty, Houndoom is the signature Pokémon of Archer, Piloswine is the signature Pokémon of Pryce, and Kingdra is the signature Pokémon of Clair.
- The Viridian Gym, as it appears in the anime, made a cameo in a Pokémon GO loading screen from October 2 to December 16, 2019, which featured Giovanni observing the player battling the Team GO Rocket Leaders and their Shadow Pokémon.
- In Pokémon: Let's Go, Pikachu! and Let's Go, Eevee!, next to Giovanni, there is a bowl containing four Oran Berries, despite them not being obtainable in these games.
- Conceptual art for Pokémon Red and Green suggests that the Viridian Gym was going to be the first Gym to be fought, and that a different character would have acted as its Gym Leader.[1]
References
| Gym Leaders of the Kanto region | |||||||||||||||||||||||||
|---|---|---|---|---|---|---|---|---|---|---|---|---|---|---|---|---|---|---|---|---|---|---|---|---|---|
|
|
|
| ||||||||||||||||||||||
|
|
|
| ||||||||||||||||||||||

|
This article is part of Project Locations, a Bulbapedia project that aims to write comprehensive articles on every location in the Pokémon world. |

