|
|
| (16 intermediate revisions by 12 users not shown) |
| Line 17: |
Line 17: |
| Victory Road has three floors. To reach the other end of the tunnel, a series of puzzles involving using {{m|Strength}} to move boulders need to be solved. | | Victory Road has three floors. To reach the other end of the tunnel, a series of puzzles involving using {{m|Strength}} to move boulders need to be solved. |
|
| |
|
| In [[Generation I]], Victory Road is where the [[legendary Pokémon]] {{p|Moltres}} can be found. In {{game|FireRed and LeafGreen|s}}, it is instead found at [[Knot Island]]'s [[Mt. Ember]] and is subsequently found in [[Mt. Silver]] in {{game|HeartGold and SoulSilver|s}}. | | In [[Generation I]], Victory Road is where the [[Legendary Pokémon]] {{p|Moltres}} can be found. In {{game|FireRed and LeafGreen|s}}, it is instead found at [[One Island]]'s [[Mt. Ember]] and is subsequently found in [[Mt. Silver]] in {{game|HeartGold and SoulSilver|s}}. |
|
| |
|
| A [[Move Tutor]] at the very end of Victory Road in Pokémon FireRed and LeafGreen offers to teach a Pokémon the [[move]] {{m|Double-Edge}}. | | A [[Move Tutor]] at the very end of Victory Road in Pokémon FireRed and LeafGreen offers to teach a Pokémon the [[move]] {{m|Double-Edge}}. |
| Line 31: |
Line 31: |
| {{Itlisth|cave}} | | {{Itlisth|cave}} |
| {{Itemlist|TM Flying|North of the movable boulder in the northeast corner|R=yes|B=yes|Y=yes|display={{TM|43|Sky Attack}}}} | | {{Itemlist|TM Flying|North of the movable boulder in the northeast corner|R=yes|B=yes|Y=yes|display={{TM|43|Sky Attack}}}} |
| {{Itemlist|Rare Candy|West of the movable boulder in the northeast corner|R=yes|B=yes|Y=yes|display={{DL|Vitamin|Rare Candy}}}} | | {{Itemlist|Rare Candy|West of the movable boulder in the northeast corner|R=yes|B=yes|Y=yes}} |
| {{Itemlist|Full Heal| | | {{Itemlist|Full Heal| |
| * On a rock west of the entrance ''(hidden)'' | | * On a rock west of the entrance ''(hidden)'' |
| * In the northeast corner|G=yes|S=yes|C=yes|display={{DL|Status ailment healing item|Full Heal}} ×2}} | | * In the northeast corner|G=yes|S=yes|C=yes|display={{DL|Status condition healing item|Full Heal}} ×2}} |
| {{Itemlist|Max Revive|In the northeast corner|G=yes|S=yes|C=yes|display={{DL|Revive|Max Revive}}}} | | {{Itemlist|Max Revive|In the northeast corner|G=yes|S=yes|C=yes|display={{DL|Revive|Max Revive}}}} |
| {{Itemlist|Rare Candy|Northern wall, west of TM02 (rock puzzle)|FR=yes|LG=yes|display={{DL|Vitamin|Rare Candy}}}} | | {{Itemlist|Rare Candy|Northern wall, west of TM02 (rock puzzle)|FR=yes|LG=yes}} |
| {{Itemlist|TM Dragon|Northern wall, north of Rare Candy (rock puzzle)|FR=yes|LG=yes|display={{TM|02|Dragon Claw}}}} | | {{Itemlist|TM Dragon|Northern wall, north of Rare Candy (rock puzzle)|FR=yes|LG=yes|display={{TM|02|Dragon Claw}}}} |
| {{Itemlist|Ultra Ball|In a rock in the center of the room ''(hidden)''|FR=yes|LG=yes|display={{ball|Ultra}}}} | | {{Itemlist|Ultra Ball|In a rock in the center of the room ''(hidden)''|FR=yes|LG=yes|display={{ball|Ultra}}}} |
| {{Itemlist|Full Restore|Northeast corner, in a rock near TM02 ''(hidden)''|FR=yes|LG=yes|display={{DL|Potion|Full Restore}}}} | | {{Itemlist|Full Restore|Northeast corner, in a rock near TM02 ''(hidden)''|FR=yes|LG=yes|display={{DL|Potion|Full Restore}}}} |
| {{Itemlist|Potion|North of the ledge north of the entrance|HG=yes|SS=yes|display={{DL|Potion|Potion}}}} | | {{Itemlist|Potion|North of the ledge north of the entrance|HG=yes|SS=yes|display={{DL|Potion|Potion}}}} |
| {{Itemlist|Full Heal|On the L-shaped raised section west of the Potion ''(hidden)''|HG=yes|SS=yes|display={{DL|Status ailment healing item|Full Heal}}}} | | {{Itemlist|Full Heal|On the L-shaped raised section west of the Potion ''(hidden)''|HG=yes|SS=yes|display={{DL|Status condition healing item|Full Heal}}}} |
| {{Itemlist|Full Heal|Underneath the bridge|HG=yes|SS=yes|display={{DL|Status ailment healing item|Full Heal}}}} | | {{Itemlist|Full Heal|Underneath the bridge|HG=yes|SS=yes|display={{DL|Status condition healing item|Full Heal}}}} |
| {{Itemlist|Max Potion|West of the L-shaped raised section ''(hidden)''|HG=yes|SS=yes|display={{DL|Potion|Max Potion}}}} | | {{Itemlist|Max Potion|West of the L-shaped raised section ''(hidden)''|HG=yes|SS=yes|display={{DL|Potion|Max Potion}}}} |
| {{Itemlist|Max Revive|Amid the jumble of rocks at the northern end|HG=yes|SS=yes|display={{DL|Revive|Max Revive}}}} | | {{Itemlist|Max Revive|Amid the jumble of rocks at the northern end|HG=yes|SS=yes|display={{DL|Revive|Max Revive}}}} |
| Line 50: |
Line 50: |
| {{Itlisth|cave}} | | {{Itlisth|cave}} |
| {{Itemlist|TM Normal|South of the rock platform|R=yes|B=yes|Y=yes|display={{TM|05|Mega Kick}}}} | | {{Itemlist|TM Normal|South of the rock platform|R=yes|B=yes|Y=yes|display={{TM|05|Mega Kick}}}} |
| {{Itemlist|Full Heal|Northeast area, next to the Tamer|R=yes|B=yes|Y=yes|display={{DL|Status ailment healing item|Full Heal}}}} | | {{Itemlist|Full Heal|Northeast area, next to the Tamer|R=yes|B=yes|Y=yes|display={{DL|Status condition healing item|Full Heal}}}} |
| {{Itemlist|TM Fighting|Northeast corner, near the Juggler|R=yes|B=yes|Y=yes|display={{TM|17|Submission}}}} | | {{Itemlist|TM Fighting|Northeast corner, near the Juggler|R=yes|B=yes|Y=yes|display={{TM|17|Submission}}}} |
| {{Itemlist|Ultra Ball|Northwest area, on the lone rock ''(hidden)''|R=yes|B=yes|Y=yes|display={{ball|Ultra}}}} | | {{Itemlist|Ultra Ball|Northwest area, on the lone rock ''(hidden)''|R=yes|B=yes|Y=yes|display={{ball|Ultra}}}} |
| Line 58: |
Line 58: |
| {{Itemlist|TM Ground|On the northwest ledge|G=yes|S=yes|C=yes|display={{TM|26|Earthquake}}}} | | {{Itemlist|TM Ground|On the northwest ledge|G=yes|S=yes|C=yes|display={{TM|26|Earthquake}}}} |
| {{Itemlist|Max Potion|On the rock next to TM26 ''(hidden)''|G=yes|S=yes|C=yes|display={{DL|Potion|Max Potion}}}} | | {{Itemlist|Max Potion|On the rock next to TM26 ''(hidden)''|G=yes|S=yes|C=yes|display={{DL|Potion|Max Potion}}}} |
| {{Itemlist|X Special|On the south ledge|G=yes|S=yes|display={{DL|Battle item|X Special}}}} | | {{Itemlist|X Special|On the south ledge|G=yes|S=yes|display=[[X Sp. Atk|X Special]]|sprite=Bag X Sp. Atk Sprite}} |
| {{Itemlist|HP Up|On the south ledge|C=yes|display={{DL|Vitamin|HP Up}}}} | | {{Itemlist|HP Up|On the south ledge|C=yes|display={{DL|Vitamin|HP Up}}}} |
| {{Itemlist|Guard Spec.|In the crater in the northeast area|FR=yes|LG=yes|display={{DL|Battle item|Guard Spec.}}}} | | {{Itemlist|Guard Spec.|In the crater in the northwest segment, accessible from 3F|FR=yes|LG=yes|display={{DL|Battle item|Guard Spec.}}}} |
| {{Itemlist|Full Heal|In the sand near Tamer Vincent|FR=yes|LG=yes|display={{DL|Status ailment healing item|Full Heal}}}} | | {{Itemlist|Full Heal|In the sand near Tamer Vincent|FR=yes|LG=yes|display={{DL|Status condition healing item|Full Heal}}}} |
| {{Itemlist|TM Ground|In a corner near the eastmost switch|FR=yes|LG=yes|display={{TM|37|Sandstorm}}}} | | {{Itemlist|TM Ground|In a corner near the eastmost switch|FR=yes|LG=yes|display={{TM|37|Sandstorm}}}} |
| {{Itemlist|TM Ice|In the northeast area, near Juggler Gregory|FR=yes|LG=yes|display={{TM|07|Hail}}}} | | {{Itemlist|TM Ice|In the northeast area, near Juggler Gregory|FR=yes|LG=yes|display={{TM|07|Hail}}}} |
| Line 81: |
Line 81: |
| {{Itemlist|Ultra Ball|West of second ladder|HG=yes|SS=yes|display={{ball|Ultra}}}} | | {{Itemlist|Ultra Ball|West of second ladder|HG=yes|SS=yes|display={{ball|Ultra}}}} |
| {{Itemlist|Zinc|Behind a smashable rock west of the Ultra Ball ''(hidden)''|HG=yes|SS=yes|display={{DL|Vitamin|Zinc}}}} | | {{Itemlist|Zinc|Behind a smashable rock west of the Ultra Ball ''(hidden)''|HG=yes|SS=yes|display={{DL|Vitamin|Zinc}}}} |
| {{Itemlist|Rare Candy|North-east of the last hole|HG=yes|SS=yes|display={{DL|Vitamin|Rare Candy}}}} | | {{Itemlist|Rare Candy|North-east of the last hole|HG=yes|SS=yes}} |
| {{Itemlist|TM Dark|Behind three {{m|Rock Smash|smashable rocks}} south of the exit (requires {{m|Rock Smash}})|HG=yes|SS=yes|display={{TM|79|Dark Pulse}}}} | | {{Itemlist|TM Dark|Behind three {{m|Rock Smash|smashable rocks}} south of the exit (requires {{m|Rock Smash}})|HG=yes|SS=yes|display={{TM|79|Dark Pulse}}}} |
| {{Itlistfoot|cave}} | | {{Itlistfoot|cave}} |
| Line 93: |
Line 93: |
| {{Itemlist|Heart Scale|Randomly found by {{m|Rock Smash|smashing rocks}}|HG=yes|SS=yes|display={{DL|Exchangeable item|Heart Scale}}}} | | {{Itemlist|Heart Scale|Randomly found by {{m|Rock Smash|smashing rocks}}|HG=yes|SS=yes|display={{DL|Exchangeable item|Heart Scale}}}} |
| {{Itemlist|Revive|Randomly found by {{m|Rock Smash|smashing rocks}}|HG=yes|SS=yes|display={{DL|Revive|Revive}}}} | | {{Itemlist|Revive|Randomly found by {{m|Rock Smash|smashing rocks}}|HG=yes|SS=yes|display={{DL|Revive|Revive}}}} |
| {{Itemlist|Max Ether|Randomly found by {{m|Rock Smash|smashing rocks}}|HG=yes|SS=yes|display={{DL|Ether|Max Ether}}}} | | {{Itemlist|Max Ether|Randomly found by {{m|Rock Smash|smashing rocks}}|HG=yes|SS=yes}} |
| {{Itemlist|Star Piece|Randomly found by {{m|Rock Smash|smashing rocks}}|HG=yes|SS=yes|display={{DL|Valuable item|Star Piece}}}} | | {{Itemlist|Star Piece|Randomly found by {{m|Rock Smash|smashing rocks}}|HG=yes|SS=yes|display={{DL|Valuable item|Star Piece}}}} |
| {{Itlistfoot|cave}} | | {{Itlistfoot|cave}} |
| Line 108: |
Line 108: |
| {{catch/entry1|074|Geodude|yes|yes|no|Cave|26|15%|type1=Rock|type2=Ground}} | | {{catch/entry1|074|Geodude|yes|yes|no|Cave|26|15%|type1=Rock|type2=Ground}} |
| {{catch/entry1|074|Geodude|no|no|yes|Cave|26, 31, 36, 41|65%|type1=Rock|type2=Ground}} | | {{catch/entry1|074|Geodude|no|no|yes|Cave|26, 31, 36, 41|65%|type1=Rock|type2=Ground}} |
| {{catch/entry1|075|Graveler|yes|yes|no|Cave|42|5%|type1=Rock|type2=Ground}} | | {{catch/entry1|075|Graveler|yes|yes|no|Cave|41|5%|type1=Rock|type2=Ground}} |
| {{catch/entry1|075|Graveler|no|no|yes|Cave|41, 47|5%|type1=Rock|type2=Ground}} | | {{catch/entry1|075|Graveler|no|no|yes|Cave|41, 47|5%|type1=Rock|type2=Ground}} |
| {{catch/entry1|095|Onix|yes|yes|no|Cave|36, 39, 42|30%|type1=Rock|type2=Ground}} | | {{catch/entry1|095|Onix|yes|yes|no|Cave|36, 39, 42|30%|type1=Rock|type2=Ground}} |
| Line 153: |
Line 153: |
|
| |
|
| ====Generation II==== | | ====Generation II==== |
| ''In the Japanese games, {{p|Ursaring}} appears only in Silver, while {{p|Donphan}} appears only in Gold.'' | | ''In the Japanese and Korean games, {{p|Ursaring}} appears only in Silver, while {{p|Donphan}} appears only in Gold.'' |
| {{catch/header|cave|yes}} | | {{catch/header|cave|yes}} |
| {{catch/entry2|042|Golbat|yes|yes|no|Cave|32|all=30%|type1=Poison|type2=Flying}} | | {{catch/entry2|042|Golbat|yes|yes|no|Cave|32|all=30%|type1=Poison|type2=Flying}} |
| Line 308: |
Line 308: |
| |move1=Recover|move1type=Normal | | |move1=Recover|move1type=Normal |
| |move2=Future Sight|move2type=Psychic | | |move2=Future Sight|move2type=Psychic |
| |move3=Disable|move3type=Psychic | | |move3=Disable|move3type=Normal |
| |move4=Psybeam|move4type=Psychic}} | | |move4=Psybeam|move4type=Psychic}} |
| |{{Pokémon/2 | | |{{Pokémon/2 |
| Line 387: |
Line 387: |
| |move1=Recover|move1type=Normal | | |move1=Recover|move1type=Normal |
| |move2=Future Sight|move2type=Psychic | | |move2=Future Sight|move2type=Psychic |
| |move3=Disable|move3type=Psychic | | |move3=Disable|move3type=Normal |
| |move4=Psybeam|move4type=Psychic}} | | |move4=Psybeam|move4type=Psychic}} |
| |{{Pokémon/2 | | |{{Pokémon/2 |
| Line 466: |
Line 466: |
| |move1=Recover|move1type=Normal | | |move1=Recover|move1type=Normal |
| |move2=Future Sight|move2type=Psychic | | |move2=Future Sight|move2type=Psychic |
| |move3=Disable|move3type=Psychic | | |move3=Disable|move3type=Normal |
| |move4=Psybeam|move4type=Psychic}} | | |move4=Psybeam|move4type=Psychic}} |
| |{{Pokémon/2 | | |{{Pokémon/2 |
| Line 518: |
Line 518: |
| |class=Rival | | |class=Rival |
| |classlink=Rival | | |classlink=Rival |
| |name={{color2|000000|Silver (game)|Silver}} | | |name={{color2|000|Silver (game)|Silver}} |
| |game=HGSS | | |game=HGSS |
| |location=Victory Road (Kanto) | | |location=Victory Road (Kanto) |
| Line 562: |
Line 562: |
| {{Party/Footer}} | | {{Party/Footer}} |
|
| |
|
| {{MSP|155|Cyndaquil}} If the {{player}} chose {{p|Cyndaquil}}: | | {{MSP|155|Cyndaquil}} If the {{player}} chose {{p|Cyndaquil}}: |
| {{Party/Single | | {{Party/Single |
| |color={{silver color}} | | |color={{silver color}} |
| Line 571: |
Line 571: |
| |class=Rival | | |class=Rival |
| |classlink=Rival | | |classlink=Rival |
| |name={{color2|000000|Silver (game)|Silver}} | | |name={{color2|000|Silver (game)|Silver}} |
| |game=HGSS | | |game=HGSS |
| |location=Victory Road (Kanto) | | |location=Victory Road (Kanto) |
| Line 624: |
Line 624: |
| |class=Rival | | |class=Rival |
| |classlink=Rival | | |classlink=Rival |
| |name={{color2|000000|Silver (game)|Silver}} | | |name={{color2|000|Silver (game)|Silver}} |
| |game=HGSS | | |game=HGSS |
| |location=Victory Road (Kanto) | | |location=Victory Road (Kanto) |
| Line 674: |
Line 674: |
| ! 1F | | ! 1F |
| ! 2F | | ! 2F |
| ! style="{{roundytr|5px}};" | 3F | | ! style="{{roundytr|5px}}" | 3F |
| |- style="background:#000" | | |- style="background:#000" |
| ! style="background:#{{red color}}" | {{color2|000|Pokémon Red and Blue Versions|Red}} | | ! style="background:#{{red color}}" | {{color2|000|Pokémon Red and Blue Versions|Red}} |
| Line 708: |
Line 708: |
| ! style="background:#{{soulsilver color}}" | {{color2|000|Pokémon HeartGold and SoulSilver Versions|SoulSilver}} | | ! style="background:#{{soulsilver color}}" | {{color2|000|Pokémon HeartGold and SoulSilver Versions|SoulSilver}} |
| |- | | |- |
| | colspan="4" style="background:#{{locationcolor/light|cave}}; {{roundybottom|5px}}" | | | | colspan="4" style="background:#{{locationcolor/light|cave}}; {{roundybottom|5px}}" | |
| |} | | |} |
|
| |
|
| Line 720: |
Line 720: |
|
| |
|
| ==In the anime== | | ==In the anime== |
| ===In Pokémon Origins===
| |
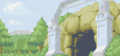
| [[File:Victory Road PO.png|230px|thumb|Victory Road in Pokémon Origins]] | | [[File:Victory Road PO.png|230px|thumb|Victory Road in Pokémon Origins]] |
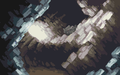
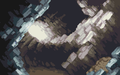
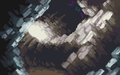
| [[File:Red Charizard Moltres Flamethrower PO.png|230px|thumb|left|Moltres's nest in Pokémon Origins]] | | [[File:Red Charizard Moltres Flamethrower PO.png|230px|thumb|left|Moltres's nest in Pokémon Origins]] |
| Victory Road appeared briefly in the [[Pokémon Origins]] episode ''[[PO04|File 4 - Charizard]]'' as {{OBP|Red|Origins}} was shown exiting it on his way to the [[Indigo Plateau]]. Later in the episode, Red was shown battling {{p|Moltres}} at the Victory Road with his {{TP|Red|Charizard}}, catching the legendary bird soon after off-screen. | | ===In Pokémon Origins=== |
| | Victory Road appeared briefly in the [[Pokémon Origins]] episode ''[[PO04|File 4: Charizard]]'' as {{OBP|Red|Origins}} was shown exiting it on his way to the [[Indigo Plateau]]. Later in the episode, Red was shown battling {{p|Moltres}} at the Victory Road with his {{TP|Red|Charizard}}, catching the Legendary bird soon after off-screen. |
| {{-}} | | {{-}} |
|
| |
|
| ==Trivia== | | ==Trivia== |
| * In [[Generation II|Generations II]] and {{gen|IV}}, Kanto Victory Road has the least amount of Trainers of all Victory Roads, the only Trainer battle being against {{ga|Silver}}. | | * In [[Generation II|Generations II]] and {{gen|IV}}, Kanto Victory Road has the least amount of Trainers of all Victory Roads, the only Trainer battle being against {{ga|Silver}}. |
| | * In [[Generation I]], if a player falls through the hole from 3F to 2F while riding their bike, they will be forced off the bike in the transition, but the bike music will keep playing. |
|
| |
|
| ==In other languages== | | ==In other languages== |
| {{langtable|color={{locationcolor/med|cave}}|bordercolor={{locationcolor/dark|cave}} | | {{langtable|color={{locationcolor/med|cave}}|bordercolor={{locationcolor/dark|cave}} |
| | |fr=Route Victoire |
| |de=Siegesstraße | | |de=Siegesstraße |
| |es=Calle Victoria
| |
| |fr=Route Victoire
| |
| |it=Via Vittoria | | |it=Via Vittoria |
| |ko=챔피언로드 ''Champion Road'' | | |ko=챔피언로드 ''Champion Road'' |
| | |pt_br=Estrada da Vitória |
| | |es=Calle Victoria |
| }} | | }} |
|
| |
|
| Line 751: |
Line 753: |
|
| |
|
| [[de:Siegesstraße (Kanto)]] | | [[de:Siegesstraße (Kanto)]] |
| [[es:Calle Victoria (Kanto)]]
| |
| [[fr:Route Victoire (Kanto)]] | | [[fr:Route Victoire (Kanto)]] |
| [[it:Via Vittoria (Kanto)]] | | [[it:Via Vittoria (Kanto)]] |


 If the player chose Chikorita:


 If the player chose Cyndaquil: