Stow-on-Side Stadium: Difference between revisions
Milanzo2006 (talk | contribs) (Created page with "{{GymInfobox |name=Stow-on-Side |characters= |japanese=Lateral |alt=Stadium |image= |location=Stow-on-Side ||leader=Bea{{sup/8|Sw}}<br>Allister{{sup/8|Sh}} ||badge=Fig...") |
|||
| (94 intermediate revisions by 25 users not shown) | |||
| Line 1: | Line 1: | ||
{{GymInfobox | {{GymInfobox | ||
|name=Stow-on-Side | |name=Stow-on-Side | ||
|characters= | |characters=ラテラルスタジアム | ||
|japanese=Lateral | |japanese=Lateral | ||
|alt=Stadium | |alt=Stadium | ||
|image= | |image=Stow-on-Side Stadium Sh.png | ||
|location=Stow-on-Side | |location=Stow-on-Side | ||
|leader=[[Allister]]{{sup/8|Sh}} | |||
|badge=Ghost Badge | |||
|type=Ghost | |||
|region=Galar | |region=Galar | ||
}} | |||
{{GymInfobox | |||
|name=Stow-on-Side | |||
|characters=ラテラルスタジアム | |||
|japanese=Lateral | |||
|alt=Stadium | |||
|image=Stow-on-Side Stadium anime.png | |||
|location=Stow-on-Side | |||
|leader=[[Bea]]{{sup/8|Sw}} | |||
|badge=Fighting Badge | |||
|type=Fighting | |||
|region=Galar | |||
|battlefield=Stow-on-Side Stadium battlefield.png | |||
}} | }} | ||
'''Stow-on-Side Stadium''' is the official [[Gym|Stadium]] of [[Stow-on-Side]]. | '''Stow-on-Side Stadium''' (Japanese: '''ラテラルスタジアム''' ''Lateral Stadium'') is the official [[Gym|Stadium]] of [[Stow-on-Side]]. Its appearance, [[type]] speciality, and [[Gym Leader]] varies between the game the player is playing. In [[Pokémon Sword and Shield|Pokémon Sword]], the Gym specializes in {{type|Fighting}} {{OBP|Pokémon|species}}. During the [[Galar League|Gym Challenge]], Gym Challengers battle the [[Gym Leader]] [[Bea]] to earn the {{badge|Fighting}}. In [[Pokémon Sword and Shield|Pokémon Shield]], the Gym specializes in {{type|Ghost}} Pokémon, and Challengers battle the Leader [[Allister]] to earn the {{badge|Ghost}}. | ||
==In the games== | ==In the games== | ||
Stow-on-Side Stadium is the largest building in the town and is the site at which the fourth installment in the [[Galar]] [[region]]'s Gym Challenge takes place. | Stow-on-Side Stadium is the largest building in the town and is the site at which the fourth installment in the [[Galar]] [[region]]'s Gym Challenge takes place. | ||
===Gym Challenge=== | |||
====Gym mission==== | |||
During the Gym mission, the {{player}} has to navigate sloped mazes while inside a spinning teacup. There are three courses in total. | |||
The teacup naturally slides downwards, but the player can influence its movement by rotating the Control Stick in the direction they want the teacup to spin. Hitting a wall or obstacle can cause the teacup to lose momentum, but does not otherwise penalize the player. In the second and third course, there are several boxing gloves{{sup/8|Sw}}/ghoulish hands{{sup/8|Sh}} on springs against the edges of the course that launch the teacup away when it comes into contact with them. | |||
At the end of each course, the player has to battle a {{tc|Gym Trainer}}. Behind each Trainer is a [[warp tile]] that the player can use to return to the entrance, from where they can withdraw from their Gym Challenge. After completing three courses, the Gym mission is complete. | |||
The player can withdraw from the Gym mission at any time by returning to the entrance. If the player loses a battle or withdraws, the mission is reset; however, defeated Gym Trainers cannot be battled again. Once the player has completed the Gym mission, even if they leave or lose, they proceed straight to the Gym battle from the reception area. | |||
The player cannot use [[Pokémon Camp]], [[Pokémon Box Link]], or [[VS]] during the Gym mission or in the hallway before the Gym battle. | |||
=====Trainers===== | |||
======Pokémon Sword====== | |||
{{trainerheader|fighting}} | |||
{{Trainerentry|VSGym Trainer Fighting M.png{{!}}150px|game=8|Gym Trainer|Ian|3,072|2|759|Stufful|♂|31|None|760|Bewear|♂|32|None|36=ツヨシ|37=Tsuyoshi}} | |||
{{trainerdiv|fighting}} | |||
{{Trainerentry|VSGym Trainer Fighting F.png{{!}}150px|game=8|Gym Trainer|Claire|3,072|1|083G|Farfetch'd|♀|32|36=アイコ|37=Aiko}} | |||
{{trainerdiv|fighting}} | |||
{{Trainerentry|VSGym Trainer Fighting M.png{{!}}150px|game=8|Gym Trainer|Simon|3,168|2|106|Hitmonlee|♂|33|None|107|Hitmonchan|♂|33|36=トシヤ |37=Toshiya}} | |||
{{trainerfooter|fighting|8}} | |||
======Pokémon Shield====== | |||
{{trainerheader|ghost}} | |||
{{Trainerentry|VSGym Trainer Ghost M.png{{!}}150px|game=8|Gym Trainer|Clive|2,976|3|710|Pumpkaboo<!--Small-->|♂|31|None|708|Phantump|♂|31|None|710|Pumpkaboo<!--Super Size-->|♂|31|None|36=カイ|37=Kai}} | |||
{{trainerdiv|ghost}} | |||
{{Trainerentry|VSGym Trainer Ghost F.png{{!}}150px|game=8|Gym Trainer|Lynne|3,072|1|222G|Corsola|♀|32|36=ユウコ|37=Yūko}} | |||
{{trainerdiv|ghost}} | |||
{{Trainerentry|VSGym Trainer Ghost M.png{{!}}150px|game=8|Gym Trainer|Roy|3,168|2|093|Haunter|♂|33|None|426|Drifblim|♂|33|36=レイジ|37=Reiji}} | |||
{{trainerfooter|ghost|8}} | |||
====Gym battle==== | |||
=====Pokémon Sword===== | |||
Bea [[Gigantamax]]es her Machamp at the first opportunity. | |||
{{Party/Single | |||
|color={{fighting color}} | |||
|bordercolor={{fighting color dark}} | |||
|headcolor={{fighting color light}} | |||
|sprite=VSBea.png | |||
|size=150px | |||
|prize={{PDollar}}5,760 | |||
|class=Gym Leader | |||
|classlink=Gym Leader | |||
|name={{color2|000|Bea}} | |||
|game=Sw | |||
|location=Stow-on-Side Stadium | |||
|pokemon=4}} | |||
|{{Pokémon/8 | |||
|game=SwSh | |||
|ndex=237 | |||
|pokemon=Hitmontop | |||
|level=34 | |||
|gender=male | |||
|type1=Fighting | |||
|ability=Technician | |||
|move1=Triple Kick|move1type=Fighting|move1cat=Physical | |||
|move2=Quick Attack|move2type=Normal|move2cat=Physical | |||
|move3=Counter|move3type=Fighting|move3cat=Physical | |||
|move4=Revenge|move4type=Fighting|move4cat=Physical}} | |||
|{{Pokémon/8 | |||
|game=SwSh | |||
|ndex=675 | |||
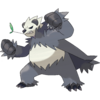
|pokemon=Pangoro | |||
|level=34 | |||
|gender=male | |||
|type1=Fighting|type2=Dark | |||
|ability=Mold Breaker | |||
|move1=Bullet Punch|move1type=Steel|move1cat=Physical | |||
|move2=Circle Throw|move2type=Fighting|move2cat=Physical | |||
|move3=Night Slash|move3type=Dark|move3cat=Physical | |||
|move4=Work Up|move4type=Normal|move4cat=Status}} | |||
{{Party/Div|color={{fighting color}}}} | |||
|{{Pokémon/8 | |||
|game=SwSh | |||
|ndex=865 | |||
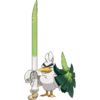
|pokemon=Sirfetch'd | |||
|level=35 | |||
|gender=male | |||
|type1=Fighting | |||
|ability=Steadfast | |||
|move1=Detect|move1type=Fighting|move1cat=Status | |||
|move2=Swords Dance|move2type=Normal|move2cat=Status | |||
|move3=Brutal Swing|move3type=Dark|move3cat=Physical | |||
|move4=Revenge|move4type=Fighting|move4cat=Physical}} | |||
|{{Pokémon/8 | |||
|game=SwSh | |||
|ndex=068 | |||
|pokemon=Machamp | |||
|form=-Gigantamax | |||
|level=36 | |||
|gender=female | |||
|type1=Fighting | |||
|ability=Guts | |||
|move1=Scary Face|move1type=Normal|move1cat=Status | |||
|move2=Revenge|move2type=Fighting|move2cat=Physical | |||
|move3=Knock Off|move3type=Dark|move3cat=Physical | |||
|move4=Strength|move4type=Normal|move4cat=Physical}} | |||
{{Party/Footer}} | |||
=====Pokémon Shield===== | |||
Allister [[Gigantamax]]es his Gengar at the first opportunity. | |||
{{Party/Single | |||
|color={{ghost color}} | |||
|bordercolor={{ghost color dark}} | |||
|headcolor={{ghost color light}} | |||
|sprite=VSAllister.png | |||
|size=150px | |||
|prize={{PDollar}}5,760 | |||
|class=Gym Leader | |||
|classlink=Gym Leader | |||
|name={{color2|000|Allister}} | |||
|game=Sh | |||
|location=Stow-on-Side Stadium | |||
|pokemon=4}} | |||
|{{Pokémon/8 | |||
|game=SwSh | |||
|ndex=562 | |||
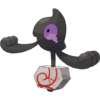
|pokemon=Yamask | |||
|form=-Galar | |||
|level=34 | |||
|gender=male | |||
|type1=Ground|type2=Ghost | |||
|ability=Wandering Spirit | |||
|move1=Brutal Swing|move1type=Dark|move1cat=Physical | |||
|move2=Hex|move2type=Ghost|move2cat=Special | |||
|move3=Disable|move3type=Normal|move3cat=Status}} | |||
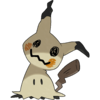
|{{Pokémon/8 | |||
|game=SwSh | |||
|ndex=778 | |||
|pokemon=Mimikyu | |||
|level=34 | |||
|gender=male | |||
|type1=Ghost|type2=Fairy | |||
|ability=Disguise | |||
|move1=Shadow Sneak|move1type=Ghost|move1cat=Physical | |||
|move2=Baby-Doll Eyes|move2type=Fairy|move2cat=Status | |||
|move3=Hone Claws|move3type=Dark|move3cat=Status | |||
|move4=Slash|move4type=Normal|move4cat=Physical}} | |||
{{Party/Div|color={{ghost color}}}} | |||
|{{Pokémon/8 | |||
|game=SwSh | |||
|ndex=864 | |||
|pokemon=Cursola | |||
|level=35 | |||
|gender=female | |||
|type1=Ghost | |||
|ability=Weak Armor | |||
|move1=Ancient Power|move1type=Rock|move1cat=Special | |||
|move2=Curse|move2type=Ghost|move2cat=Status | |||
|move3=Hex|move3type=Ghost|move3cat=Special}} | |||
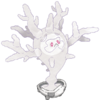
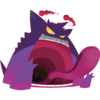
|{{Pokémon/8 | |||
|game=SwSh | |||
|ndex=094 | |||
|pokemon=Gengar | |||
|form=-Gigantamax | |||
|level=36 | |||
|gender=male | |||
|type1=Ghost|type2=Poison | |||
|ability=Cursed Body | |||
|move1=Venoshock|move1type=Poison|move1cat=Special | |||
|move2=Hex|move2type=Ghost|move2cat=Special | |||
|move3=Hypnosis|move3type=Psychic|move3cat=Status | |||
|move4=Payback|move4type=Dark|move4cat=Physical}} | |||
{{Party/Footer}} | |||
===Sordward and Shielbert=== | |||
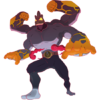
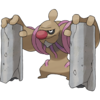
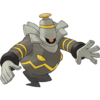
While pursuing [[Sordward]] and [[Shielbert]], the brothers will use their stock of [[Wishing Star]]s to force multiple Pokémon from the Stadium to [[Dynamax]] against their will, causing them to rampage in the Stadium. The player will face a {{p|Conkeldurr}}{{sup/8|Sw}}/{{p|Dusknoir}}{{sup/8|Sh}} with their [[party]] while [[Hop]], [[Piers]], and Bea{{sup/8|Sw}}/Allister{{sup/8|Sh}} handle the rest. | |||
{| | |||
! [[Pokémon Sword and Shield|Pokémon Sword]] | |||
! [[Pokémon Sword and Shield|Pokémon Shield]] | |||
|- | |||
|{{Pokémon/8 | |||
|ndex=534 | |||
|pokemon=Conkeldurr | |||
|gender=male | |||
|type1=Fighting | |||
|ability=Iron Fist | |||
|level=62<br><small>{{color2|000|Dynamax}}</small> | |||
|move1=Thunder Punch|move1type=Electric|move1cat=Physical | |||
|move2=Ice Punch|move2type=Ice|move2cat=Physical | |||
|move3=Hammer Arm|move3type=Fighting|move3cat=Physical | |||
|move4=Stone Edge|move4type=Rock|move4cat=Physical}} | |||
|{{Pokémon/8 | |||
|ndex=477 | |||
|pokemon=Dusknoir | |||
|gender=female | |||
|type1=Ghost | |||
|ability=Pressure | |||
|level=62<br><small>{{color2|000|Dynamax}}</small> | |||
|move1=Ice Punch|move1type=Ice|move1cat=Physical | |||
|move2=Earthquake|move2type=Ground|move2cat=Physical | |||
|move3=Thunder Punch|move3type=Electric|move3cat=Physical | |||
|move4=Shadow Punch|move4type=Ghost|move4cat=Physical}} | |||
|} | |||
===Items=== | |||
{{Itlisth|fighting}} | |||
{{Itemlist|Heavy Ball|From the [[Ball Guy]]|Sw=yes|Sh=yes}} | |||
{{Itemlist|TM Fighting VI|Reward for defeating Bea|Sw=yes|display={{TM|42|Revenge}}}} | |||
{{Itemlist|None|sprite=Fighting Gym logo|size=32px|Reward for defeating Bea|Sw=yes|display=[[List of clothing (Sword and Shield)|Fighting Uniform]]}} | |||
{{Itemlist|TM Ghost VI|Reward for defeating Allister|Sh=yes|display={{TM|77|Hex}}}} | |||
{{Itemlist|None|sprite=Ghost Gym logo|size=32px|Reward for defeating Allister|Sh=yes|display=[[List of clothing (Sword and Shield)|Ghost Uniform]]}} | |||
{{itemlist|None|From Bea after defeating the [[Dynamax]] {{p|Conkeldurr}}|Sw=yes|display=[[Bea]]'s rare [[League Card]]|sprite=League Card Bea rare|size=x32}} | |||
{{itemlist|None|From Allister after defeating the Dynamax {{p|Dusknoir}}|Sh=yes|display=[[Allister]]'s rare [[League Card]]|sprite=League Card Allister rare|size=x32}} | |||
{{Itlistfoot|ghost}} | |||
===Poké Mart=== | |||
This Poké Mart is located on the right side of the Stow-on-Side Stadium lobby. | |||
{{shop|Cashier}} | |||
{{shoprow|{{shopitem|Poké Ball (item)|200|5=Poké Ball|display=Poké Ball}}|{{shopitem|Great Ball|600}}}} | |||
{{shoprow|{{shopitem|Ultra Ball|800|note=<sup>5 {{color2|000|Badge|Badges}}</sup>}}|{{shopitem|Potion|200}}}} | |||
{{shoprow|{{shopitem|Super Potion|700}}|{{shopitem|Hyper Potion|1,500|note=<sup>4 {{color2|000|Badge|Badges}}</sup>}}}} | |||
{{shoprow|{{shopitem|Max Potion|2,500|note=<sup>7 {{color2|000|Badge}}</sup>}}|{{shopitem|Full Restore|3,000|note=<sup>8 {{color2|000|Badge|Badges}}</sup>}}}} | |||
{{shoprow|{{shopitem|Antidote|200}}|{{shopitem|Burn Heal|200}}}} | |||
{{shoprow|{{shopitem|Ice Heal|200}}|{{shopitem|Awakening|200}}}} | |||
{{shoprow|{{shopitem|Paralyze Heal|200}}|{{shopitem|Full Heal|400|note=<sup>6 {{color2|000|Badge|Badges}}</sup>}}}} | |||
{{shoprow|{{shopitem|Revive|2,000}}|{{shopitem|Repel|400}}}} | |||
{{shoprow|{{shopitem|Super Repel|700|note=<sup>5 {{color2|000|Badge|Badges}}</sup>}}|{{shopitem|Max Repel|900|note=<sup>7 {{color2|000|Badge|Badges}}</sup>}}}} | |||
{{shoprow|{{shopitem|Poké Doll|300}}}} | |||
{{shopfooter}} | |||
===Uniform shop=== | |||
This shop is located on the left side of the Stow-on-Side Stadium lobby. | |||
====Male==== | |||
{{Clothing/8/header|scheme=Sword}} | |||
{{Fashion/l2|Uniform|Uniform||Ghost Uniform<sup>'''{{color2|{{sword color}}|Sw}}'''</sup>|18,000}} | |||
{{Fashion/l2|Uniform|Uniform||Fighting Uniform<sup>'''{{color2|{{shield color}}|Sh}}'''</sup>|18,000}} | |||
{{Fashion/l2|Uniform|Uniform||Ice Uniform<sup>'''{{color2|{{sword color}}|Sw}}'''</sup>|18,000}} | |||
{{Fashion/l2|Uniform|Uniform||Rock Uniform<sup>'''{{color2|{{shield color}}|Sh}}'''</sup>|18,000}} | |||
{{Fashion/l2|Uniform|Uniform||Bug Uniform|18,000}} | |||
{{Fashion/l2|Uniform|Uniform||Steel Uniform|18,000}} | |||
{{Fashion/l2|Uniform|Uniform||Psychic Uniform|18,000}} | |||
{{Fashion/l2|Uniform|Uniform||Electric Uniform|18,000}} | |||
{{Fashion/l2|Uniform|Uniform||Ground Uniform|18,000}} | |||
{{Fashion/l2|Uniform|Uniform||Flying Uniform|18,000}} | |||
{{Fashion/l2|Uniform|Uniform||Normal Uniform|18,000}} | |||
{{Fashion/l2|Uniform|Uniform||Poison Uniform|18,000}} | |||
{{Fashion/footer|scheme=Sword}} | |||
====Female==== | |||
{{Clothing/8/header|scheme=Shield}} | |||
{{Fashion/l2|Uniform|Uniform||Ghost Uniform<sup>'''{{color2|{{sword color}}|Sw}}'''</sup>|18,000}} | |||
{{Fashion/l2|Uniform|Uniform||Fighting Uniform<sup>'''{{color2|{{shield color}}|Sh}}'''</sup>|18,000}} | |||
{{Fashion/l2|Uniform|Uniform||Ice Uniform<sup>'''{{color2|{{sword color}}|Sw}}'''</sup>|18,000}} | |||
{{Fashion/l2|Uniform|Uniform||Rock Uniform<sup>'''{{color2|{{shield color}}|Sh}}'''</sup>|18,000}} | |||
{{Fashion/l2|Uniform|Uniform||Bug Uniform|18,000}} | |||
{{Fashion/l2|Uniform|Uniform||Steel Uniform|18,000}} | |||
{{Fashion/l2|Uniform|Uniform||Psychic Uniform|18,000}} | |||
{{Fashion/l2|Uniform|Uniform||Electric Uniform|18,000}} | |||
{{Fashion/l2|Uniform|Uniform||Ground Uniform|18,000}} | |||
{{Fashion/l2|Uniform|Uniform||Flying Uniform|18,000}} | |||
{{Fashion/l2|Uniform|Uniform||Normal Uniform|18,000}} | |||
{{Fashion/l2|Uniform|Uniform||Poison Uniform|18,000}} | |||
{{Fashion/footer|scheme=Shield}} | |||
==In the spin-off games== | |||
===[[Pokémon Masters EX]]=== | |||
Artwork depicting Stow-on-Side Stadium is seen in {{mas|Bea}} and {{mas|Allister}}'s mindscapes. | |||
{| style="background: #7B30B2; {{roundy}}; border: #7B30B2;" | |||
| | |||
{| style="background: #AB60E2; {{roundy}}; border: #AB60E2;" | |||
|- style="text-align:center" | |||
| | |||
{| style="background: #{{fighting color light}}; {{roundy}}; border: #{{fighting color light}}; padding: 0px 5px 5px 5px" | |||
|- | |||
|<big>'''{{color2|000|Bea (Masters)#Sirfetch'd|Bea & Sirfetch'd}}'''</big> | |||
|- | |||
| [[File:Bea Mindscape.png|200px]] | |||
|} | |||
| | |||
{| style="background: #{{ghost color light}}; {{roundy}}; border: #{{ghost color light}}; padding: 0px 5px 5px 5px" | |||
|- | |||
|<big>'''{{color2|000|Allister (Masters)#Gengar|Allister & Gengar}}'''</big> | |||
|- | |||
| [[File:Allister Mindscape.png|200px]] | |||
|} | |||
|} | |||
|} | |||
==In the anime== | |||
[[File:Stow-on-Side Ghost Gym.png|thumb|250px|Allister's Ghost-type Gym in the {{pkmn|anime}}]] | |||
The Stow-on-Side Stadium first appeared briefly in ''[[JN043|Sword and Shield: The Darkest Day!]]'' as [[Goh]] and [[Sonia]] visited Stow-on-Side. In ''[[JN045|Sword and Shield... The Legends Awaken!]]'', a {{rf|Galarian}} {{p|Yamask}} was seen above the Stadium, [[Dynamax]]ed due to the [[Darkest Day]]. Once {{Ash}} and Goh succeeded in stopping the event in [[Hammerlocke]], the Yamask shrunk back to normal. | |||
Ash and Goh traveled to the Stow-on-Side Stadium in ''[[JN085|Battle Three With Bea!]]'' in preparation for Ash's [[World Coronation Series]] battle against [[Bea]], and were soon joined by {{an|Korrina}}. The battle begun the next day and continued in [[JN086|the next episode]], culminating in a showdown between Ash's [[Mega Evolution|Mega]] {{AP|Lucario}} and Bea's [[Gigantamax]] {{p|Machamp}}. While Lucario couldn't defeat Machamp before its Gigantamax wore off, it was able to do so soon afterwards, making Ash the winner of the match. | |||
In ''[[JN092|The Winding Path to Greatness!]]'', Ash and Goh visited [[Allister]]'s Ghost-type Gym in Stow-on-Side to get his help in getting [[Ash's Gengar]] to Gigantamax. Allister accompanied them to the Stow-on-Side Stadium, where Bea allowed them to use the stadium battlefield for their training. When it turned out that Gengar could only perform standard Dynamax, Allister assisted Ash and Goh in collecting [[Max Mushrooms]] to make {{DL|Master Dojo|Max Soup}}, which enabled Gengar to Gigantamax when Ash attempted it again. | |||
===Pokémon used in the Gym=== | |||
{{TrainerPoké | |||
|trainer=Bea | |||
|pkmn=Grapploct | |||
|type1=Fighting | |||
|img=Bea Grapploct.png | |||
|epnum=JN034 | |||
|epname=Solitary and Menacing! | |||
|vajp=Noriaki Kanze | |||
|vaen=James Weaver Clark | |||
|desc={{p|Grapploct}} is Bea's first known Pokémon. In ''[[JN085|Battle Three With Bea!]]'', it was the first Pokémon Bea used in her second rematch with Ash. It first went up against Pikachu, who was soon switched out for {{AP|Lucario}}. After a while, Grapploct was recalled and replaced with {{p|Hawlucha}}. In [[JN086|the next episode]], it was sent out to battle [[Ash's Pikachu]], defeating him before being knocked out by Lucario. | |||
Grapploct's known moves are {{m|Detect}}, {{m|Close Combat}}, {{m|Liquidation}}, and {{m|Octolock}}.}} | |||
{{TrainerPoké | |||
|trainer=Bea | |||
|pkmn=Hawlucha | |||
|type1=Fighting | |||
|type2=Flying | |||
|img=Bea Hawlucha.png | |||
|epnum=JN034 | |||
|epname=Solitary and Menacing! | |||
|vajp=Ryota Iwasaki | |||
|vaen=H.D. Quinn | |||
|desc={{p|Hawlucha}} is Bea's second known Pokémon. In ''[[JN085|Battle Three With Bea!]]'', Hawlucha was the second Pokémon Bea used in her second rematch with Ash. It fought against his {{AP|Lucario}}, but was soon switched out for {{p|Machamp}}. In [[JN086|the next episode]], it fought against [[Ash's Sirfetch'd]] and managed to win, before being defeated by [[Ash's Pikachu]]. | |||
Hawlucha's known moves are {{m|Hone Claws}}, {{m|Karate Chop}}{{tt|*|Hawlucha could not legally use Karate Chop at the time}}, {{m|Flying Press}}, {{m|High Jump Kick}}, {{m|Wing Attack}}, and {{m|Sky Attack}}.}} | |||
{{TrainerPoké | |||
|trainer=Bea | |||
|pkmn=Machamp [[File:Dynamax icon.png|25px|link=Gigantamax]] | |||
|type1=Fighting | |||
|img=Bea Machamp.png | |||
|img2=Bea Machamp Gigantamax.png | |||
|cap2=Bea's Gigantamax Machamp | |||
|epnum=JN034 | |||
|epname=Solitary and Menacing! | |||
|vajp= | |||
|vaen= | |||
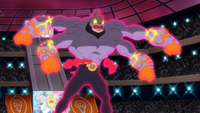
|desc={{p|Machamp}} is Bea's ace Pokémon, being capable of [[Gigantamax]]ing. In ''[[JN085|Battle Three With Bea!]]'', Machamp was the third Pokémon Bea used in her second rematch with Ash, being sent out to battle his {{AP|Lucario}}. In [[JN086|the next episode]], it fought against [[Ash's Sirfetch'd]] after Lucario had been [[recall]]ed, before being recalled itself. It was later sent out to battle [[Ash's Pikachu]], defeating it before facing Lucario again. In response to Ash's decision to [[Mega Evolution|Mega Evolve]] Lucario, Bea Gigantamaxed Machamp. Lucario managed to survive long enough for Machamp to revert back to normal, and then proceeded to defeat it soon afterwards, making Ash the winner. | |||
Machamp's known moves are {{m|Bullet Punch}}, {{m|Cross Chop}}, and {{m|Strength}}.<br> | |||
As a Gigantamax Machamp, it can use {{m|Max Steelspike}}, {{m|Max Strike}}, and {{m|G-Max Chi Strike}}.}} | |||
==In the manga== | |||
===Pokémon Adventures=== | |||
[[File:Stow-on-Side Stadium Adventures.png|thumb|250px|Stow-on-Side Stadium in [[Pokémon Adventures]]]] | |||
===={{MangaArc|Sword & Shield}}==== | |||
The Stow-on-Side Stadium first appeared in ''[[PASS13|Glittering!! The Tapestry in the Vault]]'', where {{Henry}} was the first one of remaining {{tc|Gym Challenger}}s to challenge it. During his match against [[Allister]], Henry heard the voice of his deceased father talking to him from [[Gigantamax]] {{p|Gengar}}'s mouth. The match ended in Henry's clear victory, with Allister failing to defeat a single one of his Pokémon. {{Casey}}'s match was initially delayed due to Allister running off to inspect [[Professor Magnolia]]'s {{p|Sinistea}} and {{p|Polteageist}}, but she was eventually able to have it and win herself a {{badge|Ghost}} as well. | |||
In ''[[PASS15|Shocking!! Reunion in the Forest]]'', it was revealed that Allister and [[Bea]] take turns in leading the Gym and taking on Gym Challengers. In ''[[PASS18|Chomp!! It's Dracovish]]'', [[Marnie]] revealed that, due to Allister having left the Gym after his battle with Casey in order to follow Casey and her friends, she had been forced to battle Bea instead. She had managed to defeat Bea and win herself the {{badge|Fighting}}, despite her {{p|Morpeko}} being at a disadvantage against Bea's {{t|Fighting}} Pokémon. | |||
====Pokémon used in the Gym==== | |||
=====Used by Allister===== | |||
{{TrainerPoké | |||
|trainer=Allister | |||
|pkmn=Yamask | |||
|type1=Ground | |||
|type2=Ghost | |||
|img=Allister Yamask Adventures.png | |||
|epnum=PASS13 | |||
|epname=Glittering!! The Tapestry in the Vault | |||
|desc={{rf|Galarian}} {{p|Yamask}} is Allister's first known Pokémon. It was first used to battle {{Henry}}'s {{p|Sirfetch'd}}, [[Lancelot]], in a Gym battle, but was defeated. It is housed in a [[Dusk Ball]]. | |||
Yamask's only known move is {{m|Brutal Swing}}.}} | |||
{{TrainerPoké | |||
|trainer=Allister | |||
|pkmn=Cursola | |||
|type1=Ghost | |||
|img=Allister Cursola Adventures.png | |||
|img_size=130px | |||
|epnum=PASS13 | |||
|epname=Glittering!! The Tapestry in the Vault | |||
|desc={{p|Cursola}} is Allister's second known Pokémon. It was first used to battle {{Henry}} in a Gym battle. It managed to damage Henry's {{p|Sirfetch'd}}, [[Lancelot]], but was defeated by his {{p|Oranguru}}, Fanguru. | |||
None of Cursola's moves are known.}} | |||
{{TrainerPoké | |||
|trainer=Allister | |||
|pkmn=Gengar [[File:Dynamax icon.png|25px|link=Gigantamax]] | |||
|type1=Ghost | |||
|type2=Poison | |||
|img=Allister Gengar Adventures.png | |||
|img2=Allister Gigantamax Gengar Adventures.png | |||
|img2_size=150px | |||
|cap=Allister's Gengar | |||
|cap2=Allister's Gengar | |||
|epnum=PASS13 | |||
|epname=Glittering!! The Tapestry in the Vault | |||
|desc={{p|Gengar}} is Allister's third known Pokémon. It was first used in Allister's Gym battle against {{Henry}} but was defeated by his {{p|Oranguru}}, Fanguru, after it exited its [[Gigantamax]] state. Allister also uses it as a mode of transportation. It is housed in a [[Dusk Ball]]. | |||
Gengar's only known move is {{m|Venoshock}}{{tt|*|Mentioned only}}{{tt|*|Gengar is also implied to know a damaging Ghost-type move due to the use of G-Max Terror}}.<br> | |||
As a Gigantamax Gengar, it can use {{m|G-Max Terror}} and {{m|Max Ooze}}.}} | |||
=====Used by Bea===== | |||
{{TrainerPoké | |||
|trainer=Bea | |||
|pkmn=Grapploct | |||
|type1=Fighting | |||
|img=Bea Grapploct Adventures.png | |||
|epnum=PASS15 | |||
|epname=Shocking!! Reunion in the Forest | |||
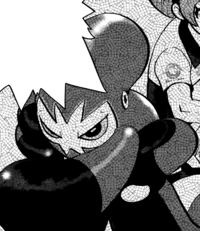
|desc={{p|Grapploct}} is Bea's first known Pokémon. It was first seen in {{Casey}}'s fantasy when she talked to [[Allister]] about [[Stow-on-Side]]'s Gym Leaders. | |||
None of Grapploct's moves are known.}} | |||
{{TrainerPoké | |||
|trainer=Bea | |||
|pkmn=Hitmontop | |||
|gender=male | |||
|type1=Fighting | |||
|img=Bea Hitmontop Adventures.png | |||
|epnum=PASS18 | |||
|epname=Chomp!! It's Dracovish | |||
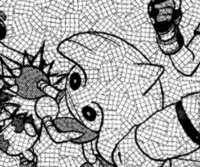
|desc={{p|Hitmontop}} is Bea's second known Pokémon. He was first seen in [[Marnie]]'s fantasy when she recalled her Gym battle against Bea. | |||
None of Hitmontop's moves are known.}} | |||
{{-}} | |||
{{Gym Leaders of Galar}}<br> | |||
{{Project Locations notice}} | |||
[[Category:Gyms]] | |||
[[Category:Galar Stadiums and Gyms]] | |||
[[Category:Power Spots]] | |||
[[de:Passbeck-Stadion]] | |||
[[es:Estadio de Ladera]] | |||
[[fr:Stade d'Old Chister]] | |||
[[it:Stadio di Latermore]] | |||
[[ja:ラテラルスタジアム]] | |||
[[zh:溯傳競技場]] | |||
Latest revision as of 15:02, 5 May 2024
| Stow-on-Side Stadium ラテラルスタジアム Lateral Stadium | |
| |
| Location | Stow-on-Side |
| Gym Leader | AllisterSh |
| Badge | Ghost Badge |
| Dominant Type | Ghost |
| Region | Galar |
| Stow-on-Side Stadium ラテラルスタジアム Lateral Stadium | |

| |
| Location | Stow-on-Side |
| Gym Leader | BeaSw |
| Badge | Fighting Badge |
| Dominant Type | Fighting |
| Region | Galar |
| |
| Battlefield | |
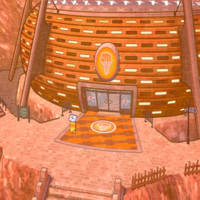
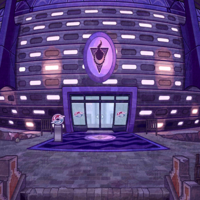
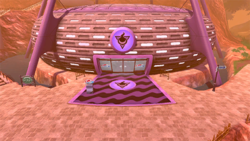
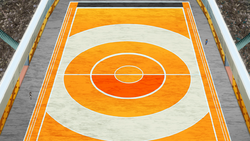
Stow-on-Side Stadium (Japanese: ラテラルスタジアム Lateral Stadium) is the official Stadium of Stow-on-Side. Its appearance, type speciality, and Gym Leader varies between the game the player is playing. In Pokémon Sword, the Gym specializes in Fighting-type Pokémon. During the Gym Challenge, Gym Challengers battle the Gym Leader Bea to earn the Fighting Badge. In Pokémon Shield, the Gym specializes in Ghost-type Pokémon, and Challengers battle the Leader Allister to earn the Ghost Badge.
In the games
Stow-on-Side Stadium is the largest building in the town and is the site at which the fourth installment in the Galar region's Gym Challenge takes place.
Gym Challenge
Gym mission
During the Gym mission, the player has to navigate sloped mazes while inside a spinning teacup. There are three courses in total.
The teacup naturally slides downwards, but the player can influence its movement by rotating the Control Stick in the direction they want the teacup to spin. Hitting a wall or obstacle can cause the teacup to lose momentum, but does not otherwise penalize the player. In the second and third course, there are several boxing glovesSw/ghoulish handsSh on springs against the edges of the course that launch the teacup away when it comes into contact with them.
At the end of each course, the player has to battle a Gym Trainer. Behind each Trainer is a warp tile that the player can use to return to the entrance, from where they can withdraw from their Gym Challenge. After completing three courses, the Gym mission is complete.
The player can withdraw from the Gym mission at any time by returning to the entrance. If the player loses a battle or withdraws, the mission is reset; however, defeated Gym Trainers cannot be battled again. Once the player has completed the Gym mission, even if they leave or lose, they proceed straight to the Gym battle from the reception area.
The player cannot use Pokémon Camp, Pokémon Box Link, or VS during the Gym mission or in the hallway before the Gym battle.
Trainers
Pokémon Sword
| Trainer | Pokémon | |||||||||||
|---|---|---|---|---|---|---|---|---|---|---|---|---|
|
| |||||||||||
| ||||||||||||
|
| |||||||||||
|
| |||||||||||
| ||||||||||||
Pokémon Shield
| Trainer | Pokémon | |||||||||||
|---|---|---|---|---|---|---|---|---|---|---|---|---|
|
| |||||||||||
| ||||||||||||
| ||||||||||||
|
| |||||||||||
|
| |||||||||||
| ||||||||||||
Gym battle
Pokémon Sword
Bea Gigantamaxes her Machamp at the first opportunity.
|
|||||||||||||||||||||||||||||||||||||||||||||||||||||||||||||||||||||||||||||||||||||||||||||||||||||||||||||||||||||||||||||||||||||||
| |||||||||||||||||||||||||||||||||||||||||||||||||||||||||||||||||||||||||||||||||||||||||||||||||||||||||||||||||||||||||||||||||||||||
Pokémon Shield
Allister Gigantamaxes his Gengar at the first opportunity.
|
|||||||||||||||||||||||||||||||||||||||||||||||||||||||||||||||||||||||||||||||||||||||||||||||||||||||||||||||||||||||||||||||||||||||||||||
| |||||||||||||||||||||||||||||||||||||||||||||||||||||||||||||||||||||||||||||||||||||||||||||||||||||||||||||||||||||||||||||||||||||||||||||
Sordward and Shielbert
While pursuing Sordward and Shielbert, the brothers will use their stock of Wishing Stars to force multiple Pokémon from the Stadium to Dynamax against their will, causing them to rampage in the Stadium. The player will face a ConkeldurrSw/DusknoirSh with their party while Hop, Piers, and BeaSw/AllisterSh handle the rest.
| Pokémon Sword | Pokémon Shield | ||||||||||||||||||||||||||||||||||||||||||||||||||||||||||||||||
|---|---|---|---|---|---|---|---|---|---|---|---|---|---|---|---|---|---|---|---|---|---|---|---|---|---|---|---|---|---|---|---|---|---|---|---|---|---|---|---|---|---|---|---|---|---|---|---|---|---|---|---|---|---|---|---|---|---|---|---|---|---|---|---|---|---|
|
| ||||||||||||||||||||||||||||||||||||||||||||||||||||||||||||||||
Items
| Item | Location | Games | |
|---|---|---|---|
| Heavy Ball | From the Ball Guy | Sw Sh | |
| TM42 (Revenge) | Reward for defeating Bea | Sw | |
| Fighting Uniform | Reward for defeating Bea | Sw | |
| TM77 (Hex) | Reward for defeating Allister | Sh | |
| Ghost Uniform | Reward for defeating Allister | Sh | |
| Bea's rare League Card | From Bea after defeating the Dynamax Conkeldurr | Sw | |
| Allister's rare League Card | From Allister after defeating the Dynamax Dusknoir | Sh | |
Poké Mart
This Poké Mart is located on the right side of the Stow-on-Side Stadium lobby.
| Cashier | |||||||
|---|---|---|---|---|---|---|---|
|
| ||||||
|
| ||||||
|
| ||||||
|
| ||||||
|
| ||||||
|
| ||||||
|
| ||||||
|
| ||||||
|
| ||||||
|
|||||||
Uniform shop
This shop is located on the left side of the Stow-on-Side Stadium lobby.
Male
| Type | Item | Brand | Patterns | Price | ||
|---|---|---|---|---|---|---|
| Uniform | Uniform | Ghost UniformSw | $18,000 | |||
| Uniform | Uniform | Fighting UniformSh | $18,000 | |||
| Uniform | Uniform | Ice UniformSw | $18,000 | |||
| Uniform | Uniform | Rock UniformSh | $18,000 | |||
| Uniform | Uniform | Bug Uniform | $18,000 | |||
| Uniform | Uniform | Steel Uniform | $18,000 | |||
| Uniform | Uniform | Psychic Uniform | $18,000 | |||
| Uniform | Uniform | Electric Uniform | $18,000 | |||
| Uniform | Uniform | Ground Uniform | $18,000 | |||
| Uniform | Uniform | Flying Uniform | $18,000 | |||
| Uniform | Uniform | Normal Uniform | $18,000 | |||
| Uniform | Uniform | Poison Uniform | $18,000 | |||
Female
| Type | Item | Brand | Patterns | Price | ||
|---|---|---|---|---|---|---|
| Uniform | Uniform | Ghost UniformSw | $18,000 | |||
| Uniform | Uniform | Fighting UniformSh | $18,000 | |||
| Uniform | Uniform | Ice UniformSw | $18,000 | |||
| Uniform | Uniform | Rock UniformSh | $18,000 | |||
| Uniform | Uniform | Bug Uniform | $18,000 | |||
| Uniform | Uniform | Steel Uniform | $18,000 | |||
| Uniform | Uniform | Psychic Uniform | $18,000 | |||
| Uniform | Uniform | Electric Uniform | $18,000 | |||
| Uniform | Uniform | Ground Uniform | $18,000 | |||
| Uniform | Uniform | Flying Uniform | $18,000 | |||
| Uniform | Uniform | Normal Uniform | $18,000 | |||
| Uniform | Uniform | Poison Uniform | $18,000 | |||
In the spin-off games
Pokémon Masters EX
Artwork depicting Stow-on-Side Stadium is seen in Bea and Allister's mindscapes.
|
In the anime
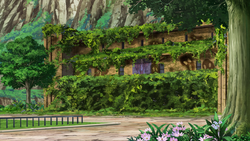
The Stow-on-Side Stadium first appeared briefly in Sword and Shield: The Darkest Day! as Goh and Sonia visited Stow-on-Side. In Sword and Shield... The Legends Awaken!, a Galarian Yamask was seen above the Stadium, Dynamaxed due to the Darkest Day. Once Ash and Goh succeeded in stopping the event in Hammerlocke, the Yamask shrunk back to normal.
Ash and Goh traveled to the Stow-on-Side Stadium in Battle Three With Bea! in preparation for Ash's World Coronation Series battle against Bea, and were soon joined by Korrina. The battle begun the next day and continued in the next episode, culminating in a showdown between Ash's Mega Lucario and Bea's Gigantamax Machamp. While Lucario couldn't defeat Machamp before its Gigantamax wore off, it was able to do so soon afterwards, making Ash the winner of the match.
In The Winding Path to Greatness!, Ash and Goh visited Allister's Ghost-type Gym in Stow-on-Side to get his help in getting Ash's Gengar to Gigantamax. Allister accompanied them to the Stow-on-Side Stadium, where Bea allowed them to use the stadium battlefield for their training. When it turned out that Gengar could only perform standard Dynamax, Allister assisted Ash and Goh in collecting Max Mushrooms to make Max Soup, which enabled Gengar to Gigantamax when Ash attempted it again.
Pokémon used in the Gym
|
||
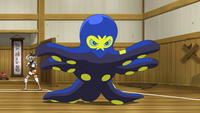
| Grapploct is Bea's first known Pokémon. In Battle Three With Bea!, it was the first Pokémon Bea used in her second rematch with Ash. It first went up against Pikachu, who was soon switched out for Lucario. After a while, Grapploct was recalled and replaced with Hawlucha. In the next episode, it was sent out to battle Ash's Pikachu, defeating him before being knocked out by Lucario.
Grapploct's known moves are Detect, Close Combat, Liquidation, and Octolock. | ||
| Debut | Solitary and Menacing! | |
|---|---|---|
| Voice actors | ||
| Japanese | Noriaki Kanze | |
| English | James Weaver Clark | |
|
||
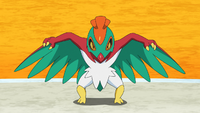
| Hawlucha is Bea's second known Pokémon. In Battle Three With Bea!, Hawlucha was the second Pokémon Bea used in her second rematch with Ash. It fought against his Lucario, but was soon switched out for Machamp. In the next episode, it fought against Ash's Sirfetch'd and managed to win, before being defeated by Ash's Pikachu.
Hawlucha's known moves are Hone Claws, Karate Chop*, Flying Press, High Jump Kick, Wing Attack, and Sky Attack. | ||
| Debut | Solitary and Menacing! | |
|---|---|---|
| Voice actors | ||
| Japanese | Ryota Iwasaki | |
| English | H.D. Quinn | |
|
||
| Machamp is Bea's ace Pokémon, being capable of Gigantamaxing. In Battle Three With Bea!, Machamp was the third Pokémon Bea used in her second rematch with Ash, being sent out to battle his Lucario. In the next episode, it fought against Ash's Sirfetch'd after Lucario had been recalled, before being recalled itself. It was later sent out to battle Ash's Pikachu, defeating it before facing Lucario again. In response to Ash's decision to Mega Evolve Lucario, Bea Gigantamaxed Machamp. Lucario managed to survive long enough for Machamp to revert back to normal, and then proceeded to defeat it soon afterwards, making Ash the winner.
Machamp's known moves are Bullet Punch, Cross Chop, and Strength. | ||
| Debut | Solitary and Menacing! | |
|---|---|---|
In the manga
Pokémon Adventures

Sword & Shield arc
The Stow-on-Side Stadium first appeared in Glittering!! The Tapestry in the Vault, where Henry was the first one of remaining Gym Challengers to challenge it. During his match against Allister, Henry heard the voice of his deceased father talking to him from Gigantamax Gengar's mouth. The match ended in Henry's clear victory, with Allister failing to defeat a single one of his Pokémon. Casey's match was initially delayed due to Allister running off to inspect Professor Magnolia's Sinistea and Polteageist, but she was eventually able to have it and win herself a Ghost Badge as well.
In Shocking!! Reunion in the Forest, it was revealed that Allister and Bea take turns in leading the Gym and taking on Gym Challengers. In Chomp!! It's Dracovish, Marnie revealed that, due to Allister having left the Gym after his battle with Casey in order to follow Casey and her friends, she had been forced to battle Bea instead. She had managed to defeat Bea and win herself the Fighting Badge, despite her Morpeko being at a disadvantage against Bea's Fighting Pokémon.
Pokémon used in the Gym
Used by Allister
|
||
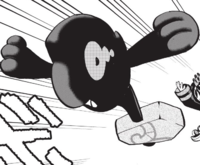
| Galarian Yamask is Allister's first known Pokémon. It was first used to battle Henry's Sirfetch'd, Lancelot, in a Gym battle, but was defeated. It is housed in a Dusk Ball.
Yamask's only known move is Brutal Swing. | ||
| Debut | Glittering!! The Tapestry in the Vault | |
|---|---|---|
|
||
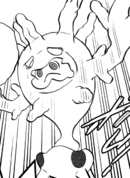
| Cursola is Allister's second known Pokémon. It was first used to battle Henry in a Gym battle. It managed to damage Henry's Sirfetch'd, Lancelot, but was defeated by his Oranguru, Fanguru.
None of Cursola's moves are known. | ||
| Debut | Glittering!! The Tapestry in the Vault | |
|---|---|---|
|
||
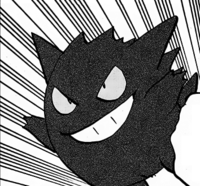
| Gengar is Allister's third known Pokémon. It was first used in Allister's Gym battle against Henry but was defeated by his Oranguru, Fanguru, after it exited its Gigantamax state. Allister also uses it as a mode of transportation. It is housed in a Dusk Ball.
Gengar's only known move is Venoshock**. | ||
| Debut | Glittering!! The Tapestry in the Vault | |
|---|---|---|
Used by Bea
|
||
| Grapploct is Bea's first known Pokémon. It was first seen in Casey's fantasy when she talked to Allister about Stow-on-Side's Gym Leaders.
None of Grapploct's moves are known. | ||
| Debut | Shocking!! Reunion in the Forest | |
|---|---|---|
|
||
| Hitmontop is Bea's second known Pokémon. He was first seen in Marnie's fantasy when she recalled her Gym battle against Bea.
None of Hitmontop's moves are known. | ||
| Debut | Chomp!! It's Dracovish | |
|---|---|---|

|
This article is part of Project Locations, a Bulbapedia project that aims to write comprehensive articles on every location in the Pokémon world. |


