Unova Route 3: Difference between revisions
mNo edit summary |
|||
| (38 intermediate revisions by 22 users not shown) | |||
| Line 1: | Line 1: | ||
{{ | {{incomplete|needs=Needs full route maps for all seasons in both BW and B2W2}} | ||
{{Route infobox | {{Route infobox | ||
|number=3 | |number=3 | ||
|image=Unova Route 3 Spring<!--{{#switch: {{#expr: {{#time: n}} mod 4}}|0=Winter|1=Spring|2=Summer|3=Autumn}}--> B2W2.png | |||
|image=Unova Route 3 Winter | |||
|generation=5 | |generation=5 | ||
|mapdesc=A long winding road with lots of ponds and [[tall grass]]. | |mapdesc=A long winding road with lots of ponds and [[tall grass]]. | ||
| Line 20: | Line 19: | ||
==Route description== | ==Route description== | ||
Access in {{game|Black and White|s}} is blocked until the {{player}} defeats [[Team Plasma]] at the [[Dreamyard]] and receives the [[C-Gear]] from [[Fennel]]. | |||
When the player first locates the Pokémon Day Care in | Route 3 starts off with a short simple path to the north after exiting Striaton City. Straight ahead is the [[Pokémon Day Care]] and a school where several {{tc|Preschooler}}s can be fought in the playground. A {{tc|Nursery Aide}} can heal the player's Pokémon inside the school building. A pair of {{tc|Twins}} initially blocks the player's path further westwards unless they have at least two usable Pokémon in their [[party]]. The player can travel westwards to find two separate paths, one that leads west and another that leads south; a patch of tall grass is located at the top of the intersection. The player can continue down the west path to find [[Wellspring Cave]] and a large patch of grass, or to the south, which winds around the shore of a pond. The player can then cross the pond by a bridge to the west leading to [[Nacrene City]], past a few patches of tall grass. In Black and White, this is the first area where [[Tall grass#Dark grass|dark grass]] is accessible. | ||
When the player first locates the Pokémon Day Care in Black and White, only one Pokémon can be deposited. After meeting the Day-Care Man in [[Nimbasa City]] and helping him against some {{tc|Team Plasma Grunt}}s, he will return to the Day Care and two Pokémon can now be deposited in the Day Care, allowing for [[Pokémon breeding]] to occur. In {{game|Black and White|s|Pokémon Black 2 and White 2|2}}, this is not necessary, as the Day Care will accept two Pokémon as soon as the player reaches it. | |||
After obtaining {{HM|03|Surf}}, the player can travel across the pond to the other side. On the west side of the pond, the player can find two patches of tall grass and a {{tc|Pokémon Breeder}}. | After obtaining {{HM|03|Surf}}, the player can travel across the pond to the other side. On the west side of the pond, the player can find two patches of tall grass and a {{tc|Pokémon Breeder}}. | ||
| Line 28: | Line 29: | ||
==Items== | ==Items== | ||
{{Itlisth|forest}} | {{Itlisth|forest}} | ||
{{Itemlist|Ultra Ball|In the sandbox west of the daycare ''(hidden)''|Bl=yes|W=yes | {{Itemlist|Ultra Ball|In the sandbox west of the daycare ''(hidden)''|Bl=yes|W=yes}} | ||
{{Itemlist|Super Potion|In a grass patch in the west|Bl=yes|W=yes | {{Itemlist|Super Potion|In a grass patch in the west|Bl=yes|W=yes}} | ||
{{Itemlist|Oran Berry|Given by Pokémon Breeder Adelaide after defeating her|Bl=yes|W=yes}} | {{Itemlist|Oran Berry|Given by Pokémon Breeder Adelaide after defeating her|Bl=yes|W=yes}} | ||
{{Itemlist|Repel|In the grass, near Adelaide|Bl=yes|W=yes | {{Itemlist|Repel|In the grass, near Adelaide|Bl=yes|W=yes}} | ||
{{Itemlist|Heal Ball|Given after defeating the [[Team Plasma]] grunts in [[Wellspring Cave]]|Bl=yes|W=yes|display= | {{Itemlist|Heal Ball|Given after defeating the [[Team Plasma]] grunts in [[Wellspring Cave]]|Bl=yes|W=yes|display=[[Heal Ball]] ×3}} | ||
{{Itemlist|Antidote|In a grass patch on the way south|Bl=yes|W=yes | {{Itemlist|Antidote|In a grass patch on the way south|Bl=yes|W=yes}} | ||
{{Itemlist|Great Ball|Very south at the end of a short path|Bl=yes|W=yes | {{Itemlist|Great Ball|Very south at the end of a short path|Bl=yes|W=yes}} | ||
{{Itemlist|Awakening|In a grass in the south|Bl=yes|W=yes | {{Itemlist|Awakening|In a grass in the south|Bl=yes|W=yes}} | ||
{{Itemlist|Full Heal|North of the bridge (requires {{m|Surf}})|Bl=yes|W=yes | {{Itemlist|Full Heal|North of the bridge (requires {{m|Surf}})|Bl=yes|W=yes}} | ||
{{Itemlist|Rare Candy| | {{Itemlist|Rare Candy| | ||
{{Itemlist|Max Ether|North-west of the bridge (requires {{m|Surf}})|Bl=yes|W=yes | * In the dark grass patch ''(hidden)'' | ||
* Northwest of the bridge (requires {{m|Surf}}) ''(hidden)''|Bl=yes|W=yes|display=[[Rare Candy]] ×2}} | |||
{{Itemlist|Max Ether|North-west of the bridge (requires {{m|Surf}})|Bl=yes|W=yes}} | |||
{{Itemlist|Lum Berry|Gift from Pokémon Breeder Galen (requires {{m|Surf}})|Bl=yes|W=yes}} | {{Itemlist|Lum Berry|Gift from Pokémon Breeder Galen (requires {{m|Surf}})|Bl=yes|W=yes}} | ||
{{Itemlist|HP Up|North-west of the bridge (requires {{m|Surf}})|Bl=yes|W=yes | {{Itemlist|HP Up|North-west of the bridge (requires {{m|Surf}})|Bl=yes|W=yes}} | ||
{{Itemlist|Quick Ball|Near School Kid Marsha|B2=yes|W2=yes | {{Itemlist|Quick Ball|Near School Kid Marsha|B2=yes|W2=yes}} | ||
{{Itemlist|Zinc|South of the pond, near Fisherman Bruce|B2=yes|W2=yes | {{Itemlist|Zinc|South of the pond, near Fisherman Bruce|B2=yes|W2=yes}} | ||
{{Itemlist|Big Nugget|East of the pond, near School Kid Edgar|B2=yes|W2=yes | {{Itemlist|Big Nugget|East of the pond, near School Kid Edgar|B2=yes|W2=yes}} | ||
{{Itemlist|Ultra Ball| | {{Itemlist|Ultra Ball| | ||
* West of Fisherman Mack (requires {{m|Surf}}) ''(hidden)'' | * West of Fisherman Mack (requires {{m|Surf}}) ''(hidden)'' | ||
* North of the T-intersection|B2=yes|W2=yes|display= | * North of the T-intersection|B2=yes|W2=yes|display=[[Ultra Ball]] ×2}} | ||
{{Itemlist|Calcium|Northwest of Fisherman Mack (requires {{m|Surf}})|B2=yes|W2=yes | {{Itemlist|Calcium|Northwest of Fisherman Mack (requires {{m|Surf}})|B2=yes|W2=yes}} | ||
{{Itemlist|Full Restore|North of Fisherman Mack (requires {{m|Surf}})|B2=yes|W2=yes | {{Itemlist|Full Restore|North of Fisherman Mack (requires {{m|Surf}})|B2=yes|W2=yes}} | ||
{{Itemlist|Nugget|On the ledge near Lass Shannon ''(hidden)''|B2=yes|W2=yes | {{Itemlist|Nugget|On the ledge near Lass Shannon ''(hidden)''|B2=yes|W2=yes}} | ||
{{Itemlist|Rare Candy| | {{Itemlist|Rare Candy| | ||
* In the sandbox west of the daycare ''(hidden)'' | * In the sandbox west of the daycare ''(hidden)'' | ||
* Inside the school|B2=yes|W2=yes|display=[[Rare Candy]] ×2}} | * Inside the school|B2=yes|W2=yes|display=[[Rare Candy]] ×2}} | ||
{{Itemlist|Dive Ball|From the School Kid at the fork in the road after completing the [[Habitat List]]|B2=yes|W2=yes|display= | {{Itemlist|Dive Ball|From the School Kid at the fork in the road after completing the [[Habitat List]]|B2=yes|W2=yes|display=[[Dive Ball]] ×5}} | ||
{{Itlistfoot|forest}} | {{Itlistfoot|forest}} | ||
===Hidden Grotto=== | ===Hidden Grotto=== | ||
{{Itlisth|forest}} | {{Itlisth|forest}} | ||
{{Itemlist|Damp Mulch|Sometimes in Hidden Grotto (both) ([[ | {{Itemlist|Damp Mulch|Sometimes in Hidden Grotto (both) ([[Recurring item|reappears]]) ''(hidden)''|B2=yes|W2=yes}} | ||
{{Itemlist|Growth Mulch|Sometimes in Hidden Grotto (both) ([[ | {{Itemlist|Growth Mulch|Sometimes in Hidden Grotto (both) ([[Recurring item|reappears]]) ''(hidden)''|B2=yes|W2=yes}} | ||
{{Itemlist|Stable Mulch|Sometimes in Hidden Grotto (both) ([[ | {{Itemlist|Stable Mulch|Sometimes in Hidden Grotto (both) ([[Recurring item|reappears]]) ''(hidden)''|B2=yes|W2=yes}} | ||
{{Itemlist|Gooey Mulch|Sometimes in Hidden Grotto (both) ([[ | {{Itemlist|Gooey Mulch|Sometimes in Hidden Grotto (both) ([[Recurring item|reappears]]) ''(hidden)''|B2=yes|W2=yes}} | ||
{{Itemlist|Repel|Sometimes in Hidden Grotto (both) ([[ | {{Itemlist|Repel|Sometimes in Hidden Grotto (both) ([[Recurring item|reappears]])|B2=yes|W2=yes}} | ||
{{Itemlist|Super Repel|Sometimes in Hidden Grotto (both) ([[ | {{Itemlist|Super Repel|Sometimes in Hidden Grotto (both) ([[Recurring item|reappears]])|B2=yes|W2=yes}} | ||
{{Itemlist|Max Repel|Sometimes in Hidden Grotto (both) ([[ | {{Itemlist|Max Repel|Sometimes in Hidden Grotto (both) ([[Recurring item|reappears]])|B2=yes|W2=yes}} | ||
{{Itemlist|Poké Ball|Sometimes in Hidden Grotto (both) ([[ | {{Itemlist|Poké Ball|Sometimes in Hidden Grotto (both) ([[Recurring item|reappears]])|B2=yes|W2=yes|display={{i|Poké Ball}}}} | ||
{{Itemlist|Great Ball|Sometimes in Hidden Grotto (both) ([[ | {{Itemlist|Great Ball|Sometimes in Hidden Grotto (both) ([[Recurring item|reappears]])|B2=yes|W2=yes}} | ||
{{Itemlist|Ultra Ball|Sometimes in Hidden Grotto (both) ([[ | {{Itemlist|Ultra Ball|Sometimes in Hidden Grotto (both) ([[Recurring item|reappears]])|B2=yes|W2=yes}} | ||
{{Itemlist|Potion|Sometimes in Hidden Grotto (both) ([[ | {{Itemlist|Potion|Sometimes in Hidden Grotto (both) ([[Recurring item|reappears]])|B2=yes|W2=yes}} | ||
{{Itemlist|Super Potion|Sometimes in Hidden Grotto (both) ([[ | {{Itemlist|Super Potion|Sometimes in Hidden Grotto (both) ([[Recurring item|reappears]])|B2=yes|W2=yes}} | ||
{{Itemlist|Hyper Potion|Sometimes in Hidden Grotto (both) ([[ | {{Itemlist|Hyper Potion|Sometimes in Hidden Grotto (both) ([[Recurring item|reappears]])|B2=yes|W2=yes}} | ||
{{Itemlist|Fire Stone|Sometimes in Hidden Grotto (dark grass) ([[ | {{Itemlist|Fire Stone|Sometimes in Hidden Grotto (dark grass) ([[Recurring item|reappears]])|B2=yes|W2=yes}} | ||
{{Itemlist|Leaf Stone|Sometimes in Hidden Grotto (dark grass) ([[ | {{Itemlist|Leaf Stone|Sometimes in Hidden Grotto (dark grass) ([[Recurring item|reappears]])|B2=yes|W2=yes}} | ||
{{Itemlist|Water Stone|Sometimes in Hidden Grotto (dark grass) ([[ | {{Itemlist|Water Stone|Sometimes in Hidden Grotto (dark grass) ([[Recurring item|reappears]])|B2=yes|W2=yes}} | ||
{{Itemlist|Thunder Stone|Sometimes in Hidden Grotto (dark grass) ([[ | {{Itemlist|Thunder Stone|Sometimes in Hidden Grotto (dark grass) ([[Recurring item|reappears]])|B2=yes|W2=yes|display=[[Thunder Stone|Thunderstone]]}} | ||
{{Itemlist|Dawn Stone|Sometimes in Hidden Grotto (pond) ([[ | {{Itemlist|Dawn Stone|Sometimes in Hidden Grotto (pond) ([[Recurring item|reappears]])|B2=yes|W2=yes}} | ||
{{Itemlist| | {{Itemlist|Tiny Mushroom|Sometimes in Hidden Grotto (both) ([[Recurring item|reappears]]) ''(hidden)''|B2=yes|W2=yes|display=[[Tiny Mushroom|TinyMushroom]]}} | ||
{{Itemlist|Big Mushroom|Sometimes in Hidden Grotto (both) ([[ | {{Itemlist|Big Mushroom|Sometimes in Hidden Grotto (both) ([[Recurring item|reappears]]) ''(hidden)''|B2=yes|W2=yes}} | ||
{{Itemlist|Rare Candy|Sometimes in Hidden Grotto (both) ([[ | {{Itemlist|Rare Candy|Sometimes in Hidden Grotto (both) ([[Recurring item|reappears]]) ''(hidden)''|B2=yes|W2=yes}} | ||
{{Itemlist|PP Up|Sometimes in Hidden Grotto (both) ([[ | {{Itemlist|PP Up|Sometimes in Hidden Grotto (both) ([[Recurring item|reappears]]) ''(hidden)''|B2=yes|W2=yes}} | ||
{{Itemlist|PP Max|Sometimes in Hidden Grotto (both) ([[ | {{Itemlist|PP Max|Sometimes in Hidden Grotto (both) ([[Recurring item|reappears]]) ''(hidden)''|B2=yes|W2=yes}} | ||
{{Itemlist|Red Shard|Sometimes in Hidden Grotto (both) ([[ | {{Itemlist|Red Shard|Sometimes in Hidden Grotto (both) ([[Recurring item|reappears]]) ''(hidden)''|B2=yes|W2=yes}} | ||
{{Itemlist|Green Shard|Sometimes in Hidden Grotto (both) ([[ | {{Itemlist|Green Shard|Sometimes in Hidden Grotto (both) ([[Recurring item|reappears]]) ''(hidden)''|B2=yes|W2=yes}} | ||
{{Itemlist|Yellow Shard|Sometimes in Hidden Grotto (both) ([[ | {{Itemlist|Yellow Shard|Sometimes in Hidden Grotto (both) ([[Recurring item|reappears]]) ''(hidden)''|B2=yes|W2=yes}} | ||
{{Itemlist|Blue Shard|Sometimes in Hidden Grotto (both) ([[ | {{Itemlist|Blue Shard|Sometimes in Hidden Grotto (both) ([[Recurring item|reappears]]) ''(hidden)''|B2=yes|W2=yes}} | ||
{{Itlistfoot|forest}} | {{Itlistfoot|forest}} | ||
| Line 104: | Line 107: | ||
{{catch/entry5|531|Audino|yes|yes|yes|Rustling|8-11|all=100%|type1=normal}} | {{catch/entry5|531|Audino|yes|yes|yes|Rustling|8-11|all=100%|type1=normal}} | ||
{{catch/div|water|Surfing}} | {{catch/div|water|Surfing}} | ||
{{catch/entry5|550|Basculin|yes|no|no|Surf|5-15|all=100%|type1=Water}} | {{catch/entry5|550|Basculin|yes|no|no|Surf|5-15|all=100%|type1=Water|form=Red-Striped}} | ||
{{catch/entry5|550B|Basculin|no|yes|no|Surf|5-15|all=100%|type1=Water}} | {{catch/entry5|550B|Basculin|no|yes|no|Surf|5-15|all=100%|type1=Water|form=Blue-Striped}} | ||
{{catch/div|water|Surfing in rippling water}} | {{catch/div|water|Surfing in rippling water}} | ||
{{catch/entry5|550|Basculin|no|yes|no|Rippling|5-15|all=100%|type1=Water}} | {{catch/entry5|550|Basculin|no|yes|no|Rippling|5-15|all=100%|type1=Water|form=Red-Striped}} | ||
{{catch/entry5|550B|Basculin|yes|no|no|Rippling|5-15|all=100%|type1=Water}} | {{catch/entry5|550B|Basculin|yes|no|no|Rippling|5-15|all=100%|type1=Water|form=Blue-Striped}} | ||
{{catch/div|water|Fishing}} | {{catch/div|water|Fishing}} | ||
{{catch/entry5|118|Goldeen|yes|yes|no|Fish Super|35-55|all=70%|type1=Water}} | {{catch/entry5|118|Goldeen|yes|yes|no|Fish Super|35-55|all=70%|type1=Water}} | ||
{{catch/entry5|550|Basculin|yes|no|no|Fish Super|35-55|all=30%|type1=Water}} | {{catch/entry5|550|Basculin|yes|no|no|Fish Super|35-55|all=30%|type1=Water|form=Red-Striped}} | ||
{{catch/entry5|550B|Basculin|no|yes|no|Fish Super|35-55|all=30%|type1=Water}} | {{catch/entry5|550B|Basculin|no|yes|no|Fish Super|35-55|all=30%|type1=Water|form=Blue-Striped}} | ||
{{catch/div|water|Fishing in rippling water}} | {{catch/div|water|Fishing in rippling water}} | ||
{{catch/entry5|118|Goldeen|yes|yes|no|Rippling|35-60|all=60%|type1=Water}} | {{catch/entry5|118|Goldeen|yes|yes|no|Rippling|35-60|all=60%|type1=Water}} | ||
{{catch/entry5|119|Seaking|yes|yes|no|Rippling|45-70|all=10%|type1=Water}} | {{catch/entry5|119|Seaking|yes|yes|no|Rippling|45-70|all=10%|type1=Water}} | ||
{{catch/entry5|550|Basculin|no|yes|no|Rippling|35-60|all=30%|type1=Water}} | {{catch/entry5|550|Basculin|no|yes|no|Rippling|35-60|all=30%|type1=Water|form=Red-Striped}} | ||
{{catch/entry5|550B|Basculin|yes|no|no|Rippling|35-60|all=30%|type1=Water}} | {{catch/entry5|550B|Basculin|yes|no|no|Rippling|35-60|all=30%|type1=Water|form=Blue-Striped}} | ||
{{catch/div|forest|Swarm}} | {{catch/div|forest|Swarm}} | ||
{{catch/entry5|313|Volbeat|yes|no|yes|Grass|15-55|all=40%|type1=Bug}} | {{catch/entry5|313|Volbeat|yes|no|yes|Grass|15-55|all=40%|type1=Bug}} | ||
| Line 140: | Line 143: | ||
{{catch/div|forest|Rustling grass}} | {{catch/div|forest|Rustling grass}} | ||
{{catch/entry5-2|508|Stoutland|yes|yes|Rustling|58, 59|all=5%|type1=Normal}} | {{catch/entry5-2|508|Stoutland|yes|yes|Rustling|58, 59|all=5%|type1=Normal}} | ||
{{catch/entry5-2|521 | {{catch/entry5-2|521{{#ifexpr: ({{#time: H}} mod 2)=0||F}}|Unfezant|yes|yes|Rustling|58|all=5%|type1=Normal|type2=Flying}} | ||
{{catch/entry5-2|531|Audino|yes|yes|Rustling|55-58|all=85%|type1=Normal}} | {{catch/entry5-2|531|Audino|yes|yes|Rustling|55-58|all=85%|type1=Normal}} | ||
{{catch/entry5-2|469|Yanmega|yes|yes|Rustling|58|all=5%|type1=Bug|type2=Flying}} | {{catch/entry5-2|469|Yanmega|yes|yes|Rustling|58|all=5%|type1=Bug|type2=Flying}} | ||
{{catch/div|water|Surfing}} | {{catch/div|water|Surfing}} | ||
{{catch/entry5-2|341|Corphish|yes|yes|Surf|45-60|all=30%|type1=Water}} | {{catch/entry5-2|341|Corphish|yes|yes|Surf|45-60|all=30%|type1=Water}} | ||
{{catch/entry5-2|550|Basculin|yes|no|Surf|45-60|all=70%|type1=Water}} | {{catch/entry5-2|550|Basculin|yes|no|Surf|45-60|all=70%|type1=Water|form=Red-Striped}} | ||
{{catch/entry5-2|550B|Basculin|no|yes|Surf|45-60|all=70%|type1=Water}} | {{catch/entry5-2|550B|Basculin|no|yes|Surf|45-60|all=70%|type1=Water|form=Blue-Striped}} | ||
{{catch/div|water|Surfing in rippling water}} | {{catch/div|water|Surfing in rippling water}} | ||
{{catch/entry5-2|341|Corphish|yes|yes|Rippling|45-60|all=60%|type1=Water}} | {{catch/entry5-2|341|Corphish|yes|yes|Rippling|45-60|all=60%|type1=Water}} | ||
{{catch/entry5-2|342|Crawdaunt|yes|yes|Rippling|50-60|all=10%|type1=Water|type2=Dark}} | {{catch/entry5-2|342|Crawdaunt|yes|yes|Rippling|50-60|all=10%|type1=Water|type2=Dark}} | ||
{{catch/entry5-2|550B|Basculin|yes|no|Rippling|45-60|all=30%|type1=Water}} | {{catch/entry5-2|550B|Basculin|yes|no|Rippling|45-60|all=30%|type1=Water|form=Blue-Striped}} | ||
{{catch/entry5-2|550|Basculin|no|yes|Rippling|45-60|all=30%|type1=Water}} | {{catch/entry5-2|550|Basculin|no|yes|Rippling|45-60|all=30%|type1=Water|form=Red-Striped}} | ||
{{catch/div|water|Fishing}} | {{catch/div|water|Fishing}} | ||
{{catch/entry5-2|118|Goldeen|yes|yes|Fish Super|40-70|all=70%|type1=Water}} | {{catch/entry5-2|118|Goldeen|yes|yes|Fish Super|40-70|all=70%|type1=Water}} | ||
{{catch/entry5-2|550|Basculin|yes|no|Fish Super|40-60|all=30%|type1=Water}} | {{catch/entry5-2|550|Basculin|yes|no|Fish Super|40-60|all=30%|type1=Water|form=Red-Striped}} | ||
{{catch/entry5-2|550B|Basculin|no|yes|Fish Super|40-60|all=30%|type1=Water}} | {{catch/entry5-2|550B|Basculin|no|yes|Fish Super|40-60|all=30%|type1=Water|form=Blue-Striped}} | ||
{{catch/div|water|Fishing in rippling water}} | {{catch/div|water|Fishing in rippling water}} | ||
{{catch/entry5-2|118|Goldeen|yes|yes|Rippling|40-60|all=60%|type1=Water}} | {{catch/entry5-2|118|Goldeen|yes|yes|Rippling|40-60|all=60%|type1=Water}} | ||
{{catch/entry5-2|119|Seaking|yes|yes|Rippling|50-70|all=10%|type1=Water}} | {{catch/entry5-2|119|Seaking|yes|yes|Rippling|50-70|all=10%|type1=Water}} | ||
{{catch/entry5-2|550B|Basculin|yes|no|Rippling|40-60|all=30%|type1=Water}} | {{catch/entry5-2|550B|Basculin|yes|no|Rippling|40-60|all=30%|type1=Water|form=Blue-Striped}} | ||
{{catch/entry5-2|550|Basculin|no|yes|Rippling|40-60|all=30%|type1=Water}} | {{catch/entry5-2|550|Basculin|no|yes|Rippling|40-60|all=30%|type1=Water|form=Red-Striped}} | ||
{{catch/div|forest|Swarm}} | {{catch/div|forest|Swarm}} | ||
{{catch/entry5-2|313|Volbeat|yes|no|Grass|40-55|all=40%|type1=Bug}} | {{catch/entry5-2|313|Volbeat|yes|no|Grass|40-55|all=40%|type1=Bug}} | ||
{{catch/entry5-2|314|Illumise|no|yes|Grass|40-55|all=40%|type1=Bug}} | {{catch/entry5-2|314|Illumise|no|yes|Grass|40-55|all=40%|type1=Bug}} | ||
{{catch/div|forest|{{tt|Hidden Grotto | {{catch/div|forest|{{tt|Hidden Grotto (dark grass)|20% chance for Pokémon to appear}}}} | ||
{{catch/entry5-2|310|Manectric|yes|yes|Grotto|55-60|all={{tt| | {{catch/entry5-2|310|Manectric|yes|yes|Grotto|55-60|all={{tt|4%|Has its Hidden Ability}}|type1=Electric}} | ||
{{catch/entry5-2|417|Pachirisu|yes|yes|Grotto|55-60|all={{tt| | {{catch/entry5-2|417|Pachirisu|yes|yes|Grotto|55-60|all={{tt|15%|Has its Hidden Ability}}|type1=Electric}} | ||
{{catch/entry5-2|523|Zebstrika|yes|yes|Grotto|55-60|all={{tt| | {{catch/entry5-2|523|Zebstrika|yes|yes|Grotto|55-60|all={{tt|1%|Has its Hidden Ability}}|type1=Electric}} | ||
{{catch/div|water|{{tt|Hidden Grotto | {{catch/div|water|{{tt|Hidden Grotto (northern part of the pond)|20% chance for Pokémon to appear}}}} | ||
{{catch/entry5-2|048|Venonat|yes|yes|Grotto|55-60|all={{tt| | {{catch/entry5-2|048|Venonat|yes|yes|Grotto|55-60|all={{tt|4%|Has its Hidden Ability}}|type1=Bug|type2=Poison}} | ||
{{catch/entry5-2|271|Lombre|yes|yes|Grotto|55-60|all={{tt| | {{catch/entry5-2|271|Lombre|yes|yes|Grotto|55-60|all={{tt|1%|Has its Hidden Ability}}|type1=Water|type2=Grass}} | ||
{{catch/entry5-2|400|Bibarel|yes|yes|Grotto|55-60|all={{tt| | {{catch/entry5-2|400|Bibarel|yes|yes|Grotto|55-60|all={{tt|15%|Has its Hidden Ability}}|type1=Normal|type2=Water}} | ||
{{catch/footer|forest}} | {{catch/footer|forest}} | ||
| Line 186: | Line 188: | ||
{{Trainerentry|Spr BW Preschooler M.png|Preschooler|Tully|40|1|511|Pansage|♂|10|36=ミノル|37=Minoru}} | {{Trainerentry|Spr BW Preschooler M.png|Preschooler|Tully|40|1|511|Pansage|♂|10|36=ミノル|37=Minoru}} | ||
{{Trainerdiv|forest}} | {{Trainerdiv|forest}} | ||
{{Trainerentry|Spr BW Twins.png|Twins|Kumi & Amy|160|2|509|Purrloin|♀|10||509|Purrloin|♀|10|36=クミとルミ|37=Kumi and Rumi}} | {{Trainerentry|Spr BW Twins.png|Twins|Kumi & Amy|160<br><small>Requires two or more<br>Pokémon in the party</small>|2|509|Purrloin|♀|10||509|Purrloin|♀|10|36=クミとルミ|37=Kumi and Rumi}} | ||
{{trainerdiv|forest}} | {{trainerdiv|forest}} | ||
{{Trainerentry|Spr BW Pokémon Breeder F.png|Pokémon Breeder|Adelaide|432|3|504|Patrat|♀|9||519|Pidove|♀|9||506|Lillipup|♀|9|36=トモミ|37=Tomomi}} | {{Trainerentry|Spr BW Pokémon Breeder F.png|Pokémon Breeder|Adelaide|432|3|504|Patrat|♀|9||519|Pidove|♀|9||506|Lillipup|♀|9|36=トモミ|37=Tomomi}} | ||
{{trainerfooter|forest|5}} | {{trainerfooter|forest|5}} | ||
{{MSP|495|Snivy}} If the {{player}} chose {{p|Snivy}}: | {{MSP/3|495|Snivy}} If the {{player}} chose {{p|Snivy}}: | ||
{{Party/Single | {{Party/Single | ||
|color={{black color}} | |color={{black color}} | ||
| Line 224: | Line 216: | ||
|ability=Blaze | |ability=Blaze | ||
|held=Oran Berry | |held=Oran Berry | ||
|move1= | |move1=Odor Sleuth|move1type=Normal|move1cat=Status | ||
|move2=Tail Whip|move2type=Normal|move2cat=Status | |move2=Tail Whip|move2type=Normal|move2cat=Status | ||
|move3=Ember|move3type=Fire|move3cat=Special | |move3=Ember|move3type=Fire|move3cat=Special | ||
| Line 242: | Line 234: | ||
{{Party/Footer}} | {{Party/Footer}} | ||
{{MSP|498|Tepig}} If the {{player}} chose {{p|Tepig}}: | {{MSP/3|498|Tepig}} If the {{player}} chose {{p|Tepig}}: | ||
{{Party/Single | {{Party/Single | ||
|color={{black color}} | |color={{black color}} | ||
| Line 283: | Line 275: | ||
{{Party/Footer}} | {{Party/Footer}} | ||
{{MSP|501|Oshawott}} If the {{player}} chose {{p|Oshawott}}: | {{MSP/3|501|Oshawott}} If the {{player}} chose {{p|Oshawott}}: | ||
{{Party/Single | {{Party/Single | ||
|color={{black color}} | |color={{black color}} | ||
| Line 323: | Line 315: | ||
|move4=Sand-Attack|move4type=Ground|move4cat=Status}} | |move4=Sand-Attack|move4type=Ground|move4cat=Status}} | ||
{{Party/Footer}} | {{Party/Footer}} | ||
{{-}} | |||
{{trainerheader|forest}} | |||
{{trainerdiv|forest|After defeating Team Plasma in Wellspring Cave}} | |||
{{Trainerentry|Spr BW School Kid M.png|School Kid|Al|260|1|522|Blitzle|♂|13|36=アル|37=Al}} | |||
{{trainerdiv|forest}} | |||
{{Trainerentry|Spr BW School Kid F.png|School Kid|Marsha|260|1|527|Woobat|♀|13|36=サワコ|37=Sawako}} | |||
{{trainerdiv|forest}} | |||
{{Trainerentry|Spr BW School Kid F.png|School Kid|Gina|240|2|504|Patrat|♀|12||509|Purrloin|♀|12|36=ミズホ|37=Mizuho}} | |||
{{trainerdiv|forest}} | |||
{{Trainerentry|Spr BW School Kid M.png|School Kid|Edgar|240|2|519|Pidove|♂|12||524|Roggenrola|♂|12|36=シュウヘイ|37=Shūhei}} | |||
{{trainerdiv|forest|Requires Surf}} | |||
{{Trainerentry|Spr BW Pokémon Breeder M.png|Pokémon Breeder|Galen|1536|3|512|Simisage|♂|32||514|Simisear|♂|32||516|Simipour|♂|32|36=ユウリ|37=Yūri}} | |||
{{trainerfooter|forest|5}} | |||
===[[Pokémon Black and White Versions 2|Pokémon Black 2 and White 2]]=== | ===[[Pokémon Black and White Versions 2|Pokémon Black 2 and White 2]]=== | ||
| Line 355: | Line 361: | ||
==In the anime== | ==In the anime== | ||
[[File:Unova Route 3 anime.png|thumb| | [[File:Unova Route 3 anime.png|thumb|250px|Route 3 in the {{pkmn|anime}}]] | ||
Route 3 | Route 3 appeared from ''[[BW007|Snivy Plays Hard to Catch!]]'' to ''[[BW013|Minccino-Neat and Tidy!]]''. | ||
In ''Snivy Plays Hard to Catch!'', {{Ash}} {{pkmn2|caught}} his {{AP|Snivy}} on a grassy route, which features trees with vines and a bog with huge lily pads. The [[Wellspring Cave]] was also located nearby. In ''[[BW011|A Home for Dwebble!]]'', there is a rocky terrain near a river where {{an|Cilan}} caught a {{TP|Cilan|Dwebble}}. | |||
A small city is also located here, as seen in ''[[BW008|Saving Darmanitan From the Bell!]]''. The town is famous for its historic [[clock tower]] which was initially slated for demolition after its bell stopped ringing. A spate of food thefts by two {{p|Darumaka}} was also plaguing the town. Though thanks to {{Ash}} and {{ashfr}}, the bell's hook was repaired, so the clock tower was reinstated again. Also the resident {{p|Darmanitan}} reverted to Standard Mode, after it was using all its energy to support the broken bell, and assumed the role of the clock tower's guardian. | |||
In ''[[BW010|A Rival Battle for Club Champ!]]'', the group arrived in [[Luxuria Town]], where Ash took on and lost to rival [[Trip]] in a five-on-five match at the local [[Battle Club]]. | |||
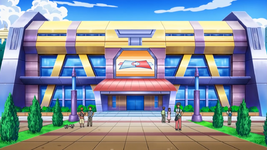
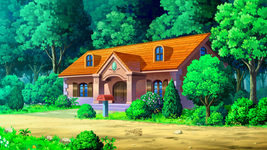
A joint [[Pokémon Day Care]] and Kindergarten, operated by [[Karena]] and her granddaughter [[Daniela]], was featured in ''[[BW012|Here Comes the Trubbish Squad!]]''. The students had befriended a {{p|Trubbish}}, who brought its bad smell and the garbage from the local dump to the Day Care. Daniela was against Trubbish staying, but after it saved the children, she allowed it to stay. Karena also gifted Ash an {{pkmn|Egg}} as thanks, which later hatched into a {{AP|Scraggy}}. | |||
===Gallery=== | ===Gallery=== | ||
{| style="margin:auto; text-align:center; background: #{{Locationcolor/med|forest}}; {{roundy}}; border: 3px solid #{{Locationcolor/light|forest}}" | |||
|- style="background:# #{{Locationcolor/dark|forest}} " | |||
File: | ! style="{{roundytl|5px}}" | {{color2|000|Wellspring Cave}} | ||
File: | ! style="{{roundytr|5px}}" | {{color2|000|Clock Tower}} | ||
File: | ! style="{{roundytr|5px}}" | {{color2|000|Luxuria Town}} | ||
File:Unova | ! style="{{roundytr|5px}}" | {{color2|000|Pokémon Day Care}} | ||
|- style="background:#fff" | |||
| [[File:Wellspring Cave anime.png|x150px]] | |||
| [[File:Clock tower anime.png|x150px]] | |||
| [[File:Luxuria Town Battle Club.png|x150px]] | |||
| [[File:Day Care Unova.png|x150px]] | |||
|} | |||
==Trivia== | ==Trivia== | ||
* The in-game maps show Route 3 leaving Striaton City directly from the west. However, the actual entrance to the city is a north-south entrance. | * The in-game maps show Route 3 leaving Striaton City directly from the west. However, the actual entrance to the city is a north-south entrance. | ||
* The two westernmost columns of tall grass in the patch closest to Nacrene City are subject to a graphical glitch: Seven tall grass sprites in each column are squashed to fit into six spaces on the world's grid. The player still moves along this grid, thus disaligning | * The two westernmost columns of tall grass in the patch closest to Nacrene City are subject to a graphical glitch: Seven tall grass sprites in each column are squashed to fit into six spaces on the world's grid. The player still moves along this grid, thus disaligning them with the grass sprites in these rows. | ||
{{Unova}}<br/> | {{Unova}}<br/> | ||
| Line 392: | Line 399: | ||
[[de:Route 3 (Einall)]] | [[de:Route 3 (Einall)]] | ||
[[es:Ruta 3 (Teselia)]] | |||
[[fr:Route 3 (Unys)]] | [[fr:Route 3 (Unys)]] | ||
[[it:Percorso 3 (Unima)]] | [[it:Percorso 3 (Unima)]] | ||
[[ja:3ばんどうろ (イッシュ地方)]] | [[ja:3ばんどうろ (イッシュ地方)]] | ||
[[zh:3号道路(合众)]] | [[zh:3号道路(合众)]] | ||
Latest revision as of 08:59, 1 November 2021

|
This article is incomplete. Please feel free to edit this article to add missing information and complete it. Reason: Needs full route maps for all seasons in both BW and B2W2 |
| ||||||||||
| ||||||||||
Map description
| ||||||||||
| Required for navigation
| ||||||||||
Connecting locations
| ||||||||||
Location 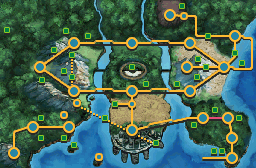 Location of Route 3 in Unova. | ||||||||||
Pokémon world routes
| ||||||||||
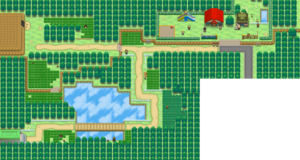
Route 3 (Japanese: 3番道路 Route 3) is a route in southeastern Unova, connecting Striaton City to Nacrene City, while also providing access to Wellspring Cave.
Route description
Access in Pokémon Black and White is blocked until the player defeats Team Plasma at the Dreamyard and receives the C-Gear from Fennel.
Route 3 starts off with a short simple path to the north after exiting Striaton City. Straight ahead is the Pokémon Day Care and a school where several Preschoolers can be fought in the playground. A Nursery Aide can heal the player's Pokémon inside the school building. A pair of Twins initially blocks the player's path further westwards unless they have at least two usable Pokémon in their party. The player can travel westwards to find two separate paths, one that leads west and another that leads south; a patch of tall grass is located at the top of the intersection. The player can continue down the west path to find Wellspring Cave and a large patch of grass, or to the south, which winds around the shore of a pond. The player can then cross the pond by a bridge to the west leading to Nacrene City, past a few patches of tall grass. In Black and White, this is the first area where dark grass is accessible.
When the player first locates the Pokémon Day Care in Black and White, only one Pokémon can be deposited. After meeting the Day-Care Man in Nimbasa City and helping him against some Team Plasma Grunts, he will return to the Day Care and two Pokémon can now be deposited in the Day Care, allowing for Pokémon breeding to occur. In Pokémon Black 2 and White 2, this is not necessary, as the Day Care will accept two Pokémon as soon as the player reaches it.
After obtaining HM03 (Surf), the player can travel across the pond to the other side. On the west side of the pond, the player can find two patches of tall grass and a Pokémon Breeder.
Items
| Item | Location | Games | |
|---|---|---|---|
| Ultra Ball | In the sandbox west of the daycare (hidden) | B W | |
| Super Potion | In a grass patch in the west | B W | |
| Oran Berry | Given by Pokémon Breeder Adelaide after defeating her | B W | |
| Repel | In the grass, near Adelaide | B W | |
| Heal Ball ×3 | Given after defeating the Team Plasma grunts in Wellspring Cave | B W | |
| Antidote | In a grass patch on the way south | B W | |
| Great Ball | Very south at the end of a short path | B W | |
| Awakening | In a grass in the south | B W | |
| Full Heal | North of the bridge (requires Surf) | B W | |
| Rare Candy ×2 |
|
B W | |
| Max Ether | North-west of the bridge (requires Surf) | B W | |
| Lum Berry | Gift from Pokémon Breeder Galen (requires Surf) | B W | |
| HP Up | North-west of the bridge (requires Surf) | B W | |
| Quick Ball | Near School Kid Marsha | B2 W2 | |
| Zinc | South of the pond, near Fisherman Bruce | B2 W2 | |
| Big Nugget | East of the pond, near School Kid Edgar | B2 W2 | |
| Ultra Ball ×2 |
|
B2 W2 | |
| Calcium | Northwest of Fisherman Mack (requires Surf) | B2 W2 | |
| Full Restore | North of Fisherman Mack (requires Surf) | B2 W2 | |
| Nugget | On the ledge near Lass Shannon (hidden) | B2 W2 | |
| Rare Candy ×2 |
|
B2 W2 | |
| Dive Ball ×5 | From the School Kid at the fork in the road after completing the Habitat List | B2 W2 | |
Hidden Grotto
| Item | Location | Games | |
|---|---|---|---|
| Damp Mulch | Sometimes in Hidden Grotto (both) (reappears) (hidden) | B2 W2 | |
| Growth Mulch | Sometimes in Hidden Grotto (both) (reappears) (hidden) | B2 W2 | |
| Stable Mulch | Sometimes in Hidden Grotto (both) (reappears) (hidden) | B2 W2 | |
| Gooey Mulch | Sometimes in Hidden Grotto (both) (reappears) (hidden) | B2 W2 | |
| Repel | Sometimes in Hidden Grotto (both) (reappears) | B2 W2 | |
| Super Repel | Sometimes in Hidden Grotto (both) (reappears) | B2 W2 | |
| Max Repel | Sometimes in Hidden Grotto (both) (reappears) | B2 W2 | |
| Poké Ball | Sometimes in Hidden Grotto (both) (reappears) | B2 W2 | |
| Great Ball | Sometimes in Hidden Grotto (both) (reappears) | B2 W2 | |
| Ultra Ball | Sometimes in Hidden Grotto (both) (reappears) | B2 W2 | |
| Potion | Sometimes in Hidden Grotto (both) (reappears) | B2 W2 | |
| Super Potion | Sometimes in Hidden Grotto (both) (reappears) | B2 W2 | |
| Hyper Potion | Sometimes in Hidden Grotto (both) (reappears) | B2 W2 | |
| Fire Stone | Sometimes in Hidden Grotto (dark grass) (reappears) | B2 W2 | |
| Leaf Stone | Sometimes in Hidden Grotto (dark grass) (reappears) | B2 W2 | |
| Water Stone | Sometimes in Hidden Grotto (dark grass) (reappears) | B2 W2 | |
| Thunderstone | Sometimes in Hidden Grotto (dark grass) (reappears) | B2 W2 | |
| Dawn Stone | Sometimes in Hidden Grotto (pond) (reappears) | B2 W2 | |
| TinyMushroom | Sometimes in Hidden Grotto (both) (reappears) (hidden) | B2 W2 | |
| Big Mushroom | Sometimes in Hidden Grotto (both) (reappears) (hidden) | B2 W2 | |
| Rare Candy | Sometimes in Hidden Grotto (both) (reappears) (hidden) | B2 W2 | |
| PP Up | Sometimes in Hidden Grotto (both) (reappears) (hidden) | B2 W2 | |
| PP Max | Sometimes in Hidden Grotto (both) (reappears) (hidden) | B2 W2 | |
| Red Shard | Sometimes in Hidden Grotto (both) (reappears) (hidden) | B2 W2 | |
| Green Shard | Sometimes in Hidden Grotto (both) (reappears) (hidden) | B2 W2 | |
| Yellow Shard | Sometimes in Hidden Grotto (both) (reappears) (hidden) | B2 W2 | |
| Blue Shard | Sometimes in Hidden Grotto (both) (reappears) (hidden) | B2 W2 | |
Pokémon
Pokémon Black and White
| Pokémon | Games | Location | Levels | Rate | ||||||||||||
|---|---|---|---|---|---|---|---|---|---|---|---|---|---|---|---|---|
|
B | W |
|
8 | 20% | |||||||||||
|
B | W |
|
9 | 10% | |||||||||||
|
B | W |
|
9 | 10% | |||||||||||
|
B | W |
|
8-11 | 40% | |||||||||||
|
B | W |
|
8-11 | 20% | |||||||||||
| Dark grass | ||||||||||||||||
|
B | W |
|
10 | 20% | |||||||||||
|
B | W |
|
11 | 10% | |||||||||||
|
B | W |
|
11 | 10% | |||||||||||
|
B | W |
|
10-13 | 40% | |||||||||||
|
B | W |
|
10-13 | 20% | |||||||||||
| Rustling grass | ||||||||||||||||
|
B | W |
|
8-11 | 100% | |||||||||||
| Surfing | ||||||||||||||||
|
B | W |
|
5-15 | 100% | |||||||||||
|
B | W |
|
5-15 | 100% | |||||||||||
| Surfing in rippling water | ||||||||||||||||
|
B | W |
|
5-15 | 100% | |||||||||||
|
B | W |
|
5-15 | 100% | |||||||||||
| Fishing | ||||||||||||||||
|
B | W |
|
35-55 | 70% | |||||||||||
|
B | W |
|
35-55 | 30% | |||||||||||
|
B | W |
|
35-55 | 30% | |||||||||||
| Fishing in rippling water | ||||||||||||||||
|
B | W |
|
35-60 | 60% | |||||||||||
|
B | W |
|
45-70 | 10% | |||||||||||
|
B | W |
|
35-60 | 30% | |||||||||||
|
B | W |
|
35-60 | 30% | |||||||||||
| Swarm | ||||||||||||||||
|
B | W |
|
15-55 | 40% | |||||||||||
|
B | W |
|
15-55 | 40% | |||||||||||
| A colored background means that the Pokémon can be found in this location in the specified game. A white background with a colored letter means that the Pokémon cannot be found here. | ||||||||||||||||
Pokémon Black 2 and White 2
| Pokémon | Games | Location | Levels | Rate | ||||||||||||
|---|---|---|---|---|---|---|---|---|---|---|---|---|---|---|---|---|
|
B2 | W2 |
|
56 | 10% | |||||||||||
|
B2 | W2 |
|
55 | 20% | |||||||||||
|
B2 | W2 |
|
57 | 10% | |||||||||||
|
B2 | W2 |
|
57 | 10% | |||||||||||
|
B2 | W2 |
|
55, 57 | 30% | |||||||||||
|
B2 | W2 |
|
56, 58 | 20% | |||||||||||
| Dark grass | ||||||||||||||||
|
B2 | W2 |
|
64 | 10% | |||||||||||
|
B2 | W2 |
|
63 | 20% | |||||||||||
|
B2 | W2 |
|
65 | 10% | |||||||||||
|
B2 | W2 |
|
65 | 10% | |||||||||||
|
B2 | W2 |
|
63, 65 | 30% | |||||||||||
|
B2 | W2 |
|
64, 66 | 20% | |||||||||||
| Rustling grass | ||||||||||||||||
|
B2 | W2 |
|
58, 59 | 5% | |||||||||||
|
B2 | W2 |
|
58 | 5% | |||||||||||
|
B2 | W2 |
|
55-58 | 85% | |||||||||||
|
B2 | W2 |
|
58 | 5% | |||||||||||
| Surfing | ||||||||||||||||
|
B2 | W2 |
|
45-60 | 30% | |||||||||||
|
B2 | W2 |
|
45-60 | 70% | |||||||||||
|
B2 | W2 |
|
45-60 | 70% | |||||||||||
| Surfing in rippling water | ||||||||||||||||
|
B2 | W2 |
|
45-60 | 60% | |||||||||||
|
B2 | W2 |
|
50-60 | 10% | |||||||||||
|
B2 | W2 |
|
45-60 | 30% | |||||||||||
|
B2 | W2 |
|
45-60 | 30% | |||||||||||
| Fishing | ||||||||||||||||
|
B2 | W2 |
|
40-70 | 70% | |||||||||||
|
B2 | W2 |
|
40-60 | 30% | |||||||||||
|
B2 | W2 |
|
40-60 | 30% | |||||||||||
| Fishing in rippling water | ||||||||||||||||
|
B2 | W2 |
|
40-60 | 60% | |||||||||||
|
B2 | W2 |
|
50-70 | 10% | |||||||||||
|
B2 | W2 |
|
40-60 | 30% | |||||||||||
|
B2 | W2 |
|
40-60 | 30% | |||||||||||
| Swarm | ||||||||||||||||
|
B2 | W2 |
|
40-55 | 40% | |||||||||||
|
B2 | W2 |
|
40-55 | 40% | |||||||||||
| Hidden Grotto (dark grass) | ||||||||||||||||
|
B2 | W2 |
|
55-60 | 4% | |||||||||||
|
B2 | W2 |
|
55-60 | 15% | |||||||||||
|
B2 | W2 |
|
55-60 | 1% | |||||||||||
| Hidden Grotto (northern part of the pond) | ||||||||||||||||
|
B2 | W2 |
|
55-60 | 4% | |||||||||||
|
B2 | W2 |
|
55-60 | 1% | |||||||||||
|
B2 | W2 |
|
55-60 | 15% | |||||||||||
| A colored background means that the Pokémon can be found in this location in the specified game. A white background with a colored letter means that the Pokémon cannot be found here. | ||||||||||||||||
Trainers
Pokémon Black and White
| Trainer | Pokémon | |||||||||||
|---|---|---|---|---|---|---|---|---|---|---|---|---|
|
| |||||||||||
| ||||||||||||
|
| |||||||||||
|
| |||||||||||
|
| |||||||||||
|
| |||||||||||
| ||||||||||||
|
| |||||||||||
| ||||||||||||
| ||||||||||||
|
|||||||||||||||||||||||||||||||||||||||||||||||||||||||||||||||||||
| |||||||||||||||||||||||||||||||||||||||||||||||||||||||||||||||||||
|
|||||||||||||||||||||||||||||||||||||||||||||||||||||||||||||||||||
| |||||||||||||||||||||||||||||||||||||||||||||||||||||||||||||||||||
|
|||||||||||||||||||||||||||||||||||||||||||||||||||||||||||||||||||
| |||||||||||||||||||||||||||||||||||||||||||||||||||||||||||||||||||
| Trainer | Pokémon | |||||||||||
|---|---|---|---|---|---|---|---|---|---|---|---|---|
| After defeating Team Plasma in Wellspring Cave | ||||||||||||
|
| |||||||||||
|
| |||||||||||
|
| |||||||||||
| ||||||||||||
|
| |||||||||||
| ||||||||||||
| Requires Surf | ||||||||||||
|
| |||||||||||
| ||||||||||||
| ||||||||||||
Pokémon Black 2 and White 2
| Trainer | Pokémon | |||||||||||
|---|---|---|---|---|---|---|---|---|---|---|---|---|
|
| |||||||||||
| ||||||||||||
| ||||||||||||
|
| |||||||||||
| ||||||||||||
| ||||||||||||
| ||||||||||||
| ||||||||||||
| ||||||||||||
|
| |||||||||||
| ||||||||||||
| ||||||||||||
|
| |||||||||||
| ||||||||||||
| ||||||||||||
|
| |||||||||||
| ||||||||||||
|
| |||||||||||
| ||||||||||||
|
| |||||||||||
| ||||||||||||
| ||||||||||||
|
| |||||||||||
| ||||||||||||
|
| |||||||||||
| ||||||||||||
|
| |||||||||||
| ||||||||||||
Trainer Tips
Pokémon Black and White
|
||||
Pokémon Black 2 and White 2
|
||||
In the anime

Route 3 appeared from Snivy Plays Hard to Catch! to Minccino-Neat and Tidy!.
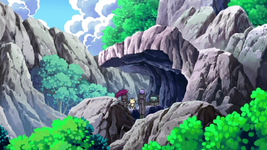
In Snivy Plays Hard to Catch!, Ash caught his Snivy on a grassy route, which features trees with vines and a bog with huge lily pads. The Wellspring Cave was also located nearby. In A Home for Dwebble!, there is a rocky terrain near a river where Cilan caught a Dwebble.
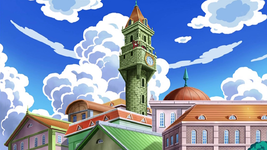
A small city is also located here, as seen in Saving Darmanitan From the Bell!. The town is famous for its historic clock tower which was initially slated for demolition after its bell stopped ringing. A spate of food thefts by two Darumaka was also plaguing the town. Though thanks to Ash and his friends, the bell's hook was repaired, so the clock tower was reinstated again. Also the resident Darmanitan reverted to Standard Mode, after it was using all its energy to support the broken bell, and assumed the role of the clock tower's guardian.
In A Rival Battle for Club Champ!, the group arrived in Luxuria Town, where Ash took on and lost to rival Trip in a five-on-five match at the local Battle Club.
A joint Pokémon Day Care and Kindergarten, operated by Karena and her granddaughter Daniela, was featured in Here Comes the Trubbish Squad!. The students had befriended a Trubbish, who brought its bad smell and the garbage from the local dump to the Day Care. Daniela was against Trubbish staying, but after it saved the children, she allowed it to stay. Karena also gifted Ash an Egg as thanks, which later hatched into a Scraggy.
Gallery
| Wellspring Cave | Clock Tower | Luxuria Town | Pokémon Day Care |
|---|---|---|---|
|
|
|
|
Trivia
- The in-game maps show Route 3 leaving Striaton City directly from the west. However, the actual entrance to the city is a north-south entrance.
- The two westernmost columns of tall grass in the patch closest to Nacrene City are subject to a graphical glitch: Seven tall grass sprites in each column are squashed to fit into six spaces on the world's grid. The player still moves along this grid, thus disaligning them with the grass sprites in these rows.

|
This article is part of Project Routes, a Bulbapedia project that aims to write comprehensive articles on every route in the Pokémon world. |
