Appendix:HeartGold and SoulSilver walkthrough/Section 30: Difference between revisions
mNo edit summary |
mNo edit summary |
||
| (16 intermediate revisions by 11 users not shown) | |||
| Line 1: | Line 1: | ||
{{WalkthroughNotice|HGSS}} | {{WalkthroughNotice|HGSS}} | ||
== | ==Route 10 (North)== | ||
[[File:Kanto Route 10 HGSS.png|thumb|Route 10]] | |||
[[File: | |||
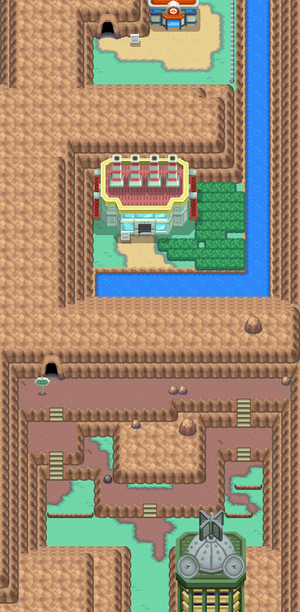
In the time it took to obtain the {{badge|Earth}}, the last of [[Kanto]]'s three [[legendary birds]] has appeared outside the [[Kanto Power Plant|Power Plant]] on {{rt|10|Kanto}}. | |||
===VS Zapdos=== | |||
Begin with {{t|Rock}}- and {{type|Ice}} attacks to wear its health down quickly, then follow up with {{t|Bug}}-, {{t|Grass}}-, {{t|Fighting}}-, {{t|Flying}}-, and {{type|Steel}} moves to chip away at it even further. Consider lulling it to {{status|Sleep}} to restrict its movements, and be sure to bring along some healing items as well. | |||
| | |||
| | |||
| | |||
{| style="margin: auto;" | |||
| | |||
{{Pokémon/4|game=HeartGold | |||
|ndex=145|pokemon=Zapdos | |||
|type1=Electric|type2=Flying | |||
|ability=Pressure | |||
|level=50 | |||
{| style="margin: auto | |move1=AncientPower|move1type=Rock|move1cat=Special | ||
| | |move2=Charge|move2type=Electric|move2cat=Status | ||
|move3=Agility|move3type=Psychic|move3cat=Status | |||
|move4=Discharge|move4type=Electric|move4cat=Special}} | |||
| | |||
| | |||
| | |||
| | |||
| | |||
| | |||
| | |||
| | |||
| | |||
| | |||
| | |||
| | |||
| | |||
| | |||
|} | |} | ||
{{-}} | |||
==Cerulean City== | |||
[[File:Cerulean Cave 1F HGSS.png|thumb|Cerulean Cave, 1F]] | |||
[[File:Cerulean Cave 2F HGSS.png|thumb|Cerulean Cave, 2F]] | |||
[[File:Cerulean Cave B1F HGSS.png|thumb|Cerulean Cave, B1F]] | |||
Only Trainers who have proven their worth by earning all 16 Badges are permitted to enter [[Cerulean Cave]], a mysterious place on the northwest edge of [[Cerulean City]]. To get there, visitors must {{m|Surf}} southward from {{rt|24|Kanto}}. | |||
=== | ===Cerulean Cave=== | ||
The mysterious [[Cerulean Cave]] is a sprawling cave network that extends deep into the mountains outside [[Cerulean City]]. It is impossible to navigate the pitch-black cave without the use of {{m|Surf}}, {{m|Rock Smash}}, and {{m|Rock Climb}}, and difficult to do so without {{m|Flash}}, as well. Before [[Cinnabar Island]]'s volcano erupted, it is here that the {{p|Mewtwo|genetically-engineered Pokémon}} from the island's {{ka|Pokémon Mansion}} fled after escaping the facility. | |||
{| class="expandable" style=" | {| class="expandable" align="center" style="background: #{{locationcolor/med|cave}}; {{roundy}}; border: 5px solid #{{locationcolor/light|cave}};" | ||
|- align="center" | |- align="center" | ||
! Available Pokémon | ! Available Pokémon | ||
|- | |- | ||
| | |||
{| class="expandable" align="center" style="background: #{{locationcolor/med|cave}}; {{roundy}}; border: 5px solid #{{locationcolor/light|cave}};" | |||
|- align="center" | |||
! 1F | |||
|- | |||
| | | | ||
{| class="expandable" style=" | {{catch/header|cave}} | ||
{{catch/entryhs|101|Electrode|yes|yes|Cave|40|all=5%|type1=Electric}} | |||
{{catch/entryhs|202|Wobbuffet|yes|yes|Cave|37|all=5%|type1=Psychic}} | |||
{{catch/entryhs|067|Machoke|yes|yes|Cave|39-40|24%|24%|6%|type1=Fighting}} | |||
{{catch/entryhs|047|Parasect|yes|yes|Cave|38|20%|20%|10%|type1=Bug|type2=Grass}} | |||
{{catch/entryhs|057|Primeape|yes|no|Cave|38-39|14%|14%|0%|type1=Fighting}} | |||
{{catch/entryhs|057|Primeape|yes|no|Cave|39|0%|0%|4%|type1=Fighting}} | |||
{{catch/entryhs|053|Persian|no|yes|Cave|38-39|14%|14%|0%|type1=Normal}} | |||
{{catch/entryhs|053|Persian|no|yes|Cave|39|0%|0%|4%|type1=Normal}} | |||
{{catch/entryhs|082|Magneton|yes|yes|Cave|39-40|11%|11%|0%|type1=Electric|type2=Steel}} | |||
{{catch/entryhs|082|Magneton|yes|yes|Cave|40|0%|0%|10%|type1=Electric|type2=Steel}} | |||
{{catch/entryhs|132|Ditto|yes|yes|Cave|39-40|11%|11%|0%|type1=Normal}} | |||
{{catch/entryhs|132|Ditto|yes|yes|Cave|39|0%|0%|10%|type1=Normal}} | |||
{{catch/entryhs|042|Golbat|yes|yes|Cave|38|10%|10%|0%|type1=Poison|type2=Flying}} | |||
{{catch/entryhs|042|Golbat|yes|yes|Cave|38-39|0%|0%|50%|type1=Poison|type2=Flying}} | |||
{{catch/div|water|Surfing}} | |||
{{catch/entryhs|054|Psyduck|yes|yes|Surf|35-40|all=90%|type1=Water}} | |||
{{catch/entryhs|055|Golduck|yes|yes|Surf|40|all=10%|type1=Water}} | |||
{{catch/div|water|Fishing}} | |||
{{catch/entryhs|129|Magikarp|yes|yes|Fish Old|10|all=100%|type1=Water}} | |||
{{catch/entryhs|060|Poliwag|yes|yes|Fish Good|20|all=45%|type1=Water}} | |||
{{catch/entryhs|118|Goldeen|yes|yes|Fish Good|20|all=40%|type1=Water}} | |||
{{catch/entryhs|129|Magikarp|yes|yes|Fish Good|20|all=15%|type1=Water}} | |||
{{catch/entryhs|060|Poliwag|yes|yes|Fish Super|40|all=40%|type1=Water}} | |||
{{catch/entryhs|061|Poliwhirl|yes|yes|Fish Super|40|all=30%|type1=Water}} | |||
{{catch/entryhs|130|Gyarados|yes|yes|Fish Super|40|all=30%|type1=Water|type2=Flying}} | |||
{{catch/div|cave|Rock Smash}} | |||
{{catch/entryhs|074|Geodude|yes|yes|Rock Smash|22-24|all=80%|type1=Rock|type2=Ground}} | |||
{{catch/entryhs|075|Graveler|yes|yes|Rock Smash|26-30|all=20%|type1=Rock|type2=Ground}} | |||
{{catch/div|cave|Special}} | |||
{{catch/entryhs|296|Makuhita|yes|yes|Hoenn|39-40|all=20%|type1=Fighting}} | |||
{{catch/entryhs|359|Absol|yes|yes|Hoenn|38|all=20%|type1=Dark}} | |||
{{catch/entryhs|433|Chingling|yes|yes|Sinnoh|39-40|all=20%|type1=Psychic}} | |||
{{catch/entryhs|436|Bronzor|yes|yes|Sinnoh|38|all=20%|type1=Steel|type2=Psychic}} | |||
{{catch/footer|cave}} | |||
|} | |||
{| class="expandable" align="center" style="background: #{{locationcolor/med|cave}}; {{roundy}}; border: 5px solid #{{locationcolor/light|cave}};" | |||
|- align="center" | |- align="center" | ||
! | ! 2F | ||
|- | |- | ||
| | | | ||
{{ | {{catch/header|cave}} | ||
{{ | {{catch/entryhs|042|Golbat|yes|yes|Cave|41|10%|10%|0%|type1=Poison|type2=Flying}} | ||
{{ | {{catch/entryhs|042|Golbat|yes|yes|Cave|41-42|0%|0%|20%|type1=Poison|type2=Flying}} | ||
{{ | {{catch/entryhs|047|Parasect|yes|yes|Cave|40|all=20%|type1=Bug|type2=Grass}} | ||
{{ | {{catch/entryhs|064|Kadabra|yes|yes|Cave|42|all=20%|type1=Psychic}} | ||
{{ | {{catch/entryhs|067|Machoke|yes|yes|Cave|39, 41-42|20%|20%|0%|type1=Fighting}} | ||
{{catch/entryhs|067|Machoke|yes|yes|Cave|39|0%|0%|10%|type1=Fighting}} | |||
{{ | {{catch/entryhs|082|Magneton|yes|yes|Cave|41|all=10%|type1=Electric|type2=Steel}} | ||
{{ | {{catch/entryhs|101|Electrode|yes|yes|Cave|41|all=5%|type1=Electric}} | ||
{{ | {{catch/entryhs|132|Ditto|yes|yes|Cave|42|all=10%|type1=Normal}} | ||
{{ | {{catch/entryhs|202|Wobbuffet|yes|yes|Cave|42|all=5%|type1=Psychic}} | ||
{{ | {{catch/div|water|Fishing}} | ||
{{ | {{catch/entryhs|129|Magikarp|yes|yes|Fish Old|10|all=100%|type1=Water}} | ||
{{ | {{catch/entryhs|060|Poliwag|yes|yes|Fish Good|20|all=45%|type1=Water}} | ||
{{ | {{catch/entryhs|118|Goldeen|yes|yes|Fish Good|20|all=40%|type1=Water}} | ||
{{ | {{catch/entryhs|129|Magikarp|yes|yes|Fish Good|20|all=15%|type1=Water}} | ||
{{ | {{catch/entryhs|060|Poliwag|yes|yes|Fish Super|40|all=40%|type1=Water}} | ||
{{ | {{catch/entryhs|061|Poliwhirl|yes|yes|Fish Super|40|all=30%|type1=Water}} | ||
{{ | {{catch/entryhs|130|Gyarados|yes|yes|Fish Super|40|all=30%|type1=Water|type2=Flying}} | ||
{{ | {{catch/div|cave|Special}} | ||
{{ | {{catch/entryhs|296|Makuhita|yes|yes|Hoenn|41-42|all=20%|type1=Fighting}} | ||
{{ | {{catch/entryhs|359|Absol|yes|yes|Hoenn|39, 41|all=20%|type1=Dark}} | ||
{{ | {{catch/entryhs|433|Chingling|yes|yes|Sinnoh|41-42|all=20%|type1=Psychic}} | ||
{{ | {{catch/entryhs|436|Bronzor|yes|yes|Sinnoh|39, 41|all=20%|type1=Steel|type2=Psychic}} | ||
{{ | {{catch/footer|cave}} | ||
|} | |} | ||
{| class="expandable" style=" | {| class="expandable" align="center" style="background: #{{locationcolor/med|cave}}; {{roundy}}; border: 5px solid #{{locationcolor/light|cave}};" | ||
|- align="center" | |- align="center" | ||
! | ! B1F | ||
|- | |- | ||
| | | | ||
{{ | {{catch/header|cave|no}} | ||
{{ | {{catch/entryhs|047|Parasect|yes|yes|Cave|45, 47|all=25%|type1=Bug|type2=Grass}} | ||
{{ | {{catch/entryhs|064|Kadabra|yes|yes|Cave|46|all=20%|type1=Psychic}} | ||
{{ | {{catch/entryhs|082|Magneton|yes|yes|Cave|45, 47|all=15%|type1=Electric|type2=Steel}} | ||
{{ | {{catch/entryhs|042|Golbat|yes|yes|Cave|47|all=10%|type1=Poison|type2=Flying}} | ||
{{ | {{catch/entryhs|067|Machoke|yes|yes|Cave|45|all=10%|type1=Fighting}} | ||
{{ | {{catch/entryhs|132|Ditto|yes|yes|Cave|45|all=10%|type1=Normal}} | ||
{{ | {{catch/entryhs|101|Electrode|yes|yes|Cave|46|all=5%|type1=Electric}} | ||
{{ | {{catch/entryhs|202|Wobbuffet|yes|yes|Cave|49|all=5%|type1=Psychic}} | ||
{{ | {{catch/div|water|Surfing}} | ||
{{catch/div| | {{catch/entryhs|054|Psyduck|yes|yes|Surf|35-40|all=90%|type1=Water}} | ||
{{ | {{catch/entryhs|055|Golduck|yes|yes|Surf|40|all=10%|type1=Water}} | ||
{{ | {{catch/div|water|Fishing}} | ||
{{catch/entryhs|129|Magikarp|yes|yes|Fish Old|10|all=100%|type1=Water}} | |||
{{catch/entryhs|060|Poliwag|yes|yes|Fish Good|20|all=45%|type1=Water}} | |||
{{catch/entryhs|118|Goldeen|yes|yes|Fish Good|20|all=40%|type1=Water}} | |||
{{catch/entryhs|129|Magikarp|yes|yes|Fish Good|20|all=15%|type1=Water}} | |||
{{catch/entryhs|060|Poliwag|yes|yes|Fish Super|40|all=40%|type1=Water}} | |||
{{catch/entryhs|061|Poliwhirl|yes|yes|Fish Super|40|all=30%|type1=Water}} | |||
{{catch/entryhs|130|Gyarados|yes|yes|Fish Super|40|all=30%|type1=Water|type2=Flying}} | |||
{{catch/div|cave|Rock Smash}} | |||
{{catch/entryhs|074|Geodude|yes|yes|Rock Smash|22-24|all=80%|type1=Rock|type2=Ground}} | |||
{{catch/entryhs|075|Graveler|yes|yes|Rock Smash|26-30|all=20%|type1=Rock|type2=Ground}} | |||
{{catch/div|cave|Special}} | |||
{{catch/entryhs|296|Makuhita|yes|yes|Hoenn|45|all=20%|type1=Fighting}} | |||
{{catch/entryhs|359|Absol|yes|yes|Hoenn|45, 47|all=20%|type1=Dark}} | |||
{{catch/entryhs|433|Chingling|yes|yes|Sinnoh|45|all=20%|type1=Psychic}} | |||
{{catch/entryhs|436|Bronzor|yes|yes|Sinnoh|45, 47|all=20%|type1=Steel|type2=Psychic}} | |||
{{catch/footer|cave}} | |||
|} | |} | ||
|} | |} | ||
{| class="expandable" style=" | {| class="expandable" align="center" style="background: #{{locationcolor/med|cave}}; {{roundy}}; border: 5px solid #{{locationcolor/light|cave}};" | ||
|- align="center" | |- align="center" | ||
! Items | ! Items | ||
|- | |- | ||
| | | | ||
{{itlisth|cave}} | {{itlisth|cave}} | ||
{{catch/div|cave| | {{catch/div|cave|1F}} | ||
{{ | {{Itemlist|Nugget|Between the two western ladders|HG=yes|SS=yes}} | ||
{{ | {{Itemlist|Hyper Potion|Southwest area, on the wall surrounded by three breakable rocks (hidden; requires {{m|Rock Smash}})|HG=yes|SS=yes}} | ||
{{ | {{Itemlist|Full Restore|South-southwest area, next to two large crystals|HG=yes|SS=yes}} | ||
{{ | {{Itemlist|Revive|Southwest area, on a single small crystal next to a large crystal (hidden)|HG=yes|SS=yes}} | ||
{{ | {{Itemlist|Max Elixir|Upper level, east end of the bridge|HG=yes|SS=yes}} | ||
{{ | {{Itemlist|Sea Incense|Upper level, northwest of the bridge|HG=yes|SS=yes}} | ||
{{ | {{Itemlist|Rare Candy|Upper level, on the northern of two crystals in the southeast corner (hidden)|HG=yes|SS=yes}} | ||
{{ | {{catch/div|cave|2F}} | ||
{{ | {{Itemlist|TM Electric|Northeast; at the end of the path (requires {{m|Rock Smash}})|HG=yes|SS=yes|display={{TM|24|Thunderbolt}}}} | ||
{{ | {{Itemlist|PP Up| | ||
{{ | * West; a few steps north of the west-central ladder (requires {{m|Rock Smash}}) | ||
{{ | * Southeast; in the large clearing, on the lone crystal in the southeast corner (hidden)|HG=yes|SS=yes|display=[[PP Up]] ×2}} | ||
{{Itemlist|Zinc|Southeast; in the large clearing, east-southeast of the ladder (hidden)|HG=yes|SS=yes}} | |||
{{ | {{Itemlist|Full Heal|Southeast; in the large clearing, near the northeast corner (hidden)|HG=yes|SS=yes}} | ||
{{ | {{Itemlist|Big Pearl|Southeast; in the large clearing, near the lone crystal in the southwest (hidden)|HG=yes|SS=yes}} | ||
{{catch/div|cave| | {{Itemlist|Ultra Ball| | ||
{{ | * Southeast; in the large clearing, northeast of the northernmost lone crystal (hidden) | ||
{{ | * Northwest; west-central area|HG=yes|SS=yes|display=[[Ultra Ball]] ×2}} | ||
{{ | {{Itemlist|Odd Incense|Northwest; a few steps east of the southernmost ladder (requires {{m|Rock Smash}})|HG=yes|SS=yes}} | ||
{{ | {{Itemlist|Protein|Northwest; north end of the path along the west wall (hidden; requires {{m|Rock Smash}})|HG=yes|SS=yes}} | ||
{{ | {{catch/div|cave|B1F}} | ||
{{Itemlist|Ultra Ball| | |||
* Southwest area, on a rocky ridge | |||
* Near the center of B1F, west of the group of five breakable rocks (hidden; requires {{m|Rock Smash}})|HG=yes|SS=yes|display=[[Ultra Ball]] ×2}} | |||
{{Itemlist|Dusk Stone|West-central area, east of the three large crystals (requires {{m|Rock Climb}})|HG=yes|SS=yes}} | |||
{{Itemlist|Max Revive| | |||
* Northwest area, behind two breakable rocks (hidden; requires {{m|Rock Smash}}) | |||
* Dead-end path in the north-central area|HG=yes|SS=yes|display=[[Max Revive]] ×2}} | |||
{{Itemlist|Nugget|North-northeast area, on the eastern of two small crystals (hidden; requires {{m|Rock Smash}})|HG=yes|SS=yes}} | |||
{{Itemlist|Electirizer|Northeast corner (requires {{m|Rock Climb}})|HG=yes|SS=yes}} | |||
{{Itemlist|Black Sludge|Southeast corner (requires {{m|Surf}})|HG=yes|SS=yes}} | |||
{{itlistfoot|cave}} | {{itlistfoot|cave}} | ||
|} | |} | ||
====1F==== | |||
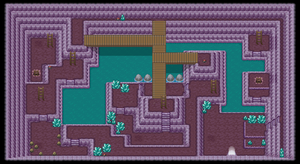
Head north and use {{m|Surf}} to reach the northeast corner, and climb up the ladder for a short detour. | |||
==== | |||
====2F (Northeast)==== | |||
Follow the path and use {{m|Rock Smash}} to clear the two [[breakable rock]]s. Pick up {{TM|24|Thunderbolt}}, then backtrack and return to 1F. | |||
==== | ====1F==== | ||
{{m|Surf}} westward and climb out of the water. Pick up the nearby [[Nugget]], then climb up the ladder to the southwest. | |||
====2F (West)==== | |||
Use {{m|Rock Smash}} and follow the branching path to its end to find a [[PP Up]]. Backtrack to the ladder and return to 1F. | |||
====1F==== | |||
Go south, then head east to find a [[Full Restore]] sitting next to the two crystals. Turn north and climb up the nearest ladder. | |||
====2F (Southeast)==== | |||
Search this wide-open area for any stray items, then return to 1F. | |||
==== | ====1F==== | ||
Go west and pass under the bridge, then turn south. Loop around and climb up the stairway to reach the bridge. Moving northward, take the right turn to reach a [[Max Elixir]] on a cliff, then the left turn to reach a [[Sea Incense]] on a narrow trail along the north wall. The north end of the bridge leads to the other end of this narrow trail, which serves as a shortcut to the exit. Return to the south end of the bridge and climb up the ladder. | |||
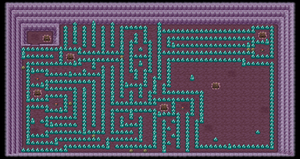
====2F (Northwest)==== | |||
Head west to reach a fork in the road; turn south, then turn east and clear two [[breakable rock]]s to reach an [[Odd Incense]]. Backtrack to the first east turn, then follow the southwest tunnel to the southwest corner and northward along the west wall. Make the first right turn to reach another [[Ultra Ball]]. Return to the first fork and go north this time, then turn east. Follow the zigzagging tunnel around to the northwest corner, and climb down the ladder. | |||
====1F (Northwest)==== | |||
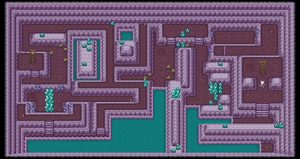
Climb down the next ladder to B1F. | |||
====B1F==== | |||
==== | Move southward and use {{m|Rock Climb}} to reach an [[Ultra Ball]], then go east and use the move again to grab the [[Dusk Stone]] in the dead-end to the east. Use Rock Climb again to continue northward past a group of [[breakable rock]]s and head east. Turn southward, then take the first path eastward to reach a [[Max Revive]]. Continue south to the water's edge and use {{m|Surf}} to move northeastward. Cross over the ridge with the two crystals and use Rock Climb to reach the [[Electirizer]] in the northeast corner. Jump the nearby ledge and use Rock Climb again to continue southward. Use {{m|Surf}} to collect the [[Black Sludge]] in the southeast corner, climb the stairway on the east-central hill to meet the Genetic Pokémon. | ||
=====VS Mewtwo===== | |||
Begin with {{t|Bug}}-, {{t|Ghost}}-, and {{type|Dark}} attacks to wear its health down quickly, then follow up with {{t|Fighting}}- and {{type|Psychic}} moves to chip away at it even further. Consider inflicting status ailments like {{status|Sleep}} and {{status|Paralysis}} to restrict its movements, and be sure to bring along some healing items as well. | |||
{| style="margin: auto;" | |||
{| | |||
| | | | ||
{{ | {{Pokémon/4|game=HeartGold | ||
|ndex=150|pokemon=Mewtwo | |||
|type1=Psychic | |||
|ability=Pressure | |||
|level=70 | |||
|move1=Psycho Cut|move1type=Psychic|move1cat=Physical | |||
|move2=Amnesia|move2type=Psychic|move2cat=Status | |||
| | |move3=Power Swap|move3type=Psychic|move3cat=Status | ||
|move4=Guard Swap|move4type=Psychic|move4cat=Status}} | |||
| | |||
|} | |} | ||
After the battle, either use an [[Escape Rope]], or climb up the nearby ladder. | |||
====1F==== | |||
Jump the ledge and use {{m|Surf}} to return to the entrance. | |||
==== | |||
==== | ==Route 25== | ||
[[File:Kanto Route 25 HGSS.png|thumb|400px|Route 25]] | |||
===The Aurora is Calmed=== | |||
After brief sightings of {{p|Suicune}} in [[Ecruteak City]], [[Cianwood City]], {{rt|42|Johto}}, [[Vermilion City]], and {{rt|14|Kanto}}, its search for a suitable environment comes to an end at [[Kanto Route 25|Cerulean Cape]]. As [[Eusine]] once said, it seems to prefer ''"a hilly place, near water... ...Somewhere north."'' | |||
[[ | When you reach the top of the stairway, {{p|Suicune}} lets out a cry just as [[Eusine]] arrives. He is out of breath, and reluctantly admits that he is no match for you. He reveals that he has had a feeling since first meeting you in the [[Burned Tower]] that Suicune would choose you. He encourages you to face the legendary creature, pointing out that it is waiting to battle a worthy Trainer that it can trust to be its partner. | ||
[[ | |||
=== | ===VS Suicune=== | ||
Begin with {{t|Grass}}- and {{type|Electric}} attacks to wear its health down quickly, then follow up with {{t|Fire}}-, {{t|Water}}-, {{t|Ice}}-, and {{type|Steel}} moves to chip away at it even further. Consider inflicting status ailments like {{status|Sleep}} and {{status|Paralysis}} to restrict its movements, and be sure to bring along some healing items as well. | |||
{| style="margin: auto;" | |||
| | |||
{{Pokémon/4|game=HeartGold | |||
|ndex=245|pokemon=Suicune | |||
|type1=Water | |||
{| style="margin: auto | |||
| | |||
|ndex= | |||
|type1= | |||
|ability=Pressure | |ability=Pressure | ||
| | |level=40 | ||
|move1= | |move1=Rain Dance|move1type=Water|move1cat=Status | ||
|move2= | |move2=Gust|move2type=Flying|move2cat=Special | ||
|move3= | |move3=Aurora Beam|move3type=Ice|move3cat=Special | ||
|move4= | |move4=Mist|move4type=Ice|move4cat=Status}} | ||
|} | |} | ||
After the battle, [[Eusine]] exclaims that he has never seen a battle so intense. He states that he has no regrets, and bids farewell to you and {{p|Suicune}}. | |||
==Pallet Town== | |||
[[File:Professor Oak Lab inside HGSS.png|thumb|Professor Oak's Lab]] | |||
{| class="expandable" align="center" style="background: #BDBDBD; {{roundy}}; border: 5px solid #D3D3D3;" | |||
{| class="expandable" style=" | |||
|- align="center" | |- align="center" | ||
! Available Pokémon | ! Available Pokémon | ||
|- | |||
|- | |||
| | | | ||
{{ | {{Catch/header|road|4}} | ||
{{ | {{Catch/div|road|Gift Pokémon}} | ||
{{ | {{Catch/entryhs|001|Bulbasaur|yes|yes|Gift|5|all=One|type1=Grass|type2=Poison}} | ||
{{Catch/entryhs|004|Charmander|yes|yes|Gift|5|all=One|type1=Fire}} | |||
{{Catch/entryhs|007|Squirtle|yes|yes|Gift|5|all=One|type1=Water}} | |||
{{Catch/footer|road|2}} | |||
|} | |} | ||
{{ | ===Oak's Lab=== | ||
With {{ga|Red}} defeated, return to [[Pallet Town]] and speak to [[Professor Oak]]. He has heard a lot about you, and would like to reward all of your hard work with a gift. He motions to the three Poké Balls on the desk behind him, and gives you the choice of [[First partner Pokémon|three Pokémon]] rarely seen in [[Kanto]]. | |||
{| | {| style="margin: auto; background: #{{kanto color dark}}; text-align: center; font-size: 85%; {{roundy}}; border: 5px solid #{{kanto color}};" cellpadding="5" | ||
|- | |||
! | ! colspan="2" style="width: 80px; background: #{{kanto color light}}; {{roundytl|5px}};" | [[File:0001Bulbasaur.png|100px]]<br>'''{{pcolor|Bulbasaur|{{kanto color dark}}}}'''<br> | ||
! colspan="2" style="width: 80px; background: #{{kanto color light}};" | [[File:0004Charmander.png|100px]]<br>'''{{pcolor|Charmander|{{kanto color dark}}}}'''<br> | |||
! colspan="2" style="width: 80px; background: #{{kanto color light}}; {{roundytr|5px}};" | [[File:0007Squirtle.png|100px]]<br>'''{{pcolor|Squirtle|{{kanto color dark}}}}''' | |||
|- | |- | ||
| | | style="background: #{{grass color}};" | {{color2|FFF|Grass (type)|Grass}} | ||
{{ | | style="background: #{{poison color}};" | {{color2|FFF|Poison (type)|Poison}} | ||
{{ | | colspan="2" style="background: #{{fire color}};" | {{color2|FFF|Fire (type)|Fire}} | ||
{{ | | colspan="2" style="background: #{{water color}};" | {{color2|FFF|Water (type)|Water}} | ||
{{ | |- style="background: #{{kanto color light}};" | ||
{{ | | {{MSP/6|002|Ivysaur}} | ||
{{ | | {{pcolor|Ivysaur|{{kanto color dark}}}} | ||
{{ | | {{MSP/6|005|Charmeleon}} | ||
{{ | | {{pcolor|Charmeleon|{{kanto color dark}}}} | ||
{{ | | {{MSP/6|008|Wartortle}} | ||
| {{pcolor|Wartortle|{{kanto color dark}}}} | |||
|- | |- | ||
| | | style="background: #{{grass color}};" | {{color2|FFF|Grass (type)|Grass}} | ||
| style="background: #{{poison color}};" | {{color2|FFF|Poison (type)|Poison}} | |||
| colspan="2" style="background: #{{fire color}};" | {{color2|FFF|Fire (type)|Fire}} | |||
{{ | | colspan="2" style="background: #{{water color}};" | {{color2|FFF|Water (type)|Water}} | ||
|- style="background: #{{kanto color light}};" | |||
{{ | | {{MSP/6|003|Venusaur}} | ||
| {{pcolor|Venusaur|{{kanto color dark}}}} | |||
| {{MSP/6|006|Charizard}} | |||
{{ | | {{pcolor|Charizard|{{kanto color dark}}}} | ||
| {{MSP/6|009|Blastoise}} | |||
| {{pcolor|Blastoise|{{kanto color dark}}}} | |||
{{ | |||
{{ | |||
{{ | |||
{{ | |||
{{ | |||
{{ | |||
{{ | |||
{{ | |||
{{ | |||
{{ | |||
{{ | |||
{{ | |||
{{ | |||
{{ | |||
| | |||
|- | |- | ||
| | | style="background: #{{grass color}}; {{roundybl|5px}};" | {{color2|FFF|Grass (type)|Grass}} | ||
{{ | | style="background: #{{poison color}};" | {{color2|FFF|Poison (type)|Poison}} | ||
{{ | | style="background: #{{fire color}};" | {{color2|FFF|Fire (type)|Fire}} | ||
{{ | | style="background: #{{flying color}};" | {{color2|FFF|Flying (type)|Flying}} | ||
{{ | | colspan="2" style="background: #{{water color}}; {{roundybr|5px}};" | {{color2|FFF|Water (type)|Water}} | ||
{{ | |||
{{ | |||
{{ | |||
{{ | |||
|} | |} | ||
== | ==Saffron City== | ||
[[File: | [[File:Silph Co 1F HGSS.png|thumb|Silph Co., 1F]] | ||
{| class="expandable" style=" | {| class="expandable" align="center" style="background: #F6D263; {{roundy}}; border: 5px solid #F9E197;" | ||
|- align="center" | |- align="center" | ||
! Available Pokémon | ! Available Pokémon | ||
|- | |- | ||
| | | | ||
{{ | {{Catch/header|sand|4}} | ||
{{catch/div|sand|Gift Pokémon}} | |||
{{catch/ | {{catch/entryhs|252|Treecko|yes|yes|Gift|5|all={{tt|One|Must select the choice of Green Stone}}|type1=grass}} | ||
{{catch/entryhs| | {{catch/entryhs|255|Torchic|yes|yes|Gift|5|all={{tt|One|Must select the choice of Red Stone}}|type1=fire}} | ||
{{ | {{catch/entryhs|258|Mudkip|yes|yes|Gift|5|all={{tt|One|Must select the choice of Blue Stone}}|type1=water}} | ||
{{Catch/div|sand|Special Pokémon}} | |||
{{catch/entryhs|374|Beldum|yes|yes|Trade|The same as the traded Pokémon|all={{tt|One|After speaking to Steven in Pewter City}}|tradenum=205|tradename=Forretress|type1=steel|type2=psychic}} | |||
{{catch/entryhs| | {{Catch/footer|sand}} | ||
{{ | |||
{{catch/entryhs| | |||
{{ | |||
{{ | |||
{{catch/entryhs| | |||
{{ | |||
{{ | |||
|} | |} | ||
===Silph Co.=== | |||
====The Three Stones==== | |||
Having defeated {{ga|Red}}, return to [[Saffron City]] and visit the [[Silph Co.]] building. Inside, you find [[Steven Stone]] near the information desk on the east side. He is just ending a phone call, but quickly notices you. Seeing that you have a [[Pokédex]], he realizes that you too are searching for Pokémon, and believes that he can help with that. He poses a question to you: ''"Let's say that you have stones in front of you. Which color would you pick?"'' The answer given—green stone, red stone, or blue stone—determines which of the [[First partner Pokémon|three Pokémon]] from his native [[Hoenn]] region that he offers you. | |||
{| | {| style="margin: auto; background: #{{hoenn color dark}}; text-align: center; font-size: 85%; {{roundy}}; border: 5px solid #{{hoenn color}};" cellpadding="5" | ||
|- | |- | ||
! colspan="2" style="width: 80px; background: #{{hoenn color light}}; {{roundytl|5px}};" | [[File:252Treecko.png|100px]]<br>'''{{pcolor|Treecko|{{hoenn color dark}}}}'''<br> | |||
! colspan="2" style="width: 80px; background: #{{hoenn color light}};" | [[File:255Torchic.png|100px]]<br>'''{{pcolor|Torchic|{{hoenn color dark}}}}'''<br> | |||
! colspan="2" style="width: 80px; background: #{{hoenn color light}}; {{roundytr|5px}};" | [[File:258Mudkip.png|100px]]<br>'''{{pcolor|Mudkip|{{hoenn color dark}}}}''' | |||
|- | |||
| colspan="2" style="background: #{{grass color}};" | {{color2|FFF|Grass (type)|Grass}} | |||
| colspan="2" style="background: #{{fire color}};" | {{color2|FFF|Fire (type)|Fire}} | |||
| colspan="2" style="background: #{{water color}};" | {{color2|FFF|Water (type)|Water}} | |||
|- style="background: #{{hoenn color light}};" | |||
| {{MSP/6|253|Grovyle}} | |||
| {{pcolor|Grovyle|{{hoenn color dark}}}} | |||
| {{MSP/6|256|Combusken}} | |||
| {{pcolor|Combusken|{{hoenn color dark}}}} | |||
| {{MSP/6|259|Marshtomp}} | |||
| {{pcolor|Marshtomp|{{hoenn color dark}}}} | |||
|- | |||
| colspan="2" style="background: #{{grass color}};" | {{color2|FFF|Grass (type)|Grass}} | |||
| style="background: #{{fire color}};" | {{color2|FFF|Fire (type)|Fire}} | |||
| style="background: #{{fighting color}};" | {{color2|FFF|Fighting (type)|Fighting}} | |||
| style="background: #{{water color}};" | {{color2|FFF|Water (type)|Water}} | |||
| style="background: #{{ground color}};" | {{color2|FFF|Ground (type)|Ground}} | |||
|- style="background: #{{hoenn color light}};" | |||
| {{MSP/6|254|Sceptile}} | |||
| {{pcolor|Sceptile|{{hoenn color dark}}}} | |||
| {{MSP/6|257|Blaziken}} | |||
| {{pcolor|Blaziken|{{hoenn color dark}}}} | |||
| {{MSP/6|260|Swampert}} | |||
| {{pcolor|Swampert|{{hoenn color dark}}}} | |||
|- | |- | ||
| | | colspan="2" style="background: #{{grass color}}; {{roundybl|5px}};" | {{color2|FFF|Grass (type)|Grass}} | ||
{{ | | style="background: #{{fire color}};" | {{color2|FFFFFF|Fire (type)|Fire}} | ||
{{ | | style="background: #{{fighting color}};" | {{color2|FFF|Fighting (type)|Fighting}} | ||
{{ | | style="background: #{{water color}};" | {{color2|FFF|Water (type)|Water}} | ||
{{ | | style="background: #{{ground color}}; {{roundybr|5px}};" | {{color2|FFF|Ground (type)|Ground}} | ||
{{ | |||
|} | |} | ||
He advises you to take good care of the young Pokémon, then leaves. | |||
==== | ==Pewter City== | ||
===Pewter Museum of Science=== | |||
After speaking to [[Steven Stone|Steven]] in [[Silph Co.]], travel to [[Pewter City]] to meet him again. Visit the [[Pewter Museum of Science]] to find him engrossed in an exhibit, talking to himself about stars shining in the night sky. | |||
{| | ==Saffron City== | ||
===Silph Co.=== | |||
====Time for a Trade==== | |||
{| style=" | After speaking to [[Steven Stone|Steven]] in [[Pewter City]], return to the [[Silph Co.]] building to find that he is already here. He can now be found near the statue at the entrance. Speak to him to find that he would like to trade Pokémon. He is willing to part with his {{p|Beldum}} in exchange for a {{p|Forretress}}. Forretress cannot be found in the wild, but its pre-evolved form, {{p|Pineco}}, is a common sight when {{m|Headbutt|headbutting}} trees. His Beldum holds a [[Dawn Stone]]. | ||
==Route 30== | |||
{| class="expandable" align="center" style="background: #{{locationcolor/med|land}}; {{roundy}}; border: 5px solid #{{locationcolor/light|land}};" | |||
|- align="center" | |- align="center" | ||
! | ! Items | ||
|- | |- | ||
| | | | ||
{| | {{Itlisth|land}} | ||
| | {{Itemlist|Blue Orb IV|Northeast house; from Mr. Pokémon, after obtaining a [[Kanto]] [[first partner Pokémon]] from Professor Oak|HG=yes|display=[[Blue Orb]]}} | ||
{{Itemlist|Red Orb IV|Northeast house; from Mr. Pokémon, after obtaining a [[Kanto]] [[first partner Pokémon]] from Professor Oak|SS=yes|display=[[Red Orb]]}} | |||
| | {{itlistfoot|land}} | ||
| | |||
| | |||
| | |||
| | |||
}} | |||
|} | |||
|} | |} | ||
===Mr. Pokémon's house=== | |||
Having received a [[first partner Pokémon]] from [[Professor Oak]], return to {{rt|30|Johto}} and visit [[Mr. Pokémon]]. When you enter his home, he immediately informs you that he has something that he would like you to have, and was just about to send an email to Professor Oak. He explains that [[Steven Stone|a friend of his]] from [[Hoenn]] delivered this to him, and fetches the [[Blue Orb]]{{sup/4|HG}} / [[Red Orb]]{{sup/4|SS}} from the cabinet in the corner. He continues, saying that this gemstone is somehow related to the [[Embedded Tower|ancient ruins]] located past [[Cianwood City]], but few Trainers can reach the area. Professor Oak thinks highly of you, so Mr. Pokémon is sure that you can solve the mystery of the Orb and the secret of the ruins. | |||
==Roaming (Johto)== | |||
After fleeing from the [[Burned Tower]] in [[Ecruteak City]], the [[legendary beasts]] begin racing across the countryside. While {{p|Suicune}} sets off on its own adventure spanning both [[Johto]] and [[Kanto]], {{p|Raikou}} and {{p|Entei}} begin [[Roaming Pokémon|roaming]] the Johto region. When traveling to a different area, each of the beasts race to a different route. They will also attempt to flee from battle at the first opportunity; this makes Pokémon with {{cat|Trapping Abilities|trapping Abiliities}} especially useful, as it blocks the beasts' escape. Speedy Pokémon that act first with {{status|sleep}}-inducing moves are also helpful, as both of the beasts can use {{m|Roar}} to escape otherwise. After seeing them in battle, the [[Pokégear]]'s Map tracks their movements. If defeated, they will reappear in the Burned Tower after entering the [[Hall of Fame]]; they must be interacted with here for them to begin roaming again. | |||
===VS Raikou=== | |||
Once {{p|Raikou}} is unable to flee, begin with {{type|Ground}} attacks to wear its health down quickly, then follow up with {{t|Flying}}-, {{t|Electric}}-, and {{type|Steel}} moves to chip away at it even further. | |||
{| style="margin: auto;" | |||
{| | |||
| | | | ||
{{ | {{Pokémon/4|game=HeartGold | ||
|ndex=243|pokemon=Raikou | |||
|type1=Electric | |||
|ability=Pressure | |||
|level=40 | |||
|move1=Roar|move1type=Normal|move1cat=Status | |||
|move2=Quick Attack|move2type=Normal|move2cat=Physical | |||
|move3=Spark|move3type=Electric|move3cat=Physical | |||
|move4=Reflect|move4type=Psychic|move4cat=Status}} | |||
|} | |} | ||
=== | ===VS Entei=== | ||
Once {{p|Entei}} is unable to flee, begin with {{t|Water}}-, {{t|Rock}}-, and {{type|Ground}} attacks to wear its health down quickly, then follow up with {{t|Bug}}-, {{t|Grass}}-, {{t|Fire}}-, {{t|Ice}}-, and {{type|Steel}} moves to chip away at it even further. | |||
{| style="margin: auto;" | {| style="margin: auto;" | ||
| | | | ||
{{Pokémon/4|game=HeartGold | {{Pokémon/4|game=HeartGold | ||
|ndex= | |ndex=244|pokemon=Entei | ||
|type1= | |type1=Fire | ||
|level= | |ability=Pressure | ||
|level=40 | |||
|move1= | |move1=Roar|move1type=Normal|move1cat=Status | ||
|move2= | |move2=Fire Spin|move2type=Fire|move2cat=Special | ||
|move3= | |move3=Stomp|move3type=Normal|move3cat=Physical | ||
|move4= | |move4=Flamethrower|move4type=Fire|move4cat=Special}} | ||
}} | |||
|} | |} | ||
==Roaming (Kanto)== | |||
{{-}} | After meeting [[Steven Stone|Steven]] in [[Vermilion City]], one of the Eon Pokémon begins [[Roaming Pokémon|roaming]] across [[Kanto]]. When traveling to a different area, the Pokémon races to a different route. It will also attempt to flee from battle at the first opportunity; this makes Pokémon with {{cat|Trapping Abilities|trapping Abiliities}} especially useful, as it blocks the dragon's escape. Speedy Pokémon that act first with status-inducing moves, like {{m|Hypnosis}}, are also helpful. Its location is tracked in the [[Pokégear]]'s Map once Steven informs you of its presence in Kanto. | ||
== | |||
===VS Latias{{sup/4|HG}} / Latios{{sup/4|SS}}=== | |||
Begin with {{t|Bug}}-, {{t|Ghost}}-, {{t|Dark}}-, {{t|Ice}}-, and {{type|Dragon}} attacks to wear its health down quickly, then follow up with {{t|Grass}}-, {{t|Fire}}-, {{t|Water}}-, {{t|Electric}}-, {{t|Psychic}}-, and {{type|Fighting}} moves to chip away at it even further. | |||
{| class=" | {| class="roundy" width="50%" style="margin: auto; box-shadow: 0 0 0.2em #999999; background: linear-gradient(135deg, #{{dragon color dark}} 50%, #{{psychic color}} 50%); padding: 0.5em;" | ||
|- | |- | ||
| | | | ||
{ | {| style="margin: auto; background: #{{heartgold color}}; {{roundy}}; border: 3px solid #{{heartgold color light}};" | ||
|- align="center" | |- align="center" | ||
! | ! Pokémon HeartGold | ||
|- | |- | ||
| | | | ||
{{ | {{Pokémon/4|game=HeartGold | ||
|ndex=380|pokemon=Latias | |||
|type1=Dragon|type2=Psychic | |||
|level=35 | |||
|gender=female | |||
|ability=Levitate | |||
|move1=DragonBreath|move1type=Dragon|move1cat=Special | |||
|move2=Water Sport|move2type=Water|move2cat=Status | |||
|move3=Refresh|move3type=Normal|move3cat=Status | |||
|move4=Mist Ball|move4type=Psychic|move4cat=Special}} | |||
|} | |} | ||
| | |||
{| align="center" style="background: #{{soulsilver color}}; {{roundy}}; border: 3px solid #{{soulsilver color light}};" | |||
|- align="center" | |- align="center" | ||
! | ! Pokémon SoulSilver | ||
|- | |- | ||
| | | | ||
{{ | {{Pokémon/4|game=SoulSilver | ||
|ndex=381|pokemon=Latios | |||
|type1=Dragon|type2=Psychic | |||
|level=35 | |||
|gender=male | |||
|ability=Levitate | |||
|move1=DragonBreath|move1type=Dragon|move1cat=Special | |||
|move2=Protect|move2type=Normal|move2cat=Status | |||
|move3=Refresh|move3type=Normal|move3cat=Status | |||
|move4=Luster Purge|move4type=Psychic|move4cat=Special}} | |||
|} | |} | ||
|} | |} | ||
| Line 693: | Line 496: | ||
{{WalkthroughPrevNext | {{WalkthroughPrevNext | ||
|game=HeartGold | |game=HeartGold|game2=SoulSilver | ||
|game2=SoulSilver | |||
|gamename=HeartGold and SoulSilver | |gamename=HeartGold and SoulSilver | ||
|prevsection=29 | |prevsection=29 | ||
|prevname=Mt. Silver | |prevname=Mt. Silver Cave | ||
| | |nextsection=31 | ||
|nextname=Cliff Edge Gate, Route 47, Cliff Cave, Embedded Tower, Route 48, Safari Zone | |||
}} | }} | ||
Latest revision as of 18:09, 1 September 2024
These pages follow the remade Nintendo DS iteration, not Pokémon Gold and Silver. The guide for those games can be found here.
Route 10 (North)
In the time it took to obtain the Earth Badge, the last of Kanto's three legendary birds has appeared outside the Power Plant on Route 10.
VS Zapdos
Begin with Rock- and Ice-type attacks to wear its health down quickly, then follow up with Bug-, Grass-, Fighting-, Flying-, and Steel-type moves to chip away at it even further. Consider lulling it to Sleep to restrict its movements, and be sure to bring along some healing items as well.
| ||||||||||||||||||||||||||||||||||
Cerulean City
Only Trainers who have proven their worth by earning all 16 Badges are permitted to enter Cerulean Cave, a mysterious place on the northwest edge of Cerulean City. To get there, visitors must Surf southward from Route 24.
Cerulean Cave
The mysterious Cerulean Cave is a sprawling cave network that extends deep into the mountains outside Cerulean City. It is impossible to navigate the pitch-black cave without the use of Surf, Rock Smash, and Rock Climb, and difficult to do so without Flash, as well. Before Cinnabar Island's volcano erupted, it is here that the genetically-engineered Pokémon from the island's Pokémon Mansion fled after escaping the facility.
| Available Pokémon | |||||||||||||||||||||||||||||||||||||||||||||||||||||||||||||||||||||||||||||||||||||||||||||||||||||||||||||||||||||||||||||||||||||||||||||||||||||||||||||||||||||||||||||||||||||||||||||||||||||||||||||||||||||||||||||||||||||||||||||||||||||||||||||||||||||||||||||||||||||||||||||||||||||||||||||||||||||||||||||||||||||||||||||||||||||||||||||||||||||||||||||||||||||||||||||||||||||||||||||||||||||||||||||||||||||||||||||||||||||||||||||||||||||||||||||||||||||||||||||||||||||||||||||||||||||||||||||||||||||||||||||||||||||||||||||||||||||||||||||||||||||||||||||||||||||||||||||||||||||||||||||||||||||||||||||||||||||||||||||||||||||||||||||||||||||||||||||||||||||||||||||||||||||||||||||||||||||||||||||||||||||||||||||||||||||||||||||||||||||||||||||||||||||||||||||||||||||||||||||||||||||||||||||||||||||||||||||||||||||||||||||||||||||||||||||||||||||||||||||||||||||||||||||||||||||||||||||||||||||||||||||||||||||||||||||||||||||||||||||||||||||||||||||||||||||||||||||||||||||||
|---|---|---|---|---|---|---|---|---|---|---|---|---|---|---|---|---|---|---|---|---|---|---|---|---|---|---|---|---|---|---|---|---|---|---|---|---|---|---|---|---|---|---|---|---|---|---|---|---|---|---|---|---|---|---|---|---|---|---|---|---|---|---|---|---|---|---|---|---|---|---|---|---|---|---|---|---|---|---|---|---|---|---|---|---|---|---|---|---|---|---|---|---|---|---|---|---|---|---|---|---|---|---|---|---|---|---|---|---|---|---|---|---|---|---|---|---|---|---|---|---|---|---|---|---|---|---|---|---|---|---|---|---|---|---|---|---|---|---|---|---|---|---|---|---|---|---|---|---|---|---|---|---|---|---|---|---|---|---|---|---|---|---|---|---|---|---|---|---|---|---|---|---|---|---|---|---|---|---|---|---|---|---|---|---|---|---|---|---|---|---|---|---|---|---|---|---|---|---|---|---|---|---|---|---|---|---|---|---|---|---|---|---|---|---|---|---|---|---|---|---|---|---|---|---|---|---|---|---|---|---|---|---|---|---|---|---|---|---|---|---|---|---|---|---|---|---|---|---|---|---|---|---|---|---|---|---|---|---|---|---|---|---|---|---|---|---|---|---|---|---|---|---|---|---|---|---|---|---|---|---|---|---|---|---|---|---|---|---|---|---|---|---|---|---|---|---|---|---|---|---|---|---|---|---|---|---|---|---|---|---|---|---|---|---|---|---|---|---|---|---|---|---|---|---|---|---|---|---|---|---|---|---|---|---|---|---|---|---|---|---|---|---|---|---|---|---|---|---|---|---|---|---|---|---|---|---|---|---|---|---|---|---|---|---|---|---|---|---|---|---|---|---|---|---|---|---|---|---|---|---|---|---|---|---|---|---|---|---|---|---|---|---|---|---|---|---|---|---|---|---|---|---|---|---|---|---|---|---|---|---|---|---|---|---|---|---|---|---|---|---|---|---|---|---|---|---|---|---|---|---|---|---|---|---|---|---|---|---|---|---|---|---|---|---|---|---|---|---|---|---|---|---|---|---|---|---|---|---|---|---|---|---|---|---|---|---|---|---|---|---|---|---|---|---|---|---|---|---|---|---|---|---|---|---|---|---|---|---|---|---|---|---|---|---|---|---|---|---|---|---|---|---|---|---|---|---|---|---|---|---|---|---|---|---|---|---|---|---|---|---|---|---|---|---|---|---|---|---|---|---|---|---|---|---|---|---|---|---|---|---|---|---|---|---|---|---|---|---|---|---|---|---|---|---|---|---|---|---|---|---|---|---|---|---|---|---|---|---|---|---|---|---|---|---|---|---|---|---|---|---|---|---|---|---|---|---|---|---|---|---|---|---|---|---|---|---|---|---|---|---|---|---|---|---|---|---|---|---|---|---|---|---|---|---|---|---|---|---|---|---|---|---|---|---|---|---|---|---|---|---|---|---|---|---|---|---|---|---|---|---|---|---|---|---|---|---|---|---|---|---|---|---|---|---|---|---|---|---|---|---|---|---|---|---|---|---|---|---|---|---|---|---|---|---|---|---|---|---|---|---|---|---|---|---|---|---|---|---|---|---|---|---|---|---|---|---|---|---|---|---|---|---|---|---|---|---|---|---|---|---|---|---|---|---|---|---|---|---|---|---|---|---|---|---|---|---|---|---|---|---|---|---|---|---|---|---|---|---|---|---|---|---|---|---|---|---|---|---|---|---|---|---|---|---|---|---|---|---|---|---|---|---|---|---|---|---|---|---|---|---|---|---|---|---|---|---|---|---|---|---|---|---|---|---|---|---|---|---|---|---|---|---|---|---|---|---|---|---|---|---|---|---|---|---|---|---|---|---|---|---|---|---|---|---|---|---|---|---|---|---|---|---|---|---|---|---|---|---|---|---|---|---|---|---|---|---|---|---|---|---|---|---|---|---|---|---|---|---|---|---|---|---|---|---|---|---|---|---|---|---|---|---|---|---|---|---|---|---|---|---|---|---|---|---|---|---|---|---|---|---|---|---|---|---|---|---|---|---|---|---|---|---|---|---|---|---|---|---|---|---|---|---|---|---|---|---|---|---|---|---|---|---|---|---|---|---|---|---|---|---|---|---|---|---|---|---|---|---|---|---|---|---|---|---|---|---|---|---|---|---|---|---|---|---|---|---|---|---|---|---|---|---|---|---|---|---|---|---|---|---|---|---|---|---|---|---|---|---|---|---|---|---|---|---|---|---|---|---|---|---|---|---|---|---|---|---|---|---|---|---|---|---|---|---|---|---|---|---|---|
| |||||||||||||||||||||||||||||||||||||||||||||||||||||||||||||||||||||||||||||||||||||||||||||||||||||||||||||||||||||||||||||||||||||||||||||||||||||||||||||||||||||||||||||||||||||||||||||||||||||||||||||||||||||||||||||||||||||||||||||||||||||||||||||||||||||||||||||||||||||||||||||||||||||||||||||||||||||||||||||||||||||||||||||||||||||||||||||||||||||||||||||||||||||||||||||||||||||||||||||||||||||||||||||||||||||||||||||||||||||||||||||||||||||||||||||||||||||||||||||||||||||||||||||||||||||||||||||||||||||||||||||||||||||||||||||||||||||||||||||||||||||||||||||||||||||||||||||||||||||||||||||||||||||||||||||||||||||||||||||||||||||||||||||||||||||||||||||||||||||||||||||||||||||||||||||||||||||||||||||||||||||||||||||||||||||||||||||||||||||||||||||||||||||||||||||||||||||||||||||||||||||||||||||||||||||||||||||||||||||||||||||||||||||||||||||||||||||||||||||||||||||||||||||||||||||||||||||||||||||||||||||||||||||||||||||||||||||||||||||||||||||||||||||||||||||||||||||||||||||||
| Items | |||||||||||||||||||||||||||||||||||||||||||||||||||||||||||||||||||||||||||||||||||||||||||||||||||||||||||||||||||||||||||||||||||||||||
|---|---|---|---|---|---|---|---|---|---|---|---|---|---|---|---|---|---|---|---|---|---|---|---|---|---|---|---|---|---|---|---|---|---|---|---|---|---|---|---|---|---|---|---|---|---|---|---|---|---|---|---|---|---|---|---|---|---|---|---|---|---|---|---|---|---|---|---|---|---|---|---|---|---|---|---|---|---|---|---|---|---|---|---|---|---|---|---|---|---|---|---|---|---|---|---|---|---|---|---|---|---|---|---|---|---|---|---|---|---|---|---|---|---|---|---|---|---|---|---|---|---|---|---|---|---|---|---|---|---|---|---|---|---|---|---|---|---|
| |||||||||||||||||||||||||||||||||||||||||||||||||||||||||||||||||||||||||||||||||||||||||||||||||||||||||||||||||||||||||||||||||||||||||
1F
Head north and use Surf to reach the northeast corner, and climb up the ladder for a short detour.
2F (Northeast)
Follow the path and use Rock Smash to clear the two breakable rocks. Pick up TM24 (Thunderbolt), then backtrack and return to 1F.
1F
Surf westward and climb out of the water. Pick up the nearby Nugget, then climb up the ladder to the southwest.
2F (West)
Use Rock Smash and follow the branching path to its end to find a PP Up. Backtrack to the ladder and return to 1F.
1F
Go south, then head east to find a Full Restore sitting next to the two crystals. Turn north and climb up the nearest ladder.
2F (Southeast)
Search this wide-open area for any stray items, then return to 1F.
1F
Go west and pass under the bridge, then turn south. Loop around and climb up the stairway to reach the bridge. Moving northward, take the right turn to reach a Max Elixir on a cliff, then the left turn to reach a Sea Incense on a narrow trail along the north wall. The north end of the bridge leads to the other end of this narrow trail, which serves as a shortcut to the exit. Return to the south end of the bridge and climb up the ladder.
2F (Northwest)
Head west to reach a fork in the road; turn south, then turn east and clear two breakable rocks to reach an Odd Incense. Backtrack to the first east turn, then follow the southwest tunnel to the southwest corner and northward along the west wall. Make the first right turn to reach another Ultra Ball. Return to the first fork and go north this time, then turn east. Follow the zigzagging tunnel around to the northwest corner, and climb down the ladder.
1F (Northwest)
Climb down the next ladder to B1F.
B1F
Move southward and use Rock Climb to reach an Ultra Ball, then go east and use the move again to grab the Dusk Stone in the dead-end to the east. Use Rock Climb again to continue northward past a group of breakable rocks and head east. Turn southward, then take the first path eastward to reach a Max Revive. Continue south to the water's edge and use Surf to move northeastward. Cross over the ridge with the two crystals and use Rock Climb to reach the Electirizer in the northeast corner. Jump the nearby ledge and use Rock Climb again to continue southward. Use Surf to collect the Black Sludge in the southeast corner, climb the stairway on the east-central hill to meet the Genetic Pokémon.
VS Mewtwo
Begin with Bug-, Ghost-, and Dark-type attacks to wear its health down quickly, then follow up with Fighting- and Psychic-type moves to chip away at it even further. Consider inflicting status ailments like Sleep and Paralysis to restrict its movements, and be sure to bring along some healing items as well.
| ||||||||||||||||||||||||||||||||
After the battle, either use an Escape Rope, or climb up the nearby ladder.
1F
Jump the ledge and use Surf to return to the entrance.
Route 25
The Aurora is Calmed
After brief sightings of Suicune in Ecruteak City, Cianwood City, Route 42, Vermilion City, and Route 14, its search for a suitable environment comes to an end at Cerulean Cape. As Eusine once said, it seems to prefer "a hilly place, near water... ...Somewhere north."
When you reach the top of the stairway, Suicune lets out a cry just as Eusine arrives. He is out of breath, and reluctantly admits that he is no match for you. He reveals that he has had a feeling since first meeting you in the Burned Tower that Suicune would choose you. He encourages you to face the legendary creature, pointing out that it is waiting to battle a worthy Trainer that it can trust to be its partner.
VS Suicune
Begin with Grass- and Electric-type attacks to wear its health down quickly, then follow up with Fire-, Water-, Ice-, and Steel-type moves to chip away at it even further. Consider inflicting status ailments like Sleep and Paralysis to restrict its movements, and be sure to bring along some healing items as well.
| ||||||||||||||||||||||||||||||||
After the battle, Eusine exclaims that he has never seen a battle so intense. He states that he has no regrets, and bids farewell to you and Suicune.
Pallet Town
| Available Pokémon | |||||||||||||||||||||||||||||||||||||||||||||||||||||||||||||||||||||||||||||||||||||||||
|---|---|---|---|---|---|---|---|---|---|---|---|---|---|---|---|---|---|---|---|---|---|---|---|---|---|---|---|---|---|---|---|---|---|---|---|---|---|---|---|---|---|---|---|---|---|---|---|---|---|---|---|---|---|---|---|---|---|---|---|---|---|---|---|---|---|---|---|---|---|---|---|---|---|---|---|---|---|---|---|---|---|---|---|---|---|---|---|---|---|
| |||||||||||||||||||||||||||||||||||||||||||||||||||||||||||||||||||||||||||||||||||||||||
Oak's Lab
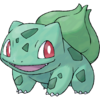
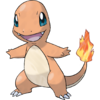
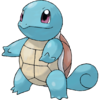
With Red defeated, return to Pallet Town and speak to Professor Oak. He has heard a lot about you, and would like to reward all of your hard work with a gift. He motions to the three Poké Balls on the desk behind him, and gives you the choice of three Pokémon rarely seen in Kanto.
 Bulbasaur |
 Charmander |
 Squirtle | |||
|---|---|---|---|---|---|
| Grass | Poison | Fire | Water | ||
| Ivysaur | Charmeleon | Wartortle | |||
| Grass | Poison | Fire | Water | ||
| Venusaur | Charizard | Blastoise | |||
| Grass | Poison | Fire | Flying | Water | |
Saffron City
| Available Pokémon | ||||||||||||||||||||||||||||||||||||||||||||||||||||||||||||||||||||||||||||||||||||||||||||||||||||||||||||||||||||||||
|---|---|---|---|---|---|---|---|---|---|---|---|---|---|---|---|---|---|---|---|---|---|---|---|---|---|---|---|---|---|---|---|---|---|---|---|---|---|---|---|---|---|---|---|---|---|---|---|---|---|---|---|---|---|---|---|---|---|---|---|---|---|---|---|---|---|---|---|---|---|---|---|---|---|---|---|---|---|---|---|---|---|---|---|---|---|---|---|---|---|---|---|---|---|---|---|---|---|---|---|---|---|---|---|---|---|---|---|---|---|---|---|---|---|---|---|---|---|---|---|---|
| ||||||||||||||||||||||||||||||||||||||||||||||||||||||||||||||||||||||||||||||||||||||||||||||||||||||||||||||||||||||||
Silph Co.
The Three Stones
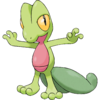
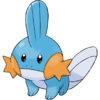
Having defeated Red, return to Saffron City and visit the Silph Co. building. Inside, you find Steven Stone near the information desk on the east side. He is just ending a phone call, but quickly notices you. Seeing that you have a Pokédex, he realizes that you too are searching for Pokémon, and believes that he can help with that. He poses a question to you: "Let's say that you have stones in front of you. Which color would you pick?" The answer given—green stone, red stone, or blue stone—determines which of the three Pokémon from his native Hoenn region that he offers you.
 Treecko |
 Torchic |
 Mudkip | |||
|---|---|---|---|---|---|
| Grass | Fire | Water | |||
| Grovyle | Combusken | Marshtomp | |||
| Grass | Fire | Fighting | Water | Ground | |
| Sceptile | Blaziken | Swampert | |||
| Grass | Fire | Fighting | Water | Ground | |
He advises you to take good care of the young Pokémon, then leaves.
Pewter City
Pewter Museum of Science
After speaking to Steven in Silph Co., travel to Pewter City to meet him again. Visit the Pewter Museum of Science to find him engrossed in an exhibit, talking to himself about stars shining in the night sky.
Saffron City
Silph Co.
Time for a Trade
After speaking to Steven in Pewter City, return to the Silph Co. building to find that he is already here. He can now be found near the statue at the entrance. Speak to him to find that he would like to trade Pokémon. He is willing to part with his Beldum in exchange for a Forretress. Forretress cannot be found in the wild, but its pre-evolved form, Pineco, is a common sight when headbutting trees. His Beldum holds a Dawn Stone.
Route 30
| Items | ||||||||||||||||
|---|---|---|---|---|---|---|---|---|---|---|---|---|---|---|---|---|
| ||||||||||||||||
Mr. Pokémon's house
Having received a first partner Pokémon from Professor Oak, return to Route 30 and visit Mr. Pokémon. When you enter his home, he immediately informs you that he has something that he would like you to have, and was just about to send an email to Professor Oak. He explains that a friend of his from Hoenn delivered this to him, and fetches the Blue OrbHG / Red OrbSS from the cabinet in the corner. He continues, saying that this gemstone is somehow related to the ancient ruins located past Cianwood City, but few Trainers can reach the area. Professor Oak thinks highly of you, so Mr. Pokémon is sure that you can solve the mystery of the Orb and the secret of the ruins.
Roaming (Johto)
After fleeing from the Burned Tower in Ecruteak City, the legendary beasts begin racing across the countryside. While Suicune sets off on its own adventure spanning both Johto and Kanto, Raikou and Entei begin roaming the Johto region. When traveling to a different area, each of the beasts race to a different route. They will also attempt to flee from battle at the first opportunity; this makes Pokémon with trapping Abiliities especially useful, as it blocks the beasts' escape. Speedy Pokémon that act first with sleep-inducing moves are also helpful, as both of the beasts can use Roar to escape otherwise. After seeing them in battle, the Pokégear's Map tracks their movements. If defeated, they will reappear in the Burned Tower after entering the Hall of Fame; they must be interacted with here for them to begin roaming again.
VS Raikou
Once Raikou is unable to flee, begin with Ground-type attacks to wear its health down quickly, then follow up with Flying-, Electric-, and Steel-type moves to chip away at it even further.
| ||||||||||||||||||||||||||||||||
VS Entei
Once Entei is unable to flee, begin with Water-, Rock-, and Ground-type attacks to wear its health down quickly, then follow up with Bug-, Grass-, Fire-, Ice-, and Steel-type moves to chip away at it even further.
| ||||||||||||||||||||||||||||||||
Roaming (Kanto)
After meeting Steven in Vermilion City, one of the Eon Pokémon begins roaming across Kanto. When traveling to a different area, the Pokémon races to a different route. It will also attempt to flee from battle at the first opportunity; this makes Pokémon with trapping Abiliities especially useful, as it blocks the dragon's escape. Speedy Pokémon that act first with status-inducing moves, like Hypnosis, are also helpful. Its location is tracked in the Pokégear's Map once Steven informs you of its presence in Kanto.
VS LatiasHG / LatiosSS
Begin with Bug-, Ghost-, Dark-, Ice-, and Dragon-type attacks to wear its health down quickly, then follow up with Grass-, Fire-, Water-, Electric-, Psychic-, and Fighting-type moves to chip away at it even further.
|
| ||||||||||||||||||||||||||||||||||||||||||||||||||||||||||||||||||||||||
|
HeartGold and SoulSilver walkthrough |
|

|
This article is part of Project Walkthroughs, a Bulbapedia project that aims to write comprehensive step-by-step guides on each Pokémon game. |
