Appendix:Emerald walkthrough/Section 20: Difference between revisions
m (→Trainer Hill: replaced: {{ball|Great}} → Great Ball) |
No edit summary |
||
| Line 66: | Line 66: | ||
| colspan="2" style="background: #{{fire color}};" | {{color2|FFFFFF|Fire (type)|Fire}} | | colspan="2" style="background: #{{fire color}};" | {{color2|FFFFFF|Fire (type)|Fire}} | ||
| colspan="2" style="background: #{{water color}}; {{roundybr|5px}};" | {{color2|FFF|Water (type)|Water}} | | colspan="2" style="background: #{{water color}}; {{roundybr|5px}};" | {{color2|FFF|Water (type)|Water}} | ||
|} | |||
==Safari Zone (optional) (After Upgrade to National Pokédex)== | |||
Once you have upgraded to National Pokédex, you can return to the Safari Zone and catch some native [[Johto]] Pokémon. | |||
{| class="expandable" style="margin: auto; background: #{{locationcolor/med|land}}; {{roundy}}; border: 5px solid #{{locationcolor/light|land}};" | |||
|- align="center" | |||
! Area 5 (Extended: SE) | |||
|- | |||
| | |||
{{Catch/header|land|no}} | |||
{{Catch/entry3|179|Mareep|no|no|yes|Grass|34, 36|30%|type1=Electric}} | |||
{{Catch/entry3|191|Sunkern|no|no|yes|Grass|33, 35|30%|type1=Grass}} | |||
{{Catch/entry3|167|Spinarak|no|no|yes|Grass|33|10%|type1=Bug|type2=Poison}} | |||
{{Catch/entry3|190|Aipom|no|no|yes|Grass|34|10%|type1=Normal}} | |||
{{Catch/entry3|163|Hoothoot|no|no|yes|Grass|35|5%|type1=Normal|type2=Flying}} | |||
{{Catch/entry3|207|Gligar|no|no|yes|Grass|37, 40|5%|type1=Ground|type2=Flying}} | |||
{{Catch/entry3|209|Snubbull|no|no|yes|Grass|34|5%|type1=Normal}} | |||
{{Catch/entry3|234|Stantler|no|no|yes|Grass|36, 39|5%|type1=Normal}} | |||
{{Catch/div|water|Surfing}} | |||
{{Catch/entry3|194|Wooper|no|no|yes|Surf|25-30|60%|type1=Water|type2=Ground}} | |||
{{Catch/entry3|183|Marill|no|no|yes|Surf|25-35|39%|type1=Water}} | |||
{{Catch/entry3|195|Quagsire|no|no|yes|Surf|35-40|1%|type1=Water|type2=Ground}} | |||
{{Catch/div|water|Fishing}} | |||
{{Catch/entry3|129|Magikarp|no|no|yes|Fish Old|25-30|70%|type1=Water}} | |||
{{Catch/entry3|118|Goldeen|no|no|yes|Fish Old|25-30|30%|type1=Water}} | |||
{{Catch/entry3|129|Magikarp|no|no|yes|Fish Good|25-30|60%|type1=Water}} | |||
{{Catch/entry3|118|Goldeen|no|no|yes|Fish Good|25-30|20%|type1=Water}} | |||
{{Catch/entry3|223|Remoraid|no|no|yes|Fish Good|30-35|20%|type1=Water}} | |||
{{Catch/entry3|223|Remoraid|no|no|yes|Fish Super|25-35|59%|type1=Water}} | |||
{{Catch/entry3|118|Goldeen|no|no|yes|Fish Super|25-30|40%|type1=Water}} | |||
{{Catch/entry3|224|Octillery|no|no|yes|Fish Super|35-40|1%|type1=Water}} | |||
{{Catch/footer|land}} | |||
|} | |||
{| class="expandable" style="margin: auto; background: #{{locationcolor/med|land}}; {{roundy}}; border: 5px solid #{{locationcolor/light|land}};" | |||
|- align="center" | |||
! Area 6 (Extended: NE) | |||
|- | |||
| | |||
{{Catch/header|land|no}} | |||
{{Catch/entry3|190|Aipom|no|no|yes|Grass|33, 35|30%|type1=Normal}} | |||
{{Catch/entry3|216|Teddiursa|no|no|yes|Grass|34, 36|30%|type1=Normal}} | |||
{{Catch/entry3|165|Ledyba|no|no|yes|Grass|33|10%|type1=Bug|type2=Flying}} | |||
{{Catch/entry3|191|Sunkern|no|no|yes|Grass|34|10%|type1=Grass}} | |||
{{Catch/entry3|163|Hoothoot|no|no|yes|Grass|35|5%|type1=Normal|type2=Flying}} | |||
{{Catch/entry3|204|Pineco|no|no|yes|Grass|34|5%|type1=Bug}} | |||
{{Catch/entry3|228|Houndour|no|no|yes|Grass|36, 39|5%|type1=Dark|type2=Fire}} | |||
{{Catch/entry3|241|Miltank|no|no|yes|Grass|37, 40|5%|type1=Normal}} | |||
{{Catch/div|land|Rock Smash}} | |||
{{Catch/entry3|213|Shuckle|no|no|yes|Rock Smash|20-40|100%|type1=Bug|type2=Rock}} | |||
{{Catch/footer|land}} | |||
|} | |} | ||
| Line 101: | Line 151: | ||
==The Super-Ancient Pokémon== | ==The Super-Ancient Pokémon== | ||
===Weather Institute=== | ===Weather Institute=== | ||
Return to {{rt|119|Hoenn}} and pay a visit to the [[Weather Institute]]. Speak to the meteorologist on the second floor to learn that he has been tracking weather patterns across [[Hoenn]]. He's even found an unusual weather system localized to a certain area. Routes {{rtn|114|Hoenn}}, {{rtn|115|Hoenn}}, {{rtn|116|Hoenn}}, and {{rtn|118|Hoenn}} have been suffering under severe drought, while Routes {{rtn|105|Hoenn}}, {{rtn|125|Hoenn}}, {{rtn|127|Hoenn}}, and {{rtn|129|Hoenn}} have become prone to heavy thunderstorms. The existence of these unusual conditions indicates the presence of {{p|Groudon}} and {{p|Kyogre}}, hidden away in a new home that it's made for itself. But these ancient Pokémon are fickle and won't stay put for long, so hurry off to the specified route and you may stumble across a legend! | Return to {{rt|119|Hoenn}} and pay a visit to the [[Weather Institute]]. Speak to the meteorologist on the second floor to learn that he has been tracking weather patterns across [[Hoenn]]. He's even found an unusual weather system localized to a certain area. Routes {{rtn|114|Hoenn}}, {{rtn|115|Hoenn}}, {{rtn|116|Hoenn}}, and {{rtn|118|Hoenn}} have been suffering under severe drought, while Routes {{rtn|105|Hoenn}}, {{rtn|125|Hoenn}}, {{rtn|127|Hoenn}}, and {{rtn|129|Hoenn}} have become prone to heavy thunderstorms. The existence of these unusual conditions indicates the presence of {{p|Groudon}} and {{p|Kyogre}}, hidden away in a new home that it's made for itself. But these ancient Pokémon are fickle and won't stay put for long, so hurry off to the specified route and you may stumble across a legend! | ||
===Terra Cave=== | ===Terra Cave=== | ||
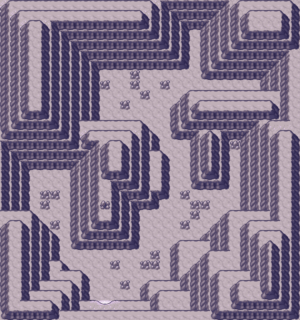
[[File:Terra Cave entrance E.png|thumb|left|Terra Cave, entrance]] | |||
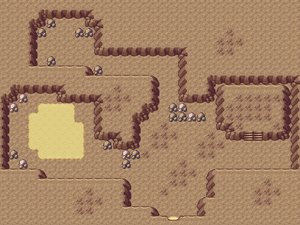
[[File:Terra Cave end E.png|thumb|left|Terra Cave, interior]] | |||
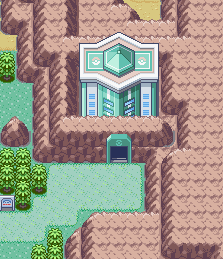
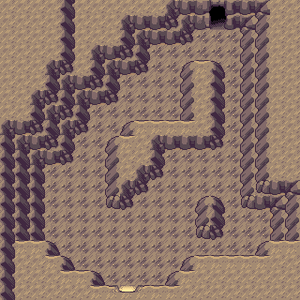
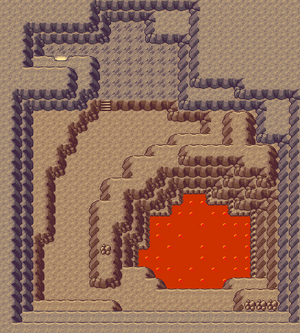
After learning of a severe drought on Hoenn's west side, you need to visit the specified route in order to track down [[Terra Cave]]. Be aware that if it appears on {{rt|114|Hoenn}}, you will need to scale the waterfall to access it. Enter the cave and proceed to the second chamber, where you find a long tunnel with {{p|Groudon}} sitting in a pool of magma at its end. Be sure to save the game before you approach it, as it will disappear if you happen to defeat it. Its {{a|Drought}} Ability increases {{m|Fire Blast}}'s power by 50% and lets it use {{m|SolarBeam}} without charging. {{m|Rest}} allows it to recover its health, but also makes it easier to catch. Begin with {{t|Grass}}, {{t|Water}}, and {{t|Ice}} moves to weaken it quickly, then follow up with {{t|Rock}} and {{t|Poison}} moves to wear it down further. | After learning of a severe drought on Hoenn's west side, you need to visit the specified route in order to track down [[Terra Cave]]. Be aware that if it appears on {{rt|114|Hoenn}}, you will need to scale the waterfall to access it. Enter the cave and proceed to the second chamber, where you find a long tunnel with {{p|Groudon}} sitting in a pool of magma at its end. Be sure to save the game before you approach it, as it will disappear if you happen to defeat it. Its {{a|Drought}} Ability increases {{m|Fire Blast}}'s power by 50% and lets it use {{m|SolarBeam}} without charging. {{m|Rest}} allows it to recover its health, but also makes it easier to catch. Begin with {{t|Grass}}, {{t|Water}}, and {{t|Ice}} moves to weaken it quickly, then follow up with {{t|Rock}} and {{t|Poison}} moves to wear it down further. | ||
| Line 127: | Line 176: | ||
===Marine Cave=== | ===Marine Cave=== | ||
[[File:Marine Cave E.png|thumb|Marine Cave, entrance]] | |||
[[File:Marine Cave end E.png|thumb|Marine Cave, interior]] | |||
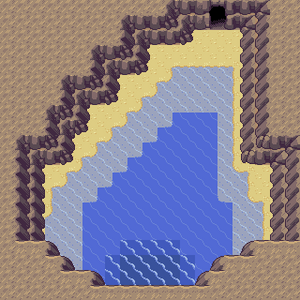
After learning of heavy storms on Hoenn's east side, you need to visit the specified route in order to track down [[Marine Cave]]. {{m|Surf}} across the route in search of a small patch of deep, dark water, and {{m|Dive}} down to the ocean floor. Resurface inside the cave and proceed to the second chamber, where you find a long tunnel with {{p|Kyogre}} in a deep pit of seawater at its end. Be sure to save the game before you approach it, as it will disappear if you happen to defeat it. Its {{a|Drizzle}} Ability increases {{m|Hydro Pump}}'s power by 50%. {{m|Rest}} allows it to recover its health, but also makes it easier to catch. Begin with {{t|Grass}} and {{t|Electric}} moves to weaken it quickly, then follow up with {{t|Fire}}, {{t|Water}}, {{t|Ice}}, and {{t|Steel}} moves to wear it down further. | After learning of heavy storms on Hoenn's east side, you need to visit the specified route in order to track down [[Marine Cave]]. {{m|Surf}} across the route in search of a small patch of deep, dark water, and {{m|Dive}} down to the ocean floor. Resurface inside the cave and proceed to the second chamber, where you find a long tunnel with {{p|Kyogre}} in a deep pit of seawater at its end. Be sure to save the game before you approach it, as it will disappear if you happen to defeat it. Its {{a|Drizzle}} Ability increases {{m|Hydro Pump}}'s power by 50%. {{m|Rest}} allows it to recover its health, but also makes it easier to catch. Begin with {{t|Grass}} and {{t|Electric}} moves to weaken it quickly, then follow up with {{t|Fire}}, {{t|Water}}, {{t|Ice}}, and {{t|Steel}} moves to wear it down further. | ||
Revision as of 22:45, 22 September 2019
Littleroot Town
Home
When the credits conclude, you awaken in your room back in Littleroot Town. Head downstairs and Norman hands you a gift from Mr. Briney—the S.S. Ticket. With this, you can ride Captain Stern's new ferry! Norman suggests taking the ferry from either Slateport or Lilycove, then heads back to the Petalburg Gym.
The Eon Pokémon
After Norman leaves, a breaking news story flashes across the TV screen; it seems that a certain unnamed Pokémon has been spotted flying around the region. The reporter informs viewers of the Pokémon's color, but static interference prevents you from learning it. After viewing this report, Mom asks which color it was, giving you the choice of red or blue. Depending on your choice, you will be able to encounter the legendary Pokémon Latias or Latios, respectively, roaming across Hoenn.
The Pokémon moves to a different area every time you change locations. The easiest way to track it down is to begin in a central area like Mauville City. Find a patch of tall grass near a building, like Route 117's Day Care, or the route's end, like Route 110. Use Repels to avoid other Pokémon and cross the threshold enough times and the Pokémon will eventually appear nearby. To make matters more difficult, it will also attempt to flee on the first turn of battle. The best way to prevent this is to send out a faster Pokémon to use a trapping move, like Mean Look or Wrap. If afflicted by a status condition, it will retain this ailment when it is next encountered. After meeting it for the first time, the Pokédex tracks its movements.
|
| ||||||||||||||||||||||||||||||||||||||||||||||||||||
Professor Birch's Lab
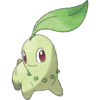
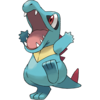
Be sure to visit Professor Birch in his Lab once you have caught all 200 Pokémon in the Hoenn regional Pokédex. Once he verifies that you are indeed successful, he offers you a gift to start you on your quest to complete the National Pokédex listing. This gift is the choice between one of three Pokémon, the starter Pokémon of the distant Johto region: Chikorita, Cyndaquil, and Totodile!
 Chikorita |
 Cyndaquil |
 Totodile | |||
|---|---|---|---|---|---|
| Grass | Fire | Water | |||

|
Bayleef | 
|
Quilava | 
|
Croconaw |
| Grass | Fire | Water | |||

|
Meganium | 
|
Typhlosion | 
|
Feraligatr |
| Grass | Fire | Water | |||
Safari Zone (optional) (After Upgrade to National Pokédex)
Once you have upgraded to National Pokédex, you can return to the Safari Zone and catch some native Johto Pokémon.
| Area 5 (Extended: SE) | ||||||||||||||||||||||||||||||||||||||||||||||||||||||||||||||||||||||||||||||||||||||||||||||||||||||||||||||||||||||||||||||||||||||||||||||||||||||||||||||||||||||||||||||||||||||||||||||||||||||||||||||||||||||||||||||||||||||||||||||||||||||||||||||||||||||||||||||||||||||||||||||||||||||||||||||||||||||||||||||||||||||||||||||||||||||||||||||||||||||||
|---|---|---|---|---|---|---|---|---|---|---|---|---|---|---|---|---|---|---|---|---|---|---|---|---|---|---|---|---|---|---|---|---|---|---|---|---|---|---|---|---|---|---|---|---|---|---|---|---|---|---|---|---|---|---|---|---|---|---|---|---|---|---|---|---|---|---|---|---|---|---|---|---|---|---|---|---|---|---|---|---|---|---|---|---|---|---|---|---|---|---|---|---|---|---|---|---|---|---|---|---|---|---|---|---|---|---|---|---|---|---|---|---|---|---|---|---|---|---|---|---|---|---|---|---|---|---|---|---|---|---|---|---|---|---|---|---|---|---|---|---|---|---|---|---|---|---|---|---|---|---|---|---|---|---|---|---|---|---|---|---|---|---|---|---|---|---|---|---|---|---|---|---|---|---|---|---|---|---|---|---|---|---|---|---|---|---|---|---|---|---|---|---|---|---|---|---|---|---|---|---|---|---|---|---|---|---|---|---|---|---|---|---|---|---|---|---|---|---|---|---|---|---|---|---|---|---|---|---|---|---|---|---|---|---|---|---|---|---|---|---|---|---|---|---|---|---|---|---|---|---|---|---|---|---|---|---|---|---|---|---|---|---|---|---|---|---|---|---|---|---|---|---|---|---|---|---|---|---|---|---|---|---|---|---|---|---|---|---|---|---|---|---|---|---|---|---|---|---|---|---|---|---|---|---|---|---|---|---|---|---|---|---|---|---|---|---|---|---|---|---|---|---|---|---|---|---|---|---|---|---|---|---|---|---|---|---|---|---|---|---|---|---|---|---|---|---|---|---|---|---|---|---|---|---|---|---|---|---|---|---|
| ||||||||||||||||||||||||||||||||||||||||||||||||||||||||||||||||||||||||||||||||||||||||||||||||||||||||||||||||||||||||||||||||||||||||||||||||||||||||||||||||||||||||||||||||||||||||||||||||||||||||||||||||||||||||||||||||||||||||||||||||||||||||||||||||||||||||||||||||||||||||||||||||||||||||||||||||||||||||||||||||||||||||||||||||||||||||||||||||||||||||
| Area 6 (Extended: NE) | |||||||||||||||||||||||||||||||||||||||||||||||||||||||||||||||||||||||||||||||||||||||||||||||||||||||||||||||||||||||||||||||||||||||||||||||||||||||||||||||||||||||||||||||||||||||||
|---|---|---|---|---|---|---|---|---|---|---|---|---|---|---|---|---|---|---|---|---|---|---|---|---|---|---|---|---|---|---|---|---|---|---|---|---|---|---|---|---|---|---|---|---|---|---|---|---|---|---|---|---|---|---|---|---|---|---|---|---|---|---|---|---|---|---|---|---|---|---|---|---|---|---|---|---|---|---|---|---|---|---|---|---|---|---|---|---|---|---|---|---|---|---|---|---|---|---|---|---|---|---|---|---|---|---|---|---|---|---|---|---|---|---|---|---|---|---|---|---|---|---|---|---|---|---|---|---|---|---|---|---|---|---|---|---|---|---|---|---|---|---|---|---|---|---|---|---|---|---|---|---|---|---|---|---|---|---|---|---|---|---|---|---|---|---|---|---|---|---|---|---|---|---|---|---|---|---|---|---|---|---|---|---|---|
| |||||||||||||||||||||||||||||||||||||||||||||||||||||||||||||||||||||||||||||||||||||||||||||||||||||||||||||||||||||||||||||||||||||||||||||||||||||||||||||||||||||||||||||||||||||||||
Trainer Hill
Trainer Hill is located to the east of the Winstrate home. This tower was designed for challengers to race through as quickly as possible, battling four floors of Trainers on the way to the rooftop. The ground floor holds both a Pokémon Center and Poké Mart, so Trainers can be well-prepared for the trial ahead. There are four different modes—Normal, Variety, Unique, and Expert—with each one more difficult than the last. A challenger's Pokémon will not be healed by the staff, but recovery items like Potions may be used during and between battles. Prizes vary depending on the amount of time elapsed, and all battles conducted here are Double Battles. No experience or prize money is awarded.
| Time | Prize | |
|---|---|---|
| Under 12 minutes | TM11 (Sunny Day) Normal Mode | |
| Elixir Variety Mode | ||
| TM19 (Giga Drain) Unique Mode | ||
| TM31 (Brick Break) Expert Mode | ||
| 12-13 minutes | Ether | |
| 13-14 minutes | Max Potion | |
| 14-16 minutes | Revive | |
| 16-18 minutes | Fluffy Tail | |
| Over 18 minutes | Great Ball | |
The Super-Ancient Pokémon
Weather Institute
Return to Route 119 and pay a visit to the Weather Institute. Speak to the meteorologist on the second floor to learn that he has been tracking weather patterns across Hoenn. He's even found an unusual weather system localized to a certain area. Routes 114, 115, 116, and 118 have been suffering under severe drought, while Routes 105, 125, 127, and 129 have become prone to heavy thunderstorms. The existence of these unusual conditions indicates the presence of Groudon and Kyogre, hidden away in a new home that it's made for itself. But these ancient Pokémon are fickle and won't stay put for long, so hurry off to the specified route and you may stumble across a legend!
Terra Cave
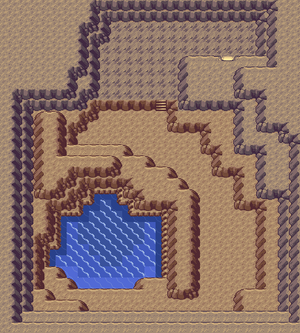
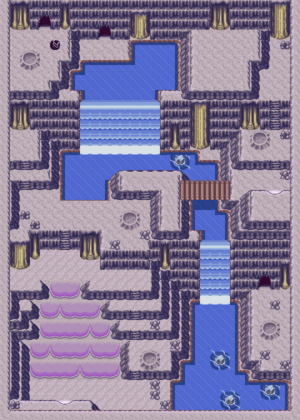
After learning of a severe drought on Hoenn's west side, you need to visit the specified route in order to track down Terra Cave. Be aware that if it appears on Route 114, you will need to scale the waterfall to access it. Enter the cave and proceed to the second chamber, where you find a long tunnel with Groudon sitting in a pool of magma at its end. Be sure to save the game before you approach it, as it will disappear if you happen to defeat it. Its Drought Ability increases Fire Blast's power by 50% and lets it use SolarBeam without charging. Rest allows it to recover its health, but also makes it easier to catch. Begin with Grass, Water, and Ice moves to weaken it quickly, then follow up with Rock and Poison moves to wear it down further.
| ||||||||||||||||||||||||
Marine Cave
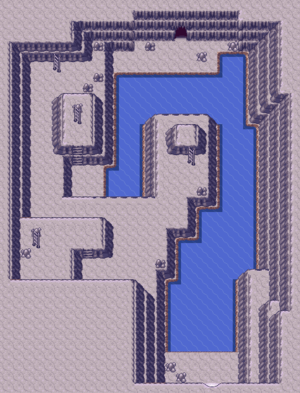
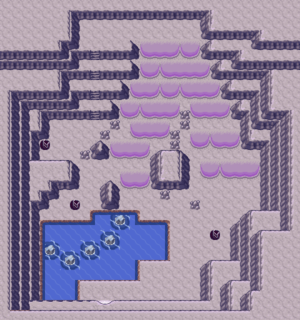
After learning of heavy storms on Hoenn's east side, you need to visit the specified route in order to track down Marine Cave. Surf across the route in search of a small patch of deep, dark water, and Dive down to the ocean floor. Resurface inside the cave and proceed to the second chamber, where you find a long tunnel with Kyogre in a deep pit of seawater at its end. Be sure to save the game before you approach it, as it will disappear if you happen to defeat it. Its Drizzle Ability increases Hydro Pump's power by 50%. Rest allows it to recover its health, but also makes it easier to catch. Begin with Grass and Electric moves to weaken it quickly, then follow up with Fire, Water, Ice, and Steel moves to wear it down further.
| ||||||||||||||||||||||||
Steven Continues His Training
Mossdeep City
Return to Mossdeep City and pay a visit to Steven's house. He's not home, but he has left a note for you on the table. It says that he plans to do some soul-searching as he continues his training on the road, and doesn't intend to return home for quite some time. He asks a favor of you, to take the Poké Ball on the desk. It contains a Beldum, his favorite Pokémon. He ends the note by saying that he hopes your paths cross again someday.
Meteor Falls
| Trainers | ||||||||||||||||||||||||||||||||||||||||||||||||||||||||||||||||||||||||||||||||||||||||||||||||||||||||||||||||||||||||||||||||||||||||||||||||||||||||||||||||||||
|---|---|---|---|---|---|---|---|---|---|---|---|---|---|---|---|---|---|---|---|---|---|---|---|---|---|---|---|---|---|---|---|---|---|---|---|---|---|---|---|---|---|---|---|---|---|---|---|---|---|---|---|---|---|---|---|---|---|---|---|---|---|---|---|---|---|---|---|---|---|---|---|---|---|---|---|---|---|---|---|---|---|---|---|---|---|---|---|---|---|---|---|---|---|---|---|---|---|---|---|---|---|---|---|---|---|---|---|---|---|---|---|---|---|---|---|---|---|---|---|---|---|---|---|---|---|---|---|---|---|---|---|---|---|---|---|---|---|---|---|---|---|---|---|---|---|---|---|---|---|---|---|---|---|---|---|---|---|---|---|---|---|---|---|---|
| ||||||||||||||||||||||||||||||||||||||||||||||||||||||||||||||||||||||||||||||||||||||||||||||||||||||||||||||||||||||||||||||||||||||||||||||||||||||||||||||||||||
| Available Pokémon | ||||||||||||||||||||||||||||||||||||||||||||||||||||||||||||||||||||||||||||||||||||||||||||||||||||||||||||||||||||||||||||||||||||||||||||||||||||||||||||||||||||||||||||||||||||||||||||||||||||||||||||||||||||||||||||||||||||||||||||||||||||||||||||||||||||||||||||||||||||||||||||||||||||||||||||||||||||||||||||||||||||||||||||||||||||||||||||||||||||||||||||||||||||||||||||||||||||||||||||||||||||||||||||||||||||||||||||||||||||||||||||||||||||||||||||||||||||||||||||||||||||||||||||||||||||||||||||||||||||||||||||||||||||||||||||||||||||||||||||||||||||||||||||||||||||||||||||||||||||||||||||||||||||||||||||||||||||||||||||||||||||||||||||||||||||||||||||||||||||||||||||||||||||||||||||||||||||||||||||||||||||||||||||||||||||||||||||||||||||||||||
|---|---|---|---|---|---|---|---|---|---|---|---|---|---|---|---|---|---|---|---|---|---|---|---|---|---|---|---|---|---|---|---|---|---|---|---|---|---|---|---|---|---|---|---|---|---|---|---|---|---|---|---|---|---|---|---|---|---|---|---|---|---|---|---|---|---|---|---|---|---|---|---|---|---|---|---|---|---|---|---|---|---|---|---|---|---|---|---|---|---|---|---|---|---|---|---|---|---|---|---|---|---|---|---|---|---|---|---|---|---|---|---|---|---|---|---|---|---|---|---|---|---|---|---|---|---|---|---|---|---|---|---|---|---|---|---|---|---|---|---|---|---|---|---|---|---|---|---|---|---|---|---|---|---|---|---|---|---|---|---|---|---|---|---|---|---|---|---|---|---|---|---|---|---|---|---|---|---|---|---|---|---|---|---|---|---|---|---|---|---|---|---|---|---|---|---|---|---|---|---|---|---|---|---|---|---|---|---|---|---|---|---|---|---|---|---|---|---|---|---|---|---|---|---|---|---|---|---|---|---|---|---|---|---|---|---|---|---|---|---|---|---|---|---|---|---|---|---|---|---|---|---|---|---|---|---|---|---|---|---|---|---|---|---|---|---|---|---|---|---|---|---|---|---|---|---|---|---|---|---|---|---|---|---|---|---|---|---|---|---|---|---|---|---|---|---|---|---|---|---|---|---|---|---|---|---|---|---|---|---|---|---|---|---|---|---|---|---|---|---|---|---|---|---|---|---|---|---|---|---|---|---|---|---|---|---|---|---|---|---|---|---|---|---|---|---|---|---|---|---|---|---|---|---|---|---|---|---|---|---|---|---|---|---|---|---|---|---|---|---|---|---|---|---|---|---|---|---|---|---|---|---|---|---|---|---|---|---|---|---|---|---|---|---|---|---|---|---|---|---|---|---|---|---|---|---|---|---|---|---|---|---|---|---|---|---|---|---|---|---|---|---|---|---|---|---|---|---|---|---|---|---|---|---|---|---|---|---|---|---|---|---|---|---|---|---|---|---|---|---|---|---|---|---|---|---|---|---|---|---|---|---|---|---|---|---|---|---|---|---|---|---|---|---|---|---|---|---|---|---|---|---|---|---|---|---|---|---|---|---|---|---|---|---|---|---|---|---|---|---|---|---|---|---|---|---|---|---|---|---|---|---|---|---|---|---|---|---|---|---|---|---|---|---|---|---|---|---|---|---|---|---|---|---|---|---|---|---|---|---|---|---|---|---|---|---|---|---|---|---|---|---|---|---|---|---|---|---|---|---|---|---|---|---|---|---|---|---|---|---|---|---|---|---|---|---|---|---|---|---|---|---|---|---|---|---|---|---|---|---|---|---|---|---|---|---|---|---|---|---|---|---|---|---|---|---|---|---|---|---|---|---|---|---|---|---|---|---|---|---|---|---|---|---|---|---|---|---|---|---|---|---|---|---|---|---|---|---|---|---|---|---|---|---|---|---|---|---|---|---|---|---|---|---|---|---|---|---|---|---|---|---|---|---|---|---|---|---|---|---|---|---|---|---|---|---|---|---|---|---|---|---|---|---|---|---|---|---|---|---|---|---|---|---|---|---|---|---|---|---|---|---|---|---|---|---|---|---|---|---|---|---|---|---|---|---|---|---|---|---|---|---|---|---|---|---|---|---|---|---|---|---|---|---|---|---|---|---|---|---|---|---|---|---|---|---|---|---|---|---|---|---|---|---|---|---|---|---|---|---|---|---|---|
| ||||||||||||||||||||||||||||||||||||||||||||||||||||||||||||||||||||||||||||||||||||||||||||||||||||||||||||||||||||||||||||||||||||||||||||||||||||||||||||||||||||||||||||||||||||||||||||||||||||||||||||||||||||||||||||||||||||||||||||||||||||||||||||||||||||||||||||||||||||||||||||||||||||||||||||||||||||||||||||||||||||||||||||||||||||||||||||||||||||||||||||||||||||||||||||||||||||||||||||||||||||||||||||||||||||||||||||||||||||||||||||||||||||||||||||||||||||||||||||||||||||||||||||||||||||||||||||||||||||||||||||||||||||||||||||||||||||||||||||||||||||||||||||||||||||||||||||||||||||||||||||||||||||||||||||||||||||||||||||||||||||||||||||||||||||||||||||||||||||||||||||||||||||||||||||||||||||||||||||||||||||||||||||||||||||||||||||||||||||||||||
| Items | ||||||||||||||||||||||||||||||||||||||||||||||||||
|---|---|---|---|---|---|---|---|---|---|---|---|---|---|---|---|---|---|---|---|---|---|---|---|---|---|---|---|---|---|---|---|---|---|---|---|---|---|---|---|---|---|---|---|---|---|---|---|---|---|---|
| ||||||||||||||||||||||||||||||||||||||||||||||||||
1F (front)
Enter Meteor Falls and scale the upper waterfall to reach the second part of 1F.
1F (back)
A series of ledges restrict movement from this direction, so go northeast and climb down the ladder.
B1F (front)
A short distance away, you find a fork in the road.
- Taking the northwest ladder leads to the previous chamber, where another ladder leads back here. This lets you Surf across the water to the north doorway, which leads to a tiny chamber with TM02 (Dragon Claw). It's also the only area where wild Bagon can be found. Surf southeast from that chamber to another doorway which leads to a part of the entrance chamber that holds a PP Up.
- Taking the southwest ladder leads to the far northwest hill in the entrance chamber. Collect TM23 (Iron Tail) and step through the north doorway.
1F (upper)
There is nothing important in this final chamber aside from Steven, standing at the north wall. He's been digging for new rocks and stones to add to his collection. He's impressed that you found him here, and warns that if you intend to mount a serious challenge to expect the worst!
VS Steven
| ||||||||||||||||||||||||||||||||||||||||||||||||||||||||||||||||||||||||||||||||||||||||||||||||||||||||||||||||||||||||||||||||||||||||||||||||||||||||||||||||||||||||||||||
Altering Cave
Back on Route 103, a cave entrance has opened up on the east bank of the river that divides the route. This is Altering Cave, and although there have been rumors of rare Pokémon inside, it seems to house only Zubat.
| Available Pokémon | ||||||||||||||||||||||||||||||||||||||||||
|---|---|---|---|---|---|---|---|---|---|---|---|---|---|---|---|---|---|---|---|---|---|---|---|---|---|---|---|---|---|---|---|---|---|---|---|---|---|---|---|---|---|---|
| ||||||||||||||||||||||||||||||||||||||||||
Desert Underpass
Fly back to Fallarbor Town and head west to Route 114 to pay a visit to the Fossil Maniac in his home just outside of town. His constant digging for new Fossils has caused the wall to collapse, revealing a long, sandy tunnel stretching far to the east. This is the Desert Underpass, which leads through the mountains of northern Hoenn before ending beneath the desert of Route 111. At the tunnel's end, you find the remaining Fossil that fell beneath the sands when Mirage Tower disappeared. There are also a handful of Pokémon species to be found here, including Ditto, which can't be found anywhere else. This Pokémon is unique as its only move, Transform, allows it to become a nearly-identical copy of the target. But it's even more useful outside of battle. When left in the Day Care building on Route 117 with nearly any other Pokémon, the pair are able to produce an Egg containing the other Pokémon's first-stage form! This makes it incredibly useful when working to complete the Pokédex.
| Available Pokémon | ||||||||||||||||||||||||||||||||||||||||||||||||||||||||||||||||||||||||||
|---|---|---|---|---|---|---|---|---|---|---|---|---|---|---|---|---|---|---|---|---|---|---|---|---|---|---|---|---|---|---|---|---|---|---|---|---|---|---|---|---|---|---|---|---|---|---|---|---|---|---|---|---|---|---|---|---|---|---|---|---|---|---|---|---|---|---|---|---|---|---|---|---|---|---|
| ||||||||||||||||||||||||||||||||||||||||||||||||||||||||||||||||||||||||||
| Items | ||||||||||||
|---|---|---|---|---|---|---|---|---|---|---|---|---|
| ||||||||||||
|
Emerald walkthrough |
|

|
This article is part of Project Walkthroughs, a Bulbapedia project that aims to write comprehensive step-by-step guides on each Pokémon game. |


