Sootopolis Gym: Difference between revisions
YutoMaikeru (talk | contribs) m (→Interior: Oops) |
|||
| (68 intermediate revisions by 28 users not shown) | |||
| Line 3: | Line 3: | ||
|characters=ルネ | |characters=ルネ | ||
|japanese=Rune | |japanese=Rune | ||
|image=Sootopolis Gym | |image=Sootopolis Gym Exterior ORAS.png | ||
|location=Sootopolis City | |location=Sootopolis City | ||
|leader=[[Wallace]]{{sup/3|RS}}{{sup/6|ORAS}}<br>[[Juan]]{{sup/3|E}} | |leader=[[Wallace]]{{sup/3|RS}}{{sup/6|ORAS}}<br>[[Juan]]{{sup/3|E}} | ||
| Line 9: | Line 9: | ||
|type=Water | |type=Water | ||
|region=Hoenn | |region=Hoenn | ||
|battlefield=Sootopolis Gym | |battlefield=Sootopolis Gym Leader Battle Environment ORAS.png | ||
|battlefieldsize=300px | |||
|imagesize=300px | |||
|colordark=A0A0A0 | |colordark=A0A0A0 | ||
|colorlight=C0C0C0 | |colorlight=C0C0C0 | ||
}} | }} | ||
[[File:Wallace's Gym Leader Area ORAS.png|thumb|300px|Wallace's Gym Leader area]] | |||
The '''Sootopolis Gym''' (Japanese: '''ルネジム''' ''Rune Gym'') is the official [[Gym]] of [[Sootopolis City]]. It is based on {{type|Water}} {{OBP|Pokémon|species}}. The [[Gym Leader]] is [[Wallace]]{{sup/3|RS}}{{sup/6|ORAS}}, who succeeded and, in {{game|Emerald}}, was eventually replaced by his mentor [[Juan]]{{sup/3|E}}. {{pkmn|Trainer}}s who defeat them receive the {{Badge|Rain}}. | |||
==In the games== | |||
===Core series games=== | |||
{{flexheader|gap=0px}} | |||
{| | |||
|- | |||
| style="vertical-align:top" | | |||
{{sign|E|header}} | |||
{{sign|E|title|Sootopolis City Pokémon Gym<br>Leader: Wallace}} | |||
{{sign|E|Artist, and lover of water}} | |||
{{sign|E|footer}} | |||
| style="vertical-align:top" | | |||
{{sign|E|header}} | |||
{{sign|E|title|Sootopolis City Pokémon Gym<br>Leader: Juan}} | |||
{{sign|E|The <sc>Gym Leader</sc> with the beauty<br>of pure water!}} | |||
{{sign|E|footer}} | |||
|} | |||
{{sign|RS|header}} | |||
{{sign|RS|title|Sootopolis City Pokémon Gym<br>Leader: Wallace}} | |||
{{sign|RS|Artist, and lover of water}} | |||
{{sign|RS|footer}} | |||
{{flexfooter}} | |||
The Sootopolis Gym's door is initially locked. It will only open up once the {{player}} has solved [[Hoenn]]'s weather crisis. | |||
In Ruby, Sapphire, and Emerald, to reach the Gym Leader, Trainers must step on every ice tile to activate the stairways to the next level. If any tile is used twice, the player will fall to a lower floor, where the Gym Trainers are located. No matter where the player falls, at least one Trainer must be challenged before the stairs can be returned to. The levels on the basement floor are separated with ice slides, allowing the player to only move downwards. | |||
When defeated, Wallace{{sup/3|RS}} or Juan{{sup/3|E}} will give the player the {{Badge|Rain}} as well as {{TM|03|Water Pulse}} as a reward. | |||
In Omega Ruby and Alpha Sapphire, the player can walk across the ice diagonally instead of just straight. The second and third puzzles now also contain solid platforms which can be stepped onto multiple times without them breaking. Once a puzzle is solved | In Omega Ruby and Alpha Sapphire, the player can walk across the ice diagonally instead of just straight. The second and third puzzles now also contain solid platforms which can be stepped onto multiple times without them breaking. Once a puzzle is solved from a position that allows direct access to the stairs, the cracked tiles on the solved puzzle can be stepped onto without them breaking. The ice slides on the lower floor are replaced with stairs, allowing the player to freely move between the different levels of the floor. In addition, two Trainers can now be battled on the main floor. | ||
When defeated, Wallace | When defeated, Wallace will give the player the {{Badge|Rain}} as well as {{HM|05|Waterfall}} as a reward. | ||
===Appearance=== | ====Appearance==== | ||
=====Interior===== | |||
{| class=roundy style="margin:auto; background: #000; border: 3px solid #{{water color dark}}" | {| class=roundy style="margin:auto; background: #000; border: 3px solid #{{water color dark}}" | ||
|- | |- | ||
| Line 39: | Line 68: | ||
| [[File:Sootopolis Gym 1F E.png|150px]] | | [[File:Sootopolis Gym 1F E.png|150px]] | ||
| [[File:Sootopolis Gym B1F E.png|150px]] | | [[File:Sootopolis Gym B1F E.png|150px]] | ||
|- | |||
! style="background:#{{omega ruby color}}" | {{color2|fff|Pokémon Omega Ruby and Alpha Sapphire|Omega Ruby}} | |||
! rowspan="2" | [[File:Sootopolis Gym 1F ORAS.png|150px]] | |||
! rowspan="2" | [[File:Sootopolis Gym B1F ORAS.png|140px]] | |||
|- | |||
! style="background:#{{alpha sapphire color}}" | {{color2|fff|Pokémon Omega Ruby and Alpha Sapphire|Alpha Sapphire}} | |||
|- | |- | ||
| colspan="3" style="background:#{{water color light}}; {{roundybottom|5px}}" | | | colspan="3" style="background:#{{water color light}}; {{roundybottom|5px}}" | | ||
|} | |} | ||
===Trainers=== | ====Items==== | ||
===={{game|Ruby and Sapphire|s}}==== | {{Itlisth|Water}} | ||
{{Itemlist|TM Water|Reward for defeating Wallace{{sup/3|RS}}/Juan{{sup/3|E}}|Ru=yes|Sa=yes|E=yes|display={{TM|03|Water Pulse}}}} | |||
{{Itemlist|HM Water VI|Reward for defeating Wallace|OR=yes|AS=yes|display={{HM|05|Waterfall}}}} | |||
{{Itlistfoot|Water}} | |||
====Trainers==== | |||
====={{game|Ruby and Sapphire|s}}===== | |||
{{Trainerheader|Water}} | {{Trainerheader|Water}} | ||
{{Trainerdiv|Water|B1F (lowest level)}} | |||
{{Trainerentry|Spr RS Beauty.png|Beauty|Connie|3200|2|118|Goldeen|♀|40|None|320|Wailmer|♀|40|None|36=マユコ|37=Mayuko}} | |||
{{Trainerdiv|Water}} | |||
{{Trainerentry|Spr RS Lass.png|Lass|Andrea|656|1|370|Luvdisc||41|None|36=ミキ|37=Miki}} | |||
{{Trainerdiv|Water|B1F (middle level)}} | |||
{{Trainerentry|Spr RS Beauty.png|Beauty|Bridget|3280|1|184|Azumarill|♀|41|None|36=セイコ|37=Seiko}} | |||
{{Trainerdiv|Water}} | |||
{{Trainerentry|Spr RS Lady.png|Lady|Brianna|8200|1|119|Seaking|♀|41|Nugget|36=シオリ|37=Shiori}} | |||
{{Trainerdiv|Water|B1F (highest level)}} | |||
{{Trainerentry|Spr RS Beauty.png|Beauty|Olivia|3280|1|271|Lombre|♀|41|None|36=ナオコ|37=Naoko}} | {{Trainerentry|Spr RS Beauty.png|Beauty|Olivia|3280|1|271|Lombre|♀|41|None|36=ナオコ|37=Naoko}} | ||
{{Trainerdiv|Water}} | {{Trainerdiv|Water}} | ||
| Line 53: | Line 103: | ||
{{Trainerdiv|Water}} | {{Trainerdiv|Water}} | ||
{{Trainerentry|Spr RS Pokéfan F.png|Pokéfan|Marissa|3200|3|298|Azurill|♀|36|Oran Berry|183|Marill|♀|38|Oran Berry|184|Azumarill|♀|40|Oran Berry|36=テイコ|37=Teiko}} | {{Trainerentry|Spr RS Pokéfan F.png|Pokéfan|Marissa|3200|3|298|Azurill|♀|36|Oran Berry|183|Marill|♀|38|Oran Berry|184|Azumarill|♀|40|Oran Berry|36=テイコ|37=Teiko}} | ||
{{ | {{Trainerfooter|Water|3|inside}} | ||
Wallace uses two [[Hyper Potion]]s. | |||
{{Party/Single | {{Party/Single | ||
|color={{water color}} | |color={{water color}} | ||
|headcolor={{water color light}} | |headcolor={{water color light}} | ||
|bordercolor={{water color dark}} | |bordercolor={{water color dark}} | ||
|sprite=Spr RS Wallace. | |sprite=Spr RS Wallace.png | ||
|prize={{PDollar}}4300 | |prize={{PDollar}}4300 | ||
|class=Leader | |class=Leader | ||
| Line 74: | Line 117: | ||
|game=RS | |game=RS | ||
|location=Sootopolis Gym | |location=Sootopolis Gym | ||
|pokemon=5 | |pokemon=5}} | ||
}} | |||
|{{Pokémon/3 | |{{Pokémon/3 | ||
|game=Ruby | |game=Ruby | ||
| Line 141: | Line 183: | ||
{{Party/Footer}} | {{Party/Footer}} | ||
===={{game|Emerald}}==== | ====={{game|Emerald}}===== | ||
{{Trainerheader|Water}} | {{Trainerheader|Water}} | ||
{{Trainerdiv|Water|B1F (lowest level)}} | |||
{{Trainerentry|Spr RS Beauty.png|Beauty|Connie|3200|1|118|Goldeen|♀|40|None|36=マユコ|37=Mayuko}} | {{Trainerentry|Spr RS Beauty.png|Beauty|Connie|3200|1|118|Goldeen|♀|40|None|36=マユコ|37=Mayuko}} | ||
{{Trainerdiv|Water}} | {{Trainerdiv|Water}} | ||
{{Trainerentry|Spr RS Lass.png|Lass|Andrea|640|1|370|Luvdisc|♀|40|None|36=ミキ|37=Miki}} | {{Trainerentry|Spr RS Lass.png|Lass|Andrea|640|1|370|Luvdisc|♀|40|None|36=ミキ|37=Miki}} | ||
{{Trainerdiv|Water}} | {{Trainerdiv|Water|B1F (middle level)}} | ||
{{Trainerentry|Spr RS Lady.png|Lady|Daphne|7800<br><small>Potential [[Double Battle]] with Annika</small>|2|370|Luvdisc|♀|39|Nugget|370|Luvdisc|♀|39|Nugget|36=エイカ|37=Eika}} | {{Trainerentry|Spr RS Lady.png|Lady|Daphne|7800<br><small>Potential [[Double Battle]] with Annika</small>|2|370|Luvdisc|♀|39|Nugget|370|Luvdisc|♀|39|Nugget|36=エイカ|37=Eika}} | ||
{{Trainerentry|Spr RS Pokéfan F.png|Pokéfan|Annika|3120<br><small>Potential [[Double Battle]] with Daphne</small>|2|349|Feebas|♀|39|Oran Berry|349|Feebas|♀|39|Oran Berry|36=ミネコ|37=Mineko}} | {{Trainerentry|Spr RS Pokéfan F.png|Pokéfan|Annika|3120<br><small>Potential [[Double Battle]] with Daphne</small>|2|349|Feebas|♀|39|Oran Berry|349|Feebas|♀|39|Oran Berry|36=ミネコ|37=Mineko}} | ||
{{Trainerdiv|Water}} | {{Trainerdiv|Water|B1F (highest level)}} | ||
{{Trainerentry|Spr RS Beauty.png|Beauty|Tiffany|3120<br><small>Potential [[Double Battle]] with Crissy</small>|2|318|Carvanha|♀|39|None|319|Sharpedo|♀|39|None|36=ハルコ|37=Haruko}} | {{Trainerentry|Spr RS Beauty.png|Beauty|Tiffany|3120<br><small>Potential [[Double Battle]] with Crissy</small>|2|318|Carvanha|♀|39|None|319|Sharpedo|♀|39|None|36=ハルコ|37=Haruko}} | ||
{{Trainerentry|Spr RS Lass.png|Lass|Crissy|624<br><small>Potential [[Double Battle]] with Tiffany</small>|2|118|Goldeen|♀|39|None|320|Wailmer|♀|39|None|36=メイ|37=Mei}} | {{Trainerentry|Spr RS Lass.png|Lass|Crissy|624<br><small>Potential [[Double Battle]] with Tiffany</small>|2|118|Goldeen|♀|39|None|320|Wailmer|♀|39|None|36=メイ|37=Mei}} | ||
{{Trainerdiv|Water}} | {{Trainerdiv|Water}} | ||
{{Trainerentry|Spr RS Pokéfan F.png|Pokéfan|Bethany|3120<br><small>Potential [[Double Battle]] with Olivia</small>|3|298|Azurill|♀|35|Oran Berry|183|Marill|♀|37|Oran Berry|184|Azumarill|♀|39|Oran Berry|36=テイコ|37=Teiko}} | |||
{{Trainerentry|Spr RS Beauty.png|Beauty|Olivia|3120<br><small>Potential [[Double Battle]] with Bethany</small>|3|366|Clamperl|♀|35|None|341|Corphish|♀|37|None|271|Lombre|♀|39|None|36=ナオコ|37=Naoko}} | {{Trainerentry|Spr RS Beauty.png|Beauty|Olivia|3120<br><small>Potential [[Double Battle]] with Bethany</small>|3|366|Clamperl|♀|35|None|341|Corphish|♀|37|None|271|Lombre|♀|39|None|36=ナオコ|37=Naoko}} | ||
{{Trainerdiv|Water}} | {{Trainerdiv|Water}} | ||
{{Trainerentry|Spr RS Lady.png|Lady|Brianna|8000<br><small>Potential [[Double Battle]] with Bridget</small>|1|119|Seaking|♀|40|Nugget|36=シオリ|37=Shiori}} | |||
{{Trainerentry|Spr RS Beauty.png|Beauty|Bridget|3200<br><small>Potential [[Double Battle]] with Brianna</small>|1|184|Azumarill|♀|40|None|36=セイコ|37=Seiko}} | {{Trainerentry|Spr RS Beauty.png|Beauty|Bridget|3200<br><small>Potential [[Double Battle]] with Brianna</small>|1|184|Azumarill|♀|40|None|36=セイコ|37=Seiko}} | ||
{{Trainerfooter|Water|3|inside}} | |||
{{Trainerfooter|Water|inside}} | |||
Juan uses two [[Hyper Potion]]s in the Gym battle and three [[Full Restore]]s in the rematches. | |||
{{Party/Single | {{Party/Single | ||
|color={{water color}} | |color={{water color}} | ||
| Line 171: | Line 215: | ||
|game=E | |game=E | ||
|location=Sootopolis Gym | |location=Sootopolis Gym | ||
|pokemon=5 | |pokemon=5}} | ||
}} | |||
|{{Pokémon/3 | |{{Pokémon/3 | ||
|game=Emerald | |game=Emerald | ||
| Line 195: | Line 238: | ||
|move1=Rain Dance|move1type=Water | |move1=Rain Dance|move1type=Water | ||
|move2=Water Pulse|move2type=Water | |move2=Water Pulse|move2type=Water | ||
|move3= | |move3=Amnesia|move3type=Psychic | ||
|move4= | |move4=Earthquake|move4type=Ground}} | ||
|{{Pokémon/3 | |{{Pokémon/3 | ||
|game=Emerald | |game=Emerald | ||
| Line 218: | Line 261: | ||
|type1=Water|type2=Dark | |type1=Water|type2=Dark | ||
|ability=Hyper Cutter | |ability=Hyper Cutter | ||
|move1= | |move1=Water Pulse|move1type=Water | ||
|move2= | |move2=Crabhammer|move2type=Water | ||
|move3= | |move3=Taunt|move3type=Dark | ||
|move4= | |move4=Leer|move4type=Normal}} | ||
| style="margin:auto" |{{Pokémon/3 | | style="margin:auto" |{{Pokémon/3 | ||
|game=Emerald | |game=Emerald | ||
| Line 232: | Line 275: | ||
|ability=Swift Swim | |ability=Swift Swim | ||
|move1=Water Pulse|move1type=Water | |move1=Water Pulse|move1type=Water | ||
|move2= | |move2=Double Team|move2type=Normal | ||
|move3=Ice Beam|move3type=Ice | |move3=Ice Beam|move3type=Ice | ||
|move4= | |move4=Rest|move4type=Psychic}} | ||
{{Party/Footer}} | {{Party/Footer}} | ||
=====First [[rematch]]===== | ======First [[rematch]]====== | ||
{{Party/Single | {{Party/Single | ||
|color={{water color}} | |color={{water color}} | ||
| Line 249: | Line 292: | ||
|game=E | |game=E | ||
|location=Sootopolis Gym | |location=Sootopolis Gym | ||
|pokemon=5 | |pokemon=5}} | ||
}} | |||
|{{Pokémon/3 | |{{Pokémon/3 | ||
|game=Emerald | |game=Emerald | ||
| Line 260: | Line 302: | ||
|ability=Water Absorb | |ability=Water Absorb | ||
|move1=Hypnosis|move1type=Psychic | |move1=Hypnosis|move1type=Psychic | ||
|move2= | |move2=Rain Dance|move2type=Water | ||
|move3=Protect|move3type=Normal | |move3=Protect|move3type=Normal | ||
|move4= | |move4=Hydro Pump|move4type=Water}} | ||
|{{Pokémon/3 | |{{Pokémon/3 | ||
|game=Emerald | |game=Emerald | ||
| Line 274: | Line 316: | ||
|move1=Rain Dance|move1type=Water | |move1=Rain Dance|move1type=Water | ||
|move2=Water Pulse|move2type=Water | |move2=Water Pulse|move2type=Water | ||
|move3= | |move3=Double Team|move3type=Normal | ||
|move4= | |move4=Fissure|move4type=Ground}} | ||
|{{Pokémon/3 | |{{Pokémon/3 | ||
|game=Emerald | |game=Emerald | ||
| Line 284: | Line 326: | ||
|type1=Ice|type2=Water | |type1=Ice|type2=Water | ||
|ability=Thick Fat | |ability=Thick Fat | ||
|move1= | |move1=Water Pulse|move1type=Water | ||
|move2=Body Slam|move2type=Normal | |move2=Body Slam|move2type=Normal | ||
|move3= | |move3=Protect|move3type=Normal | ||
|move4= | |move4=Ice Beam|move4type=Ice}} | ||
{{Party/Div|color={{water color}}}} | {{Party/Div|color={{water color}}}} | ||
| style="margin:auto" |{{Pokémon/3 | | style="margin:auto" |{{Pokémon/3 | ||
| Line 298: | Line 340: | ||
|held=Chesto Berry | |held=Chesto Berry | ||
|ability=Hyper Cutter | |ability=Hyper Cutter | ||
|move1= | |move1=Rest|move1type=Psychic | ||
|move2= | |move2=Crabhammer|move2type=Water | ||
|move3= | |move3=Taunt|move3type=Dark | ||
|move4= | |move4=Double Team|move4type=Normal}} | ||
| style="margin:auto" |{{Pokémon/3 | | style="margin:auto" |{{Pokémon/3 | ||
|game=Emerald | |game=Emerald | ||
| Line 312: | Line 354: | ||
|ability=Swift Swim | |ability=Swift Swim | ||
|move1=Water Pulse|move1type=Water | |move1=Water Pulse|move1type=Water | ||
|move2= | |move2=Double Team|move2type=Normal | ||
|move3=Ice Beam|move3type=Ice | |move3=Ice Beam|move3type=Ice | ||
|move4= | |move4=Rest|move4type=Psychic}} | ||
{{Party/Footer}} | {{Party/Footer}} | ||
=====Second rematch===== | ======Second rematch====== | ||
{{Party/Single | {{Party/Single | ||
|color={{water color}} | |color={{water color}} | ||
| Line 329: | Line 371: | ||
|game=E | |game=E | ||
|location=Sootopolis Gym | |location=Sootopolis Gym | ||
|pokemon=5 | |pokemon=5}} | ||
}} | |||
|{{Pokémon/3 | |{{Pokémon/3 | ||
|game=Emerald | |game=Emerald | ||
| Line 340: | Line 381: | ||
|ability=Water Absorb | |ability=Water Absorb | ||
|move1=Hypnosis|move1type=Psychic | |move1=Hypnosis|move1type=Psychic | ||
|move2= | |move2=Rain Dance|move2type=Water | ||
|move3=Protect|move3type=Normal | |move3=Protect|move3type=Normal | ||
|move4= | |move4=Hydro Pump|move4type=Water}} | ||
|{{Pokémon/3 | |{{Pokémon/3 | ||
|game=Emerald | |game=Emerald | ||
| Line 354: | Line 395: | ||
|move1=Rain Dance|move1type=Water | |move1=Rain Dance|move1type=Water | ||
|move2=Water Pulse|move2type=Water | |move2=Water Pulse|move2type=Water | ||
|move3= | |move3=Double Team|move3type=Normal | ||
|move4= | |move4=Fissure|move4type=Ground}} | ||
|{{Pokémon/3 | |{{Pokémon/3 | ||
|game=Emerald | |game=Emerald | ||
| Line 365: | Line 406: | ||
|type2=Water | |type2=Water | ||
|ability=Thick Fat | |ability=Thick Fat | ||
|move1= | |move1=Water Pulse|move1type=Water | ||
|move2=Body Slam|move2type=Normal | |move2=Body Slam|move2type=Normal | ||
|move3= | |move3=Protect|move3type=Normal | ||
|move4= | |move4=Ice Beam|move4type=Ice}} | ||
{{Party/Div|color={{water color}}}} | {{Party/Div|color={{water color}}}} | ||
| style="margin:auto" |{{Pokémon/3 | | style="margin:auto" |{{Pokémon/3 | ||
| Line 379: | Line 420: | ||
|held=Chesto Berry | |held=Chesto Berry | ||
|ability=Hyper Cutter | |ability=Hyper Cutter | ||
|move1= | |move1=Rest|move1type=Psychic | ||
|move2= | |move2=Guillotine|move2type=Normal | ||
|move3= | |move3=Taunt|move3type=Dark | ||
|move4= | |move4=Double Team|move4type=Normal}} | ||
| style="margin:auto" |{{Pokémon/3 | | style="margin:auto" |{{Pokémon/3 | ||
|game=Emerald | |game=Emerald | ||
| Line 393: | Line 434: | ||
|ability=Swift Swim | |ability=Swift Swim | ||
|move1=Water Pulse|move1type=Water | |move1=Water Pulse|move1type=Water | ||
|move2= | |move2=Double Team|move2type=Normal | ||
|move3=Ice Beam|move3type=Ice | |move3=Ice Beam|move3type=Ice | ||
|move4= | |move4=Rest|move4type=Psychic}} | ||
{{Party/Footer}} | {{Party/Footer}} | ||
=====Third rematch===== | ======Third rematch====== | ||
{{Party/Single | {{Party/Single | ||
|color={{water color}} | |color={{water color}} | ||
| Line 410: | Line 451: | ||
|game=E | |game=E | ||
|location=Sootopolis Gym | |location=Sootopolis Gym | ||
|pokemon=6 | |pokemon=6}} | ||
}} | |||
|{{Pokémon/3 | |{{Pokémon/3 | ||
|game=Emerald | |game=Emerald | ||
| Line 421: | Line 461: | ||
|ability=Water Absorb | |ability=Water Absorb | ||
|move1=Hydro Pump|move1type=Water | |move1=Hydro Pump|move1type=Water | ||
|move2= | |move2=Perish Song|move2type=Normal | ||
|move3=Ice Beam|move3type=Ice | |move3=Ice Beam|move3type=Ice | ||
|move4= | |move4=Confuse Ray|move4type=Ghost}} | ||
|{{Pokémon/3 | |{{Pokémon/3 | ||
|game=Emerald | |game=Emerald | ||
| Line 434: | Line 474: | ||
|move1=Rain Dance|move1type=Water | |move1=Rain Dance|move1type=Water | ||
|move2=Water Pulse|move2type=Water | |move2=Water Pulse|move2type=Water | ||
|move3= | |move3=Double Team|move3type=Normal | ||
|move4= | |move4=Fissure|move4type=Ground}} | ||
|{{Pokémon/3 | |{{Pokémon/3 | ||
|game=Emerald | |game=Emerald | ||
| Line 445: | Line 485: | ||
|ability=Water Absorb | |ability=Water Absorb | ||
|move1=Hypnosis|move1type=Psychic | |move1=Hypnosis|move1type=Psychic | ||
|move2= | |move2=Rain Dance|move2type=Water | ||
|move3=Protect|move3type=Normal | |move3=Protect|move3type=Normal | ||
|move4= | |move4=Hydro Pump|move4type=Water}} | ||
{{Party/Div|color={{water color}}}} | {{Party/Div|color={{water color}}}} | ||
|{{Pokémon/3 | |{{Pokémon/3 | ||
| Line 457: | Line 497: | ||
|type1=Ice|type2=Water | |type1=Ice|type2=Water | ||
|ability=Thick Fat | |ability=Thick Fat | ||
|move1= | |move1=Water Pulse|move1type=Water | ||
|move2=Body Slam|move2type=Normal | |move2=Body Slam|move2type=Normal | ||
|move3= | |move3=Protect|move3type=Normal | ||
|move4= | |move4=Ice Beam|move4type=Ice}} | ||
|{{Pokémon/3 | |{{Pokémon/3 | ||
|game=Emerald | |game=Emerald | ||
| Line 470: | Line 510: | ||
|held=Chesto Berry | |held=Chesto Berry | ||
|ability=Hyper Cutter | |ability=Hyper Cutter | ||
|move1= | |move1=Rest|move1type=Psychic | ||
|move2= | |move2=Guillotine|move2type=Normal | ||
|move3= | |move3=Taunt|move3type=Dark | ||
|move4= | |move4=Double Team|move4type=Normal}} | ||
|{{Pokémon/3 | |{{Pokémon/3 | ||
|game=Emerald | |game=Emerald | ||
| Line 484: | Line 524: | ||
|ability=Swift Swim | |ability=Swift Swim | ||
|move1=Water Pulse|move1type=Water | |move1=Water Pulse|move1type=Water | ||
|move2= | |move2=Double Team|move2type=Normal | ||
|move3=Ice Beam|move3type=Ice | |move3=Ice Beam|move3type=Ice | ||
|move4= | |move4=Rest|move4type=Psychic}} | ||
{{Party/Footer}} | {{Party/Footer}} | ||
=====Fourth rematch===== | ======Fourth rematch onwards====== | ||
{{Party/Single | {{Party/Single | ||
|color={{water color}} | |color={{water color}} | ||
| Line 501: | Line 541: | ||
|game=E | |game=E | ||
|location=Sootopolis Gym | |location=Sootopolis Gym | ||
|pokemon=6 | |pokemon=6}} | ||
}} | |||
|{{Pokémon/3 | |{{Pokémon/3 | ||
|game=Emerald | |game=Emerald | ||
| Line 512: | Line 551: | ||
|ability=Water Absorb | |ability=Water Absorb | ||
|move1=Hydro Pump|move1type=Water | |move1=Hydro Pump|move1type=Water | ||
|move2= | |move2=Perish Song|move2type=Normal | ||
|move3=Ice Beam|move3type=Ice | |move3=Ice Beam|move3type=Ice | ||
|move4= | |move4=Confuse Ray|move4type=Ghost}} | ||
|{{Pokémon/3 | |{{Pokémon/3 | ||
|game=Emerald | |game=Emerald | ||
| Line 526: | Line 565: | ||
|move1=Rain Dance|move1type=Water | |move1=Rain Dance|move1type=Water | ||
|move2=Water Pulse|move2type=Water | |move2=Water Pulse|move2type=Water | ||
|move3= | |move3=Double Team|move3type=Normal | ||
|move4= | |move4=Fissure|move4type=Ground}} | ||
|{{Pokémon/3 | |{{Pokémon/3 | ||
|game=Emerald | |game=Emerald | ||
| Line 537: | Line 576: | ||
|ability=Water Absorb | |ability=Water Absorb | ||
|move1=Hypnosis|move1type=Psychic | |move1=Hypnosis|move1type=Psychic | ||
|move2= | |move2=Rain Dance|move2type=Water | ||
|move3= | |move3=Hydro Pump|move3type=Water | ||
|move4= | |move4=Perish Song|move4type=Normal}} | ||
{{Party/Div|color={{water color}}}} | {{Party/Div|color={{water color}}}} | ||
|{{Pokémon/3 | |{{Pokémon/3 | ||
| Line 549: | Line 588: | ||
|type1=Ice|type2=Water | |type1=Ice|type2=Water | ||
|ability=Thick Fat | |ability=Thick Fat | ||
|move1= | |move1=Water Pulse|move1type=Water | ||
|move2=Body Slam|move2type=Normal | |move2=Body Slam|move2type=Normal | ||
|move3= | |move3=Protect|move3type=Normal | ||
|move4= | |move4=Sheer Cold|move4type=Ice}} | ||
|{{Pokémon/3 | |{{Pokémon/3 | ||
|game=Emerald | |game=Emerald | ||
| Line 562: | Line 601: | ||
|held=Chesto Berry | |held=Chesto Berry | ||
|ability=Hyper Cutter | |ability=Hyper Cutter | ||
|move1= | |move1=Rest|move1type=Psychic | ||
|move2= | |move2=Guillotine|move2type=Normal | ||
|move3= | |move3=Taunt|move3type=Dark | ||
|move4= | |move4=Double Team|move4type=Normal}} | ||
|{{Pokémon/3 | |{{Pokémon/3 | ||
|game=Emerald | |game=Emerald | ||
| Line 576: | Line 615: | ||
|ability=Swift Swim | |ability=Swift Swim | ||
|move1=Water Pulse|move1type=Water | |move1=Water Pulse|move1type=Water | ||
|move2= | |move2=Double Team|move2type=Normal | ||
|move3=Ice Beam|move3type=Ice | |move3=Ice Beam|move3type=Ice | ||
|move4= | |move4=Rest|move4type=Psychic}} | ||
{{Party/Footer}} | {{Party/Footer}} | ||
===={{g|Omega Ruby and Alpha Sapphire}}==== | ====={{g|Omega Ruby and Alpha Sapphire}}===== | ||
{{Trainerheader|Water}} | {{Trainerheader|Water}} | ||
{{Trainerdiv|Water|1F}} | {{Trainerdiv|Water|1F}} | ||
{{Trainerentry|VSPoké Fan F ORAS.png{{!}}150px|Poké Fan|Marissa|2,752|1|184|Azumarill|♀|43|36=テイコ|37=Teiko}} | {{Trainerentry|VSPoké Fan F ORAS.png{{!}}150px|game=6|Poké Fan|Marissa|2,752|1|184|Azumarill|♀|43|36=テイコ|37=Teiko}} | ||
{{Trainerdiv|Water}} | {{Trainerdiv|Water}} | ||
{{Trainerentry|VSLass ORAS.png{{!}}150px|Lass|Crissy|656|2|370|Luvdisc|♀|39||117|Seadra|♀|41|36=メイ|37=Mei}} | {{Trainerentry|VSLass ORAS.png{{!}}150px|game=6|Lass|Crissy|656|2|370|Luvdisc|♀|39||117|Seadra|♀|41|36=メイ|37=Mei}} | ||
{{Trainerdiv|Water| | {{Trainerdiv|Water|BF}} | ||
{{Trainerentry|VSBeauty ORAS.png{{!}}150px|Beauty|Olivia|2,408|1|121|Starmie||43|36=ナオコ|37=Naoko}} | {{Trainerentry|VSBeauty ORAS.png{{!}}150px|game=6|Beauty|Olivia|2,408|1|121|Starmie||43|36=ナオコ|37=Naoko}} | ||
{{Trainerdiv|Water}} | {{Trainerdiv|Water}} | ||
{{Trainerentry|VSLady ORAS.png{{!}}150px|Lady|Brianna|4,920|2|366|Clamperl|♀|41||222|Corsola|♀|41|36=シオリ|37= | {{Trainerentry|VSLady ORAS.png{{!}}150px|game=6|Lady|Brianna|4,920|2|366|Clamperl|♀|41||222|Corsola|♀|41|36=シオリ|37=Shiori}} | ||
{{Trainerdiv|Water}} | {{Trainerdiv|Water}} | ||
{{Trainerentry|VSBeauty ORAS.png{{!}}150px|Beauty|Connie|2,408|1|367|Huntail|♀|43|36=マユコ|37=Mayuko}} | {{Trainerentry|VSBeauty ORAS.png{{!}}150px|game=6|Beauty|Connie|2,408|1|367|Huntail|♀|43|36=マユコ|37=Mayuko}} | ||
{{Trainerdiv|Water}} | {{Trainerdiv|Water}} | ||
{{Trainerentry|VSBeauty ORAS.png{{!}}150px|Beauty|Bridget|2,408|1|368|Gorebyss|♀|43|36=セイコ|37=Seiko}} | {{Trainerentry|VSBeauty ORAS.png{{!}}150px|game=6|Beauty|Bridget|2,408|1|368|Gorebyss|♀|43|36=セイコ|37=Seiko}} | ||
{{Trainerdiv|Water}} | {{Trainerdiv|Water}} | ||
{{Trainerentry|VSBeauty ORAS.png{{!}}150px|Beauty|Tiffany|2,296|2|055|Golduck|♀|41||321|Wailord|♀|41|36=ハルコ|37=Haruko}} | {{Trainerentry|VSBeauty ORAS.png{{!}}150px|game=6|Beauty|Tiffany|2,296|2|055|Golduck|♀|41||321|Wailord|♀|41|36=ハルコ|37=Haruko}} | ||
{{Trainerdiv|Water}} | {{Trainerdiv|Water}} | ||
{{Trainerentry|VSLass ORAS.png{{!}}150px|Lass|Andrea|672|1|272|Ludicolo|♀|42|36=ミキ|37=Miki}} | {{Trainerentry|VSLass ORAS.png{{!}}150px|game=6|Lass|Andrea|672|1|272|Ludicolo|♀|42|36=ミキ|37=Miki}} | ||
{{Trainerfooter|Water|3}} | {{Trainerfooter|Water|3}} | ||
| Line 605: | Line 644: | ||
|headcolor={{water color light}} | |headcolor={{water color light}} | ||
|bordercolor={{water color dark}} | |bordercolor={{water color dark}} | ||
|sprite=VSWallace. | |sprite=VSWallace.png | ||
|size=150px | |size=150px | ||
|prize={{PDollar}}5,520 | |prize={{PDollar}}5,520 | ||
|class=Leader | |class=Leader | ||
|classlink=Gym Leader | |classlink=Gym Leader | ||
|name=Wallace | |name={{color2|000|Wallace}} | ||
|game=ORAS | |game=ORAS | ||
|location=Sootopolis Gym | |location=Sootopolis Gym | ||
| Line 674: | Line 713: | ||
{{Party/Footer}} | {{Party/Footer}} | ||
=== | ===In the spin-off games=== | ||
{{ | ====[[Pokémon Masters EX]]==== | ||
{ | Artwork depicting the Sootopolis Gym is seen in {{mas|Wallace}}'s mindscape. | ||
{{ | {| style="margin:auto; text-align:center;background: #7B30B2; {{roundy}}; border: #7B30B2;" | ||
| | |||
{| style="background: #AB60E2; {{roundy}}; border: #AB60E2;" | |||
|- style="text-align:center" | |||
| | |||
{| style="background: #{{water color light}}; {{roundy}}; border: #{{water color light}}; padding: 0px 5px 5px 5px" | |||
|- | |||
|<big>'''{{color2|000|Wallace (Masters)#Milotic|Wallace & Milotic}}'''</big> | |||
|- | |||
| [[File:Wallace Mindscape.png|200px]] | |||
|} | |||
|} | |||
|} | |||
==In the anime== | ==In the anime== | ||
[[File:Sootopolis Gym anime.png|thumb|250px|left|Sootopolis Gym in the {{pkmn|anime}}]] | |||
[[File:Sootopolis Gym{{#switch: {{#expr: {{#time: U}} mod 2}}|0=|1=_second}} Battlefield.png|thumb|250px|Sootopolis Gym's battlefield in the anime]] | |||
In the {{pkmn|anime}}, the Sootopolis Gym battle is fought in two segments. The first segment is a [[Double Battle]] fought on a water battlefield with floating platforms. Once both of the [[Gym Leader]]'s Pokémon have been defeated, the Trainers switch podiums, the battlefield is changed into one that's a mixture of water and land, and the rest of the battle is fought as a Single Battle. | |||
{{Ash}} and {{ashfr}} first arrived | The Sootopolis Gym debuted in ''[[AG110|The Great Eight Fate!]]'', when {{Ash}} and {{ashfr}} first arrived there with [[Juan]]. After arrival, Ash immediately began his Gym battle with Juan. The battle concluded in ''[[AG111|Eight Ain't Enough!]]'' in Ash's victory, earning him his {{badge|Rain}}. | ||
In ''[[DP075|Our Cup Runneth Over!]]'', [[Wallace]] was revealed to have been the Leader of the Sootopolis Gym before becoming the [[Hoenn League]] {{pkmn|Champion}}. In ''[[XYS02|Mega Evolution Special II]]'', {{an|Steven Stone|Steven}} was revealed to have become the reigning Champion of [[Hoenn]]. In ''[[JN105|Reuniting for the First Time!]]'', Wallace, as the Sootopolis Gym Leader, challenged Ash to an unofficial battle in [[Lilycove City]] and lost, rewarding him with a second Rain Badge. | |||
Sootopolis Gym is also the home to {{ho|Sebastian}}, the Gym assistant, who acts as a [[Battle judge|referee]] in Juan's matches. | |||
{{-}} | |||
Sootopolis Gym is also the home to {{ho|Sebastian}}, the assistant | |||
===Pokémon used in the Gym=== | |||
====Used by Wallace==== | |||
It is unknown what Pokémon [[Wallace]] used in his Gym battles. | |||
====Used by Juan==== | |||
{{TrainerPoké | {{TrainerPoké | ||
|trainer=Juan | |trainer=Juan | ||
| Line 731: | Line 755: | ||
|epnum=AG110 | |epnum=AG110 | ||
|epname=The Great Eight Fate! | |epname=The Great Eight Fate! | ||
|vajp=Shin | |vajp=Shin-ichiro Miki | ||
|vaen=Maddie Blaustein | |vaen=Maddie Blaustein | ||
|desc={{p|Sealeo}} made a cameo during its first appearance in {{TRT}}'s electric net but was eventually freed. | |desc={{p|Sealeo}} made a cameo during its first appearance in {{TRT}}'s electric net but was eventually freed. | ||
In the [[AG111|next episode]], Sealeo was one of the two Pokémon Juan used in the first round of his battle with Ash. Sealeo used Blizzard on {{AP|Pikachu}} and {{AP|Snorunt}}, but Snorunt countered it with {{m|Icy Wind}}. It then tried to hit Pikachu with Aurora Beam, but Pikachu dodged. When Ash switched Snorunt for {{AP|Corphish}} and attacked with {{m|BubbleBeam}}, Sealeo dived into the water and tried hitting Pikachu again, but once again Pikachu dodged. After Sealeo was left alone against both of Ash's Pokémon it used Ice Ball repeatedly and almost won the battle, but was eventually taken down by Corphish's {{m|Crabhammer}}. | In the [[AG111|next episode]], Sealeo was one of the two Pokémon Juan used in the first round of his battle with Ash. Sealeo used Blizzard on {{AP|Pikachu}} and {{AP|Snorunt}}, but Snorunt countered it with {{m|Icy Wind}}. It then tried to hit Pikachu with Aurora Beam, but Pikachu dodged. When Ash switched Snorunt for {{AP|Corphish}} and attacked with {{m|BubbleBeam}}, Sealeo dived into the water and tried hitting Pikachu again, but once again Pikachu dodged. After Sealeo was left alone against both of Ash's Pokémon it used Ice Ball repeatedly and almost won the battle, but was eventually taken down by Corphish's {{m|Crabhammer}}. | ||
Sealeo's known moves are {{m|Blizzard}}, {{m|Aurora Beam}} and {{m|Ice Ball}}.}} | Sealeo's known moves are {{m|Blizzard}}, {{m|Aurora Beam}}, and {{m|Ice Ball}}.}} | ||
{{TrainerPoké | {{TrainerPoké | ||
| Line 750: | Line 773: | ||
|desc={{p|Seaking}} battled alongside Sealeo in the Double Battle against Pikachu and Snorunt. It used Horn Drill to reflect Pikachu's {{t|Electric}} attacks at Snorunt. When Ash's Pokémon were attempting to attack from up close, Seaking hit Snorunt with Hyper Beam, forcing Ash to switch Snorunt for {{AP|Corphish}}. Seaking then dived and used Horn Attack, but Corphish caught it by the horn. Seaking followed up with Horn Drill, damaging Corphish, but was then hit by Pikachu's {{m|Iron Tail}} and fainted. | |desc={{p|Seaking}} battled alongside Sealeo in the Double Battle against Pikachu and Snorunt. It used Horn Drill to reflect Pikachu's {{t|Electric}} attacks at Snorunt. When Ash's Pokémon were attempting to attack from up close, Seaking hit Snorunt with Hyper Beam, forcing Ash to switch Snorunt for {{AP|Corphish}}. Seaking then dived and used Horn Attack, but Corphish caught it by the horn. Seaking followed up with Horn Drill, damaging Corphish, but was then hit by Pikachu's {{m|Iron Tail}} and fainted. | ||
Seaking's known moves are {{m|Horn Drill}}, {{m|Hyper Beam}}, and {{m|Horn Attack}}.}} | |||
Seaking's known moves are {{m|Horn Drill}}, {{m|Hyper Beam}} and {{m|Horn Attack}}.}} | |||
{{TrainerPoké | {{TrainerPoké | ||
|trainer=Juan | |trainer=Juan | ||
|pkmn= | |pkmn=Luvdisc | ||
|type1=Water | |type1=Water | ||
|img=Juan Luvdisc.png | |||
|img=Juan | |||
|epnum=AG110 | |epnum=AG110 | ||
|epname=The Great Eight Fate! | |epname=The Great Eight Fate! | ||
|desc= | |vajp=Megumi Hayashibara | ||
|vaen=Rachael Lillis | |||
|desc={{p|Luvdisc}} first appeared in ''[[AG110|The Great Eight Fate!]]'' where it put a dazzling performance with the other of Juan's Pokémon, it was later captured by {{TRT}} but helped to get free. | |||
In the second round of his battle with Ash, Juan chose {{p|Luvdisc}} against {{AP|Grovyle}}. Luvdisc started out with Water Pulse, but Grovyle dodged in time and countered with {{m|Leaf Blade}}. Luvdisc, however, was fast enough to dodge that attack and use Sweet Kiss, confusing Grovyle. Grovyle hit itself in confusion, and Luvdisc finished it off with Water Gun, which resulted in a loss for Grovyle despite the type advantage. Ash switched back to Corphish. The two Pokémon kept dodging each other's attacks until Luvdisc dived underwater and Ash ordered Corphish to hit the water with {{m|Crabhammer}}. Corphish's attack, however, sprayed the battlefield with water, simulating heavy rain, which activated Luvdisc's Ability, Swift Swim, allowing it to move even faster than before. Eventually, though, Corphish managed to hit Luvdisc with another {{m|Crabhammer}}, taking it out of the battle. | |||
Luvdisc's known moves are {{m|Water Pulse}}, {{m|Sweet Kiss}}, and {{m|Water Gun}}, and its Ability is {{a|Swift Swim}}.}} | |||
{{TrainerPoké | {{TrainerPoké | ||
|trainer=Juan | |trainer=Juan | ||
|pkmn= | |pkmn=Whiscash | ||
|type1=Water | |type1=Water | ||
|type2=Ground | |type2=Ground | ||
|img=Juan | |img=Juan Whiscash.png | ||
|epnum= | |epnum=AG111 | ||
|epname= | |epname=Eight Ain't Enough! | ||
|desc=Juan | |vajp=Shin-ichiro Miki | ||
|vaen=Eric Stuart | |||
|desc=The fourth Pokémon Juan used against Ash was {{p|Whiscash}}, who easily defeated Ash's Corphish with Surf and Rock Smash. Ash then chose {{AP|Swellow}}, but Whiscash grabbed it and used Tickle, followed by Hyper Beam. Juan thought he won the round, but Swellow recovered and used {{m|Aerial Ace}}, even after Whiscash dived underwater. After missing another Hyper Beam and getting hit by another Aerial Ace, Whiscash was unable to battle. | |||
Whiscash's known moves are {{m|Surf}}, {{m|Rock Smash}}, {{m|Tickle}}, and {{m|Hyper Beam}}.}} | |||
{{TrainerPoké | {{TrainerPoké | ||
|trainer=Juan | |trainer=Juan | ||
|pkmn= | |pkmn=Milotic | ||
|type1=Water | |type1=Water | ||
|img=Juan Milotic.png | |||
|img=Juan | |||
|epnum=AG110 | |epnum=AG110 | ||
|epname=The Great Eight Fate! | |epname=The Great Eight Fate! | ||
|desc= | |desc={{p|Milotic}} first appeared in ''[[AG110|The Great Eight Fate]]'', where it was used in a water exhibition. It also won in a battle against {{TRT}}. Milotic is Juan's strongest and most experienced Pokémon, having helped Juan in his career as a {{pkmn|Coordinator}} by winning many [[Pokémon Contest]]s years ago. With the help of Milotic, Juan was able to win the [[Grand Festival]], earning the [[Ribbon Cup]] and the title of [[Top Coordinator]]. Nowadays, Milotic uses all of its experience against challengers who come to the Sootopolis Gym. | ||
Juan used Milotic as his final Pokémon in the Gym battle against {{Ash}}. With its elegant grace and power, Milotic was able to gain the upper hand against Ash. It defeated Ash's Swellow with Hydro Pump and Twister, then put up a good fight against Pikachu thanks to its ability to Recover from Electric attacks. It was also able to draw in Pikachu's {{m|Thunder}} with Iron Tail. However, Pikachu pulled Milotic below the water and used Thunder to defeat it, thus earning Ash the {{Badge|Rain}}. | |||
Milotic's known moves are {{m|Twister}}, {{m|Hydro Pump}}, {{m|Iron Tail}}, and {{m|Recover}}.}} | |||
==Trivia== | ==Trivia== | ||
* Despite being a {{type|Water}} Gym, | * Despite being a {{type|Water}} [[Gym]], this Gym's puzzle resembles an {{type|Ice}} Gym. | ||
* | * This is one of the only four Gyms that have different [[Gym Leader]]s in the same [[generation]] depending on the version. The other Gyms are the [[Opelucid Gym]] in [[Unova]] ({{2v2|Black|White}} only) and the [[Stow-on-Side Stadium|Stow-on-Side]] and [[Circhester Stadium]]s in [[Galar]]. | ||
* There is a [[glitch]] in {{game|Emerald}} on the bottom floor of the Gym where the {{player}} can walk into the wall above the ladder. | |||
* There is a glitch in {{game|Emerald}} on the bottom floor of the | * Due to [[Wallace]] giving {{HM|05|Waterfall}} in [[Pokémon Omega Ruby and Alpha Sapphire]], this is the only Gym in which the player is ever rewarded with an [[HM]] rather than a [[TM]]. | ||
* Due to Wallace giving {{HM|05|Waterfall}} in Pokémon Omega Ruby and Alpha Sapphire, this is the only Gym in which the player is rewarded with an [[HM]] rather than a [[TM]]. | * This is the only Gym in [[Hoenn]] where the [[Gym Leader]] ever uses a {{type|Dark}} Pokémon or a {{type|Fairy}} move. | ||
{{-}} | {{-}} | ||
| Line 965: | Line 832: | ||
[[de:Pokémon-Arena von Xeneroville]] | [[de:Pokémon-Arena von Xeneroville]] | ||
[[es:Gimnasio Pokémon de Arrecípolis]] | |||
[[fr:Arène d'Atalanopolis]] | [[fr:Arène d'Atalanopolis]] | ||
[[it:Palestra di Ceneride]] | |||
[[ja:ルネジム]] | [[ja:ルネジム]] | ||
[[ | [[zh:琉璃道館]] | ||
Latest revision as of 03:31, 19 April 2024
| Sootopolis Gym ルネジム Rune Gym | |
| |
| Location | Sootopolis City |
| Gym Leader | WallaceRSORAS JuanE |
| Badge | Rain Badge |
| Dominant Type | Water |
| Region | Hoenn |
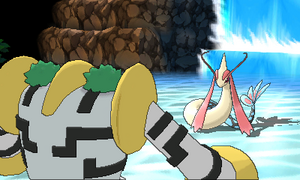
| |
| Battlefield | |
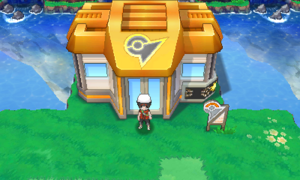
The Sootopolis Gym (Japanese: ルネジム Rune Gym) is the official Gym of Sootopolis City. It is based on Water-type Pokémon. The Gym Leader is WallaceRSORAS, who succeeded and, in Pokémon Emerald, was eventually replaced by his mentor JuanE. Trainers who defeat them receive the Rain Badge.
In the games
Core series games
|
|
|
The Sootopolis Gym's door is initially locked. It will only open up once the player has solved Hoenn's weather crisis.
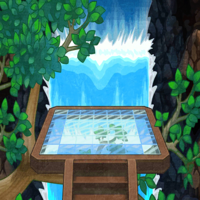
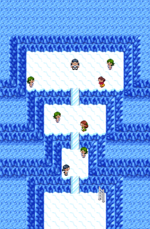
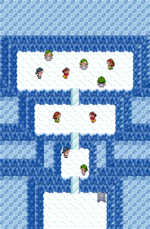
In Ruby, Sapphire, and Emerald, to reach the Gym Leader, Trainers must step on every ice tile to activate the stairways to the next level. If any tile is used twice, the player will fall to a lower floor, where the Gym Trainers are located. No matter where the player falls, at least one Trainer must be challenged before the stairs can be returned to. The levels on the basement floor are separated with ice slides, allowing the player to only move downwards.
When defeated, WallaceRS or JuanE will give the player the Rain Badge as well as TM03 (Water Pulse) as a reward.
In Omega Ruby and Alpha Sapphire, the player can walk across the ice diagonally instead of just straight. The second and third puzzles now also contain solid platforms which can be stepped onto multiple times without them breaking. Once a puzzle is solved from a position that allows direct access to the stairs, the cracked tiles on the solved puzzle can be stepped onto without them breaking. The ice slides on the lower floor are replaced with stairs, allowing the player to freely move between the different levels of the floor. In addition, two Trainers can now be battled on the main floor.
When defeated, Wallace will give the player the Rain Badge as well as HM05 (Waterfall) as a reward.
Appearance
Interior
| Version | 1F | B1F |
|---|---|---|
| Ruby | 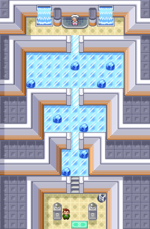
|
|
| Sapphire | ||
| Emerald | 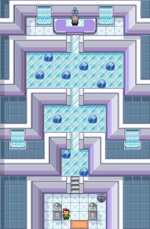
|
|
| Omega Ruby | 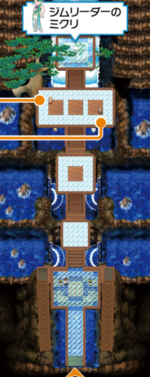
|

|
| Alpha Sapphire | ||
Items
| Item | Location | Games | |
|---|---|---|---|
| TM03 (Water Pulse) | Reward for defeating WallaceRS/JuanE | R S E | |
| HM05 (Waterfall) | Reward for defeating Wallace | OR AS | |
Trainers
Pokémon Ruby and Sapphire
| Trainer | Pokémon | |||||||||||
|---|---|---|---|---|---|---|---|---|---|---|---|---|
| B1F (lowest level) | ||||||||||||
|
| |||||||||||
| ||||||||||||
|
| |||||||||||
| B1F (middle level) | ||||||||||||
|
| |||||||||||
|
| |||||||||||
| B1F (highest level) | ||||||||||||
|
| |||||||||||
|
| |||||||||||
| ||||||||||||
|
| |||||||||||
| ||||||||||||
| ||||||||||||
|
| |||||||||||
| ||||||||||||
| ||||||||||||
| Trainers with a PokéNav by their names will be registered in the Trainer's Eyes or Match Call function after the first battle, and may have a rematch with the player with higher-level Pokémon. | ||||||||||||
Wallace uses two Hyper Potions.
|
||||||||||||||||||||||||||||||||||||||||||||||||||||||||||||||||||||||||||||||||||||||||||||||||||||||||||||||||||||||||||||||||||
| ||||||||||||||||||||||||||||||||||||||||||||||||||||||||||||||||||||||||||||||||||||||||||||||||||||||||||||||||||||||||||||||||||
Pokémon Emerald
| Trainer | Pokémon | |||||||||||
|---|---|---|---|---|---|---|---|---|---|---|---|---|
| B1F (lowest level) | ||||||||||||
|
| |||||||||||
|
| |||||||||||
| B1F (middle level) | ||||||||||||
|
| |||||||||||
| ||||||||||||
|
| |||||||||||
| ||||||||||||
| B1F (highest level) | ||||||||||||
|
| |||||||||||
| ||||||||||||
|
| |||||||||||
| ||||||||||||
|
| |||||||||||
| ||||||||||||
| ||||||||||||
|
| |||||||||||
| ||||||||||||
| ||||||||||||
|
| |||||||||||
|
| |||||||||||
| Trainers with a PokéNav by their names will be registered in the Trainer's Eyes or Match Call function after the first battle, and may have a rematch with the player with higher-level Pokémon. | ||||||||||||
Juan uses two Hyper Potions in the Gym battle and three Full Restores in the rematches.
|
||||||||||||||||||||||||||||||||||||||||||||||||||||||||||||||||||||||||||||||||||||||||||||||||||||||||||||||||||||||||||||||||||||||
| ||||||||||||||||||||||||||||||||||||||||||||||||||||||||||||||||||||||||||||||||||||||||||||||||||||||||||||||||||||||||||||||||||||||
First rematch
|
||||||||||||||||||||||||||||||||||||||||||||||||||||||||||||||||||||||||||||||||||||||||||||||||||||||||||||||||||||||||||||||||||||||
| ||||||||||||||||||||||||||||||||||||||||||||||||||||||||||||||||||||||||||||||||||||||||||||||||||||||||||||||||||||||||||||||||||||||
Second rematch
|
||||||||||||||||||||||||||||||||||||||||||||||||||||||||||||||||||||||||||||||||||||||||||||||||||||||||||||||||||||||||||||||||||||||
| ||||||||||||||||||||||||||||||||||||||||||||||||||||||||||||||||||||||||||||||||||||||||||||||||||||||||||||||||||||||||||||||||||||||
Third rematch
|
|||||||||||||||||||||||||||||||||||||||||||||||||||||||||||||||||||||||||||||||||||||||||||||||||||||||||||||||||||||||||||||||||||||||||||||||||||||||||||||||||
| |||||||||||||||||||||||||||||||||||||||||||||||||||||||||||||||||||||||||||||||||||||||||||||||||||||||||||||||||||||||||||||||||||||||||||||||||||||||||||||||||
Fourth rematch onwards
|
|||||||||||||||||||||||||||||||||||||||||||||||||||||||||||||||||||||||||||||||||||||||||||||||||||||||||||||||||||||||||||||||||||||||||||||||||||||||||||||||||
| |||||||||||||||||||||||||||||||||||||||||||||||||||||||||||||||||||||||||||||||||||||||||||||||||||||||||||||||||||||||||||||||||||||||||||||||||||||||||||||||||
Pokémon Omega Ruby and Alpha Sapphire
| Trainer | Pokémon | |||||||||||
|---|---|---|---|---|---|---|---|---|---|---|---|---|
| 1F | ||||||||||||
|
| |||||||||||
|
| |||||||||||
| ||||||||||||
| BF | ||||||||||||
|
| |||||||||||
|
| |||||||||||
| ||||||||||||
|
| |||||||||||
|
| |||||||||||
|
| |||||||||||
| ||||||||||||
|
| |||||||||||
| Trainers with a PokéNav by their names will be registered in the Trainer's Eyes or Match Call function after the first battle, and may have a rematch with the player with higher-level Pokémon. | ||||||||||||
|
||||||||||||||||||||||||||||||||||||||||||||||||||||||||||||||||||||||||||||||||||||||||||||||||||||||||||||||||||||||||||||||||||||||||||||||||||||||||||||||||||||||||||
| ||||||||||||||||||||||||||||||||||||||||||||||||||||||||||||||||||||||||||||||||||||||||||||||||||||||||||||||||||||||||||||||||||||||||||||||||||||||||||||||||||||||||||
In the spin-off games
Pokémon Masters EX
Artwork depicting the Sootopolis Gym is seen in Wallace's mindscape.
|
In the anime
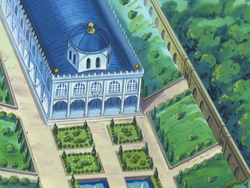
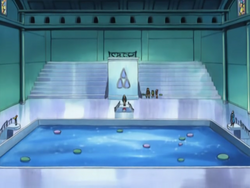
In the anime, the Sootopolis Gym battle is fought in two segments. The first segment is a Double Battle fought on a water battlefield with floating platforms. Once both of the Gym Leader's Pokémon have been defeated, the Trainers switch podiums, the battlefield is changed into one that's a mixture of water and land, and the rest of the battle is fought as a Single Battle.
The Sootopolis Gym debuted in The Great Eight Fate!, when Ash and his friends first arrived there with Juan. After arrival, Ash immediately began his Gym battle with Juan. The battle concluded in Eight Ain't Enough! in Ash's victory, earning him his Rain Badge.
In Our Cup Runneth Over!, Wallace was revealed to have been the Leader of the Sootopolis Gym before becoming the Hoenn League Champion. In Mega Evolution Special II, Steven was revealed to have become the reigning Champion of Hoenn. In Reuniting for the First Time!, Wallace, as the Sootopolis Gym Leader, challenged Ash to an unofficial battle in Lilycove City and lost, rewarding him with a second Rain Badge.
Sootopolis Gym is also the home to Sebastian, the Gym assistant, who acts as a referee in Juan's matches.
Pokémon used in the Gym
Used by Wallace
It is unknown what Pokémon Wallace used in his Gym battles.
Used by Juan
|
||
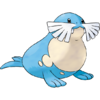
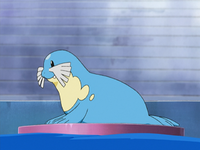
| Sealeo made a cameo during its first appearance in Team Rocket's electric net but was eventually freed.
In the next episode, Sealeo was one of the two Pokémon Juan used in the first round of his battle with Ash. Sealeo used Blizzard on Pikachu and Snorunt, but Snorunt countered it with Icy Wind. It then tried to hit Pikachu with Aurora Beam, but Pikachu dodged. When Ash switched Snorunt for Corphish and attacked with BubbleBeam, Sealeo dived into the water and tried hitting Pikachu again, but once again Pikachu dodged. After Sealeo was left alone against both of Ash's Pokémon it used Ice Ball repeatedly and almost won the battle, but was eventually taken down by Corphish's Crabhammer. Sealeo's known moves are Blizzard, Aurora Beam, and Ice Ball. | ||
| Debut | The Great Eight Fate! | |
|---|---|---|
| Voice actors | ||
| Japanese | Shin-ichiro Miki | |
| English | Maddie Blaustein | |
|
||
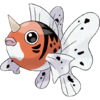
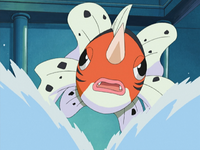
| Seaking battled alongside Sealeo in the Double Battle against Pikachu and Snorunt. It used Horn Drill to reflect Pikachu's Electric attacks at Snorunt. When Ash's Pokémon were attempting to attack from up close, Seaking hit Snorunt with Hyper Beam, forcing Ash to switch Snorunt for Corphish. Seaking then dived and used Horn Attack, but Corphish caught it by the horn. Seaking followed up with Horn Drill, damaging Corphish, but was then hit by Pikachu's Iron Tail and fainted.
Seaking's known moves are Horn Drill, Hyper Beam, and Horn Attack. | ||
| Debut | The Great Eight Fate! | |
|---|---|---|
| Voice actors | ||
| Japanese | ||
| English | Eric Stuart | |
|
||
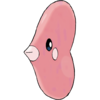
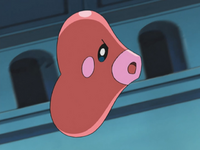
| Luvdisc first appeared in The Great Eight Fate! where it put a dazzling performance with the other of Juan's Pokémon, it was later captured by Team Rocket but helped to get free.
In the second round of his battle with Ash, Juan chose Luvdisc against Grovyle. Luvdisc started out with Water Pulse, but Grovyle dodged in time and countered with Leaf Blade. Luvdisc, however, was fast enough to dodge that attack and use Sweet Kiss, confusing Grovyle. Grovyle hit itself in confusion, and Luvdisc finished it off with Water Gun, which resulted in a loss for Grovyle despite the type advantage. Ash switched back to Corphish. The two Pokémon kept dodging each other's attacks until Luvdisc dived underwater and Ash ordered Corphish to hit the water with Crabhammer. Corphish's attack, however, sprayed the battlefield with water, simulating heavy rain, which activated Luvdisc's Ability, Swift Swim, allowing it to move even faster than before. Eventually, though, Corphish managed to hit Luvdisc with another Crabhammer, taking it out of the battle. Luvdisc's known moves are Water Pulse, Sweet Kiss, and Water Gun, and its Ability is Swift Swim. | ||
| Debut | The Great Eight Fate! | |
|---|---|---|
| Voice actors | ||
| Japanese | Megumi Hayashibara | |
| English | Rachael Lillis | |
|
||
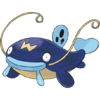
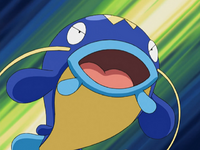
| The fourth Pokémon Juan used against Ash was Whiscash, who easily defeated Ash's Corphish with Surf and Rock Smash. Ash then chose Swellow, but Whiscash grabbed it and used Tickle, followed by Hyper Beam. Juan thought he won the round, but Swellow recovered and used Aerial Ace, even after Whiscash dived underwater. After missing another Hyper Beam and getting hit by another Aerial Ace, Whiscash was unable to battle.
Whiscash's known moves are Surf, Rock Smash, Tickle, and Hyper Beam. | ||
| Debut | Eight Ain't Enough! | |
|---|---|---|
| Voice actors | ||
| Japanese | Shin-ichiro Miki | |
| English | Eric Stuart | |
|
||
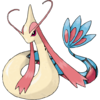
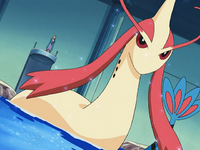
| Milotic first appeared in The Great Eight Fate, where it was used in a water exhibition. It also won in a battle against Team Rocket. Milotic is Juan's strongest and most experienced Pokémon, having helped Juan in his career as a Coordinator by winning many Pokémon Contests years ago. With the help of Milotic, Juan was able to win the Grand Festival, earning the Ribbon Cup and the title of Top Coordinator. Nowadays, Milotic uses all of its experience against challengers who come to the Sootopolis Gym.
Juan used Milotic as his final Pokémon in the Gym battle against Ash. With its elegant grace and power, Milotic was able to gain the upper hand against Ash. It defeated Ash's Swellow with Hydro Pump and Twister, then put up a good fight against Pikachu thanks to its ability to Recover from Electric attacks. It was also able to draw in Pikachu's Thunder with Iron Tail. However, Pikachu pulled Milotic below the water and used Thunder to defeat it, thus earning Ash the Rain Badge. Milotic's known moves are Twister, Hydro Pump, Iron Tail, and Recover. | ||
| Debut | The Great Eight Fate! | |
|---|---|---|
Trivia
- Despite being a Water-type Gym, this Gym's puzzle resembles an Ice-type Gym.
- This is one of the only four Gyms that have different Gym Leaders in the same generation depending on the version. The other Gyms are the Opelucid Gym in Unova (Black and White only) and the Stow-on-Side and Circhester Stadiums in Galar.
- There is a glitch in Pokémon Emerald on the bottom floor of the Gym where the player can walk into the wall above the ladder.
- Due to Wallace giving HM05 (Waterfall) in Pokémon Omega Ruby and Alpha Sapphire, this is the only Gym in which the player is ever rewarded with an HM rather than a TM.
- This is the only Gym in Hoenn where the Gym Leader ever uses a Dark-type Pokémon or a Fairy-type move.

|
This article is part of Project Locations, a Bulbapedia project that aims to write comprehensive articles on every location in the Pokémon world. |


