Shoal Cave: Difference between revisions
Sadist4life (talk | contribs) (→Items) |
No edit summary Tags: Mobile edit Mobile web edit |
||
| (51 intermediate revisions by 29 users not shown) | |||
| Line 1: | Line 1: | ||
{{Infobox location | {{Infobox location | ||
|image=Shoal Cave | |image=Shoal Cave ORAS.png | ||
|type={{#switch: {{#time: g}}|9|10|11|12|1|2=water|cave}} | |type={{#switch: {{#time: g}}|9|10|11|12|1|2=water|cave}} | ||
|location_name=Shoal Cave | |location_name=Shoal Cave | ||
|japanese_name=あさせのほらあな | |japanese_name={{tt|浅瀬の洞穴|あさせのほらあな}} | ||
|translated_name=Shoal Cave | |translated_name=Shoal Cave | ||
|location={{rt|125|Hoenn}} | |location={{rt|125|Hoenn}} | ||
|region=Hoenn | |region=Hoenn | ||
|generation={{gen|III}} | |mapdesc=This cave's appearance changes greatly between high tide and low tide. | ||
|generation={{gen|III}}, {{gen|VI}} | |||
}} | }} | ||
'''Shoal Cave''' (Japanese: '''あさせのほらあな''' ''Shoal Cave'') is a location in [[Hoenn]]. It is north of [[Mossdeep City]] | |||
'''Shoal Cave''' (Japanese: '''{{tt|浅瀬の洞穴|あさせのほらあな}}''' ''Shoal Cave'') is a location in [[Hoenn]]. | |||
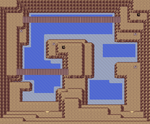
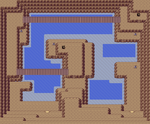
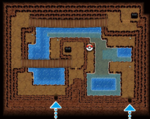
It is located north of [[Mossdeep City]] on {{Rt|125|Hoenn}}, and is the only place in {{game2|Ruby|Sapphire|Emerald}} where {{pkmn2|wild}} {{p|Spheal}} and {{p|Snorunt}} can be encountered. Shoal Cave uniquely features a high tide and low tide mechanic, where certain areas are only reachable during a specific time of day. The overall area accessible during high tide is smaller than during low tide. | |||
Due to the presence of an [[Ice Rock]], {{p|Eevee}} can [[Evolution|evolve]] into {{p|Glaceon}} on the lowest floor in {{pkmn|Omega Ruby and Alpha Sapphire}}. | |||
==Geography== | ==Geography== | ||
Shoal Cave is a cave north of Mossdeep City. This cave was carved into the side of a rocky mountain rising from the ocean. At | [[File:Shoal_Cave_RSE.png|thumb|right|200px|Shoal Cave's exterior in {{game|Emerald}}]] | ||
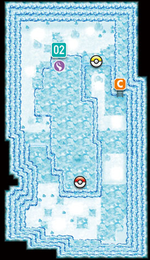
Shoal Cave is a cave north of Mossdeep City. This cave was carved into the side of a rocky mountain rising from the ocean. At predetermined times of the day, every six hours, the tides rise or fall. During high tide, the cave floods, allowing the {{player}} to use {{m|Surf}} to access levels of terrain otherwise out of reach on foot. Conversely, during low tide, the receding waters allow the player to descend to levels that would otherwise be underwater, most notably the ice floor at the lowest level in the cave. This icy room contains the [[Never-Melt Ice]], and can only be accessed if the player has {{m|Strength}}, or the [[Mach Bike]] in Omega Ruby and Alpha Sapphire. Near the entrance to the icy area is a {{tc|Black Belt}} who gives away a [[Focus Band]]. | |||
In Omega Ruby and Alpha Sapphire only, the [[Ice Rock]] is located in the icy room, which allows {{p|Eevee}} to [[evolution|evolve]] into {{p|Glaceon}}. | |||
===Tides=== | ===Tides=== | ||
Once the player enters the cave, the tide will not reset until the player leaves the cave and attempts to re-enter. | |||
{| class="roundy" style="background: #{{locationcolor/med|{{#switch: {{#time: g}}|9|10|11|12|1|2=water|cave}}}}; border: 3px solid #{{locationcolor/dark|{{#switch: {{#time: g}}|9|10|11|12|1|2=water|cave}}}}" | {| class="roundy" style="background: #{{locationcolor/med|{{#switch: {{#time: g}}|9|10|11|12|1|2=water|cave}}}}; border: 3px solid #{{locationcolor/dark|{{#switch: {{#time: g}}|9|10|11|12|1|2=water|cave}}}}" | ||
|- | |- | ||
| Line 43: | Line 54: | ||
! {{#ifexpr: {{#time: G}} = 23|style="background: #{{locationcolor/light|water}}; color: #{{locationcolor/dark|water}}; {{roundy|5px}}" {{!}} ▼| }} | ! {{#ifexpr: {{#time: G}} = 23|style="background: #{{locationcolor/light|water}}; color: #{{locationcolor/dark|water}}; {{roundy|5px}}" {{!}} ▼| }} | ||
|- | |- | ||
! width="4%" style="background: #{{night color light}}; color: #{{night textcolor}} | ! width="4%" style="background: #{{night color light}}; color: #{{night textcolor}}" | 12 | ||
! width="4%" style="background: #{{night color light}}; color: #{{night textcolor}} | ! width="4%" style="background: #{{night color light}}; color: #{{night textcolor}}" | 1 | ||
! width="4%" style="background: #{{night color light}}; color: #{{night textcolor}} | ! width="4%" style="background: #{{night color light}}; color: #{{night textcolor}}" | 2 | ||
! width="4%" style="background: #{{night color light}}; color: #{{night textcolor}} | ! width="4%" style="background: #{{night color light}}; color: #{{night textcolor}}" | 3 | ||
! width="4%" style="background: #{{morning color light}}; color: #{{morning textcolor}} | ! width="4%" style="background: #{{morning color light}}; color: #{{morning textcolor}}" | 4 | ||
! width="5%" style="background: #{{morning color light}}; color: #{{morning textcolor}} | ! width="5%" style="background: #{{morning color light}}; color: #{{morning textcolor}}" | 5 | ||
! width="4%" style="background: #{{morning color light}}; color: #{{morning textcolor}} | ! width="4%" style="background: #{{morning color light}}; color: #{{morning textcolor}}" | 6 | ||
! width="4%" style="background: #{{morning color light}}; color: #{{morning textcolor}} | ! width="4%" style="background: #{{morning color light}}; color: #{{morning textcolor}}" | 7 | ||
! width="4%" style="background: #{{morning color light}}; color: #{{morning textcolor}} | ! width="4%" style="background: #{{morning color light}}; color: #{{morning textcolor}}" | 8 | ||
! width="4%" style="background: #{{morning color light}}; color: #{{morning textcolor}} | ! width="4%" style="background: #{{morning color light}}; color: #{{morning textcolor}}" | 9 | ||
! width="4%" style="background: #{{day color light}}; color: #{{day textcolor}} | ! width="4%" style="background: #{{day color light}}; color: #{{day textcolor}}" | 10 | ||
! width="5%" style="background: #{{day color light}}; color: #{{day textcolor}} | ! width="5%" style="background: #{{day color light}}; color: #{{day textcolor}}" | 11 | ||
! width="4%" style="background: #{{day color light}}; color: #{{day textcolor}} | ! width="4%" style="background: #{{day color light}}; color: #{{day textcolor}}" | 12 | ||
! width="4%" style="background: #{{day color light}}; color: #{{day textcolor}} | ! width="4%" style="background: #{{day color light}}; color: #{{day textcolor}}" | 1 | ||
! width="4%" style="background: #{{day color light}}; color: #{{day textcolor}} | ! width="4%" style="background: #{{day color light}}; color: #{{day textcolor}}" | 2 | ||
! width="4%" style="background: #{{day color light}}; color: #{{day textcolor}} | ! width="4%" style="background: #{{day color light}}; color: #{{day textcolor}}" | 3 | ||
! width="4%" style="background: #{{day color light}}; color: #{{day textcolor}} | ! width="4%" style="background: #{{day color light}}; color: #{{day textcolor}}" | 4 | ||
! width="5%" style="background: #{{day color light}}; color: #{{day textcolor}} | ! width="5%" style="background: #{{day color light}}; color: #{{day textcolor}}" | 5 | ||
! width="4%" style="background: #{{day color light}}; color: #{{day textcolor}} | ! width="4%" style="background: #{{day color light}}; color: #{{day textcolor}}" | 6 | ||
! width="4%" style="background: #{{day color light}}; color: #{{day textcolor}} | ! width="4%" style="background: #{{day color light}}; color: #{{day textcolor}}" | 7 | ||
! width="4%" style="background: #{{night color light}}; color: #{{night textcolor}} | ! width="4%" style="background: #{{night color light}}; color: #{{night textcolor}}" | 8 | ||
! width="4%" style="background: #{{night color light}}; color: #{{night textcolor}} | ! width="4%" style="background: #{{night color light}}; color: #{{night textcolor}}" | 9 | ||
! width="4%" style="background: #{{night color light}}; color: #{{night textcolor}} | ! width="4%" style="background: #{{night color light}}; color: #{{night textcolor}}" | 10 | ||
! width="5%" style="background: #{{night color light}}; color: #{{night textcolor}} | ! width="5%" style="background: #{{night color light}}; color: #{{night textcolor}}" | 11 | ||
|- | |- | ||
! style="background: #{{locationcolor/light|{{#switch: {{#time: g}}|9|10|11|12|1|2=water|cave}}}}; {{roundybl|5px}}" | Tide | ! style="background: #{{locationcolor/light|{{#switch: {{#time: g}}|9|10|11|12|1|2=water|cave}}}}; {{roundybl|5px}}" | Tide | ||
! colspan="3" style="background: #{{locationcolor/light|water}}; color: #{{locationcolor/dark|cave}} | ! colspan="3" style="background: #{{locationcolor/light|water}}; color: #{{locationcolor/dark|cave}}" | High tide | ||
! colspan="6" style="background: #{{locationcolor/light|cave}}; color: #{{locationcolor/dark|water}} | ! colspan="6" style="background: #{{locationcolor/light|cave}}; color: #{{locationcolor/dark|water}}" | Low tide | ||
! colspan="6" style="background: #{{locationcolor/light|water}}; color: #{{locationcolor/dark|cave}} | ! colspan="6" style="background: #{{locationcolor/light|water}}; color: #{{locationcolor/dark|cave}}" | High tide | ||
! colspan="6" style="background: #{{locationcolor/light|cave}}; color: #{{locationcolor/dark|water}} | ! colspan="6" style="background: #{{locationcolor/light|cave}}; color: #{{locationcolor/dark|water}}" | Low tide | ||
! colspan="3" style="background: #{{locationcolor/light|water}}; color: #{{locationcolor/dark|cave}}; {{roundybr|5px}}" | High tide | ! colspan="3" style="background: #{{locationcolor/light|water}}; color: #{{locationcolor/dark|cave}}; {{roundybr|5px}}" | High tide | ||
|} | |} | ||
| Line 78: | Line 89: | ||
===Obtaining the Shell Bell=== | ===Obtaining the Shell Bell=== | ||
Four [[ | Four [[Shoal Salt]]s and four [[Shoal Shell]]s are found in the Shoal Cave; the Shoal Salts are available during low tide and the Shoal Shells are available during high tide. If the player has four Shoal Salts and four Shoal Shells in their [[Bag]], the {{player}} can give the materials to the old man in the first room to make a [[Shell Bell]]; the old man can make any number of Shell Bells, as long as the player provides the necessary materials each time. This is the only way to obtain Shoal Salts and Shoal Shells in the Generation III and VI games. | ||
Immediately after crafting a Shell Bell for the player, the old man prompts the player to find the ingredients for another. However, the player must wait for the tide to change in order to gather the salts and shells again. | |||
==Items== | ==Items== | ||
===Any time=== | |||
{{itlisth|{{#switch: {{#time: g}}|9|10|11|12|1|2=water|cave}}}} | {{itlisth|{{#switch: {{#time: g}}|9|10|11|12|1|2=water|cave}}}} | ||
{{Itemlist| | {{Itemlist|Shell Bell|Entrance room, from the old man near the entrance if brought four Shoal Salt and Shoal Shell|Ru=yes|Sa=yes|E=yes|OR=yes|AS=yes}} | ||
{{Itemlist| | {{Itemlist|Slowbronite|Entrance room, from the old man near the entrance after trading for Shell Bell for the first time|OR=yes|AS=yes}} | ||
{{itlistfoot|{{#switch: {{#time: g}}|9|10|11|12|1|2=water|cave}}}} | |||
===High tide=== | |||
{{itlisth|water}} | |||
{{Itemlist|Star Piece|Entrance room, southwest ''(hidden)''|OR=yes|AS=yes}} | |||
{{Itemlist|Rare Candy|Inner room, east of central ledge|Ru=yes|Sa=yes|E=yes|OR=yes|AS=yes}} | |||
{{Itemlist|Big Pearl|Entrance room, northeast, accessible from southeast inner room|Ru=yes|Sa=yes|E=yes|OR=yes|AS=yes}} | |||
{{Itemlist|Shoal Shell| | {{Itemlist|Shoal Shell| | ||
*Inner room | *Inner room, on ledge just north of the southern bridge | ||
*Inner room | *Inner room, on northwestern ledge | ||
*Inner room | *Inner room, on northeastern ledge | ||
*Inner room | *Inner room, on southeastern ledge|Ru=yes|Sa=yes|E=yes|OR=yes|AS=yes|display=[[Shoal Shell]] ×4}} | ||
{{itlistfoot|water}} | |||
===Low tide=== | |||
{{itlisth|cave}} | |||
{{Itemlist|Pearl|Entrance room, north corner of the westmost accessible point ''(hidden)''|OR=yes|AS=yes|display={{i|Pearl}}}} | |||
{{Itemlist|Shoal Salt| | {{Itemlist|Shoal Salt| | ||
*Stairs room | *Stairs room, southeast corner | ||
*Lower room | *Lower room, top center | ||
*Inner room | *Inner room, outside western exit from lower room | ||
*Inner room | *Inner room, under the northern bridge|Ru=yes|Sa=yes|E=yes|OR=yes|AS=yes|display=[[Shoal Salt]] ×4}} | ||
{{Itemlist|Ice Heal|Stairs room | {{Itemlist|Ice Heal|Stairs room, east of the ladder|Ru=yes|Sa=yes|E=yes|OR=yes|AS=yes}} | ||
{{Itemlist|Focus Band|Lower room | {{Itemlist|Focus Band|Lower room, given by the {{tc|Black Belt}}|Ru=yes|Sa=yes|E=yes|OR=yes|AS=yes}} | ||
{{Itemlist| | {{Itemlist|TM Ice VI|Lower room, up muddy slopes (requires [[Mach Bike]])|OR=yes|AS=yes|display={{TM|79|Frost Breath}}}} | ||
{{Itemlist| | {{Itemlist|Never-Melt Ice|Ice room, on the elevated floor|Ru=yes|Sa=yes|E=yes|OR=yes|AS=yes}} | ||
{{Itemlist| | {{Itemlist|Glalitite|Ice room, on the elevated floor|OR=yes|AS=yes}} | ||
{{ | {{Itemlist|Ice Heal|Ice room, west of the Glalitite ''(hidden)''|OR=yes|AS=yes}} | ||
{{Itemlist|TM Ice VI|Ice room, near the ledge|Ru=yes|Sa=yes|E=yes|OR=yes|AS=yes|display={{TM|07|Hail}}}} | |||
{{itlistfoot|cave}} | |||
====Rock Smash==== | |||
{{Itlisth|cave}} | |||
{{Itemlist|Big Pearl|Randomly found by smashing [[breakable rock]]s|OR=yes|AS=yes}} | |||
{{Itemlist|Ether|Randomly found by smashing [[breakable rock]]s|OR=yes|AS=yes}} | |||
{{Itemlist|Hard Stone|Randomly found by smashing [[breakable rock]]s|OR=yes|AS=yes}} | |||
{{Itemlist|Heart Scale|Randomly found by smashing [[breakable rock]]s|OR=yes|AS=yes}} | |||
{{Itemlist|Max Ether|Randomly found by smashing [[breakable rock]]s|OR=yes|AS=yes}} | |||
{{Itemlist|Max Revive|Randomly found by smashing [[breakable rock]]s|OR=yes|AS=yes}} | |||
{{Itemlist|Normal Gem|Randomly found by smashing [[breakable rock]]s|OR=yes|AS=yes}} | |||
{{Itemlist|Pearl|Randomly found by smashing [[breakable rock]]s|OR=yes|AS=yes|display={{i|Pearl}}}} | |||
{{Itemlist|Revive|Randomly found by smashing [[breakable rock]]s|OR=yes|AS=yes}} | |||
{{Itemlist|Soft Sand|Randomly found by smashing [[breakable rock]]s|OR=yes|AS=yes}} | |||
{{Itemlist|Star Piece|Randomly found by smashing [[breakable rock]]s|OR=yes|AS=yes}} | |||
{{Itlistfoot|cave}} | |||
==Pokémon== | ==Pokémon== | ||
===Main cave=== | ===Generation III=== | ||
====Main cave==== | |||
{{Catch/header|{{#switch: {{#time: g}}|9|10|11|12|1|2=water|cave}}|no}} | {{Catch/header|{{#switch: {{#time: g}}|9|10|11|12|1|2=water|cave}}|no}} | ||
{{Catch/entry3|041|Zubat|yes|yes|yes|Cave|26, 28, 30, 32|45%|type1=Poison|type2=Flying}} | {{Catch/entry3|041|Zubat|yes|yes|yes|Cave|26, 28, 30, 32|45%|type1=Poison|type2=Flying}} | ||
{{Catch/entry3|042|Golbat|yes|yes|yes|Cave|32|5%|type1=Poison|type2=Flying}} | {{Catch/entry3|042|Golbat|yes|yes|yes|Cave|32|5%|type1=Poison|type2=Flying}} | ||
{{Catch/entry3|363|Spheal|yes|yes|yes|Cave|26, 28, 30, 32|50%|type1=Ice|type2=Water}} | {{Catch/entry3|363|Spheal|yes|yes|yes|Cave|26, 28, 30, 32|50%|type1=Ice|type2=Water}} | ||
{{ | {{Catch/div|water|Surfing}} | ||
{{Catch/entry3|072|Tentacool|yes|yes|yes|Surf|5-35|60%|type1=Water|type2=Poison}} | {{Catch/entry3|072|Tentacool|yes|yes|yes|Surf|5-35|60%|type1=Water|type2=Poison}} | ||
{{Catch/entry3|041|Zubat|yes|yes|yes|Surf|5-35|30%|type1=Poison|type2=Flying}} | {{Catch/entry3|041|Zubat|yes|yes|yes|Surf|5-35|30%|type1=Poison|type2=Flying}} | ||
{{Catch/entry3|363|Spheal|yes|yes|yes|Surf|25-35|10%|type1=Ice|type2=Water}} | {{Catch/entry3|363|Spheal|yes|yes|yes|Surf|25-35|10%|type1=Ice|type2=Water}} | ||
{{ | {{Catch/div|water|Fishing}} | ||
{{Catch/entry3|072|Tentacool|yes|yes|yes|Fish Old|5-10|30%|type1=Water|type2=Poison}} | {{Catch/entry3|072|Tentacool|yes|yes|yes|Fish Old|5-10|30%|type1=Water|type2=Poison}} | ||
{{Catch/entry3|129|Magikarp|yes|yes|yes|Fish Old|5-10|70%|type1=Water}} | {{Catch/entry3|129|Magikarp|yes|yes|yes|Fish Old|5-10|70%|type1=Water}} | ||
| Line 120: | Line 164: | ||
{{Catch/footer|{{#switch: {{#time: g}}|9|10|11|12|1|2=water|cave}}}} | {{Catch/footer|{{#switch: {{#time: g}}|9|10|11|12|1|2=water|cave}}}} | ||
===Ice | ====Ice room==== | ||
{{Catch/header|snow|no}} | {{Catch/header|snow|no}} | ||
{{Catch/entry3|041|Zubat|yes|yes|yes|Cave|26, 28, 30|40%|type1=Poison|type2=Flying}} | {{Catch/entry3|041|Zubat|yes|yes|yes|Cave|26, 28, 30|40%|type1=Poison|type2=Flying}} | ||
| Line 128: | Line 172: | ||
{{Catch/footer|snow}} | {{Catch/footer|snow}} | ||
== | ===Generation VI=== | ||
{| class="roundy" style="margin:auto; background: #000; border: 3px solid #{{locationcolor/dark| | ====High tide==== | ||
{{Catch/header|cave|no}} | |||
{{Catch/entryoras|042|Golbat|yes|yes|Cave|31-34|40%|type1=Poison|type2=Flying}} | |||
{{Catch/entryoras|363|Spheal|yes|yes|Cave|31|20%|type1=Ice|type2=Water}} | |||
{{Catch/entryoras|364|Sealeo|yes|yes|Cave|32-34|40%|type1=Ice|type2=Water}} | |||
{{Catch/div|cave|{{color2|000|Horde Encounter}}}} | |||
{{Catch/entryoras|041|Zubat|yes|yes|Horde Encounter|17|40%|type1=Poison|type2=Flying}} | |||
{{Catch/entryoras|363|Spheal|yes|yes|Horde Encounter|17|60%|type1=Ice|type2=Water}} | |||
{{Catch/div|cave|Exclusively as {{color2|000|DexNav#Hidden Pokémon|hidden Pokémon}}<br><small>After defeating or capturing {{pcolor|Groudon|000}}/{{pcolor|Kyogre|000}}</small>}} | |||
{{Catch/entryoras|087|Dewgong|yes|yes|Cave|34|??%|type1=Water|type2=Ice}} | |||
{{Catch/entryoras|225|Delibird|yes|yes|Cave|34|??%|type1=Ice|type2=Flying}} | |||
{{Catch/entryoras|613|Cubchoo|yes|yes|Cave|34|??%|type1=Ice}} | |||
{{Catch/div|water|Surfing}} | |||
{{Catch/entryoras|042|Golbat|yes|yes|Surf|25, 30, 35|35%|type1=Poison|type2=Flying}} | |||
{{Catch/entryoras|072|Tentacool|yes|yes|Surf|25|50%|type1=Water|type2=Poison}} | |||
{{Catch/entryoras|073|Tentacruel|yes|yes|Surf|30|15%|type1=Water|type2=Poison}} | |||
{{Catch/div|water|Fishing}} | |||
{{Catch/entryoras|072|Tentacool|yes|yes|Fish Old|5|35%|type1=Water|type2=Poison}} | |||
{{Catch/entryoras|129|Magikarp|yes|yes|Fish Old|10, 15|65%|type1=Water}} | |||
{{Catch/entryoras|072|Tentacool|yes|yes|Fish Good|25|35%|type1=Water|type2=Poison}} | |||
{{Catch/entryoras|129|Magikarp|yes|yes|Fish Good|25|60%|type1=Water}} | |||
{{Catch/entryoras|320|Wailmer|yes|yes|Fish Good|25|5%|type1=Water}} | |||
{{Catch/entryoras|320|Wailmer|yes|yes|Fish Super|30, 35, 40|100%|type1=Water}} | |||
{{Catch/footer|cave}} | |||
====Low tide==== | |||
{{Catch/header|cave|no}} | |||
{{Catch/entryoras|042|Golbat|yes|yes|Cave|31-34|40%|type1=Poison|type2=Flying}} | |||
{{Catch/entryoras|361|Snorunt|yes|yes|Cave|34|5%|type1=Ice}} | |||
{{Catch/entryoras|363|Spheal|yes|yes|Cave|31|20%|type1=Ice|type2=Water}} | |||
{{Catch/entryoras|364|Sealeo|yes|yes|Cave|32-34|35%|type1=Ice|type2=Water}} | |||
{{Catch/div|cave|{{color2|000|Horde Encounter}}}} | |||
{{Catch/entryoras|041|Zubat|yes|yes|Horde Encounter|17|60%|type1=Poison|type2=Flying}} | |||
{{Catch/entryoras|363|Spheal|yes|yes|Horde Encounter|17|40%|type1=Ice|type2=Water}} | |||
{{Catch/div|cave|Exclusively as {{color2|000|DexNav#Hidden Pokémon|hidden Pokémon}}<br><small>After defeating or capturing {{pcolor|Groudon|000}}/{{pcolor|Kyogre|000}}</small>}} | |||
{{Catch/entryoras|087|Dewgong|yes|yes|Cave|34|??%|type1=Water|type2=Ice}} | |||
{{Catch/entryoras|225|Delibird|yes|yes|Cave|34|??%|type1=Ice|type2=Flying}} | |||
{{Catch/entryoras|613|Cubchoo|yes|yes|Cave|34|??%|type1=Ice}} | |||
{{Catch/div|cave|{{mcolor|Rock Smash|000}}}} | |||
{{Catch/entryoras|075|Graveler|yes|yes|Rock Smash|31-34|100%|type1=Rock|type2=Ground}} | |||
{{Catch/footer|cave}} | |||
====Ice room==== | |||
{{Catch/header|snow|no}} | |||
{{Catch/entryoras|042|Golbat|yes|yes|Cave|31-34|20%|type1=Poison|type2=Flying}} | |||
{{Catch/entryoras|361|Snorunt|yes|yes|Cave|31-34|40%|type1=Ice}} | |||
{{Catch/entryoras|363|Spheal|yes|yes|Cave|31|10%|type1=Ice|type2=Water}} | |||
{{Catch/entryoras|364|Sealeo|yes|yes|Cave|32-34|30%|type1=Ice|type2=Water}} | |||
{{Catch/div|snow|{{color2|000|Horde Encounter}}}} | |||
{{Catch/entryoras|041|Zubat|yes|yes|Horde Encounter|17|60%|type1=Poison|type2=Flying}} | |||
{{Catch/entryoras|361|Snorunt|yes|yes|Horde Encounter|17|5%|type1=Ice}} | |||
{{Catch/entryoras|363|Spheal|yes|yes|Horde Encounter|17|35%|type1=Ice|type2=Water}} | |||
{{Catch/footer|snow}} | |||
==Appearance== | |||
===High tide=== | |||
{| class="roundy" style="margin:auto; background: #000; border: 3px solid #{{locationcolor/dark|water}}" | |||
|- | |- | ||
! | ! style="background:#{{locationcolor/light|water}}; {{roundytl|5px}}" | Game | ||
! style="background:#{{locationcolor/light|water}}" | Entrance room | |||
! style="background:#{{locationcolor/light| | ! style="background:#{{locationcolor/light|water}}; {{roundytr|5px}}" | Inner room | ||
! style="background:#{{locationcolor/light| | |||
|- | |- | ||
! style="background:#{{ruby color}}" | {{color2|fff|Pokémon Ruby and Sapphire Versions|Ruby}} | ! style="background:#{{ruby color}}" | {{color2|fff|Pokémon Ruby and Sapphire Versions|Ruby}} | ||
| rowspan=2 |[[File:Shoal Cave entrance high tide RS.png| | | rowspan=2 |[[File:Shoal Cave entrance high tide RS.png|150px]] | ||
| rowspan=2 |[[File:Shoal Cave inner room high tide RS.png| | | rowspan=2 |[[File:Shoal Cave inner room high tide RS.png|150px]] | ||
|- | |- | ||
! style="background:#{{sapphire color}}" | {{color2|fff|Pokémon Ruby and Sapphire Versions|Sapphire}} | ! style="background:#{{sapphire color}}" | {{color2|fff|Pokémon Ruby and Sapphire Versions|Sapphire}} | ||
|- | |- | ||
! style="background:#{{emerald color}}" | {{color2| | ! style="background:#{{emerald color}}" | {{color2|fff|Pokémon Emerald Version|Emerald}} | ||
|[[File:Shoal Cave entrance high tide E.png| | |[[File:Shoal Cave entrance high tide E.png|150px]] | ||
|[[File:Shoal Cave inner room high tide E.png| | |[[File:Shoal Cave inner room high tide E.png|150px]] | ||
|- | |||
! style="background:#{{omega ruby color}}" | {{color2|fff|Pokémon Omega Ruby and Alpha Sapphire|Omega Ruby}} | |||
| rowspan=2 |[[File:Shoal Cave entrance high tide ORAS.png|150px]] | |||
| rowspan=2 |[[File:Shoal Cave inner room high tide ORAS.png|150px]] | |||
|- | |||
! style="background:#{{alpha sapphire color}}" | {{color2|fff|Pokémon Omega Ruby and Alpha Sapphire|Alpha Sapphire}} | |||
|- | |||
| colspan="3" style="background:#{{locationcolor/light|water}}; {{roundybottom|5px}}" | | |||
|} | |||
===Low tide=== | |||
{| class="roundy" style="margin:auto; background: #000; border: 3px solid #{{locationcolor/dark|cave}}" | |||
|- | |||
! style="background:#{{locationcolor/light|cave}}; {{roundytl|5px}}" | Game | |||
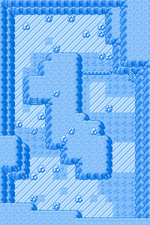
! style="background:#{{locationcolor/light|cave}}" | Entrance room | |||
! style="background:#{{locationcolor/light|cave}}" | Inner room | |||
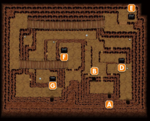
! style="background:#{{locationcolor/light|cave}}" | Stairs room | |||
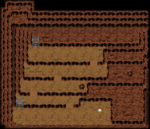
! style="background:#{{locationcolor/light|cave}}" | Lower room | |||
! style="background:#{{locationcolor/light|cave}}; {{roundytr|5px}}" | Ice room | |||
|- | |- | ||
! style="background:#{{ruby color}}" | {{color2|fff|Pokémon Ruby and Sapphire Versions|Ruby}} | ! style="background:#{{ruby color}}" | {{color2|fff|Pokémon Ruby and Sapphire Versions|Ruby}} | ||
| rowspan=2 |[[File:Shoal Cave entrance low tide RS.png| | | rowspan=2 |[[File:Shoal Cave entrance low tide RS.png|150px]] | ||
| rowspan=2 |[[File:Shoal Cave inner room low tide RS.png| | | rowspan=2 |[[File:Shoal Cave inner room low tide RS.png|150px]] | ||
| rowspan=2 |[[File:Shoal Cave stairs room RS.png| | | rowspan=2 |[[File:Shoal Cave stairs room RS.png|150px]] | ||
| rowspan=2 |[[File:Shoal Cave lower room RS.png| | | rowspan=2 |[[File:Shoal Cave lower room RS.png|150px]] | ||
| rowspan=2 |[[File:Shoal Cave ice room RS.png| | | rowspan=2 |[[File:Shoal Cave ice room RS.png|150px]] | ||
|- | |- | ||
! style="background:#{{sapphire color}}" | {{color2|fff|Pokémon Ruby and Sapphire Versions|Sapphire}} | ! style="background:#{{sapphire color}}" | {{color2|fff|Pokémon Ruby and Sapphire Versions|Sapphire}} | ||
|- | |- | ||
! style="background:#{{emerald color}}" | {{color2| | ! style="background:#{{emerald color}}" | {{color2|fff|Pokémon Emerald Version|Emerald}} | ||
|[[File:Shoal Cave entrance low tide E.png| | |[[File:Shoal Cave entrance low tide E.png|150px]] | ||
|[[File:Shoal Cave inner room low tide E.png| | |[[File:Shoal Cave inner room low tide E.png|150px]] | ||
|[[File:Shoal Cave stairs room E.png| | |[[File:Shoal Cave stairs room E.png|150px]] | ||
|[[File:Shoal Cave lower room E.png| | |[[File:Shoal Cave lower room E.png|150px]] | ||
|[[File:Shoal Cave ice room E.png| | |[[File:Shoal Cave ice room E.png|150px]] | ||
|- | |||
! style="background:#{{omega ruby color}}" | {{color2|fff|Pokémon Omega Ruby and Alpha Sapphire|Omega Ruby}} | |||
| rowspan=2 |[[File:Shoal Cave entrance low tide ORAS.png|150px]] | |||
| rowspan=2 |[[File:Shoal Cave inner room low tide ORAS.png|150px]] | |||
| rowspan=2 |[[File:Shoal Cave stairs room low tide ORAS.png|150px]] | |||
| rowspan=2 |[[File:Shoal Cave B1F low tide ORAS.png|150px]] | |||
| rowspan=2 |[[File:Shoal Cave ice room low tide ORAS.png|150px]] | |||
|- | |||
! style="background:#{{alpha sapphire color}}" | {{color2|fff|Pokémon Omega Ruby and Alpha Sapphire|Alpha Sapphire}} | |||
|- | |- | ||
| colspan=" | | colspan="6" style="background:#{{locationcolor/light|cave}}; {{roundybottom|5px}}" | | ||
|} | |} | ||
==In other languages== | ==In other languages== | ||
{{Langtable|color={{locationcolor/light|{{#switch: {{#time: g}}|9|10|11|12|1|2=water|cave}}}}|bordercolor={{locationcolor/dark|{{#switch: {{#time: g}}|9|10|11|12|1|2=water|cave}}}} | {{Langtable|color={{locationcolor/light|{{#switch: {{#time: g}}|9|10|11|12|1|2=water|cave}}}}|bordercolor={{locationcolor/dark|{{#switch: {{#time: g}}|9|10|11|12|1|2=water|cave}}}} | ||
|zh_yue=淺灘洞穴 ''{{tt|Chíntāan Duhngyuht|Shoal Cave}}'' | |||
|zh_cmn=淺灘洞穴 / 浅滩洞穴 ''{{tt|Qiǎntān Dòngxuè / Qiǎntān Dòngxué|Shoal Cave}}'' | |||
|fr=Grotte Tréfonds | |fr=Grotte Tréfonds | ||
|de=Küstenhöhle | |de=Küstenhöhle | ||
|it=Grotta Ondosa | |it=Grotta Ondosa | ||
|ko=여울의 동굴 ''Yeoul-yi Donggul'' | |ko=여울의 동굴 ''{{tt|Yeoul-yi Donggul|Shoal Cave}}'' | ||
|es=Cueva Cardumen}} | |es=Cueva Cardumen}} | ||
{{ | |||
{{Hoenn}} | {{Ice Rock locations}} | ||
{{Hoenn}}<br/> | |||
{{Project Locations notice}} | {{Project Locations notice}} | ||
| Line 190: | Line 309: | ||
[[Category:Ruby and Sapphire locations]] | [[Category:Ruby and Sapphire locations]] | ||
[[Category:Emerald locations]] | [[Category:Emerald locations]] | ||
[[Category:Omega Ruby and Alpha Sapphire locations]] | |||
[[Category:Caves]] | [[Category:Caves]] | ||
[[de:Küstenhöhle]] | [[de:Küstenhöhle]] | ||
[[es:Cueva Cardumen]] | |||
[[fr:Grotte Tréfonds]] | [[fr:Grotte Tréfonds]] | ||
[[it:Grotta Ondosa]] | [[it:Grotta Ondosa]] | ||
[[ja:あさせのほらあな]] | [[ja:あさせのほらあな]] | ||
[[zh:浅滩洞穴]] | [[zh:浅滩洞穴]] | ||
Latest revision as of 16:06, 15 October 2022
| ||||
| ||||
| Map description: | This cave's appearance changes greatly between high tide and low tide. | |||
|---|---|---|---|---|
| Location: | Route 125 | |||
| Region: | Hoenn | |||
| Generations: | III, VI | |||
 Location of Shoal Cave in Hoenn. | ||||
| Pokémon world locations | ||||
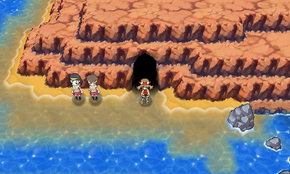
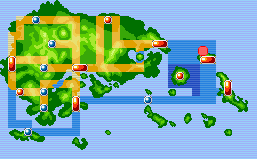
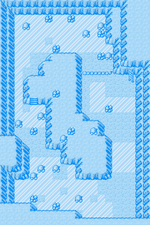
Shoal Cave (Japanese: 浅瀬の洞穴 Shoal Cave) is a location in Hoenn.
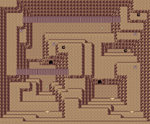
It is located north of Mossdeep City on Route 125, and is the only place in Pokémon Ruby, Sapphire, and Emerald where wild Spheal and Snorunt can be encountered. Shoal Cave uniquely features a high tide and low tide mechanic, where certain areas are only reachable during a specific time of day. The overall area accessible during high tide is smaller than during low tide.
Due to the presence of an Ice Rock, Eevee can evolve into Glaceon on the lowest floor in Omega Ruby and Alpha Sapphire.
Geography
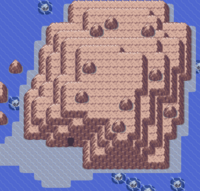
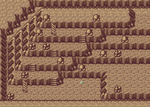
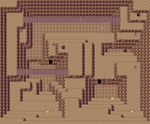
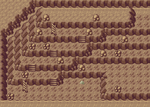
Shoal Cave is a cave north of Mossdeep City. This cave was carved into the side of a rocky mountain rising from the ocean. At predetermined times of the day, every six hours, the tides rise or fall. During high tide, the cave floods, allowing the player to use Surf to access levels of terrain otherwise out of reach on foot. Conversely, during low tide, the receding waters allow the player to descend to levels that would otherwise be underwater, most notably the ice floor at the lowest level in the cave. This icy room contains the Never-Melt Ice, and can only be accessed if the player has Strength, or the Mach Bike in Omega Ruby and Alpha Sapphire. Near the entrance to the icy area is a Black Belt who gives away a Focus Band.
In Omega Ruby and Alpha Sapphire only, the Ice Rock is located in the icy room, which allows Eevee to evolve into Glaceon.
Tides
Once the player enters the cave, the tide will not reset until the player leaves the cave and attempts to re-enter.
| Time | ▼ | |||||||||||||||||||||||
|---|---|---|---|---|---|---|---|---|---|---|---|---|---|---|---|---|---|---|---|---|---|---|---|---|
| 12 | 1 | 2 | 3 | 4 | 5 | 6 | 7 | 8 | 9 | 10 | 11 | 12 | 1 | 2 | 3 | 4 | 5 | 6 | 7 | 8 | 9 | 10 | 11 | |
| Tide | High tide | Low tide | High tide | Low tide | High tide | |||||||||||||||||||
Obtaining the Shell Bell
Four Shoal Salts and four Shoal Shells are found in the Shoal Cave; the Shoal Salts are available during low tide and the Shoal Shells are available during high tide. If the player has four Shoal Salts and four Shoal Shells in their Bag, the player can give the materials to the old man in the first room to make a Shell Bell; the old man can make any number of Shell Bells, as long as the player provides the necessary materials each time. This is the only way to obtain Shoal Salts and Shoal Shells in the Generation III and VI games.
Immediately after crafting a Shell Bell for the player, the old man prompts the player to find the ingredients for another. However, the player must wait for the tide to change in order to gather the salts and shells again.
Items
Any time
| Item | Location | Games | |
|---|---|---|---|
| Shell Bell | Entrance room, from the old man near the entrance if brought four Shoal Salt and Shoal Shell | R S E OR AS | |
| Slowbronite | Entrance room, from the old man near the entrance after trading for Shell Bell for the first time | OR AS | |
High tide
| Item | Location | Games | |
|---|---|---|---|
| Star Piece | Entrance room, southwest (hidden) | OR AS | |
| Rare Candy | Inner room, east of central ledge | R S E OR AS | |
| Big Pearl | Entrance room, northeast, accessible from southeast inner room | R S E OR AS | |
| Shoal Shell ×4 |
|
R S E OR AS | |
Low tide
| Item | Location | Games | |
|---|---|---|---|
| Pearl | Entrance room, north corner of the westmost accessible point (hidden) | OR AS | |
| Shoal Salt ×4 |
|
R S E OR AS | |
| Ice Heal | Stairs room, east of the ladder | R S E OR AS | |
| Focus Band | Lower room, given by the Black Belt | R S E OR AS | |
| TM79 (Frost Breath) | Lower room, up muddy slopes (requires Mach Bike) | OR AS | |
| Never-Melt Ice | Ice room, on the elevated floor | R S E OR AS | |
| Glalitite | Ice room, on the elevated floor | OR AS | |
| Ice Heal | Ice room, west of the Glalitite (hidden) | OR AS | |
| TM07 (Hail) | Ice room, near the ledge | R S E OR AS | |
Rock Smash
| Item | Location | Games | |
|---|---|---|---|
| Big Pearl | Randomly found by smashing breakable rocks | OR AS | |
| Ether | Randomly found by smashing breakable rocks | OR AS | |
| Hard Stone | Randomly found by smashing breakable rocks | OR AS | |
| Heart Scale | Randomly found by smashing breakable rocks | OR AS | |
| Max Ether | Randomly found by smashing breakable rocks | OR AS | |
| Max Revive | Randomly found by smashing breakable rocks | OR AS | |
| Normal Gem | Randomly found by smashing breakable rocks | OR AS | |
| Pearl | Randomly found by smashing breakable rocks | OR AS | |
| Revive | Randomly found by smashing breakable rocks | OR AS | |
| Soft Sand | Randomly found by smashing breakable rocks | OR AS | |
| Star Piece | Randomly found by smashing breakable rocks | OR AS | |
Pokémon
Generation III
Main cave
| Pokémon | Games | Location | Levels | Rate | |||||||||||
|---|---|---|---|---|---|---|---|---|---|---|---|---|---|---|---|
|
R | S | E |
|
26, 28, 30, 32 | 45% | |||||||||
|
R | S | E |
|
32 | 5% | |||||||||
|
R | S | E |
|
26, 28, 30, 32 | 50% | |||||||||
| Surfing | |||||||||||||||
|
R | S | E |
|
5-35 | 60% | |||||||||
|
R | S | E |
|
5-35 | 30% | |||||||||
|
R | S | E |
|
25-35 | 10% | |||||||||
| Fishing | |||||||||||||||
|
R | S | E |
|
5-10 | 30% | |||||||||
|
R | S | E |
|
5-10 | 70% | |||||||||
|
R | S | E |
|
10-30 | 20% | |||||||||
|
R | S | E |
|
10-30 | 60% | |||||||||
|
R | S | E |
|
10-30 | 20% | |||||||||
|
R | S | E |
|
20-45 | 100% | |||||||||
| A colored background means that the Pokémon can be found in this location in the specified game. A white background with a colored letter means that the Pokémon cannot be found here. | |||||||||||||||
Ice room
| Pokémon | Games | Location | Levels | Rate | |||||||||||
|---|---|---|---|---|---|---|---|---|---|---|---|---|---|---|---|
|
R | S | E |
|
26, 28, 30 | 40% | |||||||||
|
R | S | E |
|
30, 32 | 5% | |||||||||
|
R | S | E |
|
26, 28, 30 | 10% | |||||||||
|
R | S | E |
|
26, 28, 30, 32 | 45% | |||||||||
| A colored background means that the Pokémon can be found in this location in the specified game. A white background with a colored letter means that the Pokémon cannot be found here. | |||||||||||||||
Generation VI
High tide
| Pokémon | Games | Location | Levels | Rate | ||||||||||||
|---|---|---|---|---|---|---|---|---|---|---|---|---|---|---|---|---|
|
OR | AS |
|
31-34 | 40% | |||||||||||
|
OR | AS |
|
31 | 20% | |||||||||||
|
OR | AS |
|
32-34 | 40% | |||||||||||
| Horde Encounter | ||||||||||||||||
|
OR | AS |
|
17 | 40% | |||||||||||
|
OR | AS |
|
17 | 60% | |||||||||||
| Exclusively as hidden Pokémon After defeating or capturing Groudon/Kyogre | ||||||||||||||||
|
OR | AS |
|
34 | ??% | |||||||||||
|
OR | AS |
|
34 | ??% | |||||||||||
|
OR | AS |
|
34 | ??% | |||||||||||
| Surfing | ||||||||||||||||
|
OR | AS |
|
25, 30, 35 | 35% | |||||||||||
|
OR | AS |
|
25 | 50% | |||||||||||
|
OR | AS |
|
30 | 15% | |||||||||||
| Fishing | ||||||||||||||||
|
OR | AS |
|
5 | 35% | |||||||||||
|
OR | AS |
|
10, 15 | 65% | |||||||||||
|
OR | AS |
|
25 | 35% | |||||||||||
|
OR | AS |
|
25 | 60% | |||||||||||
|
OR | AS |
|
25 | 5% | |||||||||||
|
OR | AS |
|
30, 35, 40 | 100% | |||||||||||
| A colored background means that the Pokémon can be found in this location in the specified game. A white background with a colored letter means that the Pokémon cannot be found here. | ||||||||||||||||
Low tide
| Pokémon | Games | Location | Levels | Rate | ||||||||||||
|---|---|---|---|---|---|---|---|---|---|---|---|---|---|---|---|---|
|
OR | AS |
|
31-34 | 40% | |||||||||||
|
OR | AS |
|
34 | 5% | |||||||||||
|
OR | AS |
|
31 | 20% | |||||||||||
|
OR | AS |
|
32-34 | 35% | |||||||||||
| Horde Encounter | ||||||||||||||||
|
OR | AS |
|
17 | 60% | |||||||||||
|
OR | AS |
|
17 | 40% | |||||||||||
| Exclusively as hidden Pokémon After defeating or capturing Groudon/Kyogre | ||||||||||||||||
|
OR | AS |
|
34 | ??% | |||||||||||
|
OR | AS |
|
34 | ??% | |||||||||||
|
OR | AS |
|
34 | ??% | |||||||||||
| Rock Smash | ||||||||||||||||
|
OR | AS |
|
31-34 | 100% | |||||||||||
| A colored background means that the Pokémon can be found in this location in the specified game. A white background with a colored letter means that the Pokémon cannot be found here. | ||||||||||||||||
Ice room
| Pokémon | Games | Location | Levels | Rate | ||||||||||||
|---|---|---|---|---|---|---|---|---|---|---|---|---|---|---|---|---|
|
OR | AS |
|
31-34 | 20% | |||||||||||
|
OR | AS |
|
31-34 | 40% | |||||||||||
|
OR | AS |
|
31 | 10% | |||||||||||
|
OR | AS |
|
32-34 | 30% | |||||||||||
| Horde Encounter | ||||||||||||||||
|
OR | AS |
|
17 | 60% | |||||||||||
|
OR | AS |
|
17 | 5% | |||||||||||
|
OR | AS |
|
17 | 35% | |||||||||||
| A colored background means that the Pokémon can be found in this location in the specified game. A white background with a colored letter means that the Pokémon cannot be found here. | ||||||||||||||||
Appearance
High tide
| Game | Entrance room | Inner room |
|---|---|---|
| Ruby | 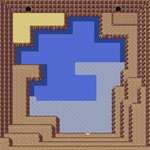
|
|
| Sapphire | ||
| Emerald | 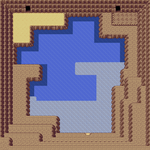
|
|
| Omega Ruby | 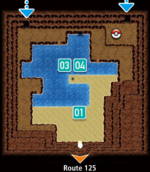
|
|
| Alpha Sapphire | ||
Low tide
| Game | Entrance room | Inner room | Stairs room | Lower room | Ice room |
|---|---|---|---|---|---|
| Ruby | 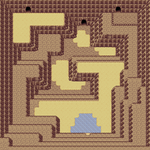
|
|
|

|
|
| Sapphire | |||||
| Emerald | 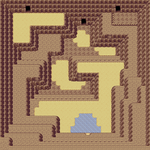
|
|
|

|
|
| Omega Ruby | 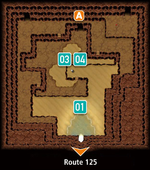
|
|
|

|
|
| Alpha Sapphire | |||||
In other languages
| ||||||||||||||||||||||||||
| |||||

|
This article is part of Project Locations, a Bulbapedia project that aims to write comprehensive articles on every location in the Pokémon world. |
