Pokémon Gold and Silver Spaceworld '97 demo: Difference between revisions
m (→Graphics) |
|||
| (81 intermediate revisions by 22 users not shown) | |||
| Line 1: | Line 1: | ||
{{Infobox game|colorscheme=gold|bordercolorscheme=silver | {{Infobox game|colorscheme=gold|bordercolorscheme=silver | ||
|name=Pokémon Gold demo | |name=Pokémon Gold demo | ||
|name2=Pokémon Silver demo | |name2=Pokémon Silver demo | ||
|boxart=GoldDemoTitle | |boxart=GoldDemoTitle.png | ||
|boxart2=SilverDemoTitle | |boxart2=SilverDemoTitle.png | ||
|caption=Title screen of the Pokémon Gold demo | |caption=Title screen of the Pokémon Gold demo | ||
|caption2=Title screen of the Pokémon Silver demo | |caption2=Title screen of the Pokémon Silver demo | ||
| Line 16: | Line 13: | ||
|publisher=[[Nintendo]]/[[The Pokémon Company]] | |publisher=[[Nintendo]]/[[The Pokémon Company]] | ||
|developer=[[Game Freak]] | |developer=[[Game Freak]] | ||
|website_ja=[https://www.nintendo.co.jp/n12/swgbsoft/swgb03.html | |website_ja=[https://web.archive.org/web/19990505010142/https://www.nintendo.co.jp/n12/swgbsoft/swgb03.html Space World] | ||
}} | }} | ||
The '''Pokémon Gold and Silver demo''' is an early build of the games {{game|Gold and Silver|s}} shown at | The '''Pokémon Gold and Silver Spaceworld '97 demo''' is an early build of the games {{game|Gold and Silver|s}} that was shown at [[Nintendo Space World]] '97 from November 21 to 23, 1997. At the time, the final game was estimated to be about 80% complete and was set to be released for the original [[Game Boy]]—the [[Game Boy Color]] would not be announced until late March of the following year.<ref>[https://web.archive.org/web/20190307015419/http://www.geocities.jp/pcakatsuki/pokemonlab/prepm2.html ''Pokemon Gold and Pokemon Silver Nintendo Space World 97 version'' - geocities.jp] (archived; retrieved June 21, 2021)</ref><ref>[https://web.archive.org/web/19990505010142/https://www.nintendo.co.jp/n12/swgbsoft/swgb03.html ''SPACEWORLD'97 Exhibit GAME BOY software vol.3'' - nintendo.co.jp] (archived; retrieved June 21, 2021)</ref> However, due to a variety of delays, including a complete overhaul to the game, it would not be released until late 1999. | ||
During the two years after it was first shown at Nintendo Space World '97 until its final release in November 21, 1999, the game changed extensively from this early demo. As with the final games, the demo used the Japanese {{game|Blue| (Japanese)}} as its basis for development. | |||
Up until 2018, little information was known about this demo, due to the majority of the game being locked off from players. Only a few photographs were taken, and most of the information known comes from testimony of attendees. On May 26, 2018, however, ROM files of both the Gold and Silver demos were anonymously posted online, including versions with debug menus, allowing players to explore data that was blocked off at Space World. | |||
Beyond what was intended to be played appears unfinished: many Pokémon have unfinished and placeholder base stats; scripts, NPCs, and warp data is largely absent; collision data is missing; and some areas are completely missing. Nevertheless, a large amount of information can be gathered from what is present, including many redesigned or scrapped Pokémon designs, minigame easter eggs, and a completely different region. | |||
==Gameplay== | ==Gameplay== | ||
The demo begins with a monologue from [[Professor Oak]], similar to the final game. However, there is no option to give the player a gender or a name, who is instead automatically [[Ethan (game)|a boy]] named Satoshi (サトシ){{sup/2|G}} or Shigeru (シゲル){{sup/2|S}}. Afterwards, the player begins in his room in a town called Silent Hill (サイレントヒル); this town is also named Silent Hills (サイレントヒルズ) in the Official Fan Book of Pocket Monsters (Japanese: ポケットモンスター公式ファンブック), published earlier in 1997. The player will already have 3000{{PDollar}} and eight [[Badge]]s, although the [[Gym Leader]]s are blacked out. One of three [[first partner Pokémon]], randomly chosen, is already placed in the player's party. | |||
{| | |||
|{{User:Celadonkey/gsbetapokemon | |||
|pokemon=Chikorita | |||
|nickname={{tt|ハッパ|Happa}} | |||
|ndex=152 | |||
|level=8 | |||
|item=Berry | |||
|type1=Grass | |||
|move1=Tackle|move1type=Normal | |||
|move2=Growth|move2type=Normal<!--Is this Normal-type, like in Generation I, or was it planned to change to Grass?--> | |||
|move3=Leech Seed|move3type=Grass}} | |||
|{{User:Celadonkey/gsbetapokemon | |||
|pokemon=Honōguma | |||
|nickname={{tt|ホノオグマ|Honōguma}} | |||
|ndex=155 | |||
|level=8 | |||
|item=Berry | |||
|type1=Fire | |||
|move1=Tackle|move1type=Normal | |||
|move2=Leer|move2type=Normal}} | |||
|{{User:Celadonkey/gsbetapokemon | |||
|pokemon=Kurusu | |||
|nickname={{tt|クルス|Kurusu}} | |||
|ndex=158 | |||
|level=8 | |||
|item=Berry | |||
|type1=Water | |||
|move1=Tackle|move1type=Normal | |||
|move2=Growl|move2type=Normal | |||
|move3=Water Gun|move3type=Water}} | |||
|} | |||
Silent Hill has exits to the west, north, and east; however, the northern and eastern exits are blocked to prevent the player from accessing unfinished areas. A [[Pokémon Center]] which the player can enter is present in the town, but all of its functions are unavailable. Silent Hill also has a laboratory, but it cannot be entered. | |||
The player will then move west to Route 1, a typical route with a dungeon called Silent Hill (しずかなおか) in the middle. (Although the English translations for both サイレントヒルズ and しずかなおか are the same, they are written differently in Japanese: the town is a transliteration of the English term "Silent Hill" in katakana, and the dungeon area in Route 1 is the Japanese native translation for "Silent Hill," written in hiragana.) Silent Hill has the first Trainers to encounter in the game. After going through Silent Hill, the player reemerges on the other side of Route 1, where they will encounter another trainer. At the end of Route 1, the {{ga|Silver|rival}}, automatically named Shigeru (シゲル), stops the player, and the demo ends. The demo will also end if the player [[Black out|blacks out]]. | |||
==Differences from the final game== | |||
The demo and the final versions of the [[Generation II]] games had numerous differences. | |||
<gallery> | |||
File:GS demo morning.PNG|Morning | |||
File:GS demo day.PNG|Day | |||
File:GS demo night.PNG|Night | |||
</gallery> | |||
The demo was meant to be played on Game Boy hardware and was not designed to take advantage of the colors available on a Game Boy Color; as such, the colors available through the Super Game Boy were less detailed. The day and night system is present, but due to running on a Game Boy color scheme, the change in colors for the time of the day are just shades of blue. Playing the final games on a Super Game Boy yields a similar effect. | |||
The intro lacks music, and instead of showing the Generation II first partner Pokémon at the end of the intro, {{p|Venusaur}} and {{p|Blastoise}} are shown instead; {{p|Charizard}}, which was present in the final game's intro, has a slightly less detailed design. | |||
[[Generation I]] Pokédex entries were carried over as placeholders for Pokémon until new Pokédex entries were able to be written for them. All Pokédex entries for Generation II Pokémon use the same placeholder text:{{tt|「はっけんされた ばかりの ポケモン げんざい ちょうさちゅう。」|Now investigating this newly discovered Pokémon.}} In an odd occurrence, it was also possible to battle wild Pokémon twice in a row without moving from a grass panel; why this was an implemented feature at the time is unknown. | |||
[[Kanto Route 1]] music plays for all Routes. The music of [[Viridian City]], [[Saffron City]], and [[Pewter City]] plays for all cities and towns present. Trainer and wild Pokémon battles both use Pokémon Red and Green [[Gym Leader]] music. More tracks from Pokémon Red and Green are present for events that are not normally possible in this build. | |||
===Type chart=== | ===Type chart=== | ||
Several type match ups differed from the final version of the game. | Several type match ups differed from the final version of the game. Notably, {{t|Normal}} and {{t|Dark}} would be super effective against Dark types, while Normal types would only take resisted damage from Dark-type moves, {{t|Water}} and {{t|Electric}} would have been super effective against {{t|Steel}}, and {{t|Poison}} would be resisted by the Steel-type instead of Poison-type moves doing no damage. Additionally, Poison remained super effective against {{t|Bug}}, something that existed in [[Generation I]], but was changed to be neutrally effective in the final version. | ||
In the below type chart, bold text and a different shade of the color means that the type matchup is different than in the final version. | |||
{| class="roundy" style="border: 2px solid #111111; background:#555555 | {| class="roundy" style="border: 2px solid #111111; background:#555555" margin-right: 5px; margin-bottom: 5px" | ||
|- | |- | ||
! colspan="2" rowspan="2" | × | ! colspan="2" rowspan="2" style="color:#FFF;" | × | ||
! colspan="17" style="{{roundytr|5px}} background:#4C4BA4" | <small>Defending type</small> | ! colspan="17" style="{{roundytr|5px}} background:#4C4BA4; color:#FFF" | <small>Defending type</small> | ||
|- | |- | ||
! style="background:#{{normal color}}" | {{ic|Normal}} | ! style="background:#{{normal color}}" | {{ic|Normal}} | ||
| Line 51: | Line 107: | ||
! style="background:#{{dark color}}" | {{ic|Dark}} | ! style="background:#{{dark color}}" | {{ic|Dark}} | ||
|- style="text-align:center; background:#FFFFFF; font-size:90%" | |- style="text-align:center; background:#FFFFFF; font-size:90%" | ||
! rowspan="17" style="background:#A44C4B" | <small> | ! rowspan="17" style="background:#A44C4B; writing-mode:vertical-rl;text-orientation:upright;letter-spacing:5px;width:25px; color:#FFF" | <small>Attacking type</small> | ||
! style="background:#{{normal color}}" | {{ic|Normal}} | ! style="background:#{{normal color}}" | {{ic|Normal}} | ||
| 1× | | 1× | ||
| Line 58: | Line 114: | ||
| 1× | | 1× | ||
| 1× | | 1× | ||
| style="background:#FF0000; color:#FFFFFF | | style="background:#FF0000; color:#FFFFFF" | ½× | ||
| 1× | | 1× | ||
| style="background:#000000; color:#FFFFFF" | 0× | |||
| style="background:#CCCCCC" | '''1×''' | |||
| 1× | | 1× | ||
| 1× | | 1× | ||
| Line 69: | Line 125: | ||
| 1× | | 1× | ||
| 1× | | 1× | ||
| style="background:# | | style="background:#669966; color:#FFFFFF" | '''2×''' | ||
|- style="text-align:center; background:#FFFFFF; font-size:90%" | |- style="text-align:center; background:#FFFFFF; font-size:90%" | ||
! style="background:#{{fighting color}}" | {{ic|Fighting}} | ! style="background:#{{fighting color}}" | {{ic|Fighting}} | ||
| style="background:#009900; color:#FFFFFF | | style="background:#009900; color:#FFFFFF" | 2× | ||
| 1× | | 1× | ||
| style="background:#FF0000; color:#FFFFFF" | ½× | |||
| style="background:#FF0000; color:#FFFFFF | | style="background:#FF0000; color:#FFFFFF" | ½× | ||
| style="background:#FF0000; color:#FFFFFF | |||
| 1× | | 1× | ||
| style="background:#009900; color:#FFFFFF" | 2× | |||
| style="background:#FF0000; color:#FFFFFF" | ½× | |||
| style="background:#000000; color:#FFFFFF" | 0× | |||
| style="background:#FF6666; color:#FFFFFF" | '''½×''' | |||
| 1× | | 1× | ||
| 1× | | 1× | ||
| 1× | | 1× | ||
| 1× | | 1× | ||
| style="background:#FF0000; color:#FFFFFF" | ½× | |||
| style="background:#009900; color:#FFFFFF" | 2× | |||
| 1× | | 1× | ||
| style="background:#CCCCCC" | '''1×''' | |||
|- style="text-align:center; background:#FFFFFF; font-size:90%" | |- style="text-align:center; background:#FFFFFF; font-size:90%" | ||
! style="background:#{{flying color}}" | {{ic|Flying}} | ! style="background:#{{flying color}}" | {{ic|Flying}} | ||
| 1× | | 1× | ||
| style="background:#009900; color:#FFFFFF | | style="background:#009900; color:#FFFFFF" | 2× | ||
| 1× | | 1× | ||
| 1× | | 1× | ||
| 1× | | 1× | ||
| style="background:#FF0000; color:#FFFFFF" | ½× | |||
| style="background:#009900; color:#FFFFFF" | 2× | |||
| 1× | | 1× | ||
| style="background:#CCCCCC" | '''1×''' | |||
| 1× | | 1× | ||
| 1× | | 1× | ||
| style="background:#009900; color:#FFFFFF | | style="background:#009900; color:#FFFFFF" | 2× | ||
| style="background:#FF0000; color:#FFFFFF | | style="background:#FF0000; color:#FFFFFF" | ½× | ||
| 1× | | 1× | ||
| 1× | | 1× | ||
| Line 113: | Line 169: | ||
| 1× | | 1× | ||
| 1× | | 1× | ||
| style="background:#FF0000; color:#FFFFFF | | style="background:#FF0000; color:#FFFFFF" | ½× | ||
| style="background:#FF0000; color:#FFFFFF | | style="background:#FF0000; color:#FFFFFF" | ½× | ||
| style="background:#FF0000; color:#FFFFFF | | style="background:#FF0000; color:#FFFFFF" | ½× | ||
| style="background:# | | style="background:#669966; color:#FFFFFF" | '''2×''' | ||
| style="background:#FF0000; color:#FFFFFF | | style="background:#FF0000; color:#FFFFFF" | ½× | ||
| style="background:# | | style="background:#FF6666; color:#FFFFFF" | '''½×''' | ||
| 1× | | 1× | ||
| 1× | | 1× | ||
| style="background:#009900; color:#FFFFFF | | style="background:#009900; color:#FFFFFF" | 2× | ||
| 1× | | 1× | ||
| 1× | | 1× | ||
| Line 131: | Line 187: | ||
| 1× | | 1× | ||
| 1× | | 1× | ||
| style="background:#000000; color:#FFFFFF | | style="background:#000000; color:#FFFFFF" | 0× | ||
| style="background:#009900; color:#FFFFFF | | style="background:#009900; color:#FFFFFF" | 2× | ||
| 1× | | 1× | ||
| style="background:#009900; color:#FFFFFF" | 2× | |||
| style="background:#FF0000; color:#FFFFFF" | ½× | |||
| 1× | | 1× | ||
| style="background:#009900; color:#FFFFFF | | style="background:#CCCCCC" | '''1×''' | ||
| style="background:#009900; color:#FFFFFF" | 2× | |||
| 1× | | 1× | ||
| style="background:#FF0000; color:#FFFFFF | | style="background:#FF0000; color:#FFFFFF" | ½× | ||
| style="background:#009900; color:#FFFFFF | | style="background:#009900; color:#FFFFFF" | 2× | ||
| 1× | | 1× | ||
| 1× | | 1× | ||
| Line 149: | Line 205: | ||
! style="background:#{{rock color}}" | {{ic|Rock}} | ! style="background:#{{rock color}}" | {{ic|Rock}} | ||
| 1× | | 1× | ||
| style="background:#FF0000; color:#FFFFFF | | style="background:#FF0000; color:#FFFFFF" | ½× | ||
| style="background:#009900; color:#FFFFFF | | style="background:#009900; color:#FFFFFF" | 2× | ||
| 1× | | 1× | ||
| style="background:#FF0000; color:#FFFFFF | | style="background:#FF0000; color:#FFFFFF" | ½× | ||
| 1× | | 1× | ||
| style="background:#009900; color:#FFFFFF | | style="background:#009900; color:#FFFFFF" | 2× | ||
| 1× | | 1× | ||
| style="background:#FF0000; color:#FFFFFF | | style="background:#FF0000; color:#FFFFFF" | ½× | ||
| style="background:#009900; color:#FFFFFF | | style="background:#009900; color:#FFFFFF" | 2× | ||
| 1× | | 1× | ||
| 1× | | 1× | ||
| 1× | | 1× | ||
| 1× | | 1× | ||
| style="background:#009900; color:#FFFFFF | | style="background:#009900; color:#FFFFFF" | 2× | ||
| 1× | | 1× | ||
| 1× | | 1× | ||
| Line 168: | Line 224: | ||
! style="background:#{{bug color}}" | {{ic|Bug}} | ! style="background:#{{bug color}}" | {{ic|Bug}} | ||
| 1× | | 1× | ||
| style="background:#FF0000; color:#FFFFFF | | style="background:#FF0000; color:#FFFFFF" | ½× | ||
| style="background:#FF0000; color:#FFFFFF | | style="background:#FF0000; color:#FFFFFF" | ½× | ||
| style="background:# | | style="background:#669966; color:#FFFFFF" | '''2×''' | ||
| 1× | | 1× | ||
| 1× | | 1× | ||
| 1× | | 1× | ||
| style="background:#FF0000; color:#FFFFFF; | | style="background:#FF0000; color:#FFFFFF" | ½× | ||
| style="background:#CCCCCC" | '''1×''' | |||
| style="background:#FF0000; color:#FFFFFF" | ½× | |||
| 1× | | 1× | ||
| style="background:#009900; color:#FFFFFF | | style="background:#009900; color:#FFFFFF" | 2× | ||
| 1× | | 1× | ||
| style="background:#009900; color:#FFFFFF | | style="background:#009900; color:#FFFFFF" | 2× | ||
| 1× | | 1× | ||
| 1× | | 1× | ||
| style="background:#009900; color:#FFFFFF | | style="background:#009900; color:#FFFFFF" | 2× | ||
|- style="text-align:center; background:#FFFFFF; font-size:90%" | |- style="text-align:center; background:#FFFFFF; font-size:90%" | ||
! style="background:#{{ghost color}}" | {{ic|Ghost}} | ! style="background:#{{ghost color}}" | {{ic|Ghost}} | ||
| style="background:#000000; color:#FFFFFF | | style="background:#000000; color:#FFFFFF" | 0× | ||
| 1× | | 1× | ||
| 1× | | 1× | ||
| Line 195: | Line 249: | ||
| 1× | | 1× | ||
| 1× | | 1× | ||
| style="background:#CCCCCC" | '''1×''' | |||
| style="background:#CCCCCC" | '''1×''' | |||
| 1× | | 1× | ||
| 1× | | 1× | ||
| 1× | | 1× | ||
| 1× | | 1× | ||
| style="background:#009900; color:#FFFFFF | | style="background:#009900; color:#FFFFFF" | 2× | ||
| 1× | | 1× | ||
| 1× | | 1× | ||
| style="background:#FF0000; color:#FFFFFF | | style="background:#FF0000; color:#FFFFFF" | ½× | ||
|- style="text-align:center; background:#FFFFFF; font-size:90%" | |- style="text-align:center; background:#FFFFFF; font-size:90%" | ||
! style="background:#{{steel color}}" | {{ic|Steel}} | ! style="background:#{{steel color}}" | {{ic|Steel}} | ||
| Line 210: | Line 266: | ||
| 1× | | 1× | ||
| 1× | | 1× | ||
| style="background:#009900; color:#FFFFFF | | style="background:#009900; color:#FFFFFF" | 2× | ||
| 1× | | 1× | ||
| 1× | | 1× | ||
| style="background:# | | style="background:#666666; color:#FFFFFF" | '''0×''' | ||
| style="background:#CCCCCC" | '''1×''' | |||
| style="background:#FF0000; color:#FFFFFF" | ½× | |||
| 1× | | 1× | ||
| style="background:#FF0000; color:#FFFFFF" | ½× | |||
| 1× | | 1× | ||
| style="background:#CCCCCC" | '''1×''' | |||
| 1× | | 1× | ||
| 1× | | 1× | ||
| Line 229: | Line 285: | ||
| 1× | | 1× | ||
| 1× | | 1× | ||
| style="background:#FF0000; color:#FFFFFF | | style="background:#FF0000; color:#FFFFFF" | ½× | ||
| style="background:#009900; color:#FFFFFF | | style="background:#009900; color:#FFFFFF" | 2× | ||
| 1× | | 1× | ||
| style="background:#FF0000; color:#FFFFFF | | style="background:#CCCCCC" | '''1×''' | ||
| style="background:#FF0000; color:#FFFFFF | | style="background:#FF0000; color:#FFFFFF" | ½× | ||
| style="background:#009900; color:#FFFFFF | | style="background:#FF0000; color:#FFFFFF" | ½× | ||
| style="background:#009900; color:#FFFFFF" | 2× | |||
| 1× | | 1× | ||
| 1× | | 1× | ||
| style="background:#009900; color:#FFFFFF | | style="background:#009900; color:#FFFFFF" | 2× | ||
| style="background:#FF0000; color:#FFFFFF | | style="background:#FF0000; color:#FFFFFF" | ½× | ||
| 1× | | 1× | ||
|- style="text-align:center; background:#FFFFFF; font-size:90%" | |- style="text-align:center; background:#FFFFFF; font-size:90%" | ||
| Line 247: | Line 303: | ||
| 1× | | 1× | ||
| 1× | | 1× | ||
| style="background:#009900; color:#FFFFFF | | style="background:#009900; color:#FFFFFF" | 2× | ||
| style="background:#009900; color:#FFFFFF | | style="background:#009900; color:#FFFFFF" | 2× | ||
| 1× | | 1× | ||
| 1× | | 1× | ||
| style="background:# | | style="background:#669966; color:#FFFFFF" | '''2×''' | ||
| style="background:#009900; color:#FFFFFF | | style="background:#009900; color:#FFFFFF" | 2× | ||
| style="background:#FF0000; color:#FFFFFF | | style="background:#FF0000; color:#FFFFFF" | ½× | ||
| style="background:#FF0000; color:#FFFFFF | | style="background:#FF0000; color:#FFFFFF" | ½× | ||
| style="background:# | | style="background:#FF6666; color:#FFFFFF" | '''½×''' | ||
| 1× | | 1× | ||
| 1× | | 1× | ||
| style="background:#FF0000; color:#FFFFFF | | style="background:#FF0000; color:#FFFFFF" | ½× | ||
| 1× | | 1× | ||
|- style="text-align:center; background:#FFFFFF; font-size:90%" | |- style="text-align:center; background:#FFFFFF; font-size:90%" | ||
| Line 264: | Line 320: | ||
| 1× | | 1× | ||
| 1× | | 1× | ||
| style="background:#FF0000; color:#FFFFFF | | style="background:#FF0000; color:#FFFFFF" | ½× | ||
| style="background:#FF0000; color:#FFFFFF | | style="background:#FF0000; color:#FFFFFF" | ½× | ||
| style="background:#009900; color:#FFFFFF | | style="background:#009900; color:#FFFFFF" | 2× | ||
| style="background:#009900; color:#FFFFFF | | style="background:#009900; color:#FFFFFF" | 2× | ||
| style="background:#FF0000; color:#FFFFFF | | style="background:#FF0000; color:#FFFFFF" | ½× | ||
| 1× | | 1× | ||
| style="background:#FF0000; color:#FFFFFF | | style="background:#CCCCCC" | '''1×''' | ||
| style="background:#009900; color:#FFFFFF | | style="background:#FF0000; color:#FFFFFF" | ½× | ||
| style="background:#FF0000; color:#FFFFFF | | style="background:#009900; color:#FFFFFF" | 2× | ||
| style="background:#FF0000; color:#FFFFFF" | ½× | |||
| 1× | | 1× | ||
| 1× | | 1× | ||
| 1× | | 1× | ||
| style="background:#FF0000; color:#FFFFFF | | style="background:#FF0000; color:#FFFFFF" | ½× | ||
| 1× | | 1× | ||
|- style="text-align:center; background:#FFFFFF; font-size:90%" | |- style="text-align:center; background:#FFFFFF; font-size:90%" | ||
| Line 283: | Line 339: | ||
| 1× | | 1× | ||
| 1× | | 1× | ||
| style="background:#009900; color:#FFFFFF | | style="background:#009900; color:#FFFFFF" | 2× | ||
| 1× | | 1× | ||
| style="background:#000000; color:#FFFFFF | | style="background:#000000; color:#FFFFFF" | 0× | ||
| 1× | | 1× | ||
| 1× | | 1× | ||
| 1× | | 1× | ||
| style="background:# | | style="background:#669966; color:#FFFFFF" | '''2×''' | ||
| 1× | | 1× | ||
| style="background:#009900; color:#FFFFFF | | style="background:#009900; color:#FFFFFF" | 2× | ||
| style="background:#FF0000; color:#FFFFFF | | style="background:#FF0000; color:#FFFFFF" | ½× | ||
| style="background:#FF0000; color:#FFFFFF | | style="background:#FF0000; color:#FFFFFF" | ½× | ||
| 1× | | 1× | ||
| 1× | | 1× | ||
| style="background:#FF0000; color:#FFFFFF | | style="background:#FF0000; color:#FFFFFF" | ½× | ||
| 1× | | 1× | ||
|- style="text-align:center; background:#FFFFFF; font-size:90%" | |- style="text-align:center; background:#FFFFFF; font-size:90%" | ||
! style="background:#{{psychic color}}" | {{ic|Psychic}} | ! style="background:#{{psychic color}}" | {{ic|Psychic}} | ||
| 1× | | 1× | ||
| style="background:#009900; color:#FFFFFF | | style="background:#009900; color:#FFFFFF" | 2× | ||
| 1× | | 1× | ||
| style="background:#009900; color:#FFFFFF" | 2× | |||
| 1× | | 1× | ||
| 1× | | 1× | ||
| 1× | | 1× | ||
| 1× | | 1× | ||
| style="background:#CCCCCC" | '''1×''' | |||
| 1× | | 1× | ||
| 1× | | 1× | ||
| 1× | | 1× | ||
| 1× | | 1× | ||
| style="background:#FF0000; color:#FFFFFF | | style="background:#FF0000; color:#FFFFFF" | ½× | ||
| 1× | | 1× | ||
| 1× | | 1× | ||
| style="background:# | | style="background:#FF6666; color:#FFFFFF" | '''½×''' | ||
|- style="text-align:center; background:#FFFFFF; font-size:90%" | |- style="text-align:center; background:#FFFFFF; font-size:90%" | ||
! style="background:#{{ice color}}" | {{ic|Ice}} | ! style="background:#{{ice color}}" | {{ic|Ice}} | ||
| 1× | | 1× | ||
| 1× | | 1× | ||
| style="background:#009900; color:#FFFFFF | | style="background:#009900; color:#FFFFFF" | 2× | ||
| 1× | | 1× | ||
| style="background:#009900; color:#FFFFFF" | 2× | |||
| 1× | | 1× | ||
| 1× | | 1× | ||
| 1× | | 1× | ||
| style="background:#FF0000; color:#FFFFFF | | style="background:#CCCCCC" | '''1×''' | ||
| style="background:#FF0000; color:#FFFFFF | | style="background:#FF0000; color:#FFFFFF" | ½× | ||
| style="background:#009900; color:#FFFFFF | | style="background:#FF0000; color:#FFFFFF" | ½× | ||
| style="background:#009900; color:#FFFFFF" | 2× | |||
| 1× | | 1× | ||
| 1× | | 1× | ||
| style="background:#FF0000; color:#FFFFFF | | style="background:#FF0000; color:#FFFFFF" | ½× | ||
| style="background:#009900; color:#FFFFFF | | style="background:#009900; color:#FFFFFF" | 2× | ||
| 1× | | 1× | ||
|- style="text-align:center; background:#FFFFFF; font-size:90%" | |- style="text-align:center; background:#FFFFFF; font-size:90%" | ||
| Line 346: | Line 402: | ||
| 1× | | 1× | ||
| 1× | | 1× | ||
| style="background:#CCCCCC" | '''1×''' | |||
| 1× | | 1× | ||
| 1× | | 1× | ||
| Line 352: | Line 409: | ||
| 1× | | 1× | ||
| 1× | | 1× | ||
| style="background:#009900; color:#FFFFFF" | 2× | |||
| style="background:#009900; color:#FFFFFF | |||
| 1× | | 1× | ||
|- style="text-align:center; background:#FFFFFF; font-size:90%" | |- style="text-align:center; background:#FFFFFF; font-size:90%" | ||
! style="background:#{{dark color}}" | {{ic|Dark}} | ! style="background:#{{dark color}}" | {{ic|Dark}} | ||
| style="background:# | | style="background:#FF6666; color:#FFFFFF" | '''½×''' | ||
| | | style="background:#CCCCCC" | '''1×''' | ||
| 1× | |||
| 1× | | 1× | ||
| 1× | | 1× | ||
| 1× | | 1× | ||
| 1× | | 1× | ||
| 1× | | 1× | ||
| style="background:#009900; color:#FFFFFF" | 2× | |||
| style="background:#CCCCCC" | '''1×''' | |||
| 1× | | 1× | ||
| 1× | | 1× | ||
| 1× | | 1× | ||
| 1× | | 1× | ||
| style="background:#009900; color:#FFFFFF | | style="background:#009900; color:#FFFFFF" | 2× | ||
| 1× | | 1× | ||
| 1× | | 1× | ||
| style="background:# | | style="background:#669966; color:#FFFFFF" | '''2×''' | ||
|- | |- | ||
| colspan="19" style="{{roundybottom|5px}}; background:#999999" | <small>These matchups are suitable for the Gold and Silver Spaceworld | | colspan="19" style="{{roundybottom|5px}}; background:#999999" | <small>These matchups are suitable for the Gold and Silver Spaceworld '97 demo.</small> | ||
|} | |} | ||
==Demo restrictions== | |||
As this game was meant to be publicly played at Space World '97, there were several restrictions put in place to make sure the game could not lock up or be set up to not work for other players. The only options available at the start screen are "ポケモンを あそぶ" (Play Pokémon) and "せっていを かえる" (Change Settings). There is no Continue option as the player is not able to [[save]] in the demo build. The player is given a random level 8 [[first partner Pokémon]]. | |||
The player could only heal using [[Potion]]s as [[Pokémon Center]]s are not accessible in the demo. PCs are also not able to be used. Trying to visit a Pokémon Center or use a PC gives the text of "''under repair''" or "''being adjusted''." This was likely to prevent a single attendee from hogging the demo by repeatedly healing to avoid [[black out|blacking out]]. | |||
== | The {{Player}} and rival's names are random pre-selected names. First partner Pokémon and wild Pokémon that appear in the demo are not able to evolve. When an NPC loses, they do not have any losing dialog, presumably to make the demo faster to play. The player can only visit Silent Hill and early routes up to the forest area. When all the player's Pokémon faint, the game returns to the title screen to ensure the next person could have a turn. | ||
==Pokémon== | |||
<!--Please refrain from speculating what their translated names would have been or speculate why a Pokémon may have been dropped or redesigned, thank you.--> | |||
{{main|Pokémon Gold and Silver Spaceworld '97 demo/Pokémon}} | |||
Although only a few new Pokémon can be seen in the demo through normal gameplay, 100 new Pokémon had been designed at the time. Some of these Pokémon were kept into the final release largely unchanged; some had major modifications; others went completely unused. 16 of the unused Pokémon were related to the original 151 [[Generation I]] Pokémon, and two of the unused Pokémon were related to [[Generation II]] Pokémon which made it into the final release. | |||
Many of the 151 [[Generation I]] Pokémon still used their sprites from Pokémon Blue as placeholder sprites during this time. Several Pokémon would have also gained either an evolution or a [[Baby Pokémon|pre-evolution]]. Certain scrapped Pokémon correspond to, and may have inspired, later-generation Pokémon such as {{p|Leafeon}} or {{p|Lickilicky}}. | |||
<!--I do plan to add notes on Pokémon that had drastic changes along with Pokémon that were dropped but this is just a placeholder for the time being. Any Pokémon pages that wind up being made should link to here. Pokémon that only got minor changes to their appearance should only have their changes noted on the respective Pokémon's page in their trivia section. Thank you! - Frozen Fennec--> | |||
Many new Pokémon that were unused in the demo had placeholder base stats, which were all 50. | |||
===List of new Pokémon=== | |||
{| class=roundy style="margin:auto; border: 2px solid #{{silver color dark}}; background: #{{silver color dark}}" | |||
! style="{{roundytl|5px}}; background: #{{gold color light}}" | Ndex | |||
! style="background: #{{gold color light}}" | Sprite | |||
! style="background: #{{gold color light}}" | Pokémon | |||
! style="{{roundytr|5px}}; background: #{{gold color light}}" colspan="2" | Type | |||
{{demodex|Happa|152|Plant|1|Grass}} | |||
{{demodex|Hanamogura|153|Plant|1|Grass}} | |||
{{demodex|Hanaryū|154|Plant|1|Grass}} | |||
{{demodex|Honōguma|155|Rhydon|1|Fire}} | |||
{{demodex|Borubeā|156|Rhydon|1|Fire}} | |||
{{demodex|Dainabea|157|Rhydon|1|Fire}} | |||
{{demodex|Kurusu|158|Aquatic|1|Water}} | |||
{{demodex|Akua|159|Aquatic|1|Water}} | |||
{{demodex|Akueria|160|Aquatic|1|Water}} | |||
{{demodex|Hōhō|161|Bird|1|Flying}} | |||
{{demodex|Bōbō|162|Bird|1|Flying}} | |||
{{demodex|Pachimē|163|Animal|1|Electric}} | |||
{{demodex|Mokoko|164|Animal|1|Electric}} | |||
{{demodex|Denryū|165|Rhydon|1|Electric}} | |||
{{demodex|Mikon|166|Animal|1|Water}} | |||
{{demodex|Monja|167|Plant|1|Grass}} | |||
{{demodex|Jaranra|168|Plant|1|Grass}} | |||
{{demodex|Hanēi|169|Fish|2|Water|Flying}} | |||
{{demodex|Pukū|170|Fish|1|Water}} | |||
{{demodex|Shibirefugu|171|Fish|1|Water}} | |||
{{demodex|Pichū|172|Pikachu|1|Electric}} | |||
{{demodex|Py|173|Clefairy|1|Normal}} | |||
{{demodex|Pupurin|174|Jigglypuff|1|Normal}} | |||
{{demodex|Mizūo|175|Rhydon|1|Water}} | |||
{{demodex|Neiti|176|Bird|2|Flying|Psychic}} | |||
{{demodex|Neitio|177|Bird|2|Flying|Psychic}} | |||
{{demodex|Gyopin|178|Fish|1|Water}} | |||
{{demodex|Mariru|179|Jigglypuff|1|Water}} | |||
{{demodex|Manbō1|180|Fish|1|Water}} | |||
{{demodex|Ikari|181|Fish|2|Water|Steel}} | |||
{{demodex|Gurotesu|182|Fish|2|Water|Steel}} | |||
{{demodex|Ekushingu|183|Zubat|2|Poison|Flying}} | |||
{{demodex|Para|184|Bug|1|Bug}} | |||
{{demodex|Kokumo|185|Bug|2|Bug|Poison}} | |||
{{demodex|Tsūheddo|186|Bug|2|Bug|Poison}} | |||
{{demodex|Yoroidori|187|Bird|2|Flying|Steel}} | |||
{{demodex|Animon|188|Amorphous|1|Normal}} | |||
{{demodex|Hināzu|189|Bird|2|Normal|Flying}} | |||
{{demodex|Sanī|190|Plant|2|Grass|Psychic}} | |||
{{demodex|Paon|191|Quadruped|1|Ground}} | |||
{{demodex|Donfan|192|Quadruped|1|Ground}} | |||
{{demodex|Tsuinzu|193|Gengar|2|Dark|Normal}} | |||
{{demodex|Kirinriki|194|Animal|2|Dark|Normal}} | |||
{{demodex|Peintā|195|Human|1|Normal}} | |||
{{demodex|Kōnya|196|Animal|1|Normal}} | |||
{{demodex|Rinrin|197|Animal|1|Dark}} | |||
{{demodex|Berurun|198|Animal|1|Dark}} | |||
{{demodex|Nyorotono|199|Poliwag|1|Water}} | |||
{{demodex|Yadokingu|200|Rhydon|2|Water|Psychic}} | |||
{{demodex|Annōn|201|Unown|1|Normal}} | |||
{{demodex|Rediba|202|Bug|2|Bug|Flying}} | |||
{{demodex|Mitsuboshi|203|Bug|2|Bug|Flying}} | |||
{{demodex|Puchikōn|204|Quadruped|1|Normal}} | |||
{{demodex|Ēfi|205|Animal|1|Psychic}} | |||
{{demodex|Burakkī|206|Animal|1|Poison}} | |||
{{demodex|Tāban|207|Animal|1|Water}} | |||
{{demodex|Betobebī|208|Amorphous|1|Poison}} | |||
{{demodex|Teppouo|209|Fish|1|Water}} | |||
{{demodex|Okutan|210|Fish|1|Water}} | |||
{{demodex|Gongu|211|Wrestler|1|Fighting}} | |||
{{demodex|Kapoerā|212|Wrestler|1|Fighting}} | |||
{{demodex|Pudi|213|Animal|1|Fire}} | |||
{{demodex|Haneko|214|Plant|2|Grass|Flying}} | |||
{{demodex|Poponeko|215|Plant|2|Grass|Flying}} | |||
{{demodex|Wataneko|216|Plant|2|Grass|Flying}} | |||
{{demodex|Baririna|217|Human|1|Normal}} | |||
{{demodex|Rippu|218|Human|1|Ice}} | |||
{{demodex|Erebebī|219|Human|1|Electric}} | |||
{{demodex|Bubyi|220|Human|1|Fire}} | |||
{{demodex|Kireihana|221|Plant|2|Grass|Poison}} | |||
{{demodex|Tsubomitto|222|Plant|2|Grass|Poison}} | |||
{{demodex|Mirutanku|223|Quadruped|1|Normal}} | |||
{{demodex|Bomushikā|224|Aquatic|2|Water|Fire}} | |||
{{demodex|Gifuto|225|Clefairy|2|Water|Ice}} | |||
{{demodex|Kotora|226|Animal|1|Electric}} | |||
{{demodex|Raitora|227|Animal|1|Electric}} | |||
{{demodex|Madāmu|228|Bird|2|Normal|Flying}} | |||
{{demodex|Norowara|229|Gengar|1|Ghost}} | |||
{{demodex|Kyonpan|230|Gengar|1|Ghost}} | |||
{{demodex|Yamikarasu|231|Animal|2|Dark|Flying}} | |||
{{demodex|Happī|232|Rhydon|1|Normal}} | |||
{{demodex|Shizāsu|233|Bird|2|Bug|Flying}} | |||
{{demodex|Purakkusu|234|Bug|1|Bug}} | |||
{{demodex|Debiru|235|Animal|1|Fire}} | |||
{{demodex|Herugā|236|Animal|1|Fire}} | |||
{{demodex|Urufuman|237|Rhydon|1|Ice}} | |||
{{demodex|Wāurufu|238|Rhydon|1|Ice}} | |||
{{demodex|Porigon2|239|Artificial|1|Normal}} | |||
{{demodex|Namēru|240|Rhydon|1|Normal}} | |||
{{demodex|Haganēru|241|Snake|2|Steel|Ground}} | |||
{{demodex|Kingudora|242|Aquatic|2|Dragon|Water}} | |||
{{demodex|Rai|243|Animal|1|Electric}} | |||
{{demodex|En|244|Animal|1|Fire}} | |||
{{demodex|Sui|245|Animal|1|Water}} | |||
{{demodex|Nyūra|246|Animal|1|Dark}} | |||
{{demodex|Houou|247|Bird|1|Flying}} | |||
{{demodex|Togepī|248|Clefairy|1|Normal}} | |||
{{demodex|Bulu|249|Clefairy|1|Psychic}} | |||
{{demodex|Teiru|250|Animal|1|Normal}} | |||
{{demodex|Rīfi|251|Animal|1|Grass}} | |||
|} | |||
[[ | ===Special entry animations=== | ||
{{p|Pikachu}} and Sanī used the special "stars" animation, which would be later used for [[Shiny Pokémon]]. However, this demo lacked a special animation linked to Shininess.<ref>[https://tcrf.net/Proto:Pokémon_Gold_and_Silver/Spaceworld_1997_Demo/Pokémon#Shinies Pokémon Gold and Silver/Spaceworld 1997 Demo/Pokémon → Shinies | The Cutting Room Floor]</ref> | |||
Hōhō used a special "fade-in" animation, which remains in the final games, but is unused. | |||
There was also a special "wave" animation, which was unused even in the demo. | |||
===Shiny Pokémon=== | |||
[[Shiny Pokémon]] had much different mechanics than in the final games. Instead of exact DV requirements (Defense, Speed and Special DVs at 10, and Attack DV of 2, 3, 6, 7, 10, 11, 14 or 15), all Shiny Pokémon had DVs of 10 or higher for all stats other than HP, which translates to Shininess odds of 81/4096, or ~1.977%. Shiny Pokémon had no special star animation when sent out, although that animation is implemented in-game. For some reason, it only applies to non-Shiny {{p|Pikachu}} and Sanī. | |||
== | Due to technical limitations caused by the Super Game Boy's hardware, each color palette also had an assigned Shiny palette. Thus, all Pokémon with a given color palette also had the same Shiny palette. | ||
{| class="roundy" style="text-align: center; border: 2px solid #{{silver color dark}}; background: #{{silver color dark}}" | |||
{{ | |- style="background: #{{gold color light}}" | ||
! style="{{roundytl|5px}} | Color | |||
! colspan=4 | Standard palette | |||
! colspan=4 style="{{roundytr|5px}} | Shiny palette | |||
|- | |||
| style="background-color: #fff" | Green | |||
| style="background-color: #E7E7E7; color: #000000;" | #E7E7E7 | |||
| style="background-color: #A7D787; color: #000000;" | #A7D787 | |||
| style="background-color: #4FA75F; color: #000000;" | #4FA75F | |||
| style="background-color: #272727; color: #FFFFFF;" | #272727 | |||
| style="background-color: #E7E7E7; color: #000000;" | #E7E7E7 | |||
| style="background-color: #BFAF87; color: #000000;" | #BFAF87 | |||
| style="background-color: #676757; color: #000000;" | #676757 | |||
| style="background-color: #272727; color: #FFFFFF;" | #272727 | |||
|- | |||
| style="background-color: #fff" | Orange | |||
| style="background-color: #E7E7E7; color: #000000;" | #E7E7E7 | |||
| style="background-color: #FFA757; color: #000000;" | #FFA757 | |||
| style="background-color: #D75737; color: #000000;" | #D75737 | |||
| style="background-color: #272727; color: #FFFFFF;" | #272727 | |||
| style="background-color: #E7E7E7; color: #000000;" | #E7E7E7 | |||
| style="background-color: #B77F87; color: #000000;" | #B77F87 | |||
| style="background-color: #8F172F; color: #000000;" | #8F172F | |||
| style="background-color: #272727; color: #FFFFFF;" | #272727 | |||
|- | |||
| style="background-color: #fff" | Cyan | |||
| style="background-color: #E7E7E7; color: #000000;" | #E7E7E7 | |||
| style="background-color: #AFCFEF; color: #000000;" | #AFCFEF | |||
| style="background-color: #779FCF; color: #000000;" | #779FCF | |||
| style="background-color: #272727; color: #FFFFFF;" | #272727 | |||
| style="background-color: #E7E7E7; color: #000000;" | #E7E7E7 | |||
| style="background-color: #7FA7A7; color: #000000;" | #7FA7A7 | |||
| style="background-color: #2F8787; color: #000000;" | #2F8787 | |||
| style="background-color: #272727; color: #FFFFFF;" | #272727 | |||
|- | |||
| style="background-color: #fff" | Brown | |||
| style="background-color: #E7E7E7; color: #000000;" | #E7E7E7 | |||
| style="background-color: #E7A77F; color: #000000;" | #E7A77F | |||
| style="background-color: #AF774F; color: #000000;" | #AF774F | |||
| style="background-color: #272727; color: #FFFFFF;" | #272727 | |||
| style="background-color: #E7E7E7; color: #000000;" | #E7E7E7 | |||
| style="background-color: #A78F97; color: #000000;" | #A78F97 | |||
| style="background-color: #976F5F; color: #000000;" | #976F5F | |||
| style="background-color: #272727; color: #FFFFFF;" | #272727 | |||
|- | |||
| style="background-color: #fff" | Yellow | |||
| style="background-color: #E7E7E7; color: #000000;" | #E7E7E7 | |||
| style="background-color: #FFE777; color: #000000;" | #FFE777 | |||
| style="background-color: #D7A707; color: #000000;" | #D7A707 | |||
| style="background-color: #272727; color: #FFFFFF;" | #272727 | |||
| style="background-color: #E7E7E7; color: #000000;" | #E7E7E7 | |||
| style="background-color: #D7BF87; color: #000000;" | #D7BF87 | |||
| style="background-color: #EF774F; color: #000000;" | #EF774F | |||
| style="background-color: #272727; color: #FFFFFF;" | #272727 | |||
|- | |||
| style="background-color: #fff" | Blue | |||
| style="background-color: #E7E7E7; color: #000000;" | #E7E7E7 | |||
| style="background-color: #97A7DF; color: #000000;" | #97A7DF | |||
| style="background-color: #5F7FBF; color: #000000;" | #5F7FBF | |||
| style="background-color: #272727; color: #FFFFFF;" | #272727 | |||
| style="background-color: #E7E7E7; color: #000000;" | #E7E7E7 | |||
| style="background-color: #8797AF; color: #000000;" | #8797AF | |||
| style="background-color: #576797; color: #000000;" | #576797 | |||
| style="background-color: #272727; color: #FFFFFF;" | #272727 | |||
|- | |||
| style="background-color: #fff" | Purple | |||
| style="background-color: #E7E7E7; color: #000000;" | #E7E7E7 | |||
| style="background-color: #DFB7C7; color: #000000;" | #DFB7C7 | |||
| style="background-color: #AF7FBF; color: #000000;" | #AF7FBF | |||
| style="background-color: #272727; color: #FFFFFF;" | #272727 | |||
| style="background-color: #E7E7E7; color: #000000;" | #E7E7E7 | |||
| style="background-color: #BF7F9F; color: #000000;" | #BF7F9F | |||
| style="background-color: #772767; color: #000000;" | #772767 | |||
| style="background-color: #272727; color: #FFFFFF;" | #272727 | |||
|- | |||
| style="background-color: #fff" | Human | |||
| style="background-color: #E7E7E7; color: #000000;" | #E7E7E7 | |||
| style="background-color: #F7B78F; color: #000000;" | #F7B78F | |||
| style="background-color: #87779F; color: #000000;" | #87779F | |||
| style="background-color: #272727; color: #FFFFFF;" | #272727 | |||
| style="background-color: #E7E7E7; color: #000000;" | #E7E7E7 | |||
| style="background-color: #BF9F6F; color: #000000;" | #BF9F6F | |||
| style="background-color: #77678F; color: #000000;" | #77678F | |||
| style="background-color: #272727; color: #FFFFFF;" | #272727 | |||
|- | |||
| style="background-color: #fff" | Faded | |||
| style="background-color: #E7E7E7; color: #000000;" | #E7E7E7 | |||
| style="background-color: #D7AFB7; color: #000000;" | #D7AFB7 | |||
| style="background-color: #7F7F97; color: #000000;" | #7F7F97 | |||
| style="background-color: #272727; color: #FFFFFF;" | #272727 | |||
| style="background-color: #E7E7E7; color: #000000;" | #E7E7E7 | |||
| style="background-color: #979797; color: #000000;" | #979797 | |||
| style="background-color: #575757; color: #000000;" | #575757 | |||
| style="background-color: #272727; color: #FFFFFF;" | #272727 | |||
|- | |||
| style="background-color: #fff; {{roundybl|5px}}" | Pink | |||
| style="background-color: #E7E7E7; color: #000000;" | #E7E7E7 | |||
| style="background-color: #F7B7C7; color: #000000;" | #F7B7C7 | |||
| style="background-color: #E77FAF; color: #000000;" | #E77FAF | |||
| style="background-color: #272727; color: #FFFFFF;" | #272727 | |||
| style="background-color: #E7E7E7; color: #000000;" | #E7E7E7 | |||
| style="background-color: #AFCFEF; color: #000000;" | #AFCFEF | |||
| style="background-color: #F7B7C7; color: #000000;" | #F7B7C7 | |||
| style="background-color: #272727; color: #FFFFFF; {{roundybr|5px}}" | #272727 | |||
|} | |||
== | ==Trainer Classes== | ||
The | {{incomplete|needs=Every Trainer Class found in the demo.}} | ||
In the demo, the majority of trainer classes present would go on to be unused or have drastic character redesigns when compared to the final game. In this build, the [[Gym Leader]] "classes" work just like in [[Generation I]], with each entry only being the character's name. In the [[Pokémon Gold and Silver|final release]] they're all just known as ''Gym Leader,'' with their name added after it. | |||
{| style="margin:auto; text-align:center; background: #{{gold color light}}; {{roundy|10px}}; border: 3px solid #{{silver color}};" | |||
|- | |||
! Trainer Classes | |||
|- | |||
| | |||
{| border="1" style="border: 1px solid #{{gold color light}}; border-collapse: collapse; background: white; margin:auto;" cellspacing="1" cellpadding="2" | |||
|- style="background:#{{silver color light}};" | |||
! Trainer # (Hex) | |||
! Class (Demo) | |||
! Class (Final) | |||
! Overworld (Demo) | |||
! Overworld (Final) | |||
! Battle (Demo) | |||
! Battle (Final) | |||
! Notes | |||
|- | |||
|01 | |||
|ハヤト<br>Hayato | |||
|ジムリーダー<br>Gym Leader | |||
|[[File:Hayato-1 SW97 II OD.png]][[File:Hayato-2 SW97 II OD.png]][[File:Hayato-3 SW97 II OD.png]] | |||
|[[File:Falkner II OD.png]] | |||
|[[File:Spr GS SW97 Hayato.png]] | |||
|[[File:Spr GS Falkner.png]] | |||
|The first Gym Leader, [[Falkner]], has a different design. Leader of [[Pokémon Gold and Silver Spaceworld '97 demo/Locations|Old's]] Gym. | |||
|- | |||
|02 | |||
|アカネ<br>Akane | |||
|ジムリーダー<br>Gym Leader | |||
|[[File:Tsukushi-1 SW97 II OD.png]][[File:Tsukushi-2 SW97 II OD.png]][[File:Tsukushi-3 SW97 II OD.png]] | |||
|[[File:Whitney II OD.png]] | |||
|[[File:Spr RG Bug Catcher.png]] | |||
|[[File:Spr GS Whitney.png]] | |||
|The second Gym Leader, [[Whitney]], uses a placeholder sprite and reuses a copy of Bugsy's overworld sprites, though Whitney also is listed as the second Gym Leader internally in the final. [[Pokémon Gold and Silver Spaceworld '97 demo/Locations|West]]'s Gym has [[Bugsy]] as the leader, meaning he may have already been decided as the second leader at an earlier point. It is unknown where she would have been battled, though a female Gym Leader can be found in [[Pokémon Gold and Silver Spaceworld '97 demo/Locations|High-Tech]]'s Gym. | |||
|- | |||
|03 | |||
|ツクシ<br>Tsukushi | |||
|ジムリーダー<br>Gym Leader | |||
|[[File:Tsukushi-1 SW97 II OD.png]][[File:Tsukushi-2 SW97 II OD.png]][[File:Tsukushi-3 SW97 II OD.png]] | |||
|[[File:Bugsy II OD.png]] | |||
|[[File:Spr GS SW97 Tsukushi.png]] | |||
|[[File:Spr GS Bugsy.png]] | |||
|The third Gym Leader, [[Bugsy]], has a different design. Can be found in [[Pokémon Gold and Silver Spaceworld '97 demo/Locations|West]]'s Gym. | |||
|- | |||
|04 | |||
|エノキ<br>Enoki | |||
|ジムリーダー<br>Gym Leader | |||
|[[File:Enoki-1 SW97 II OD.png]][[File:Enoki-2 SW97 II OD.png]][[File:Enoki-3 SW97 II OD.png]] | |||
|[[File:Morty II OD.png]] | |||
|[[File:Spr GS SW97 Enoki.png]] | |||
|[[File:Spr GS Morty.png]] | |||
|The fourth Gym Leader, [[Morty]], has a different design. Overworld sprites depict him with a ponytail, though this is never used in the demo. It is unknown where he would have been battled, though the [[Pokémon Gold and Silver Spaceworld '97 demo/Locations|Birdon]] Gym features pitfalls much like Morty's in the final game and is also the fourth city with a Gym, suggesting that he may have still been the fourth leader. '''Enoki''' was the name given to Morty in [[Ken Sugimori]]'s early conceptual sketches for the characters.<ref>https://web.archive.org/web/20230201102400/https://twitter.com/SUPER_32X/status/566790273804419073</ref> It seems to originate from the Japanese name of the {{wp|Celtis sinensis|Chinese hackberry}}, often referenced in folklore surrounding the ghostly light {{wp|Kitsunebi}}, a kind of Will-o'-the-wisp. | |||
|- | |||
|05 | |||
|オケラ<br>Okera | |||
|ジムリーダー<br>Gym Leader | |||
|[[File:Mikan-1 SW97 II OD.png]][[File:Mikan-2 SW97 II OD.png]][[File:Mikan-3 SW97 II OD.png]]<br>[[File:Mikan-4 SW97 II OD.png]][[File:Mikan-5 SW97 II OD.png]][[File:Mikan-6 SW97 II OD.png]] | |||
|'''N/A''' | |||
|[[File:Spr RG Jr Trainer M.png]] | |||
|'''N/A''' | |||
|The fifth Gym Leader, seemingly related to [[Pryce]]. Uses a placeholder sprite and reuses a copy of Jasmine's overworld sprites. The name '''Okera''' was Pryce's name early in development,<ref>https://twitter.com/xdanieldzd/status/1253849097062285313</ref> with this class sharing the same ID of Pryce in the final game. It is unknown where he would have been battled, though [[Pokémon Gold and Silver Spaceworld '97 demo/Locations|Newtype]] would be the next Gym after [[Pokémon Gold and Silver Spaceworld '97 demo/Locations|Birdon]] and contains a male leader. | |||
|- | |||
|06 | |||
|ミカン<br>Mikan | |||
|ジムリーダー<br>Gym Leader | |||
|[[File:Mikan-1 SW97 II OD.png]][[File:Mikan-2 SW97 II OD.png]][[File:Mikan-3 SW97 II OD.png]]<br>[[File:Mikan-4 SW97 II OD.png]][[File:Mikan-5 SW97 II OD.png]][[File:Mikan-6 SW97 II OD.png]] | |||
|[[File:Jasmine II OD.png]] | |||
|[[File:Spr GS SW97 Mikan.png]] | |||
|[[File:Spr GS Jasmine.png]] | |||
|The sixth Gym Leader, [[Jasmine]], has a different design. Her overworld sprites go unused in the demo, so it is unknown where she would have been battled, since the gym in [[Pokémon Gold and Silver Spaceworld '97 demo/Locations|Blue Forest]] appeared to be a Ghost gym. It may suggest that Jasmine was originally a Ghost-type leader, or that the map was based on an even earlier arrangement of leaders. | |||
|- | |||
|07 | |||
|ブルー<br>Blue | |||
|ジムリーダー<br>Gym Leader | |||
| | |||
|'''N/A''' | |||
|[[File:Spr RG PokéManiac.png]] | |||
|'''N/A''' | |||
|The seventh Gym Leader, seemingly [[Red]]. Uses a placeholder sprite, with an overworld sprite of Red being in the [[Pokémon Gold and Silver Spaceworld '97 demo/Locations|Kanto]] Gym. '''ブルー''' is the default name for the player in [[Pokémon Blue|Blue]]. This does not refer to the rival character [[Blue]], who is known as '''Green''' in Japan. It is unknown where he would have been battled, though the aforementioned [[Pokémon Gold and Silver Spaceworld '97 demo/Locations|Kanto]] Gym appears to be most likely, a role ironically fulfilled by the rival character [[Blue]] in the final game. | |||
|- | |||
|08 | |||
|ガマ<br>Gama | |||
|ジムリーダー<br>Gym Leader | |||
| | |||
|'''N/A''' | |||
|[[File:Spr RG Super Nerd.png]] | |||
|'''N/A''' | |||
|The eighth Gym Leader, uses a placeholder sprite. '''Gama''' may come from the Japanese name of the Common Cattail of the genus Typha, which is named after {{wp|Typhon}}—a serpentine giant in Greek mythology. It is unknown where they would have been battled, though due to their placement as the final Gym Leader, this may be an early iteration of [[Clair]], who uses Pokémon that fit a similar description in the final game, such as [[Dragonair]] and [[Gyarados]]. | |||
|- | |||
|} | |||
|} | |||
==Maps== | ==Maps== | ||
{{main|Pokémon Gold and Silver demo/Locations}} | [[File:Johto Town Map GS Demo.png|thumb|Demo map of Johto]] | ||
Although only {{DL|Pokémon Gold and Silver demo/Locations|Silent Hill}} and the route and forest leading from it to {{DL|Pokémon Gold and Silver demo/Locations|Old City}} are accessible in the demo, many other locations are programmed into the game. | {{main|Pokémon Gold and Silver Spaceworld '97 demo/Locations}} | ||
Although only {{DL|Pokémon Gold and Silver demo/Locations|Silent Hill}} and the route and forest leading from it to {{DL|Pokémon Gold and Silver demo/Locations|Old City}} are accessible in the demo, many other locations are programmed into the game. However, the inaccessible locations lack collision and warp data. | |||
The final map of [[Johto]] shares little resemblance to the | The final map of [[Johto]] shares little resemblance to the region present in the demo, which was based on the entirety of Japan, with [[Kanto]] included as a large city within it. Apart from Kanto and a prototype of the [[Ruins of Alph]], none of the areas from the final game appear in the demo; however, some maps bear similarities. | ||
<!--More will be added here in time but for now, this is a placeholder.--> | <!--More will be added here in time but for now, this is a placeholder.--> | ||
{{-}} | |||
==Mini-games== | ==Mini-games== | ||
| Line 417: | Line 786: | ||
===Title screen=== | ===Title screen=== | ||
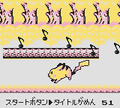
A hidden mini-game involving {{p|Pikachu}} can be played if the game is left idle at the title screen for an extended period of time. The player tries to avoid obstacles and collect musical notes while catching up to {{p|Jigglypuff}}. The game ends once Pikachu catches up to Jigglypuff and returns to the title screen. | [[File:GoldDemoTitle alternate.png|thumb|Alternate title screen]] | ||
A hidden mini-game involving {{p|Pikachu}} can be played if the game is left idle at the title screen for an extended period of time. The player tries to avoid obstacles and collect musical notes while catching up to {{p|Jigglypuff}}. The game ends once Pikachu catches up to Jigglypuff and returns to the title screen. After playing, the title screen will have musical notes flying across the screen, rather than fire. | |||
===Picross=== | ===Picross=== | ||
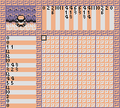
| Line 432: | Line 802: | ||
===Slide puzzle=== | ===Slide puzzle=== | ||
The last mini-game is a 15-tile {{wp|slide puzzle}} game where the player has to try rearranging the tiles to reveal who the Pokémon is. | The last mini-game is a 15-tile {{wp|slide puzzle}} game where the player has to try rearranging the tiles to reveal who the Pokémon is. | ||
===Gallery=== | |||
<gallery> | |||
File:GS demo minigame.png|Title screen mini-game | |||
File:GS demo picross.png|Picross | |||
File:GS demo poker.png|Poker | |||
File:GS demo memory.png|Memory game | |||
File:GS demo sliding.png|Slide puzzle | |||
</gallery> | |||
==Items== | ==Items== | ||
{{main|Pokémon Gold and Silver demo/Items}} | {{main|Pokémon Gold and Silver Spaceworld '97 demo/Items}} | ||
With the introduction of [[held item]]s, many new items and Key | With the introduction of [[held item]]s, many new items and [[Key Item]]s were added that would be cut, have slight changes in how they worked, or be scrapped altogether. | ||
==References== | ==References== | ||
<references/> | |||
{{-}} | {{-}} | ||
{{beta|gold|silver}}<br> | {{beta|gold|silver}} | ||
{{Demo Games}}<br> | |||
{{Project Games notice}} | {{Project Games notice}} | ||
[[Category:Pokémon Gold and Silver]] | [[Category:Pokémon Gold and Silver]] | ||
[[Category:Game demos]] | [[Category:Game demos]] | ||
[[Category:Game Boy games]] | [[Category:Game Boy games]] | ||
[[de:Pokémon Gold und Silber (Vorabversion)/Space World 1997]] | |||
Latest revision as of 02:10, 10 March 2024
| Pokémon Gold demo | |
|---|---|
 Title screen of the Pokémon Gold demo | |
| Pokémon Silver demo | |
 Title screen of the Pokémon Silver demo | |
Basic info
| |
| Platform: | Game Boy (enhanced for the Super Game Boy) |
| Category: | RPG demo |
| Players: | 1 player |
| Connectivity: | None |
| Developer: | Game Freak |
| Publisher: | Nintendo/The Pokémon Company |
| Part of: | Generation II |
Ratings
| |
| CERO: | N/A |
| ESRB: | N/A |
| ACB: | N/A |
| OFLC: | N/A |
| PEGI: | N/A |
| GRAC: | N/A |
| GSRR: | N/A |
Release dates
| |
| Japan: | November 21, 1997 |
| North America: | N/A |
| Australia: | N/A |
| Europe: | N/A |
| South Korea: | N/A |
| Hong Kong: | N/A |
| Taiwan: | N/A |
Websites
| |
| Japanese: | Space World |
| English: | N/A |
The Pokémon Gold and Silver Spaceworld '97 demo is an early build of the games Pokémon Gold and Silver that was shown at Nintendo Space World '97 from November 21 to 23, 1997. At the time, the final game was estimated to be about 80% complete and was set to be released for the original Game Boy—the Game Boy Color would not be announced until late March of the following year.[1][2] However, due to a variety of delays, including a complete overhaul to the game, it would not be released until late 1999.
During the two years after it was first shown at Nintendo Space World '97 until its final release in November 21, 1999, the game changed extensively from this early demo. As with the final games, the demo used the Japanese Pokémon Blue as its basis for development.
Up until 2018, little information was known about this demo, due to the majority of the game being locked off from players. Only a few photographs were taken, and most of the information known comes from testimony of attendees. On May 26, 2018, however, ROM files of both the Gold and Silver demos were anonymously posted online, including versions with debug menus, allowing players to explore data that was blocked off at Space World.
Beyond what was intended to be played appears unfinished: many Pokémon have unfinished and placeholder base stats; scripts, NPCs, and warp data is largely absent; collision data is missing; and some areas are completely missing. Nevertheless, a large amount of information can be gathered from what is present, including many redesigned or scrapped Pokémon designs, minigame easter eggs, and a completely different region.
Gameplay
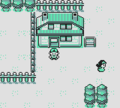
The demo begins with a monologue from Professor Oak, similar to the final game. However, there is no option to give the player a gender or a name, who is instead automatically a boy named Satoshi (サトシ)G or Shigeru (シゲル)S. Afterwards, the player begins in his room in a town called Silent Hill (サイレントヒル); this town is also named Silent Hills (サイレントヒルズ) in the Official Fan Book of Pocket Monsters (Japanese: ポケットモンスター公式ファンブック), published earlier in 1997. The player will already have 3000$ and eight Badges, although the Gym Leaders are blacked out. One of three first partner Pokémon, randomly chosen, is already placed in the player's party.
|
|
| ||||||||||||||||||||||||||||||||||||||||||||||||||||||||||||||||||||||||||||||
Silent Hill has exits to the west, north, and east; however, the northern and eastern exits are blocked to prevent the player from accessing unfinished areas. A Pokémon Center which the player can enter is present in the town, but all of its functions are unavailable. Silent Hill also has a laboratory, but it cannot be entered.
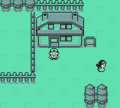
The player will then move west to Route 1, a typical route with a dungeon called Silent Hill (しずかなおか) in the middle. (Although the English translations for both サイレントヒルズ and しずかなおか are the same, they are written differently in Japanese: the town is a transliteration of the English term "Silent Hill" in katakana, and the dungeon area in Route 1 is the Japanese native translation for "Silent Hill," written in hiragana.) Silent Hill has the first Trainers to encounter in the game. After going through Silent Hill, the player reemerges on the other side of Route 1, where they will encounter another trainer. At the end of Route 1, the rival, automatically named Shigeru (シゲル), stops the player, and the demo ends. The demo will also end if the player blacks out.
Differences from the final game
The demo and the final versions of the Generation II games had numerous differences.

Morning
Day
Night


The demo was meant to be played on Game Boy hardware and was not designed to take advantage of the colors available on a Game Boy Color; as such, the colors available through the Super Game Boy were less detailed. The day and night system is present, but due to running on a Game Boy color scheme, the change in colors for the time of the day are just shades of blue. Playing the final games on a Super Game Boy yields a similar effect.
The intro lacks music, and instead of showing the Generation II first partner Pokémon at the end of the intro, Venusaur and Blastoise are shown instead; Charizard, which was present in the final game's intro, has a slightly less detailed design.
Generation I Pokédex entries were carried over as placeholders for Pokémon until new Pokédex entries were able to be written for them. All Pokédex entries for Generation II Pokémon use the same placeholder text:「はっけんされた ばかりの ポケモン げんざい ちょうさちゅう。」 In an odd occurrence, it was also possible to battle wild Pokémon twice in a row without moving from a grass panel; why this was an implemented feature at the time is unknown.
Kanto Route 1 music plays for all Routes. The music of Viridian City, Saffron City, and Pewter City plays for all cities and towns present. Trainer and wild Pokémon battles both use Pokémon Red and Green Gym Leader music. More tracks from Pokémon Red and Green are present for events that are not normally possible in this build.
Type chart
Several type match ups differed from the final version of the game. Notably, Normal and Dark would be super effective against Dark types, while Normal types would only take resisted damage from Dark-type moves, Water and Electric would have been super effective against Steel, and Poison would be resisted by the Steel-type instead of Poison-type moves doing no damage. Additionally, Poison remained super effective against Bug, something that existed in Generation I, but was changed to be neutrally effective in the final version.
In the below type chart, bold text and a different shade of the color means that the type matchup is different than in the final version.
| × | Defending type | |||||||||||||||||
|---|---|---|---|---|---|---|---|---|---|---|---|---|---|---|---|---|---|---|
| Attacking type | 1× | 1× | 1× | 1× | 1× | ½× | 1× | 0× | 1× | 1× | 1× | 1× | 1× | 1× | 1× | 1× | 2× | |
| 2× | 1× | ½× | ½× | 1× | 2× | ½× | 0× | ½× | 1× | 1× | 1× | 1× | ½× | 2× | 1× | 1× | ||
| 1× | 2× | 1× | 1× | 1× | ½× | 2× | 1× | 1× | 1× | 1× | 2× | ½× | 1× | 1× | 1× | 1× | ||
| 1× | 1× | 1× | ½× | ½× | ½× | 2× | ½× | ½× | 1× | 1× | 2× | 1× | 1× | 1× | 1× | 1× | ||
| 1× | 1× | 0× | 2× | 1× | 2× | ½× | 1× | 1× | 2× | 1× | ½× | 2× | 1× | 1× | 1× | 1× | ||
| 1× | ½× | 2× | 1× | ½× | 1× | 2× | 1× | ½× | 2× | 1× | 1× | 1× | 1× | 2× | 1× | 1× | ||
| 1× | ½× | ½× | 2× | 1× | 1× | 1× | ½× | 1× | ½× | 1× | 2× | 1× | 2× | 1× | 1× | 2× | ||
| 0× | 1× | 1× | 1× | 1× | 1× | 1× | 1× | 1× | 1× | 1× | 1× | 1× | 2× | 1× | 1× | ½× | ||
| 1× | 1× | 1× | 1× | 1× | 2× | 1× | 1× | 0× | 1× | ½× | 1× | ½× | 1× | 1× | 1× | 1× | ||
| 1× | 1× | 1× | 1× | 1× | ½× | 2× | 1× | 1× | ½× | ½× | 2× | 1× | 1× | 2× | ½× | 1× | ||
| 1× | 1× | 1× | 1× | 2× | 2× | 1× | 1× | 2× | 2× | ½× | ½× | ½× | 1× | 1× | ½× | 1× | ||
| 1× | 1× | ½× | ½× | 2× | 2× | ½× | 1× | 1× | ½× | 2× | ½× | 1× | 1× | 1× | ½× | 1× | ||
| 1× | 1× | 2× | 1× | 0× | 1× | 1× | 1× | 2× | 1× | 2× | ½× | ½× | 1× | 1× | ½× | 1× | ||
| 1× | 2× | 1× | 2× | 1× | 1× | 1× | 1× | 1× | 1× | 1× | 1× | 1× | ½× | 1× | 1× | ½× | ||
| 1× | 1× | 2× | 1× | 2× | 1× | 1× | 1× | 1× | ½× | ½× | 2× | 1× | 1× | ½× | 2× | 1× | ||
| 1× | 1× | 1× | 1× | 1× | 1× | 1× | 1× | 1× | 1× | 1× | 1× | 1× | 1× | 1× | 2× | 1× | ||
| ½× | 1× | 1× | 1× | 1× | 1× | 1× | 2× | 1× | 1× | 1× | 1× | 1× | 2× | 1× | 1× | 2× | ||
| These matchups are suitable for the Gold and Silver Spaceworld '97 demo. | ||||||||||||||||||
Demo restrictions
As this game was meant to be publicly played at Space World '97, there were several restrictions put in place to make sure the game could not lock up or be set up to not work for other players. The only options available at the start screen are "ポケモンを あそぶ" (Play Pokémon) and "せっていを かえる" (Change Settings). There is no Continue option as the player is not able to save in the demo build. The player is given a random level 8 first partner Pokémon.
The player could only heal using Potions as Pokémon Centers are not accessible in the demo. PCs are also not able to be used. Trying to visit a Pokémon Center or use a PC gives the text of "under repair" or "being adjusted." This was likely to prevent a single attendee from hogging the demo by repeatedly healing to avoid blacking out.
The player and rival's names are random pre-selected names. First partner Pokémon and wild Pokémon that appear in the demo are not able to evolve. When an NPC loses, they do not have any losing dialog, presumably to make the demo faster to play. The player can only visit Silent Hill and early routes up to the forest area. When all the player's Pokémon faint, the game returns to the title screen to ensure the next person could have a turn.
Pokémon
- Main article: Pokémon Gold and Silver Spaceworld '97 demo/Pokémon
Although only a few new Pokémon can be seen in the demo through normal gameplay, 100 new Pokémon had been designed at the time. Some of these Pokémon were kept into the final release largely unchanged; some had major modifications; others went completely unused. 16 of the unused Pokémon were related to the original 151 Generation I Pokémon, and two of the unused Pokémon were related to Generation II Pokémon which made it into the final release.
Many of the 151 Generation I Pokémon still used their sprites from Pokémon Blue as placeholder sprites during this time. Several Pokémon would have also gained either an evolution or a pre-evolution. Certain scrapped Pokémon correspond to, and may have inspired, later-generation Pokémon such as Leafeon or Lickilicky.
Many new Pokémon that were unused in the demo had placeholder base stats, which were all 50.
List of new Pokémon
| Ndex | Sprite | Pokémon | Type | |
|---|---|---|---|---|
| #152 | 
|
Happa | Grass | |
| #153 | 
|
Hanamogura | Grass | |
| #154 | 
|
Hanaryū | Grass | |
| #155 | 
|
Honōguma | Fire | |
| #156 | 
|
Borubeā | Fire | |
| #157 | 
|
Dainabea | Fire | |
| #158 | 
|
Kurusu | Water | |
| #159 | 
|
Akua | Water | |
| #160 | 
|
Akueria | Water | |
| #161 | 
|
Hōhō | Flying | |
| #162 | 
|
Bōbō | Flying | |
| #163 | 
|
Pachimē | Electric | |
| #164 | 
|
Mokoko | Electric | |
| #165 | 
|
Denryū | Electric | |
| #166 | 
|
Mikon | Water | |
| #167 | 
|
Monja | Grass | |
| #168 | 
|
Jaranra | Grass | |
| #169 | 
|
Hanēi | Water | Flying |
| #170 | 
|
Pukū | Water | |
| #171 | 
|
Shibirefugu | Water | |
| #172 | 
|
Pichū | Electric | |
| #173 | 
|
Py | Normal | |
| #174 | 
|
Pupurin | Normal | |
| #175 | 
|
Mizūo | Water | |
| #176 | 
|
Neiti | Flying | Psychic |
| #177 | 
|
Neitio | Flying | Psychic |
| #178 | 
|
Gyopin | Water | |
| #179 | 
|
Mariru | Water | |
| #180 | 
|
Manbō1 | Water | |
| #181 | 
|
Ikari | Water | Steel |
| #182 | 
|
Gurotesu | Water | Steel |
| #183 | 
|
Ekushingu | Poison | Flying |
| #184 | 
|
Para | Bug | |
| #185 | 
|
Kokumo | Bug | Poison |
| #186 | 
|
Tsūheddo | Bug | Poison |
| #187 | 
|
Yoroidori | Flying | Steel |
| #188 | 
|
Animon | Normal | |
| #189 | 
|
Hināzu | Normal | Flying |
| #190 | 
|
Sanī | Grass | Psychic |
| #191 | 
|
Paon | Ground | |
| #192 | 
|
Donfan | Ground | |
| #193 | 
|
Tsuinzu | Dark | Normal |
| #194 | 
|
Kirinriki | Dark | Normal |
| #195 | 
|
Peintā | Normal | |
| #196 | 
|
Kōnya | Normal | |
| #197 | 
|
Rinrin | Dark | |
| #198 | 
|
Berurun | Dark | |
| #199 | 
|
Nyorotono | Water | |
| #200 | 
|
Yadokingu | Water | Psychic |
| #201 | 
|
Annōn | Normal | |
| #202 | 
|
Rediba | Bug | Flying |
| #203 | 
|
Mitsuboshi | Bug | Flying |
| #204 | 
|
Puchikōn | Normal | |
| #205 | 
|
Ēfi | Psychic | |
| #206 | 
|
Burakkī | Poison | |
| #207 | 
|
Tāban | Water | |
| #208 | 
|
Betobebī | Poison | |
| #209 | 
|
Teppouo | Water | |
| #210 | 
|
Okutan | Water | |
| #211 | 
|
Gongu | Fighting | |
| #212 | 
|
Kapoerā | Fighting | |
| #213 | 
|
Pudi | Fire | |
| #214 | 
|
Haneko | Grass | Flying |
| #215 | 
|
Poponeko | Grass | Flying |
| #216 | 
|
Wataneko | Grass | Flying |
| #217 | 
|
Baririna | Normal | |
| #218 | 
|
Rippu | Ice | |
| #219 | 
|
Erebebī | Electric | |
| #220 | 
|
Bubyi | Fire | |
| #221 | 
|
Kireihana | Grass | Poison |
| #222 | 
|
Tsubomitto | Grass | Poison |
| #223 | 
|
Mirutanku | Normal | |
| #224 | 
|
Bomushikā | Water | Fire |
| #225 | 
|
Gifuto | Water | Ice |
| #226 | 
|
Kotora | Electric | |
| #227 | 
|
Raitora | Electric | |
| #228 | 
|
Madāmu | Normal | Flying |
| #229 | 
|
Norowara | Ghost | |
| #230 | 
|
Kyonpan | Ghost | |
| #231 | 
|
Yamikarasu | Dark | Flying |
| #232 | 
|
Happī | Normal | |
| #233 | 
|
Shizāsu | Bug | Flying |
| #234 | 
|
Purakkusu | Bug | |
| #235 | 
|
Debiru | Fire | |
| #236 | 
|
Herugā | Fire | |
| #237 | 
|
Urufuman | Ice | |
| #238 | 
|
Wāurufu | Ice | |
| #239 | 
|
Porigon2 | Normal | |
| #240 | 
|
Namēru | Normal | |
| #241 | 
|
Haganēru | Steel | Ground |
| #242 | 
|
Kingudora | Dragon | Water |
| #243 | 
|
Rai | Electric | |
| #244 | 
|
En | Fire | |
| #245 | 
|
Sui | Water | |
| #246 | 
|
Nyūra | Dark | |
| #247 | 
|
Houou | Flying | |
| #248 | 
|
Togepī | Normal | |
| #249 | 
|
Bulu | Psychic | |
| #250 | 
|
Teiru | Normal | |
| #251 | 
|
Rīfi | Grass | |
Special entry animations
Pikachu and Sanī used the special "stars" animation, which would be later used for Shiny Pokémon. However, this demo lacked a special animation linked to Shininess.[3]
Hōhō used a special "fade-in" animation, which remains in the final games, but is unused.
There was also a special "wave" animation, which was unused even in the demo.
Shiny Pokémon
Shiny Pokémon had much different mechanics than in the final games. Instead of exact DV requirements (Defense, Speed and Special DVs at 10, and Attack DV of 2, 3, 6, 7, 10, 11, 14 or 15), all Shiny Pokémon had DVs of 10 or higher for all stats other than HP, which translates to Shininess odds of 81/4096, or ~1.977%. Shiny Pokémon had no special star animation when sent out, although that animation is implemented in-game. For some reason, it only applies to non-Shiny Pikachu and Sanī.
Due to technical limitations caused by the Super Game Boy's hardware, each color palette also had an assigned Shiny palette. Thus, all Pokémon with a given color palette also had the same Shiny palette.
| Color | Standard palette | Shiny palette | ||||||
|---|---|---|---|---|---|---|---|---|
| Green | #E7E7E7 | #A7D787 | #4FA75F | #272727 | #E7E7E7 | #BFAF87 | #676757 | #272727 |
| Orange | #E7E7E7 | #FFA757 | #D75737 | #272727 | #E7E7E7 | #B77F87 | #8F172F | #272727 |
| Cyan | #E7E7E7 | #AFCFEF | #779FCF | #272727 | #E7E7E7 | #7FA7A7 | #2F8787 | #272727 |
| Brown | #E7E7E7 | #E7A77F | #AF774F | #272727 | #E7E7E7 | #A78F97 | #976F5F | #272727 |
| Yellow | #E7E7E7 | #FFE777 | #D7A707 | #272727 | #E7E7E7 | #D7BF87 | #EF774F | #272727 |
| Blue | #E7E7E7 | #97A7DF | #5F7FBF | #272727 | #E7E7E7 | #8797AF | #576797 | #272727 |
| Purple | #E7E7E7 | #DFB7C7 | #AF7FBF | #272727 | #E7E7E7 | #BF7F9F | #772767 | #272727 |
| Human | #E7E7E7 | #F7B78F | #87779F | #272727 | #E7E7E7 | #BF9F6F | #77678F | #272727 |
| Faded | #E7E7E7 | #D7AFB7 | #7F7F97 | #272727 | #E7E7E7 | #979797 | #575757 | #272727 |
| Pink | #E7E7E7 | #F7B7C7 | #E77FAF | #272727 | #E7E7E7 | #AFCFEF | #F7B7C7 | #272727 |
Trainer Classes

|
This article is incomplete. Please feel free to edit this article to add missing information and complete it. Reason: Every Trainer Class found in the demo. |
In the demo, the majority of trainer classes present would go on to be unused or have drastic character redesigns when compared to the final game. In this build, the Gym Leader "classes" work just like in Generation I, with each entry only being the character's name. In the final release they're all just known as Gym Leader, with their name added after it.
| Trainer Classes | ||||||||||||||||||||||||||||||||||||||||||||||||||||||||||||||||||||||||
|---|---|---|---|---|---|---|---|---|---|---|---|---|---|---|---|---|---|---|---|---|---|---|---|---|---|---|---|---|---|---|---|---|---|---|---|---|---|---|---|---|---|---|---|---|---|---|---|---|---|---|---|---|---|---|---|---|---|---|---|---|---|---|---|---|---|---|---|---|---|---|---|---|
|


Maps

- Main article: Pokémon Gold and Silver Spaceworld '97 demo/Locations
Although only Silent Hill and the route and forest leading from it to Old City are accessible in the demo, many other locations are programmed into the game. However, the inaccessible locations lack collision and warp data.
The final map of Johto shares little resemblance to the region present in the demo, which was based on the entirety of Japan, with Kanto included as a large city within it. Apart from Kanto and a prototype of the Ruins of Alph, none of the areas from the final game appear in the demo; however, some maps bear similarities.
Mini-games
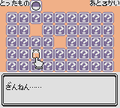
This build of the game contained far more mini-games, with a total of 5.
Title screen

A hidden mini-game involving Pikachu can be played if the game is left idle at the title screen for an extended period of time. The player tries to avoid obstacles and collect musical notes while catching up to Jigglypuff. The game ends once Pikachu catches up to Jigglypuff and returns to the title screen. After playing, the title screen will have musical notes flying across the screen, rather than fire.
Picross
A picross mini-game featuring Pokémon was present.
Some Pokémon picross puzzles would later appear in Picross NP Vol. 1. Pokémon Picross would also be announced for the Game Boy Color; however, it was ultimately cancelled. A Pokémon picross game would not be released until Pokémon Picross in December 2015.
Poker
The poker mini-game was based on the real-life game of poker but with various Pokémon on the cards instead of clubs, diamonds, hearts, and spades. It would be replaced with card flip in the final version of the game.
Memory game
A memory game is a game where the player attempts to match five pairs of cards in five turns. However, no coins are actually rewarded for any matches. This game remains unused in the final game.
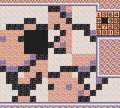
Slide puzzle
The last mini-game is a 15-tile slide puzzle game where the player has to try rearranging the tiles to reveal who the Pokémon is.
Gallery
Title screen mini-game
Picross

Poker
Memory game
Slide puzzle


Items
- Main article: Pokémon Gold and Silver Spaceworld '97 demo/Items
With the introduction of held items, many new items and Key Items were added that would be cut, have slight changes in how they worked, or be scrapped altogether.
References
- ↑ Pokemon Gold and Pokemon Silver Nintendo Space World 97 version - geocities.jp (archived; retrieved June 21, 2021)
- ↑ SPACEWORLD'97 Exhibit GAME BOY software vol.3 - nintendo.co.jp (archived; retrieved June 21, 2021)
- ↑ Pokémon Gold and Silver/Spaceworld 1997 Demo/Pokémon → Shinies | The Cutting Room Floor
- ↑ https://web.archive.org/web/20230201102400/https://twitter.com/SUPER_32X/status/566790273804419073
- ↑ https://twitter.com/xdanieldzd/status/1253849097062285313
| |||||||||||||||||||||||||||||||||||||||||||||||||||||||||||||
| This game-related article is part of Project Games, a Bulbapedia project that aims to write comprehensive articles on the Pokémon games. |