Appendix:HeartGold and SoulSilver walkthrough/Section 12: Difference between revisions
m (→Dragon's Den) |
Davidjl123 (talk | contribs) m (→Elm's Lab) |
||
| (29 intermediate revisions by 11 users not shown) | |||
| Line 1: | Line 1: | ||
{{WalkthroughNotice|HGSS}} | {{WalkthroughNotice|HGSS}} | ||
==Mt. Mortar (optional)== | |||
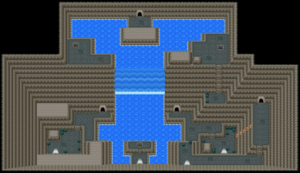
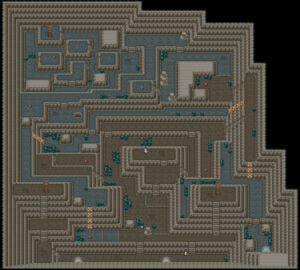
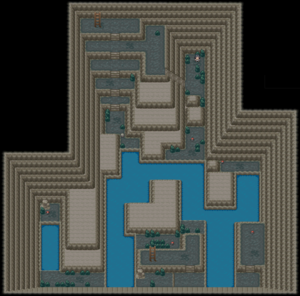
[[Mt. Mortar]] is a tall mountain that looms over northern Johto. Inside is a large network of caves, and even a giant waterfall. {{m|Surf}}, {{m|Strength}}, {{m|Waterfall}}, and {{m|Rock Climb}} are required to fully explore the area. [[Kiyo|The Karate King]] from [[Saffron City]] is training on the lowest floor; venture inside with an empty party slot to receive {{p|Tyrogue|one}} of his prized Pokémon. | |||
{| class="expandable" align="center" style="background: # | [[File:Mt Mortar Entrance HGSS.png|thumb|Mt. Mortar, Entrance]] | ||
[[File:Mt Mortar Lower Cave HGSS.png|thumb|Mt. Mortar, Lower Cave]]<!-- | |||
[[File:Mt Mortar Upper Cave HGSS.png|thumb|Mt. Mortar, Upper Cave]]--> | |||
[[File:Mt Mortar Basement HGSS.png|thumb|Mt. Mortar, Basement]] | |||
{| class="expandable" align="center" style="background: #{{locationcolor/med|cave}}; {{roundy}}; border: 5px solid #{{locationcolor/light|cave}};" | |||
|- align="center" | |||
! Trainers | |||
|- | |||
| | |||
{{trainerheader|cave}} | |||
{{catch/div|cave|Lower Cave}} | |||
{{Trainerentry|Spr HGSS Poké Maniac.png|Poké Maniac|Harrison|1088|2|034|Nidoking|♂|17|None|031|Nidoqueen|♀|17|None}} | |||
{{Trainerdiv|cave}} | |||
{{Trainerentry|Spr HGSS Super Nerd.png|Super Nerd|Markus|912|1|079|Slowpoke|♂|19|None}} | |||
{{catch/div|cave|Upper Cave}} | |||
{{Trainerentry|Spr HGSS Super Nerd.png|Super Nerd|Hugh|1872|1|117|Seadra|♂|39|None}} | |||
{{Trainerfooter|cave|II}} | |||
|} | |||
{| class="expandable" align="center" style="background: #{{locationcolor/med|cave}}; {{roundy}}; border: 5px solid #{{locationcolor/light|cave}};" | |||
|- align="center" | |- align="center" | ||
! Available Pokémon | ! Available Pokémon | ||
|- | |- | ||
| | | | ||
{{ | {| class="expandable" align="center" style="background: #{{locationcolor/med|cave}}; {{roundy}}; border: 5px solid #{{locationcolor/light|cave}};" | ||
{{ | |- align="center" | ||
{{ | ! Entrance | ||
{{ | |- | ||
{{ | | | ||
{{ | {{catch/header|cave|4}} | ||
{{ | {{catch/entryhs|041|Zubat|yes|yes|Cave|13-15|all=60%|type1=Poison|type2=Flying}} | ||
{{ | {{catch/entryhs|066|Machop|yes|yes|Cave|14|all=20%|type1=Fighting}} | ||
{{ | {{catch/entryhs|019|Rattata|yes|yes|Cave|14-16|all=19%|type1=Normal}} | ||
{{ | {{catch/entryhs|074|Geodude|yes|yes|Cave|14|all=5%|type1=Rock|type2=Ground}} | ||
{{ | {{catch/entryhs|183|Marill|yes|yes|Cave|15|all=1%|type1=Water}} | ||
{{catch/div|water|Surfing}} | |||
{{catch/entryhs|118|Goldeen|yes|yes|Surf|10-25|all=90%|type1=Water}} | |||
{{catch/entryhs|119|Seaking|yes|yes|Surf|15-25|all=10%|type1=Water}} | |||
{{catch/div|water|Fishing}} | |||
{{catch/entryhs|129|Magikarp|yes|yes|Fish Old|10|all=95%|type1=Water}} | |||
{{catch/entryhs|118|Goldeen|yes|yes|Fish Old|10|all=5%|type1=Water}} | |||
{{catch/entryhs|129|Magikarp|yes|yes|Fish Good|20|all=60%|type1=Water}} | |||
{{catch/entryhs|118|Goldeen|yes|yes|Fish Good|20|all=40%|type1=Water}} | |||
{{catch/footer|cave}} | |||
|} | |} | ||
{| class="expandable" align="center" style="background: # | {| class="expandable" align="center" style="background: #{{locationcolor/med|cave}}; {{roundy}}; border: 5px solid #{{locationcolor/light|cave}};" | ||
|- align="center" | |- align="center" | ||
! | ! Lower Cave | ||
|- | |- | ||
| | | | ||
{{ | {{catch/header|cave|4}} | ||
{{ | {{catch/entryhs|074|Geodude|yes|yes|Cave|13-15|all=50%|type1=Rock|type2=Ground}} | ||
{{catch/entryhs|066|Machop|yes|yes|Cave|13-15|all=35%|type1=Fighting}} | |||
{{ | {{catch/entryhs|019|Rattata|yes|yes|Cave|14|all=10%|type1=Normal}} | ||
{{ | {{catch/entryhs|041|Zubat|yes|yes|Cave|13-15|all=5%|type1=Poison|type2=Flying}} | ||
{{catch/footer|cave}} | |||
= | |||
| | |||
| | |||
|} | |} | ||
{| class="expandable" align="center" style="background: #{{locationcolor/med|cave}}; {{roundy}}; border: 5px solid #{{locationcolor/light|cave}};" | {| class="expandable" align="center" style="background: #{{locationcolor/med|cave}}; {{roundy}}; border: 5px solid #{{locationcolor/light|cave}};" | ||
|- align="center" | |- align="center" | ||
! | ! Upper Cave | ||
|- | |- | ||
| | | | ||
{{ | {{catch/header|cave|4}} | ||
{{ | {{catch/entryhs|067|Machoke|yes|yes|Cave|32|all=30%|type1=Fighting}} | ||
{{ | {{catch/entryhs|075|Graveler|yes|yes|Cave|31|all=30%|type1=Rock|type2=Ground}} | ||
{{ | {{catch/entryhs|074|Geodude|yes|yes|Cave|31|all=20%|type1=Rock|type2=Ground}} | ||
{{ | {{catch/entryhs|020|Raticate|yes|yes|Cave|30|all=10%|type1=Normal}} | ||
{{ | {{catch/entryhs|042|Golbat|yes|yes|Cave|30|all=5%|type1=Poison|type2=Flying}} | ||
{{ | {{catch/entryhs|066|Machop|yes|yes|Cave|28|all=5%|type1=Fighting}} | ||
{{catch/div|water|Surfing}} | |||
{{catch/entryhs|118|Goldeen|yes|yes|Surf|10-15|all=90%|type1=Water}} | |||
{{catch/entryhs|119|Seaking|yes|yes|Surf|15|all=10%|type1=Water}} | |||
{{catch/div|water|Fishing}} | |||
{{catch/entryhs|129|Magikarp|yes|yes|Fish Old|10|all=95%|type1=Water}} | |||
{{catch/entryhs|118|Goldeen|yes|yes|Fish Old|10|all=5%|type1=Water}} | |||
{{catch/entryhs|118|Goldeen|yes|yes|Fish Good|20|all=60%|type1=Water}} | |||
{{catch/entryhs|129|Magikarp|yes|yes|Fish Good|20|all=40%|type1=Water}} | |||
{{catch/footer|cave}} | |||
|} | |} | ||
{| class="expandable" align="center" style="background: #{{locationcolor/med|cave}}; {{roundy}}; border: 5px solid #{{locationcolor/light|cave}};" | {| class="expandable" align="center" style="background: #{{locationcolor/med|cave}}; {{roundy}}; border: 5px solid #{{locationcolor/light|cave}};" | ||
|- align="center" | |- align="center" | ||
! | ! Basement | ||
|- | |- | ||
| | | | ||
{{catch/header|cave|4}} | {{catch/header|cave|4}} | ||
{{catch/entryhs|041|Zubat|yes|yes|Cave|15-17|all=60%|type1=Poison|type2=Flying}} | |||
{{catch/entryhs|019|Rattata|yes|yes|Cave|16|all=20%|type1=Normal}} | |||
{{catch/entryhs|066|Machop|yes|yes|Cave|13-16|all=10%|type1=Fighting}} | |||
{{catch/entryhs|020|Raticate|yes|yes|Cave|16|all=5%|type1=Normal}} | |||
{{catch/entryhs|074|Geodude|yes|yes|Cave|13-16|all=5%|type1=Rock|type2=Ground}} | |||
{{catch/div|water|Surfing}} | {{catch/div|water|Surfing}} | ||
{{catch/entryhs| | {{catch/entryhs|118|Goldeen|yes|yes|Surf|10-15|all=90%|type1=Water}} | ||
{{catch/entryhs| | {{catch/entryhs|119|Seaking|yes|yes|Surf|15|all=10%|type1=Water}} | ||
{{catch/div|water|Fishing}} | {{catch/div|water|Fishing}} | ||
{{catch/entryhs|129|Magikarp|yes|yes|Fish Old|10|all= | {{catch/entryhs|129|Magikarp|yes|yes|Fish Old|10|all=95%|type1=Water}} | ||
{{catch/entryhs| | {{catch/entryhs|118|Goldeen|yes|yes|Fish Old|10|all=5%|type1=Water}} | ||
{{catch/entryhs| | {{catch/entryhs|118|Goldeen|yes|yes|Fish Good|20|all=60%|type1=Water}} | ||
{{catch/div|cave| | {{catch/entryhs|129|Magikarp|yes|yes|Fish Good|20|all=40%|type1=Water}} | ||
{{catch/entryhs| | {{catch/div|cave|Gift Pokémon}} | ||
{{catch/entryhs|236|Tyrogue|yes|yes|Gift|10|all={{tt|One|Gift from Kiyo after defeating him}}|type1=Fighting}} | |||
{{catch/footer|cave}} | {{catch/footer|cave}} | ||
|} | |||
|} | |} | ||
{| class="expandable" align="center" style="background: #{{locationcolor/med|cave}}; {{roundy}}; border: 5px solid #{{locationcolor/light|cave}};" | {| class="expandable" align="center" style="background: #{{locationcolor/med|cave}}; {{roundy}}; border: 5px solid #{{locationcolor/light|cave}};" | ||
|- align="center" | |- align="center" | ||
! Items | ! Items | ||
|- | |||
| | |||
{| class="expandable" align="center" style="background: #{{locationcolor/med|cave}}; {{roundy}}; border: 5px solid #{{locationcolor/light|cave}};" | |||
|- align="center" | |||
! Entrance | |||
|- | |||
| | |||
{{itlisth|cave}} | |||
{{itemlist|Hyper Potion|On a stalagmite near the western entrance ''(hidden)''|HG=yes|SS=yes}} | |||
{{itemlist|Ether|West side above the waterfall, accessed via Lower Cave|HG=yes|SS=yes}} | |||
{{itemlist|Revive|East side above the waterfall, accessed via Lower Cave|HG=yes|SS=yes|display=[[Revive]]}} | |||
{{itlistfoot|cave}} | |||
|} | |||
{| class="expandable" align="center" style="background: #{{locationcolor/med|cave}}; {{roundy}}; border: 5px solid #{{locationcolor/light|cave}};" | |||
|- align="center" | |||
! Lower Cave | |||
|- | |||
| | |||
{{itlisth|cave}} | |||
{{itemlist|Max Repel|North of the movable boulder ''(hidden)'', (requires {{m|Strength}})|HG=yes|SS=yes}} | |||
{{itemlist|Max Potion|In a group of stalagmites, north of Super Nerd Markus (requires {{m|Strength}})|HG=yes|SS=yes}} | |||
{{itemlist|Ultra Ball|West of Super Nerd Markus (requires {{m|Strength}})|HG=yes|SS=yes|display=[[Ultra Ball]]}} | |||
{{itemlist|Escape Rope|East of Super Nerd Markus (requires {{m|Strength}})|HG=yes|SS=yes}} | |||
{{itemlist|Nugget|Northeast corner, south of the ledge (requires {{m|Strength}})|HG=yes|SS=yes|display=[[Nugget]]}} | |||
{{itemlist|Iron|Northwest corner, accessed via Upper Cave (requires {{m|Surf}}, {{m|Waterfall}})|HG=yes|SS=yes}} | |||
{{itemlist|Ether|On a hill in the northwest corner, accessed via Upper Cave ''(hidden)'', (requires {{m|Surf}}, {{m|Waterfall}})|HG=yes|SS=yes}} | |||
{{itemlist|Iron Ball|On the north-central hill, accessed via Upper Cave (requires {{m|Surf}}, {{m|Waterfall}})|HG=yes|SS=yes}} | |||
{{Itemlist|Max Revive|West of the ladder down to B1F and Karate King Kiyo (requires {{m|Surf}} and {{m|Waterfall}})|HG=yes|SS=yes}} | |||
{{itlistfoot|cave}} | |||
|} | |||
{| class="expandable" align="center" style="background: #{{locationcolor/med|cave}}; {{roundy}}; border: 5px solid #{{locationcolor/light|cave}};" | |||
|- align="center" | |||
! Upper Cave | |||
|- | |||
| | |||
{{itlisth|cave}} | |||
{{catch/div|water|Requires {{color2|000|Surf (move)|Surf}}, {{color2|000|Waterfall (move)|Waterfall}}}} | |||
{{itemlist|Rare Candy|Southwest corner, across a pool of water|HG=yes|SS=yes}} | |||
{{itemlist|Hyper Potion|Southeast, in a wall south of the Max Potion ''(hidden)''|HG=yes|SS=yes}} | |||
{{itemlist|Max Potion|On the southeast platform|HG=yes|SS=yes}} | |||
{{itemlist|Full Restore|On a stalagmite, on the edge of the east-central lake ''(hidden)''|HG=yes|SS=yes}} | |||
{{itemlist|HP Up|On a large rock near the center, southeast of TM40 ''(hidden)''|HG=yes|SS=yes}} | |||
{{itemlist|TM Flying|On the center platform, northeast of Super Nerd Hugh|HG=yes|SS=yes|display={{TM|40|Aerial Ace}}}} | |||
{{itemlist|Escape Rope|On the northeast platform|HG=yes|SS=yes}} | |||
{{itemlist|Dragon Scale|On the northwest platform|HG=yes|SS=yes}} | |||
{{itemlist|Elixir|Near the ladder in the northwest area|HG=yes|SS=yes}} | |||
{{itemlist|Full Heal|On a stalagmite, near the northwest ladder ''(hidden)''|HG=yes|SS=yes}} | |||
{{itlistfoot|cave}} | |||
|} | |||
{| class="expandable" align="center" style="background: #{{locationcolor/med|cave}}; {{roundy}}; border: 5px solid #{{locationcolor/light|cave}};" | |||
|- align="center" | |||
! Basement | |||
|- | |- | ||
| | | | ||
{{itlisth|cave}} | {{itlisth|cave}} | ||
{{itemlist|Revive|On a rock, | {{itemlist|Max Revive|On a rock, atop the stairway near Black Belt Kiyo; accessed via Upper Cave ''(hidden)''|HG=yes|SS=yes}} | ||
{{itemlist| | {{catch/div|water|Requires {{color2|000|Surf (move)|Surf}}}} | ||
{{itemlist|Max | {{itemlist|Full Restore|On the platform in the southeast corner|HG=yes|SS=yes}} | ||
{{itemlist| | {{itemlist|Max Ether|Northeast edge of the water|HG=yes|SS=yes}} | ||
{{itemlist|Hyper Potion|North-northeast edge of the water|HG=yes|SS=yes}} | |||
{{itemlist|PP Up|North of the ladder to 1F|HG=yes|SS=yes}} | |||
{{itemlist| | {{itemlist|Ultra Ball|On the wall, south of the smaller lake ''(hidden)''|HG=yes|SS=yes}} | ||
{{itemlist| | {{itemlist|Carbos|North of the smaller lake|HG=yes|SS=yes}} | ||
{{itlistfoot|cave}} | {{itlistfoot|cave}} | ||
|} | |||
|} | |} | ||
====West, East Entrances==== | |||
=====Entrance===== | |||
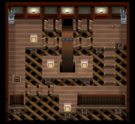
Both the west and east entrances lead behind the waterfall to the Lower Cave. A hidden [[Hyper Potion]] can be found near the west entrance. | |||
=====Lower Cave===== | |||
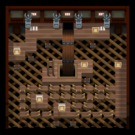
There are two items that can be obtained before exploring most of the Lower Cave. The ladder atop the stairway to the west leads to an [[Ether]]. The ladder atop the stairway to the east, near Poké Maniac Harrison, leads to a [[Revive]]. | |||
Northwest of Poké Maniac Harrison is a boulder; move it aside to reach a hidden [[Max Repel]] and continue north. A dead-end to the west leads to an [[Ultra Ball]], and a [[Max Potion]] can be found among a group of stalagmites to the east. Turn east, then south to fight Super Nerd Markus and reach an [[Escape Rope]]. Climb the large stairway to the upper level on the room's east side. Collect the [[Nugget]] to the north. | |||
====Center Entrance==== | |||
=====Entrance===== | |||
Climb down the ladder near the center entrance to the Basement. | |||
=====Basement===== | |||
Surf east to the southeast corner to reach a [[Full Restore]]. Swim northeast to get a [[Max Ether]], then west for a [[Hyper Potion]]. There is a boulder farther to the west, but the narrow pathway prevents northward travel. Surf southward and pick up the [[PP Up]] near the ladder. Cross the water to the southwest corner, and inspect the wall to find a hidden [[Ultra Ball]]. Surf north for a [[Carbos]], then jump the ledge to the southeast and climb the ladder back to the Entrance. | |||
=====Entrance===== | |||
Surf north and use {{m|Waterfall}} to scale the cascade, and enter the doorway to the Upper Cave. | |||
=====Upper Cave===== | |||
Surf west to reach a [[Rare Candy]] in the southwest corner. Head back east, past the platform with Super Nerd Hugh, and swim north across the nearest pool of water. Grab the [[Max Potion]] from the platform, and surf to the southeast corner. Head north across the next two pools, the second of which has a [[Full Restore]] hidden on its north shore. Go west, jump the ledge, and head west to the wall. Swim north across the water and jump the ledge to reach a platform with {{TM|40|Aerial Ace}}. Loop back around to the north, and continue eastward. Surf across another pool, and pick up the [[Escape Rope]] from the northeast platform. Cross the northeast pool, then jump the two north-central ledges to collect a [[Dragon Scale]]. Jump the third ledge and go west for an [[Elixir]], then cross the northwest pool to the ladder. | |||
=====Lower Cave===== | |||
Navigate around the small platforms to get an [[Iron]] and a hidden [[Ether]]. Go east, then south for an [[Iron Ball]], then follow the platform to the southwest. Grab the [[Max Revive]], and climb down the ladder. | |||
==== | =====Basement===== | ||
Walk down the nearest stairway and turn east. Check the lone rock for a hidden [[Max Revive]], and take the large stairway down to the northeastern-most area. The [[Kiyo|Karate King]] of {{ci|Saffron}}'s [[Fighting Dojo]] is training here, and gladly accepts your challenge. | |||
{| style="margin: auto;" | {| style="margin: auto;" | ||
| | | | ||
{{Party | {{Party|color={{fighting color}}|bordercolor={{fighting color dark}}|headcolor={{fighting color light}} | ||
| | |sprite=Spr HGSS_Black Belt.png | ||
| | |prize={{pdollar}}816 | ||
| | |class=Black Belt|name={{color2|000000|Kiyo}} | ||
|game=HGSS|location= | |game=HGSS|location=Mt. Mortar | ||
|pokemon=2 | |||
|pokemon= | |||
|pokemon1={{Pokémon/4|game=HeartGold | |pokemon1={{Pokémon/4|game=HeartGold | ||
|ndex= | |ndex=106|pokemon=Hitmonlee | ||
|type1= | |type1=Fighting | ||
|level= | |level=34|gender=male | ||
|ability= | |ability=Reckless | ||
|move1= | |move1=Focus Energy|move1type=Normal|move1cat=Status | ||
|move2= | |move2=Mind Reader|move2type=Normal|move2cat=Status | ||
|move3= | |move3=Hi Jump Kick|move3type=Fighting|move3cat=Physical | ||
|move4= | |move4=Feint|move4type=Normal|move4cat=Physical}} | ||
|pokemon2={{Pokémon/4|game= | |pokemon2={{Pokémon/4|game=HeartGold | ||
|ndex= | |ndex=107|pokemon=Hitmonchan | ||
|type1= | |type1=Fighting | ||
|level= | |level=34|gender=male | ||
|ability= | |ability=Iron Fist | ||
|move1= | |move1=Vacuum Wave|move1type=Fighting|move1cat=Special | ||
|move2= | |move2=ThunderPunch|move2type=Electric|move2cat=Physical | ||
|move3= | |move3=Ice Punch|move3type=Ice|move3cat=Physical | ||
|move4= | |move4=Fire Punch|move4type=Fire|move4cat=Physical}} | ||
}} | |||
|} | |||
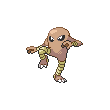
| | When defeated, he rewards you with a {{p|Tyrogue}}, a rare {{type|Fighting}} Pokémon that can evolve into either {{p|Hitmonlee}}, {{p|Hitmonchan}}, or {{p|Hitmontop}} beginning at level 20. | ||
| | |||
{| style="margin: auto;" | |||
| | |||
{{Pokémon/4|game=HeartGold | |||
|ndex=236|pokemon=Tyrogue | |||
|type1=Fighting | |||
|level=10|gender=male | |||
|ability=Guts|ability2=Steadfast | |||
|move1=Tackle|move1type=Normal|move1cat=Physical | |||
| | |move2=Helping Hand|move2type=Normal|move2cat=Status | ||
|move3=Fake Out|move3type=Normal|move3cat=Physical | |||
|move4=Foresight|move4type=Normal|move4cat=Status | |||
|ndex= | |||
|type1= | |||
|level= | |||
|ability= | |||
|move1= | |||
|move2= | |||
|move3= | |||
|move4= | |||
}} | }} | ||
|} | |} | ||
== | ==New Bark Town== | ||
===Elm's Lab=== | |||
{| class="expandable" align="center" style="background: #187D5F; {{roundy}}; border: 5px solid #60C0A8;" | |||
{| class="expandable" align="center" style="background: # | |||
|- align="center" | |- align="center" | ||
! | ! Items | ||
|- | |- | ||
| | | | ||
{{ | {{itlisth|road}} | ||
{{ | {{Itemlist|Everstone|Gift from Professor Elm when showing him the [[Mystery Egg]] {{p|Togepi}}|HG=yes|SS=yes}} | ||
{{Itemlist|Master Ball|Gift from Professor Elm after earning the eight [[Johto]] [[Badge]]s|HG=yes|SS=yes}} | |||
{{itlistfoot|road}} | |||
{{ | |||
{{ | |||
{{ | |||
|} | |} | ||
{| | Inside {{prof|Elm}}'s Lab, Lyra/Ethan is impressed that you have already earned eight badges. Elm tells you that his research is going great, thanks to you. To show his appreciation, he hands out the [[Master Ball]], a Poké Ball guaranteed to catch any Pokémon, which is normally given only to noted Pokémon researchers. If you hatched the [[Mystery Egg]], then this is also a good time to receive an [[Everstone]]. | ||
Elm also mentions that a group of [[Kimono Girls]] was looking for you. The group is waiting at the Ecruteak Dance Theater. | |||
==Ecruteak City== | |||
===Ecruteak Dance Theater=== | |||
As you arrive at the [[Ecruteak City]] Dance Theater, Silver is just leaving, still agonizing over his defeat by the [[Kimono Girls]]. Inside, you are welcomed by Zuki, the Kimono Girl you met in [[Violet City]]. She claims that in order to persuade {{p|Ho-Oh}}{{sup/4|HG}} / {{p|Lugia}}{{sup/4|SS}} to return, they needed to find someone who had the right bond with Pokémon. She reveals that it was they who gave the [[Mystery Egg]] to [[Mr. Pokémon]], in the hopes that he would give it to someone who showed "true potential". However, that alone is not enough to face the legendary Pokémon, and Zuki presents an opportunity for you to prove yourself by defeating the five sisters in quick succession. | |||
First up is Zuki, from [[Violet City]], and her {{p|Umbreon}}. Second is Naoko, from [[Ilex Forest]], and her {{p|Espeon}}. Third is Miki, from the Dance Theater, and her {{p|Flareon}}. Fourth is Sayo, from [[Ice Path]], and her {{p|Jolteon}}. The final sister is Kuni, from [[Goldenrod Tunnel]], and her {{p|Vaporeon}}. | |||
{| class="expandable" style="margin: auto; background: #{{locationcolor/med|building}}; {{roundy}}; border: 5px solid #{{locationcolor/light|building}};" | |||
|- align="center" | |- align="center" | ||
! | ! Kimono Girls | ||
|- | |- | ||
| | | | ||
{{ | {{Party|color={{johto color}}|bordercolor={{johto color dark}}|headcolor={{johto color light}} | ||
{{ | |sprite=Spr HGSS Kimono Girl.png | ||
{{ | |prize={{pdollar}}4560 | ||
|class=Kimono Girl|name=Zuki | |||
{{ | |game=HGSS|location=Ecruteak City | ||
{{ | |pokemon=1 | ||
{{ | |pokemon1={{Pokémon/4|game=HeartGold | ||
{{ | |ndex=197|pokemon=Umbreon | ||
|type1=Dark | |||
{{ | |level=38|gender=male | ||
{{ | |ability=Synchronize | ||
{{ | |move1=Dark Pulse|move1type=Dark|move1cat=Special | ||
|move2=Shadow Ball|move2type=Ghost|move2cat=Special | |||
|move3=Confuse Ray|move3type=Ghost|move3cat=Status | |||
{{ | |move4=Last Resort|move4type=Normal|move4cat=Physical}} | ||
{{ | }} | ||
{{ | |||
{{Party|color={{johto color}}|bordercolor={{johto color dark}}|headcolor={{johto color light}} | |||
|sprite=Spr HGSS Kimono Girl.png | |||
|prize={{pdollar}}4560 | |||
|class=Kimono Girl|name=Naoko | |||
|game=HGSS|location=Ecruteak City | |||
|pokemon=1 | |||
|pokemon1={{Pokémon/4|game=HeartGold | |||
|ndex=196|pokemon=Espeon | |||
|type1=Psychic | |||
|level=38|gender=male | |||
|ability=Synchronize | |||
|move1=Psychic|move1type=Psychic|move1cat=Special | |||
|move2=Swift|move2type=Normal|move2cat=Special | |||
|move3=Psych Up|move3type=Normal|move3cat=Status | |||
|move4=Last Resort|move4type=Normal|move4cat=Physical}} | |||
}} | |||
{{Party|color={{johto color}}|bordercolor={{johto color dark}}|headcolor={{johto color light}} | |||
|sprite=Spr HGSS Kimono Girl.png | |||
|prize={{pdollar}}4560 | |||
|class=Kimono Girl|name=Miki | |||
|game=HGSS|location=Ecruteak City | |||
|pokemon=1 | |||
|pokemon1={{Pokémon/4|game=HeartGold | |||
|ndex=136|pokemon=Flareon | |||
|type1=Fire | |||
|level=38|gender=male | |||
|ability=Flash Fire | |||
|move1=Fire Blast|move1type=Fire|move1cat=Special | |||
|move2=Quick Attack|move2type=Normal|move2cat=Physical | |||
|move3=Will-O-Wisp|move3type=Fire|move3cat=Status | |||
|move4=Last Resort|move4type=Normal|move4cat=Physical}} | |||
}} | |||
{{Party|color={{johto color}}|bordercolor={{johto color dark}}|headcolor={{johto color light}} | |||
|sprite=Spr HGSS Kimono Girl.png | |||
|prize={{pdollar}}4560 | |||
|class=Kimono Girl|name={{color2|000000|Sakura|Sayo}} | |||
|game=HGSS|location=Ecruteak City | |||
|pokemon=1 | |||
|pokemon1={{Pokémon/4|game=HeartGold | |||
|ndex=135|pokemon=Jolteon | |||
|type1=Electric | |||
|level=38|gender=male | |||
|ability=Volt Absorb | |||
|move1=Thunderbolt|move1type=Electric|move1cat=Special | |||
|move2=Double Team|move2type=Normal|move2cat=Status | |||
|move3=Thunder Wave|move3type=Electric|move3cat=Status | |||
|move4=Last Resort|move4type=Normal|move4cat=Physical}} | |||
}} | |||
{{Party|color={{johto color}}|bordercolor={{johto color dark}}|headcolor={{johto color light}} | |||
|sprite=Spr HGSS Kimono Girl.png | |||
|prize={{pdollar}}4560 | |||
|class=Kimono Girl|name=Kuni | |||
|game=HGSS|location=Ecruteak City | |||
|pokemon=1 | |||
|pokemon1={{Pokémon/4|game=HeartGold | |||
|ndex=134|pokemon=Vaporeon | |||
|type1=Water | |||
|level=38|gender=male | |||
|ability=Water Absorb | |||
|move1=Surf|move1type=Water|move1cat=Special | |||
|move2=Quick Attack|move2type=Normal|move2cat=Physical | |||
|move3=Aurora Beam|move3type=Ice|move3cat=Special | |||
|move4=Last Resort|move4type=Normal|move4cat=Physical}} | |||
}} | |||
|} | |} | ||
{| class="expandable" align="center" style="background: #{{locationcolor/med| | |||
When all five sisters are defeated, Zuki gives you the [[Clear Bell]]{{sup/4|HG}} or [[Tidal Bell]]{{sup/4|SS}}. When combined with the [[Rainbow Wing]]{{sup/4|HG}} or [[Silver Wing]]{{sup/4|SS}}, the two items can be used to summon the two legendary birds. | |||
==Ho-Oh Descends to the Bell Tower{{sup/4|HG}}== | |||
Suddenly, their younger sister enters the building and claims that she just saw the shadow of a big Pokémon over the [[Bell Tower]]. The sisters run off, leaving you to follow. {{p|Ho-Oh}} will not let itself be caught easily, so be sure to stock up on useful Poké Balls, such as [[Timer Ball]]s. Repels, Escape Ropes, and Pokémon with status-inflicting moves, like {{m|Spore}} or {{m|Thunder Wave}}, are also recommended. Head north from the Dance Theater to reach the Barrier Station. Flash the Fog Badge to reach [[Bellchime Trail]]. | |||
{| class="expandable" align="center" style="background: #{{locationcolor/med|forest}}; {{roundy}}; border: 5px solid #{{locationcolor/light|forest}};" | |||
|- align="center" | |- align="center" | ||
! Items | ! Items | ||
|- | |- | ||
| | | | ||
{{ | {{Itlisth|forest}} | ||
{{ | {{Itemlist|Tiny Mushroom| | ||
* Northeast of the entrance ''(hidden)'' | |||
* East of the first TinyMushroom ''(hidden)'' | |||
* Next to the northwest corner of the Bell Tower ''(hidden)''|HG=yes|SS=yes|display=[[Tiny Mushroom|TinyMushroom]] ×3}} | |||
{{Itemlist|Big Mushroom| | |||
* North of the curve in the trail ''(hidden)'' | |||
{{ | * South of the Bell Tower ''(hidden)''|HG=yes|SS=yes|display=[[Big Mushroom]] ×2}} | ||
{{Itlistfoot|forest}} | |||
{{ | |||
|} | |} | ||
===Bell Tower=== | |||
As you approach the back of the first floor, the [[Rainbow Wing]] suddenly floats up into the air. Seeing the shimmering rainbow feather, the monk finally moves from the ladder. | |||
{| class="expandable" align="center" style="background: #{{locationcolor/med|building}}; {{roundy}}; border: 5px solid #{{locationcolor/light|building}};" | |||
{| class="expandable" align="center" style="background: #{{locationcolor/med| | |||
|- align="center" | |- align="center" | ||
! Available Pokémon | ! Available Pokémon | ||
|- | |- | ||
| | | | ||
{{catch/header|building}} | |||
{{catch/div|building|2F-10F}} | |||
{{catch/entryhs|019|Rattata|yes|yes|2F-10F|{{tt|20-24|Morning, Day}}, {{tt|22-24|Night}}|100%|100%|20%|type1=Normal}} | |||
{{catch/entryhs|092|Gastly|yes|yes|2F-10F|20-22|0%|0%|80%|type1=Ghost|type2=Poison}} | |||
{{catch/div|building|Stationary Pokémon}} | |||
{{catch/header| | {{catch/entryhs|250|Ho-Oh|yes|yes|Special|{{tt|45|HeartGold}}, {{tt|70|SoulSilver}}|all=One|type1=Fire|type2=Flying}} | ||
{{catch/ | {{catch/footer|building}} | ||
{{catch/entryhs| | |||
{{ | |||
{{ | |||
{{catch/entryhs| | |||
{{catch/div| | |||
{{catch/entryhs| | |||
{{ | |||
{{ | |||
{{catch/footer| | |||
|} | |} | ||
{| class="expandable" align="center" style="background: #{{locationcolor/med| | {| class="expandable" align="center" style="background: #{{locationcolor/med|building}}; {{roundy}}; border: 5px solid #{{locationcolor/light|building}};" | ||
|- align="center" | |- align="center" | ||
! Items | ! Items | ||
|- | |- | ||
| | | | ||
{{itlisth| | {{itlisth|building}} | ||
{{catch/div| | {{catch/div|building|3F}} | ||
{{itemlist| | {{itemlist|Full Heal|Southwest platform|HG=yes|SS=yes}} | ||
{{ | {{Itemlist|Max Potion|On the ramp obscured behind the swaying pillar ''(hidden)''|HG=yes|SS=yes}} | ||
{{ | {{catch/div|building|4F}} | ||
{{itemlist| | {{itemlist|Ultra Ball|East side series of ramps|HG=yes|SS=yes}} | ||
{{itemlist| | {{itemlist|PP Up|Near the southeast ladder|HG=yes|SS=yes}} | ||
{{itemlist| | {{itemlist|Escape Rope|Near the southwest ladder|HG=yes|SS=yes}} | ||
{{catch/div| | {{catch/div|building|5F}} | ||
{{itemlist| | {{itemlist|Rare Candy|In front of the center pillar|HG=yes|SS=yes}} | ||
{{ | {{Itemlist|Full Restore|Platform above the most southest platform ''(hidden)''|HG=yes|SS=yes}} | ||
{{ | {{catch/div|building|6F}} | ||
{{itemlist| | {{itemlist|Max Potion|Left of the center pillar|HG=yes|SS=yes}} | ||
{{itemlist|Full Heal|Northwest corner|HG=yes|SS=yes}} | |||
{{itemlist|Full Heal | {{catch/div|building|7F}} | ||
{{itemlist|Max Revive|Northeast corner|HG=yes|SS=yes}} | |||
{{catch/div| | {{catch/div|building|8F}} | ||
{{itemlist| | {{itemlist|Nugget|Southeast area, accessed by warp panel from 9F|HG=yes|SS=yes}} | ||
{{ | {{itemlist|Max Elixir|Near the center pillar, accessed by warp panel from 9F|HG=yes|SS=yes}} | ||
{{itemlist| | {{Itemlist|Carbos|Northeast side, accessed by warp panel from 9F ''(hidden)''|HG=yes|SS=yes}} | ||
{{itemlist| | {{itemlist|Full Restore|Northwest corner, accessed by warp panel from 9F|HG=yes|SS=yes}} | ||
{{ | {{catch/div|building|9F}} | ||
{{itemlist| | {{itemlist|HP Up|North side, behind the pillar|HG=yes|SS=yes}} | ||
{{ | {{itlistfoot|building}} | ||
{{itemlist| | |||
{{itlistfoot| | |||
|} | |} | ||
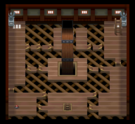
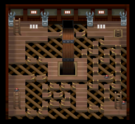
[[File:Bell Tower 3F HGSS.png|thumb|135px|left|Bell Tower, 3F]] | |||
[[File:Bell Tower 4F HGSS.png|thumb|135px|Bell Tower, 4F]] | |||
====2F==== | |||
Go south around the column and climb the ladder. | |||
====3F==== | |||
Go west to reach a [[Full Heal]]. Move around in an S-shape to reach the northeast stairs, picking up the hidden [[Max Potion]] along the way. | |||
====4F==== | |||
Jump south, then west and follow the path to find an [[Ultra Ball]]. Continue following the path to get a [[PP Up]]. Grab the [[Escape Rope]] in the southwest, then climb the northwest stairs. | |||
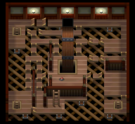
[[File:Bell Tower 5F HGSS.png|thumb|135px|left|Bell Tower, 5F]] | |||
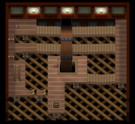
[[File:Bell Tower 6F HGSS.png|thumb|135px|Bell Tower, 6F]] | |||
====5F==== | |||
Work your way to the pillar for a [[Rare Candy]]. The ramps here keep you from advancing, so take the southeast stairs (grabbing the hidden [[Full Restore]] along the way) and backtrack through 4F. As you emerge from the stairs, jump east twice before taking the first ramp south. Next, take the first ramp west and then south. You'll come to a fork with two paths. Take the eastern ramps (closest to the pillar) to reach stairs in the south. | |||
====6F==== | |||
6F has a simple layout that serves as a transition between the ramps on the lower floors and what lies above. The next three floors use a series of warp tiles for quick navigation. First grab the [[Max Potion]], then circle around to the northwest corner to get the [[Full Heal]]. Jump the two ramps south and take the stairs up to 7F. | |||
[[File:Bell Tower 7F HGSS.png|thumb|135px|left|Bell Tower, 7F]] | |||
[[File:Bell Tower 8F HGSS.png|thumb|135px|Bell Tower, 8F]] | |||
====7F==== | |||
Step on the nearest warp tile to reach the pillar, and take the next to reach the east wall of 9F. There are two warp tiles to the south; the right one leads to the center of 8F and a [[Max Elixir]], while the left one leads to the south side of 8F and a [[Nugget]]. Backtrack to the first warp on 7F, grab the [[Max Revive]] to the northeast, and go south to take the next warp to the west side of 8F. | |||
====8F==== | |||
The next warp takes you to the north side of 9F where you can find an [[HP Up]]. Continue west and take the second warp tile on 9F, which brings you back to the east side of 8F. Pick up the [[Full Restore]] to the northwest and take one last warp to the center of 9F. | |||
[[File:Bell Tower 9F HGSS.png|thumb|135px|left|Bell Tower, 9F]] | |||
[[File:Bell Tower Summit HGSS.png|thumb|135px|Bell Tower, Rooftop]] | |||
====9F==== | |||
Climb the stairs to reach the rooftop. | |||
==== | ====Rooftop==== | ||
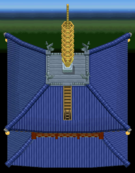
Climb the golden stairway to reach the tower's rooftop, where the [[Kimono Girls]] are waiting for you. Zuki tells you that once their mystical dance combines with the sound of the [[Clear Bell]], {{p|Ho-Oh}} will return from the great arch of the sky once more. The Clear Bell floats up above you, and the sisters begin their dance. The four other bells, each hanging from a different corner of the roof, also activate. As if drawn by the peal of the bells, Ho-Oh appears and descends to the tower. | |||
''SoulSilver players are unable to challenge Ho-Oh until after obtaining the Rainbow Wing in Pewter City. The Clear Bell is not required.'' | |||
=====Ho-Oh===== | |||
'''SAVE''' your game before trying to catch Ho-Oh. | |||
{| | Start off by using status-inflicting moves, like {{m|Spore}} or {{m|Thunder Wave}}, to wear it down. Follow up with {{t|Water}}- or {{type|Electric}} attacks to inflict double the damage. Use caution with {{type|Rock}} attacks, as Ho-Oh takes four times the normal damage from such moves. Then slowly chip away at its remaining health with {{t|Fire}}-, {{t|Grass}}-, {{t|Fighting}}-, {{t|Bug}}-, or {{type|Steel}} attacks, as moves of these types only inflict half- or quarter-damage. If you happen to knock it out and don't want to [[soft resetting|soft reset]], it will reappear once you have entered the [[Hall of Fame]]. | ||
{| style="margin: auto; background: #{{heartgold color light}}; {{roundy}}; border: 5px solid #{{heartgold color}};" | |||
|- | |- | ||
| | | | ||
{ | {| style="margin: auto; background: #{{heartgold color light}}; {{roundy}}; border: 5px solid #{{soulsilver color light}};" | ||
|- align="center" | |- align="center" | ||
! | ! HeartGold | ||
|- | |- | ||
| | |{{Pokémon/4|game=HeartGold | ||
{{ | |ndex=250|pokemon=Ho-Oh | ||
|type1=Fire|type2=Flying | |||
|level=45 | |||
|ability=Pressure | |||
|held=Sacred Ash | |||
|move1=Extrasensory|move1type=Psychic|move1cat=Special | |||
|move2=Sunny Day|move2type=Fire|move2cat=Status | |||
|move3=Fire Blast|move3type=Fire|move3cat=Special | |||
|move4=Sacred Fire|move4type=Fire|move4cat=Physical}} | |||
|} | |} | ||
|} | |} | ||
{{WalkthroughPrevNext | {{WalkthroughPrevNext | ||
| Line 523: | Line 507: | ||
|gamename=HeartGold and SoulSilver | |gamename=HeartGold and SoulSilver | ||
|prevsection=11 | |prevsection=11 | ||
|prevname= | |prevname=Blackthorn City, Route 45, Dark Cave, Route 46, Dragon's Den | ||
|nextsection=13 | |nextsection=13 | ||
|nextname= | |nextname=Whirl Islands, Ruins of Alph | ||
}} | }} | ||
Latest revision as of 21:14, 22 April 2024
These pages follow the remade Nintendo DS iteration, not Pokémon Gold and Silver. The guide for those games can be found here.
Mt. Mortar (optional)
Mt. Mortar is a tall mountain that looms over northern Johto. Inside is a large network of caves, and even a giant waterfall. Surf, Strength, Waterfall, and Rock Climb are required to fully explore the area. The Karate King from Saffron City is training on the lowest floor; venture inside with an empty party slot to receive one of his prized Pokémon.
| Trainers | |||||||||||||||||||||||||||||||||||||||||||||||||||||||||||||||||||||||||||||||||
|---|---|---|---|---|---|---|---|---|---|---|---|---|---|---|---|---|---|---|---|---|---|---|---|---|---|---|---|---|---|---|---|---|---|---|---|---|---|---|---|---|---|---|---|---|---|---|---|---|---|---|---|---|---|---|---|---|---|---|---|---|---|---|---|---|---|---|---|---|---|---|---|---|---|---|---|---|---|---|---|---|---|
| |||||||||||||||||||||||||||||||||||||||||||||||||||||||||||||||||||||||||||||||||
| Available Pokémon | |||||||||||||||||||||||||||||||||||||||||||||||||||||||||||||||||||||||||||||||||||||||||||||||||||||||||||||||||||||||||||||||||||||||||||||||||||||||||||||||||||||||||||||||||||||||||||||||||||||||||||||||||||||||||||||||||||||||||||||||||||||||||||||||||||||||||||||||||||||||||||||||||||||||||||||||||||||||||||||||||||||||||||||||||||||||||||||||||||||||||||||||||||||||||||||||||||||||||||||||||||||||||||||||||||||||||||||||||||||||||||||||||||||||||||||||||||||||||||||||||||||||||||||||||||||||||||||||||||||||||||||||||||||||||||||||||||||||||||||||||||||||||||||||||||||||||||||||||||||||||||||||||||||||||||||||||||||||||||||||||||||||||||||||||||||||||||||||||||||||||||||||||||||||||||||||||||||||||||||||||||||||||||||||||||||||||||||||||||||||||||||||||||||||||||||||||||||||||||||||||||||||||||||||||||||||||||||||||||||||||
|---|---|---|---|---|---|---|---|---|---|---|---|---|---|---|---|---|---|---|---|---|---|---|---|---|---|---|---|---|---|---|---|---|---|---|---|---|---|---|---|---|---|---|---|---|---|---|---|---|---|---|---|---|---|---|---|---|---|---|---|---|---|---|---|---|---|---|---|---|---|---|---|---|---|---|---|---|---|---|---|---|---|---|---|---|---|---|---|---|---|---|---|---|---|---|---|---|---|---|---|---|---|---|---|---|---|---|---|---|---|---|---|---|---|---|---|---|---|---|---|---|---|---|---|---|---|---|---|---|---|---|---|---|---|---|---|---|---|---|---|---|---|---|---|---|---|---|---|---|---|---|---|---|---|---|---|---|---|---|---|---|---|---|---|---|---|---|---|---|---|---|---|---|---|---|---|---|---|---|---|---|---|---|---|---|---|---|---|---|---|---|---|---|---|---|---|---|---|---|---|---|---|---|---|---|---|---|---|---|---|---|---|---|---|---|---|---|---|---|---|---|---|---|---|---|---|---|---|---|---|---|---|---|---|---|---|---|---|---|---|---|---|---|---|---|---|---|---|---|---|---|---|---|---|---|---|---|---|---|---|---|---|---|---|---|---|---|---|---|---|---|---|---|---|---|---|---|---|---|---|---|---|---|---|---|---|---|---|---|---|---|---|---|---|---|---|---|---|---|---|---|---|---|---|---|---|---|---|---|---|---|---|---|---|---|---|---|---|---|---|---|---|---|---|---|---|---|---|---|---|---|---|---|---|---|---|---|---|---|---|---|---|---|---|---|---|---|---|---|---|---|---|---|---|---|---|---|---|---|---|---|---|---|---|---|---|---|---|---|---|---|---|---|---|---|---|---|---|---|---|---|---|---|---|---|---|---|---|---|---|---|---|---|---|---|---|---|---|---|---|---|---|---|---|---|---|---|---|---|---|---|---|---|---|---|---|---|---|---|---|---|---|---|---|---|---|---|---|---|---|---|---|---|---|---|---|---|---|---|---|---|---|---|---|---|---|---|---|---|---|---|---|---|---|---|---|---|---|---|---|---|---|---|---|---|---|---|---|---|---|---|---|---|---|---|---|---|---|---|---|---|---|---|---|---|---|---|---|---|---|---|---|---|---|---|---|---|---|---|---|---|---|---|---|---|---|---|---|---|---|---|---|---|---|---|---|---|---|---|---|---|---|---|---|---|---|---|---|---|---|---|---|---|---|---|---|---|---|---|---|---|---|---|---|---|---|---|---|---|---|---|---|---|---|---|---|---|---|---|---|---|---|---|---|---|---|---|---|---|---|---|---|---|---|---|---|---|---|---|---|---|---|---|---|---|---|---|---|---|---|---|---|---|---|---|---|---|---|---|---|---|---|---|---|---|---|---|---|---|---|---|---|---|---|---|---|---|---|---|---|---|---|---|---|---|---|---|---|---|---|---|---|---|---|---|---|---|---|---|---|---|---|---|---|---|---|---|---|---|---|---|---|---|---|---|---|---|---|---|---|---|---|---|---|---|---|---|---|---|---|---|---|---|---|---|---|---|---|---|---|---|---|---|---|---|---|---|---|---|---|---|---|---|---|---|---|---|---|---|---|---|---|---|---|---|---|---|---|---|---|---|---|---|---|---|---|---|---|---|---|---|---|---|---|---|---|---|---|---|---|---|---|---|---|---|---|---|---|---|---|---|---|---|---|---|---|---|---|---|---|---|---|---|---|---|---|---|---|---|---|---|---|---|---|---|---|---|---|---|---|---|---|---|---|---|---|---|---|---|---|---|---|---|---|---|---|---|---|---|---|---|---|---|---|---|---|---|---|---|---|---|---|---|---|---|---|---|---|---|---|---|---|---|---|---|---|---|---|---|---|---|---|---|---|---|---|---|---|---|---|---|---|---|---|---|---|---|---|---|---|---|---|
| |||||||||||||||||||||||||||||||||||||||||||||||||||||||||||||||||||||||||||||||||||||||||||||||||||||||||||||||||||||||||||||||||||||||||||||||||||||||||||||||||||||||||||||||||||||||||||||||||||||||||||||||||||||||||||||||||||||||||||||||||||||||||||||||||||||||||||||||||||||||||||||||||||||||||||||||||||||||||||||||||||||||||||||||||||||||||||||||||||||||||||||||||||||||||||||||||||||||||||||||||||||||||||||||||||||||||||||||||||||||||||||||||||||||||||||||||||||||||||||||||||||||||||||||||||||||||||||||||||||||||||||||||||||||||||||||||||||||||||||||||||||||||||||||||||||||||||||||||||||||||||||||||||||||||||||||||||||||||||||||||||||||||||||||||||||||||||||||||||||||||||||||||||||||||||||||||||||||||||||||||||||||||||||||||||||||||||||||||||||||||||||||||||||||||||||||||||||||||||||||||||||||||||||||||||||||||||||||||||||||||
| Items | ||||||||||||||||||||||||||||||||||||||||||||||||||||||||||||||||||||||||||||||||||||||||||||||||||||||||||||||||||||||||||||||||||||||||||||||||||||||||||||||||||||||||||||||||||||||||||
|---|---|---|---|---|---|---|---|---|---|---|---|---|---|---|---|---|---|---|---|---|---|---|---|---|---|---|---|---|---|---|---|---|---|---|---|---|---|---|---|---|---|---|---|---|---|---|---|---|---|---|---|---|---|---|---|---|---|---|---|---|---|---|---|---|---|---|---|---|---|---|---|---|---|---|---|---|---|---|---|---|---|---|---|---|---|---|---|---|---|---|---|---|---|---|---|---|---|---|---|---|---|---|---|---|---|---|---|---|---|---|---|---|---|---|---|---|---|---|---|---|---|---|---|---|---|---|---|---|---|---|---|---|---|---|---|---|---|---|---|---|---|---|---|---|---|---|---|---|---|---|---|---|---|---|---|---|---|---|---|---|---|---|---|---|---|---|---|---|---|---|---|---|---|---|---|---|---|---|---|---|---|---|---|---|---|---|
| ||||||||||||||||||||||||||||||||||||||||||||||||||||||||||||||||||||||||||||||||||||||||||||||||||||||||||||||||||||||||||||||||||||||||||||||||||||||||||||||||||||||||||||||||||||||||||
West, East Entrances
Entrance
Both the west and east entrances lead behind the waterfall to the Lower Cave. A hidden Hyper Potion can be found near the west entrance.
Lower Cave
There are two items that can be obtained before exploring most of the Lower Cave. The ladder atop the stairway to the west leads to an Ether. The ladder atop the stairway to the east, near Poké Maniac Harrison, leads to a Revive.
Northwest of Poké Maniac Harrison is a boulder; move it aside to reach a hidden Max Repel and continue north. A dead-end to the west leads to an Ultra Ball, and a Max Potion can be found among a group of stalagmites to the east. Turn east, then south to fight Super Nerd Markus and reach an Escape Rope. Climb the large stairway to the upper level on the room's east side. Collect the Nugget to the north.
Center Entrance
Entrance
Climb down the ladder near the center entrance to the Basement.
Basement
Surf east to the southeast corner to reach a Full Restore. Swim northeast to get a Max Ether, then west for a Hyper Potion. There is a boulder farther to the west, but the narrow pathway prevents northward travel. Surf southward and pick up the PP Up near the ladder. Cross the water to the southwest corner, and inspect the wall to find a hidden Ultra Ball. Surf north for a Carbos, then jump the ledge to the southeast and climb the ladder back to the Entrance.
Entrance
Surf north and use Waterfall to scale the cascade, and enter the doorway to the Upper Cave.
Upper Cave
Surf west to reach a Rare Candy in the southwest corner. Head back east, past the platform with Super Nerd Hugh, and swim north across the nearest pool of water. Grab the Max Potion from the platform, and surf to the southeast corner. Head north across the next two pools, the second of which has a Full Restore hidden on its north shore. Go west, jump the ledge, and head west to the wall. Swim north across the water and jump the ledge to reach a platform with TM40 (Aerial Ace). Loop back around to the north, and continue eastward. Surf across another pool, and pick up the Escape Rope from the northeast platform. Cross the northeast pool, then jump the two north-central ledges to collect a Dragon Scale. Jump the third ledge and go west for an Elixir, then cross the northwest pool to the ladder.
Lower Cave
Navigate around the small platforms to get an Iron and a hidden Ether. Go east, then south for an Iron Ball, then follow the platform to the southwest. Grab the Max Revive, and climb down the ladder.
Basement
Walk down the nearest stairway and turn east. Check the lone rock for a hidden Max Revive, and take the large stairway down to the northeastern-most area. The Karate King of Saffron's Fighting Dojo is training here, and gladly accepts your challenge.
| |||||||||||||||||||||||||||||||||||||||||||||||||||||||||||||||||||||||||||||||
When defeated, he rewards you with a Tyrogue, a rare Fighting-type Pokémon that can evolve into either Hitmonlee, Hitmonchan, or Hitmontop beginning at level 20.
| ||||||||||||||||||||||||||||||||
New Bark Town
Elm's Lab
| Items | ||||||||||||||||
|---|---|---|---|---|---|---|---|---|---|---|---|---|---|---|---|---|
| ||||||||||||||||
Inside Elm's Lab, Lyra/Ethan is impressed that you have already earned eight badges. Elm tells you that his research is going great, thanks to you. To show his appreciation, he hands out the Master Ball, a Poké Ball guaranteed to catch any Pokémon, which is normally given only to noted Pokémon researchers. If you hatched the Mystery Egg, then this is also a good time to receive an Everstone.
Elm also mentions that a group of Kimono Girls was looking for you. The group is waiting at the Ecruteak Dance Theater.
Ecruteak City
Ecruteak Dance Theater
As you arrive at the Ecruteak City Dance Theater, Silver is just leaving, still agonizing over his defeat by the Kimono Girls. Inside, you are welcomed by Zuki, the Kimono Girl you met in Violet City. She claims that in order to persuade Ho-OhHG / LugiaSS to return, they needed to find someone who had the right bond with Pokémon. She reveals that it was they who gave the Mystery Egg to Mr. Pokémon, in the hopes that he would give it to someone who showed "true potential". However, that alone is not enough to face the legendary Pokémon, and Zuki presents an opportunity for you to prove yourself by defeating the five sisters in quick succession.
First up is Zuki, from Violet City, and her Umbreon. Second is Naoko, from Ilex Forest, and her Espeon. Third is Miki, from the Dance Theater, and her Flareon. Fourth is Sayo, from Ice Path, and her Jolteon. The final sister is Kuni, from Goldenrod Tunnel, and her Vaporeon.
When all five sisters are defeated, Zuki gives you the Clear BellHG or Tidal BellSS. When combined with the Rainbow WingHG or Silver WingSS, the two items can be used to summon the two legendary birds.
Ho-Oh Descends to the Bell TowerHG
Suddenly, their younger sister enters the building and claims that she just saw the shadow of a big Pokémon over the Bell Tower. The sisters run off, leaving you to follow. Ho-Oh will not let itself be caught easily, so be sure to stock up on useful Poké Balls, such as Timer Balls. Repels, Escape Ropes, and Pokémon with status-inflicting moves, like Spore or Thunder Wave, are also recommended. Head north from the Dance Theater to reach the Barrier Station. Flash the Fog Badge to reach Bellchime Trail.
| Items | ||||||||||||||||
|---|---|---|---|---|---|---|---|---|---|---|---|---|---|---|---|---|
| ||||||||||||||||
Bell Tower
As you approach the back of the first floor, the Rainbow Wing suddenly floats up into the air. Seeing the shimmering rainbow feather, the monk finally moves from the ladder.
| Available Pokémon | |||||||||||||||||||||||||||||||||||||||||||||||||||||||||||||||||||||||||||||||||||||||||||||||||||||||||||
|---|---|---|---|---|---|---|---|---|---|---|---|---|---|---|---|---|---|---|---|---|---|---|---|---|---|---|---|---|---|---|---|---|---|---|---|---|---|---|---|---|---|---|---|---|---|---|---|---|---|---|---|---|---|---|---|---|---|---|---|---|---|---|---|---|---|---|---|---|---|---|---|---|---|---|---|---|---|---|---|---|---|---|---|---|---|---|---|---|---|---|---|---|---|---|---|---|---|---|---|---|---|---|---|---|---|---|---|
| |||||||||||||||||||||||||||||||||||||||||||||||||||||||||||||||||||||||||||||||||||||||||||||||||||||||||||
| Items | |||||||||||||||||||||||||||||||||||||||||||||||||||||||||||||||||||||||||||||||||||||||||||||||||||||||||||||||||||||||||||||||||||||||||||||||||||||||||||||||||||||||||||||
|---|---|---|---|---|---|---|---|---|---|---|---|---|---|---|---|---|---|---|---|---|---|---|---|---|---|---|---|---|---|---|---|---|---|---|---|---|---|---|---|---|---|---|---|---|---|---|---|---|---|---|---|---|---|---|---|---|---|---|---|---|---|---|---|---|---|---|---|---|---|---|---|---|---|---|---|---|---|---|---|---|---|---|---|---|---|---|---|---|---|---|---|---|---|---|---|---|---|---|---|---|---|---|---|---|---|---|---|---|---|---|---|---|---|---|---|---|---|---|---|---|---|---|---|---|---|---|---|---|---|---|---|---|---|---|---|---|---|---|---|---|---|---|---|---|---|---|---|---|---|---|---|---|---|---|---|---|---|---|---|---|---|---|---|---|---|---|---|---|---|---|---|---|---|
| |||||||||||||||||||||||||||||||||||||||||||||||||||||||||||||||||||||||||||||||||||||||||||||||||||||||||||||||||||||||||||||||||||||||||||||||||||||||||||||||||||||||||||||
2F
Go south around the column and climb the ladder.
3F
Go west to reach a Full Heal. Move around in an S-shape to reach the northeast stairs, picking up the hidden Max Potion along the way.
4F
Jump south, then west and follow the path to find an Ultra Ball. Continue following the path to get a PP Up. Grab the Escape Rope in the southwest, then climb the northwest stairs.
5F
Work your way to the pillar for a Rare Candy. The ramps here keep you from advancing, so take the southeast stairs (grabbing the hidden Full Restore along the way) and backtrack through 4F. As you emerge from the stairs, jump east twice before taking the first ramp south. Next, take the first ramp west and then south. You'll come to a fork with two paths. Take the eastern ramps (closest to the pillar) to reach stairs in the south.
6F
6F has a simple layout that serves as a transition between the ramps on the lower floors and what lies above. The next three floors use a series of warp tiles for quick navigation. First grab the Max Potion, then circle around to the northwest corner to get the Full Heal. Jump the two ramps south and take the stairs up to 7F.
7F
Step on the nearest warp tile to reach the pillar, and take the next to reach the east wall of 9F. There are two warp tiles to the south; the right one leads to the center of 8F and a Max Elixir, while the left one leads to the south side of 8F and a Nugget. Backtrack to the first warp on 7F, grab the Max Revive to the northeast, and go south to take the next warp to the west side of 8F.
8F
The next warp takes you to the north side of 9F where you can find an HP Up. Continue west and take the second warp tile on 9F, which brings you back to the east side of 8F. Pick up the Full Restore to the northwest and take one last warp to the center of 9F.
9F
Climb the stairs to reach the rooftop.
Rooftop
Climb the golden stairway to reach the tower's rooftop, where the Kimono Girls are waiting for you. Zuki tells you that once their mystical dance combines with the sound of the Clear Bell, Ho-Oh will return from the great arch of the sky once more. The Clear Bell floats up above you, and the sisters begin their dance. The four other bells, each hanging from a different corner of the roof, also activate. As if drawn by the peal of the bells, Ho-Oh appears and descends to the tower.
SoulSilver players are unable to challenge Ho-Oh until after obtaining the Rainbow Wing in Pewter City. The Clear Bell is not required.
Ho-Oh
SAVE your game before trying to catch Ho-Oh.
Start off by using status-inflicting moves, like Spore or Thunder Wave, to wear it down. Follow up with Water- or Electric-type attacks to inflict double the damage. Use caution with Rock-type attacks, as Ho-Oh takes four times the normal damage from such moves. Then slowly chip away at its remaining health with Fire-, Grass-, Fighting-, Bug-, or Steel-type attacks, as moves of these types only inflict half- or quarter-damage. If you happen to knock it out and don't want to soft reset, it will reappear once you have entered the Hall of Fame.
| ||||||||||||||||||||||||||||||||||||
|
HeartGold and SoulSilver walkthrough |
|

|
This article is part of Project Walkthroughs, a Bulbapedia project that aims to write comprehensive step-by-step guides on each Pokémon game. |
