Appendix:Yellow walkthrough/Section 10: Difference between revisions
m (→Route 16) |
m (→Saffron Gym) |
||
| (33 intermediate revisions by 19 users not shown) | |||
| Line 1: | Line 1: | ||
== | {{WalkthroughNotice|Y}} | ||
[[File: | ==Saffron City== | ||
[[File:Saffron City RBY.png|thumb|Saffron City]] | |||
[[File:Silph Co 1F RBY.png|thumb|Silph Co, 1F]] | |||
[[File:Silph Co 2F RBY.png|thumb|Silph Co, 2F]] | |||
[[File:Silph Co 3F RBY.png|thumb|Silph Co, 3F]] | |||
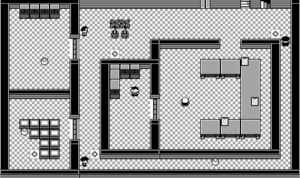
[[File:Silph Co 4F RBY.png|thumb|Silph Co, 4F]] | |||
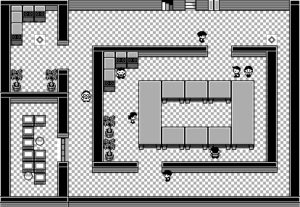
[[File:Silph Co 5F RBY.png|thumb|Silph Co, 5F]] | |||
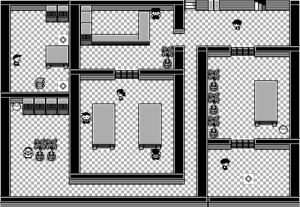
[[File:Silph Co 6F RBY.png|thumb|Silph Co, 6F]] | |||
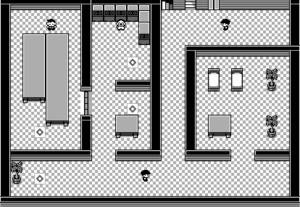
[[File:Silph Co 7F RBY.png|thumb|Silph Co, 7F]] | |||
[[File:Silph Co 8F RBY.png|thumb|Silph Co, 8F]] | |||
[[File:Silph Co 9F RBY.png|thumb|Silph Co, 9F]] | |||
[[File:Silph Co 10F RBY.png|thumb|Silph Co, 10F]] | |||
[[File:Silph Co 11F RBY.png|thumb|Silph Co, 11F]] | |||
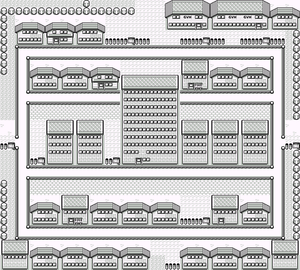
[[Saffron City]] is a sprawling metropolis located in the heart of the region between [[Cerulean City]], [[Celadon City]], [[Lavender Town]], and [[Vermilion City]]. The [[Silph Co.]] headquarters dominates the city skyline, and two Pokémon Gyms stand in the northeast district. It is the most populous city in all of [[Kanto]]. | |||
{| class="expandable" align="center" style="background: #F6D263; {{roundy}}; border: 5px solid #F9E197;" | |||
|- align="center" | |||
! Available Pokémon | |||
|- | |||
| | |||
{{Catch/header|sand|no}} | |||
{{catch/div|sand|Silph Co.}} | |||
{{catch/entry1|131|Lapras|no|no|yes|Gift|15|One|type1=water|type2=ice}} | |||
{{Catch/div|sand|Fighting Dojo}} | |||
{{Catch/entry1|106|Hitmonlee|no|no|yes|Gift|30|{{tt|One|May only choose one of the two}}|type1=Fighting}} | |||
{{Catch/entry1|107|Hitmonchan|no|no|yes|Gift|30|{{tt|One|May only choose one of the two}}|type1=Fighting}} | |||
{{catch/footer|sand}} | |||
|} | |||
{| class="expandable" align="center" style="background: #F6D263; {{roundy}}; border: 5px solid #F9E197;" | |||
|- align="center" | |||
! Items | |||
|- | |||
| | |||
{{itlisth|sand}} | |||
{{itemlist|TM Normal|Northwest house; from the {{OBP|Copycat|character}}, after giving her a [[Poké Doll]]|Y=yes|display={{TM|31|Mimic}}}} | |||
{{itemlist|Nugget|Northwest house; on the desk in the Copycat's room ''(hidden)''|Y=yes}} | |||
{{itemlist|TM Psychic|Southeast house; from Mr. Psychic in his home|Y=yes|display={{TM|29|Psychic}}}} | |||
{{Itemlist|TM Psychic|From Sabrina, after defeating her|Y=yes|display={{TM|46|Psywave}}}} | |||
{{itlistfoot|sand}} | |||
|} | |||
{| class="expandable" align="center" style="background: #{{ | |||
===Mr. Psychic's house=== | |||
The southeast house belongs to a man known as Mr. Psychic. Speak to him and he claims to know exactly why you are here, and gives you {{TM|29|Psychic}}. | |||
===Silph Co.=== | |||
The [[Silph Co]]. is the leading manufacturer of items like Poké Balls, Potions, and TMs. Their products are supplied to every Poké Mart in the region. The company has been a target of [[Team Rocket]], first for their {{key|I|Silph Scope}} prototype, and now for a top-secret development project. The Rocket Grunt posted outside the building has fallen asleep, leaving a perfect opportunity to sneak inside. The building holds eleven floors, with [[warp tile]]s allowing the workers to quickly move around. This convenience ends up acting as a maze for anyone trying to reach the top floor. | |||
{| class="expandable" align="center" style="background: #{{locationcolor/med|building}}; {{roundy}}; border: 5px solid #{{locationcolor/light|building}};" | |||
|- align="center" | |- align="center" | ||
! Trainers | ! Trainers | ||
|- | |- | ||
| | | | ||
{{trainerheader| | {| class="expandable" align="center" style="background: #{{locationcolor/med|building}}; {{roundy}}; border: 5px solid #{{locationcolor/light|building}};" | ||
{{trainerentry| | |- align="center" | ||
! 2F | |||
|- | |||
{{trainerdiv| | | | ||
{{trainerentry| | {{trainerheader|building}} | ||
{{trainerdiv| | {{trainerentry|Spr Y Rocket.png|game=1|Rocket||750|5|042|Golbat||25||041|Zubat||25||041|Zubat||25||020|Raticate||25||041|Zubat||25||}} | ||
{{trainerentry| | {{trainerdiv|building}} | ||
{{trainerentry|Spr Y Scientist.png|game=1|Scientist||1400|3|081|Magnemite||28||100|Voltorb||28||082|Magneton||28||}} | |||
{{trainerdiv|building}} | |||
{{trainerdiv| | {{trainerentry|Spr Y Rocket.png|game=1|Rocket||870|2|104|Cubone||29||041|Zubat||29||}} | ||
{{trainerentry| | {{trainerdiv|building}} | ||
{{trainerfooter| | {{trainerentry|Spr Y Scientist.png|game=1|Scientist||1300|4|088|Grimer||26||110|Weezing||26||109|Koffing||26||110|Weezing||26||}} | ||
{{trainerfooter|building|1}} | |||
|} | |} | ||
{| class="expandable" align="center" style="background: #{{ | {| class="expandable" align="center" style="background: #{{locationcolor/med|building}}; {{roundy}}; border: 5px solid #{{locationcolor/light|building}};" | ||
|- align="center" | |- align="center" | ||
! | ! 3F | ||
|- | |||
| | |||
{{trainerheader|building}} | |||
{{trainerentry|Spr Y Rocket.png|game=1|Rocket||840|3|020|Raticate||28||097|Hypno||28||020|Raticate||28||}} | |||
{{trainerdiv|building}} | |||
{{trainerentry|Spr Y Scientist.png|game=1|Scientist||1450|2|101|Electrode||29||110|Weezing||29||}} | |||
{{trainerfooter|building|1}} | |||
|} | |||
{| class="expandable" align="center" style="background: #{{locationcolor/med|building}}; {{roundy}}; border: 5px solid #{{locationcolor/light|building}};" | |||
|- align="center" | |||
! 4F | |||
|- | |||
| | |||
{{trainerheader|building}} | |||
{{trainerentry|Spr Y Rocket.png|game=1|Rocket||840|3|023|Ekans||28||041|Zubat||28||104|Cubone||28||}} | |||
{{trainerdiv|building}} | |||
{{trainerentry|Spr Y Rocket.png|game=1|Rocket||870|2|066|Machop||29||096|Drowzee||29||}} | |||
{{trainerdiv|building}} | |||
{{trainerentry|Spr Y Scientist.png|game=1|Scientist||1650|1|101|Electrode||33||}} | |||
{{trainerfooter|building|1}} | |||
|} | |||
{| class="expandable" align="center" style="background: #{{locationcolor/med|building}}; {{roundy}}; border: 5px solid #{{locationcolor/light|building}};" | |||
|- align="center" | |||
! 5F | |||
|- | |||
| | |||
{{trainerheader|building}} | |||
{{trainerentry|Spr Y Rocket.png|game=1|Rocket||990|1|097|Hypno||33| |}} | |||
{{trainerdiv|building}} | |||
{{trainerentry|Spr Y Juggler.png|game=1|Juggler||1015|2|064|Kadabra||29| |122|Mr. Mime||29||}} | |||
{{trainerdiv|building}} | |||
{{trainerentry|Spr Y Scientist.png|game=1|Scientist||1300|4|082|Magneton||26||109|Koffing||26||110|Weezing||26||081|Magnemite||26||}} | |||
{{trainerdiv|building}} | |||
{{trainerentry|Spr Y Rocket.png|game=1|Rocket||990|1|024|Arbok||33||}} | |||
{{trainerfooter|building|1}} | |||
|} | |||
{| class="expandable" align="center" style="background: #{{locationcolor/med|building}}; {{roundy}}; border: 5px solid #{{locationcolor/light|building}};" | |||
|- align="center" | |||
! 6F | |||
|- | |||
| | |||
{{trainerheader|building}} | |||
{{trainerentry|Spr Y Rocket.png|game=1|Rocket||870|2|066|Machop||29||067|Machoke||29||}} | |||
{{trainerdiv|building}} | |||
{{trainerentry|Spr Y Rocket.png|game=1|Rocket||840|3|041|Zubat||28||041|Zubat||28||042|Golbat||28||}} | |||
{{trainerdiv|building}} | |||
{{trainerentry|Spr Y Scientist.png|game=1|Scientist||1250|5|100|Voltorb||25||109|Koffing||25||082|Magneton||25||081|Magnemite||25||109|Koffing||25||}} | |||
{{trainerfooter|building|1}} | |||
|} | |||
{| class="expandable" align="center" style="background: #{{locationcolor/med|building}}; {{roundy}}; border: 5px solid #{{locationcolor/light|building}};" | |||
|- align="center" | |||
! 7F | |||
|- | |- | ||
| | | | ||
{{ | {{trainerheader|building}} | ||
{{ | {{trainerentry|Spr Y Rocket.png|game=1|Rocket||870|2|104|Cubone||29||104|Cubone||29||}} | ||
{{ | {{trainerdiv|building}} | ||
{{trainerentry|Spr Y Rocket.png|game=1|Rocket||780|4|020|Raticate||26||024|Arbok||26||109|Koffing||26||042|Golbat||26||}} | |||
{{trainerdiv|building}} | |||
{{ | {{trainerentry|Spr Y Scientist.png|game=1|Scientist||1450|2|101|Electrode||29||089|Muk||29||}} | ||
{{ | {{trainerdiv|building}} | ||
{{ | {{trainerentry|Spr Y Rocket.png|game=1|Rocket||870|2|027|Sandshrew||29||028|Sandslash||29||}} | ||
{{ | {{trainerfooter|building|1}} | ||
|} | |} | ||
{| class="expandable" align="center" style="background: #{{locationcolor/med|building}}; {{roundy}}; border: 5px solid #{{locationcolor/light|building}};" | |||
{| class="expandable" align="center" style="background: #{{ | |||
|- align="center" | |- align="center" | ||
! | ! 8F | ||
|- | |- | ||
| | | | ||
{{trainerheader| | {{trainerheader|building}} | ||
{{trainerentry| | {{trainerentry|Spr Y Rocket.png|game=1|Rocket||780|4|020|Raticate||26||041|Zubat||26||042|Golbat||26||019|Rattata||26||}} | ||
{{trainerdiv|building}} | |||
{{trainerentry|Spr Y Rocket.png|game=1|Rocket||840|3|110|Weezing||28||042|Golbat||28||109|Koffing||28||}} | |||
{{trainerdiv| | {{trainerdiv|building}} | ||
{{trainerentry| | {{trainerentry|Spr Y Scientist.png|game=1|Scientist||1450|2|088|Grimer||29||101|Electrode||29||}} | ||
{{trainerdiv| | {{trainerfooter|building|1}} | ||
{{trainerentry| | |||
{{ | |||
|} | |} | ||
{| class="expandable" align="center" style="background: #{{ | {| class="expandable" align="center" style="background: #{{locationcolor/med|building}}; {{roundy}}; border: 5px solid #{{locationcolor/light|building}};" | ||
|- align="center" | |- align="center" | ||
! | ! 9F | ||
|- | |- | ||
| | | | ||
{{ | {{trainerheader|building}} | ||
{{ | {{trainerentry|Spr Y Rocket.png|game=1|Rocket||840|3|042|Golbat||28||096|Drowzee||28||097|Hypno||28||}} | ||
{{trainerdiv|building}} | |||
{{ | {{trainerentry|Spr Y Rocket.png|game=1|Rocket||840|3|096|Drowzee||28||088|Grimer||28||066|Machop||28||}} | ||
{{trainerdiv|building}} | |||
{{ | {{trainerentry|Spr Y Scientist.png|game=1|Scientist||1400|3|100|Voltorb||28||109|Koffing||28||082|Magneton||28||}} | ||
{{ | {{trainerfooter|building|1}} | ||
{{ | |||
|} | |} | ||
{| class="expandable" align="center" style="background: #{{locationcolor/med|building}}; {{roundy}}; border: 5px solid #{{locationcolor/light|building}};" | |||
{| class="expandable" align="center" style="background: #{{ | |||
|- align="center" | |- align="center" | ||
! | ! 10F | ||
|- | |- | ||
| | | | ||
{{trainerheader| | {{trainerheader|building}} | ||
{{trainerentry| | {{trainerentry|Spr Y Scientist.png|game=1|Scientist||1450|2|081|Magnemite||29||109|Koffing||29||}} | ||
{{trainerdiv| | {{trainerdiv|building}} | ||
{{trainerentry| | {{trainerentry|Spr Y Rocket.png|game=1|Rocket||990|1|067|Machoke||33||}} | ||
{{ | {{trainerfooter|building|1}} | ||
|} | |} | ||
{| class="expandable" align="center" style="background: #{{ | {| class="expandable" align="center" style="background: #{{locationcolor/med|building}}; {{roundy}}; border: 5px solid #{{locationcolor/light|building}};" | ||
|- align="center" | |- align="center" | ||
! | ! 11F | ||
|- | |- | ||
| | | | ||
{{ | {{trainerheader|building}} | ||
{{ | {{trainerentry|Spr Y Rocket.png|game=1|Rocket||750|5|019|Rattata||25||019|Rattata||25||041|Zubat||25||019|Rattata||25||023|Ekans||25||}} | ||
{{trainerfooter|building|1}} | |||
{{ | |||
|} | |} | ||
|} | |||
{| class="expandable" align="center" style="background: #{{locationcolor/med|building}}; {{roundy}}; border: 5px solid #{{locationcolor/light|building}};" | |||
|- align="center" | |||
! Items | |||
|- | |||
| | |||
{{itlisth|building}} | |||
{{Itemlist|TM Normal|2F; from the woman in the northwest room|Y=yes|display={{TM|36|Selfdestruct}}}} | |||
{{Itemlist|Hyper Potion|3F; near the Scientist|Y=yes}} | |||
{{Itemlist|Full Heal|4F; in the northwest room|Y=yes}} | |||
{{Itemlist|Max Revive|4F; in the northwest room|Y=yes}} | |||
{{Itemlist|Escape Rope|4F; in the northwest room|Y=yes}} | |||
{{Itemlist|Card Key III|5F; in the south hallway|Y=yes|display={{ka|Card Key}}}} | |||
{{Itemlist|Protein|5F; in the northwest room (requires the {{ka|Card Key}})|Y=yes}} | |||
{{Itemlist|TM Normal|5F; in the southwest room|Y=yes|display={{TM|09|Take Down}}}} | |||
{{Itemlist|Elixir|5F; in the planter on the right ''(hidden)''|Y=yes|display=[[Elixir|Elixer]]}} | |||
{{Itemlist|HP Up|6F; in the southwest room (requires the {{ka|Card Key}})|Y=yes}} | |||
{{Itemlist|X Accuracy|6F; in the southwest room (requires the {{ka|Card Key}})|Y=yes}} | |||
{{Itemlist|TM Normal|7F; in the east-central room (requires the {{ka|Card Key}})|Y=yes|display={{TM|03|Swords Dance}}}} | |||
{{Itemlist|Calcium|7F; in the southwest room|Y=yes}} | |||
{{Itemlist|Max Potion|9F; on the bed to the left of the nurse ''(hidden)''|Y=yes}} | |||
{{Itemlist|Carbos|10F; in the southwest room|Y=yes}} | |||
{{Itemlist|Rare Candy|10F; in the southwest room|Y=yes}} | |||
{{Itemlist|TM Ground|10F; in the southwest room|Y=yes|display={{TM|26|Earthquake}}}} | |||
{{Itemlist|Master Ball|11F; from the Silph Co. president, after defeating [[Giovanni]]|Y=yes}} | |||
{{itlistfoot|building}} | |||
|} | |||
====2F==== | |||
It is not possible to open the electronic doors yet, so step on either [[warp tile]] to teleport to the eighth floor. | |||
====8F==== | |||
== | Battle the Scientist and the two Rocket Grunts, then take the elevator down to 3F. | ||
====3F==== | |||
Take the northeast warp tile back to the second floor. Speak to the woman here in the northwest room to receive {{TM|36|Selfdestruct}}, then warp back to 3F. | |||
Fight the Rocket Grunt and take the warp tile in the southwest to reach 5F; pick up the {{TM|09|Take Down}} from the southwest room before returning to 3F. | |||
Climb up the stairs to 4F. | |||
====4F==== | |||
Battle another two Rocket Grunts and climb to the fifth floor. | |||
====5F==== | |||
Fight the Rocket Grunt near the stairs and the Scientist to the west. Follow the hallway southward to reach another Rocket Grunt standing next to a warp tile. Defeat him, step on the warp tile, then warp right back. Turn eastward to find a {{ka|Card Key}}, which is used to open the building's electronic doors. Pass by the warp tile again and unlock the northwest room to reach a [[Protein]]. Take the stairs up to 6F. | |||
====6F==== | |||
Follow the western hallway past the Scientist and unlock the southwest room to get an [[HP Up]] and an [[X Accuracy]]. Climb the stairs to 7F. | |||
====7F==== | |||
Use the Card Key to unlock the east-central room and pick up {{TM|03|Swords Dance}}. Turn around and follow the central hallway to the southwest room. Battle the Scientist and grab the [[Calcium]] before taking the stairs up to 9F. | |||
====9F==== | |||
Defeat the Rocket Grunt at the south end of the central hallway, then open the door to the break room. Speak to the woman here, and she heals your Pokémon to full health as thanks for your efforts. Climb the stairs to the tenth floor. | |||
====10F==== | |||
Battle the Scientist and the Rocket Grunt, then pick up the [[Carbos]], [[Rare Candy]], and {{TM|26|Earthquake}} from the southwest room. Ride the elevator all the way down to 3F. | |||
====3F==== | |||
Use the Card Key to unlock the central room. Open the door to the west-central room beyond that, defeat the Scientist, and grab the nearby [[Hyper Potion]]. Take the warp in the central room. | |||
====7F (Northwest)==== | |||
When you reach the northwest room on the seventh floor, {{ga|Blue}} is waiting for you. | |||
=====Rival Battle 6===== | |||
{{ga|Blue}} has made some changes to his team since the previous battle in [[Pokémon Tower]]. He has swapped out his {{p|Fearow}} for a {{p|Kadabra}}, while his {{p|Shellder}}, {{p|Magnemite}}, {{p|Vulpix}}, and {{p|Eevee}} have all evolved. | |||
{{Party|color={{ | ======{{MSP/6|134|Vaporeon}} If {{p|Eevee}} evolved into {{p|Vaporeon}}:====== | ||
sprite= | {| style="margin: auto;" | ||
prize={{pdollar}} | | | ||
{{Party/Single | |||
name= | |color={{blue color}} | ||
game=Y| | |headcolor={{blue color light}} | ||
location= | |bordercolor={{green color dark}} | ||
pokemon= | |sprite=Spr Y Blue 2.png | ||
|prize={{pdollar}}2600 | |||
ndex= | |name={{color2|000|Blue (game)|Blue}} | ||
pokemon= | |game=Y | ||
|location=Silph Co. | |||
|pokemon=5}} | |||
move1=Tackle|move1type=Normal| | |{{Pokémon/1 | ||
move2= | |game=Yellow | ||
move3= | |ndex=028 | ||
move4= | |pokemon=Sandslash | ||
|level=38 | |||
ndex= | |type1=Ground | ||
pokemon= | |move1=Slash|move1type=Normal | ||
level= | |move2=Sand-Attack|move2type=Normal | ||
type1= | |move3=Poison Sting|move3type=Poison | ||
move1= | |move4=Swift|move4type=Normal}} | ||
move2= | |{{Pokémon/1 | ||
move3= | |game=Yellow | ||
move4= | |ndex=082 | ||
|pokemon=Magneton | |||
ndex= | |level=35 | ||
pokemon= | |type1=Electric | ||
level= | |move1=Tackle|move1type=Normal | ||
type1= | |move2=SonicBoom|move2type=Normal | ||
move1= | |move3=ThunderShock|move3type=Electric | ||
move2= | |move4=Supersonic|move4type=Normal}} | ||
move3= | |{{Pokémon/1 | ||
move4= | |game=Yellow | ||
|ndex=038 | |||
ndex= | |pokemon=Ninetales | ||
pokemon= | |level=37 | ||
level= | |type1=Fire | ||
type1= | |move1=Ember|move1type=Fire | ||
|move2=Tail Whip|move2type=Normal | |||
move1= | |move3=Quick Attack|move3type=Normal | ||
move2= | |move4=Roar|move4type=Normal}} | ||
move3= | {{Party/Div|color={{blue color}}}} | ||
move4= | |style="margin:auto"| | ||
}} | {{Pokémon/1 | ||
|game=Yellow | |||
|ndex=064 | |||
|pokemon=Kadabra | |||
|level=35 | |||
|type1=Psychic | |||
|move1=Confusion|move1type=Psychic | |||
|move2=Disable|move2type=Normal | |||
|move3=Psybeam|move3type=Psychic | |||
|move4=Recover|move4type=Normal}} | |||
|style="margin:auto"|{{Pokémon/1 | |||
|game=Yellow | |||
|ndex=134 | |||
|pokemon=Vaporeon | |||
|level=40 | |||
|type1=Water | |||
|move1=Water Gun|move1type=Water | |||
|move2=Sand-Attack|move2type=Normal | |||
|move3=Bite|move3type=Normal | |||
|move4=Aurora Beam|move4type=Ice}} | |||
{{Party/Footer}} | |||
|} | |} | ||
======{{MSP/6|135|Jolteon}} If {{p|Eevee}} evolved into {{p|Jolteon}}:====== | |||
{| style="margin: auto;" | |||
| | |||
{{Party/Single | |||
|color={{blue color}} | |||
|headcolor={{blue color light}} | |||
|bordercolor={{green color dark}} | |||
|sprite=Spr Y Blue 2.png | |||
|prize={{pdollar}}2600 | |||
|name={{color2|000|Blue (game)|Blue}} | |||
|game=Y | |||
|location=Silph Co. | |||
|pokemon=5}} | |||
|{{Pokémon/1 | |||
|game=Yellow | |||
|ndex=028 | |||
|pokemon=Sandslash | |||
|level=38 | |||
|type1=Ground | |||
|move1=Slash|move1type=Normal | |||
|move2=Sand-Attack|move2type=Normal | |||
|move3=Poison Sting|move3type=Poison | |||
|move4=Swift|move4type=Normal}} | |||
|{{Pokémon/1 | |||
|game=Yellow | |||
|ndex=038 | |||
|pokemon=Ninetales | |||
|level=35 | |||
|type1=Fire | |||
|move1=Ember|move1type=Fire | |||
|move2=Tail Whip|move2type=Normal | |||
|move3=Quick Attack|move3type=Normal | |||
|move4=Roar|move4type=Normal}} | |||
|{{Pokémon/1 | |||
|game=Yellow | |||
|ndex=091 | |||
|pokemon=Cloyster | |||
|level=37 | |||
|type1=Water|type2=Ice | |||
|move1=Withdraw|move1type=Water | |||
|move2=Supersonic|move2type=Normal | |||
|move3=Clamp|move3type=Water | |||
|move4=Aurora Beam|move4type=Ice}} | |||
{{Party/Div|color={{blue color}}}} | |||
|style="margin:auto"| | |||
{{Pokémon/1 | |||
|game=Yellow | |||
|ndex=064 | |||
|pokemon=Kadabra | |||
|level=35 | |||
|type1=Psychic | |||
|move1=Confusion|move1type=Psychic | |||
|move2=Disable|move2type=Normal | |||
|move3=Psybeam|move3type=Psychic | |||
|move4=Recover|move4type=Normal}} | |||
|style="margin:auto"|{{Pokémon/1 | |||
|game=Yellow | |||
|ndex=135 | |||
|pokemon=Jolteon | |||
|level=40 | |||
|type1=Electric | |||
|move1=ThunderShock|move1type=Electric | |||
|move2=Sand-Attack|move2type=Normal | |||
|move3=Double Kick|move3type=Fighting | |||
|move4=Pin Missile|move4type=Bug}} | |||
{{Party/Footer}} | |||
|} | |} | ||
======{{MSP/6|136|Flareon}} If {{p|Eevee}} evolved into {{p|Flareon}}:====== | |||
{| style="margin: auto;" | |||
| | |||
{{Party/Single | |||
|color={{blue color}} | |||
|headcolor={{blue color light}} | |||
|bordercolor={{green color dark}} | |||
|sprite=Spr Y Blue 2.png | |||
|prize={{pdollar}}2600 | |||
|name={{color2|000|Blue (game)|Blue}} | |||
|game=Y | |||
|location=Silph Co. | |||
|pokemon=5}} | |||
|{{Pokémon/1 | |||
|game=Yellow | |||
|ndex=028 | |||
|pokemon=Sandslash | |||
|level=38 | |||
|type1=Ground | |||
|move1=Slash|move1type=Normal | |||
|move2=Sand-Attack|move2type=Normal | |||
|move3=Poison Sting|move3type=Poison | |||
|move4=Swift|move4type=Normal}} | |||
|{{Pokémon/1 | |||
|game=Yellow | |||
|ndex=091 | |||
|pokemon=Cloyster | |||
|level=35 | |||
|type1=Water|type2=Ice | |||
|move1=Withdraw|move1type=Water | |||
|move2=Supersonic|move2type=Normal | |||
|move3=Clamp|move3type=Water | |||
|move4=Aurora Beam|move4type=Ice}} | |||
|{{Pokémon/1 | |||
|game=Yellow | |||
|ndex=082 | |||
|pokemon=Magneton | |||
|level=37 | |||
|type1=Electric | |||
|move1=Tackle|move1type=Normal | |||
|move2=SonicBoom|move2type=Normal | |||
|move3=ThunderShock|move3type=Electric | |||
|move4=Supersonic|move4type=Normal}} | |||
{{Party/Div|color={{blue color}}}} | |||
|style="margin:auto"|{{Pokémon/1 | |||
|game=Yellow | |||
|ndex=064 | |||
|pokemon=Kadabra | |||
|level=35 | |||
|type1=Psychic | |||
|move1=Confusion|move1type=Psychic | |||
|move2=Disable|move2type=Normal | |||
|move3=Psybeam|move3type=Psychic | |||
|move4=Recover|move4type=Normal}} | |||
|style="margin:auto"|{{Pokémon/1 | |||
|game=Yellow | |||
|ndex=136 | |||
|pokemon=Flareon | |||
|level=40 | |||
|type1=Fire | |||
|move1=Ember|move1type=Fire | |||
|move2=Sand-Attack|move2type=Normal | |||
|move3=Bite|move3type=Normal | |||
|move4=Fire Spin|move4type=Fire}} | |||
{{Party/Footer}} | |||
|} | |||
Afterward, he brags that he will be the world's most powerful Trainer before warping away. Once he leaves, speak to the nearby office worker. Realizing that you are here to save them all, he would like to give you a Pokémon. If you have room in your party, he gives you a {{p|Lapras}}. They had been keeping it in their lab, but he thinks it would be much better off with you. Take the final warp tile to the west side of 11F. | |||
== | ====11F (West)==== | ||
As soon as you move off of the warp tile, you are confronted by [[Team Rocket trio|Jessie and James]] again. They claim that their boss is in a meeting and intend to defeat you so that he will not be disturbed. | |||
{| | {| style="margin: auto;" | ||
| | | | ||
{{Party/Single | |||
| | |color=666666 | ||
| | |bordercolor=CC0000 | ||
{{ | |headcolor=CCCCCC | ||
|sprite=Spr Y Jessie James.png | |||
|prize={{Pdollar}}930 | |||
{{ | |name={{color2|000|Team Rocket trio|Rocket}} | ||
|game=Y | |||
|location=Silph Co. | |||
{{ | |pokemon=3}} | ||
|{{Pokémon/1 | |||
|game=Yellow | |||
{{ | |ndex=110 | ||
|pokemon=Weezing | |||
|level=31 | |||
{{ | |type1=Poison | ||
|move1=Tackle|move1type=Normal | |||
|move2=Smog|move2type=Poison | |||
|move3=Sludge|move3type=Poison}} | |||
|{{Pokémon/1 | |||
|game=Yellow | |||
|ndex=024 | |||
|pokemon=Arbok | |||
|level=31 | |||
|type1=Poison | |||
|move1=Bite|move1type=Normal | |||
|move2=Leer|move2type=Normal | |||
|move3=Poison Sting|move3type=Poison | |||
|move4=Glare|move4type=Normal}} | |||
|{{Pokémon/1 | |||
|game=Yellow | |||
|ndex=052 | |||
|pokemon=Meowth | |||
|level=31|type1=Normal | |||
|move1=Growl|move1type=Normal | |||
|move2=Bite|move2type=Normal | |||
|move3=Pay Day|move3type=Normal | |||
|move4=Screech|move4type=Normal}} | |||
{{Party/Footer}} | |||
|} | |} | ||
Use the Card Key to open the door and confront [[Giovanni]]. He claims to be having some important business meeting with the company president and warns you to stay out of grown-up matters before drawing you into battle. | |||
[[ | |||
=====VS Giovanni===== | |||
[[Giovanni]]'s {{p|Nidorino}}, {{p|Rhyhorn}}, and {{p|Nidoqueen}} all take serious damage from {{type|Ground}} attacks like {{m|Dig}} and {{m|Earthquake}}. The latter two are also vulnerable to {{t|Water}} moves. His {{p|Persian}} only takes super effective damage from {{t|Fighting}} attacks. | |||
{| | {| style="margin: auto;" | ||
| | | | ||
{{Party/Single | |||
| | |color=666666 | ||
| | |bordercolor=CC0000 | ||
{{ | |headcolor=CCCCCC | ||
{{ | |sprite=Spr Y Giovanni.png | ||
{{ | |prize={{pdollar}}4059 | ||
|name={{color2|000|Giovanni}} | |||
{{ | |game=Y | ||
|location=Silph Co. | |||
|pokemon=4}} | |||
|{{Pokémon/1 | |||
{{ | |game=Yellow | ||
{{ | |ndex=033 | ||
|pokemon=Nidorino | |||
|level=37 | |||
{{ | |type1=Poison | ||
|move1=Double Kick|move1type=Fighting | |||
|move2=Poison Sting|move2type=Poison | |||
|move3=Focus Energy|move3type=Normal | |||
|move4=Fury Attack|move4type=Normal}} | |||
{{ | |{{Pokémon/1 | ||
|game=Yellow | |||
|ndex=111 | |||
|pokemon=Rhyhorn | |||
|level=37|type1=Ground|type2=Rock | |||
|move1=Horn Attack|move1type=Normal | |||
|move2=Stomp|move2type=Normal | |||
|move3=Tail Whip|move3type=Normal}} | |||
{{Party/Div|color=666666}} | |||
|{{Pokémon/1 | |||
|game=Yellow | |||
|ndex=053 | |||
|pokemon=Persian | |||
|level=35 | |||
|type1=Normal | |||
|move1=Scratch|move1type=Normal | |||
|move2=Growl|move2type=Normal | |||
|move3=Bite|move3type=Normal | |||
|move4=Pay Day|move4type=Normal}} | |||
|{{Pokémon/1 | |||
|game=Yellow | |||
|ndex=031 | |||
|pokemon=Nidoqueen | |||
|level=41 | |||
|type1=Poison|type2=Ground | |||
|move1=Scratch|move1type=Normal | |||
|move2=Tail Whip|move2type=Normal | |||
|move3=Body Slam|move3type=Normal | |||
|move4=Double Kick|move4type=Fighting}} | |||
{{Party/Footer}} | |||
|} | |} | ||
=== | With [[Giovanni]] defeated, [[Team Rocket]]'s plans for [[Silph Co.]] have been thwarted. He vows that the group will never fall and promises to return. Giovanni and his underlings make their escape, while their co-conspirators also flee the building. Speak to the president, who is so grateful to you for saving Silph that he rewards you with the [[Master Ball]] prototype. This improved kind of Poké Ball has a 100% success rate, so be sure to save it for a hard-to-catch Pokémon. | ||
[[File: | |||
===Copycat's house=== | |||
Now that the Rockets have left the city, the Grunt outside the northwest house is gone. A girl inside known as the {{OBP|Copycat|character}} likes to collect [[Pokémon dolls]]. Give her a [[Poké Doll]] to receive {{TM|31|Mimic}} in return. | |||
===Fighting Dojo=== | |||
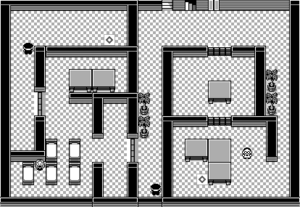
[[File:Fighting Dojo RBY.png|thumb|Fighting Dojo]] | |||
[[Saffron City]] is unique as the only city to have two Pokémon Gyms. The [[Fighting Dojo]] is located in the northeast neighborhood, next door to the [[Saffron Gym]]. The two clubs had once competed to determine which would become the city's one official Gym, and the {{t|Psychic}} Pokémon of Saffron Gym were victorious. There is no Badge to be won here, but defeat the [[Koichi|Karate Master]] to earn the choice of two rare {{type|Fighting}} Pokémon: the hard-kicking {{p|Hitmonlee}} or the piston-punching {{p|Hitmonchan}}. Use Psychic- and {{type|Flying}} attacks here for greatest effect. | |||
{| | {| align="center" | ||
|- align="center" valign="top" | |||
| | |||
{| align="center" style="background: #{{fighting color}}; {{roundy}}; border: 5px solid #{{fighting color light}};" | |||
|- align="center" | |||
! Fighting Dojo<br><br> | |||
|- | |||
| | |||
{| align="center" class="expandable" style="background: #{{fighting color}}; {{roundy}}; border: 5px solid #{{fighting color light}};" | |||
|- align="center" | |- align="center" | ||
! | ! Trainers | ||
|- | |- | ||
| | | | ||
{{ | {{trainerheader|fighting}} | ||
{{ | {{trainerentry|Spr Y Blackbelt.png|game=1|Blackbelt||775|3|066|Machop||31|None|056|Mankey||31|None|057|Primeape||31|None|}} | ||
{{trainerdiv|fighting}} | |||
{{ | {{trainerentry|Spr Y Blackbelt.png|game=1|Blackbelt||800|2|066|Machop||32|None|067|Machoke||32|None|}} | ||
{{trainerdiv|fighting}} | |||
{{ | {{trainerentry|Spr Y Blackbelt.png|game=1|Blackbelt||900|1|057|Primeape||36|None|}} | ||
{{ | {{trainerdiv|fighting}} | ||
{{ | {{trainerentry|Spr Y Blackbelt.png|game=1|Blackbelt||775|3|056|Mankey||31|None|056|Mankey||31|None|057|Primeape||31|None|}} | ||
{{trainerfooter|fighting|I}} | |||
{{ | |} | ||
{{ | |||
{{ | |||
{{ | {| style="margin: auto;" | ||
| | |||
{{ | {{Party/Single | ||
|color={{fighting color}} | |||
{{ | |bordercolor={{fighting color dark}} | ||
|headcolor={{fighting color light}} | |||
|sprite=Spr Y Blackbelt.png | |||
|prize={{PDollar}}925 | |||
|name={{color2|000|Koichi|Blackbelt}} | |||
|game=RGB | |||
|location=Fighting Dojo | |||
|pokemon=2}} | |||
|{{Pokémon/1 | |||
|game=Yellow | |||
|ndex=106 | |||
|pokemon=Hitmonlee | |||
|level=37 | |||
|type1=Fighting | |||
|move1=Double Kick|move1type=Fighting | |||
|move2=Rolling Kick|move2type=Fighting | |||
|move3=Meditate|move3type=Psychic | |||
|move4=Mega Kick|move4type=Normal}} | |||
|{{Pokémon/1 | |||
|game=Yellow | |||
|ndex=107 | |||
|pokemon=Hitmonchan | |||
|level=37 | |||
|type1=Fighting | |||
|move1=Comet Punch|move1type=Normal | |||
|move2=Mega Punch|move2type=Normal | |||
|move3=Agility|move3type=Psychic | |||
|move4=Fire Punch|move4type=Fire}} | |||
{{Party/Footer}} | |||
|} | |||
|} | |||
|} | |} | ||
===Saffron Gym=== | |||
[[File:Saffron Gym RBY.png|thumb|Saffron Gym]] | |||
{{sign|RBY|header}} | |||
{{sign|RBY|title|SAFFRON CITY POKéMON GYM<br>LEADER: SABRINA}} | |||
{{sign|RBY|The Master of<br>Psychic Pokémon!}} | |||
{{sign|RBY|footer}} | |||
The [[Saffron Gym]] specializes in {{t|Psychic}} Pokémon. Only {{t|Bug}} attacks deal super effective damage to them, but the few available Bug moves are relatively weak. Psychic Pokémon typically have low {{stat|Defense}}, so it is better to use moves that deal physical damage, like {{t|Normal}}-, {{t|Flying}}-, and {{type|Rock}} attacks. | |||
[[ | |||
The Gym uses {{DL|Saffron Gym|Generations I-IV|a series of warp tiles}} to confuse and disorient any challengers. Step on the tile near the entrance to reach the southeast room. To reach the Gym Leader by using as few warps as possible, continue by stepping on the northwest, southwest, and southwest tiles in the following rooms. This leads to the center room, where [[Sabrina]] awaits anyone up to the challenge. | |||
{| | {| align="center" | ||
|- align="center" valign="top" | |||
| | |||
{| align="center" style="background: #{{psychic color}}; {{roundy}}; border: 5px solid #{{psychic color light}};" | |||
|- align="center" | |||
! Saffron Gym<br>[[File:Marsh Badge.png|35px|The Marsh Badge]]<br><br> | |||
|- | |||
| | |||
{| align="center" class="expandable" style="background: #{{psychic color}}; {{roundy}}; border: 5px solid #{{psychic color light}};" | |||
|- align="center" | |- align="center" | ||
! | ! Trainers | ||
|- | |- | ||
| | | | ||
{{ | {{Trainerheader|Psychic}} | ||
{{ | {{Trainerentry|Spr Y Psychic.png|game=1|Psychic||330|3|079|Slowpoke||33|None|079|Slowpoke||33|None|080|Slowbro||33|None|}} | ||
{{Trainerdiv|Psychic}} | |||
{{ | {{Trainerentry|Spr Y Psychic.png|game=1|Psychic||340|2|122|Mr. Mime||34|None|064|Kadabra||34|None|}} | ||
{{Trainerdiv|Psychic}} | |||
{{ | {{Trainerentry|Spr Y Channeler.png|game=1|Channeler||1140|1|093|Haunter||38|None|}} | ||
{{ | {{Trainerdiv|Psychic}} | ||
{{ | {{Trainerentry|Spr Y Psychic.png|game=1|Psychic||380|1|080|Slowbro||38|None|}} | ||
{{ | {{Trainerdiv|Psychic}} | ||
{{Trainerentry|Spr Y Channeler.png|game=1|Channeler||1020|2|092|Gastly||34|None|093|Haunter||34|None|}} | |||
{{ | {{Trainerdiv|Psychic}} | ||
{{ | {{Trainerentry|Spr Y Channeler.png|game=1|Channeler||990|3|092|Gastly||33|None|092|Gastly||33|None|093|Haunter||33|None|}} | ||
{{Trainerdiv|Psychic}} | |||
{{ | {{Trainerentry|Spr Y Psychic.png|game=1|Psychic||310|4|064|Kadabra||31|None|079|Slowpoke||31|None|122|Mr. Mime||31|None|064|Kadabra||31|None|}} | ||
{{Trainerfooter|Psychic|1|inside}} | |||
{{ | |||
|} | |} | ||
= | {| style="margin: auto;" | ||
| | |||
{{Party/Single | |||
|color={{psychic color}} | |||
|bordercolor={{psychic color dark}} | |||
|headcolor={{psychic color light}} | |||
| | |sprite=Spr Y Sabrina.png | ||
|prize={{pdollar}}4950 | |||
| | |name={{color2|000|Sabrina}} | ||
| | |game=Y | ||
|location=Saffron Gym | |||
{{ | |pokemon=3}} | ||
|{{Pokémon/1|game=Yellow | |||
{{ | |ndex=063|pokemon=Abra | ||
|level=50 | |||
|type1=Psychic | |||
|move1=Flash|move1type=Normal}} | |||
|{{Pokémon/1|game=Yellow | |||
|ndex=064|pokemon=Kadabra | |||
{{ | |level=50 | ||
|type1=Psychic | |||
|move1=Psychic|move1type=Psychic | |||
|move2=Recover|move2type=Normal | |||
|move3=Kinesis|move3type=Psychic | |||
{{ | |move4=Psywave|move4type=Psychic}} | ||
|{{Pokémon/1|game=Yellow | |||
|ndex=065|pokemon=Alakazam | |||
|level=50 | |||
|type1=Psychic | |||
|move1=Psychic|move1type=Psychic | |||
|move2=Psywave|move2type=Psychic | |||
|move3=Reflect|move3type=Psychic | |||
|move4=Recover|move4type=Normal}} | |||
{{Party/Footer}} | |||
|} | |||
|} | |||
|} | |} | ||
After the battle, [[Sabrina]] awards you the {{badge|Marsh}}, which ensures obedience from all Pokémon up to level 70. She also gives you {{TM|46|Psywave}} as a prize. | |||
The next destination is [[Fuchsia City]] to the south. There are two paths that lead there: either take Cycling Road west of [[Celadon City]], or follow the coast south of [[Lavender Town]]. | |||
| Line 393: | Line 729: | ||
|game=Yellow | |game=Yellow | ||
|gamename=Yellow | |gamename=Yellow | ||
|prevsection=9 | |prevsection=9 | ||
|prevname= | |prevname=Celadon City, Celadon Gym, Rocket Hideout, Pokémon Tower | ||
|nextsection=11 | |nextsection=11 | ||
|nextname= | |nextname=Route 16, Route 17, Route 18, Fuchsia City, Safari Zone | ||
}} | }} | ||
Latest revision as of 20:57, 25 February 2024
These pages follow the original Game Boy iteration, not Pokémon: Let's Go, Pikachu! and Let's Go, Eevee!. The guide for those games can be found here.
Saffron City
Saffron City is a sprawling metropolis located in the heart of the region between Cerulean City, Celadon City, Lavender Town, and Vermilion City. The Silph Co. headquarters dominates the city skyline, and two Pokémon Gyms stand in the northeast district. It is the most populous city in all of Kanto.
| Available Pokémon | ||||||||||||||||||||||||||||||||||||||||||||||||||||||||||||||||||||||||||||||||||||||||||||||||||||||||
|---|---|---|---|---|---|---|---|---|---|---|---|---|---|---|---|---|---|---|---|---|---|---|---|---|---|---|---|---|---|---|---|---|---|---|---|---|---|---|---|---|---|---|---|---|---|---|---|---|---|---|---|---|---|---|---|---|---|---|---|---|---|---|---|---|---|---|---|---|---|---|---|---|---|---|---|---|---|---|---|---|---|---|---|---|---|---|---|---|---|---|---|---|---|---|---|---|---|---|---|---|---|---|---|---|
| ||||||||||||||||||||||||||||||||||||||||||||||||||||||||||||||||||||||||||||||||||||||||||||||||||||||||
| Items | ||||||||||||||||||||||||
|---|---|---|---|---|---|---|---|---|---|---|---|---|---|---|---|---|---|---|---|---|---|---|---|---|
| ||||||||||||||||||||||||
Mr. Psychic's house
The southeast house belongs to a man known as Mr. Psychic. Speak to him and he claims to know exactly why you are here, and gives you TM29 (Psychic).
Silph Co.
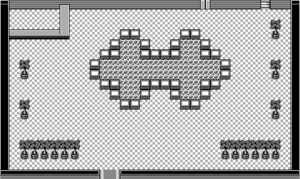
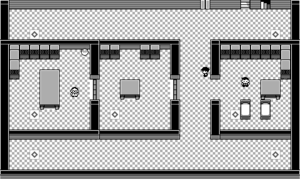
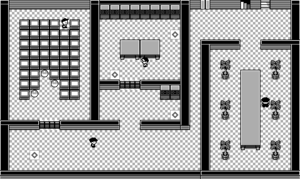
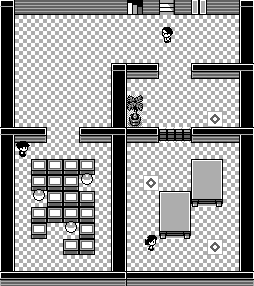
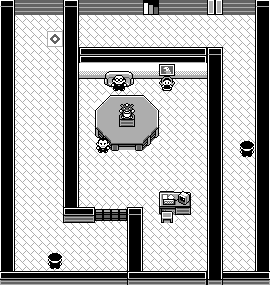
The Silph Co. is the leading manufacturer of items like Poké Balls, Potions, and TMs. Their products are supplied to every Poké Mart in the region. The company has been a target of Team Rocket, first for their Silph Scope prototype, and now for a top-secret development project. The Rocket Grunt posted outside the building has fallen asleep, leaving a perfect opportunity to sneak inside. The building holds eleven floors, with warp tiles allowing the workers to quickly move around. This convenience ends up acting as a maze for anyone trying to reach the top floor.
| Trainers | |||||||||||||||||||||||||||||||||||||||||||||||||||||||||||||||||||||||||||||||||||||||||||||||||||||||||||||||||||||||||||||||||||||||||||||||||||||||||||||||||||||||||||||||||||||||||||||||||||||||||||||||||||||||||||||||||||||||||||||||||||||||||||||||||||||||||||||||||||||||||||||||||||||||||||||||||||||||||||||||||||||||||||||||||||||||||||||||||||||||||||||||||||||||||||||||||||||||||||||||||||||||||||||||||||||||||||||||||||||||||||||||||||||||||||||||||||||||||||||||||||||||||||||||||||||||||||||||||||||||||||||||||||||||||||||||||||||||||||||||||||||||||||||||||||||||||||||||||||||||||||||||||||||||||
|---|---|---|---|---|---|---|---|---|---|---|---|---|---|---|---|---|---|---|---|---|---|---|---|---|---|---|---|---|---|---|---|---|---|---|---|---|---|---|---|---|---|---|---|---|---|---|---|---|---|---|---|---|---|---|---|---|---|---|---|---|---|---|---|---|---|---|---|---|---|---|---|---|---|---|---|---|---|---|---|---|---|---|---|---|---|---|---|---|---|---|---|---|---|---|---|---|---|---|---|---|---|---|---|---|---|---|---|---|---|---|---|---|---|---|---|---|---|---|---|---|---|---|---|---|---|---|---|---|---|---|---|---|---|---|---|---|---|---|---|---|---|---|---|---|---|---|---|---|---|---|---|---|---|---|---|---|---|---|---|---|---|---|---|---|---|---|---|---|---|---|---|---|---|---|---|---|---|---|---|---|---|---|---|---|---|---|---|---|---|---|---|---|---|---|---|---|---|---|---|---|---|---|---|---|---|---|---|---|---|---|---|---|---|---|---|---|---|---|---|---|---|---|---|---|---|---|---|---|---|---|---|---|---|---|---|---|---|---|---|---|---|---|---|---|---|---|---|---|---|---|---|---|---|---|---|---|---|---|---|---|---|---|---|---|---|---|---|---|---|---|---|---|---|---|---|---|---|---|---|---|---|---|---|---|---|---|---|---|---|---|---|---|---|---|---|---|---|---|---|---|---|---|---|---|---|---|---|---|---|---|---|---|---|---|---|---|---|---|---|---|---|---|---|---|---|---|---|---|---|---|---|---|---|---|---|---|---|---|---|---|---|---|---|---|---|---|---|---|---|---|---|---|---|---|---|---|---|---|---|---|---|---|---|---|---|---|---|---|---|---|---|---|---|---|---|---|---|---|---|---|---|---|---|---|---|---|---|---|---|---|---|---|---|---|---|---|---|---|---|---|---|---|---|---|---|---|---|---|---|---|---|---|---|---|---|---|---|---|---|---|---|---|---|---|---|---|---|---|---|---|---|---|---|---|---|---|---|---|---|---|---|---|---|---|---|---|---|---|---|---|---|---|---|---|---|---|---|---|---|---|---|---|---|---|---|---|---|---|---|---|---|---|---|---|---|---|---|---|---|---|---|---|---|---|---|---|---|---|---|---|---|---|---|---|---|---|---|---|---|---|---|---|---|---|---|---|---|---|---|---|---|---|---|---|---|---|---|---|---|---|---|---|---|---|---|---|---|---|---|---|---|---|---|---|---|---|---|---|---|---|---|---|---|---|---|---|---|---|---|---|---|---|---|---|---|---|---|---|---|---|---|---|---|---|---|---|---|---|---|---|---|---|---|---|---|---|---|---|---|---|---|---|---|---|---|---|---|---|---|---|---|---|---|---|---|---|---|---|---|---|---|---|---|---|---|---|---|---|---|---|---|---|---|---|---|---|---|
| |||||||||||||||||||||||||||||||||||||||||||||||||||||||||||||||||||||||||||||||||||||||||||||||||||||||||||||||||||||||||||||||||||||||||||||||||||||||||||||||||||||||||||||||||||||||||||||||||||||||||||||||||||||||||||||||||||||||||||||||||||||||||||||||||||||||||||||||||||||||||||||||||||||||||||||||||||||||||||||||||||||||||||||||||||||||||||||||||||||||||||||||||||||||||||||||||||||||||||||||||||||||||||||||||||||||||||||||||||||||||||||||||||||||||||||||||||||||||||||||||||||||||||||||||||||||||||||||||||||||||||||||||||||||||||||||||||||||||||||||||||||||||||||||||||||||||||||||||||||||||||||||||||||||||
| Items | ||||||||||||||||||||||||||||||||||||||||||||||||||||||||||||||||||||||||||||||||
|---|---|---|---|---|---|---|---|---|---|---|---|---|---|---|---|---|---|---|---|---|---|---|---|---|---|---|---|---|---|---|---|---|---|---|---|---|---|---|---|---|---|---|---|---|---|---|---|---|---|---|---|---|---|---|---|---|---|---|---|---|---|---|---|---|---|---|---|---|---|---|---|---|---|---|---|---|---|---|---|---|
| ||||||||||||||||||||||||||||||||||||||||||||||||||||||||||||||||||||||||||||||||
2F
It is not possible to open the electronic doors yet, so step on either warp tile to teleport to the eighth floor.
8F
Battle the Scientist and the two Rocket Grunts, then take the elevator down to 3F.
3F
Take the northeast warp tile back to the second floor. Speak to the woman here in the northwest room to receive TM36 (Selfdestruct), then warp back to 3F.
Fight the Rocket Grunt and take the warp tile in the southwest to reach 5F; pick up the TM09 (Take Down) from the southwest room before returning to 3F.
Climb up the stairs to 4F.
4F
Battle another two Rocket Grunts and climb to the fifth floor.
5F
Fight the Rocket Grunt near the stairs and the Scientist to the west. Follow the hallway southward to reach another Rocket Grunt standing next to a warp tile. Defeat him, step on the warp tile, then warp right back. Turn eastward to find a Card Key, which is used to open the building's electronic doors. Pass by the warp tile again and unlock the northwest room to reach a Protein. Take the stairs up to 6F.
6F
Follow the western hallway past the Scientist and unlock the southwest room to get an HP Up and an X Accuracy. Climb the stairs to 7F.
7F
Use the Card Key to unlock the east-central room and pick up TM03 (Swords Dance). Turn around and follow the central hallway to the southwest room. Battle the Scientist and grab the Calcium before taking the stairs up to 9F.
9F
Defeat the Rocket Grunt at the south end of the central hallway, then open the door to the break room. Speak to the woman here, and she heals your Pokémon to full health as thanks for your efforts. Climb the stairs to the tenth floor.
10F
Battle the Scientist and the Rocket Grunt, then pick up the Carbos, Rare Candy, and TM26 (Earthquake) from the southwest room. Ride the elevator all the way down to 3F.
3F
Use the Card Key to unlock the central room. Open the door to the west-central room beyond that, defeat the Scientist, and grab the nearby Hyper Potion. Take the warp in the central room.
7F (Northwest)
When you reach the northwest room on the seventh floor, Blue is waiting for you.
Rival Battle 6
Blue has made some changes to his team since the previous battle in Pokémon Tower. He has swapped out his Fearow for a Kadabra, while his Shellder, Magnemite, Vulpix, and Eevee have all evolved.
 If Eevee evolved into Vaporeon:
| ||||||||||||||||||||||||||||||||||||||||||||||||||||||||||||||||||||||||||||||||||||||||||||||||||||||||||||||||||||
 If Eevee evolved into Jolteon:
| ||||||||||||||||||||||||||||||||||||||||||||||||||||||||||||||||||||||||||||||||||||||||||||||||||||||||||||||||||||||
 If Eevee evolved into Flareon:
| ||||||||||||||||||||||||||||||||||||||||||||||||||||||||||||||||||||||||||||||||||||||||||||||||||||||||||||||||||||||
Afterward, he brags that he will be the world's most powerful Trainer before warping away. Once he leaves, speak to the nearby office worker. Realizing that you are here to save them all, he would like to give you a Pokémon. If you have room in your party, he gives you a Lapras. They had been keeping it in their lab, but he thinks it would be much better off with you. Take the final warp tile to the west side of 11F.
11F (West)
As soon as you move off of the warp tile, you are confronted by Jessie and James again. They claim that their boss is in a meeting and intend to defeat you so that he will not be disturbed.
| |||||||||||||||||||||||||||||||||||||||||||||||||||||||||||||||||||||||||||||
Use the Card Key to open the door and confront Giovanni. He claims to be having some important business meeting with the company president and warns you to stay out of grown-up matters before drawing you into battle.
VS Giovanni
Giovanni's Nidorino, Rhyhorn, and Nidoqueen all take serious damage from Ground-type attacks like Dig and Earthquake. The latter two are also vulnerable to Water moves. His Persian only takes super effective damage from Fighting attacks.
| ||||||||||||||||||||||||||||||||||||||||||||||||||||||||||||||||||||||||||||||||||||||||||||||||||||||
With Giovanni defeated, Team Rocket's plans for Silph Co. have been thwarted. He vows that the group will never fall and promises to return. Giovanni and his underlings make their escape, while their co-conspirators also flee the building. Speak to the president, who is so grateful to you for saving Silph that he rewards you with the Master Ball prototype. This improved kind of Poké Ball has a 100% success rate, so be sure to save it for a hard-to-catch Pokémon.
Copycat's house
Now that the Rockets have left the city, the Grunt outside the northwest house is gone. A girl inside known as the Copycat likes to collect Pokémon dolls. Give her a Poké Doll to receive TM31 (Mimic) in return.
Fighting Dojo
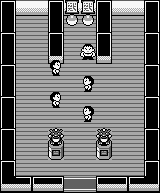
Saffron City is unique as the only city to have two Pokémon Gyms. The Fighting Dojo is located in the northeast neighborhood, next door to the Saffron Gym. The two clubs had once competed to determine which would become the city's one official Gym, and the Psychic Pokémon of Saffron Gym were victorious. There is no Badge to be won here, but defeat the Karate Master to earn the choice of two rare Fighting-type Pokémon: the hard-kicking Hitmonlee or the piston-punching Hitmonchan. Use Psychic- and Flying-type attacks here for greatest effect.
| ||||||||||||||||||||||||||||||||||||||||||||||||||||||||||||||||||||||||||||||||||||||||||||||||||||||||||||||||||||||||||||||||||||
Saffron Gym
SAFFRON CITY POKéMON GYM
LEADER: SABRINA
The Master of
Psychic Pokémon!
The Saffron Gym specializes in Psychic Pokémon. Only Bug attacks deal super effective damage to them, but the few available Bug moves are relatively weak. Psychic Pokémon typically have low Defense, so it is better to use moves that deal physical damage, like Normal-, Flying-, and Rock-type attacks.
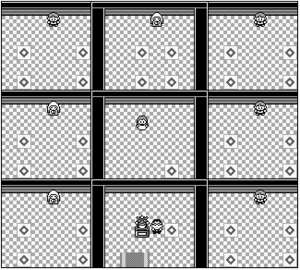
The Gym uses a series of warp tiles to confuse and disorient any challengers. Step on the tile near the entrance to reach the southeast room. To reach the Gym Leader by using as few warps as possible, continue by stepping on the northwest, southwest, and southwest tiles in the following rooms. This leads to the center room, where Sabrina awaits anyone up to the challenge.
| |||||||||||||||||||||||||||||||||||||||||||||||||||||||||||||||||||||||||||||||||||||||||||||||||||||||||||||||||||||||||||||||||||||||||||||||||||||||||||||||||||||||||||||||||||||||||||||||||||||||||||||||||||||||||
After the battle, Sabrina awards you the Marsh Badge, which ensures obedience from all Pokémon up to level 70. She also gives you TM46 (Psywave) as a prize.
The next destination is Fuchsia City to the south. There are two paths that lead there: either take Cycling Road west of Celadon City, or follow the coast south of Lavender Town.
|
Yellow walkthrough |
|

|
This article is part of Project Walkthroughs, a Bulbapedia project that aims to write comprehensive step-by-step guides on each Pokémon game. |
