Appendix:HeartGold and SoulSilver walkthrough/Section 30: Difference between revisions
mNo edit summary |
Storm Aurora (talk | contribs) m (Text replacement - "itlistfoot|city" to "itlistfoot|road") |
||
| (12 intermediate revisions by 10 users not shown) | |||
| Line 17: | Line 17: | ||
| colspan="2" style="background: #{{water color}};" | {{color2|FFF|Water (type)|Water}} | | colspan="2" style="background: #{{water color}};" | {{color2|FFF|Water (type)|Water}} | ||
|- align="center" style="background: #{{kanto color light}};" | |- align="center" style="background: #{{kanto color light}};" | ||
| {{MSP|002|Ivysaur}} || {{pcolor|Ivysaur|{{kanto color dark}}}} || {{MSP|005|Charmeleon}} || {{pcolor|Charmeleon|{{kanto color dark}}}} || {{MSP|008|Wartortle}} || {{pcolor|Wartortle|{{kanto color dark}}}} | | {{MSP/3|002|Ivysaur}} || {{pcolor|Ivysaur|{{kanto color dark}}}} || {{MSP/3|005|Charmeleon}} || {{pcolor|Charmeleon|{{kanto color dark}}}} || {{MSP/3|008|Wartortle}} || {{pcolor|Wartortle|{{kanto color dark}}}} | ||
|- align="center" | |- align="center" | ||
| style="background: #{{grass color}};" | {{color2|FFF|Grass (type)|Grass}} | | style="background: #{{grass color}};" | {{color2|FFF|Grass (type)|Grass}} | ||
| Line 24: | Line 24: | ||
| colspan="2" style="background: #{{water color}};" | {{color2|FFF|Water (type)|Water}} | | colspan="2" style="background: #{{water color}};" | {{color2|FFF|Water (type)|Water}} | ||
|- align="center" style="background: #{{kanto color light}};" | |- align="center" style="background: #{{kanto color light}};" | ||
| {{MSP|003|Venusaur}} || {{pcolor|Venusaur|{{kanto color dark}}}} || {{MSP|006|Charizard}} || {{pcolor|Charizard|{{kanto color dark}}}} || {{MSP|009|Blastoise}} || {{pcolor|Blastoise|{{kanto color dark}}}} | | {{MSP/3|003|Venusaur}} || {{pcolor|Venusaur|{{kanto color dark}}}} || {{MSP/3|006|Charizard}} || {{pcolor|Charizard|{{kanto color dark}}}} || {{MSP/3|009|Blastoise}} || {{pcolor|Blastoise|{{kanto color dark}}}} | ||
|- align="center" | |- align="center" | ||
| style="background: #{{grass color}}; {{roundybl|5px}};" | {{color2|FFF|Grass (type)|Grass}} | | style="background: #{{grass color}}; {{roundybl|5px}};" | {{color2|FFF|Grass (type)|Grass}} | ||
| Line 50: | Line 50: | ||
| colspan="2" style="background: #{{water color}};" | {{color2|FFF|Water (type)|Water}} | | colspan="2" style="background: #{{water color}};" | {{color2|FFF|Water (type)|Water}} | ||
|- align="center" style="background: #{{hoenn color light}};" | |- align="center" style="background: #{{hoenn color light}};" | ||
| {{MSP|253|Grovyle}} || {{pcolor|Grovyle|{{hoenn color dark}}}} || {{MSP|256|Combusken}} || {{pcolor|Combusken|{{hoenn color dark}}}} || {{MSP|259|Marshtomp}} || {{pcolor|Marshtomp|{{hoenn color dark}}}} | | {{MSP/3|253|Grovyle}} || {{pcolor|Grovyle|{{hoenn color dark}}}} || {{MSP/3|256|Combusken}} || {{pcolor|Combusken|{{hoenn color dark}}}} || {{MSP/3|259|Marshtomp}} || {{pcolor|Marshtomp|{{hoenn color dark}}}} | ||
|- align="center" | |- align="center" | ||
| colspan="2" style="background: #{{grass color}};" | {{color2|FFF|Grass (type)|Grass}} | | colspan="2" style="background: #{{grass color}};" | {{color2|FFF|Grass (type)|Grass}} | ||
| Line 57: | Line 57: | ||
| colspan="2" style="background: #{{water color}};" | {{color2|FFF|Water (type)|Water}} | | colspan="2" style="background: #{{water color}};" | {{color2|FFF|Water (type)|Water}} | ||
|- align="center" style="background: #{{hoenn color light}};" | |- align="center" style="background: #{{hoenn color light}};" | ||
| {{MSP|254|Sceptile}} || {{pcolor|Sceptile|{{hoenn color dark}}}} || {{MSP|257|Blaziken}} || {{pcolor|Blaziken|{{hoenn color dark}}}} || {{MSP|260|Swampert}} || {{pcolor|Swampert|{{hoenn color dark}}}} | | {{MSP/3|254|Sceptile}} || {{pcolor|Sceptile|{{hoenn color dark}}}} || {{MSP/3|257|Blaziken}} || {{pcolor|Blaziken|{{hoenn color dark}}}} || {{MSP/3|260|Swampert}} || {{pcolor|Swampert|{{hoenn color dark}}}} | ||
|- align="center" | |- align="center" | ||
| colspan="2" style="background: #{{grass color}}; {{roundybl|5px}};" | {{color2|FFF|Grass (type)|Grass}} | | colspan="2" style="background: #{{grass color}}; {{roundybl|5px}};" | {{color2|FFF|Grass (type)|Grass}} | ||
| Line 71: | Line 71: | ||
====Time for a Trade==== | ====Time for a Trade==== | ||
Speak to him and he asks to trade Pokémon. He is looking for a {{p|Forretress}}, and is willing to part with his {{p|Beldum}}. Beldum can only be found in the {{ | Speak to him and he asks to trade Pokémon. He is looking for a {{p|Forretress}}, and is willing to part with his {{p|Beldum}}. Beldum can only be found in the {{Safari|Johto}}, while Forretress are unavailable in the wild and must be evolved from a {{p|Pineco}}. Beldum will eventually evolve into the powerful {{p|Metagross}}, and Steven has given this one a [[Dawn Stone]] to hold. | ||
==Lugia Emerges from the Waterfall Basin{{sup/4|HG}}== | ==Lugia Emerges from the Waterfall Basin{{sup/4|HG}}== | ||
| Line 142: | Line 142: | ||
{{itlisth|cave}} | {{itlisth|cave}} | ||
{{catch/div|cave|Central chamber}} | {{catch/div|cave|Central chamber}} | ||
{{itemlist|Pearl|On a rock, near the northwest ladder (hidden)|HG=yes|SS=yes|display={{ | {{itemlist|Pearl|On a rock, near the northwest ladder (hidden)|HG=yes|SS=yes|display={{i|Pearl}}}} | ||
{{itemlist|Full Restore|South of the ladder from the northwest island|HG=yes|SS=yes}} | {{itemlist|Full Restore|South of the ladder from the northwest island|HG=yes|SS=yes}} | ||
{{itemlist|Nugget|Between the ladders leading to the northwest and northeast islands|HG=yes|SS=yes}} | {{itemlist|Nugget|Between the ladders leading to the northwest and northeast islands|HG=yes|SS=yes}} | ||
| Line 152: | Line 152: | ||
{{itemlist|Rare Candy|On the ledge overlooking Lugia's chamber|HG=yes|SS=yes}} | {{itemlist|Rare Candy|On the ledge overlooking Lugia's chamber|HG=yes|SS=yes}} | ||
{{itemlist|Calcium|North of the southeast ladder|HG=yes|SS=yes}} | {{itemlist|Calcium|North of the southeast ladder|HG=yes|SS=yes}} | ||
{{itemlist|Ultra Ball|On the wall, near the south-central ladder (hidden)|HG=yes|SS=yes | {{itemlist|Ultra Ball|On the wall, near the south-central ladder (hidden)|HG=yes|SS=yes}} | ||
{{itemlist|Escape Rope|South-central area|HG=yes|SS=yes}} | {{itemlist|Escape Rope|South-central area|HG=yes|SS=yes}} | ||
{{catch/div|cave|B2F}} | {{catch/div|cave|B2F}} | ||
| Line 158: | Line 158: | ||
{{itemlist|Full Restore|Enclosed area, northeast of the ladder|HG=yes|SS=yes}} | {{itemlist|Full Restore|Enclosed area, northeast of the ladder|HG=yes|SS=yes}} | ||
{{catch/div|cave|Northeast island}} | {{catch/div|cave|Northeast island}} | ||
{{itemlist|Ultra Ball|On the platform, near the southern ladder|HG=yes|SS=yes | {{itemlist|Ultra Ball|On the platform, near the southern ladder|HG=yes|SS=yes}} | ||
{{catch/div|cave|Southeast island}} | {{catch/div|cave|Southeast island}} | ||
{{itemlist|Rare Candy|On a rock, in the northwest corner (hidden)|HG=yes|SS=yes}} | {{itemlist|Rare Candy|On a rock, in the northwest corner (hidden)|HG=yes|SS=yes}} | ||
{{catch/div|cave|Southwest island}} | {{catch/div|cave|Southwest island}} | ||
{{itemlist|Ultra Ball|Near the eastern ladder|HG=yes|SS=yes | {{itemlist|Ultra Ball|Near the eastern ladder|HG=yes|SS=yes}} | ||
{{itlistfoot|cave}} | {{itlistfoot|cave}} | ||
|} | |} | ||
| Line 177: | Line 177: | ||
Step inside the cave, and take the ladder to the floor below. | Step inside the cave, and take the ladder to the floor below. | ||
Walk down the stairway to reach a hidden {{ | Walk down the stairway to reach a hidden {{i|Pearl}} to the northeast, and a [[Full Restore]] to the south. Jump the ledge and climb the stairway to the east in order to reach a [[Nugget]] and a hidden [[Super Repel]]. Head east and jump the two ledges to reach a ladder; this leads to a dead-end with an [[Ultra Ball]]. Go south, jump another ledge, and backtrack to the first ladder in the northwest corner. Head south along the upper level to reach a [[Carbos]], and climb down the ladder to the southeast. | ||
Grab the [[Max Elixir]] and [[Full Restore]] from this dead-end area, then use an Escape Rope to exit the cave. | Grab the [[Max Elixir]] and [[Full Restore]] from this dead-end area, then use an Escape Rope to exit the cave. | ||
| Line 188: | Line 188: | ||
Inspect the north wall for a hidden [[Full Restore]], then grab the [[Max Revive]] to the west. Speak with the monk, and the [[Silver Wing]] suddenly floats up into the air. When he sees the shimmering silver feather, the monk allows you to pass. Step through the archway just south of him to reach a [[Rare Candy]]. Continue the climb down the cliffside to reach another archway, where your lead Pokémon retreats into its Poké Ball. | Inspect the north wall for a hidden [[Full Restore]], then grab the [[Max Revive]] to the west. Speak with the monk, and the [[Silver Wing]] suddenly floats up into the air. When he sees the shimmering silver feather, the monk allows you to pass. Step through the archway just south of him to reach a [[Rare Candy]]. Continue the climb down the cliffside to reach another archway, where your lead Pokémon retreats into its Poké Ball. | ||
Step inside the waterfall chamber and find Lugia waiting in front of the waterfall. Make sure you save before battling if you are trying to capture, in case | Step inside the waterfall chamber and find Lugia waiting in front of the waterfall. Make sure you save before battling if you are trying to capture, in case Lugia faints. | ||
=====Lugia===== | =====Lugia===== | ||
| Line 211: | Line 211: | ||
{{left clear}} | {{left clear}} | ||
====Southeast Island==== | ====Southeast Island==== | ||
Check the northwest corner for a hidden [[Rare Candy]], then take the ladder down to the main cavern. | Check the northwest corner for a hidden [[Rare Candy]], then take the ladder down to the main cavern. | ||
Head north along the rock ledge to find a [[Calcium]]. Go down the stairway and loop around to the west. Search near the south-central ladder for a hidden | Head north along the rock ledge to find a [[Calcium]]. Go down the stairway and loop around to the west. Search near the south-central ladder for a hidden [[Ultra Ball]], then move the nearby boulder northward. Head west to reach an [[Escape Rope]], then climb the southwest ladder. | ||
Detour across the pool of water to the east to collect another | Detour across the pool of water to the east to collect another [[Ultra Ball]], then take the exit to emerge on the southwest island. | ||
====Southwest Island==== | ====Southwest Island==== | ||
| Line 222: | Line 223: | ||
==Ho-Oh Descends to the Bell Tower{{sup/4|SS}}== | ==Ho-Oh Descends to the Bell Tower{{sup/4|SS}}== | ||
As the player should have received the [[Rainbow Wing]] in Pewter City, proceed to the [[Bell Tower]] in [[Ecruteak City]] to capture | As the player should have received the [[Rainbow Wing]] in Pewter City, proceed to the [[Bell Tower]] in [[Ecruteak City]] to capture {{p|Ho-Oh}}. Ho-Oh will not let itself be caught easily, so be sure to stock up on your favorite type of Poké Ball. Repels, Escape Ropes, and Pokémon with status-inflicting moves, like Spore or Thunder Wave, are also recommended. Head north from the Dance Theater to reach the Barrier Station. Flash the Fog Badge to reach Bellchime Trail. On the trail, speak to [[Morty]]. He will tell you that Ho-Oh did not choose him and asks if you would help him in his training. Add his phone number if you wish to battle him again. Then proceed to the Bell Tower. | ||
===Bell Tower=== | ===Bell Tower=== | ||
| Line 249: | Line 250: | ||
{{itemlist|Full Heal|Southwest area|HG=yes|SS=yes}} | {{itemlist|Full Heal|Southwest area|HG=yes|SS=yes}} | ||
{{catch/div|building|4F}} | {{catch/div|building|4F}} | ||
{{itemlist|Ultra Ball|Near the east wall|HG=yes|SS=yes | {{itemlist|Ultra Ball|Near the east wall|HG=yes|SS=yes}} | ||
{{itemlist|PP Up|Near the east wall|HG=yes|SS=yes}} | {{itemlist|PP Up|Near the east wall|HG=yes|SS=yes}} | ||
{{itemlist|Escape Rope|Near the southwest ladder|HG=yes|SS=yes}} | {{itemlist|Escape Rope|Near the southwest ladder|HG=yes|SS=yes}} | ||
| Line 278: | Line 279: | ||
====4F==== | ====4F==== | ||
Go south to find an | Go south to find an [[Ultra Ball]], and south again to get a [[PP Up]]. Grab the [[Escape Rope]] in the southwest, then climb the northwest stairs. | ||
[[File:Bell Tower 5F HGSS.png|thumb|135px|left|Bell Tower, 5F]] | [[File:Bell Tower 5F HGSS.png|thumb|135px|left|Bell Tower, 5F]] | ||
| Line 303: | Line 304: | ||
====Rooftop==== | ====Rooftop==== | ||
Climb the golden stairway to reach the tower's rooftop, where {{p|Ho-Oh}} will be waiting for you. Make sure you save before battling if you are trying to capture, in case Ho- | Climb the golden stairway to reach the tower's rooftop, where {{p|Ho-Oh}} will be waiting for you. Make sure you save before battling if you are trying to capture, in case Ho-Oh faints. | ||
=====Ho-Oh===== | =====Ho-Oh===== | ||
| Line 331: | Line 332: | ||
| | | | ||
{{itlisth|land}} | {{itlisth|land}} | ||
{{itemlist|Blue Orb|From Mr. Pokémon, after receiving a starter Pokémon from Professor Oak|HG=yes}} | {{itemlist|Blue Orb IV|From Mr. Pokémon, after receiving a starter Pokémon from Professor Oak|HG=yes|display=[[Blue Orb]]}} | ||
{{itemlist|Red Orb|From Mr. Pokémon, after receiving a starter Pokémon from Professor Oak|SS=yes}} | {{itemlist|Red Orb IV|From Mr. Pokémon, after receiving a starter Pokémon from Professor Oak|SS=yes|display=[[Red Orb]]}} | ||
{{itlistfoot|land}} | {{itlistfoot|land}} | ||
|} | |} | ||
| Line 343: | Line 344: | ||
[[File:Cliff Edge Gate HGSS.png|thumb|Cliff Edge Gate]] | [[File:Cliff Edge Gate HGSS.png|thumb|Cliff Edge Gate]] | ||
[[Cliff Edge Gate]] is a cavern that leads to Routes {{rtn|47|Johto}} and {{rtn|48|Johto}}, and the new {{ | [[Cliff Edge Gate]] is a cavern that leads to Routes {{rtn|47|Johto}} and {{rtn|48|Johto}}, and the new {{Safari|Johto}} beyond that. | ||
{| class="expandable" style="margin: auto; background: #{{locationcolor/med|cave}}; {{roundy}}; border: 5px solid #{{locationcolor/light|cave}};" | {| class="expandable" style="margin: auto; background: #{{locationcolor/med|cave}}; {{roundy}}; border: 5px solid #{{locationcolor/light|cave}};" | ||
| Line 449: | Line 450: | ||
{{itlisth|mountain}} | {{itlisth|mountain}} | ||
{{itemlist|Revive|Mid-level, west of the first waterfall|HG=yes|SS=yes}} | {{itemlist|Revive|Mid-level, west of the first waterfall|HG=yes|SS=yes}} | ||
{{itemlist|Pearl|On the beach between the two waterfalls (hidden, requires {{m|Surf}})|HG=yes|SS=yes|display={{ | {{itemlist|Pearl|On the beach between the two waterfalls (hidden, requires {{m|Surf}})|HG=yes|SS=yes|display={{i|Pearl}}}} | ||
{{itemlist|Stardust|On a rock, south of the Embedded Tower entrance (hidden; requires {{m|Surf}}, {{m|Rock Climb}})|HG=yes|SS=yes}} | {{itemlist|Stardust|On a rock, south of the Embedded Tower entrance (hidden; requires {{m|Surf}}, {{m|Rock Climb}})|HG=yes|SS=yes}} | ||
{{itemlist|Wave Incense|On the beach, southwest of the Embedded Tower entrance (requires {{m|Surf}}, {{m|Rock Climb}})|HG=yes|SS=yes}} | {{itemlist|Wave Incense|On the beach, southwest of the Embedded Tower entrance (requires {{m|Surf}}, {{m|Rock Climb}})|HG=yes|SS=yes}} | ||
| Line 461: | Line 462: | ||
[[File:Cliff Cave 1F HGSS.png|thumb|Cliff Cave, 1F]] | [[File:Cliff Cave 1F HGSS.png|thumb|Cliff Cave, 1F]] | ||
[[Cliff Cave]] is a small, three-floor cave on the east side of {{rt|47|Johto}}. From the entrance, you can either climb to the route's upper level to reach {{rt|48|Johto}} and the {{ | [[Cliff Cave]] is a small, three-floor cave on the east side of {{rt|47|Johto}}. From the entrance, you can either climb to the route's upper level to reach {{rt|48|Johto}} and the {{Safari|Johto}}, or descend to sea level in order to reach the [[Embedded Tower]] in the southwest. | ||
{| class="expandable" style="margin: auto; background: #{{locationcolor/med|cave}}; {{roundy}}; border: 5px solid #{{locationcolor/light|cave}};" | {| class="expandable" style="margin: auto; background: #{{locationcolor/med|cave}}; {{roundy}}; border: 5px solid #{{locationcolor/light|cave}};" | ||
| Line 498: | Line 499: | ||
| | | | ||
{{itlisth|cave}} | {{itlisth|cave}} | ||
{{itemlist|Ultra Ball|Southeast corner of the top floor (hidden)|HG=yes|SS=yes | {{itemlist|Ultra Ball|Southeast corner of the top floor (hidden)|HG=yes|SS=yes}} | ||
{{catch/div|cave|Other Items}} | {{catch/div|cave|Other Items}} | ||
{{Itemlist|Red Shard|Randomly found by | {{Itemlist|Red Shard|Randomly found by smashing [[breakable rock]]s|HG=yes}} | ||
{{Itemlist|Blue Shard|Randomly found by | {{Itemlist|Blue Shard|Randomly found by smashing [[breakable rock]]s|SS=yes}} | ||
{{Itemlist|Yellow Shard|Randomly found by | {{Itemlist|Yellow Shard|Randomly found by smashing [[breakable rock]]s|HG=yes}} | ||
{{Itemlist|Green Shard|Randomly found by | {{Itemlist|Green Shard|Randomly found by smashing [[breakable rock]]s|SS=yes}} | ||
{{Itemlist|Claw Fossil|Randomly found by | {{Itemlist|Claw Fossil|Randomly found by smashing [[breakable rock]]s|HG=yes}} | ||
{{Itemlist|Root Fossil|Randomly found by | {{Itemlist|Root Fossil|Randomly found by smashing [[breakable rock]]s|SS=yes}} | ||
{{Itemlist|Max Ether|Randomly found by | {{Itemlist|Max Ether|Randomly found by smashing [[breakable rock]]s|HG=yes|SS=yes}} | ||
{{Itemlist|Pearl|Randomly found by | {{Itemlist|Pearl|Randomly found by smashing [[breakable rock]]s|HG=yes|SS=yes|display={{i|Pearl}}}} | ||
{{Itemlist|Big Pearl|Randomly found by | {{Itemlist|Big Pearl|Randomly found by smashing [[breakable rock]]s|HG=yes|SS=yes}} | ||
{{Itemlist|Rare Bone|Randomly found by | {{Itemlist|Rare Bone|Randomly found by smashing [[breakable rock]]s|HG=yes|SS=yes}} | ||
{{itlistfoot|cave}} | {{itlistfoot|cave}} | ||
|} | |} | ||
{{-}} | {{-}} | ||
===Embedded Tower=== | ===Embedded Tower=== | ||
[[File:Embedded Tower {{#switch: {{#expr: {{#time: U}} mod 2}}|0=Groudon|1=Kyogre}} HGSS.png|thumb|Embedded Tower, as seen when occupied by {{#switch: {{#expr: {{#time: U}} mod 2}}|0=Groudon|1=Kyogre}}]] | [[File:Embedded Tower {{#switch: {{#expr: {{#time: U}} mod 2}}|0=Groudon|1=Kyogre}} HGSS.png|thumb|Embedded Tower, as seen when occupied by {{#switch: {{#expr: {{#time: U}} mod 2}}|0=Groudon|1=Kyogre}}]] | ||
| Line 533: | Line 535: | ||
====Kyogre==== | ====Kyogre==== | ||
When the battle begins, {{p|Kyogre}}'s {{a|Drizzle}} Ability immediately {{DL|Rain|Effects|summons a rainstorm}}. This raises the power of all {{type|Water}} moves by 50%, increases {{m|Thunder}}'s accuracy to 100%, and weakens the power of {{m|SolarBeam}} and all {{type|Fire}} moves by 50%. Its {{m|Water Spout}} attack is powerful enough already, but the heavy rain increases its destructive force. Like {{p|Groudon}}'s {{m|Eruption}}, the move weakens when the Pokémon's health falls, but it can remedy this problem with {{m|Aqua Ring}}. Begin with {{t|Grass}}- and {{type|Electric}} attacks to wear it down quickly, then switch to {{t|Fire}}, {{t|Water}}, {{t|Ice}}, and {{t|Steel}} moves to weaken it further. | When the battle begins, {{p|Kyogre}}'s {{a|Drizzle}} Ability immediately {{DL|Rain|Effects|summons a rainstorm}}. This raises the power of all {{type|Water}} moves by 50%, increases {{m|Thunder}}'s accuracy to 100%, and weakens the power of {{m|SolarBeam}} and all {{type|Fire}} moves by 50%. Its {{m|Water Spout}} attack is powerful enough already, but the heavy rain increases its destructive force. Like {{p|Groudon}}'s {{m|Eruption}}, the move weakens when the Pokémon's health falls, but it can remedy this problem with {{m|Aqua Ring}}. Begin with {{t|Grass}}- and {{type|Electric}} attacks to wear it down quickly, then switch to {{t|Fire}}, {{t|Water}}, {{t|Ice}}, and {{t|Steel}} moves to weaken it further. [[Ultra Ball]]s, [[Dusk Ball]]s, and [[Heavy Ball]]s are especially useful. If you fail to catch it, defeat the Pokémon League once more to cause it to reappear. | ||
====Groudon==== | ====Groudon==== | ||
When the battle begins, {{p|Groudon}}'s {{a|Drought}} Ability immediately {{DL|Harsh sunlight|Effects|intensifies the sun's rays}}. This raises the power of all {{type|Fire}} moves by 50%, allows immediate use of {{m|SolarBeam}}, and weakens all {{type|Water}} moves by 50%. Its {{m|Eruption}} attack is powerful enough already, but the harsh sunlight increases its destructive force. Like {{p|Kyogre}}'s {{m|Water Spout}}, the move weakens when the Pokémon's health falls, but it can remedy this problem with {{m|Rest}}. Begin with {{t|Grass}}-, {{t|Water}}-, and {{type|Ice}} attacks to wear it down quickly, then switch to {{t|Rock}} and {{t|Poison}} moves to weaken it further. | When the battle begins, {{p|Groudon}}'s {{a|Drought}} Ability immediately {{DL|Harsh sunlight|Effects|intensifies the sun's rays}}. This raises the power of all {{type|Fire}} moves by 50%, allows immediate use of {{m|SolarBeam}}, and weakens all {{type|Water}} moves by 50%. Its {{m|Eruption}} attack is powerful enough already, but the harsh sunlight increases its destructive force. Like {{p|Kyogre}}'s {{m|Water Spout}}, the move weakens when the Pokémon's health falls, but it can remedy this problem with {{m|Rest}}. Begin with {{t|Grass}}-, {{t|Water}}-, and {{type|Ice}} attacks to wear it down quickly, then switch to {{t|Rock}} and {{t|Poison}} moves to weaken it further. [[Ultra Ball]]s, [[Dusk Ball]]s, and [[Heavy Ball]]s are especially useful. If you fail to catch it, defeat the Pokémon League once more to cause it to reappear. | ||
{| style="margin: auto; background: #{{locationcolor/light|ruins}}; {{roundy}}; border: 3px solid #{{locationcolor/med|ruins}};" | {| style="margin: auto; background: #{{locationcolor/light|ruins}}; {{roundy}}; border: 3px solid #{{locationcolor/med|ruins}};" | ||
| Line 583: | Line 585: | ||
|- | |- | ||
| | | | ||
{{itlisth| | {{itlisth|road}} | ||
{{itemlist|Jade Orb|From Professor Oak, after showing {{p|Kyogre|both}} {{p|Groudon|Pokémon}} from the [[Embedded Tower]]|HG=yes|SS=yes}} | {{itemlist|Jade Orb|From Professor Oak, after showing {{p|Kyogre|both}} {{p|Groudon|Pokémon}} from the [[Embedded Tower]]|HG=yes|SS=yes}} | ||
{{itlistfoot| | {{itlistfoot|road}} | ||
|} | |} | ||
| Line 596: | Line 598: | ||
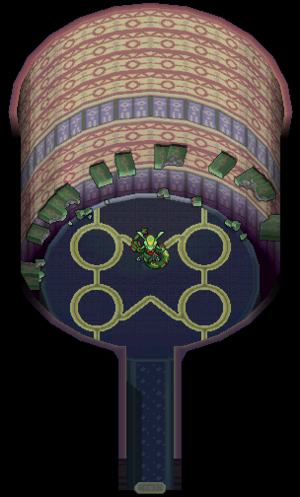
[[File:Embedded Tower Rayquaza HGSS.png|thumb|Embedded Tower, as seen when occupied by Rayquaza]] | [[File:Embedded Tower Rayquaza HGSS.png|thumb|Embedded Tower, as seen when occupied by Rayquaza]] | ||
====Rayquaza==== | ====Rayquaza==== | ||
As {{p|Rayquaza}} is related to the other two super-ancient Pokémon, its Ability is also involves the weather; however, {{a|Air Lock}} eliminates the effects of all weather conditions. Its {{m|Outrage}} attack is powerful enough already, but can become even more destructive if {{m|AncientPower}} is able to raise its stats. Begin with {{t|Rock}}- and {{type|Dragon}} attacks to wear it down quickly. {{type|Ice}} attacks are extremely effective, as well. After that, switch to {{t|Grass}}, {{t|Fire}}, {{t|Water}}, {{t|Bug}}, and {{t|Fighting}} moves to weaken it further. | As {{p|Rayquaza}} is related to the other two super-ancient Pokémon, its Ability is also involves the weather; however, {{a|Air Lock}} eliminates the effects of all weather conditions. Its {{m|Outrage}} attack is powerful enough already, but can become even more destructive if {{m|AncientPower}} is able to raise its stats. Begin with {{t|Rock}}- and {{type|Dragon}} attacks to wear it down quickly. {{type|Ice}} attacks are extremely effective, as well. After that, switch to {{t|Grass}}, {{t|Fire}}, {{t|Water}}, {{t|Bug}}, and {{t|Fighting}} moves to weaken it further. [[Ultra Ball]]s, [[Dusk Ball]]s, and [[Heavy Ball]]s are especially useful. If you fail to catch it, defeat the Pokémon League once more to cause it to reappear. | ||
{| style="margin: auto;" | {| style="margin: auto;" | ||
| Line 615: | Line 617: | ||
When presented with the third Pokémon from the [[Embedded Tower]], [[Professor Oak]] expresses his wonder at the fascination Pokémon seem to have for orbs and stones. | When presented with the third Pokémon from the [[Embedded Tower]], [[Professor Oak]] expresses his wonder at the fascination Pokémon seem to have for orbs and stones. | ||
{{-}} | {{-}} | ||
{{WalkthroughPrevNext | {{WalkthroughPrevNext | ||
Latest revision as of 08:20, 17 April 2024
These pages follow the remade Nintendo DS iteration, not Pokémon Gold and Silver. The guide for those games can be found here.
Pallet Town
Oak's Lab
When you return to Pallet Town, Professor Oak is so impressed with your accomplishments that he offers you a choice of one of the three Kanto starter Pokémon as your own. Choose whichever you like, but you will need an empty party slot to accept it.
 Bulbasaur |
 Charmander |
 Squirtle | |||
|---|---|---|---|---|---|
| Grass | Poison | Fire | Water | ||
| Ivysaur | Charmeleon | Wartortle | |||
| Grass | Poison | Fire | Water | ||
| Venusaur | Charizard | Blastoise | |||
| Grass | Poison | Fire | Flying | Water | |
Saffron City
Silph Co.
The Three Stones
Make a return trip to Saffron City and visit the Silph Co. building. Talk to Steven near the front desk, and he asks you a question: Of a group of stones in front of you, would you choose the green stone, the red stone, or the blue stone? The answer you give determines which Pokémon he offers you. Treecko, Torchic, and Mudkip are the starter Pokémon of his native Hoenn region.
 Treecko |
 Torchic |
 Mudkip | |||
|---|---|---|---|---|---|
| Grass | Fire | Water | |||
| Grovyle | Combusken | Marshtomp | |||
| Grass | Fire | Fighting | Water | ||
| Sceptile | Blaziken | Swampert | |||
| Grass | Fire | Fighting | Water | Ground | |
Follow the Leader
Once Steven leaves, follow him to the Pewter Museum. Enter the building to find him viewing one of the exhibits while muttering about the stars in the night sky. When he leaves, follow him back to the Silph Co. building.
Time for a Trade
Speak to him and he asks to trade Pokémon. He is looking for a Forretress, and is willing to part with his Beldum. Beldum can only be found in the Safari Zone, while Forretress are unavailable in the wild and must be evolved from a Pineco. Beldum will eventually evolve into the powerful Metagross, and Steven has given this one a Dawn Stone to hold.
Lugia Emerges from the Waterfall BasinHG
As the player should have received the Silver Wing in Pewter City, proceed to the Whirl Islands to capture Lugia. Lugia will not let itself be caught easily, so be sure to stock up on your favorite type of Poké Ball. Repels, Escape Ropes, and Pokémon with status-inflicting moves, like Spore or Thunder Wave, are also recommended. Fly back to Olivine or Cianwood and sail out into the ocean. Surf and Whirlpool are required to fully explore the islands' underwater cave network; Strength and Flash are helpful, but not necessary.
Whirl Islands
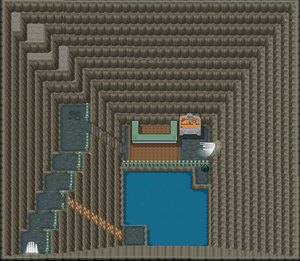
There are many items to be found throughout the caves, but if you are only looking for Lugia, start with the northeast island.
| Available Pokémon | |||||||||||||||||||||||||||||||||||||||||||||||||||||||||||||||||||||||||||||||||||||||||||||||||||||||||||||||||||||||||||||||||||||||||||||||||||||||||||||||||||||||||||||||||||||||||||||||||||||||||||||||||||||||||||||||||||||||||||||||||||||||||||||||||||||||||||||||||||||||||||||||||||||||||||||||||||||||||||||||||||||||||||||||||||||||||||||||||||||||||||||||||||||||||||||||||||||||||||||||||||||||||||||||||||||||||||||||||||||||||||||||||||||||||||||||||||||||||||||||||||||||||||||||||||||||||||||||||||||||||||||||||||||||||||||||||||||||||||||||||||||||||||||||||||||||||||||||||||
|---|---|---|---|---|---|---|---|---|---|---|---|---|---|---|---|---|---|---|---|---|---|---|---|---|---|---|---|---|---|---|---|---|---|---|---|---|---|---|---|---|---|---|---|---|---|---|---|---|---|---|---|---|---|---|---|---|---|---|---|---|---|---|---|---|---|---|---|---|---|---|---|---|---|---|---|---|---|---|---|---|---|---|---|---|---|---|---|---|---|---|---|---|---|---|---|---|---|---|---|---|---|---|---|---|---|---|---|---|---|---|---|---|---|---|---|---|---|---|---|---|---|---|---|---|---|---|---|---|---|---|---|---|---|---|---|---|---|---|---|---|---|---|---|---|---|---|---|---|---|---|---|---|---|---|---|---|---|---|---|---|---|---|---|---|---|---|---|---|---|---|---|---|---|---|---|---|---|---|---|---|---|---|---|---|---|---|---|---|---|---|---|---|---|---|---|---|---|---|---|---|---|---|---|---|---|---|---|---|---|---|---|---|---|---|---|---|---|---|---|---|---|---|---|---|---|---|---|---|---|---|---|---|---|---|---|---|---|---|---|---|---|---|---|---|---|---|---|---|---|---|---|---|---|---|---|---|---|---|---|---|---|---|---|---|---|---|---|---|---|---|---|---|---|---|---|---|---|---|---|---|---|---|---|---|---|---|---|---|---|---|---|---|---|---|---|---|---|---|---|---|---|---|---|---|---|---|---|---|---|---|---|---|---|---|---|---|---|---|---|---|---|---|---|---|---|---|---|---|---|---|---|---|---|---|---|---|---|---|---|---|---|---|---|---|---|---|---|---|---|---|---|---|---|---|---|---|---|---|---|---|---|---|---|---|---|---|---|---|---|---|---|---|---|---|---|---|---|---|---|---|---|---|---|---|---|---|---|---|---|---|---|---|---|---|---|---|---|---|---|---|---|---|---|---|---|---|---|---|---|---|---|---|---|---|---|---|---|---|---|---|---|---|---|---|---|---|---|---|---|---|---|---|---|---|---|---|---|---|---|---|---|---|---|---|---|---|---|---|---|---|---|---|---|---|---|---|---|---|---|---|---|---|---|---|---|---|---|---|---|---|---|---|---|---|---|---|---|---|---|---|---|---|---|---|---|---|---|---|---|---|---|---|---|---|---|---|---|---|---|---|---|---|---|---|---|---|---|---|---|---|---|---|---|---|---|---|---|---|---|---|---|---|---|---|---|---|---|---|---|---|---|---|---|---|---|---|---|---|---|---|---|---|---|---|---|---|---|---|---|---|---|---|---|---|---|---|---|---|---|---|---|---|---|---|---|---|---|---|---|---|---|---|---|---|---|---|---|---|---|---|---|---|---|---|---|---|---|---|---|---|---|---|---|---|---|
| |||||||||||||||||||||||||||||||||||||||||||||||||||||||||||||||||||||||||||||||||||||||||||||||||||||||||||||||||||||||||||||||||||||||||||||||||||||||||||||||||||||||||||||||||||||||||||||||||||||||||||||||||||||||||||||||||||||||||||||||||||||||||||||||||||||||||||||||||||||||||||||||||||||||||||||||||||||||||||||||||||||||||||||||||||||||||||||||||||||||||||||||||||||||||||||||||||||||||||||||||||||||||||||||||||||||||||||||||||||||||||||||||||||||||||||||||||||||||||||||||||||||||||||||||||||||||||||||||||||||||||||||||||||||||||||||||||||||||||||||||||||||||||||||||||||||||||||||||||
| Items | |||||||||||||||||||||||||||||||||||||||||||||||||||||||||||||||||||||||||||||||||||||||||||||||||||||||||||||||||||||||||||||||||||||||||||||||||||||||
|---|---|---|---|---|---|---|---|---|---|---|---|---|---|---|---|---|---|---|---|---|---|---|---|---|---|---|---|---|---|---|---|---|---|---|---|---|---|---|---|---|---|---|---|---|---|---|---|---|---|---|---|---|---|---|---|---|---|---|---|---|---|---|---|---|---|---|---|---|---|---|---|---|---|---|---|---|---|---|---|---|---|---|---|---|---|---|---|---|---|---|---|---|---|---|---|---|---|---|---|---|---|---|---|---|---|---|---|---|---|---|---|---|---|---|---|---|---|---|---|---|---|---|---|---|---|---|---|---|---|---|---|---|---|---|---|---|---|---|---|---|---|---|---|---|---|---|---|---|---|---|---|
| |||||||||||||||||||||||||||||||||||||||||||||||||||||||||||||||||||||||||||||||||||||||||||||||||||||||||||||||||||||||||||||||||||||||||||||||||||||||
Northwest Island
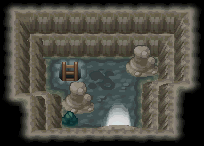
Step inside the cave, and take the ladder to the floor below.
Walk down the stairway to reach a hidden Pearl to the northeast, and a Full Restore to the south. Jump the ledge and climb the stairway to the east in order to reach a Nugget and a hidden Super Repel. Head east and jump the two ledges to reach a ladder; this leads to a dead-end with an Ultra Ball. Go south, jump another ledge, and backtrack to the first ladder in the northwest corner. Head south along the upper level to reach a Carbos, and climb down the ladder to the southeast.
Grab the Max Elixir and Full Restore from this dead-end area, then use an Escape Rope to exit the cave.
Northeast Island
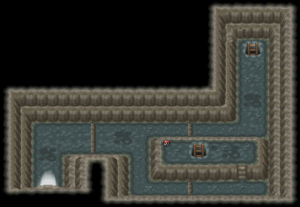
Walk east, jump the ledge, and take the northern path to reach the next part of the main cavern.
Follow the rock platform southward, collect the hidden Revive, and climb down the ladder to B2F.
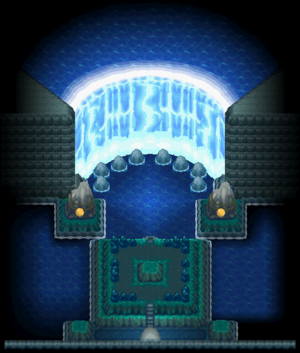
Inspect the north wall for a hidden Full Restore, then grab the Max Revive to the west. Speak with the monk, and the Silver Wing suddenly floats up into the air. When he sees the shimmering silver feather, the monk allows you to pass. Step through the archway just south of him to reach a Rare Candy. Continue the climb down the cliffside to reach another archway, where your lead Pokémon retreats into its Poké Ball.
Step inside the waterfall chamber and find Lugia waiting in front of the waterfall. Make sure you save before battling if you are trying to capture, in case Lugia faints.
Lugia
Start off by using status-inflicting moves, like Spore or Thunder Wave, to wear it down. Follow up with Rock-, Ghost-, Electric-, Ice-, or Dark-type attacks to inflict double the damage. Then slowly chip away at its remaining health with Fighting-, Grass-, or Psychic-type attacks, as moves of these types inflict only half- or quarter-damage. If you happen to knock it out, it will reappear if you again beat the Elite Four.
| HeartGold | ||||||||||||||||||||||||||||||||||
|---|---|---|---|---|---|---|---|---|---|---|---|---|---|---|---|---|---|---|---|---|---|---|---|---|---|---|---|---|---|---|---|---|---|---|
| ||||||||||||||||||||||||||||||||||
Southeast Island
Check the northwest corner for a hidden Rare Candy, then take the ladder down to the main cavern.
Head north along the rock ledge to find a Calcium. Go down the stairway and loop around to the west. Search near the south-central ladder for a hidden Ultra Ball, then move the nearby boulder northward. Head west to reach an Escape Rope, then climb the southwest ladder.
Detour across the pool of water to the east to collect another Ultra Ball, then take the exit to emerge on the southwest island.
Southwest Island
The only items accessible from the southwest island are the Escape Rope and the Calcium, both of which would have been collected already.
Ho-Oh Descends to the Bell TowerSS
As the player should have received the Rainbow Wing in Pewter City, proceed to the Bell Tower in Ecruteak City to capture Ho-Oh. Ho-Oh will not let itself be caught easily, so be sure to stock up on your favorite type of Poké Ball. Repels, Escape Ropes, and Pokémon with status-inflicting moves, like Spore or Thunder Wave, are also recommended. Head north from the Dance Theater to reach the Barrier Station. Flash the Fog Badge to reach Bellchime Trail. On the trail, speak to Morty. He will tell you that Ho-Oh did not choose him and asks if you would help him in his training. Add his phone number if you wish to battle him again. Then proceed to the Bell Tower.
Bell Tower
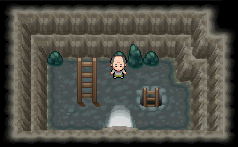
As you approach the back of the first floor, the Rainbow Wing suddenly floats up into the air. Seeing the shimmering rainbow feather, the monk finally moves from the ladder.
| Available Pokémon | |||||||||||||||||||||||||||||||||||||||||||||||||||||||||||||||||||||||||||||||||||||||||||||||||||||||||||
|---|---|---|---|---|---|---|---|---|---|---|---|---|---|---|---|---|---|---|---|---|---|---|---|---|---|---|---|---|---|---|---|---|---|---|---|---|---|---|---|---|---|---|---|---|---|---|---|---|---|---|---|---|---|---|---|---|---|---|---|---|---|---|---|---|---|---|---|---|---|---|---|---|---|---|---|---|---|---|---|---|---|---|---|---|---|---|---|---|---|---|---|---|---|---|---|---|---|---|---|---|---|---|---|---|---|---|---|
| |||||||||||||||||||||||||||||||||||||||||||||||||||||||||||||||||||||||||||||||||||||||||||||||||||||||||||
| Items | |||||||||||||||||||||||||||||||||||||||||||||||||||||||||||||||||||||||||||||||||||||||||||||||||||||||||||||||||||||||||||||||||||||||||||||||||||||||||||||||||
|---|---|---|---|---|---|---|---|---|---|---|---|---|---|---|---|---|---|---|---|---|---|---|---|---|---|---|---|---|---|---|---|---|---|---|---|---|---|---|---|---|---|---|---|---|---|---|---|---|---|---|---|---|---|---|---|---|---|---|---|---|---|---|---|---|---|---|---|---|---|---|---|---|---|---|---|---|---|---|---|---|---|---|---|---|---|---|---|---|---|---|---|---|---|---|---|---|---|---|---|---|---|---|---|---|---|---|---|---|---|---|---|---|---|---|---|---|---|---|---|---|---|---|---|---|---|---|---|---|---|---|---|---|---|---|---|---|---|---|---|---|---|---|---|---|---|---|---|---|---|---|---|---|---|---|---|---|---|---|---|---|---|
| |||||||||||||||||||||||||||||||||||||||||||||||||||||||||||||||||||||||||||||||||||||||||||||||||||||||||||||||||||||||||||||||||||||||||||||||||||||||||||||||||
2F
Go south around the column and climb the ladder.
3F
Go west to reach a Full Heal. Move around in an S-shape to reach the northeast stairs.
4F
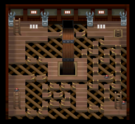
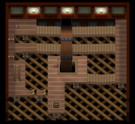
Go south to find an Ultra Ball, and south again to get a PP Up. Grab the Escape Rope in the southwest, then climb the northwest stairs.
5F
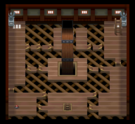
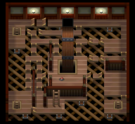
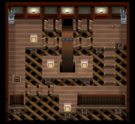
Work your way to the pillar for a Rare Candy. The ramps here keep you from advancing, so take the southeast stairs and backtrack through 4F. Stay to the west of the pillar to reach the stairs in the south.
6F
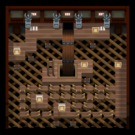
6F has a simple layout that serves as a transition between the ramps on the lower floors and what lies above. The next three floors use a series of warp tiles for quick navigation. First grab the Max Potion, then circle around to the northwest corner to get the Full Heal. Take the stairs up to 7F.
7F
Step on the nearest warp tile to reach the pillar, and take the next to reach the east wall of 9F. There are two warp tiles to the south; the right one leads to the center of 8F and a Max Elixir, while the left one leads to the south side of 8F and a Nugget. Backtrack to the first warp on 7F, grab the Max Revive to the northeast, and go south to take the next warp to the west side of 8F.
8F
The next warp takes you to the north side of 9F where you can find an HP Up, and the next warp tile on 9F brings you back to the east side of 8F. Pick up the Full Restore to the northwest and take one last warp to the center of 9F.
9F
Climb the stairs to reach the rooftop.
Rooftop
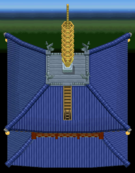
Climb the golden stairway to reach the tower's rooftop, where Ho-Oh will be waiting for you. Make sure you save before battling if you are trying to capture, in case Ho-Oh faints.
Ho-Oh
Start off by using status-inflicting moves, like Spore or Thunder Wave, to wear it down. Follow up with Water- or Electric-type attacks to inflict double the damage. Use caution with Rock-type attacks, as Ho-Oh takes four times the normal damage from such moves. Then slowly chip away at its remaining health with Fire-, Grass-, Fighting-, Bug-, or Steel-type attacks, as moves of these types only inflict half- or quarter-damage. If you happen to knock it out, it will reappear if you again beat the Elite Four.
| SoulSilver | ||||||||||||||||||||||||||||||||||
|---|---|---|---|---|---|---|---|---|---|---|---|---|---|---|---|---|---|---|---|---|---|---|---|---|---|---|---|---|---|---|---|---|---|---|
| ||||||||||||||||||||||||||||||||||
Route 30
| Items | ||||||||||||||||
|---|---|---|---|---|---|---|---|---|---|---|---|---|---|---|---|---|
| ||||||||||||||||
Back in Johto, Mr. Pokémon is thrilled because a friend of his from Hoenn recently brought him a gift. He promptly hands over the glittering stone to you, hoping that you can do more with it than he can. This stone is believed to have some connection to the Embedded Tower, ancient ruins to the west of Cianwood City.
Cianwood City
Cliff Edge Gate
Cliff Edge Gate is a cavern that leads to Routes 47 and 48, and the new Safari Zone beyond that.
| Available Pokémon | ||||||||||||||||||||||||||||||||||||||||||||||||||||||||||||||||||||||||||||||||||||||||||||||||||||||||||||||||||||||||||||||||||||||||||||||||||||||||||||||||||||||||
|---|---|---|---|---|---|---|---|---|---|---|---|---|---|---|---|---|---|---|---|---|---|---|---|---|---|---|---|---|---|---|---|---|---|---|---|---|---|---|---|---|---|---|---|---|---|---|---|---|---|---|---|---|---|---|---|---|---|---|---|---|---|---|---|---|---|---|---|---|---|---|---|---|---|---|---|---|---|---|---|---|---|---|---|---|---|---|---|---|---|---|---|---|---|---|---|---|---|---|---|---|---|---|---|---|---|---|---|---|---|---|---|---|---|---|---|---|---|---|---|---|---|---|---|---|---|---|---|---|---|---|---|---|---|---|---|---|---|---|---|---|---|---|---|---|---|---|---|---|---|---|---|---|---|---|---|---|---|---|---|---|---|---|---|---|---|---|---|---|
| ||||||||||||||||||||||||||||||||||||||||||||||||||||||||||||||||||||||||||||||||||||||||||||||||||||||||||||||||||||||||||||||||||||||||||||||||||||||||||||||||||||||||
| Items | ||||||||||||
|---|---|---|---|---|---|---|---|---|---|---|---|---|
| ||||||||||||
Route 47
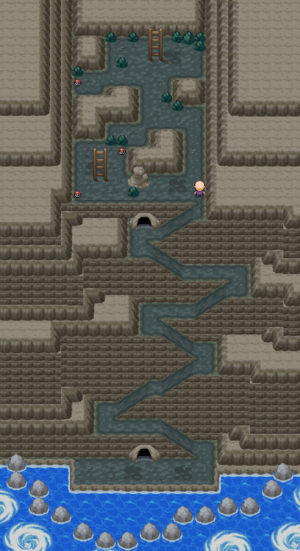
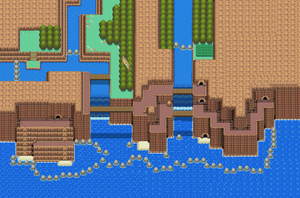
Route 47 is a rugged path that links Cliff Edge Gate and Route 48. Though the route has been accessible for some time now, the difficult terrain prevented those without Waterfall and Rock Climb from fully exploring the area.
| Trainers | ||||||||||||||||||||||||||||||||||||||||||||||||||||||||||||||||||||||||||||||||||||||||||||
|---|---|---|---|---|---|---|---|---|---|---|---|---|---|---|---|---|---|---|---|---|---|---|---|---|---|---|---|---|---|---|---|---|---|---|---|---|---|---|---|---|---|---|---|---|---|---|---|---|---|---|---|---|---|---|---|---|---|---|---|---|---|---|---|---|---|---|---|---|---|---|---|---|---|---|---|---|---|---|---|---|---|---|---|---|---|---|---|---|---|---|---|---|
| ||||||||||||||||||||||||||||||||||||||||||||||||||||||||||||||||||||||||||||||||||||||||||||
| Available Pokémon | ||||||||||||||||||||||||||||||||||||||||||||||||||||||||||||||||||||||||||||||||||||||||||||||||||||||||||||||||||||||||||||||||||||||||||||||||||||||||||||||||||||||||||||||||||||||||||||||||||||||||||||||||||||||||||||||||||||||||||||||||||||||||||||||||||||||||||||||||||||||||||||||||||||||||||||||||||||||||||||||||||||||||||||||||||||||||||||||||||||||||||||||||||||||||||||||||||||||||||||||||||||||||||||||||||||||||||||||||||||||||||||||||||||||||||||||||||||||||||||||||||||||||||||||||||||||||||||||||||||||||||||||||||||||||||||||||||||||||||||||||||||||||||||||||||||||||||||||||||||||||||||||||||||||||||||||||||||||||||||||||||||||||||||||||||||||||||||||||||||||||
|---|---|---|---|---|---|---|---|---|---|---|---|---|---|---|---|---|---|---|---|---|---|---|---|---|---|---|---|---|---|---|---|---|---|---|---|---|---|---|---|---|---|---|---|---|---|---|---|---|---|---|---|---|---|---|---|---|---|---|---|---|---|---|---|---|---|---|---|---|---|---|---|---|---|---|---|---|---|---|---|---|---|---|---|---|---|---|---|---|---|---|---|---|---|---|---|---|---|---|---|---|---|---|---|---|---|---|---|---|---|---|---|---|---|---|---|---|---|---|---|---|---|---|---|---|---|---|---|---|---|---|---|---|---|---|---|---|---|---|---|---|---|---|---|---|---|---|---|---|---|---|---|---|---|---|---|---|---|---|---|---|---|---|---|---|---|---|---|---|---|---|---|---|---|---|---|---|---|---|---|---|---|---|---|---|---|---|---|---|---|---|---|---|---|---|---|---|---|---|---|---|---|---|---|---|---|---|---|---|---|---|---|---|---|---|---|---|---|---|---|---|---|---|---|---|---|---|---|---|---|---|---|---|---|---|---|---|---|---|---|---|---|---|---|---|---|---|---|---|---|---|---|---|---|---|---|---|---|---|---|---|---|---|---|---|---|---|---|---|---|---|---|---|---|---|---|---|---|---|---|---|---|---|---|---|---|---|---|---|---|---|---|---|---|---|---|---|---|---|---|---|---|---|---|---|---|---|---|---|---|---|---|---|---|---|---|---|---|---|---|---|---|---|---|---|---|---|---|---|---|---|---|---|---|---|---|---|---|---|---|---|---|---|---|---|---|---|---|---|---|---|---|---|---|---|---|---|---|---|---|---|---|---|---|---|---|---|---|---|---|---|---|---|---|---|---|---|---|---|---|---|---|---|---|---|---|---|---|---|---|---|---|---|---|---|---|---|---|---|---|---|---|---|---|---|---|---|---|---|---|---|---|---|---|---|---|---|---|---|---|---|---|---|---|---|---|---|---|---|---|---|---|---|---|---|---|---|---|---|---|---|---|---|---|---|---|---|---|---|---|---|---|---|---|---|---|---|---|---|---|---|---|---|---|---|---|---|---|---|---|---|---|---|---|---|---|---|---|---|---|---|---|---|---|---|---|---|---|---|---|---|---|---|---|---|---|---|---|---|---|---|---|---|---|---|---|---|---|---|---|---|---|---|---|---|---|---|---|---|---|---|---|---|---|---|---|---|---|---|---|---|---|---|---|---|---|---|---|---|---|---|---|---|---|---|---|---|---|---|---|---|---|---|---|---|---|---|---|---|---|---|---|---|---|---|---|---|---|---|---|---|---|---|---|---|---|---|---|---|---|---|---|---|---|---|---|---|---|---|---|---|---|---|---|---|---|---|---|---|---|---|---|---|---|---|---|---|---|---|---|---|---|---|---|---|---|---|---|---|---|---|---|---|---|---|---|---|---|---|---|---|---|---|---|---|---|---|---|---|---|---|---|---|---|---|---|---|---|---|---|---|---|---|---|---|---|---|---|---|---|---|---|---|---|---|---|---|---|---|---|---|---|---|---|---|---|---|---|---|---|---|
| ||||||||||||||||||||||||||||||||||||||||||||||||||||||||||||||||||||||||||||||||||||||||||||||||||||||||||||||||||||||||||||||||||||||||||||||||||||||||||||||||||||||||||||||||||||||||||||||||||||||||||||||||||||||||||||||||||||||||||||||||||||||||||||||||||||||||||||||||||||||||||||||||||||||||||||||||||||||||||||||||||||||||||||||||||||||||||||||||||||||||||||||||||||||||||||||||||||||||||||||||||||||||||||||||||||||||||||||||||||||||||||||||||||||||||||||||||||||||||||||||||||||||||||||||||||||||||||||||||||||||||||||||||||||||||||||||||||||||||||||||||||||||||||||||||||||||||||||||||||||||||||||||||||||||||||||||||||||||||||||||||||||||||||||||||||||||||||||||||||||||
| Items | ||||||||||||||||||||||||||||||||
|---|---|---|---|---|---|---|---|---|---|---|---|---|---|---|---|---|---|---|---|---|---|---|---|---|---|---|---|---|---|---|---|---|
| ||||||||||||||||||||||||||||||||
Cliff Cave
Cliff Cave is a small, three-floor cave on the east side of Route 47. From the entrance, you can either climb to the route's upper level to reach Route 48 and the Safari Zone, or descend to sea level in order to reach the Embedded Tower in the southwest.
| Available Pokémon | |||||||||||||||||||||||||||||||||||||||||||||||||||||||||||||||||||||||||||||||||||||||||||||||||||||||||||||||||||||||||||||||||||||||||||||||||||||||||||||||||||||||||||||||||||||||||||||||||||||||||||||||||||||||||||||||||||||||||||||||||||||||||||||||||||||||||||||||||||||||||||||||||||||||||||||||||||||||||||||||||||||||||||||||||||||||||||||||||||||||||||
|---|---|---|---|---|---|---|---|---|---|---|---|---|---|---|---|---|---|---|---|---|---|---|---|---|---|---|---|---|---|---|---|---|---|---|---|---|---|---|---|---|---|---|---|---|---|---|---|---|---|---|---|---|---|---|---|---|---|---|---|---|---|---|---|---|---|---|---|---|---|---|---|---|---|---|---|---|---|---|---|---|---|---|---|---|---|---|---|---|---|---|---|---|---|---|---|---|---|---|---|---|---|---|---|---|---|---|---|---|---|---|---|---|---|---|---|---|---|---|---|---|---|---|---|---|---|---|---|---|---|---|---|---|---|---|---|---|---|---|---|---|---|---|---|---|---|---|---|---|---|---|---|---|---|---|---|---|---|---|---|---|---|---|---|---|---|---|---|---|---|---|---|---|---|---|---|---|---|---|---|---|---|---|---|---|---|---|---|---|---|---|---|---|---|---|---|---|---|---|---|---|---|---|---|---|---|---|---|---|---|---|---|---|---|---|---|---|---|---|---|---|---|---|---|---|---|---|---|---|---|---|---|---|---|---|---|---|---|---|---|---|---|---|---|---|---|---|---|---|---|---|---|---|---|---|---|---|---|---|---|---|---|---|---|---|---|---|---|---|---|---|---|---|---|---|---|---|---|---|---|---|---|---|---|---|---|---|---|---|---|---|---|---|---|---|---|---|---|---|---|---|---|---|---|---|---|---|---|---|---|---|---|---|---|---|---|---|---|---|---|---|---|---|---|---|---|---|---|---|---|---|---|---|---|---|---|---|---|---|---|---|---|---|---|---|---|---|---|---|---|---|---|---|---|---|---|---|---|---|---|---|---|---|---|
| |||||||||||||||||||||||||||||||||||||||||||||||||||||||||||||||||||||||||||||||||||||||||||||||||||||||||||||||||||||||||||||||||||||||||||||||||||||||||||||||||||||||||||||||||||||||||||||||||||||||||||||||||||||||||||||||||||||||||||||||||||||||||||||||||||||||||||||||||||||||||||||||||||||||||||||||||||||||||||||||||||||||||||||||||||||||||||||||||||||||||||
| Items | |||||||||||||||||||||||||||||||||||||||||||||||||||||||||||||||||||
|---|---|---|---|---|---|---|---|---|---|---|---|---|---|---|---|---|---|---|---|---|---|---|---|---|---|---|---|---|---|---|---|---|---|---|---|---|---|---|---|---|---|---|---|---|---|---|---|---|---|---|---|---|---|---|---|---|---|---|---|---|---|---|---|---|---|---|---|
| |||||||||||||||||||||||||||||||||||||||||||||||||||||||||||||||||||
Embedded Tower
Near the entrance to the ruins, a Hiker informs you of their history. Ages ago, the Embedded Tower was constructed deep into the cliffside, and its peak was said to touch the sky. It is believed that it also ran far below to the ocean floor, as well. In short, the ruins formed a link between the land, the sea, and the sky. Enter the chamber to find the legendary Pokémon KyogreHG / GroudonSS silently watching as you approach.
| Available Pokémon | ||||||||||||||||||||||||||||||||||||||||||||||||||||||||||||||||||||||||||
|---|---|---|---|---|---|---|---|---|---|---|---|---|---|---|---|---|---|---|---|---|---|---|---|---|---|---|---|---|---|---|---|---|---|---|---|---|---|---|---|---|---|---|---|---|---|---|---|---|---|---|---|---|---|---|---|---|---|---|---|---|---|---|---|---|---|---|---|---|---|---|---|---|---|---|
| ||||||||||||||||||||||||||||||||||||||||||||||||||||||||||||||||||||||||||
Kyogre
When the battle begins, Kyogre's Drizzle Ability immediately summons a rainstorm. This raises the power of all Water-type moves by 50%, increases Thunder's accuracy to 100%, and weakens the power of SolarBeam and all Fire-type moves by 50%. Its Water Spout attack is powerful enough already, but the heavy rain increases its destructive force. Like Groudon's Eruption, the move weakens when the Pokémon's health falls, but it can remedy this problem with Aqua Ring. Begin with Grass- and Electric-type attacks to wear it down quickly, then switch to Fire, Water, Ice, and Steel moves to weaken it further. Ultra Balls, Dusk Balls, and Heavy Balls are especially useful. If you fail to catch it, defeat the Pokémon League once more to cause it to reappear.
Groudon
When the battle begins, Groudon's Drought Ability immediately intensifies the sun's rays. This raises the power of all Fire-type moves by 50%, allows immediate use of SolarBeam, and weakens all Water-type moves by 50%. Its Eruption attack is powerful enough already, but the harsh sunlight increases its destructive force. Like Kyogre's Water Spout, the move weakens when the Pokémon's health falls, but it can remedy this problem with Rest. Begin with Grass-, Water-, and Ice-type attacks to wear it down quickly, then switch to Rock and Poison moves to weaken it further. Ultra Balls, Dusk Balls, and Heavy Balls are especially useful. If you fail to catch it, defeat the Pokémon League once more to cause it to reappear.
|
| ||||||||||||||||||||||||||||||||||||||||||||||||||||||||||||||||||||
Once the ancient creature has been caught, the Hiker enters and explains a bit more about the Pokémon. He also reveals that the tower was built by travelers from the distant Hoenn region.
Pallet Town
| Items | ||||||||||||
|---|---|---|---|---|---|---|---|---|---|---|---|---|
| ||||||||||||
Oak's Lab
Add the ancient Pokémon to your party and pay a visit to Professor Oak. He is amazed that you have caught one of these powerful Pokémon, but he always thinks of Kyogre and Groudon as a pair; wherever one appears, the other must not be far away. Since you have one already, he wonders if you could bring both to him. However, Groudon only shows itself to those with shining-silver spirits, while Kyogre only appears to those with golden hearts. Find a Trainer that matches this description and trade for the second Pokémon. When you show the pair to the professor, he rewards you with the Jade Orb, which calls the third member of the Hoenn myth to the Embedded Tower.
Route 47
Embedded Tower
Rayquaza
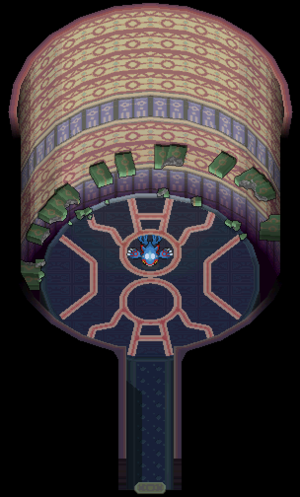
As Rayquaza is related to the other two super-ancient Pokémon, its Ability is also involves the weather; however, Air Lock eliminates the effects of all weather conditions. Its Outrage attack is powerful enough already, but can become even more destructive if AncientPower is able to raise its stats. Begin with Rock- and Dragon-type attacks to wear it down quickly. Ice-type attacks are extremely effective, as well. After that, switch to Grass, Fire, Water, Bug, and Fighting moves to weaken it further. Ultra Balls, Dusk Balls, and Heavy Balls are especially useful. If you fail to catch it, defeat the Pokémon League once more to cause it to reappear.
| ||||||||||||||||||||||||||||||||||
When presented with the third Pokémon from the Embedded Tower, Professor Oak expresses his wonder at the fascination Pokémon seem to have for orbs and stones.
|
HeartGold and SoulSilver walkthrough |

|
This article is part of Project Walkthroughs, a Bulbapedia project that aims to write comprehensive step-by-step guides on each Pokémon game. |

