Appendix:Gold and Silver walkthrough/Section 8: Difference between revisions
mNo edit summary |
mNo edit summary |
||
| (61 intermediate revisions by 24 users not shown) | |||
| Line 1: | Line 1: | ||
{{WalkthroughNotice|GS}} | |||
==Ecruteak City== | |||
[[File:Ecruteak City GS.png|thumb|Ecruteak City]] | |||
-- | [[Ecruteak City]] lies in the woods of northern [[Johto]], between Routes {{rtn|37|Johto}}, {{rtn|38|Johto}}, and {{rtn|42|Johto}}. The city honors its past by preserving long-held traditions, like the old-fashioned architecture of the local dance theater and the two towers that stand to the north. Several legendary Pokémon have ties to the area, giving Ecruteak an air of mystery. | ||
{| class="expandable" align="center" style="background: #BFA26B; {{roundy}}; border: 5px solid #CDB891;" | |||
|- align="center" | |||
! Trainers | |||
|- | |||
| | |||
{{Trainerheader|road}} | |||
{{catch/div|road|Ecruteak Dance Theater}} | |||
{{Trainerentry|Spr GS Kimono Girl.png|Kimono Girl|Naoko|1224|1|136|Flareon|♂|17|None}} | |||
{{Trainerdiv|road}} | |||
{{Trainerentry|Spr GS Kimono Girl.png|Kimono Girl|[[Sakura|Sayo]]|1224|1|196|Espeon|♂|17|None}} | |||
{{Trainerdiv|road}} | |||
{{Trainerentry|Spr GS Kimono Girl.png|Kimono Girl|Zuki|1224|1|197|Umbreon|♂|17|None}} | |||
{{Trainerdiv|road}} | |||
{{Trainerentry|Spr GS Kimono Girl.png|Kimono Girl|Kuni|1224|1|134|Vaporeon|♂|17|None}} | |||
{{Trainerdiv|road}} | |||
{{Trainerentry|Spr GS Kimono Girl.png|Kimono Girl|Miki|1224|1|135|Jolteon|♂|17|None}} | |||
{{Trainerfooter|road|I}} | |||
|} | |||
{| class="expandable" align="center" style="background: #BFA26B; {{roundy}}; border: 5px solid #CDB891;" | |||
|- align="center" | |||
! Available Pokémon | |||
|- | |||
| | |||
{{Catch/header|road|4}} | |||
{{Catch/div|water|Surfing}} | |||
{{Catch/entry2|060|Poliwag|yes|yes|no|Surf|15-24|all=90%|type1=Water}} | |||
{{Catch/entry2|061|Poliwhirl|yes|yes|no|Surf|20-24|all=10%|type1=Water}} | |||
{{Catch/div|water|Fishing}} | |||
{{Catch/entry2|129|Magikarp|yes|yes|no|Fish Old|10|all=85%|type1=Water}} | |||
{{Catch/entry2|060|Poliwag|yes|yes|no|Fish Old|10|all=15%|type1=Water}} | |||
{{Catch/footer|road}} | |||
|} | |||
{| class="expandable" align="center" style="background: #BFA26B; {{roundy}}; border: 5px solid #CDB891;" | |||
|- align="center" | |||
! Items | |||
|- | |||
| | |||
{{itlisth|road}} | |||
{{Itemlist|Itemfinder|From the Cooltrainer in the southwest house|G=yes|S=yes|display=[[Dowsing Machine|Itemfinder]]}} | |||
{{Itemlist|Hyper Potion|In the corner of the pond ''(hidden)''|G=yes|S=yes}} | |||
{{Itemlist|HM Water|Dance Theater; reward from an old man, after defeating the Kimono Girls|G=yes|S=yes|display={{HM|03|Surf}}}} | |||
{{Itemlist|TM Ghost|From [[Gym Leader]] [[Morty]], after defeating him|G=yes|S=yes|display={{TM|30|Shadow Ball}}}} | |||
{{itlistfoot|road}} | |||
|} | |||
===Treasure Hunting=== | |||
Visit the southwest house and speak to the man inside. He gives you an [[Dowsing Machine|Itemfinder]], a device that can detect any hidden items nearby. | |||
=== Bill to the | ===Pokémon Center=== | ||
====Time-Traveling Trades==== | |||
Enter the Pokémon Center to meet [[Bill]], the creator of the [[Pokémon Storage System]]. He has just finished maintenance on the [[Time Capsule]], a machine located on the second floor of every Pokémon Center that allows Trainers to "trade with [[Generation I|the past]]". There are certain restrictions, as all Pokémon and moves that were still undiscovered then are prohibited. The Time Capsule will be operational in 24 hours. After a brief explanation, Bill leaves for his home in [[Goldenrod City]]. | |||
===Ecruteak Dance Theater=== | |||
The Ecruteak Dance Theater is where the [[Kimono Girl]]s practice both their dancing and their Pokémon training. Each of the five sisters specializes in one of {{p|Eevee}}'s [[Eeveelution|evolutions]]. They may be battled in any order. After they have been defeated, speak to the Gentleman in the audience. He has challenged the sisters repeatedly but has failed each time. To reward you for defeating them when he could not, he gives you {{HM|03|Surf}}. | |||
=== | ===Burned Tower=== | ||
[[File:Burned Tower 1F GS.png|thumb|Burned Tower, 1F]] | |||
[[File:Burned Tower B1F GS.png|thumb|Burned Tower, B1F]] | |||
The charred ruins of the [[Burned Tower]] lie in the northwest part of the city. Formerly known as the Brass Tower, it was once as majestic as the [[Bell Tower|Tin Tower]] to the east. When it was new, it was said to be the roost of {{p|Lugia|an immense, silver-colored Pokémon}}. But centuries later, a heavy storm rolled in and the tower was struck by lightning, igniting a great fire that would rage for three days. The silver Pokémon and {{p|Ho-Oh|the glorious, rainbow-colored Pokémon}} that roosted on Tin Tower escaped to the skies unharmed, and the silver Pokémon flew away, never to return. A sudden downpour would finally douse the flames, and the rainbow Pokémon gave new life to [[Legendary beasts|three nameless Pokémon]] that perished in the blaze before it flew off as well. | |||
=== | {| class="expandable" align="center" style="background: #{{locationcolor/med|ash}}; {{roundy}}; border: 5px solid #{{locationcolor/light|ash}};" | ||
|- align="center" | |||
! Trainers | |||
|- | |||
! | |||
|- | |- | ||
| | | | ||
| | {{trainerheader|ash}} | ||
| {{ | {{catch/div|ash|Requires Rock Smash}} | ||
{{Trainerentry|Spr GS Firebreather.png|Firebreather|Ned|720|3|109|Koffing|♂|15|None|109|Koffing|♂|15|None|058|Growlithe|♂|16|None}} | |||
{{Trainerdiv|ash}} | |||
{{Trainerentry|Spr GS Firebreather.png|Firebreather|Dick|816|1|005|Charmeleon|♂|17|None}} | |||
{{Trainerfooter|ash|II}} | |||
|} | |||
{| class="expandable" align="center" style="background: #{{locationcolor/med|ash}}; {{roundy}}; border: 5px solid #{{locationcolor/light|ash}};" | |||
|- align="center" | |||
! Available Pokémon | |||
|- | |- | ||
| | | | ||
| | {{catch/header|ash}} | ||
| {{ | {{catch/div|ash|1F}} | ||
{{Catch/entry2|019|Rattata|yes|yes|no|1F|13,15|all=50%|type1=Normal}} | |||
{{Catch/entry2|020|Raticate|yes|yes|no|1F|15|all=5%|type1=Normal}} | |||
{{Catch/entry2|041|Zubat|yes|yes|no|1F|14|all=10%|type1=Poison|type2=Flying}} | |||
{{Catch/entry2|109|Koffing|yes|yes|no|1F|14,16|all=35%|type1=Poison}} | |||
{{Catch/div|ash|Rock Smash}} | |||
{{Catch/entry2|098|Krabby|yes|yes|no|Rock Smash|15|all=90%|type1=Water}} | |||
{{Catch/entry2|213|Shuckle|yes|yes|no|Rock Smash|15|all=10%|type1=Bug|type2=Rock}} | |||
{{catch/div|ash|B1F}} | |||
{{Catch/entry2|019|Rattata|yes|yes|no|B1F|14,16|40%|0%|40%|type1=Normal}} | |||
{{Catch/entry2|019|Rattata|yes|yes|no|B1F|14|0%|35%|0%|type1=Normal}} | |||
{{Catch/entry2|041|Zubat|yes|yes|no|B1F|15|all=5%|type1=Poison|type2=Flying}} | |||
{{Catch/entry2|109|Koffing|yes|yes|no|B1F|14,16|all=50%|type1=Poison}} | |||
{{Catch/entry2|126|Magmar|yes|yes|no|B1F|14|5%|0%|5%|type1=Fire}} | |||
{{Catch/entry2|126|Magmar|yes|yes|no|B1F|16|0%|10%|0%|type1=Fire}} | |||
{{catch/footer|ash}} | |||
|} | |||
{| class="expandable" align="center" style="background: #{{locationcolor/med|ash}}; {{roundy}}; border: 5px solid #{{locationcolor/light|ash}};" | |||
|- align="center" | |||
! Items | |||
|- | |- | ||
| | | | ||
| | {{itlisth|ash}} | ||
| {{ | {{catch/div|ash|1F}} | ||
{{itemlist|Burn Heal|Northeast corner, north of the gap in the floor (requires {{m|Rock Smash}})|G=yes|S=yes}} | |||
{{itemlist|X Speed|Fenced-in center area, northwest of the gap in the floor (requires {{m|Rock Smash}})|G=yes|S=yes}} | |||
{{itemlist|Ether|Fenced-in center area, two steps west of the gap in the floor (hidden; requires {{m|Rock Smash}})|G=yes|S=yes}} | |||
{{catch/div|ash|B1F}} | |||
{{itemlist|Burn Heal|Southeast ledge, between the rocks (hidden)|G=yes|S=yes}} | |||
{{itemlist|Ultra Ball|Southwest ledge, between the rocks (hidden)|G=yes|S=yes}} | |||
{{itemlist|HP Up|Northwest ledge|G=yes|S=yes}} | |||
{{itemlist|Nugget|On the ridge where the legendary beasts stood (hidden)|G=yes|S=yes}} | |||
{{catch/div|ash|Later visit}} | |||
{{itemlist|TM Normal|B1F; Northeast ledge, behind a boulder (requires {{m|Strength}})|G=yes|S=yes|display={{TM|20|Endure}}}} | |||
{{itlistfoot|ash}} | |||
|} | |||
====1F==== | |||
=====Ambush!===== | |||
Immediately after entering the tower, you are ambushed again by {{ga|Silver}}. He is looking for the legendary Pokémon that are supposed to be here, and accuses you of trying to get to them first. He aims to stop you, and draws you into battle. | |||
=====Rival Battle 3===== | |||
{{ga|Silver}} has added another new Pokémon to his team since the previous battle. {{p|Magnemite}} takes serious damage from {{t|Fire}}-, {{t|Ground}}-, and {{type|Fighting}} attacks. For Trainers who chose {{p|Cyndaquil}}, or traded for the {{p|Machop}} in [[Goldenrod City]], it will likely be little threat. His {{p|Gastly}} has since evolved into {{p|Haunter}}, but is still vulnerable to the same {{t|Ghost}}-, {{t|Psychic}}-, and {{type|Dark}} moves. Use {{t|Rock}}- and {{type|Electric}} moves against his {{p|Zubat}} for greatest effect. The Pokémon that he took from {{prof|Elm}}'s lab has grown a few levels but otherwise has not changed since the previous battle. | |||
======{{MSP/3|152|Chikorita}} If the player chose {{p|Chikorita}}:====== | |||
{| style="margin: auto;" | |||
| | |||
{{Party/Single | |||
|color={{silver color}} | |||
|headcolor={{silver color light}} | |||
|bordercolor={{silver color dark}} | |||
|sprite=Spr GS Silver 1.png | |||
|prize={{PDollar}}1320 | |||
|name={{color2|000|Silver (game)|Silver}} | |||
|game=GSC|location=Burned Tower | |||
|pokemon=4}} | |||
|{{Pokémon/2|game=Gold | |||
|ndex=093|pokemon=Haunter | |||
|type1=Ghost|type2=Poison | |||
|level=20|gender=male | |||
|move1=Lick|move1type=Ghost | |||
|move2=Spite|move2type=Ghost | |||
|move3=Mean Look|move3type=Normal | |||
|move4=Curse|move4type=???}} | |||
|{{Pokémon/2|game=Gold | |||
|ndex=041|pokemon=Zubat | |||
|type1=Poison|type2=Flying | |||
|level=20|gender=male | |||
|move1=Leech Life|move1type=Bug | |||
|move2=Supersonic|move2type=Normal | |||
|move3=Bite|move3type=Dark | |||
|move4=Confuse Ray|move4type=Ghost}} | |||
{{Party/Div|color={{silver color}}}} | |||
|{{Pokémon/2|game=Gold | |||
|ndex=081|pokemon=Magnemite | |||
|type1=Electric|type2=Steel | |||
|level=18 | |||
|move1=Tackle|move1type=Normal | |||
|move2=ThunderShock|move2type=Electric | |||
|move3=Supersonic|move3type=Normal | |||
|move4=SonicBoom|move4type=Normal}} | |||
|{{Pokémon/2|game=Gold | |||
|ndex=156|pokemon=Quilava | |||
|type1=Fire | |||
|level=22|gender=male | |||
|move1=Ember|move1type=Fire | |||
|move2=Leer|move2type=Normal | |||
|move3=Quick Attack|move3type=Normal | |||
|move4=SmokeScreen|move4type=Normal}} | |||
{{Party/Footer}} | |||
|} | |||
======{{MSP/3|155|Cyndaquil}} If the player chose {{p|Cyndaquil}}:====== | |||
{| style="margin: auto;" | |||
| | |||
{{Party/Single | |||
|color={{silver color}} | |||
|headcolor={{silver color light}} | |||
|bordercolor={{silver color dark}} | |||
|sprite=Spr GS Silver 1.png | |||
|prize={{PDollar}}1320 | |||
|name={{color2|000|Silver (game)|Silver}} | |||
|game=GSC|location=Burned Tower | |||
|pokemon=4}} | |||
|{{Pokémon/2|game=Gold | |||
|ndex=093|pokemon=Haunter | |||
|type1=Ghost|type2=Poison | |||
|level=20|gender=male | |||
|move1=Lick|move1type=Ghost | |||
|move2=Spite|move2type=Ghost | |||
|move3=Mean Look|move3type=Normal | |||
|move4=Curse|move4type=???}} | |||
|{{Pokémon/2|game=Gold | |||
|ndex=041|pokemon=Zubat | |||
|type1=Poison|type2=Flying | |||
|level=20|gender=male | |||
|move1=Leech Life|move1type=Bug | |||
|move2=Supersonic|move2type=Normal | |||
|move3=Bite|move3type=Dark | |||
|move4=Confuse Ray|move4type=Ghost}} | |||
{{Party/Div|color={{silver color}}}} | |||
|{{Pokémon/2|game=Gold | |||
|ndex=081|pokemon=Magnemite | |||
|type1=Electric|type2=Steel | |||
|level=18 | |||
|move1=Tackle|move1type=Normal | |||
|move2=ThunderShock|move2type=Electric | |||
|move3=Supersonic|move3type=Normal | |||
|move4=SonicBoom|move4type=Normal}} | |||
|{{Pokémon/2|game=Gold | |||
|ndex=159|pokemon=Croconaw | |||
|type1=Water | |||
|level=22|gender=male | |||
|move1=Water Gun|move1type=Water | |||
|move2=Leer|move2type=Normal | |||
|move3=Bite|move3type=Dark | |||
|move4=Rage|move4type=Normal}} | |||
{{Party/Footer}} | |||
|} | |||
======{{MSP/3|158|Totodile}} If the player chose {{p|Totodile}}:====== | |||
{| style="margin: auto;" | |||
| | |||
{{Party/Single | |||
|color={{silver color}} | |||
|headcolor={{silver color light}} | |||
|bordercolor={{silver color dark}} | |||
|sprite=Spr GS Silver 1.png | |||
|prize={{PDollar}}1320 | |||
|name={{color2|000|Silver (game)|Silver}} | |||
|game=GSC|location=Burned Tower | |||
|pokemon=4}} | |||
|{{Pokémon/2|game=Gold | |||
|ndex=093|pokemon=Haunter | |||
|type1=Ghost|type2=Poison | |||
|level=20|gender=male | |||
|move1=Lick|move1type=Ghost | |||
|move2=Spite|move2type=Ghost | |||
|move3=Mean Look|move3type=Normal | |||
|move4=Curse|move4type=???}} | |||
|{{Pokémon/2|game=Gold | |||
|ndex=041|pokemon=Zubat | |||
|type1=Poison|type2=Flying | |||
|level=20|gender=male | |||
|move1=Leech Life|move1type=Bug | |||
|move2=Supersonic|move2type=Normal | |||
|move3=Bite|move3type=Dark | |||
|move4=Confuse Ray|move4type=Ghost}} | |||
{{Party/Div|color={{silver color}}}} | |||
|{{Pokémon/2|game=Gold | |||
|ndex=081|pokemon=Magnemite | |||
|type1=Electric|type2=Steel | |||
|level=18 | |||
|move1=Tackle|move1type=Normal | |||
|move2=ThunderShock|move2type=Electric | |||
|move3=Supersonic|move3type=Normal | |||
|move4=SonicBoom|move4type=Normal}} | |||
|{{Pokémon/2|game=Gold | |||
|ndex=153|pokemon=Bayleef | |||
|type1=Grass | |||
|level=22|gender=male | |||
|move1=Razor Leaf|move1type=Grass | |||
|move2=Growl|move2type=Normal | |||
|move3=PoisonPowder|move3type=Poison | |||
|move4=Reflect|move4type=Psychic}} | |||
{{Party/Footer}} | |||
|} | |||
Afterward, Silver shrugs off his loss as he moves to leave the tower, declaring that you would never be able to catch a legendary Pokémon anyway. | |||
=====Clear a Path===== | |||
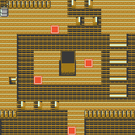
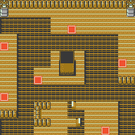
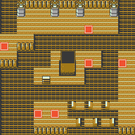
As the ruined tower is littered with fallen debris, {{m|Rock Smash}} is required to fully explore the area. Using it on the broken rock to the east clears the way to Firebreather Ned and a [[Burn Heal]], and jumping down through the hole in the floor leads to an [[HP Up]]. Use the move again to pass through the western side of the tower and reach the center area, then drop down through the hole in the floor. | |||
====B1F==== | |||
On the lower level, you find yourself standing before [[Legendary beasts|three mysterious Pokémon]]. They do not react until approached, when they suddenly dash off in different directions and begin {{DL|Roaming Pokémon|Generation II|racing across the land}}. They can be encountered almost anywhere but flee from humans immediately. After seeing them in battle, the Pokédex tracks their movements. | |||
<!--===Tracking the Beasts=== | |||
The three Pokémon now race across the vast [[Johto]] region, but it is not necessary to search every area for them. A simple strategy involves spraying on a Repel. | |||
{| width="75%" style="margin: auto; background: #{{locationcolor/med|ash}}; {{roundy}}; border: 2px solid #{{locationcolor/dark|ash}};" | |||
|- | |- | ||
| | ! colspan="2" style="background: #{{locationcolor/light|ash}}; {{roundytop|5px}}; padding 5px;" | Trainer Tips! | ||
| | |- style="background: #FFF;" | ||
| style="padding: 5px;" | 1. | |||
|- | | style="padding: 5px;" | If necessary, visit a Poké Mart to purchase a few [[Repel]]s or [[Super Repel]]s. | ||
| | |- style="background: #FFF;" | ||
| | | style="padding: 5px;" | 2. | ||
| {{ | | style="padding: 5px;" | {{m|Fly}} back to [[Viridian City]] and go north to {{rt|2|Kanto}}. | ||
|- style="background: #FFF;" | |||
| style="padding: 5px;" | 3. | |||
| style="padding: 5px;" | The Pokémon in the first party position must have a level between 11 and 49. Choose a Repel variant and spray it on. This chases off any wild Pokémon with a lower level, leaving the high-level beast the only thing left to encounter. | |||
|- style="background: #FFF;" | |||
| style="{{roundybl|5px}}; padding: 5px;" | 4. | |||
| style="{{roundybr|5px}}; padding: 5px;" | Wander through the tall grass until the beast appears. If not, enter and exit the gate to [[Viridian Forest]] to reload the map and change the Pokémon's location. | |||
|} | |} | ||
It will attempt to flee as soon as the battle begins, so be sure to use [[Ability|Abilities]] like {{a|Arena Trap}} or moves like {{m|Mean Look}} to block its escape. | |||
{| style="margin: auto;" | |||
| | |||
{{Pokémon/2|game=Gold and Silver | |||
|ndex=243|pokemon=Raikou | |||
|type1=Electric | |||
|level=40 | |||
|move1=Leer|move1type=Normal | |||
|move2=ThunderShock|move2type=Electric | |||
|move3=Roar|move3type=Normal | |||
|move4=Quick Attack|move4type=Normal | |||
}} | }} | ||
|} | |||
{| style="margin: auto;" | |||
| | |||
{{Pokémon/2|game=Gold and Silver | |||
|ndex=244|pokemon=Entei | |||
|type1=Fire | |||
|level=40 | |||
|move1=Leer|move1type=Normal | |||
|move2=Ember|move2type=Fire | |||
|move3=Roar|move3type=Normal | |||
|move4=Fire Spin|move4type=Fire | |||
}} | }} | ||
|} | |||
{| style="margin: auto;" | |||
| | |||
{{Pokémon/2|game=Gold and Silver | |||
|ndex=245|pokemon=Suicune | |||
|type1=Water | |||
|level=40 | |||
|move1=Leer|move1type=Normal | |||
|move2=Water Gun|move2type=Water | |||
|move3=Roar|move3type=Normal | |||
|move4=Gust|move4type=Flying | |||
}} | }} | ||
|} | |} | ||
{| class="expandable" | |||
|- | {{-}}--> | ||
===Tin Tower=== | |||
The [[Bell Tower|Tin Tower]] is a sacred place, and is off-limits to all but a few people. Ecruteak's Fog Badge gets you inside, but no higher than the first floor. A [[Rainbow Wing|special item]] is required to reach the rest of the tower. | |||
{| class="expandable" align="center" | |||
|- align="center" | |||
| '''Climbing the Tower''' | |||
|- | |- | ||
| | | | ||
| | In the time it took you obtain the [[Rainbow Wing]], {{p|Ho-Oh}} has finally returned to its former roost at the top of the tower. Stock up on [[Ultra Ball]]s, and bring a party capable of inflicting status ailments in order to wear it down faster. | ||
{| class="expandable" align="center" style="background: #{{locationcolor/med|building}}; {{roundy}}; border: 5px solid #{{locationcolor/light|building}};" | |||
|- align="center" | |||
! Available Pokémon | |||
|- | |- | ||
| | | | ||
| | {{catch/header|building}} | ||
|- | {{catch/div|building|2F-9F}} | ||
| | {{catch/entry2|019|Rattata|yes|yes|no|2F-9F|20-24|100%|100%|20%|type1=Normal}} | ||
| | {{catch/entry2|092|Gastly|yes|yes|no|2F-9F|20-22|0%|0%|80%|type1=Ghost|type2=Poison}} | ||
{{catch/div|building|Special}} | |||
{{catch/entry2|250|Ho-Oh|yes|no|no|Special|40|all=One|type1=Fire|type2=Flying}} | |||
{{catch/entry2|250|Ho-Oh|no|yes|no|Special|70|all=One|type1=Fire|type2=Flying}} | |||
{{catch/footer|building}} | |||
|} | |} | ||
{| class="expandable" | {| class="expandable" align="center" style="background: #{{locationcolor/med|building}}; {{roundy}}; border: 5px solid #{{locationcolor/light|building}};" | ||
|- align="center" | |||
! Items | |||
|- | |||
|- | |- | ||
| | | | ||
| | {{itlisth|building}} | ||
| | {{catch/div|building|3F}} | ||
| | {{Itemlist|Full Heal|Southwest corner|G=yes|S=yes}} | ||
| | {{catch/div|building|4F}} | ||
| | {{Itemlist|Ultra Ball|East of the pillar|G=yes|S=yes}} | ||
| | {{Itemlist|Super Potion|Next to the southeast stairs|G=yes|S=yes}} | ||
| | {{Itemlist|Escape Rope|Near the southwest stairs|G=yes|S=yes}} | ||
| | {{catch/div|building|5F}} | ||
| | {{Itemlist|Rare Candy|Next to the pillar|G=yes|S=yes}} | ||
| | {{catch/div|building|7F}} | ||
|} | {{Itemlist|Max Revive|Northeast corner|G=yes|S=yes}} | ||
{| | {{catch/div|building|8F}} | ||
| | {{Itemlist|Full Restore|Northwest corner|G=yes|S=yes}} | ||
{{Itemlist|Max Elixir|Next to the pillar|G=yes|S=yes|display=[[Max Elixir|Max Elixer]]}} | |||
{{Itemlist|Nugget|South of the pillar|G=yes|S=yes}} | |||
| | {{itlistfoot|building}} | ||
| | |||
| | |||
| | |||
| | |||
| | |||
| | |||
| | |||
| | |||
| | |||
| | |||
| | |||
| | |||
| | |||
| | |||
|} | |} | ||
[[File:Tin Tower 3F GSC.png|thumb|135px|left|Tin Tower, 3F]] | |||
[[File:Tin Tower 4F GSC.png|thumb|135px|Tin Tower, 4F]] | |||
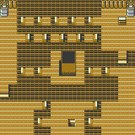
====3F==== | |||
Go west to reach a [[Full Heal]]. Move around in an S-shape to reach the northeast stairs. | |||
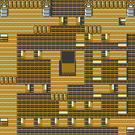
====4F==== | |||
Go south to find an [[Ultra Ball]], and south again to get a [[Super Potion]]. Grab the [[Escape Rope]] in the southwest, then climb the northwest stairs. | |||
[[File:Tin Tower 5F GSC.png|thumb|135px|left|Tin Tower, 5F]] | |||
[[File:Tin Tower 6F GSC.png|thumb|135px|Tin Tower, 6F]] | |||
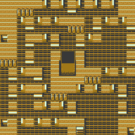
====5F==== | |||
Work your way to the pillar for a [[Rare Candy]]. With all the ledges, this room can be a bit of a maze. Use the stairs in the southeast and southwest corners to return to 4F. Climb the northwest stairs again and jump the first two northern ledges. Jump the southern ledge and head two ledges to the east. From then on, take all the northern ledges and you'll reach the staircase to 6F. | |||
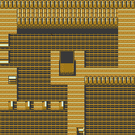
====6F==== | |||
6F has a simple layout that serves as a transition between the ramps on the lower floors and what lies above. The next three floors use a series of warp tiles for quick navigation. | |||
[[File:Tin Tower 7F GSC.png|thumb|135px|left|Tin Tower, 7F]] | |||
[[File:Tin Tower 8F GSC.png|thumb|135px|Tin Tower, 8F]] | |||
====7F==== | |||
Step on the nearest warp tile to reach the pillar, and take the next to reach the east wall of 9F. There are two warp tiles to the south; the right one leads to the center of 8F and a [[Max Elixir|Max Elixer]], while the left one leads to the south side of 8F and a [[Nugget]]. Backtrack to the first warp on 7F, grab the [[Max Revive]] to the northeast, and go south to take the next warp to the west side of 8F. | |||
=== | ====8F==== | ||
The next warp takes you to the north side of 9F, and the one after that brings you back to the east side of this floor. Pick up the [[Full Restore]] to the northwest and take one last warp to the center of 9F. | |||
[[File:Tin Tower 9F GSC.png|thumb|135px|left|Tin Tower, 9F]] | |||
[[File:Tin Tower roof GS.png|thumb|135px|Ho-Oh's roost]] | |||
====9F==== | |||
Climb the stairs to reach the rooftop. Save your progress; there's only one Ho-Oh, so don't risk losing it. | |||
==== | ====Rooftop==== | ||
=====Ho-Oh===== | |||
Start off by using status-inflicting moves, like {{m|Spore}} or {{m|Thunder Wave}}, to wear it down. Follow up with {{t|Water}}- or {{type|Electric}} attacks to inflict double the damage. Use caution with {{type|Rock}} attacks, as Ho-Oh takes four times the normal damage from such moves. Then slowly chip away at its remaining health with {{t|Fire}}-, {{t|Grass}}-, {{t|Fighting}}-, {{t|Bug}}-, or {{type|Steel}} attacks, as moves of these types only inflict half- or quarter-damage. | |||
{| align="center" style="background: #{{gold color light}}; {{roundy}}; border: 5px solid #{{gold color}};" | |||
|- | |- | ||
| | | | ||
| | {| align="center" style="background: #{{gold color light}}; {{roundy}}; border: 5px solid #{{silver color light}};" | ||
|- align="center" | |||
! Gold | |||
|- | |- | ||
| | |{{Pokémon/2|game=Gold | ||
| | |ndex=250|pokemon=Ho-Oh | ||
|type1=Fire|type2=Flying | |||
|held=Sacred Ash | |||
|level=40 | |||
|move1=Sacred Fire|move1type=Fire | |||
|move2=Safeguard|move2type=Normal | |||
|move3=Gust|move3type=Flying | |||
|move4=Recover|move4type=Normal}} | |||
|} | |||
| | |||
{| align="center" style="background: #{{gold color light}}; {{roundy}}; border: 5px solid #{{silver color light}};" | |||
|- align="center" | |||
! Silver | |||
|- | |- | ||
| | |{{Pokémon/2|game=Silver | ||
| | |ndex=250|pokemon=Ho-Oh | ||
| | |type1=Fire|type2=Flying | ||
| | |held=Sacred Ash | ||
| | |level=70 | ||
| | |move1=Recover|move1type=Normal | ||
| | |move2=Fire Blast|move2type=Fire | ||
| | |move3=Sunny Day|move3type=Fire | ||
| | |move4=Swift|move4type=Normal}} | ||
| | |} | ||
| | |} | ||
| | |} | ||
| | |||
| | |||
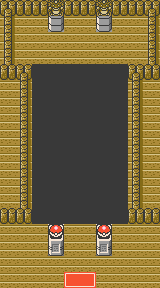
|- | ===Ecruteak Gym=== | ||
| | [[File:Ecruteak Gym GSC.png|thumb|Ecruteak Gym]] | ||
| | |||
{| class="roundy" style="background: linear-gradient(135deg, #{{ghost color}} 50%, #{{ghost color light}} 50%); padding: 0.5em;" | |||
|- | |||
! colspan=2 style="font-size: 1.3em; color: #000;" | | |||
|- style="background: #FFF;" | |||
| style="padding: 0.5em;" | '''Ecruteak City Pokémon Gym<br>Leader: Morty'''<br>The Mystic Seer of the Future | |||
|} | |} | ||
The [[Ecruteak Gym]] specializes in {{type|Ghost}} Pokémon. Ghost-type moves are super effective against Ghost- and {{type|Psychic}} Pokémon, while Ghost-type Pokémon are weak to Ghost- and {{type|Dark}} moves. {{t|Normal}}- and {{type|Fighting}} moves will have no effect. | |||
[[ | |||
The Gym features what appears to be a bottomless pit, with an invisible bridge crossing over it. Challengers who step in the wrong place are returned to the entrance. The Gym Trainers are positioned along this hidden walkway, giving the impression that they are floating in the air. The path to the [[Gym Leader]] mostly follows each Gym Trainer's line of sight. | |||
[[Morty]]'s Pokémon tend to use indirect attacks to harass their target. {{m|Spite}} and {{m|Curse}} drain the target's energy, while {{m|Lick}} and {{m|Hypnosis}} can inflict status ailments. Most of his Pokémon can even use {{m|Mean Look}} to prevent escape. {{type|Ghost}} Pokémon are vulnerable to Ghost- and {{type|Dark}} moves, but {{t|Psychic}}- and {{type|Ground}} attacks are an equally effective way to target their secondary {{t|Poison}} typing, instead. | |||
{| | {| align="center" | ||
|- style="background: #{{ghost color}};" | |- align="center" valign="top" | ||
| | |||
{| align="center" style="background: #{{ghost color}}; {{roundy}}; border: 5px solid #{{ghost color light}};" | |||
! | |- align="center" | ||
|- | ! Ecruteak Gym<br>[[File:Fog Badge.png|35px|Fog Badge]]<br><br /> | ||
| | |- | ||
| | | | ||
{| align="center" class="expandable" style="background: #{{ghost color}}; {{roundy}}; border: 5px solid #{{ghost color light}};" | |||
| | |- align="center" | ||
| | ! Trainers | ||
| | |- | ||
| | |||
| | {{Trainerheader|Ghost}} | ||
| Sage Jeffrey | {{Trainerentry|Spr GS Sage.png|Sage|Ping|512|5|092|Gastly|♂|16|None|092|Gastly|♂|16|None|092|Gastly|♂|16|None|092|Gastly|♂|16|None|092|Gastly|♂|16|None}} | ||
| | {{Trainerdiv|Ghost}} | ||
{{Trainerentry|Spr GS Medium.png|Medium|Grace|800|2|093|Haunter|♀|20|None|093|Haunter|♀|20|None}} | |||
| | {{Trainerdiv|Ghost}} | ||
| Medium Martha | {{Trainerentry|Spr GS Sage.png|Sage|Jeffrey|704|1|093|Haunter|♂|22|None}} | ||
| | {{Trainerdiv|Ghost}} | ||
{{Trainerentry|Spr GS Medium.png|Medium|Martha|800|3|092|Gastly|♀|18|None|093|Haunter|♀|20|None|092|Gastly|♀|20|None}} | |||
{{Trainerfooter|Ghost|I}} | |||
|} | |} | ||
{{Party | |||
{| style="margin: auto;" | |||
| | |||
{{Party/Single | |||
|color={{ghost color}} | |color={{ghost color}} | ||
|headcolor={{ghost color light}} | |headcolor={{ghost color light}} | ||
|bordercolor={{ghost color dark}} | |bordercolor={{ghost color dark}} | ||
|sprite= | |sprite=Spr GS Morty.png | ||
|prize={{ | |prize={{PDollar}}2300 | ||
|class= | |class=Leader | ||
| | |classlink=Gym Leader | ||
| | |name={{color2|000000|Morty}} | ||
|location= | |game=GS | ||
|pokemon=4 | |location=Ecruteak Gym | ||
|pokemon=4}} | |||
| | |{{Pokémon/2 | ||
|game=Gold | |game=Gold | ||
|ndex=092 | |ndex=092 | ||
| Line 242: | Line 542: | ||
|gender=male | |gender=male | ||
|level=21 | |level=21 | ||
|type1=Ghost | |type1=Ghost|type2=Poison | ||
|type2=Poison | |move1=Lick|move1type=Ghost | ||
|move1=Lick | |move2=Spite|move2type=Ghost | ||
|move1type=Ghost | |move3=Mean Look|move3type=Normal | ||
|move2=Spite | |move4=Curse|move4type=???}} | ||
|move2type=Ghost | |{{Pokémon/2 | ||
|move3=Mean Look | |||
|move3type=Normal | |||
|move4=Curse | |||
|move4type=???}} | |||
| | |||
|game=Gold | |game=Gold | ||
|ndex=093 | |ndex=093 | ||
| Line 260: | Line 553: | ||
|gender=male | |gender=male | ||
|level=21 | |level=21 | ||
|type1=Ghost | |type1=Ghost|type2=Poison | ||
|type2=Poison | |move1=Hypnosis|move1type=Psychic | ||
|move1=Hypnosis | |move2=Curse|move2type=??? | ||
|move1type=Psychic | |move3=Mimic|move3type=Normal | ||
|move2=Curse | |move4=Night Shade|move4type=Ghost}} | ||
|move2type=??? | {{Party/Div|color={{ghost color}}}} | ||
|move3=Mimic | |{{Pokémon/2 | ||
|move3type=Normal | |game=Gold | ||
|move4=Night Shade | |ndex=094 | ||
|move4type=Ghost}} | |pokemon=Gengar | ||
|gender=male | |||
| | |level=25 | ||
| | |type1=Ghost|type2=Poison | ||
|move1=Shadow Ball|move1type=Ghost | |||
|move2=Mean Look|move2type=Normal | |||
|move3=Hypnosis|move3type=Psychic | |||
|move4=Dream Eater|move4type=Psychic}} | |||
|{{Pokémon/2 | |||
|game=Gold | |game=Gold | ||
|ndex=093 | |ndex=093 | ||
| Line 278: | Line 576: | ||
|gender=male | |gender=male | ||
|level=23 | |level=23 | ||
|type1=Ghost | |type1=Ghost|type2=Poison | ||
|type2=Poison | |move1=Spite|move1type=Ghost | ||
|move1=Spite | |move2=Mean Look|move2type=Normal | ||
|move1type=Ghost | |move3=Mimic|move3type=Normal | ||
|move2=Mean Look | |move4=Night Shade|move4type=Ghost}} | ||
|move2type=Normal | {{Party/Footer}} | ||
|move3=Mimic | |} | ||
|move3type=Normal | |} | ||
|move4=Night Shade | |} | ||
|move4type=Ghost}} | |||
== Route 38 == | After the battle, [[Morty]] awards you the {{badge|Fog}}, which ensures obedience of all Pokémon up to level 50 and enables the use of {{m|Surf}} in the field. He also gives you {{TM|30|Shadow Ball}} as a prize. | ||
==Route 38== | |||
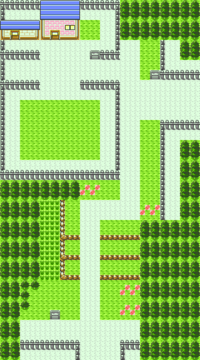
[[File:Johto Route 38 GSC.png|thumb|250px|Route 38]] | |||
{{rt|38|Johto}} leads west from [[Ecruteak City]], weaving through the trees on its way toward {{rt|39|Johto}}. | |||
{| class="expandable" | {| class="expandable" align="center" style="background: #{{locationcolor/med|road}}; {{roundy}}; border: 5px solid #{{locationcolor/light|road}};" | ||
|- align="center" | |||
! Trainers | |||
|- | |||
|- | |- | ||
| | | | ||
| | {{trainerheader|road}} | ||
{{Trainerentry|Spr GS Sailor.png|Sailor|Harry|760|1|194|Wooper|♂|19|None}} | |||
| | {{Trainerdiv|road}} | ||
| | {{Trainerentry|Spr GS Lass.png|Lass|Dana|432|2|180|Flaaffy|♀|18|None|054|Psyduck|♀|18|None|38=phone}} | ||
| | {{Trainerdiv|road}} | ||
| {{ | {{Trainerentry|Spr GS Beauty.png|Beauty|Valerie|1496|2|187|Hoppip|♀|17|None|188|Skiploom|♀|17|None}} | ||
{{Trainerdiv|road}} | |||
{{Trainerentry|Spr GS Bird Keeper.png|Bird Keeper|Toby|408|3|084|Doduo|♂|15|None|084|Doduo|♂|16|None|084|Doduo|♂|17|None}} | |||
{{Trainerdiv|road}} | |||
{{Trainerentry|Spr GS Schoolboy.png|Schoolboy|Chad|608|1|122|Mr. Mime|♂|19|None|38=phone}} | |||
{{Trainerdiv|road}} | |||
{{Trainerentry|Spr GS Beauty.png|Beauty|Olivia{{sup/2|C}}|1672|1|222|Corsola|♀|19|None}} | |||
{{Trainerfooter|road|II}} | |||
|} | |} | ||
{| class="expandable" | {| class="expandable" align="center" style="background: #{{locationcolor/med|road}}; {{roundy}}; border: 5px solid #{{locationcolor/light|road}};" | ||
|- align="center" | |||
! Pokémon | ! Available Pokémon | ||
|- | |- | ||
| Rattata | | | ||
| | {{Catch/header|road}} | ||
| | {{Catch/entry2|019|Rattata|yes|no|no|Grass|16|30%|30%|40%|type1=Normal}} | ||
| Raticate | {{Catch/entry2|020|Raticate|yes|yes|no|Grass|16|all=30%|type1=Normal}} | ||
| | {{Catch/entry2|052|Meowth|no|yes|no|Grass|16|30%|30%|40%|type1=Normal}} | ||
| | {{Catch/entry2|081|Magnemite|yes|yes|no|Grass|16|all=20%|type1=Electric|type2=Steel}} | ||
| Magnemite | {{Catch/entry2|083|Farfetch'd|yes|yes|no|Grass|16|10%|10%|0%|type1=Normal|type2=Flying}} | ||
| | {{Catch/entry2|128|Tauros|yes|yes|no|Grass|13|all=4%|type1=Normal}} | ||
| | {{Catch/entry2|209|Snubbull|yes|yes|no|Grass|13|all=1%|type1=Normal}} | ||
| Farfetch'd | {{Catch/entry2|241|Miltank|yes|yes|no|Grass|13|all=5%|type1=Normal}} | ||
| | {{Catch/div|road|{{color2|000|Headbutt tree}}<br><small>(Moderate chances of battle)</small>}} | ||
| | {{Catch/entry2|010|Caterpie|yes|no|no|Headbutt|10|all=65%|type1=Bug}} | ||
| | {{Catch/entry2|011|Metapod|yes|no|no|Headbutt|10|all=15%|type1=Bug}} | ||
| | {{Catch/entry2|012|Butterfree|yes|no|no|Headbutt|10|all=5%|type1=Bug|type2=Flying}} | ||
| | {{Catch/entry2|013|Weedle|no|yes|no|Headbutt|10|all=65%|type1=Bug|type2=Poison}} | ||
| Snubbull | {{Catch/entry2|014|Kakuna|no|yes|no|Headbutt|10|all=15%|type1=Bug|type2=Poison}} | ||
| | {{Catch/entry2|015|Beedrill|no|yes|no|Headbutt|10|all=5%|type1=Bug|type2=Poison}} | ||
| | {{Catch/entry2|102|Exeggcute|yes|yes|no|Headbutt|10|all=15%|type1=Grass|type2=Psychic}} | ||
| Miltank | {{Catch/div|road|{{color2|000|Headbutt tree}}<br><small>(Low chances of battle)</small>}} | ||
| | {{Catch/entry2|010|Caterpie|yes|no|no|Headbutt|10|all=50%|type1=Bug}} | ||
{{Catch/entry2|012|Butterfree|yes|no|no|Headbutt|10|all=5%|type1=Bug|type2=Flying}} | |||
{{Catch/entry2|013|Weedle|no|yes|no|Headbutt|10|all=50%|type1=Bug|type2=Poison}} | |||
{{Catch/entry2|015|Beedrill|no|yes|no|Headbutt|10|all=5%|type1=Bug|type2=Poison}} | |||
{{Catch/entry2|102|Exeggcute|yes|yes|no|Headbutt|10|all=15%|type1=Grass|type2=Psychic}} | |||
{{Catch/entry2|204|Pineco|yes|yes|no|Headbutt|10|all=30%|type1=Bug}} | |||
{{Catch/div|road|During a Snubbull swarm}} | |||
{{Catch/entry2|019|Rattata|yes|no|no|Swarm|16|0%|0%|10%|type1=Normal}} | |||
{{Catch/entry2|020|Raticate|yes|no|no|Swarm|16|all=30%|type1=Normal}} | |||
{{Catch/entry2|052|Meowth|no|yes|no|Swarm|16|30%|30%|40%|type1=Normal}} | |||
{{Catch/entry2|081|Magnemite|yes|yes|no|Swarm|16|all=20%|type1=Electric|type2=Steel}} | |||
{{Catch/entry2|083|Farfetch'd|yes|yes|no|Swarm|16|10%|10%|0%|type1=Normal|type2=Flying}} | |||
{{Catch/entry2|128|Tauros|yes|yes|no|Swarm|13|all=5%|type1=Normal}} | |||
{{Catch/entry2|209|Snubbull|yes|yes|no|Swarm|16|all=30%|type1=Normal}} | |||
{{Catch/entry2|241|Miltank|yes|yes|no|Swarm|13|all=5%|type1=Normal}} | |||
{{Catch/footer|road}} | |||
|} | |} | ||
{| class="expandable" | {| class="expandable" align="center" style="background: #{{locationcolor/med|road}}; {{roundy}}; border: 5px solid #{{locationcolor/light|road}};" | ||
|- align="center" | |||
! Items | |||
! | |||
|- | |- | ||
| | | | ||
| | {{itlisth|road}} | ||
{{Itemlist|None|West of the fenced section on the lower middle path, on the tree (daily)|G=yes|S=yes|display={{i|Berry}}}} | |||
{{itlistfoot|road}} | |||
| | |||
| | |||
| | |||
| | |||
| | |||
| | |||
| | |||
|} | |} | ||
===Searching for Snubbull=== | |||
After defeating Schoolboy Chad, be sure to trade phone numbers with him. He will call occasionally to alert you about a {{DL|Mass outbreak|Generation II|swarm}} of a certain Pokémon species. {{p|Snubbull}} are usually difficult to find, but will be more likely to appear along {{rt|38|Johto}} for a short time. The swarm only lasts until midnight, so be quick! | |||
== Route 39 == | {{-}} | ||
==Route 39== | |||
[[File:Johto Route 39 GSC.png|thumb|200px|Route 39]] | |||
The peaceful plains of {{rt|39|Johto}} lead downhill from {{rt|38|Johto}} to [[Olivine City]]. The [[Moomoo Farm]] is located in the northwest. | |||
{| class="expandable" | {| class="expandable" align="center" style="background: #{{locationcolor/med|road}}; {{roundy}}; border: 5px solid #{{locationcolor/light|road}};" | ||
|- align="center" | |||
! Trainers | |||
! | |||
|- | |- | ||
| | | | ||
| | {{trainerheader|road}} | ||
{{Trainerentry|Spr GS Psychic.png|Psychic|Norman|640|2|079|Slowpoke|♂|17||079|Slowpoke|♂|20|}} | |||
| | {{Trainerdiv|road}} | ||
| | {{Trainerentry|Spr GS Pokéfan M.png|Pokéfan|Derek|1360|1|025|Pikachu|♂|17|Berry|38=phone}} | ||
| | {{Trainerdiv|road}} | ||
{{Trainerentry|Spr GS Pokéfan F.png|Pokéfan|Ruth|1360|1|025|Pikachu|♀|17|Berry}} | |||
| | {{Trainerdiv|road}} | ||
| | {{Trainerentry|Spr GS Sailor.png|Sailor|Eugene|760|3|061|Poliwhirl|♂|17||098|Krabby|♂|19||020|Raticate|♂|17|}} | ||
| | {{Trainerfooter|road|II}} | ||
| | |||
| | |||
| | |||
|} | |} | ||
{| class="expandable" | {| class="expandable" align="center" style="background: #{{locationcolor/med|road}}; {{roundy}}; border: 5px solid #{{locationcolor/light|road}};" | ||
|- align="center" | |||
! Available Pokémon | |||
|- | |||
|- | |- | ||
| Magnemite | | | ||
| | {{Catch/header|road}} | ||
| | {{Catch/entry2|019|Rattata|yes|no|no|Grass|16|30%|30%|40%|type1=Normal}} | ||
| Tauros | {{Catch/entry2|020|Raticate|yes|yes|no|Grass|17|all=30%|type1=Normal}} | ||
| | {{Catch/entry2|052|Meowth|no|yes|no|Grass|16|30%|30%|40%|type1=Normal}} | ||
| | {{Catch/entry2|081|Magnemite|yes|yes|no|Grass|16|all=20%|type1=Electric|type2=Steel}} | ||
| | {{Catch/entry2|083|Farfetch'd|yes|yes|no|Grass|16|10%|10%|0%|type1=Normal|type2=Flying}} | ||
| | {{Catch/entry2|128|Tauros|yes|yes|no|Grass|15|all=5%|type1=Normal}} | ||
| | {{Catch/entry2|241|Miltank|yes|yes|no|Grass|15|all=5%|type1=Normal}} | ||
| | {{Catch/div|road|{{color2|000|Headbutt tree}}<br><small>(Moderate chances of battle)</small>}} | ||
| | {{Catch/entry2|010|Caterpie|yes|no|no|Headbutt|10|all=65%|type1=Bug}} | ||
| | {{Catch/entry2|011|Metapod|yes|no|no|Headbutt|10|all=15%|type1=Bug}} | ||
| | {{Catch/entry2|012|Butterfree|yes|no|no|Headbutt|10|all=5%|type1=Bug|type2=Flying}} | ||
| | {{Catch/entry2|013|Weedle|no|yes|no|Headbutt|10|all=65%|type1=Bug|type2=Poison}} | ||
{{Catch/entry2|014|Kakuna|no|yes|no|Headbutt|10|all=15%|type1=Bug|type2=Poison}} | |||
{{Catch/entry2|015|Beedrill|no|yes|no|Headbutt|10|all=5%|type1=Bug|type2=Poison}} | |||
{{Catch/entry2|102|Exeggcute|yes|yes|no|Headbutt|10|all=15%|type1=Grass|type2=Psychic}} | |||
{{Catch/div|road|{{color2|000|Headbutt tree}}<br><small>(Low chances of battle)</small>}} | |||
{{Catch/entry2|010|Caterpie|yes|no|no|Headbutt|10|all=50%|type1=Bug}} | |||
{{Catch/entry2|012|Butterfree|yes|no|no|Headbutt|10|all=5%|type1=Bug|type2=Flying}} | |||
{{Catch/entry2|013|Weedle|no|yes|no|Headbutt|10|all=50%|type1=Bug|type2=Poison}} | |||
{{Catch/entry2|015|Beedrill|no|yes|no|Headbutt|10|all=5%|type1=Bug|type2=Poison}} | |||
{{Catch/entry2|102|Exeggcute|yes|yes|no|Headbutt|10|all=15%|type1=Grass|type2=Psychic}} | |||
{{Catch/entry2|204|Pineco|yes|yes|no|Headbutt|10|all=30%|type1=Bug}} | |||
{{Catch/footer|road}} | |||
|} | |} | ||
{| class="expandable" | {| class="expandable" align="center" style="background: #{{locationcolor/med|road}}; {{roundy}}; border: 5px solid #{{locationcolor/light|road}};" | ||
|- align="center" | |||
! Items | |||
|- | |||
|- | |- | ||
| | | | ||
| | {{itlisth|road}} | ||
{{Itemlist|None|East of the farmhouse, on the tree (daily)|G=yes|S=yes|display=[[Mint Berry]]}} | |||
{{Itemlist|TM Normal|In the farmhouse; from the farmer, after healing Miltank|G=yes|S=yes|display={{TM|13|Snore}}}} | |||
{{Itemlist|Moomoo Milk III|May be purchased from the farmer for {{pdollar}}500 per bottle, after healing Miltank|G=yes|S=yes|display=[[Moomoo Milk]]}} | |||
{{Itemlist|Nugget|Between the four Miltank in the pasture (hidden)|G=yes|S=yes}} | |||
{{itlistfoot|road}} | |||
|} | |} | ||
===Moomoo Farm=== | |||
The [[Moomoo Farm]] depends on its herd of {{p|Miltank}} to produce its milk, which is popular with people and Pokémon as far away as [[Kanto]]. Speak to the farmer in the farmhouse to learn that one of their Miltank has fallen ill, and will need {{i|Berry|Berries}} to recover. Visit the barn to find the farmer's daughters tending to the sickly Miltank, Moomoo. In order to fully recover, she must be fed a total of seven Berries. Once her condition returns to normal, speak to the farmer again to receive {{TM|13|Snore}} as a reward. Afterward, [[Moomoo Milk]] can be purchased here for {{pdollar}}500 per bottle. | |||
{{WalkthroughPrevNext | |||
|game=Gold|game2=Silver | |||
|gamename=Gold and Silver | |||
|prevsection=7 | |||
|prevname=Route 35, National Park, Route 36, Route 37 | |||
|nextsection=9 | |||
|nextname=Olivine City, Route 40, Route 41 | |||
{| | }} | ||
| | |||
| | |||
| | |||
| | |||
<br> | <br> | ||
{{Project Walkthroughs notice}} | {{Project Walkthroughs notice}} | ||
[[Category:Gold and Silver walkthrough]] | [[Category:Gold and Silver walkthrough]] | ||
Latest revision as of 16:43, 12 May 2024
These pages follow the original Game Boy Color iteration, not Pokémon HeartGold and SoulSilver. The guide for those games can be found here.
Ecruteak City
Ecruteak City lies in the woods of northern Johto, between Routes 37, 38, and 42. The city honors its past by preserving long-held traditions, like the old-fashioned architecture of the local dance theater and the two towers that stand to the north. Several legendary Pokémon have ties to the area, giving Ecruteak an air of mystery.
| Trainers | ||||||||||||||||||||||||||||||||||||||||||||||||||||||||||||||||||||||||||||||||||||||||||||
|---|---|---|---|---|---|---|---|---|---|---|---|---|---|---|---|---|---|---|---|---|---|---|---|---|---|---|---|---|---|---|---|---|---|---|---|---|---|---|---|---|---|---|---|---|---|---|---|---|---|---|---|---|---|---|---|---|---|---|---|---|---|---|---|---|---|---|---|---|---|---|---|---|---|---|---|---|---|---|---|---|---|---|---|---|---|---|---|---|---|---|---|---|
| ||||||||||||||||||||||||||||||||||||||||||||||||||||||||||||||||||||||||||||||||||||||||||||
| Available Pokémon | ||||||||||||||||||||||||||||||||||||||||||||||||||||||||||||||||||||||||||||||||||||||||||||||||||||||||||||||||||||||||
|---|---|---|---|---|---|---|---|---|---|---|---|---|---|---|---|---|---|---|---|---|---|---|---|---|---|---|---|---|---|---|---|---|---|---|---|---|---|---|---|---|---|---|---|---|---|---|---|---|---|---|---|---|---|---|---|---|---|---|---|---|---|---|---|---|---|---|---|---|---|---|---|---|---|---|---|---|---|---|---|---|---|---|---|---|---|---|---|---|---|---|---|---|---|---|---|---|---|---|---|---|---|---|---|---|---|---|---|---|---|---|---|---|---|---|---|---|---|---|---|---|
| ||||||||||||||||||||||||||||||||||||||||||||||||||||||||||||||||||||||||||||||||||||||||||||||||||||||||||||||||||||||||
| Items | ||||||||||||||||||||||||
|---|---|---|---|---|---|---|---|---|---|---|---|---|---|---|---|---|---|---|---|---|---|---|---|---|
| ||||||||||||||||||||||||
Treasure Hunting
Visit the southwest house and speak to the man inside. He gives you an Itemfinder, a device that can detect any hidden items nearby.
Pokémon Center
Time-Traveling Trades
Enter the Pokémon Center to meet Bill, the creator of the Pokémon Storage System. He has just finished maintenance on the Time Capsule, a machine located on the second floor of every Pokémon Center that allows Trainers to "trade with the past". There are certain restrictions, as all Pokémon and moves that were still undiscovered then are prohibited. The Time Capsule will be operational in 24 hours. After a brief explanation, Bill leaves for his home in Goldenrod City.
Ecruteak Dance Theater
The Ecruteak Dance Theater is where the Kimono Girls practice both their dancing and their Pokémon training. Each of the five sisters specializes in one of Eevee's evolutions. They may be battled in any order. After they have been defeated, speak to the Gentleman in the audience. He has challenged the sisters repeatedly but has failed each time. To reward you for defeating them when he could not, he gives you HM03 (Surf).
Burned Tower
The charred ruins of the Burned Tower lie in the northwest part of the city. Formerly known as the Brass Tower, it was once as majestic as the Tin Tower to the east. When it was new, it was said to be the roost of an immense, silver-colored Pokémon. But centuries later, a heavy storm rolled in and the tower was struck by lightning, igniting a great fire that would rage for three days. The silver Pokémon and the glorious, rainbow-colored Pokémon that roosted on Tin Tower escaped to the skies unharmed, and the silver Pokémon flew away, never to return. A sudden downpour would finally douse the flames, and the rainbow Pokémon gave new life to three nameless Pokémon that perished in the blaze before it flew off as well.
| Trainers | |||||||||||||||||||||||||||||||||||||||||||||||||||||||||||
|---|---|---|---|---|---|---|---|---|---|---|---|---|---|---|---|---|---|---|---|---|---|---|---|---|---|---|---|---|---|---|---|---|---|---|---|---|---|---|---|---|---|---|---|---|---|---|---|---|---|---|---|---|---|---|---|---|---|---|---|
| |||||||||||||||||||||||||||||||||||||||||||||||||||||||||||
| Available Pokémon | ||||||||||||||||||||||||||||||||||||||||||||||||||||||||||||||||||||||||||||||||||||||||||||||||||||||||||||||||||||||||||||||||||||||||||||||||||||||||||||||||||||||||||||||||||||||||||||||||||||||||||||||||||||||||||||||||||||||||||||||||||||||||||||||||||||||||||
|---|---|---|---|---|---|---|---|---|---|---|---|---|---|---|---|---|---|---|---|---|---|---|---|---|---|---|---|---|---|---|---|---|---|---|---|---|---|---|---|---|---|---|---|---|---|---|---|---|---|---|---|---|---|---|---|---|---|---|---|---|---|---|---|---|---|---|---|---|---|---|---|---|---|---|---|---|---|---|---|---|---|---|---|---|---|---|---|---|---|---|---|---|---|---|---|---|---|---|---|---|---|---|---|---|---|---|---|---|---|---|---|---|---|---|---|---|---|---|---|---|---|---|---|---|---|---|---|---|---|---|---|---|---|---|---|---|---|---|---|---|---|---|---|---|---|---|---|---|---|---|---|---|---|---|---|---|---|---|---|---|---|---|---|---|---|---|---|---|---|---|---|---|---|---|---|---|---|---|---|---|---|---|---|---|---|---|---|---|---|---|---|---|---|---|---|---|---|---|---|---|---|---|---|---|---|---|---|---|---|---|---|---|---|---|---|---|---|---|---|---|---|---|---|---|---|---|---|---|---|---|---|---|---|---|---|---|---|---|---|---|---|---|---|---|---|---|---|---|---|---|---|---|---|---|---|---|---|---|---|---|---|---|---|---|---|---|
| ||||||||||||||||||||||||||||||||||||||||||||||||||||||||||||||||||||||||||||||||||||||||||||||||||||||||||||||||||||||||||||||||||||||||||||||||||||||||||||||||||||||||||||||||||||||||||||||||||||||||||||||||||||||||||||||||||||||||||||||||||||||||||||||||||||||||||
| Items | |||||||||||||||||||||||||||||||||||||||||||||||||||||||||||||||||||||||||||||||||||||
|---|---|---|---|---|---|---|---|---|---|---|---|---|---|---|---|---|---|---|---|---|---|---|---|---|---|---|---|---|---|---|---|---|---|---|---|---|---|---|---|---|---|---|---|---|---|---|---|---|---|---|---|---|---|---|---|---|---|---|---|---|---|---|---|---|---|---|---|---|---|---|---|---|---|---|---|---|---|---|---|---|---|---|---|---|---|
| |||||||||||||||||||||||||||||||||||||||||||||||||||||||||||||||||||||||||||||||||||||
1F
Ambush!
Immediately after entering the tower, you are ambushed again by Silver. He is looking for the legendary Pokémon that are supposed to be here, and accuses you of trying to get to them first. He aims to stop you, and draws you into battle.
Rival Battle 3
Silver has added another new Pokémon to his team since the previous battle. Magnemite takes serious damage from Fire-, Ground-, and Fighting-type attacks. For Trainers who chose Cyndaquil, or traded for the Machop in Goldenrod City, it will likely be little threat. His Gastly has since evolved into Haunter, but is still vulnerable to the same Ghost-, Psychic-, and Dark-type moves. Use Rock- and Electric-type moves against his Zubat for greatest effect. The Pokémon that he took from Elm's lab has grown a few levels but otherwise has not changed since the previous battle.
 If the player chose Chikorita:
| |||||||||||||||||||||||||||||||||||||||||||||||||||||||||||||||||||||||||||||||||||||||||||||||||||||||||||||
 If the player chose Cyndaquil:
| |||||||||||||||||||||||||||||||||||||||||||||||||||||||||||||||||||||||||||||||||||||||||||||||||||||||||||||
 If the player chose Totodile:
| |||||||||||||||||||||||||||||||||||||||||||||||||||||||||||||||||||||||||||||||||||||||||||||||||||||||||||||
Afterward, Silver shrugs off his loss as he moves to leave the tower, declaring that you would never be able to catch a legendary Pokémon anyway.
Clear a Path
As the ruined tower is littered with fallen debris, Rock Smash is required to fully explore the area. Using it on the broken rock to the east clears the way to Firebreather Ned and a Burn Heal, and jumping down through the hole in the floor leads to an HP Up. Use the move again to pass through the western side of the tower and reach the center area, then drop down through the hole in the floor.
B1F
On the lower level, you find yourself standing before three mysterious Pokémon. They do not react until approached, when they suddenly dash off in different directions and begin racing across the land. They can be encountered almost anywhere but flee from humans immediately. After seeing them in battle, the Pokédex tracks their movements.
Tin Tower
The Tin Tower is a sacred place, and is off-limits to all but a few people. Ecruteak's Fog Badge gets you inside, but no higher than the first floor. A special item is required to reach the rest of the tower.
| Climbing the Tower | ||||||||||||||||||||||||||||||||||||||||||||||||||||||||||||||||||||||||||||||||||||||||||||||||||||||||||||||||||||||||||||||||||||||||||||||||||||||||||||||||||||||||||||||||||||||||||||||||||||||||||||||||||||||||||||||||||||||||||||||||||||||||||||||||||||||||||||||||||||||||||||||||||||||||||||
|
In the time it took you obtain the Rainbow Wing, Ho-Oh has finally returned to its former roost at the top of the tower. Stock up on Ultra Balls, and bring a party capable of inflicting status ailments in order to wear it down faster.
3FGo west to reach a Full Heal. Move around in an S-shape to reach the northeast stairs. 4FGo south to find an Ultra Ball, and south again to get a Super Potion. Grab the Escape Rope in the southwest, then climb the northwest stairs. 5FWork your way to the pillar for a Rare Candy. With all the ledges, this room can be a bit of a maze. Use the stairs in the southeast and southwest corners to return to 4F. Climb the northwest stairs again and jump the first two northern ledges. Jump the southern ledge and head two ledges to the east. From then on, take all the northern ledges and you'll reach the staircase to 6F. 6F6F has a simple layout that serves as a transition between the ramps on the lower floors and what lies above. The next three floors use a series of warp tiles for quick navigation. 7FStep on the nearest warp tile to reach the pillar, and take the next to reach the east wall of 9F. There are two warp tiles to the south; the right one leads to the center of 8F and a Max Elixer, while the left one leads to the south side of 8F and a Nugget. Backtrack to the first warp on 7F, grab the Max Revive to the northeast, and go south to take the next warp to the west side of 8F. 8FThe next warp takes you to the north side of 9F, and the one after that brings you back to the east side of this floor. Pick up the Full Restore to the northwest and take one last warp to the center of 9F. 9FClimb the stairs to reach the rooftop. Save your progress; there's only one Ho-Oh, so don't risk losing it. RooftopHo-OhStart off by using status-inflicting moves, like Spore or Thunder Wave, to wear it down. Follow up with Water- or Electric-type attacks to inflict double the damage. Use caution with Rock-type attacks, as Ho-Oh takes four times the normal damage from such moves. Then slowly chip away at its remaining health with Fire-, Grass-, Fighting-, Bug-, or Steel-type attacks, as moves of these types only inflict half- or quarter-damage.
| ||||||||||||||||||||||||||||||||||||||||||||||||||||||||||||||||||||||||||||||||||||||||||||||||||||||||||||||||||||||||||||||||||||||||||||||||||||||||||||||||||||||||||||||||||||||||||||||||||||||||||||||||||||||||||||||||||||||||||||||||||||||||||||||||||||||||||||||||||||||||||||||||||||||||||||
Ecruteak Gym
| Ecruteak City Pokémon Gym Leader: Morty The Mystic Seer of the Future | |
The Ecruteak Gym specializes in Ghost-type Pokémon. Ghost-type moves are super effective against Ghost- and Psychic-type Pokémon, while Ghost-type Pokémon are weak to Ghost- and Dark-type moves. Normal- and Fighting-type moves will have no effect.
The Gym features what appears to be a bottomless pit, with an invisible bridge crossing over it. Challengers who step in the wrong place are returned to the entrance. The Gym Trainers are positioned along this hidden walkway, giving the impression that they are floating in the air. The path to the Gym Leader mostly follows each Gym Trainer's line of sight.
Morty's Pokémon tend to use indirect attacks to harass their target. Spite and Curse drain the target's energy, while Lick and Hypnosis can inflict status ailments. Most of his Pokémon can even use Mean Look to prevent escape. Ghost-type Pokémon are vulnerable to Ghost- and Dark-type moves, but Psychic- and Ground-type attacks are an equally effective way to target their secondary Poison typing, instead.
| |||||||||||||||||||||||||||||||||||||||||||||||||||||||||||||||||||||||||||||||||||||||||||||||||||||||||||||||||||||||||||||||||||||||||||||||||||||||||||||||||||||||||||||||||||||||||||||||||||||||||||||||||||||||||||||
After the battle, Morty awards you the Fog Badge, which ensures obedience of all Pokémon up to level 50 and enables the use of Surf in the field. He also gives you TM30 (Shadow Ball) as a prize.
Route 38
Route 38 leads west from Ecruteak City, weaving through the trees on its way toward Route 39.
| Trainers | ||||||||||||||||||||||||||||||||||||||||||||||||||||||||||||||||||||||||||||||||||||||||||||||||||||||||||||||||||||
|---|---|---|---|---|---|---|---|---|---|---|---|---|---|---|---|---|---|---|---|---|---|---|---|---|---|---|---|---|---|---|---|---|---|---|---|---|---|---|---|---|---|---|---|---|---|---|---|---|---|---|---|---|---|---|---|---|---|---|---|---|---|---|---|---|---|---|---|---|---|---|---|---|---|---|---|---|---|---|---|---|---|---|---|---|---|---|---|---|---|---|---|---|---|---|---|---|---|---|---|---|---|---|---|---|---|---|---|---|---|---|---|---|---|---|---|---|
| ||||||||||||||||||||||||||||||||||||||||||||||||||||||||||||||||||||||||||||||||||||||||||||||||||||||||||||||||||||
| Available Pokémon | ||||||||||||||||||||||||||||||||||||||||||||||||||||||||||||||||||||||||||||||||||||||||||||||||||||||||||||||||||||||||||||||||||||||||||||||||||||||||||||||||||||||||||||||||||||||||||||||||||||||||||||||||||||||||||||||||||||||||||||||||||||||||||||||||||||||||||||||||||||||||||||||||||||||||||||||||||||||||||||||||||||||||||||||||||||||||||||||||||||||||||||||||||||||||||||||||||||||||||||||||||||||||||||||||||||||||||||||||||||||||||||||||||||||||||||||||||||||||||||||||||||||||||||||||||||||||||||||||||||||||||||||||||||||||||
|---|---|---|---|---|---|---|---|---|---|---|---|---|---|---|---|---|---|---|---|---|---|---|---|---|---|---|---|---|---|---|---|---|---|---|---|---|---|---|---|---|---|---|---|---|---|---|---|---|---|---|---|---|---|---|---|---|---|---|---|---|---|---|---|---|---|---|---|---|---|---|---|---|---|---|---|---|---|---|---|---|---|---|---|---|---|---|---|---|---|---|---|---|---|---|---|---|---|---|---|---|---|---|---|---|---|---|---|---|---|---|---|---|---|---|---|---|---|---|---|---|---|---|---|---|---|---|---|---|---|---|---|---|---|---|---|---|---|---|---|---|---|---|---|---|---|---|---|---|---|---|---|---|---|---|---|---|---|---|---|---|---|---|---|---|---|---|---|---|---|---|---|---|---|---|---|---|---|---|---|---|---|---|---|---|---|---|---|---|---|---|---|---|---|---|---|---|---|---|---|---|---|---|---|---|---|---|---|---|---|---|---|---|---|---|---|---|---|---|---|---|---|---|---|---|---|---|---|---|---|---|---|---|---|---|---|---|---|---|---|---|---|---|---|---|---|---|---|---|---|---|---|---|---|---|---|---|---|---|---|---|---|---|---|---|---|---|---|---|---|---|---|---|---|---|---|---|---|---|---|---|---|---|---|---|---|---|---|---|---|---|---|---|---|---|---|---|---|---|---|---|---|---|---|---|---|---|---|---|---|---|---|---|---|---|---|---|---|---|---|---|---|---|---|---|---|---|---|---|---|---|---|---|---|---|---|---|---|---|---|---|---|---|---|---|---|---|---|---|---|---|---|---|---|---|---|---|---|---|---|---|---|---|---|---|---|---|---|---|---|---|---|---|---|---|---|---|---|---|---|---|---|---|---|---|---|---|---|---|---|---|---|---|---|---|---|---|---|---|---|---|---|---|---|---|---|---|---|---|---|---|---|---|---|---|---|---|---|---|---|---|---|---|---|---|---|---|---|---|---|---|---|---|---|---|---|---|---|---|---|---|---|---|---|---|---|---|---|---|---|---|---|---|---|---|---|---|---|---|---|---|---|---|---|---|---|---|---|---|---|---|---|---|---|---|---|---|---|---|---|---|---|---|---|---|---|---|---|---|---|---|---|---|---|---|---|---|---|---|---|---|---|---|---|---|---|---|---|---|---|---|---|---|---|---|---|---|---|---|---|---|---|---|---|---|---|---|---|---|---|---|---|---|---|---|---|---|---|---|
| ||||||||||||||||||||||||||||||||||||||||||||||||||||||||||||||||||||||||||||||||||||||||||||||||||||||||||||||||||||||||||||||||||||||||||||||||||||||||||||||||||||||||||||||||||||||||||||||||||||||||||||||||||||||||||||||||||||||||||||||||||||||||||||||||||||||||||||||||||||||||||||||||||||||||||||||||||||||||||||||||||||||||||||||||||||||||||||||||||||||||||||||||||||||||||||||||||||||||||||||||||||||||||||||||||||||||||||||||||||||||||||||||||||||||||||||||||||||||||||||||||||||||||||||||||||||||||||||||||||||||||||||||||||||||||
| Items | ||||||||||||
|---|---|---|---|---|---|---|---|---|---|---|---|---|
| ||||||||||||
Searching for Snubbull
After defeating Schoolboy Chad, be sure to trade phone numbers with him. He will call occasionally to alert you about a swarm of a certain Pokémon species. Snubbull are usually difficult to find, but will be more likely to appear along Route 38 for a short time. The swarm only lasts until midnight, so be quick!
Route 39
The peaceful plains of Route 39 lead downhill from Route 38 to Olivine City. The Moomoo Farm is located in the northwest.
| Trainers | ||||||||||||||||||||||||||||||||||||||||||||||||||||||||||||||||||||||||||||||||
|---|---|---|---|---|---|---|---|---|---|---|---|---|---|---|---|---|---|---|---|---|---|---|---|---|---|---|---|---|---|---|---|---|---|---|---|---|---|---|---|---|---|---|---|---|---|---|---|---|---|---|---|---|---|---|---|---|---|---|---|---|---|---|---|---|---|---|---|---|---|---|---|---|---|---|---|---|---|---|---|---|
| ||||||||||||||||||||||||||||||||||||||||||||||||||||||||||||||||||||||||||||||||
| Available Pokémon | |||||||||||||||||||||||||||||||||||||||||||||||||||||||||||||||||||||||||||||||||||||||||||||||||||||||||||||||||||||||||||||||||||||||||||||||||||||||||||||||||||||||||||||||||||||||||||||||||||||||||||||||||||||||||||||||||||||||||||||||||||||||||||||||||||||||||||||||||||||||||||||||||||||||||||||||||||||||||||||||||||||||||||||||||||||||||||||||||||||||||||||||||||||||||||
|---|---|---|---|---|---|---|---|---|---|---|---|---|---|---|---|---|---|---|---|---|---|---|---|---|---|---|---|---|---|---|---|---|---|---|---|---|---|---|---|---|---|---|---|---|---|---|---|---|---|---|---|---|---|---|---|---|---|---|---|---|---|---|---|---|---|---|---|---|---|---|---|---|---|---|---|---|---|---|---|---|---|---|---|---|---|---|---|---|---|---|---|---|---|---|---|---|---|---|---|---|---|---|---|---|---|---|---|---|---|---|---|---|---|---|---|---|---|---|---|---|---|---|---|---|---|---|---|---|---|---|---|---|---|---|---|---|---|---|---|---|---|---|---|---|---|---|---|---|---|---|---|---|---|---|---|---|---|---|---|---|---|---|---|---|---|---|---|---|---|---|---|---|---|---|---|---|---|---|---|---|---|---|---|---|---|---|---|---|---|---|---|---|---|---|---|---|---|---|---|---|---|---|---|---|---|---|---|---|---|---|---|---|---|---|---|---|---|---|---|---|---|---|---|---|---|---|---|---|---|---|---|---|---|---|---|---|---|---|---|---|---|---|---|---|---|---|---|---|---|---|---|---|---|---|---|---|---|---|---|---|---|---|---|---|---|---|---|---|---|---|---|---|---|---|---|---|---|---|---|---|---|---|---|---|---|---|---|---|---|---|---|---|---|---|---|---|---|---|---|---|---|---|---|---|---|---|---|---|---|---|---|---|---|---|---|---|---|---|---|---|---|---|---|---|---|---|---|---|---|---|---|---|---|---|---|---|---|---|---|---|---|---|---|---|---|---|---|---|---|---|---|---|---|---|---|---|---|---|---|---|---|---|---|---|---|---|---|---|---|---|---|---|---|---|---|---|---|---|---|
| |||||||||||||||||||||||||||||||||||||||||||||||||||||||||||||||||||||||||||||||||||||||||||||||||||||||||||||||||||||||||||||||||||||||||||||||||||||||||||||||||||||||||||||||||||||||||||||||||||||||||||||||||||||||||||||||||||||||||||||||||||||||||||||||||||||||||||||||||||||||||||||||||||||||||||||||||||||||||||||||||||||||||||||||||||||||||||||||||||||||||||||||||||||||||||
| Items | ||||||||||||||||||||||||
|---|---|---|---|---|---|---|---|---|---|---|---|---|---|---|---|---|---|---|---|---|---|---|---|---|
| ||||||||||||||||||||||||
Moomoo Farm
The Moomoo Farm depends on its herd of Miltank to produce its milk, which is popular with people and Pokémon as far away as Kanto. Speak to the farmer in the farmhouse to learn that one of their Miltank has fallen ill, and will need Berries to recover. Visit the barn to find the farmer's daughters tending to the sickly Miltank, Moomoo. In order to fully recover, she must be fed a total of seven Berries. Once her condition returns to normal, speak to the farmer again to receive TM13 (Snore) as a reward. Afterward, Moomoo Milk can be purchased here for $500 per bottle.
|
Gold and Silver walkthrough |
|

|
This article is part of Project Walkthroughs, a Bulbapedia project that aims to write comprehensive step-by-step guides on each Pokémon game. |


