North of Paniola Ranch, Route 5 branches into a tangle of ledges and rocky paths; the southern half you reach first connects the ranch to Brooklet Hill to the west and to Route 8 beyond a stretch you cannot yet reach.
A path near the Pokémon Center leads south to a dead end holding a couple of items, and a Berry tree drops a pile of Berries each day, guarded by a Crabrawler if the pile is a large one.
Trainers
Trainer
Pokémon
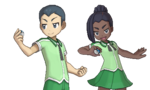
Twins Isa and Nico チヒロ と ミヒロChihiro and Mihiro Reward: $360
A colored background means that the Pokémon can be found in this location in the specified game. A white background with a colored letter means that the Pokémon cannot be found here.
Following the path northwest brings you to Hau, who has just been on the losing end of a battle against a scowling young man.
He introduces himself as Gladion and explains that his goal is to make his partner Type: Null as strong as possible, all while running small jobs for Team Skull.
He then challenges you.
Once the battle ends, Gladion admits he still is not strong enough, and two Team Skull Grunts arrive from the north to needle him about it.
They blame him for their failure to steal the Totem Pokémon from Brooklet Hill, and remind him he will never truly be one of them, before the pair walks off with Gladion trailing silently behind.
Hau hands you three Revives and heads off to keep training for the next trial.
At the Pokémon Center, a Scientist investigating Brooklet Hill's water quality asks you to catch a Corsola there; show him one once it is registered in your Pokédex and he pays you $3,000 for the trouble.
A young man named Noinoi's trainer is also looking to trade: he wants your Lillipup in exchange for his Noibat, which comes holding a Bright Powder and will be handy against the trial ahead.
Brooklet Hill
Brooklet Hill
Brooklet Hill terraces down through a series of pools and waterfalls, and it has a reputation as the best fishing spot on all of Alola.
Captain Lana is waiting just inside, and she wastes no time asking for your help.
Follow her across the first lake, which sits outside the trial site proper, and pick up the Net Ball on the western bank.
At the second lake, Lana registers Lapras Paddle to your Ride Pager so you can swim out; pressing the B Button while surfing gives Lapras a burst of speed.
Two patches of water are splashing here, one hiding a Dewpider and the other a Wishiwashi.
Only the Wishiwashi needs to be beaten to move on, though the Dewpider is fair game too; its splash simply disappears once the trial is cleared if you leave it alone.
Sail on to the third lake and repeat the process.
Its Wishiwashi calls for help every single turn once it has no ally left, no matter what state it is in, so expect the fight to run long if you let it.
Once both lakes' Wishiwashi have been sent packing, rain begins falling across the whole of Brooklet Hill and will keep falling in every battle here until the trial is done.
Step through the Captain's Gate into the Totem's Den to officially begin the trial.
Lana warns that no wild Pokémon can be caught until you clear it, and reminds you that rain boosts Water-type moves, though an Ability like Cloud Nine can cancel the weather outright.
A small splash appears in the middle of the den; the gathering Wishiwashi scatter as something much larger rises out of the water instead.
Totem Araquanid opens the fight by calling in its Dewpider ally, and calls its Masquerain ally in as well once its health drops low enough, so pace your attacks with both backups in mind.
With the Totem Pokémon down, the scene cuts to the shore, where Lana rewards you with the Waterium Z and teaches you the pose for Hydro Vortex.
She also hands you a handmade Fishing Rod and ten Dive Balls: look for rock piles under the water, cast with the A Button, and press it again when the exclamation point appears, though sometimes an item comes up instead of a Pokémon.
Wild Pokémon return to both the trial site and the Totem's Den now that the trial is over, and Lana points you toward Kiawe's trial at Wela Volcano Park next.
A colored background means that the Pokémon can be found in this location in the specified game. A white background with a colored letter means that the Pokémon cannot be found here.
A colored background means that the Pokémon can be found in this location in the specified game. A white background with a colored letter means that the Pokémon cannot be found here.
Lana walks back with you as far as the Pokémon Center, then leaves you to carry on toward Royal Avenue.
Heal up if you need to, then head southeast back through Paniola Ranch where you can pass the Sudowoodo that were blocking the road.
As you unblock the way, you are challenged by DulseUS/SolieraUM.
Continue south and Royal Avenue's gate soon comes into view on the east side of the road.
The entrance will be blocked by two Team Skull Grunts that are harassing Hapu.
Defeat them to be able to continue further south before going to Royal Avenue.
A small loop near the southern end is blocked off by several breakable rocks.
Trainers
Trainer
Pokémon
Dancing Family Jen and Fumiko ヨリコ と フミコYoriko and Fumiko Reward: $872
A colored background means that the Pokémon can be found in this location in the specified game. A white background with a colored letter means that the Pokémon cannot be found here.
You can now access the area of Heahea City that was previously blocked.
You still cannot continue further east but you can now enter the Dimensional Research Lab and the Game Freak Office.
On the floor above the Game Freak office sits an Aether Foundation office room; the employees there explain that the foundation exists to help Pokémon that have been hurt, several of them specifically worried about Pokémon caught up with Team Skull.
The Surf Association's Heahea branch sits next to the Pokémon Center; posting the top score on all four of Alola's Mantine Surf courses eventually earns you a Pikachu there that knows Surf.