|
|
| Line 1: |
Line 1: |
| ==Fuego Ironworks (optional)==
| |
| [[File:Fuego Ironworks interior DPPt.png|thumb|right|350px|Fuego Ironworks interior]]
| |
| [[File:Sinnoh Route 205 Pt.png|thumb|left|250px|Route 205]]
| |
| [[File:Fuego Ironworks Pt.png|thumb|right|180px|Fuego Ironworks exterior]]
| |
| {| class="expandable" align="center" style="background: #{{platinum color}}; {{roundy|10px}}; border: 5px solid #{{platinum color light}};"
| |
| |- align="center"
| |
| ! Available Pokémon (Exterior only)
| |
| |-
| |
| |{{Catch/header|building}}
| |
| {{Catch/entry4|081|Magnemite|no|no|yes|Grass|28-30|all=30%|type1=Electric|type2=Steel}}
| |
| {{Catch/entry4|126|Magmar|no|no|yes|Grass|28-29|30%|30%|0%|type1=Fire}}
| |
| {{Catch/entry4|126|Magmar|no|no|yes|Grass|28|0%|0%|20%|type1=Fire}}
| |
| {{Catch/entry4|419|Floatzel|no|no|yes|Grass|29-31|all=25%|type1=Water}}
| |
| {{Catch/entry4|423|Gastrodon|no|no|yes|Grass|30-31|15%|15%|0%|type1=Water}}
| |
| {{Catch/entry4|423|Gastrodon|no|no|yes|Grass|29-31|0%|0%|25%|type1=Water}}
| |
| {{Catch/div|water|Surfing}}
| |
| {{Catch/entry4|072|Tentacool|no|no|yes|Surf|20-30|all=60%|type1=Water|type2=Poison}}
| |
| {{Catch/entry4|073|Tentacruel|no|no|yes|Surf|20-40|all=9%|type1=Water|type2=Poison}}
| |
| {{Catch/entry4|422|Shellos|no|no|yes|Surf|20-30|all=30%|type1=Water}}
| |
| {{Catch/entry4|423|Gastrodon|no|no|yes|Surf|20-40|all=1%|type1=Water}}
| |
| {{Catch/div|water|Fishing}}
| |
| {{Catch/entry4|129|Magikarp|no|no|yes|Fish Old|3-15|all=100%|type1=Water}}
| |
| {{Catch/entry4|129|Magikarp|no|no|yes|Fish Good|10-25|all=65%|type1=Water}}
| |
| {{Catch/entry4|456|Finneon|no|no|yes|Fish Good|10-25|all=35%|type1=Water}}
| |
| {{Catch/footer|building}}
| |
| |}
| |
| {| class="expandable" align="center" style="background: #{{platinum color}}; {{roundy|10px}}; border: 5px solid #{{platinum color light}};"
| |
| |- align="center"
| |
| ! Trainers (Interior only)
| |
| |-
| |
| |{{trainerheader|building}}
| |
| {{trainerentry|Spr DP Worker.png|Worker|Dillan|1320|2|066|Machop|♂|33|None|067|Machoke|♂|33|None|36=イサオ|37=Isao}}
| |
| {{Trainerdiv|building}}
| |
| {{trainerentry|Spr DP Worker.png|Worker|Holden|1280|3|081|Magnemite||32|None|081|Magnemite||32|None|081|Magnemite||32|None|36=シュウイチ|37=Shūichi}}
| |
| {{Trainerdiv|building}}
| |
| {{trainerentry|Spr DP Worker.png|Worker|Conrad|1400|1|126|Magmar|♂|35|None|36=シゲミチ|37=Shigemichi}}
| |
| {{trainerfooter|building|1}}
| |
| |}
| |
| {| class="expandable" align="center" style="background: #{{platinum color}}; {{roundy|10px}}; border: 5px solid #{{platinum color light}};"
| |
| |- align="center"
| |
| ! Items
| |
| |-
| |
| |{{itlisth|building}}
| |
| {{itemlist|Ultra Ball|Outside, northwest of the honey tree ''(hidden)''|Pt=yes}}
| |
| {{Itemlist|Sitrus Berry|Berry patch west of the honey tree|Pt=yes}}
| |
| {{Itemlist|Wepear Berry|Berry patch west of the honey tree|Pt=yes|display=[[Wepear Berry]] x4}}
| |
| {{Itemlist|Kelpsy Berry|Berry patch west of the honey tree|Pt=yes}}
| |
| {{itemlist|Big Mushroom|Outside, between a small gap between the right side of the Ironworks building and some trees ''(hidden)''|Pt=yes}}
| |
| {{itemlist|Yellow Shard|Inside, behind the blue box just north of the first spinning tiles|Pt=yes}}
| |
| {{itemlist|Calcium|Inside, directly right from Worker Dillan behind a wall|Pt=yes}}
| |
| {{itemlist|Protein|Inside, at a dead end around the mid-upper-left area ''(hidden)''|Pt=yes}}
| |
| {{itemlist|Red Shard|Inside, just above Mr. Fuego's area|Pt=yes}}
| |
| {{itemlist|Blue Shard|Inside, in a dead end directly right after the twisting narrow passage|Pt=yes}}
| |
| {{itemlist|Green Shard|Inside, between the twisting narrow spinning pad passage|Pt=yes}}
| |
| {{itemlist|Star Piece|Inside, in a standalone barrel at the right side of the building interior ''(hidden)''|Pt=yes}}
| |
| {{itemlist|Fire Stone|Inside, in the upper-right corner of the interior|Pt=yes}}
| |
| {{itemlist|Rock Incense|Inside, at the bottom-right area of the interior amongst the spinning pads|Pt=yes}}
| |
| {{itemlist|TM Fire|Inside, right next to the boiler|Pt=yes|display={{tm|35|Flamethrower}}}}
| |
| {{itemlist|Star Piece|Inside, after speaking to Mr. Fuego for the first time|Pt=yes}}
| |
| {{itlistfoot|building}}
| |
| |}
| |
|
| |
| Starting from the bridge near the entrance to {{rt|205|Sinnoh}}'s south half, {{m|Surf}} on the river northwest and eventually you'll reach [[Fuego Ironworks]]. Get off at the northern bank of the river. It's worth noting that outside of the Ironworks, you can find wild {{p|Magnemite}}.
| |
|
| |
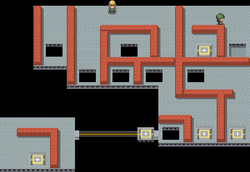
| Inside Fuego Ironworks your objective is getting to the boiler in the center, where the owner [[Mr. Fuego]] is. You will need to use the [[spin tile]]s to reach him. First head into the direction of the southeastern corner of the Ironworks at your own pace, but avoid the tile near Mr. Fuego as that one will take you through another tile that will cause you to start over. After accessing the (↓) tile in the southeastern area you will see three (←) in a line that lead to a larger patch of tiles. The northernmost (←) is the correct one to use and will get you to the area just to the right of the entrance to the boiler place.
| |
|
| |
| ===Stars for Shards===
| |
| Mr. Fuego will give you a [[Star Piece]] when you first meet him. From now on, you can trade a Star Piece for one of all four different-colored [[Shard]]s.
| |
|
| |
| {| class="expandable" align="center" style="background: #{{platinum color}}; {{roundy|10px}}; border: 5px solid #{{platinum color light}};"
| |
| |- align="center"
| |
| ! Star Piece Trade
| |
| |-
| |
| |{{itlisth|building}}
| |
| {{itemlist|Red Shard|From [[Mr. Fuego]] in exchange for a [[Star Piece]] (repeatable)|Pt=yes}}
| |
| {{itemlist|Blue Shard|From Mr. Fuego in exchange for a Star Piece (repeatable)|Pt=yes}}
| |
| {{itemlist|Yellow Shard|From Mr. Fuego in exchange for a Star Piece (repeatable)|Pt=yes}}
| |
| {{itemlist|Green Shard|From Mr. Fuego in exchange for a Star Piece (repeatable)|Pt=yes}}
| |
| {{itlistfoot|building}}
| |
| |}
| |
| {{-}}
| |
|
| |
| ==Route 213 (optional)==
| |
| [[File:Sinnoh Route 213 Pt.png|thumb|250px|Route 213]]
| |
|
| |
| {| class="expandable" align="center" style="background: #{{platinum color}}; {{roundy|10px}}; border: 5px solid #{{platinum color light}};"
| |
| |- align="center"
| |
| ! Trainers
| |
| |-
| |
| |
| |
| {{trainerheader|sand}}
| |
| {{Trainerdiv|sand|Requires Surf}}
| |
| {{Trainerentry|Spr DP Swimmer F.png|Swimmer|Haley<br>|560|2|054|Psyduck|♀|31|None|184|Azumarill|♀|35|None}}
| |
| {{trainerdiv|sand}}
| |
| {{Trainerentry|Spr DP Sailor.png|Sailor|Paul<br>|1088|3|072|Tentacool|♂|31|None|279|Pelipper|♂|31|None|067|Machoke|♂|34||}}
| |
| {{trainerdiv|sand}}
| |
| {{Trainerentry|Spr DP Swimmer M.png|Swimmer|Evan<br>|544|2|055|Golduck|♂|32|None|055|Golduck|♂|34|None}}
| |
| {{trainerdiv|sand}}
| |
| {{Trainerentry|Spr DP Swimmer F.png|Swimmer|Mary<br>|528|2|456|Finneon|♀|33|None|279|Pelipper|♀|33|None}}
| |
| {{trainerdiv|sand}}
| |
| {{Trainerentry|Spr DP Swimmer M.png|Swimmer|Sheltin<br>|512|3|130|Gyarados|♂|32|None|130|Gyarados|♂|32|None|130|Gyarados|♂|32||}}
| |
| {{Trainerfooter|sand}}
| |
| |}
| |
| {| class="expandable" align="center" style="background: #{{platinum color}}; {{roundy|10px}}; border: 5px solid #{{platinum color light}};"
| |
| |- align="center"
| |
| ! Available Pokémon
| |
| |-
| |
| |
| |
| {{Catch/header|sand|yes}}
| |
| {{Catch/div|water|Surfing}}
| |
| {{catch/entry4|072|Tentacool|no|no|yes|Surf|20-30|all=60%|type1=Water|type2=Poison}}
| |
| {{catch/entry4|073|Tentacruel|no|no|yes|Surf|20-40|all=5%|type1=Water|type2=Poison}}
| |
| {{catch/entry4|278|Wingull|no|no|yes|Surf|20-30|all=30%|type1=Water|type2=Flying}}
| |
| {{catch/entry4|422E|Shellos|no|no|yes|Surf|20-30|all=4%|type1=Water}}
| |
| {{catch/entry4|423E|Gastrodon|no|no|yes|Surf|20-40|all=1%|type1=Water|type2=Ground}}
| |
| {{Catch/footer|sand}}
| |
| |}
| |
| {| class="expandable" align="center" style="background: #{{platinum color}}; {{roundy|10px}}; border: 5px solid #{{platinum color light}};"
| |
| |- align="center"
| |
| ! Items
| |
| |-
| |
| |
| |
| {{itlisth|sand}}
| |
| {{Itemlist|Max Revive |Western islet (requires {{m|Surf}})|Pt=yes}}
| |
| {{itemlist|Big Pearl|In the islet to the west of Swimmer Sheltin (same islet as the Max Revive) (requires {{m|Surf}}) ''(hidden)''|Pt=yes}}
| |
| {{itemlist|Water Stone|At the easternmost shallow water at the southern part of Route 213, north of Swimmers Evan and Mary (requires {{m|Surf}})|Pt=yes}}
| |
| {{itlistfoot|sand}}
| |
| |}
| |
|
| |
| On {{rt|213|Sinnoh}}, use {{m|Surf}} south of Dr. Footstep's house and follow the rock wall eastward. Eventually, you will find a narrow passage to a patch of sea that contains most of the trainers and a few items. South of that is another passage leading to {{tc|Swimmer}} Shetlin, a [[Big Pearl]], and a [[Max Revive]]. Whenever you visit a small island, be sure to use the Dowsing Machine on your [[Pokétch]] to find more items.
| |
|
| |
| ==Route 219 (optional)==
| |
| [[File:Sinnoh Route 219 Pt.png|right|thumb|180px|Route 219]]
| |
|
| |
| {| class="expandable" align="center" style="background: #{{platinum color}}; {{roundy|10px}}; border: 5px solid #{{platinum color light}};"
| |
| |- align="center"
| |
| ! Available Pokémon
| |
| |-
| |
| |{{catch/header|ocean|4}}
| |
| {{catch/div|ocean|Surfing}}
| |
| {{catch/entry4|072|Tentacool|no|no|yes|Surf|20-30|all=60%|type1=Water|type2=Poison}}
| |
| {{catch/entry4|073|Tentacruel|no|no|yes|Surf|20-40|all=9%|type1=Water|type2=Poison}}
| |
| {{catch/entry4|278|Wingull|no|no|yes|Surf|20-30|all=30%|type1=Water|type2=Flying}}
| |
| {{catch/entry4|279|Pelipper|no|no|yes|Surf|20-40|all=1%|type1=Water|type2=Flying}}
| |
| {{catch/div|ocean|Fishing}}
| |
| {{catch/entry4|129|Magikarp|no|no|yes|Fish Old|3-15|all=100%|type1=Water}}
| |
| {{catch/entry4|129|Magikarp|no|no|yes|Fish Good|10-25|all=65%|type1=Water}}
| |
| {{catch/entry4|456|Finneon|no|no|yes|Fish Good|15-20|all=30%|type1=Water}}
| |
| {{catch/entry4|457|Lumineon|no|no|yes|Fish Good|25-35|all=5%|type1=Water}}
| |
| {{catch/footer|ocean}}
| |
| |}
| |
| {| class="expandable" align="center" style="background: #{{platinum color}}; {{roundy|10px}}; border: 5px solid #{{platinum color light}};"
| |
| |- align="center"
| |
| ! Trainers
| |
| |-
| |
| |{{Trainerheader|water}}
| |
| {{Trainerentry|Spr DP Tuber F.png|Tuber|Mariel|132|2|183|Marill|♀|31|None|183|Marill|♀|33|None|36=チユミ|37=Chiyumi}}
| |
| {{Trainerdiv|water}}
| |
| {{Trainerentry|Spr DP Tuber M.png|Tuber|Trenton|132|2|422|Shellos|♂|31|None|422|Shellos|♂|33|None|36=シンタロウ|37=Shintarō}}
| |
| {{Trainerfooter|water}}
| |
| |}
| |
| {| class="expandable" align="center" style="background: #{{platinum color}}; {{roundy|10px}}; border: 5px solid #{{platinum color light}};"
| |
| |- align="center"
| |
| ! Items
| |
| |-
| |
| |{{itlisth|water}}
| |
| {{itemlist|Antidote|Left side of the main shore|Pt=yes}}
| |
| {{itemlist|Zinc|On the island ''(hidden)''|Pt=yes|display=[[Zinc]]}}
| |
| {{itlistfoot|water}}
| |
| |}
| |
|
| |
| {{m|Fly}} to [[Sandgem Town]] and use the south exit to reach {{rt|219|Sinnoh}}. It is the first of a chain of routes that you can use to reach Sinnoh's [[Pal Park]]. The Pal Park will be inaccessible until you have the National Pokédex, but the training you'll get on the way there is valuable, and the Pal Park can be flown to after you visit it once. You'll want to bring {{t|Grass}}- and/or {{t|Electric}}-types for the trip since the Trainers on the upcoming Routes use mostly {{type|Water}}s.
| |
|
| |
| ==Route 220 (optional)==
| |
| [[File:Sinnoh Route 220 DP.png|thumb|left|250px|Route 220]]
| |
| {| class="expandable" align="center" style="background: #{{platinum color}}; {{roundy|10px}}; border: 5px solid #{{platinum color light}};"
| |
| |- align="center"
| |
| ! Available Pokémon
| |
| |-
| |
| |{{catch/header|ocean|4}}
| |
| {{catch/div|ocean|Surfing}}
| |
| {{catch/entry4|072|Tentacool|no|no|yes|Surf|20-30|all=60%|type1=Water|type2=Poison}}
| |
| {{catch/entry4|073|Tentacruel|no|no|yes|Surf|20-40|all=9%|type1=Water|type2=Poison}}
| |
| {{catch/entry4|278|Wingull|no|no|yes|Surf|20-30|all=30%|type1=Water|type2=Flying}}
| |
| {{catch/entry4|279|Pelipper|no|no|yes|Surf|20-40|all=1%|type1=Water|type2=Flying}}
| |
| {{catch/div|ocean|Fishing}}
| |
| {{catch/entry4|129|Magikarp|no|no|yes|Fish Old|3-15|all=100%|type1=Water}}
| |
| {{catch/entry4|129|Magikarp|no|no|yes|Fish Good|10-25|all=65%|type1=Water}}
| |
| {{catch/entry4|456|Finneon|no|no|yes|Fish Good|15-20|all=30%|type1=Water}}
| |
| {{catch/entry4|457|Lumineon|no|no|yes|Fish Good|25-35|all=5%|type1=Water}}
| |
| {{catch/footer|ocean}}
| |
| |}
| |
| {| class="expandable" align="center" style="background: #{{platinum color}}; {{roundy|10px}}; border: 5px solid #{{platinum color light}};"
| |
| |- align="center"
| |
| ! Trainers
| |
| |-
| |
| |{{Trainerheader|ocean}}
| |
| {{Trainerentry|Spr DP Swimmer F.png|Swimmer|[[Lizabeth|Katelyn]]|512|3|418|Buizel|♀|32|None|308|Medicham|♀|32|None|119|Seaking|♀|32|None|36=ヒロミ|37=Hiromi}}
| |
| {{Trainerdiv|ocean}}
| |
| {{Trainerentry|Spr DP Swimmer F.png|Swimmer|Jessica|528|4|118|Goldeen|♀|30|None|118|Goldeen|♀|30|None|118|Goldeen|♀|31|None|119|Seaking|♀|33|None|36=ユカリ|37=Yukari}}
| |
| {{Trainerdiv|ocean}}
| |
| {{Trainerentry|Spr DP Swimmer F.png|Swimmer|Erica|560|1|456|Finneon|♀|35|None|36=シホミ|37=Shihomi}}
| |
| {{Trainerdiv|ocean}}
| |
| {{Trainerentry|Spr DP Swimmer M.png|Swimmer|Adrian|544|3|223|Remoraid|♂|32|None|224|Octillery|♂|34|None|072|Tentacool|♂|30|None|36=キョウタ|37=Kyōta}}
| |
| {{Trainerdiv|ocean}}
| |
| {{Trainerentry|Spr DP Swimmer M.png|Swimmer|Vincent|528|2|279|Pelipper|♂|33|None|423|Gastrodon|♂|33|None|36=ツキオ|37=Tsukio}}
| |
| {{Trainerdiv|ocean}}
| |
| {{Trainerentry|Spr DP Swimmer M.png|Swimmer|Erik|560|1|073|Tentacruel|♂|35|None|36=モグル|37=Moguru}}
| |
| {{trainerdiv|ocean}}
| |
| {{Trainerentry|Spr DP Swimmer F.png|Swimmer|Claire|560|1|419|Floatzel|♀|35|None|36=フミエ|37=Fumie}}
| |
| {{Trainerfooter|ocean}}
| |
| |}
| |
| {| class="expandable" align="center" style="background: #{{platinum color}}; {{roundy|10px}}; border: 5px solid #{{platinum color light}};"
| |
| |- align="center"
| |
| ! Items
| |
| |-
| |
| |{{itlisth|ocean}}
| |
| {{itemlist|Max Repel|Top part of first sandbar.|Pt=yes}}
| |
| {{itemlist|Splash Plate|Bottom part of first sandbar.|Pt=yes}}
| |
| {{itemlist|Big Pearl|Near the south side, in the southeast wall of a "rock island" between the first and second sandbars ''(hidden)''|Pt=yes}}
| |
| {{itemlist|Carbos|On the shallows after the second sandbar.|Pt=yes}}
| |
| {{itlistfoot|ocean}}
| |
| |}
| |
|
| |
| Though not as simple as Route 219, {{rt|220|Sinnoh}} is pretty straightforward. Head down the eastern side when the route forks in two, fight the {{tc|Swimmer}} there, then backtrack and head down the western fork. A little further on, the way forward forks in two again, this time around a largish island. Grab the [[Max Repel]] just north of it, then head down the southern fork until you reach the island with the submerged shoreline. Continue east past the [[Carbos]], making a quick detour into route 221 to fight the female Swimmer, then backtrack and head north where the Carbos is, head west briefly to fight the male Swimmer, then go east to {{rt|221|Sinnoh}}.
| |
|
| |
| ==Route 221 (optional)== | | ==Route 221 (optional)== |
| [[File:Sinnoh Route 221 Pt.png|thumb|350px|Route 221]] | | [[File:Sinnoh Route 221 Pt.png|thumb|350px|Route 221]] |
| Line 627: |
Line 401: |
|
| |
|
| The southernmost house on the west side of town belongs to a {{tc|Sailor}} named [[Eldritch]], who handles the ferry in town. Nothing important will happen here until the post-game after obtaining the [[National Pokédex]]. Eldritch is waiting near his boat at the dock nearby, and he can take you to Iron Island which will be required to visit. South from the wharf is a hidden area where you can pick up the {{tm|89|U-turn}}. | | The southernmost house on the west side of town belongs to a {{tc|Sailor}} named [[Eldritch]], who handles the ferry in town. Nothing important will happen here until the post-game after obtaining the [[National Pokédex]]. Eldritch is waiting near his boat at the dock nearby, and he can take you to Iron Island which will be required to visit. South from the wharf is a hidden area where you can pick up the {{tm|89|U-turn}}. |
| | |
| | ==Canalave Gym== |
| | [[File:Canalave Gym 1F DPPt.png|left|thumb|250px|Canalave Gym 1F]] |
| | [[File:Canalave Gym 2F DPPt.png|thumb|250px|Canalave Gym 2F]] |
| | [[File:Canalave Gym 3F DPPt.png|left|thumb|250px|Canalave Gym 3F]] |
| | [[File:Canalave Gym 4F DPPt.png|thumb|250px|Canalave Gym 4F]] |
| | |
| | Be aware that the toughest Pokémon you'll face here is Level 41. The layout of the [[Canalave Gym]] is a maze consisting of multiple elevator platforms. As you may already know, it specializes in {{type|Steel}}s. You'll want {{t|Fire}}-, {{t|Ground}}-, and/or {{t|Fighting}}-type attacks on your Pokémon. Many of the Pokémon in this gym are part Ground or {{t|Rock}}, so {{type|Water}} attacks (such as {{m|Surf}}) are also useful. Steel-types [[Damage modification#Not very effective|resist]] attacks of almost every other type, and are completely immune to {{type|Poison}} moves. Also, most of the Pokémon in this Gym have high [[Defense]], so [[Special Attack|Special]] moves will do the most damage to them. |
| | |
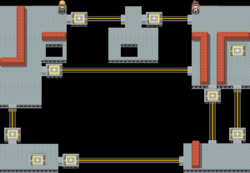
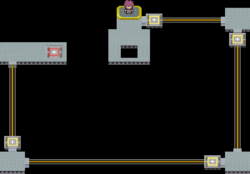
| | To deal with the maze, first head to the easternmost elevator out of the set of four you'll find on 1F. Then, take the elevator south of you on 2F to reach the southeast area of 1F. The next one will take you back up to 2F. Then, use the moving lift hooked up to a wire to get across the ledge. Take the regular elevator there to reach 3F, where you will find more moving lifts to take you across the wires. First, use the moving lift north of you to reach the north area of 3F with two moving lifts side-by side. Take the northern lift and then keep following the path that will take you back down to 2F. Another elevator will take you to the northern area of the 1F. There, an elevator with a red outline will take you up to 4F where [[Byron]], the Gym Leader and the father of [[Oreburgh City]] Gym Leader [[Roark]] is. |
| | |
| | {| align="center" |
| | |- align="center" valign="top" |
| | | |
| | {| align="center" style="background: #{{steel color}}; {{roundy|10px}}; border: 5px solid #{{steel color light}};" |
| | |- align="center" |
| | ! Canalave City Gym <br> [[File:Mine Badge.png|35px|The Mine Badge]] <br><br> |
| | |- |
| | | |
| | {| align="center" class="expandable" style="background: #{{steel color}}; {{roundy|10px}}; border: 5px solid #{{steel color light}};" |
| | |- align="center" |
| | ! Trainers |
| | |- |
| | |{{Trainerheader|Steel}} |
| | {{Trainerentry|Spr DP Black Belt.png|Black Belt|Ricky|912|1|208|Steelix|♂|38|None|36=タイト|37=Taito}} |
| | {{Trainerdiv|Steel}} |
| | {{Trainerentry|Spr DP Worker.png|Worker|Gary|1480|1|081|Magnemite|-|37|None|36=カネオ|37=Kaneo}} |
| | {{Trainerdiv|Steel}} |
| | {{Trainerentry|Spr DP Worker.png|Worker|Jackson|1360|3|081|Magnemite|-|34|None|081|Magnemite|-|34|None|081|Magnemite|-|34|None|36=テツオミ|37=Tetsuomi}} |
| | {{Trainerdiv|Steel}} |
| | {{Trainerentry|Spr DP Ace Trainer M 1.png|Ace Trainer|Cesar|2400|1|212|Scizor|♂|40|None|36=タクミ|37=Takumi}} |
| | {{Trainerdiv|Steel}} |
| | {{Trainerentry|Spr DP Worker.png|Worker|Gerardo|1400|2|081|Magnemite|-|35|None|081|Magnemite|-|35|None|36=キンジ|37=Kinji}} |
| | {{Trainerdiv|Steel}} |
| | {{Trainerentry|Spr DP Black Belt.png|Black Belt|David|888|2|208|Steelix|♂|35|None|208|Steelix|♂|37|None|36=ケンスケ|37=Kensuke}} |
| | {{Trainerdiv|Steel}} |
| | {{Trainerentry|Spr DP Ace Trainer F 1.png|Ace Trainer|Breanna|2280|3|436|Bronzor|-|35|None|436|Bronzor|-|36|None|436|Bronzor|-|38|None|36=マユコ|37=Mayuko|Steel}} |
| | {{Trainerfooter|Steel|1}} |
| | |} |
| | |
| | {{Party/Single|color={{steel color}}|bordercolor={{steel color dark}}|headcolor={{steel color light}} |
| | |sprite=Spr Pt Byron.png |
| | |prize={{PDollar}}4920 |
| | |class=Leader |
| | |name=Byron |
| | |game=Pt |
| | |location=Canalave Gym |
| | |pokemon=3}} |
| | |{{Pokémon/4|game=Platinum|ndex=082|pokemon=Magneton |
| | |ability=Magnet Pull|level=37|type1=Electric|type2=Steel |
| | |move1=Flash Cannon|move1type=Steel|move1cat=Special |
| | |move2=Thunderbolt|move2type=Electric|move2cat=Special |
| | |move3=Tri Attack|move3type=Normal|move3cat=Special |
| | |move4=Metal Sound|move4type=Steel|move4cat=Status}} |
| | |{{Pokémon/4|game=Platinum|ndex=208|pokemon=Steelix |
| | |ability=Rock Head|level=38|type1=Steel|type2=Ground|gender=male|spritegender=male |
| | |move1=Earthquake|move1type=Ground|move1cat=Physical |
| | |move2=Flash Cannon|move2type=Steel|move2cat=Special |
| | |move3=Sandstorm|move3type=Rock|move3cat=Status |
| | |move4=Ice Fang|move4type=Ice|move4cat=Physical}} |
| | |{{Pokémon/4|game=Platinum|ndex=411|pokemon=Bastiodon |
| | |ability=Sturdy|level=41|type1=Rock|type2=Steel|gender=male|held=Sitrus Berry |
| | |move1=Metal Burst|move1type=Steel|move1cat=Physical |
| | |move2=Stone Edge|move2type=Rock|move2cat=Physical |
| | |move3=Iron Defense|move3type=Steel|move3cat=Status |
| | |move4=Taunt|move4type=Dark|move4cat=Status}} |
| | {{Party/Footer}} |
| | |} |
| | |} |
| | |
| | Byron starts by sending out {{p|Magneton}}, whose weak Sp. Defense makes it vulnerable to moves like {{m|Fire Blast}}. Also, a {{type|Ground}} move like {{m|Earthquake}} could easily take it out in one hit due to its Steel/{{t|Electric}} typing. Beware of {{m|Flash Cannon}} if your Earthquake user is part {{type|Rock}}. {{m|Metal Sound}} will harshly lower your Pokémon's Special Defense, causing {{m|Thunderbolt}}, {{m|Tri Attack}}, and Flash Cannon to do even more damage, so be careful. It's best to use Special attacks on Byron's {{p|Steelix}} because of its high Defense stat. It will dispose of Fire-types with Earthquake unless you have a Fire-type strong and fast enough to take it out in one hit. Ground Pokémon, on the other hand, must watch out for {{m|Ice Fang}}. Don't worry too much about Steelix's Flash Cannon, as its Special Attack isn't the best. The last Pokémon you'll face is {{p|Bastiodon}}, which is high-leveled but can easily be defeated by a powerful Fighting- or Ground-type attack due to it's type combo of Rock/Steel. Be sure to take it out in one hit (which isn't too hard), or your Pokémon will be on the receiving end of {{m|Metal Burst}}, which does 1.5 times the damage your previous attack did to Bastiodon. {{m|Stone Edge}} poses a threat to Fire-types, and {{m|Iron Defense}} will sharply raise Bastiodon's already high Defense stat. {{m|Taunt}} will only allow your Pokémon to use attacking moves, which shouldn't be much of a concern. Get Bastiodon out of your way as quickly as possible, and you'll have saved your team some pain and earned yourself the {{badge|Mine}} without too much trouble! |
| | |
| | Once you defeat Byron, he will give you the Mine Badge, which causes all traded Pokémon up to Level 70 obey you without question and allows for {{m|Strength}} to be used outside of battle. He'll also give you {{TM|91|Flash Cannon}}, a Steel-type Special attack that occasionally lowers the enemy's Special Defense stat. |
| | |
| | When you step out the door, your rival {{ga|Barry}} will be there waiting for you. After congratulating you on getting the Mine Badge, he asks you to come with him to the Canalave Library. You can meet them there, but he will stop you if you haven't been to Iron Island to pick up {{HM|04|Strength}}. |
|
| |
|
| {{WalkthroughPrevNext | | | {{WalkthroughPrevNext | |
| Line 635: |
Line 484: |
| prevsection=11 | | | prevsection=11 | |
| nextsection=13| | | nextsection=13| |
| prevname=Route 212 to Celestic Town| | | prevname=Route 210 to Route 220| |
| nextname=Canalave Gym to Canalave City | | nextname=Iron Island to Lake Valor |
| }} | | }} |
| {{Project Walkthroughs notice}} | | {{Project Walkthroughs notice}} |
|
| |
|
| [[Category:Platinum walkthrough]] | | [[Category:Platinum walkthrough]] |
Route 221 (optional)
| Available Pokémon
|
| Pokémon
|
Games
|
Location
|
Levels
|
Rate
|
|
|
D
|
P
|
Pt
|
|
29-31
|
25%
|
|
|
D
|
P
|
Pt
|
|
28,30
|
25%
|
|
|
D
|
P
|
Pt
|
|
28-30
|
25%
|
25%
|
0%
|
|
|
D
|
P
|
Pt
|
|
29-30
|
0%
|
0%
|
15%
|
|
|
D
|
P
|
Pt
|
|
29,31
|
25%
|
25%
|
0%
|
|
|
D
|
P
|
Pt
|
|
28-29,31
|
0%
|
0%
|
35%
|
| Surfing
|
|
|
D
|
P
|
Pt
|
|
20-30
|
60%
|
|
|
D
|
P
|
Pt
|
|
20-40
|
9%
|
|
|
D
|
P
|
Pt
|
|
20-30
|
30%
|
|
|
D
|
P
|
Pt
|
|
20-40
|
1%
|
| Fishing
|
|
|
D
|
P
|
Pt
|
|
3-15
|
100%
|
|
|
D
|
P
|
Pt
|
|
10-25
|
65%
|
|
|
D
|
P
|
Pt
|
|
15-20
|
30%
|
|
|
D
|
P
|
Pt
|
|
25-35
|
5%
|
| A colored background means that the Pokémon can be found in this location in the specified game. A white background with a colored letter means that the Pokémon cannot be found here.
|
|
| Trainers
|
| Trainer
|
Pokémon
|
|
|
|
|
|
|
|
|
|
|
|
|
|
|
|
|
|
|
|
|
|
|
|
|
|
|
|
|
|
|
|
|
|
|
|
|
|
|
|
|
| Trainers with a Vs. Seeker by their names, when alerted for a rematch using the item, may use higher-level Pokémon.
|
|
| Items
|
| Item
|
Location
|
Games
|

|
Protein
|
North-western corner of the land part of the route
|
Pt
|

|
Pure Incense
|
West of the level item house
|
Pt
|

|
Big Mushroom
|
On the right side of the level item house (hidden)
|
Pt
|

|
Ultra Ball ×2
|
- Beyond the first southern patch of grass
- In the grass below the Berry patch (hidden)
|
Pt
|

|
Hyper Potion
|
Near the southwest corner of the large southern patch of grass (hidden)
|
Pt
|

|
Max Revive
|
Just west of the berry patch (hidden)
|
Pt
|

|
Leppa Berry
|
Berry patch southeast of the honey tree
|
Pt
|

|
Pecha Berry
|
Berry patch southeast of the honey tree
|
Pt
|

|
Mago Berry
|
Berry patch southeast of the honey tree
|
Pt
|

|
Hondew Berry
|
Berry patch southeast of the honey tree
|
Pt
|

|
TM81 (X-Scissor)
|
Between the large southern patch of grass and the southeastern patch of grass
|
Pt
|

|
Carbos
|
In the southeastern patch of grass (hidden)
|
Pt
|
|
|
|
Continue east from Route 220. Fight the male Swimmer, and continue east until you reach land. Head east on the northern section Route 221, stopping at the Level House (see below) to pick up the Pure Incense which allows you to produce a Chingling Egg when breeding Chimecho. When you reach the Pal Park (inaccessible until after you defeat the Elite Four), head back along the southern part of the route, collecting all the items you missed when travelling on the northern part. Now that you're finished here, it's time to Fly back to Jubilife City and head northwest via Route 218 to reach Canalave City.
Level House
The only house located on Route 221 belongs to an old man who will each ask for a Pokémon at a certain random level from 1 to 100 each day. The items he'll give you are the Black Belt, Expert Belt, or Focus Sash. Only one item is given to you out of that particular order when you complete his request, and after he gives you the Focus Sash, the cycle will start over.
For days where the requirement is an extremely high-leveled Pokémon, you can try soft resetting and not much else. On some days you might get lucky and be able to use Pokémon from your regular team. For days where low-level Pokémon are needed, the quickest solution is to simply head to an earlier area with an Quick Ball or two, catch a Pokémon of the appropriate level, and bring it to him.
Route 218
| Available Pokémon
|
| Pokémon
|
Games
|
Location
|
Levels
|
Rate
|
|
|
D
|
P
|
Pt
|
|
29-31
|
25%
|
|
|
D
|
P
|
Pt
|
|
29-31
|
30%
|
30%
|
40%
|
|
|
D
|
P
|
Pt
|
|
28,30
|
25%
|
25%
|
35%
|
|
|
D
|
P
|
Pt
|
|
28,30
|
20%
|
20%
|
0%
|
| Surfing
|
|
|
D
|
P
|
Pt
|
|
20-30
|
60%
|
|
|
D
|
P
|
Pt
|
|
20-40
|
9%
|
|
|
D
|
P
|
Pt
|
|
20-30
|
30%
|
|
|
D
|
P
|
Pt
|
|
20-40
|
1%
|
| Fishing
|
|
|
D
|
P
|
Pt
|
|
3-15
|
100%
|
|
|
D
|
P
|
Pt
|
|
10-25
|
65%
|
|
|
D
|
P
|
Pt
|
|
10-25
|
35%
|
| A colored background means that the Pokémon can be found in this location in the specified game. A white background with a colored letter means that the Pokémon cannot be found here.
|
|
| Trainers
|
| Trainer
|
Pokémon
|
|
|
|
|
|
|
|
|
|
|
|
|
|
|
|
|
|
|
|
|

|
|
|
Sailor Skyler
ケンゴ Kengo
Reward: $1088
|
|
|
|
|
|
|
|
|
|
|
|
|
| Trainers with a Vs. Seeker by their names, when alerted for a rematch using the item, may use higher-level Pokémon.
|
|
Now that you have Surf, you're able to navigate the rest of Route 218 and reach Canalave City, your next destination. There isn't much to do on this short route except for fighting the Trainers and catch Mr. Mime (this is the only location in Sinnoh where they can be found).
When you enter the guard post separating Route 218 from Canalave City, Professor Rowan's assistant will approach and give you upgrade to your Pokédex. This will allow you to check the differences in appearance between the same Pokémon in their Pokédex entry, such as gender or form differences.
Canalave City
| Available Pokémon
|
| class="roundytl" style="padding-left: 1em; padding-right: 1em; background: #Template:City color light; color: #000000" rowspan="1" | Pokémon
|
style="padding-left: 1em; padding-right: 1em; background-color: #Template:City color light; color: #000000" rowspan="1" colspan="6" | Games
|
style="padding-left: 1em; padding-right: 1em; background-color: #Template:City color light; color: #000000" rowspan="1" | Location
|
style="padding-left: 1em; padding-right: 1em; background-color: #Template:City color light; color: #000000" rowspan="1" | Levels
|
class="roundytr" style="padding-left: 1em; padding-right: 1em; background-color: #Template:City color light; color: #000000" colspan="3" | Rate
|
| Surfing
|
|
|
D
|
P
|
Pt
|
|
20-30
|
60%
|
|
|
D
|
P
|
Pt
|
|
20-40
|
9%
|
|
|
D
|
P
|
Pt
|
|
20-30
|
30%
|
|
|
D
|
P
|
Pt
|
|
20-40
|
1%
|
| Fishing
|
|
|
D
|
P
|
Pt
|
|
3-15
|
100%
|
|
|
D
|
P
|
Pt
|
|
10-25
|
65%
|
|
|
D
|
P
|
Pt
|
|
10-25
|
35%
|
| class="roundybottom" style="background: #Template:City color light; color: #000000" colspan="14" | A colored background means that the Pokémon can be found in this location in the specified game. A white background with a colored letter means that the Pokémon cannot be found here.
|
|
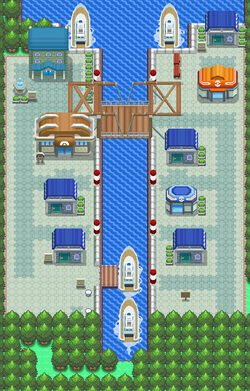
When you first enter Canalave City, be sure to visit the Pokémon Center to heal and prepare your team - when you try to cross the bridge your rival Barry will show up and challenge you to test your skills.
Barry now has a Heracross on his team, but a powerful Flying-type move can easily beat it. Unless you have an especially fast one, avoid using Psychic-type-types as Heracross's Dark-type move Night Slash will counter it. Four members of Barry's team have reached their highest evolutionary form, but they shouldn't be too much of a problem as long as your party is at least at Level 35 and has good type coverage. After the battle, Barry will suggest that the player visit Iron Island before heading off towards the library.
The Move Deleter resides in the house just north of the Poké Mart. He will be able to remove any unwanted moves in your Pokémon's present moveset including HM moves. This is the only way for a Pokémon to forget a HM.
The southernmost house on the west side of town belongs to a Sailor named Eldritch, who handles the ferry in town. Nothing important will happen here until the post-game after obtaining the National Pokédex. Eldritch is waiting near his boat at the dock nearby, and he can take you to Iron Island which will be required to visit. South from the wharf is a hidden area where you can pick up the TM89 (U-turn).
Canalave Gym
Be aware that the toughest Pokémon you'll face here is Level 41. The layout of the Canalave Gym is a maze consisting of multiple elevator platforms. As you may already know, it specializes in Steel-types. You'll want Fire-, Ground-, and/or Fighting-type attacks on your Pokémon. Many of the Pokémon in this gym are part Ground or Rock, so Water-type attacks (such as Surf) are also useful. Steel-types resist attacks of almost every other type, and are completely immune to Poison-type moves. Also, most of the Pokémon in this Gym have high Defense, so Special moves will do the most damage to them.
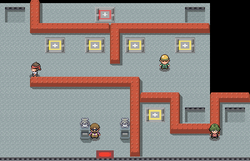
To deal with the maze, first head to the easternmost elevator out of the set of four you'll find on 1F. Then, take the elevator south of you on 2F to reach the southeast area of 1F. The next one will take you back up to 2F. Then, use the moving lift hooked up to a wire to get across the ledge. Take the regular elevator there to reach 3F, where you will find more moving lifts to take you across the wires. First, use the moving lift north of you to reach the north area of 3F with two moving lifts side-by side. Take the northern lift and then keep following the path that will take you back down to 2F. Another elevator will take you to the northern area of the 1F. There, an elevator with a red outline will take you up to 4F where Byron, the Gym Leader and the father of Oreburgh City Gym Leader Roark is.
Byron starts by sending out Magneton, whose weak Sp. Defense makes it vulnerable to moves like Fire Blast. Also, a Ground-type move like Earthquake could easily take it out in one hit due to its Steel/Electric typing. Beware of Flash Cannon if your Earthquake user is part Rock-type. Metal Sound will harshly lower your Pokémon's Special Defense, causing Thunderbolt, Tri Attack, and Flash Cannon to do even more damage, so be careful. It's best to use Special attacks on Byron's Steelix because of its high Defense stat. It will dispose of Fire-types with Earthquake unless you have a Fire-type strong and fast enough to take it out in one hit. Ground Pokémon, on the other hand, must watch out for Ice Fang. Don't worry too much about Steelix's Flash Cannon, as its Special Attack isn't the best. The last Pokémon you'll face is Bastiodon, which is high-leveled but can easily be defeated by a powerful Fighting- or Ground-type attack due to it's type combo of Rock/Steel. Be sure to take it out in one hit (which isn't too hard), or your Pokémon will be on the receiving end of Metal Burst, which does 1.5 times the damage your previous attack did to Bastiodon. Stone Edge poses a threat to Fire-types, and Iron Defense will sharply raise Bastiodon's already high Defense stat. Taunt will only allow your Pokémon to use attacking moves, which shouldn't be much of a concern. Get Bastiodon out of your way as quickly as possible, and you'll have saved your team some pain and earned yourself the Mine Badge without too much trouble!
Once you defeat Byron, he will give you the Mine Badge, which causes all traded Pokémon up to Level 70 obey you without question and allows for Strength to be used outside of battle. He'll also give you TM91 (Flash Cannon), a Steel-type Special attack that occasionally lowers the enemy's Special Defense stat.
When you step out the door, your rival Barry will be there waiting for you. After congratulating you on getting the Mine Badge, he asks you to come with him to the Canalave Library. You can meet them there, but he will stop you if you haven't been to Iron Island to pick up HM04 (Strength).


