Horde Encounter: Difference between revisions
Tiddlywinks (talk | contribs) (→{{g|Omega Ruby and Alpha Sapphire}}: This was missing a number of locations... I'll throw in an unlabeled Meteor Falls horde with "??" so maybe someone will label it and the page can be updated) |
m (Text replacement - "Hidden Ability" to "Hidden Ability") |
||
| (65 intermediate revisions by 28 users not shown) | |||
| Line 1: | Line 1: | ||
[[File:XY Prerelease Axew horde.png| | [[File:XY Prerelease Axew horde.png|250px|thumb|A horde of wild Axew]] | ||
[[File: | [[File:Horde Trainer Battle.png|250px|thumb|A horde of Trainers' Poochyena]] | ||
A '''Horde Encounter''' (Japanese: '''群れバトル''' ''Herd Battle'') is a type of [[Pokémon battle]] | A '''Horde Encounter''' (Japanese: '''群れバトル''' ''Herd Battle'') is a type of [[Pokémon battle]] in the [[Generation VI]] games, which involves one of the player's Pokémon facing five opponents at once. | ||
In | In [[Pokémon X and Y]], Horde Encounters are restricted to wild Pokémon, but in {{g|Omega Ruby and Alpha Sapphire}}, special scripted events allow five Trainers to engage the player in a Horde Battle. | ||
Not all locations have wild hordes, but where they exist, hordes may be randomly encountered at approximately a 5% rate in [[tall grass]] or flowers (but not in {{DL|tall grass|long grass}}) or in caves. Horde Encounters can also be purposefully initiated by using [[Honey]] or {{m|Sweet Scent}}; however, Honey and Sweet Scent will not cause a wild encounter if the overworld [[ | ==Mechanics== | ||
In wild Horde Encounters, all Pokémon are usually of the same species, but in some cases, one of them may instead be a counterpart or a similar Pokémon to the majority. The Pokémon in hordes are at approximately half the [[level]] of other Pokémon in the area and may be a lower [[evolution]]ary stage of a Pokémon that normally inhabits the area (such as a horde of {{p|Geodude}} occurring in areas dominated by {{p|Graveler}}). Pokémon encountered in hordes may also have their [[Hidden Ability]]. Some Pokémon can only be found in hordes. | |||
Not all locations have wild hordes, but where they exist, hordes may be randomly encountered at approximately a 5% rate in [[tall grass]] or flowers (but not in {{DL|tall grass|long grass}} in Pokémon X and Y) or in caves. Horde Encounters can also be purposefully initiated by using [[Honey]] or {{m|Sweet Scent}}; however, in Pokémon X and Y, Honey and Sweet Scent will not cause a wild encounter if the overworld [[weather]] is not clear. As in all wild battles, a Trainer cannot throw a [[Poké Ball]] unless there is only one wild Pokémon remaining. In Pokémon Omega Ruby and Alpha Sapphire, while Horde Encounters can be forced at any time with [[Honey]] or {{m|Sweet Scent}}, they only otherwise appear in {{DL|Tall grass|long grass}}. | |||
The player's moves in a Horde Encounter act as if the player was in the center of a [[Triple Battle]], except with all five other locations being treated as opponents instead of three opponents and two allies. Moves that target multiple Pokémon simultaneously (like {{m|Rock Slide}} and {{m|Surf}}) are able to strike all five Pokémon at once. | The player's moves in a Horde Encounter act as if the player was in the center of a [[Triple Battle]], except with all five other locations being treated as opponents instead of three opponents and two allies. Moves that target multiple Pokémon simultaneously (like {{m|Rock Slide}} and {{m|Surf}}) are able to strike all five Pokémon at once. | ||
| Line 13: | Line 16: | ||
In all cases of mixed hordes, four of one Pokémon species will appear, joined by one of another species. | In all cases of mixed hordes, four of one Pokémon species will appear, joined by one of another species. | ||
=== | ===Pokémon X and Y=== | ||
* A {{p|Plusle}} horde on {{rt|5|Kalos}} will always include one {{p|Minun}} in Pokémon X, and vice versa in Pokémon Y. | * A {{p|Plusle}} horde on {{rt|5|Kalos}} will always include one {{p|Minun}} in Pokémon X, and vice versa in Pokémon Y. | ||
* A {{p|Zangoose}} horde on {{rt|8|Kalos}} will always include one {{p|Seviper}} in Pokémon X, and vice versa in Pokémon Y. | * A {{p|Zangoose}} horde on {{rt|8|Kalos}} will always include one {{p|Seviper}} in Pokémon X, and vice versa in Pokémon Y. | ||
| Line 22: | Line 25: | ||
* A {{p|Trevenant}} horde on {{rt|20|Kalos}} may include one {{p|Sudowoodo}}. | * A {{p|Trevenant}} horde on {{rt|20|Kalos}} may include one {{p|Sudowoodo}}. | ||
=== | ===Pokémon Omega Ruby and Alpha Sapphire=== | ||
* A {{p|Makuhita}} horde in [[Granite Cave]] may include one {{p|Geodude}}. | |||
* A {{p|Minun}} horde on {{rt|110|Hoenn}} may include one {{p|Plusle}} in Pokémon Omega Ruby, and vice versa in Pokémon Alpha Sapphire. | * A {{p|Minun}} horde on {{rt|110|Hoenn}} may include one {{p|Plusle}} in Pokémon Omega Ruby, and vice versa in Pokémon Alpha Sapphire. | ||
* | * An {{p|Oddish}} horde on {{rt|117|Hoenn}} will always include one {{p|Zigzagoon}}. | ||
* | * A {{p|Lotad}}{{sup/6|AS}} horde on {{rt|114|Hoenn}} will always include one {{p|Swablu}}. | ||
===Mixed hordes with enemy species=== | ===Mixed hordes with enemy species=== | ||
If a mixed horde consists of {{p|Zangoose}} and {{p|Seviper}} or {{p|Heatmor}} and {{p|Durant}}, the different species will direct attacks at each other instead of at the player's Pokémon if possible. The exception to this is | If a mixed horde consists of {{p|Zangoose}} and {{p|Seviper}} or {{p|Heatmor}} and {{p|Durant}}, the different species will direct attacks at each other (likely due to the species being natural enemies) instead of at the player's Pokémon if possible. The exception to this is moves such as {{m|Leer}} that cannot target allies. Once all the Pokémon of one species have fainted, the horde will begin attacking the player's Pokémon. | ||
In contrast to Triple Battles, Pokémon attacking each other in a horde have no range limit; a Pokémon in a far-left position can attack a Pokémon in a far-right position. | In contrast to Triple Battles, Pokémon attacking each other in a horde have no range limit; a Pokémon in a far-left position can attack a Pokémon in a far-right position. | ||
==List of Horde Encounters== | ==List of Horde Encounters== | ||
=== | ===Pokémon X and Y=== | ||
{{Catch/header|X|2}} | {{Catch/header|X|2}} | ||
{{Catch/div|cave|{{color2|000|Connecting Cave}}}} | {{Catch/div|cave|{{color2|000|Connecting Cave}}}} | ||
{{Catch/entry6|041|Zubat|yes|yes|Horde Encounter|8| | {{Catch/entry6|041|Zubat|yes|yes|Horde Encounter|8|35%|type1=poison|type2=flying}} | ||
{{Catch/entry6|293|Whismur|yes|yes|Horde Encounter|7| | {{Catch/entry6|293|Whismur|yes|yes|Horde Encounter|7|60%|type1=normal}} | ||
{{Catch/entry6|610|Axew|yes|yes|Horde Encounter|8| | {{Catch/entry6|610|Axew|yes|yes|Horde Encounter|8|5%|type1=dragon}} | ||
{{Catch/div|cave|{{color2|000|Reflection Cave}}}} | {{Catch/div|cave|{{color2|000|Reflection Cave}}}} | ||
{{Catch/entry6|439|Mime Jr.|yes|yes|Horde Encounter|11| | {{Catch/entry6|439|Mime Jr.|yes|yes|Horde Encounter|11|60%|type1=psychic|type2=fairy}} | ||
{{Catch/entry6|524|Roggenrola|yes|yes|Horde Encounter|11| | {{Catch/entry6|524|Roggenrola|yes|yes|Horde Encounter|11|35%|type1=rock}} | ||
{{Catch/entry6|524|Roggenrola|yes|yes|Horde Encounter|11| | {{Catch/entry6|524|Roggenrola|yes|yes|Horde Encounter|11|{{tt|5%|4 will appear}}<br><small>with Carbink</small>|type1=rock}} | ||
{{Catch/entry6|703|Carbink|yes|yes|Horde Encounter|11| | {{Catch/entry6|703|Carbink|yes|yes|Horde Encounter|11|{{tt|5%|Only 1 will appear}}<br><small>with Roggenrola</small>|type1=rock|type2=fairy}} | ||
{{Catch/div|land|{{color2|000|Azure Bay}}}} | {{Catch/div|land|{{color2|000|Azure Bay}}}} | ||
{{Catch/entry6|079|Slowpoke|yes|yes|Horde Encounter|13| | {{Catch/entry6|079|Slowpoke|yes|yes|Horde Encounter|13|35%|type1=water|type2=psychic}} | ||
{{Catch/entry6|102|Exeggcute|yes|yes|Horde Encounter|14| | {{Catch/entry6|102|Exeggcute|yes|yes|Horde Encounter|14|5%|type1=grass|type2=psychic}} | ||
{{Catch/entry6|278|Wingull|yes|yes|Horde Encounter|13| | {{Catch/entry6|278|Wingull|yes|yes|Horde Encounter|13|60%|type1=water|type2=flying}} | ||
{{Catch/div|cave|{{color2|000|Frost Cavern}}}} | {{Catch/div|cave|{{color2|000|Frost Cavern}}}} | ||
{{Catch/entry6|238|Smoochum|yes|yes|Horde Encounter|21| | {{Catch/entry6|238|Smoochum|yes|yes|Horde Encounter|21|5%|type1=ice|type2=psychic}} | ||
{{Catch/entry6|582|Vanillite|yes|yes|Horde Encounter|20| | {{Catch/entry6|582|Vanillite|yes|yes|Horde Encounter|20|60%|type1=ice}} | ||
{{Catch/entry6|613|Cubchoo|yes|yes|Horde Encounter|20| | {{Catch/entry6|613|Cubchoo|yes|yes|Horde Encounter|20|35%|type1=ice}} | ||
{{Catch/div|cave|{{color2|000|Terminus Cave}}}} | {{Catch/div|cave|{{color2|000|Terminus Cave}}}} | ||
{{Catch/entry6|074|Geodude|yes|yes|Horde Encounter|23| | {{Catch/entry6|074|Geodude|yes|yes|Horde Encounter|23|35%|type1=rock|type2=ground}} | ||
{{Catch/entry6|246|Larvitar|no|yes|Horde Encounter|24| | {{Catch/entry6|246|Larvitar|no|yes|Horde Encounter|24|5%|type1=Rock|type2=ground}} | ||
{{Catch/entry6|304|Aron|yes|no|Horde Encounter|24| | {{Catch/entry6|304|Aron|yes|no|Horde Encounter|24|5%|type1=steel|type2=rock}} | ||
{{Catch/entry6|632|Durant|yes|yes|Horde Encounter|23| | {{Catch/entry6|632|Durant|yes|yes|Horde Encounter|23|60%|type1=bug|type2=steel}} | ||
{{Catch/div|land|{{color2|000|Pokémon Village}}}} | {{Catch/div|land|{{color2|000|Pokémon Village}}}} | ||
{{Catch/entry6|060|Poliwag|yes|yes|Horde Encounter|25| | {{Catch/entry6|060|Poliwag|yes|yes|Horde Encounter|25|35%|type1=water}} | ||
{{Catch/entry6|271|Lombre|yes|yes|Horde Encounter|25| | {{Catch/entry6|271|Lombre|yes|yes|Horde Encounter|25|5%|type1=water|type2=grass}} | ||
{{Catch/entry6|590|Foongus|yes|yes|Horde Encounter|25| | {{Catch/entry6|590|Foongus|yes|yes|Horde Encounter|25|60%|type1=grass|type2=poison}} | ||
{{Catch/div|cave|{{color2|000|Victory Road (Kalos)|Victory Road}}}} | {{Catch/div|cave|{{color2|000|Victory Road (Kalos)|Victory Road}}}} | ||
{{Catch/entry6|074|Geodude|yes|yes|Horde Encounter|28| | {{Catch/entry6|074|Geodude|yes|yes|Horde Encounter|28|60%|type1=rock|type2=ground}} | ||
{{Catch/entry6|075|Graveler|yes|yes|Horde Encounter|29| | {{Catch/entry6|075|Graveler|yes|yes|Horde Encounter|29|35%{{tt|*|In the second and third caves only}}|type1=rock|type2=ground}} | ||
{{Catch/entry6|108|Lickitung|yes|yes|Horde Encounter|30| | {{Catch/entry6|108|Lickitung|yes|yes|Horde Encounter|30|5%|type1=normal}} | ||
{{Catch/entry6|419|Floatzel|yes|yes|Horde Encounter|29| | {{Catch/entry6|419|Floatzel|yes|yes|Horde Encounter|29|35%{{tt|*|In the first and last caves only}}|type1=water}} | ||
{{Catch/div|land|{{color2|000|Kalos Route 5|Route 5}}}} | {{Catch/div|land|{{color2|000|Kalos Route 5|Route 5}}}} | ||
{{Catch/entry6|311|Plusle|yes|yes|Grass/Purple Flowers|6| | {{Catch/entry6|311|Plusle|yes|yes|Grass/Purple Flowers|6|{{tt|5%|4 in X, 1 in Y}}<br><small>with Minun</small>|type1=electric}} | ||
{{Catch/entry6|312|Minun|yes|yes|Grass/Purple Flowers|6| | {{Catch/entry6|312|Minun|yes|yes|Grass/Purple Flowers|6|{{tt|5%|1 in X, 4 in Y}}<br><small>with Plusle</small>|type1=electric}} | ||
{{Catch/entry6|316|Gulpin|yes|yes|Grass/Purple Flowers|5| | {{Catch/entry6|316|Gulpin|yes|yes|Grass/Purple Flowers|5|60%|type1=poison}} | ||
{{Catch/entry6|559|Scraggy|yes|yes|Grass/Purple Flowers|5| | {{Catch/entry6|559|Scraggy|yes|yes|Grass/Purple Flowers|5|35%|type1=dark|type2=fighting}} | ||
{{Catch/div|land|{{color2|000|Kalos Route 7|Route 7}}}} | {{Catch/div|land|{{color2|000|Kalos Route 7|Route 7}}}} | ||
{{Catch/entry6|054|Psyduck|yes|yes|Horde Encounter|7| | {{Catch/entry6|054|Psyduck|yes|yes|Horde Encounter|7|35%|type1=water}} | ||
{{Catch/entry6|187|Hoppip|yes|yes|Horde Encounter|7| | {{Catch/entry6|187|Hoppip|yes|yes|Horde Encounter|7|60%|type1=grass|type2=flying}} | ||
{{Catch/entry6|315|Roselia|yes|yes|Horde Encounter|8| | {{Catch/entry6|315|Roselia|yes|yes|Horde Encounter|8|5%|type1=grass|type2=poison}} | ||
{{Catch/div|land|{{color2|000|Kalos Route 8|Route 8}}}} | {{Catch/div|land|{{color2|000|Kalos Route 8|Route 8}}}} | ||
{{Catch/entry6|276|Taillow|yes|yes|Horde Encounter|7| | {{Catch/entry6|276|Taillow|yes|yes|Horde Encounter|7|5%|type1=normal|type2=flying}} | ||
{{Catch/entry6|278|Wingull|yes|yes|Horde Encounter|7| | {{Catch/entry6|278|Wingull|yes|yes|Horde Encounter|7|60%|type1=water|type2=flying}} | ||
{{Catch/entry6|335|Zangoose|yes|yes|Horde Encounter|8| | {{Catch/entry6|335|Zangoose|yes|yes|Horde Encounter|8|{{tt|35%|4 in X and 1 in Y}}<br><small>with Seviper</small>|type1=normal}} | ||
{{Catch/entry6|336|Seviper|yes|yes|Horde Encounter|8| | {{Catch/entry6|336|Seviper|yes|yes|Horde Encounter|8|{{tt|35%|1 in X and 4 in Y}}<br><small>with Zangoose</small>|type1=poison}} | ||
{{Catch/div|land|{{color2|000|Kalos Route 10|Route 10}}}} | {{Catch/div|land|{{color2|000|Kalos Route 10|Route 10}}}} | ||
{{Catch/entry6|193|Yanma|yes|yes|Horde Encounter|10| | {{Catch/entry6|193|Yanma|yes|yes|Horde Encounter|10|35%|type1=bug|type2=flying}} | ||
{{Catch/entry6|228|Houndour|yes|no|Horde Encounter|11| | {{Catch/entry6|228|Houndour|yes|no|Horde Encounter|11|5%|type1=Dark|type2=Fire}} | ||
{{Catch/entry6|299|Nosepass|yes|yes|Horde Encounter|10| | {{Catch/entry6|299|Nosepass|yes|yes|Horde Encounter|10|60%|type1=Rock}} | ||
{{Catch/entry6|309|Electrike|no|yes|Horde Encounter|11| | {{Catch/entry6|309|Electrike|no|yes|Horde Encounter|11|5%|type1=electric}} | ||
{{Catch/div|mountain|{{color2|000|Kalos Route 11|Route 11}}}} | {{Catch/div|mountain|{{color2|000|Kalos Route 11|Route 11}}}} | ||
{{Catch/entry6|029|Nidoran♀|yes|yes|Horde Encounter|11| | {{Catch/entry6|029|Nidoran♀|yes|yes|Horde Encounter|11|{{tt|60%|Only 1 will appear}}<br><small>with Nidoran♂</small>|type1=poison}} | ||
{{Catch/entry6|032|Nidoran♂|yes|yes|Horde Encounter|11| | {{Catch/entry6|032|Nidoran♂|yes|yes|Horde Encounter|11|{{tt|60%|4 will appear}}<br><small>with Nidoran♀</small>|type1=poison}} | ||
{{Catch/entry6|396|Starly|yes|yes|Horde Encounter|12| | {{Catch/entry6|396|Starly|yes|yes|Horde Encounter|12|5%|type1=normal|type2=flying}} | ||
{{Catch/entry6|434|Stunky|yes|yes|Horde Encounter|11| | {{Catch/entry6|434|Stunky|yes|yes|Horde Encounter|11|35%|type1=poison|type2=dark}} | ||
{{Catch/div|land|{{color2|000|Kalos Route 12|Route 12}}}} | {{Catch/div|land|{{color2|000|Kalos Route 12|Route 12}}}} | ||
{{Catch/entry6|128|Tauros|yes|yes|Horde Encounter|14| | {{Catch/entry6|128|Tauros|yes|yes|Horde Encounter|14|{{tt|5%|4 will appear}}<br><small>with Miltank</small>|type1=normal}} | ||
{{Catch/entry6|179|Mareep|yes|yes|Horde Encounter|13| | {{Catch/entry6|179|Mareep|yes|yes|Horde Encounter|13|35%|type1=electric}} | ||
{{Catch/entry6|241|Miltank|yes|yes|Horde Encounter|14| | {{Catch/entry6|241|Miltank|yes|yes|Horde Encounter|14|{{tt|5%|Only 1 will appear}}<br><small>with Tauros</small>|type1=normal}} | ||
{{Catch/entry6|278|Wingull|yes|yes|Horde Encounter|13| | {{Catch/entry6|278|Wingull|yes|yes|Horde Encounter|13|60%|type1=water|type2=flying}} | ||
{{Catch/div|marsh|{{color2|000|Kalos Route 14|Route 14}}}} | {{Catch/div|marsh|{{color2|000|Kalos Route 14|Route 14}}}} | ||
{{Catch/entry6|023|Ekans|yes|yes|Horde Encounter|17| | {{Catch/entry6|023|Ekans|yes|yes|Horde Encounter|17|5%|type1=poison}} | ||
{{Catch/entry6|069|Bellsprout|yes|yes|Horde Encounter|16| | {{Catch/entry6|069|Bellsprout|yes|yes|Horde Encounter|16|60%|type1=grass|type2=poison}} | ||
{{Catch/entry6|451|Skorupi|yes|yes|Horde Encounter|16| | {{Catch/entry6|451|Skorupi|yes|yes|Horde Encounter|16|35%|type1=poison|type2=bug}} | ||
{{Catch/div|land|{{color2|000|Kalos Route 15|Route 15}} & {{color2|000|Kalos Route 16|16}}}} | {{Catch/div|land|{{color2|000|Kalos Route 15|Route 15}} & {{color2|000|Kalos Route 16|16}}}} | ||
{{Catch/entry6|198|Murkrow|yes|yes|Horde Encounter|18| | {{Catch/entry6|198|Murkrow|yes|yes|Horde Encounter|18|60%|type1=dark|type2=Flying}} | ||
{{Catch/entry6|590|Foongus|yes|yes|Horde Encounter|18| | {{Catch/entry6|590|Foongus|yes|yes|Horde Encounter|18|35%|type1=grass|type2=poison}} | ||
{{Catch/entry6|707|Klefki|yes|yes|Horde Encounter|19| | {{Catch/entry6|707|Klefki|yes|yes|Horde Encounter|19|5%|type1=steel|type2=fairy}} | ||
{{Catch/div|land|{{color2|000|Kalos Route 18|Route 18}}}} | {{Catch/div|land|{{color2|000|Kalos Route 18|Route 18}}}} | ||
{{Catch/entry6|074|Geodude|yes|yes|Horde Encounter|23| | {{Catch/entry6|074|Geodude|yes|yes|Horde Encounter|23|60%|type1=rock|type2=ground}} | ||
{{Catch/entry6|631|Heatmor|yes|yes|Horde Encounter|23| | {{Catch/entry6|631|Heatmor|yes|yes|Horde Encounter|23|{{tt|5%|Only 1 will appear}}<br><small>with Durant</small>|type1=Fire}} | ||
{{Catch/entry6|632|Durant|yes|yes|Horde Encounter|23| | {{Catch/entry6|632|Durant|yes|yes|Horde Encounter|23|35%|type1=bug|type2=steel}} | ||
{{Catch/entry6|632|Durant|yes|yes|Horde Encounter|23| | {{Catch/entry6|632|Durant|yes|yes|Horde Encounter|23|{{tt|5%|4 will appear}}<br><small>with Heatmor</small>|type1=bug|type2=steel}} | ||
{{Catch/div|land|{{color2|000|Kalos Route 19|Route 19}}}} | {{Catch/div|land|{{color2|000|Kalos Route 19|Route 19}}}} | ||
{{Catch/entry6|024|Arbok|yes|yes|Horde Encounter|25| | {{Catch/entry6|024|Arbok|yes|yes|Horde Encounter|25|5%|type1=poison}} | ||
{{Catch/entry6|070|Weepinbell|yes|yes|Horde Encounter|24| | {{Catch/entry6|070|Weepinbell|yes|yes|Horde Encounter|24|60%|type1=grass|type2=poison}} | ||
{{Catch/entry6|207|Gligar|yes|yes|Horde Encounter|24| | {{Catch/entry6|207|Gligar|yes|yes|Horde Encounter|24|35%|type1=ground|type2=flying}} | ||
{{Catch/div|forest|{{color2|000|Kalos Route 20|Route 20}}}} | {{Catch/div|forest|{{color2|000|Kalos Route 20|Route 20}}}} | ||
{{Catch/entry6|185|Sudowoodo|yes|yes|Horde Encounter|25| | {{Catch/entry6|185|Sudowoodo|yes|yes|Horde Encounter|25|{{tt|5%|Only 1 will appear}}<br><small>with Trevenant</small>|type1=rock}} | ||
{{Catch/entry6|590|Foongus|yes|yes|Horde Encounter|25| | {{Catch/entry6|590|Foongus|yes|yes|Horde Encounter|25|60%|type1=grass|type2=poison}} | ||
{{Catch/entry6|709|Trevenant|yes|yes|Horde Encounter|25| | {{Catch/entry6|709|Trevenant|yes|yes|Horde Encounter|25|35%|type1=ghost|type2=grass}} | ||
{{Catch/entry6|709|Trevenant|yes|yes|Horde Encounter|25| | {{Catch/entry6|709|Trevenant|yes|yes|Horde Encounter|25|{{tt|5%|4 will appear}}<br><small>with Sudowoodo</small>|type1=ghost|type2=grass}} | ||
{{Catch/div|land|{{color2|000|Kalos Route 21|Route 21}}}} | {{Catch/div|land|{{color2|000|Kalos Route 21|Route 21}}}} | ||
{{Catch/entry6|123|Scyther|yes|yes|Horde Encounter|27| | {{Catch/entry6|123|Scyther|yes|yes|Horde Encounter|27|5%|type1=bug|type2=flying}} | ||
{{Catch/entry6|327|Spinda|yes|yes|Horde Encounter|26| | {{Catch/entry6|327|Spinda|yes|yes|Horde Encounter|26|60%|type1=Normal}} | ||
{{Catch/entry6|333|Swablu|yes|yes|Horde Encounter|26| | {{Catch/entry6|333|Swablu|yes|yes|Horde Encounter|26|35%|type1=normal|type2=flying}} | ||
{{Catch/footer|X}} | {{Catch/footer|X}} | ||
=== | ===Pokémon Omega Ruby and Alpha Sapphire=== | ||
{{Catch/header|X|2}} | {{Catch/header|X|2}} | ||
{{Catch/div|forest|{{color2|000|Petalburg Woods}}}} | {{Catch/div|forest|{{color2|000|Petalburg Woods}}}} | ||
| Line 155: | Line 159: | ||
{{Catch/entryoras|066|Machop|yes|yes|Horde Encounter|10|65%|type1=Fighting}} | {{Catch/entryoras|066|Machop|yes|yes|Horde Encounter|10|65%|type1=Fighting}} | ||
{{Catch/entryoras|325|Spoink|yes|yes|Horde Encounter|10|35%|type1=Psychic}} | {{Catch/entryoras|325|Spoink|yes|yes|Horde Encounter|10|35%|type1=Psychic}} | ||
{{Catch/div|cave|{{color2|000|Meteor Falls}} 1F}} | {{Catch/div|cave|{{color2|000|Meteor Falls}} 1F 1R}} | ||
{{Catch/entryoras|041|Zubat|yes|yes|Horde Encounter|9|100%|type1=Poison|type2=Flying}} | {{Catch/entryoras|041|Zubat|yes|yes|Horde Encounter|9|100%|type1=Poison|type2=Flying}} | ||
{{Catch/div|cave|{{color2|000|Meteor Falls}} | {{Catch/div|cave|{{color2|000|Meteor Falls}} 1F 2R & B1F 1R}} | ||
{{Catch/entryoras|041|Zubat|yes|yes|Horde Encounter|20|100%|type1=Poison|type2=Flying}} | {{Catch/entryoras|041|Zubat|yes|yes|Horde Encounter|20|100%|type1=Poison|type2=Flying}} | ||
{{Catch/div|cave|{{color2|000|Meteor Falls}} B1F}} | {{Catch/div|cave|{{color2|000|Meteor Falls}} B1F 2R}} | ||
{{Catch/entryoras|041|Zubat|yes|yes|Horde Encounter|20|95%|type1=Poison|type2=Flying}} | {{Catch/entryoras|041|Zubat|yes|yes|Horde Encounter|20|95%|type1=Poison|type2=Flying}} | ||
{{Catch/entryoras|371|Bagon|yes|yes|Horde Encounter|20|5%|type1=Dragon}} | {{Catch/entryoras|371|Bagon|yes|yes|Horde Encounter|20|5%|type1=Dragon}} | ||
| Line 208: | Line 212: | ||
{{Catch/entryoras|263|Zigzagoon|yes|yes|Horde Encounter|2|60%|type1=Normal}} | {{Catch/entryoras|263|Zigzagoon|yes|yes|Horde Encounter|2|60%|type1=Normal}} | ||
{{Catch/entryoras|278|Wingull|yes|yes|Horde Encounter|2|5%|type1=Water|type2=Flying}} | {{Catch/entryoras|278|Wingull|yes|yes|Horde Encounter|2|5%|type1=Water|type2=Flying}} | ||
{{Catch/div|land|{{color2|000|Hoenn Route 104|Route 104}}}} | {{Catch/div|land|{{color2|000|Hoenn Route 104|Route 104}} (south)}} | ||
{{Catch/entryoras|263|Zigzagoon|yes|yes|Horde Encounter|2|95%|type1=Normal}} | |||
{{Catch/entryoras|278|Wingull|yes|yes|Horde Encounter|2|5%|type1=Water|type2=Flying}} | |||
{{Catch/div|land|{{color2|000|Hoenn Route 104|Route 104}} (north)}} | |||
{{Catch/entryoras|263|Zigzagoon|yes|yes|Horde Encounter|2|95%|type1=Normal}} | {{Catch/entryoras|263|Zigzagoon|yes|yes|Horde Encounter|2|95%|type1=Normal}} | ||
{{Catch/entryoras|276|Taillow|yes|yes|Horde Encounter|3|5% | {{Catch/entryoras|276|Taillow|yes|yes|Horde Encounter|3|5%|type1=Normal|type2=Flying}} | ||
{{Catch/div|land|{{color2|000|Hoenn Route 110|Route 110}}}} | {{Catch/div|land|{{color2|000|Hoenn Route 110|Route 110}}}} | ||
{{Catch/entryoras|081|Magnemite|yes|yes|Horde Encounter|6|60%|type1=Electric|type2=Steel}} | {{Catch/entryoras|081|Magnemite|yes|yes|Horde Encounter|6|60%|type1=Electric|type2=Steel}} | ||
{{Catch/entryoras|311|Plusle|no|yes|Horde Encounter|6|35%|type1=Electric}} | {{Catch/entryoras|311|Plusle|no|yes|Horde Encounter|6|35%|type1=Electric}} | ||
{{Catch/entryoras|311|Plusle|yes|yes|Horde Encounter|6|{{tt|5%|4 | {{Catch/entryoras|311|Plusle|yes|yes|Horde Encounter|6|{{tt|5%|4 will appear in Alpha Sapphire, 1 in Omega Ruby}}<br><small>with Minun</small>|type1=Electric}} | ||
{{Catch/entryoras|312|Minun|yes|no|Horde Encounter|6|35%|type1=Electric}} | {{Catch/entryoras|312|Minun|yes|no|Horde Encounter|6|35%|type1=Electric}} | ||
{{Catch/entryoras|312|Minun|yes|yes|Horde Encounter|6|{{tt|5%|1 | {{Catch/entryoras|312|Minun|yes|yes|Horde Encounter|6|{{tt|5%|1 will appear in Alpha Sapphire, 4 in Omega Ruby}}<br><small>with Plusle</small>|type1=Electric}} | ||
{{Catch/div|sand|{{color2|000|Hoenn Route 111|Route 111}}}} | {{Catch/div|sand|{{color2|000|Hoenn Route 111|Route 111}}}} | ||
{{Catch/entryoras|027|Sandshrew|yes|yes|Horde Encounter|11|100%|type1=Ground}} | {{Catch/entryoras|027|Sandshrew|yes|yes|Horde Encounter|11|100%|type1=Ground}} | ||
| Line 227: | Line 233: | ||
{{Catch/entryoras|327|Spinda|yes|yes|Horde Encounter|9|95%|type1=Normal}} | {{Catch/entryoras|327|Spinda|yes|yes|Horde Encounter|9|95%|type1=Normal}} | ||
{{Catch/div|mountain|{{color2|000|Hoenn Route 114|Route 114}}}} | {{Catch/div|mountain|{{color2|000|Hoenn Route 114|Route 114}}}} | ||
{{Catch/entryoras|270|Lotad|no|yes|Horde Encounter|9|35%|type1=Water|type2=Grass}} | {{Catch/entryoras|270|Lotad|no|yes|Horde Encounter|9|{{tt|35%|4 Lotad will appear}}<br><small>with Swablu</small>|type1=Water|type2=Grass}} | ||
{{Catch/entryoras|273|Seedot|yes|no|Horde Encounter|9|35%|type1=Grass}} | {{Catch/entryoras|273|Seedot|yes|no|Horde Encounter|9|35%|type1=Grass}} | ||
{{Catch/entryoras|333|Swablu|no|yes|Horde Encounter|9|{{tt|35%|1 Swablu will appear}}<br><small>with Lotad</small>|type1=Normal|type2=Flying}} | |||
{{Catch/entryoras|333|Swablu|yes|yes|Horde Encounter|9|65%|type1=Normal|type2=Flying}} | {{Catch/entryoras|333|Swablu|yes|yes|Horde Encounter|9|65%|type1=Normal|type2=Flying}} | ||
{{Catch/div|mountain|{{color2|000|Hoenn Route 115|Route 115}}}} | {{Catch/div|mountain|{{color2|000|Hoenn Route 115|Route 115}}}} | ||
| Line 256: | Line 263: | ||
{{Catch/entryoras|353|Shuppet|yes|yes|Horde Encounter|15|60%|type1=Ghost}} | {{Catch/entryoras|353|Shuppet|yes|yes|Horde Encounter|15|60%|type1=Ghost}} | ||
{{Catch/footer|X}} | {{Catch/footer|X}} | ||
====Trainer battles==== | |||
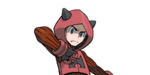
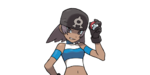
[[File:ORAS Prerelease Magma Grunt Horde.jpg|220px|thumb|Being engaged in a Horde Battle with {{tc|Team Magma Grunt}}s]] | |||
{{trainerheader|X}} | |||
{{trainerdiv|volcano|{{color2|FFF|Team Magma Hideout}}}} | |||
{{Trainerentry|game=6|VSTeam Magma Grunt M.png{{!}}150px|Team Magma Grunt|×5{{sup/6|OR}}|720<br><small>Horde Trainer Battle</small>|5|261|Poochyena|♂|18||261|Poochyena|♂|18||261|Poochyena|♂|18||261|Poochyena|♂|18||261|Poochyena|♂|18}} | |||
{{trainerdiv|water|{{color2|FFF|Team Aqua Hideout}}}} | |||
{{Trainerentry|game=6|VSTeam Aqua Grunt F.png{{!}}150px|Team Aqua Grunt|×5{{sup/6|AS}}|720<br><small>Horde Trainer Battle</small>|5|261|Poochyena|♀|18||261|Poochyena|♀|18||261|Poochyena|♀|18||261|Poochyena|♀|18||261|Poochyena|♀|18}} | |||
{{trainerdiv|building|{{color2|FFF|Mossdeep Space Center}}}} | |||
{{Trainerentry|game=6|VSTeam Magma Grunt M.png{{!}}150px|Team Magma Grunt|×5{{sup/6|OR}}|1,000<br><small>Horde Trainer Battle</small>|5|262|Mightyena|♂|25||262|Mightyena|♂|25||262|Mightyena|♂|25||262|Mightyena|♂|25||262|Mightyena|♂|25}} | |||
{{trainerdiv|building}} | |||
{{Trainerentry|game=6|VSTeam Aqua Grunt F.png{{!}}150px|Team Aqua Grunt|×5{{sup/6|AS}}|1,000<br><small>Horde Trainer Battle</small>|5|262|Mightyena|♀|25||262|Mightyena|♀|25||262|Mightyena|♀|25||262|Mightyena|♀|25||262|Mightyena|♀|25}} | |||
{{trainerfooter|X|3}} | |||
==Trivia== | ==Trivia== | ||
* In Pokémon X and Y, if the player selects a {{cat|Moves that target one adjacent ally|move that targets an adjacent ally}}, the user's spot is not highlighted, while the spots of the two opponents in the places where the Pokémon allies would be in a [[Triple Battle]] are highlighted as if either of them could be targeted (even if those Pokémon have fainted), despite the user being forced to target itself. | * In Pokémon X and Y, if the player selects a {{cat|Moves that target one adjacent ally|move that targets an adjacent ally}}, the user's spot is not highlighted, while the spots of the two opponents in the places where the Pokémon allies would be in a [[Triple Battle]] are highlighted as if either of them could be targeted (even if those Pokémon have fainted), despite the user being forced to target itself. | ||
* In Pokémon X and Y, if the player selects {{m|Acupressure}} or a {{cat|Moves that target the user and all allies|move that targets the user and all allies}}, the user's spot and the spots of the two opponents in the places where the Pokémon allies would be in a [[Triple Battle]] are highlighted (but not joined) as if any of them could be targeted (even if those Pokémon have fainted), despite the user being forced to target itself. | * In Pokémon X and Y, if the player selects {{m|Acupressure}} or a {{cat|Moves that target the user and all allies|move that targets the user and all allies}}, the user's spot and the spots of the two opponents in the places where the Pokémon allies would be in a [[Triple Battle]] are highlighted (but not joined) as if any of them could be targeted (even if those Pokémon have fainted), despite the user being forced to target itself. | ||
| Line 268: | Line 287: | ||
|fr=Rencontres de Horde | |fr=Rencontres de Horde | ||
|it=Gruppi di Pokémon | |it=Gruppi di Pokémon | ||
|ko=무리배틀 '' | |ko=무리배틀 ''{{tt|Muri Battle|Horde Battle}}'' | ||
|pt=Encontro de Horda | |||
}} | }} | ||
| Line 277: | Line 297: | ||
[[Category:Terminology]] | [[Category:Terminology]] | ||
[[Category:Game mechanics]] | [[Category:Game mechanics]] | ||
[[Category:Battle variations]] | |||
[[Category:Methods of obtaining Pokémon]] | |||
[[de:Massenbegegnung]] | |||
[[es:Encuentro de horda]] | |||
[[fr:Horde de Pokémon]] | [[fr:Horde de Pokémon]] | ||
[[it:Gruppi di Pokémon]] | [[it:Gruppi di Pokémon]] | ||
[[ja:群れバトル]] | |||
[[zh:群聚对战]] | |||
Latest revision as of 15:41, 26 August 2023


A Horde Encounter (Japanese: 群れバトル Herd Battle) is a type of Pokémon battle in the Generation VI games, which involves one of the player's Pokémon facing five opponents at once.
In Pokémon X and Y, Horde Encounters are restricted to wild Pokémon, but in Pokémon Omega Ruby and Alpha Sapphire, special scripted events allow five Trainers to engage the player in a Horde Battle.
Mechanics
In wild Horde Encounters, all Pokémon are usually of the same species, but in some cases, one of them may instead be a counterpart or a similar Pokémon to the majority. The Pokémon in hordes are at approximately half the level of other Pokémon in the area and may be a lower evolutionary stage of a Pokémon that normally inhabits the area (such as a horde of Geodude occurring in areas dominated by Graveler). Pokémon encountered in hordes may also have their Hidden Ability. Some Pokémon can only be found in hordes.
Not all locations have wild hordes, but where they exist, hordes may be randomly encountered at approximately a 5% rate in tall grass or flowers (but not in long grass in Pokémon X and Y) or in caves. Horde Encounters can also be purposefully initiated by using Honey or Sweet Scent; however, in Pokémon X and Y, Honey and Sweet Scent will not cause a wild encounter if the overworld weather is not clear. As in all wild battles, a Trainer cannot throw a Poké Ball unless there is only one wild Pokémon remaining. In Pokémon Omega Ruby and Alpha Sapphire, while Horde Encounters can be forced at any time with Honey or Sweet Scent, they only otherwise appear in long grass.
The player's moves in a Horde Encounter act as if the player was in the center of a Triple Battle, except with all five other locations being treated as opponents instead of three opponents and two allies. Moves that target multiple Pokémon simultaneously (like Rock Slide and Surf) are able to strike all five Pokémon at once.
Mixed hordes

In all cases of mixed hordes, four of one Pokémon species will appear, joined by one of another species.
Pokémon X and Y
- A Plusle horde on Route 5 will always include one Minun in Pokémon X, and vice versa in Pokémon Y.
- A Zangoose horde on Route 8 will always include one Seviper in Pokémon X, and vice versa in Pokémon Y.
- A Nidoran♂ horde on Route 11 will always include one Nidoran♀.
- A Roggenrola horde in Reflection Cave may include one Carbink.
- A Tauros horde on Route 12 will always include one Miltank.
- A Durant horde on Route 18 may include one Heatmor.
- A Trevenant horde on Route 20 may include one Sudowoodo.
Pokémon Omega Ruby and Alpha Sapphire
- A Makuhita horde in Granite Cave may include one Geodude.
- A Minun horde on Route 110 may include one Plusle in Pokémon Omega Ruby, and vice versa in Pokémon Alpha Sapphire.
- An Oddish horde on Route 117 will always include one Zigzagoon.
- A LotadAS horde on Route 114 will always include one Swablu.
Mixed hordes with enemy species
If a mixed horde consists of Zangoose and Seviper or Heatmor and Durant, the different species will direct attacks at each other (likely due to the species being natural enemies) instead of at the player's Pokémon if possible. The exception to this is moves such as Leer that cannot target allies. Once all the Pokémon of one species have fainted, the horde will begin attacking the player's Pokémon.
In contrast to Triple Battles, Pokémon attacking each other in a horde have no range limit; a Pokémon in a far-left position can attack a Pokémon in a far-right position.
List of Horde Encounters
Pokémon X and Y
| Pokémon | Games | Location | Levels | Rate | |||||||||||
|---|---|---|---|---|---|---|---|---|---|---|---|---|---|---|---|
| Connecting Cave | |||||||||||||||
|
X | Y |
|
8 | 35% | ||||||||||
|
X | Y |
|
7 | 60% | ||||||||||
|
X | Y |
|
8 | 5% | ||||||||||
| Reflection Cave | |||||||||||||||
|
X | Y |
|
11 | 60% | ||||||||||
|
X | Y |
|
11 | 35% | ||||||||||
|
X | Y |
|
11 | 5% with Carbink | ||||||||||
|
X | Y |
|
11 | 5% with Roggenrola | ||||||||||
| Azure Bay | |||||||||||||||
|
X | Y |
|
13 | 35% | ||||||||||
|
X | Y |
|
14 | 5% | ||||||||||
|
X | Y |
|
13 | 60% | ||||||||||
| Frost Cavern | |||||||||||||||
|
X | Y |
|
21 | 5% | ||||||||||
|
X | Y |
|
20 | 60% | ||||||||||
|
X | Y |
|
20 | 35% | ||||||||||
| Terminus Cave | |||||||||||||||
|
X | Y |
|
23 | 35% | ||||||||||
|
X | Y |
|
24 | 5% | ||||||||||
|
X | Y |
|
24 | 5% | ||||||||||
|
X | Y |
|
23 | 60% | ||||||||||
| Pokémon Village | |||||||||||||||
|
X | Y |
|
25 | 35% | ||||||||||
|
X | Y |
|
25 | 5% | ||||||||||
|
X | Y |
|
25 | 60% | ||||||||||
| Victory Road | |||||||||||||||
|
X | Y |
|
28 | 60% | ||||||||||
|
X | Y |
|
29 | 35%* | ||||||||||
|
X | Y |
|
30 | 5% | ||||||||||
|
X | Y |
|
29 | 35%* | ||||||||||
| Route 5 | |||||||||||||||
|
X | Y |
|
6 | 5% with Minun | ||||||||||
|
X | Y |
|
6 | 5% with Plusle | ||||||||||
|
X | Y |
|
5 | 60% | ||||||||||
|
X | Y |
|
5 | 35% | ||||||||||
| Route 7 | |||||||||||||||
|
X | Y |
|
7 | 35% | ||||||||||
|
X | Y |
|
7 | 60% | ||||||||||
|
X | Y |
|
8 | 5% | ||||||||||
| Route 8 | |||||||||||||||
|
X | Y |
|
7 | 5% | ||||||||||
|
X | Y |
|
7 | 60% | ||||||||||
|
X | Y |
|
8 | 35% with Seviper | ||||||||||
|
X | Y |
|
8 | 35% with Zangoose | ||||||||||
| Route 10 | |||||||||||||||
|
X | Y |
|
10 | 35% | ||||||||||
|
X | Y |
|
11 | 5% | ||||||||||
|
X | Y |
|
10 | 60% | ||||||||||
|
X | Y |
|
11 | 5% | ||||||||||
| Route 11 | |||||||||||||||
|
X | Y |
|
11 | 60% with Nidoran♂ | ||||||||||
|
X | Y |
|
11 | 60% with Nidoran♀ | ||||||||||
|
X | Y |
|
12 | 5% | ||||||||||
|
X | Y |
|
11 | 35% | ||||||||||
| Route 12 | |||||||||||||||
|
X | Y |
|
14 | 5% with Miltank | ||||||||||
|
X | Y |
|
13 | 35% | ||||||||||
|
X | Y |
|
14 | 5% with Tauros | ||||||||||
|
X | Y |
|
13 | 60% | ||||||||||
| Route 14 | |||||||||||||||
|
X | Y |
|
17 | 5% | ||||||||||
|
X | Y |
|
16 | 60% | ||||||||||
|
X | Y |
|
16 | 35% | ||||||||||
| Route 15 & 16 | |||||||||||||||
|
X | Y |
|
18 | 60% | ||||||||||
|
X | Y |
|
18 | 35% | ||||||||||
|
X | Y |
|
19 | 5% | ||||||||||
| Route 18 | |||||||||||||||
|
X | Y |
|
23 | 60% | ||||||||||
|
X | Y |
|
23 | 5% with Durant | ||||||||||
|
X | Y |
|
23 | 35% | ||||||||||
|
X | Y |
|
23 | 5% with Heatmor | ||||||||||
| Route 19 | |||||||||||||||
|
X | Y |
|
25 | 5% | ||||||||||
|
X | Y |
|
24 | 60% | ||||||||||
|
X | Y |
|
24 | 35% | ||||||||||
| Route 20 | |||||||||||||||
|
X | Y |
|
25 | 5% with Trevenant | ||||||||||
|
X | Y |
|
25 | 60% | ||||||||||
|
X | Y |
|
25 | 35% | ||||||||||
|
X | Y |
|
25 | 5% with Sudowoodo | ||||||||||
| Route 21 | |||||||||||||||
|
X | Y |
|
27 | 5% | ||||||||||
|
X | Y |
|
26 | 60% | ||||||||||
|
X | Y |
|
26 | 35% | ||||||||||
| A colored background means that the Pokémon can be found in this location in the specified game. A white background with a colored letter means that the Pokémon cannot be found here. | |||||||||||||||
Pokémon Omega Ruby and Alpha Sapphire
| Pokémon | Games | Location | Levels | Rate | ||||||||||||
|---|---|---|---|---|---|---|---|---|---|---|---|---|---|---|---|---|
| Petalburg Woods | ||||||||||||||||
|
OR | AS |
|
3 | 35% | |||||||||||
|
OR | AS |
|
3 | 60% | |||||||||||
|
OR | AS |
|
3 | 5% | |||||||||||
| Rusturf Tunnel | ||||||||||||||||
|
OR | AS |
|
5 | 100% | |||||||||||
| Granite Cave 1F | ||||||||||||||||
|
OR | AS |
|
6 | 60% | |||||||||||
|
OR | AS |
|
6 | 35% with Makuhita | |||||||||||
|
OR | AS |
|
6 | 35% with Geodude | |||||||||||
|
OR | AS |
|
6 | 5% | |||||||||||
| Granite Cave B1F | ||||||||||||||||
|
OR | AS |
|
6 | 60% | |||||||||||
|
OR | AS |
|
6 | 40% | |||||||||||
| Granite Cave B2F | ||||||||||||||||
|
OR | AS |
|
6 | 60% | |||||||||||
|
OR | AS |
|
6 | 5% | |||||||||||
|
OR | AS |
|
6 | 5% | |||||||||||
|
OR | AS |
|
6 | 35% | |||||||||||
| New Mauville | ||||||||||||||||
|
OR | AS |
|
12 | 35% | |||||||||||
|
OR | AS |
|
12 | 65% | |||||||||||
| Fiery Path | ||||||||||||||||
|
OR | AS |
|
8 | 35% | |||||||||||
|
OR | AS |
|
8 | 35% | |||||||||||
|
OR | AS |
|
8 | 5% | |||||||||||
|
OR | AS |
|
8 | 60% | |||||||||||
| Jagged Pass | ||||||||||||||||
|
OR | AS |
|
10 | 65% | |||||||||||
|
OR | AS |
|
10 | 35% | |||||||||||
| Meteor Falls 1F 1R | ||||||||||||||||
|
OR | AS |
|
9 | 100% | |||||||||||
| Meteor Falls 1F 2R & B1F 1R | ||||||||||||||||
|
OR | AS |
|
20 | 100% | |||||||||||
| Meteor Falls B1F 2R | ||||||||||||||||
|
OR | AS |
|
20 | 95% | |||||||||||
|
OR | AS |
|
20 | 5% | |||||||||||
| Scorched Slab | ||||||||||||||||
|
OR | AS |
|
14 | 100% | |||||||||||
| Safari Zone | ||||||||||||||||
|
OR | AS |
|
15 | 35% | |||||||||||
|
OR | AS |
|
15 | 5% | |||||||||||
|
OR | AS |
|
15 | 60% | |||||||||||
| Mt. Pyre interior | ||||||||||||||||
|
OR | AS |
|
15 | 100% | |||||||||||
| Mt. Pyre exterior & summit | ||||||||||||||||
|
OR | AS |
|
15 | 5% | |||||||||||
|
OR | AS |
|
15 | 35% | |||||||||||
|
OR | AS |
|
15 | 60% | |||||||||||
| Shoal Cave at high tide | ||||||||||||||||
|
OR | AS |
|
17 | 40% | |||||||||||
|
OR | AS |
|
17 | 60% | |||||||||||
| Shoal Cave at low tide | ||||||||||||||||
|
OR | AS |
|
17 | 60% | |||||||||||
|
OR | AS |
|
17 | 40% | |||||||||||
| Shoal Cave ice room | ||||||||||||||||
|
OR | AS |
|
17 | 60% | |||||||||||
|
OR | AS |
|
17 | 5% | |||||||||||
|
OR | AS |
|
17 | 35% | |||||||||||
| Seafloor Cavern | ||||||||||||||||
|
OR | AS |
|
18 | 100% | |||||||||||
| Cave of Origin | ||||||||||||||||
|
OR | AS |
|
18 | 100% | |||||||||||
| Sky Pillar | ||||||||||||||||
|
OR | AS |
|
23 | 60% | |||||||||||
|
OR | AS |
|
23 | 35% | |||||||||||
|
OR | AS |
|
23 | 5% | |||||||||||
| Victory Road | ||||||||||||||||
|
OR | AS |
|
20 | 60% | |||||||||||
|
OR | AS |
|
20 | 5% | |||||||||||
|
OR | AS |
|
20 | 35% | |||||||||||
| Route 101 | ||||||||||||||||
|
OR | AS |
|
2 | 5% | |||||||||||
|
OR | AS |
|
2 | 95% | |||||||||||
| Route 102 | ||||||||||||||||
|
OR | AS |
|
2 | 60% | |||||||||||
|
OR | AS |
|
2 | 35% | |||||||||||
|
OR | AS |
|
2 | 35% | |||||||||||
|
OR | AS |
|
2 | 5% | |||||||||||
| Route 103 | ||||||||||||||||
|
OR | AS |
|
2 | 35% | |||||||||||
|
OR | AS |
|
2 | 60% | |||||||||||
|
OR | AS |
|
2 | 5% | |||||||||||
| Route 104 (south) | ||||||||||||||||
|
OR | AS |
|
2 | 95% | |||||||||||
|
OR | AS |
|
2 | 5% | |||||||||||
| Route 104 (north) | ||||||||||||||||
|
OR | AS |
|
2 | 95% | |||||||||||
|
OR | AS |
|
3 | 5% | |||||||||||
| Route 110 | ||||||||||||||||
|
OR | AS |
|
6 | 60% | |||||||||||
|
OR | AS |
|
6 | 35% | |||||||||||
|
OR | AS |
|
6 | 5% with Minun | |||||||||||
|
OR | AS |
|
6 | 35% | |||||||||||
|
OR | AS |
|
6 | 5% with Plusle | |||||||||||
| Route 111 | ||||||||||||||||
|
OR | AS |
|
11 | 100% | |||||||||||
| Route 112 | ||||||||||||||||
|
OR | AS |
|
8 | 35% | |||||||||||
|
OR | AS |
|
8 | 65% | |||||||||||
| Route 113 | ||||||||||||||||
|
OR | AS |
|
9 | 5% | |||||||||||
|
OR | AS |
|
9 | 95% | |||||||||||
| Route 114 | ||||||||||||||||
|
OR | AS |
|
9 | 35% with Swablu | |||||||||||
|
OR | AS |
|
9 | 35% | |||||||||||
|
OR | AS |
|
9 | 35% with Lotad | |||||||||||
|
OR | AS |
|
9 | 65% | |||||||||||
| Route 115 | ||||||||||||||||
|
OR | AS |
|
10 | 100% | |||||||||||
| Route 116 | ||||||||||||||||
|
OR | AS |
|
4 | 60% | |||||||||||
|
OR | AS |
|
4 | 35% | |||||||||||
|
OR | AS |
|
4 | 5% | |||||||||||
| Route 117 | ||||||||||||||||
|
OR | AS |
|
7 | 60% with Zigzagoon | |||||||||||
|
OR | AS |
|
7 | 5% | |||||||||||
|
OR | AS |
|
7 | 60% with Oddish | |||||||||||
|
OR | AS |
|
7 | 35% | |||||||||||
| Route 118 | ||||||||||||||||
|
OR | AS |
|
12 | 35% | |||||||||||
|
OR | AS |
|
12 | 60% | |||||||||||
|
OR | AS |
|
12 | 5% | |||||||||||
| Route 119 | ||||||||||||||||
|
OR | AS |
|
12 | 100% | |||||||||||
| Route 120 | ||||||||||||||||
|
OR | AS |
|
13 | 60% | |||||||||||
|
OR | AS |
|
13 | 35% | |||||||||||
|
OR | AS |
|
13 | 5% | |||||||||||
| Route 121 & Route 123 | ||||||||||||||||
|
OR | AS |
|
15 | 35% | |||||||||||
|
OR | AS |
|
15 | 5% | |||||||||||
|
OR | AS |
|
15 | 60% | |||||||||||
| A colored background means that the Pokémon can be found in this location in the specified game. A white background with a colored letter means that the Pokémon cannot be found here. | ||||||||||||||||
Trainer battles

| Trainer | Pokémon | |||||||||||
|---|---|---|---|---|---|---|---|---|---|---|---|---|
| Team Magma Hideout | ||||||||||||
|
| |||||||||||
| ||||||||||||
| ||||||||||||
| ||||||||||||
| ||||||||||||
| Team Aqua Hideout | ||||||||||||
|
| |||||||||||
| ||||||||||||
| ||||||||||||
| ||||||||||||
| ||||||||||||
| Mossdeep Space Center | ||||||||||||
|
| |||||||||||
| ||||||||||||
| ||||||||||||
| ||||||||||||
| ||||||||||||
|
| |||||||||||
| ||||||||||||
| ||||||||||||
| ||||||||||||
| ||||||||||||
| Trainers with a PokéNav by their names will be registered in the Trainer's Eyes or Match Call function after the first battle, and may have a rematch with the player with higher-level Pokémon. | ||||||||||||
Trivia
- In Pokémon X and Y, if the player selects a move that targets an adjacent ally, the user's spot is not highlighted, while the spots of the two opponents in the places where the Pokémon allies would be in a Triple Battle are highlighted as if either of them could be targeted (even if those Pokémon have fainted), despite the user being forced to target itself.
- In Pokémon X and Y, if the player selects Acupressure or a move that targets the user and all allies, the user's spot and the spots of the two opponents in the places where the Pokémon allies would be in a Triple Battle are highlighted (but not joined) as if any of them could be targeted (even if those Pokémon have fainted), despite the user being forced to target itself.
In other languages
| ||||||||||||||||||||||||
| This game mechanic article is part of Project Games, a Bulbapedia project that aims to write comprehensive articles on the Pokémon games. |