Mauville Food Court: Difference between revisions
No edit summary |
m (→Trainers) |
||
| (13 intermediate revisions by 10 users not shown) | |||
| Line 1: | Line 1: | ||
{{Infobox location | {{Infobox location | ||
|image=Mauville Food Court.png | |image=Mauville Food Court.png | ||
| Line 12: | Line 11: | ||
|map=Hoenn Mauville City Map.png | |map=Hoenn Mauville City Map.png | ||
}} | }} | ||
The '''Mauville Food Court''' (Japanese: '''キンセツキッチン''' ''{{tt|Kinsetsu|Mauville}} Kitchen''), also known as the '''Battle Food Court''' (Japanese: '''バトルフードコート''' ''Battle Food Court''), is a restaurant in [[Mauville City]] introduced in [[Pokémon Omega Ruby and Alpha Sapphire | The '''Mauville Food Court''' (Japanese: '''キンセツキッチン''' ''{{tt|Kinsetsu|Mauville}} Kitchen''), also known as the '''Battle Food Court''' (Japanese: '''バトルフードコート''' ''Battle Food Court''), is a restaurant in [[Mauville City]] introduced in [[Pokémon Omega Ruby and Alpha Sapphire]]. | ||
Here, the player places an order for food at one of the three counters. After paying, the player is given an amount of turns to wait for their meal. Taking a seat, the player is then challenged to battle by a gauntlet of Trainers trying to take their seat away. Once the turn limit is up, the player will leave their seat to take their meal. If the player picks up their meal after exactly the recommended number of turns, they will be given an extra reward, and two rewards will be earned if each battle only took one turn. | Here, the player places an order for food at one of the three counters. After paying, the player is given an amount of turns to wait for their meal. Taking a seat, the player is then challenged to battle by a gauntlet of Trainers trying to take their seat away. Once the turn limit is up, the player will leave their seat to take their meal. If the player picks up their meal after exactly the recommended number of turns, they will be given an extra reward, and two rewards will be earned if each battle only took one turn. | ||
At first, the player can only order the Village Sub Combo, which consists of Single Battles and costs {{PDollar}}1,000. After the player earns the {{badge|Rain}}, the Magnemite Croquette is unlocked, which consists of [[Double Battle]]s and costs {{PDollar}}5,000. After completing the [[Delta Episode]], the Mauville Ramen Bowl is unlocked (if the Food Court has not been entered since earning the Rain Badge, the player must re-enter the Food Court once before it becomes open), which consists of [[Triple Battle]]s and costs {{PDollar}}10,000. | At first, the player can only order the Village Sub Combo, which consists of Single Battles and costs {{PDollar}}1,000. After the player earns the {{badge|Rain}}, the Magnemite Croquette is unlocked, which consists of [[Double Battle]]s and costs {{PDollar}}5,000. After completing the [[Delta Episode]], the Mauville Ramen Bowl is unlocked (if the Food Court has not been entered since earning the Rain Badge, the player must re-enter the Food Court once before it becomes open), which consists of [[Triple Battle]]s and costs {{PDollar}}10,000. All of these battles can be done once a day, and after each battle, the player's party is fully healed. | ||
{{sign|RS|header}} | {{sign|RS|header}} | ||
| Line 27: | Line 26: | ||
The [[Village Bridge|Village]] Sub Combo has a turn limit of 5. | The [[Village Bridge|Village]] Sub Combo has a turn limit of 5. | ||
{{trainerheader|building}} | {{trainerheader|building}} | ||
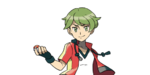
{{trainerentry|VSYoungster ORAS.png{{!}}150px|Youngster|Cutler|272|1|218|Slugma|♂|17|36=カツタロウ|37=Katsutarou}} | {{trainerentry|VSYoungster ORAS.png{{!}}150px|game=6|Youngster|Cutler|272|1|218|Slugma|♂|17|36=カツタロウ|37=Katsutarou}} | ||
{{trainerdiv|building}} | {{trainerdiv|building}} | ||
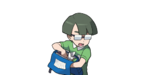
{{trainerentry|VSSchoolkid F.png{{!}}150px|Schoolkid|Nitzel|340|1|043|Oddish|♀|17|36=ベイコ|37=Beiko}} | {{trainerentry|VSSchoolkid F.png{{!}}150px|game=6|Schoolkid|Nitzel|340|1|043|Oddish|♀|17|36=ベイコ|37=Beiko}} | ||
{{trainerdiv|building}} | {{trainerdiv|building}} | ||
{{trainerentry|VSYoungster ORAS.png{{!}}150px|Youngster|Ham|272|1|276|Taillow|♂|17|36=ハムジロウ|37=Hamujirou}} | {{trainerentry|VSYoungster ORAS.png{{!}}150px|game=6|Youngster|Ham|272|1|276|Taillow|♂|17|36=ハムジロウ|37=Hamujirou}} | ||
{{trainerdiv|building}} | {{trainerdiv|building}} | ||
{{trainerentry|VSSchoolkid F.png{{!}}150px|Schoolkid|Meena|340|1|118|Goldeen|♀|17|36=ツナ|37=Tuna}} | {{trainerentry|VSSchoolkid F.png{{!}}150px|game=6|Schoolkid|Meena|340|1|118|Goldeen|♀|17|36=ツナ|37=Tuna}} | ||
{{trainerdiv|building}} | {{trainerdiv|building}} | ||
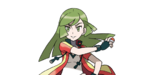
{{trainerentry|VSFairy Tale Girl.png{{!}}150px|Fairy Tale Girl|Meggi|272|1|039|Jigglypuff|♀|17|36=タマコ|37=Tamako}} | {{trainerentry|VSFairy Tale Girl.png{{!}}150px|game=6|Fairy Tale Girl|Meggi|272|1|039|Jigglypuff|♀|17|36=タマコ|37=Tamako}} | ||
{{trainerfooter|building|3}} | {{trainerfooter|building|3}} | ||
| Line 41: | Line 40: | ||
The {{p|Magnemite}} Croquette has a turn limit of 6. | The {{p|Magnemite}} Croquette has a turn limit of 6. | ||
{{trainerheader|building}} | {{trainerheader|building}} | ||
{{trainerentry|VSLass ORAS.png{{!}}150px|Lass|Suzette|880|2|556|Maractus|♀|55||134|Vaporeon|♀|55|36=オコノミ|37=Okonomi}} | {{trainerentry|VSLass ORAS.png{{!}}150px|game=6|Lass|Suzette|880|2|556|Maractus|♀|55||134|Vaporeon|♀|55|36=オコノミ|37=Okonomi}} | ||
{{trainerdiv|building}} | {{trainerdiv|building}} | ||
{{trainerentry|VSRich Boy ORAS.png{{!}}150px|Rich Boy|Filbert|6,600|2|171|Lanturn|♂|55||135|Jolteon|♂|55|36=アカシ|37=Akashi}} | {{trainerentry|VSRich Boy ORAS.png{{!}}150px|game=6|Rich Boy|Filbert|6,600|2|171|Lanturn|♂|55||135|Jolteon|♂|55|36=アカシ|37=Akashi}} | ||
{{trainerdiv|building}} | {{trainerdiv|building}} | ||
{{trainerentry|VSAroma Lady.png{{!}}150px|Aroma Lady|Thyme|1,760|2|673|Gogoat|♀|55||706|Goodra|♀|55|36=イマカ|37=Imaka}} | {{trainerentry|VSAroma Lady.png{{!}}150px|game=6|Aroma Lady|Thyme|1,760|2|673|Gogoat|♀|55||706|Goodra|♀|55|36=イマカ|37=Imaka}} | ||
{{trainerdiv|building}} | {{trainerdiv|building}} | ||
{{trainerentry|VSLady ORAS.png{{!}}150px|Lady|Dulcie|6,600|2|455|Carnivine|♀|55||429|Mismagius|♀|55|36=ドラエ|37=Dorae}} | {{trainerentry|VSLady ORAS.png{{!}}150px|game=6|Lady|Dulcie|6,600|2|455|Carnivine|♀|55||429|Mismagius|♀|55|36=ドラエ|37=Dorae}} | ||
{{trainerdiv|building}} | {{trainerdiv|building}} | ||
{{trainerentry|VSAce Trainer M ORAS.png{{!}}150px|Ace Trainer|Benedict|3,300|2|136|Flareon|♂|55||631|Heatmor|♂|55|36=トンペイ|37=Tonpei}} | {{trainerentry|VSAce Trainer M ORAS.png{{!}}150px|game=6|Ace Trainer|Benedict|3,300|2|136|Flareon|♂|55||631|Heatmor|♂|55|36=トンペイ|37=Tonpei}} | ||
{{trainerdiv|building}} | {{trainerdiv|building}} | ||
{{trainerentry|VSAce Trainer F ORAS.png{{!}}150px|Ace Trainer|Melba|3,300|2|292|Shedinja||55||292|Shedinja||55|36=ターコ|37=Taako}} | {{trainerentry|VSAce Trainer F ORAS.png{{!}}150px|game=6|Ace Trainer|Melba|3,300|2|292|Shedinja||55||292|Shedinja||55|36=ターコ|37=Taako}} | ||
{{trainerfooter|building|3}} | {{trainerfooter|building|3}} | ||
| Line 57: | Line 56: | ||
The Mauville Ramen Bowl has a turn limit of 8. The Fare Prince is originally the last Trainer the player can face in this challenge, but after he is beaten, he will no longer appear, and Black Belt Banting will appear in his place instead. | The Mauville Ramen Bowl has a turn limit of 8. The Fare Prince is originally the last Trainer the player can face in this challenge, but after he is beaten, he will no longer appear, and Black Belt Banting will appear in his place instead. | ||
{{trainerheader|building}} | {{trainerheader|building}} | ||
{{trainerentry|VSStreet Thug.png{{!}}150px|Street Thug|Alfredo|2,080|3|463|Lickilicky|♂|65|Wide Lens|549|Lilligant|♀|65|Choice Scarf|463|Lickilicky|♂|65|Wide Lens|36=ゴモクロウ|37=Gomokurō}} | {{trainerentry|VSStreet Thug.png{{!}}150px|game=6|Street Thug|Alfredo|2,080|3|463|Lickilicky|♂|65|Wide Lens|549|Lilligant|♀|65|Choice Scarf|463|Lickilicky|♂|65|Wide Lens|36=ゴモクロウ|37=Gomokurō}} | ||
{{trainerdiv|building}} | {{trainerdiv|building}} | ||
{{trainerentry|VSStreet Thug.png{{!}}150px|Street Thug|Barley|2,080|3|528|Swoobat|♂|65|Bright Powder|528|Swoobat|♂|65|Bright Powder|528|Swoobat|♂|65|Bright Powder|36=ツケロウ|37=Tsukerō}} | {{trainerentry|VSStreet Thug.png{{!}}150px|game=6|Street Thug|Barley|2,080|3|528|Swoobat|♂|65|Bright Powder|528|Swoobat|♂|65|Bright Powder|528|Swoobat|♂|65|Bright Powder|36=ツケロウ|37=Tsukerō}} | ||
{{trainerdiv|building}} | {{trainerdiv|building}} | ||
{{trainerentry|VSStreet Thug.png{{!}}150px|Street Thug|Wellington|2,080|3|553|Krookodile|♂|65|Sitrus Berry|059|Arcanine|♂|65|Sitrus Berry|560|Scrafty|♂|65|Sitrus Berry|36=ソウジロウ|37=Sōjirō}} | {{trainerentry|VSStreet Thug.png{{!}}150px|game=6|Street Thug|Wellington|2,080|3|553|Krookodile|♂|65|Sitrus Berry|059|Arcanine|♂|65|Sitrus Berry|560|Scrafty|♂|65|Sitrus Berry|36=ソウジロウ|37=Sōjirō}} | ||
{{trainerdiv|building}} | {{trainerdiv|building}} | ||
{{trainerentry|VSStreet Thug.png{{!}}150px|Street Thug|Bass|2,080|3|036|Clefable|♀|65|Metronome|036|Clefable|♀|65|Metronome|036|Clefable|♀|65|Metronome|36=パコヒコ|37=Pakohiko}} | {{trainerentry|VSStreet Thug.png{{!}}150px|game=6|Street Thug|Bass|2,080|3|036|Clefable|♀|65|Metronome|036|Clefable|♀|65|Metronome|036|Clefable|♀|65|Metronome|36=パコヒコ|37=Pakohiko}} | ||
{{trainerdiv|building}} | {{trainerdiv|building}} | ||
{{trainerentry|VSStreet Thug.png{{!}}150px|Street Thug|Soyer|2,080|3|334|Altaria|♂|65|Salac Berry|357|Tropius|♂|65|Salac Berry|142|Aerodactyl|♂|65|Salac Berry|36=ミソキチ|37=Misokichi}} | {{trainerentry|VSStreet Thug.png{{!}}150px|game=6|Street Thug|Soyer|2,080|3|334|Altaria|♂|65|Salac Berry|357|Tropius|♂|65|Salac Berry|142|Aerodactyl|♂|65|Salac Berry|36=ミソキチ|37=Misokichi}} | ||
{{trainerdiv|building}} | {{trainerdiv|building}} | ||
{{trainerentry|VSStreet Thug.png{{!}}150px|Street Thug|Pitaha|2,080|3|547|Whimsicott|♂|65|Wide Lens|547|Whimsicott|♂|65|Wide Lens|547|Whimsicott|♂|65|Wide Lens|36=ワンタン|37=Wonton}} | {{trainerentry|VSStreet Thug.png{{!}}150px|game=6|Street Thug|Pitaha|2,080|3|547|Whimsicott|♂|65|Wide Lens|547|Whimsicott|♂|65|Wide Lens|547|Whimsicott|♂|65|Wide Lens|36=ワンタン|37=Wonton}} | ||
{{trainerdiv|building}} | {{trainerdiv|building}} | ||
{{trainerentry|VSStreet Thug.png{{!}}150px|Street Thug|Rice|2,080|3|132|Ditto||65|Iron Ball|132|Ditto||65|Iron Ball|132|Ditto||65|Iron Ball|36=キシノシン|37=Kishinoshin}} | {{trainerentry|VSStreet Thug.png{{!}}150px|game=6|Street Thug|Rice|2,080|3|132|Ditto||65|Iron Ball|132|Ditto||65|Iron Ball|132|Ditto||65|Iron Ball|36=キシノシン|37=Kishinoshin}} | ||
{{trainerdiv|building}} | {{trainerdiv|building}} | ||
{{trainerentry|VSSchoolkid M.png{{!}}150px|Fare Prince|Trencherman|6,000|3|448|Lucario|♂|75|King's Rock|468|Togekiss|♂|75|King's Rock|448|Lucario|♂|75|King's Rock|36=ストマック|37=Stomach}} | {{trainerentry|VSSchoolkid M.png{{!}}150px|game=6|Fare Prince|Trencherman|6,000|3|448|Lucario|♂|75|King's Rock|468|Togekiss|♂|75|King's Rock|448|Lucario|♂|75|King's Rock|36=ストマック|37=Stomach}} | ||
{{trainerdiv|building}} | {{trainerdiv|building}} | ||
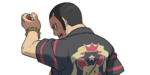
{{trainerentry|VSBlack Belt.png{{!}}150px|Black Belt|Banting|2,080|3|034|Nidoking|♂|65|Life Orb|306|Aggron|♂|65|Life Orb|409|Rampardos|♂|65|Life Orb|36=パンクレアス|37=Pancreas}} | {{trainerentry|VSBlack Belt.png{{!}}150px|game=6|Black Belt|Banting|2,080|3|034|Nidoking|♂|65|Life Orb|306|Aggron|♂|65|Life Orb|409|Rampardos|♂|65|Life Orb|36=パンクレアス|37=Pancreas}} | ||
{{trainerfooter|building|3}} | {{trainerfooter|building|3}} | ||
| Line 81: | Line 80: | ||
===Village Sub Combo=== | ===Village Sub Combo=== | ||
{{itlisth|building}} | {{itlisth|building}} | ||
{{Itemlist|Nugget|Reward for finishing the Village Sub Combo course in exactly 5 turns|OR=yes|AS=yes | {{Itemlist|Nugget|Reward for finishing the Village Sub Combo course in exactly 5 turns|OR=yes|AS=yes}} | ||
{{Itemlist|Figy Berry|Reward for finishing the Village Sub Combo course in exactly 5 turns and defeating all 5 Trainers (randomly chosen)|OR=yes|AS=yes}} | {{Itemlist|Figy Berry|Reward for finishing the Village Sub Combo course in exactly 5 turns and defeating all 5 Trainers (randomly chosen)|OR=yes|AS=yes}} | ||
{{Itemlist|Wiki Berry|Reward for finishing the Village Sub Combo course in exactly 5 turns and defeating all 5 Trainers (randomly chosen)|OR=yes|AS=yes}} | {{Itemlist|Wiki Berry|Reward for finishing the Village Sub Combo course in exactly 5 turns and defeating all 5 Trainers (randomly chosen)|OR=yes|AS=yes}} | ||
| Line 91: | Line 90: | ||
===Magnemite Croquette === | ===Magnemite Croquette === | ||
{{itlisth|building}} | {{itlisth|building}} | ||
{{Itemlist|Pearl String|Reward for finishing the Magnemite Croquette course in exactly 6 turns|OR=yes|AS=yes | {{Itemlist|Pearl String|Reward for finishing the Magnemite Croquette course in exactly 6 turns|OR=yes|AS=yes}} | ||
{{Itemlist|Metal Powder|Reward for finishing the Magnemite Croquette course in exactly 6 turns and defeating all 6 Trainers|OR=yes|AS=yes | {{Itemlist|Metal Powder|Reward for finishing the Magnemite Croquette course in exactly 6 turns and defeating all 6 Trainers|OR=yes|AS=yes}} | ||
{{itlistfoot|building}} | {{itlistfoot|building}} | ||
===Mauville Ramen Bowl=== | ===Mauville Ramen Bowl=== | ||
{{itlisth|building}} | {{itlisth|building}} | ||
{{Itemlist|Big Nugget|Reward for finishing the Mauville Ramen Bowl course in exactly 8 turns|OR=yes|AS=yes|display= | {{Itemlist|Big Nugget|Reward for finishing the Mauville Ramen Bowl course in exactly 8 turns|OR=yes|AS=yes|display=[[Big Nugget]] ×2}} | ||
{{Itemlist|Deep Sea Tooth|Reward for finishing the Mauville Ramen Bowl course in exactly 8 turns and defeating all 8 Trainers|OR=yes | {{Itemlist|Deep Sea Tooth|Reward for finishing the Mauville Ramen Bowl course in exactly 8 turns and defeating all 8 Trainers|OR=yes}} | ||
{{Itemlist|Deep Sea Scale|Reward for finishing the Mauville Ramen Bowl course in exactly 8 turns and defeating all 8 Trainers|AS=yes | {{Itemlist|Deep Sea Scale|Reward for finishing the Mauville Ramen Bowl course in exactly 8 turns and defeating all 8 Trainers|AS=yes}} | ||
{{itlistfoot|building}} | {{itlistfoot|building}} | ||
==Layout== | |||
{| class="roundy" style="margin:auto; background:#000; border:3px solid #{{Locationcolor/dark|building}}" | |||
|- | |||
! style="background:#{{omega ruby color}}; {{roundytl|5px}}" | {{color2|fff|Pokémon Omega Ruby and Alpha Sapphire|Omega Ruby}} | |||
! style="background:#{{alpha sapphire color}}; {{roundytr|5px}}" | {{color2|fff|Pokémon Omega Ruby and Alpha Sapphire|Alpha Sapphire}} | |||
|- | |||
| colspan="2" | [[File:Mauville Food Court interior ORAS.png|300px]] | |||
|- | |||
| colspan="2" style="background:#{{locationcolor/light|building}}; {{roundybottom|5px}}" | | |||
|} | |||
==Trivia== | |||
* The Trainers that can be battled here all have names based on types of food, common dishes, and other gastronomical terms. | |||
* One NPC mentions having seen [[Glacia]] eating ramen here, saying she was slurping down her noodles at such an incredible pace that she was dripping with sweat. | |||
* An Ace Trainer mentions that the cloches used here were imported from Kalos due to the owner's admiration of the region. | |||
==In other languages== | ==In other languages== | ||
| Line 111: | Line 126: | ||
|de=Gastro-Meile Malvenfroh | |de=Gastro-Meile Malvenfroh | ||
|it=Area Ristoro Ciclamipoli | |it=Area Ristoro Ciclamipoli | ||
|ko= | |ko=보라키친 ''{{tt|Bora|Mauville}} Kitchen'' | ||
|es=Malvalona Gourmet}} | |es=Malvalona Gourmet}} | ||
| | | | ||
''Battle Food Court'' <!-- does not have an alternative name in Italian/Spanish --> | ''Battle Food Court'' <!--does not have an alternative name in Italian/Spanish--> | ||
{{langtable|color={{locationcolor/light|building}}|bordercolor={{locationcolor/dark|building}} | {{langtable|color={{locationcolor/light|building}}|bordercolor={{locationcolor/dark|building}} | ||
|fr=Cafét' de Combat | |fr=Cafét' de Combat | ||
|de=Kampf-Fressmeile | |de=Kampf-Fressmeile | ||
|ko= | |ko=배틀푸드코트 ''Battle Food Court''}} | ||
|} | |} | ||
==See also== | |||
* [[Lumiose City restaurants]] | |||
* [[Battle Buffet]] | |||
{{Hoenn}}<br> | {{Hoenn}}<br> | ||
{{Project Locations notice}} | {{Project Locations notice}} | ||
| Line 126: | Line 145: | ||
[[Category:Hoenn locations]] | [[Category:Hoenn locations]] | ||
[[Category:Omega Ruby and Alpha Sapphire locations]] | [[Category:Omega Ruby and Alpha Sapphire locations]] | ||
[[Category: | [[Category:Restaurants]] | ||
[[de:Malvenfroh City#Gastro-Meile Malvenfroh]] | [[de:Malvenfroh City#Gastro-Meile Malvenfroh]] | ||
[[es:Malvalona Gourmet]] | |||
[[it:Ciclamipoli#Area Ristoro]] | [[it:Ciclamipoli#Area Ristoro]] | ||
[[ja:キンセツキッチン]] | [[ja:キンセツキッチン]] | ||
[[zh:紫堇美食广场]] | |||
Latest revision as of 04:30, 26 August 2022
| ||||
| ||||
| Location: | Mauville City | |||
|---|---|---|---|---|
| Region: | Hoenn | |||
| Generations: | VI | |||
 Location of Mauville Food Court in Hoenn. | ||||
| Pokémon world locations | ||||

The Mauville Food Court (Japanese: キンセツキッチン Kinsetsu Kitchen), also known as the Battle Food Court (Japanese: バトルフードコート Battle Food Court), is a restaurant in Mauville City introduced in Pokémon Omega Ruby and Alpha Sapphire.
Here, the player places an order for food at one of the three counters. After paying, the player is given an amount of turns to wait for their meal. Taking a seat, the player is then challenged to battle by a gauntlet of Trainers trying to take their seat away. Once the turn limit is up, the player will leave their seat to take their meal. If the player picks up their meal after exactly the recommended number of turns, they will be given an extra reward, and two rewards will be earned if each battle only took one turn.
At first, the player can only order the Village Sub Combo, which consists of Single Battles and costs $1,000. After the player earns the Rain Badge, the Magnemite Croquette is unlocked, which consists of Double Battles and costs $5,000. After completing the Delta Episode, the Mauville Ramen Bowl is unlocked (if the Food Court has not been entered since earning the Rain Badge, the player must re-enter the Food Court once before it becomes open), which consists of Triple Battles and costs $10,000. All of these battles can be done once a day, and after each battle, the player's party is fully healed.
Trainers
Village Sub Combo
The Village Sub Combo has a turn limit of 5.
| Trainer | Pokémon | |||||||||||
|---|---|---|---|---|---|---|---|---|---|---|---|---|
|
| |||||||||||
|
| |||||||||||
|
| |||||||||||
|
| |||||||||||
|
| |||||||||||
| Trainers with a PokéNav by their names will be registered in the Trainer's Eyes or Match Call function after the first battle, and may have a rematch with the player with higher-level Pokémon. | ||||||||||||


Magnemite Croquette
The Magnemite Croquette has a turn limit of 6.
| Trainer | Pokémon | |||||||||||
|---|---|---|---|---|---|---|---|---|---|---|---|---|
|
| |||||||||||
| ||||||||||||
|
| |||||||||||
| ||||||||||||
|
| |||||||||||
| ||||||||||||
|
| |||||||||||
| ||||||||||||
|
| |||||||||||
| ||||||||||||
|
| |||||||||||
| ||||||||||||
| Trainers with a PokéNav by their names will be registered in the Trainer's Eyes or Match Call function after the first battle, and may have a rematch with the player with higher-level Pokémon. | ||||||||||||


Mauville Ramen Bowl
The Mauville Ramen Bowl has a turn limit of 8. The Fare Prince is originally the last Trainer the player can face in this challenge, but after he is beaten, he will no longer appear, and Black Belt Banting will appear in his place instead.
| Trainer | Pokémon | |||||||||||
|---|---|---|---|---|---|---|---|---|---|---|---|---|
|
| |||||||||||
| ||||||||||||
| ||||||||||||
|
| |||||||||||
| ||||||||||||
| ||||||||||||
|
| |||||||||||
| ||||||||||||
| ||||||||||||
|
| |||||||||||
| ||||||||||||
| ||||||||||||
|
| |||||||||||
| ||||||||||||
| ||||||||||||
|
| |||||||||||
| ||||||||||||
| ||||||||||||
|
| |||||||||||
| ||||||||||||
| ||||||||||||
|
| |||||||||||
| ||||||||||||
| ||||||||||||
|
| |||||||||||
| ||||||||||||
| ||||||||||||
| Trainers with a PokéNav by their names will be registered in the Trainer's Eyes or Match Call function after the first battle, and may have a rematch with the player with higher-level Pokémon. | ||||||||||||

Items
After finishing a food course in exactly the requested number of turns, the player is awarded with a valuable item. If the player did this by defeating all the Trainers, they also earn an additional prize.
Village Sub Combo
| Item | Location | Games | |
|---|---|---|---|
| Nugget | Reward for finishing the Village Sub Combo course in exactly 5 turns | OR AS | |
| Figy Berry | Reward for finishing the Village Sub Combo course in exactly 5 turns and defeating all 5 Trainers (randomly chosen) | OR AS | |
| Wiki Berry | Reward for finishing the Village Sub Combo course in exactly 5 turns and defeating all 5 Trainers (randomly chosen) | OR AS | |
| Mago Berry | Reward for finishing the Village Sub Combo course in exactly 5 turns and defeating all 5 Trainers (randomly chosen) | OR AS | |
| Aguav Berry | Reward for finishing the Village Sub Combo course in exactly 5 turns and defeating all 5 Trainers (randomly chosen) | OR AS | |
| Iapapa Berry | Reward for finishing the Village Sub Combo course in exactly 5 turns and defeating all 5 Trainers (randomly chosen) | OR AS | |
Magnemite Croquette
| Item | Location | Games | |
|---|---|---|---|
| Pearl String | Reward for finishing the Magnemite Croquette course in exactly 6 turns | OR AS | |
| Metal Powder | Reward for finishing the Magnemite Croquette course in exactly 6 turns and defeating all 6 Trainers | OR AS | |
Mauville Ramen Bowl
| Item | Location | Games | |
|---|---|---|---|
| Big Nugget ×2 | Reward for finishing the Mauville Ramen Bowl course in exactly 8 turns | OR AS | |
| Deep Sea Tooth | Reward for finishing the Mauville Ramen Bowl course in exactly 8 turns and defeating all 8 Trainers | OR | |
| Deep Sea Scale | Reward for finishing the Mauville Ramen Bowl course in exactly 8 turns and defeating all 8 Trainers | AS | |
Layout
| Omega Ruby | Alpha Sapphire |
|---|---|

| |
Trivia
- The Trainers that can be battled here all have names based on types of food, common dishes, and other gastronomical terms.
- One NPC mentions having seen Glacia eating ramen here, saying she was slurping down her noodles at such an incredible pace that she was dripping with sweat.
- An Ace Trainer mentions that the cloches used here were imported from Kalos due to the owner's admiration of the region.
In other languages
|
Mauville Food Court
|
Battle Food Court
| ||||||||||||||||||||||||||||||||||||||
See also
| This article is part of Project Locations, a Bulbapedia project that aims to write comprehensive articles on every location in the Pokémon world. |