Appendix:Emerald walkthrough/Section 7: Difference between revisions
No edit summary |
Tiddlywinks (talk | contribs) m (The old item shouldn't be at the default name) |
||
| (21 intermediate revisions by 7 users not shown) | |||
| Line 26: | Line 26: | ||
{{itemlist|Full Heal|North of the Route 114 entrance|E=yes}} | {{itemlist|Full Heal|North of the Route 114 entrance|E=yes}} | ||
{{itemlist|Moon Stone|On a hill, northwest of the bridge|E=yes}} | {{itemlist|Moon Stone|On a hill, northwest of the bridge|E=yes}} | ||
{{itlistfoot|cave}} | {{itlistfoot|cave}} | ||
|} | |} | ||
===1F=== | ===1F=== | ||
Head west over the bridge to find two [[Team Magma]] Grunts who have just stolen a Meteorite from [[Professor Cozmo]]. Soon after they notice you, the leader of the opposing Team Aqua enters, flanked by two of his subordinates. The thieves don't seem to care, and flee with the Meteorite to [[Mt. Chimney]]. The team leader introduces himself as [[Archie]], and tells you that his group intends to thwart the villainous team's plans at any cost, as they have committed many destructive acts in their bid to enlarge the landmass. The three then leave to pursue the thieves to Mt. Chimney. To pursue them yourself, exit Meteor Falls either north to {{rt|114|Hoenn}} or south to {{rt|115 | Head west over the bridge to find two [[Team Magma]] Grunts who have just stolen a Meteorite from [[Professor Cozmo]]. Soon after they notice you, the leader of the opposing Team Aqua enters, flanked by two of his subordinates. The thieves don't seem to care, and flee with the Meteorite to [[Mt. Chimney]]. The team leader introduces himself as [[Archie]], and tells you that his group intends to thwart the villainous team's plans at any cost, as they have committed many destructive acts in their bid to enlarge the landmass. The three then leave to pursue the thieves to Mt. Chimney. To pursue them yourself, exit Meteor Falls either north to {{rt|114|Hoenn}} or south to {{rt|115|Hoenn}}. | ||
{{-}} | {{-}} | ||
==Route 115 (optional)== | |||
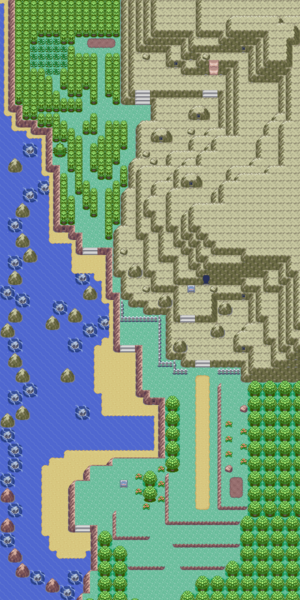
[[File:Hoenn Route 115 E.png|thumb|Route 115]] | |||
First, follow the eastern edge of the route until you reach a boulder that can be smashed. Pick up the Great Ball and Bluk Berries here. Battle the Pokémon Trainers, catch some more Pokémon, and continue on your way to [[Mt. Chimney]]. | |||
{| class="expandable" style="margin: auto; background: #{{locationcolor/med|mountain}}; {{roundy}}; border: 5px solid #{{locationcolor/light|mountain}};" | |||
|- align="center" | |||
! Trainers | |||
|- | |||
| | |||
{{Trainerheader|mountain}} | |||
{{Trainerentry|Spr RS Black Belt.png|Black Belt|Nob|608|1|066|Machop|♂|19||38=Nav}} | |||
{{Trainerdiv|mountain}} | |||
{{Trainerentry|Spr RS Collector.png|Collector|Hector|1080<br><small>Potential [[Double Battle]] with Marlene</small>|2|335|Zangoose|♂|18||336|Seviper|♂|18|}} | |||
{{Trainerdiv|mountain}} | |||
{{Trainerentry|Spr RS Psychic F.png|Psychic|Marlene|432<br><small>Potential [[Double Battle]] with Hector</small>|2|307|Meditite|♀|18||325|Spoink|♀|18|}} | |||
{{Trainerdiv|mountain}} | |||
{{Trainerentry|Spr RS Battle Girl.png|Battle Girl|Cyndy|432|2|307|Meditite|♀|18||296|Makuhita|♂|18||38=Nav}} | |||
{{catch/div|mountain|Rematch}} | |||
{{trainerentry|Spr RS Black Belt.png|Black Belt|Nob{{tt|*|First rematch}}|864|1|067|Machoke|♂|27||38=Nav}} | |||
{{trainerentry|Spr RS Black Belt.png|Black Belt|Nob{{tt|*|Second rematch}}|928|2|066|Machop|♂|29||067|Machoke|♂|29||38=Nav}} | |||
{{trainerentry|Spr RS Black Belt.png|Black Belt|Nob{{tt|*|Third rematch}}|992|3|066|Machop|♂|31||067|Machoke|♂|31||067|Machoke|♂|31||38=Nav}} | |||
{{trainerentry|Spr RS Black Belt.png|Black Belt|Nob{{tt|*|Fourth rematch onwards}}|1056|4|066|Machop|♂|33||067|Machoke|♂|33||067|Machoke|♂|33||068|Machamp|♂|33|Black Belt|38=Nav}} | |||
{{trainerdiv|mountain}} | |||
{{trainerentry|Spr RS Battle Girl.png|Battle Girl|Cyndy{{tt|*|First and second rematch}}|{{tt|624|First rematch}}/{{tt|696|Second rematch}}|2|307|Meditite|♀|{{tt|26|First rematch}}/{{tt|29|Second rematch}}||296|Makuhita|♂|{{tt|26|First rematch}}/{{tt|29|Second rematch}}||38=Nav}} | |||
{{trainerentry|Spr RS Battle Girl.png|Battle Girl|Cyndy{{tt|*|Third and fourth rematch onwards}}|{{tt|768|Third rematch}}/{{tt|840|Fourth rematch onwards}}|2|308|Medicham|♀|{{tt|32|Third rematch}}/{{tt|35|Fourth rematch onwards}}||297|Hariyama|♂|{{tt|32|Third rematch}}/{{tt|35|Fourth rematch onwards}}||38=Nav}} | |||
{{Trainerfooter|mountain|3}} | |||
|} | |||
{| class="expandable" style="margin: auto; background: #{{locationcolor/med|mountain}}; {{roundy}}; border: 5px solid #{{locationcolor/light|mountain}};" | |||
|- align="center" | |||
! Available Pokémon | |||
|- | |||
| | |||
{{Catch/header|mountain|no}} | |||
{{Catch/div|water|Fishing}} | |||
{{Catch/entry3|129|Magikarp|no|no|yes|Fish Old|5-10|70%|type1=Water}} | |||
{{Catch/entry3|072|Tentacool|no|no|yes|Fish Old|5-10|30%|type1=Water|type2=Poison}} | |||
{{Catch/footer|mountain}} | |||
|} | |||
{| class="expandable" style="margin: auto; background: #{{locationcolor/med|mountain}}; {{roundy}}; border: 5px solid #{{locationcolor/light|mountain}};" | |||
|- align="center" | |||
! Items | |||
|- | |||
| | |||
{{itlisth|mountain}} | |||
{{itemlist|Super Potion|On the south end of the beach, near Rustboro City|E=yes}} | |||
{{itemlist|Great Ball|South of Meteor Falls, on a ledge to the east (requires {{m|Rock Smash}})|E=yes}} | |||
{{itemlist|Bluk Berry|From the Berry Trees, south of Meteor Falls|E=yes|display=[[Bluk Berry]] ×6}} | |||
{{itemlist|PP Up|South of Meteor Falls, at the south end of the dirt path|E=yes}} | |||
{{itemlist|Heart Scale|On the beach, one step north of Battle Girl Cyndy (hidden)|E=yes}} | |||
{{itlistfoot|mountain}} | |||
|} | |||
==Route 112 (south)== | ==Route 112 (south)== | ||
| Line 54: | Line 103: | ||
{{trainerdiv|volcano}} | {{trainerdiv|volcano}} | ||
{{trainerentry|Spr RS Team Magma Grunt M.png|Team Magma Grunt||400<br/><small>Potential [[Double Battle]] with the above Grunt</small>|1|041|Zubat|♂|20|}} | {{trainerentry|Spr RS Team Magma Grunt M.png|Team Magma Grunt||400<br/><small>Potential [[Double Battle]] with the above Grunt</small>|1|041|Zubat|♂|20|}} | ||
{{trainerfooter|volcano|3}} | {{trainerfooter|volcano|3}} | ||
|} | |} | ||
| Line 244: | Line 277: | ||
| | | | ||
{{itlisth|volcano}} | {{itlisth|volcano}} | ||
{{itemlist|Full Heal|In the northwestern ash-covered grass patch (hidden)|E=yes | {{itemlist|Full Heal|In the northwestern ash-covered grass patch (hidden)|E=yes}} | ||
{{itemlist|Burn Heal|North of a tree in the southeast part of the area|E=yes}} | {{itemlist|Burn Heal|North of a tree in the southeast part of the area|E=yes}} | ||
{{itemlist|Great Ball|Northwest of the Route 112 entrance, on the second ledge (hidden)|E=yes | {{itemlist|Great Ball|Northwest of the Route 112 entrance, on the second ledge (hidden)|E=yes}} | ||
{{itlistfoot|volcano}} | {{itlistfoot|volcano}} | ||
|} | |} | ||
===It's All Downhill=== | ===It's All Downhill=== | ||
Jump the first two ledges and go west. Inspect the patch of ash-covered grass to find a hidden [[Full Heal]]. Take the stairway southward and jump the next two ledges, stopping near a Team Magma Grunt. Turn east and take the stairway to reach a [[Burn Heal]] lying near a tree. Jump the ledge to the south, then head all the way to the west and jump another ledge. Check the corner here for a hidden | Jump the first two ledges and go west. Inspect the patch of [[volcanic ash|ash]]-covered grass to find a hidden [[Full Heal]]. Take the stairway southward and jump the next two ledges, stopping near a Team Magma Grunt. Turn east and take the stairway to reach a [[Burn Heal]] lying near a tree. Jump the ledge to the south, then head all the way to the west and jump another ledge. Check the corner here for a hidden [[Great Ball]], then continue south past Camper Ethan to reach the exit. This leads to the southwest part of {{rt|112|Hoenn}}, just outside [[Lavaridge Town]]. | ||
{{-}} | {{-}} | ||
==Lavaridge Town== | ==Lavaridge Town== | ||
[[File:Lavaridge Town E.png|thumb|left|Lavaridge Town]] | [[File:Lavaridge Town E.png|thumb|left|Lavaridge Town]] | ||
| Line 278: | Line 312: | ||
{{catch/div|volcano|After defeating the Lavaridge Gym}} | {{catch/div|volcano|After defeating the Lavaridge Gym}} | ||
{{itemlist|TM Fire|From Flannery upon her defeat|E=yes|display={{TM|50|Overheat}}}} | {{itemlist|TM Fire|From Flannery upon her defeat|E=yes|display={{TM|50|Overheat}}}} | ||
{{itemlist|Go-Goggles|From May/Brendan outside the Gym|E=yes}} | {{itemlist|Go-Goggles III|From May/Brendan outside the Gym|E=yes|display=[[Go-Goggles]]}} | ||
{{itlistfoot|volcano}} | {{itlistfoot|volcano}} | ||
|} | |} | ||
| Line 404: | Line 438: | ||
After the battle, Flannery awards you the {{badge|Heat}}, which ensures obedience of all Pokémon up to level 50 and enables the use of {{m|Strength}} in the field. She also hands out {{TM|50|Overheat}} as a prize, and registers herself in your PokéNav. Jump the nearby ledge to return to the entrance. Outside, May/Brendan is impressed that you defeated the Lavaridge Gym. Since you are obviously capable, she/he hands you the [[Go-Goggles]], which allow you to explore the desert of {{rt|111|Hoenn}} in spite of the raging sandstorm. Your friend then heads off. | After the battle, Flannery awards you the {{badge|Heat}}, which ensures obedience of all Pokémon up to level 50 and enables the use of {{m|Strength}} in the field. She also hands out {{TM|50|Overheat}} as a prize, and registers herself in your PokéNav. Jump the nearby ledge to return to the entrance. Outside, May/Brendan is impressed that you defeated the Lavaridge Gym. Since you are obviously capable, she/he hands you the [[Go-Goggles]], which allow you to explore the desert of {{rt|111|Hoenn}} in spite of the raging sandstorm. Your friend then heads off. | ||
==Route 112== | |||
To exit Lavaridge Town, just go east over the ledges, make sure you stop after the second jump to pick up a handy [[Nugget]]. | |||
{| class="expandable" style="margin: auto; background: #{{locationcolor/med|volcano}}; {{roundy}}; border: 5px solid #{{locationcolor/light|volcano}};" | |||
|- align="center" | |||
! {{color|FFBC00|Items}} | |||
|- | |||
| | |||
{{itlisth|volcano}} | |||
{{catch/div|volcano|After descending from Mt. Chimney}} | |||
{{itemlist|Nugget|On a ledge, south of Fiery Path (can be accesed from [[Lavaridge Town]])|E=yes}} | |||
{{itlistfoot|volcano}} | |||
|} | |||
==Fiery Path (optional)== | ==Fiery Path (optional)== | ||
Now that you can use {{m|Strength}} outside of battle, you can use this move to shove aside rocks in blocking your way to the items in [[Fiery Path]]. | |||
{| class="expandable" style="margin: auto; background: #{{locationcolor/med|volcano}}; {{roundy}}; border: 5px solid #{{locationcolor/light|volcano}};" | {| class="expandable" style="margin: auto; background: #{{locationcolor/med|volcano}}; {{roundy}}; border: 5px solid #{{locationcolor/light|volcano}};" | ||
|- align="center" | |- align="center" | ||
| Line 417: | Line 465: | ||
{{itlistfoot|volcano}} | {{itlistfoot|volcano}} | ||
|} | |} | ||
==Mt. Chimney (optional)== | |||
After visiting Lavaridge Town, return here to fight some trainers. | |||
{| class="expandable" style="margin: auto; background: #{{locationcolor/med|volcano}}; {{roundy}}; border: 5px solid #{{locationcolor/light|volcano}};" | |||
|- align="center" | |||
! {{color|FFBC00|Trainers}} | |||
|- | |||
| | |||
{{trainerheader|volcano}} | |||
{{catch/div|volcano|After visiting Lavaridge Town}} | |||
{{trainerentry|Spr RS Beauty.png|Beauty|Shirley|1680|1|322|Numel|♀|21|}} | |||
{{trainerdiv|volcano}} | |||
{{trainerentry|Spr RS Beauty.png|Beauty|Sheila|1680|1|285|Shroomish|♀|21|}} | |||
{{trainerdiv|volcano}} | |||
{{trainerentry|Spr RS Expert F.png|Expert|Shelby|840|2|307|Meditite|♀|21||296|Makuhita|♂|21||38=Nav}} | |||
{{trainerdiv|volcano}} | |||
{{trainerentry|Spr RS Hiker.png|Hiker|Sawyer|840<br/><small>Potential [[Double Battle]] with Melissa</small>|1|074|Geodude|♂|21||38=Nav}} | |||
{{trainerentry|Spr RS Beauty.png|Beauty|Melissa|1680<br/><small>Potential [[Double Battle]] with Sawyer</small>|1|183|Marill|♀|21|}} | |||
{{catch/div|volcano|Rematch}} | |||
{{trainerentry|Spr RS Expert F.png|Expert|Shelby{{tt|*|First rematch}}|1200|2|307|Meditite|♀|30||296|Makuhita|♂|30||38=Nav}} | |||
{{trainerentry|Spr RS Expert F.png|Expert|Shelby{{tt|*|Second, third and fourth rematch onwards}} |{{tt|1320|Second rematch}}/{{tt|1440|Third rematch}}/{{tt|1560|Fourth rematch onwards}}|2|308|Medicham|♀|{{tt|33|Second rematch}}/{{tt|36|Third rematch}}/{{tt|39|Fourth rematch onwards}}||297|Hariyama|♂|{{tt|33|Second rematch}}/{{tt|36|Third rematch}}/{{tt|39|Fourth rematch onwards}}||38=Nav}} | |||
{{trainerdiv|volcano}} | |||
{{trainerentry|Spr RS Hiker.png|Hiker|Sawyer{{tt|*|First rematch}}|1040|2|074|Geodude|♂|26||322|Numel|♂|26||38=Nav}} | |||
{{trainerentry|Spr RS Hiker.png|Hiker|Sawyer{{tt|*|Second and third rematch}}|{{tt|1120|Second rematch}}/{{tt|1200|Third rematch}}|3|066|Machop|♂|{{tt|28|Second rematch}}/{{tt|30|Third rematch}}||322|Numel|♂|{{tt|28|Second rematch}}/{{tt|30|Third rematch}}||075|Graveler|♂|{{tt|28|Second rematch}}/{{tt|30|Third rematch}}||38=Nav}} | |||
{{trainerentry|Spr RS Hiker.png|Hiker|Sawyer{{tt|*|Fourth rematch onwards}}|1320|3|067|Machoke|♂|33||323|Camerupt|♂|33||076|Golem|♂|33||38=Nav}} | |||
{{trainerfooter|volcano|3}} | |||
|} | |||
==Trick House - Puzzle 3 (optional)== | |||
In [[Trick House]] now you can complete the puzzle 3. First, make sure you have a Pokémon that knows {{m|Rock Smash}}. | |||
| Line 423: | Line 502: | ||
|gamename=Emerald | |gamename=Emerald | ||
|prevsection=6 | |prevsection=6 | ||
|prevname=Route 112 | |prevname=Route 112 (south), Fiery Path, Route 112 (north), Route 111 (north), Route 113, Fallarbor Town, Route 114 | ||
|nextsection=8 | |nextsection=8 | ||
|nextname=Route 111 | |nextname=Route 111 (desert), Mirage Tower, Petalburg City, Route 115, Route 105, Route 107, Route 108 | ||
}} | }} | ||
Latest revision as of 18:13, 4 December 2022
Meteor Falls
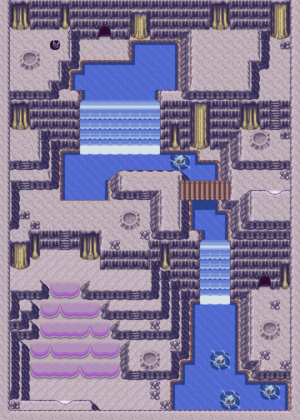
Nestled in the mountains between Routes 114 and 115, Meteor Falls is said to have been the site of a meteor shower in the distant past. The cavern's rushing rapids prevent novice Trainers from fully exploring the area, as doing so requires certain field moves.
| Available Pokémon | |||||||||||||||||||||||||||||||||||||||||||||||||||||||||||||||||||||||||||||||||||||||||||||||||||||||||
|---|---|---|---|---|---|---|---|---|---|---|---|---|---|---|---|---|---|---|---|---|---|---|---|---|---|---|---|---|---|---|---|---|---|---|---|---|---|---|---|---|---|---|---|---|---|---|---|---|---|---|---|---|---|---|---|---|---|---|---|---|---|---|---|---|---|---|---|---|---|---|---|---|---|---|---|---|---|---|---|---|---|---|---|---|---|---|---|---|---|---|---|---|---|---|---|---|---|---|---|---|---|---|---|---|---|
| |||||||||||||||||||||||||||||||||||||||||||||||||||||||||||||||||||||||||||||||||||||||||||||||||||||||||
| Items | |||||||||||||||||||||||||||||||
|---|---|---|---|---|---|---|---|---|---|---|---|---|---|---|---|---|---|---|---|---|---|---|---|---|---|---|---|---|---|---|---|
| |||||||||||||||||||||||||||||||
1F
Head west over the bridge to find two Team Magma Grunts who have just stolen a Meteorite from Professor Cozmo. Soon after they notice you, the leader of the opposing Team Aqua enters, flanked by two of his subordinates. The thieves don't seem to care, and flee with the Meteorite to Mt. Chimney. The team leader introduces himself as Archie, and tells you that his group intends to thwart the villainous team's plans at any cost, as they have committed many destructive acts in their bid to enlarge the landmass. The three then leave to pursue the thieves to Mt. Chimney. To pursue them yourself, exit Meteor Falls either north to Route 114 or south to Route 115.
Route 115 (optional)
First, follow the eastern edge of the route until you reach a boulder that can be smashed. Pick up the Great Ball and Bluk Berries here. Battle the Pokémon Trainers, catch some more Pokémon, and continue on your way to Mt. Chimney.
| Trainers | |||||||||||||||||||||||||||||||||||||||||||||||||||||||||||||||||||||||||||||||||||||||||||||||||||||||||||||||||||||||||||||||||||||||||||||||||||||||||||||||||||||||||||||||||||||||||||||||||||||||||||||||||||||||||||||||
|---|---|---|---|---|---|---|---|---|---|---|---|---|---|---|---|---|---|---|---|---|---|---|---|---|---|---|---|---|---|---|---|---|---|---|---|---|---|---|---|---|---|---|---|---|---|---|---|---|---|---|---|---|---|---|---|---|---|---|---|---|---|---|---|---|---|---|---|---|---|---|---|---|---|---|---|---|---|---|---|---|---|---|---|---|---|---|---|---|---|---|---|---|---|---|---|---|---|---|---|---|---|---|---|---|---|---|---|---|---|---|---|---|---|---|---|---|---|---|---|---|---|---|---|---|---|---|---|---|---|---|---|---|---|---|---|---|---|---|---|---|---|---|---|---|---|---|---|---|---|---|---|---|---|---|---|---|---|---|---|---|---|---|---|---|---|---|---|---|---|---|---|---|---|---|---|---|---|---|---|---|---|---|---|---|---|---|---|---|---|---|---|---|---|---|---|---|---|---|---|---|---|---|---|---|---|---|---|---|---|---|---|---|---|---|---|---|---|---|---|---|---|---|---|
| |||||||||||||||||||||||||||||||||||||||||||||||||||||||||||||||||||||||||||||||||||||||||||||||||||||||||||||||||||||||||||||||||||||||||||||||||||||||||||||||||||||||||||||||||||||||||||||||||||||||||||||||||||||||||||||||
| Available Pokémon | |||||||||||||||||||||||||||||||||||||||||||||||||||||||||||||||||||||||||
|---|---|---|---|---|---|---|---|---|---|---|---|---|---|---|---|---|---|---|---|---|---|---|---|---|---|---|---|---|---|---|---|---|---|---|---|---|---|---|---|---|---|---|---|---|---|---|---|---|---|---|---|---|---|---|---|---|---|---|---|---|---|---|---|---|---|---|---|---|---|---|---|---|---|
| |||||||||||||||||||||||||||||||||||||||||||||||||||||||||||||||||||||||||
| Items | ||||||||||||||||||||||||||||
|---|---|---|---|---|---|---|---|---|---|---|---|---|---|---|---|---|---|---|---|---|---|---|---|---|---|---|---|---|
| ||||||||||||||||||||||||||||
Route 112 (south)
Team Magma has taken Professor Cozmo's Meteorite to Mt. Chimney, and the only way to follow is by Cable Car. When you arrive, you find that the guards are no longer guarding the station. Enter the building and take the Cable Car up to the summit.
Mt. Chimney
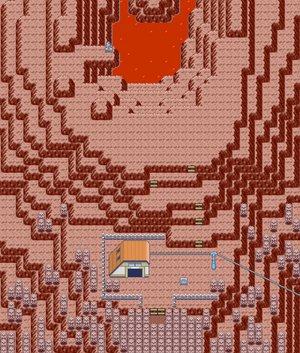
Located in the heart of Hoenn, Mt. Chimney is a monstrous volcano that seethes with incredible power. Although their intentions are not yet clear, Team Magma is determined to use Professor Cozmo's Meteorite here in the next stage of their campaign.
| Trainers | ||||||||||||||||||||||||||||||||
|---|---|---|---|---|---|---|---|---|---|---|---|---|---|---|---|---|---|---|---|---|---|---|---|---|---|---|---|---|---|---|---|---|
| ||||||||||||||||||||||||||||||||
| Items | |||||||||||||||||||||||||||
|---|---|---|---|---|---|---|---|---|---|---|---|---|---|---|---|---|---|---|---|---|---|---|---|---|---|---|---|
| |||||||||||||||||||||||||||
Steer Clear of the Grunts
Normally, visitors to the mountaintop would be able to head south through Jagged Pass to reach Lavaridge Town. But Team Magma and Team Aqua are locked in battle all over the summit, including the entrance to the mountain pass. Let their Pokémon fight it out while you climb up north to the crater.
West of the stairway, you find Aqua Leader Archie in a skirmish against a group of opposing Grunts. You're only here for Cozmo's Meteorite, though, so slip past the battle and work your way to the northwest.
Spotted!
There are two Grunts ahead standing guard, and you are quickly drawn into battle. But you're more than a match for the pair, so finish them off quickly and continue northward.
Challenge Accepted!
Make your way farther north and you'll be stopped by Tabitha, who isn't about to let you pass by so easily!
VS Tabitha
| |||||||||||||||||||||||||||||||||||||||||||||||||||||||||||||||||||||||||||||||||||||||||||||||||||||||||||||||||||||||||
Battle with the Boss
Tabitha is defeated, but the real threat still lurks ahead. Turn east toward the crater to find the leader of Team Magma standing near some sort of high-tech device fitted with the stolen Meteorite. After revealing that he intends to use the Meteorite to intensify Mt. Chimney's volcanic activity, he draws you into battle!
VS Maxie
| |||||||||||||||||||||||||||||||||||||||||||||||||||||||||||||||||||||||||||||||||||||||||||
With his defeat, Maxie grudgingly gives up his plans for Mt. Chimney, but reassures you that his team will still prevail. He flees along with his subordinates, a moment before Archie appears. He thanks you for your help, and pledges to continue fighting against the villainous team's destructive plans. Once he leaves, inspect the machine to retrieve the Meteorite for Professor Cozmo.
Jagged Pass (first visit)
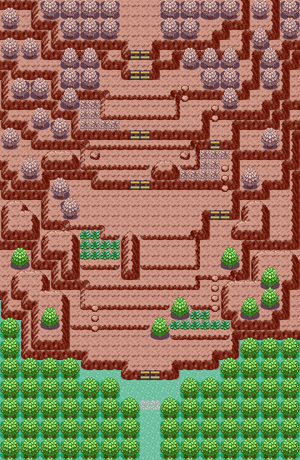
Jagged Pass was formed as the result of an ancient volcanic eruption. When the lava cooled, it proved to be suitable for an alternate route to the summit. Though not necessary for southward travel, the Acro Bike is needed to scale the rough terrain when traveling northward.
| Trainers | ||||||||||||||||||||||||||||||||||||||||||||||||||||||||||||||||||||||||||||||||||||||||||||||||||||||||||||||||||||||||||||||||||||||||||||||||||||||||||||||||||||||||||||||||||||||||||||||||||||||||||||||||||||||||||||||||||||||||||||||||||||||||||||||||||||||||||||||||||||||||||||||||||||||||||||||
|---|---|---|---|---|---|---|---|---|---|---|---|---|---|---|---|---|---|---|---|---|---|---|---|---|---|---|---|---|---|---|---|---|---|---|---|---|---|---|---|---|---|---|---|---|---|---|---|---|---|---|---|---|---|---|---|---|---|---|---|---|---|---|---|---|---|---|---|---|---|---|---|---|---|---|---|---|---|---|---|---|---|---|---|---|---|---|---|---|---|---|---|---|---|---|---|---|---|---|---|---|---|---|---|---|---|---|---|---|---|---|---|---|---|---|---|---|---|---|---|---|---|---|---|---|---|---|---|---|---|---|---|---|---|---|---|---|---|---|---|---|---|---|---|---|---|---|---|---|---|---|---|---|---|---|---|---|---|---|---|---|---|---|---|---|---|---|---|---|---|---|---|---|---|---|---|---|---|---|---|---|---|---|---|---|---|---|---|---|---|---|---|---|---|---|---|---|---|---|---|---|---|---|---|---|---|---|---|---|---|---|---|---|---|---|---|---|---|---|---|---|---|---|---|---|---|---|---|---|---|---|---|---|---|---|---|---|---|---|---|---|---|---|---|---|---|---|---|---|---|---|---|---|---|---|---|---|---|---|---|---|---|---|---|---|---|---|---|---|---|---|---|---|---|---|---|---|---|---|---|---|---|---|---|---|---|---|---|---|---|---|---|---|---|---|---|---|---|---|---|---|---|---|
| ||||||||||||||||||||||||||||||||||||||||||||||||||||||||||||||||||||||||||||||||||||||||||||||||||||||||||||||||||||||||||||||||||||||||||||||||||||||||||||||||||||||||||||||||||||||||||||||||||||||||||||||||||||||||||||||||||||||||||||||||||||||||||||||||||||||||||||||||||||||||||||||||||||||||||||||
| Available Pokémon | ||||||||||||||||||||||||||||||||||||||||||||||||||||||||||||||||||||||||||
|---|---|---|---|---|---|---|---|---|---|---|---|---|---|---|---|---|---|---|---|---|---|---|---|---|---|---|---|---|---|---|---|---|---|---|---|---|---|---|---|---|---|---|---|---|---|---|---|---|---|---|---|---|---|---|---|---|---|---|---|---|---|---|---|---|---|---|---|---|---|---|---|---|---|---|
| ||||||||||||||||||||||||||||||||||||||||||||||||||||||||||||||||||||||||||
| Items | ||||||||||||||||||||
|---|---|---|---|---|---|---|---|---|---|---|---|---|---|---|---|---|---|---|---|---|
| ||||||||||||||||||||
It's All Downhill
Jump the first two ledges and go west. Inspect the patch of ash-covered grass to find a hidden Full Heal. Take the stairway southward and jump the next two ledges, stopping near a Team Magma Grunt. Turn east and take the stairway to reach a Burn Heal lying near a tree. Jump the ledge to the south, then head all the way to the west and jump another ledge. Check the corner here for a hidden Great Ball, then continue south past Camper Ethan to reach the exit. This leads to the southwest part of Route 112, just outside Lavaridge Town.
Lavaridge Town
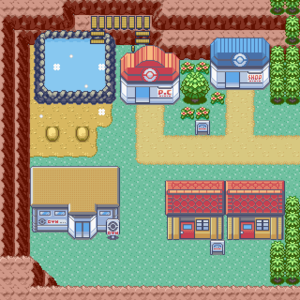
Nestled at the foot of Mt. Chimney, Lavaridge Town is a welcome sight for travelers and tourists alike. It is well-known throughout Hoenn for its soothing hot springs, said to cure any ailment, and also features a specialty shop that sells bitter but beneficial herbs for Pokémon. The Lavaridge Gym, fourth in the Hoenn League, stands in the southwest part of town.
| Available Pokémon | |||||||||||||||||||||||||||||||||||||||||||||||||||||||||
|---|---|---|---|---|---|---|---|---|---|---|---|---|---|---|---|---|---|---|---|---|---|---|---|---|---|---|---|---|---|---|---|---|---|---|---|---|---|---|---|---|---|---|---|---|---|---|---|---|---|---|---|---|---|---|---|---|---|
| |||||||||||||||||||||||||||||||||||||||||||||||||||||||||
| Items | |||||||||||||||||||||||||||||||||||||||
|---|---|---|---|---|---|---|---|---|---|---|---|---|---|---|---|---|---|---|---|---|---|---|---|---|---|---|---|---|---|---|---|---|---|---|---|---|---|---|---|
| |||||||||||||||||||||||||||||||||||||||
Pokémon Center and Hot Springs
The building's back door leads to the steamy hot springs. Take a dip if you wish, and use the Itemfinder to locate an Ice Heal hidden in the waters. Afterward, use the PC to organize your party so that you are carrying no more than five Pokémon. Step outside and talk to the old woman near the sand baths, and she offers you a Pokémon Egg to take with you on your travels!
Herb Shop
At the Herb Shop, a woman sells herbal medicines for Pokémon. These natural remedies are just as effective as their traditional counterparts and less expensive, but their bitter taste make them difficult for Pokémon to take, leaving them less friendly toward you. As Max Revives cannot be purchased anywhere, it may be useful to buy a few Revival Herbs to have in case of an emergency.
| ||||||||||||||||||
Be sure to talk to the old man near the counter, as well. Doing so gets you a Charcoal, which boosts the power of Fire-type moves by 10% when held.
Move Tutor
Visit the southeast house to find a young boy that mimics the speech patterns of the elderly residents. Speak to him, and he offers to teach the move Mimic to a Pokémon, one time only.
Lavaridge Gym
Like the name suggests, the Lavaridge Gym specializes in Fire-type Pokémon. Grass-, Bug-, Ice-, and Steel-type Pokémon are most vulnerable to their scorching attacks. While the Fire Pokémon are weak to Water, the prevalence of Sunny Day in this gym means Ground and Rock moves will give you more of an upper hand. The humid Gym features two floors; stepping on a pool of water will cause you to fall to the basement, and doing the same there will send you back to the first floor atop a geyser.
There are two nearby puddles in the first room; step on the northeast one to fall to the basement. Go southwest to battle Kindler Jace and Hiker Eli, then step on either puddle to the west to ride the geyser to the southwest part of 1F. Cooltrainer Gerald, Kindler Cole, and Kindler Axle can all be fought in this room, but to advance you need to fall through the hole to the northwest. Kindler Keegan hides in the northeast pool, while the geyser can be found by stepping on the northwest puddle. Check the northeast puddle to find Battle Girl Danielle, then drop down through the northwest hole. Go east and ride the middle geyser to 1F's north-central room. Drop through the hole in the southeast corner, jump the ledge there, and ride the final geyser up to the Gym Leader's room.
Flannery has only recently begun serving as Gym Leader, and is intent on proving her worth. Given the chance, her Pokémon can unleash powerful moves that can reduce a challenger's party to cinders. Sunny Day gives a 50% power boost to all Fire attacks, which makes her Pokémon's strongest move, Overheat, even more devastating. Its only drawback is that it harshly lowers the user's Special Attack after each use, but once is usually enough! To counter this, her Torkoal holds a White Herb, which negates the first stat drop when consumed. In addition, the harsh sunlight temporarily cuts the power of Water attacks in half.
| |||||||||||||||||||||||||||||||||||||||||||||||||||||||||||||||||||||||||||||||||||||||||||||||||||||||||||||||||||||||||||||||||||||||||||||||||||||||||||||||||||||||||||||||||||||||||||||||||||||||||||||||||||||||||||||||||||||||||||||||||||||||||
After the battle, Flannery awards you the Heat Badge, which ensures obedience of all Pokémon up to level 50 and enables the use of Strength in the field. She also hands out TM50 (Overheat) as a prize, and registers herself in your PokéNav. Jump the nearby ledge to return to the entrance. Outside, May/Brendan is impressed that you defeated the Lavaridge Gym. Since you are obviously capable, she/he hands you the Go-Goggles, which allow you to explore the desert of Route 111 in spite of the raging sandstorm. Your friend then heads off.
Route 112
To exit Lavaridge Town, just go east over the ledges, make sure you stop after the second jump to pick up a handy Nugget.
| Items | |||||||||||||||||||||||||||
|---|---|---|---|---|---|---|---|---|---|---|---|---|---|---|---|---|---|---|---|---|---|---|---|---|---|---|---|
| |||||||||||||||||||||||||||
Fiery Path (optional)
Now that you can use Strength outside of battle, you can use this move to shove aside rocks in blocking your way to the items in Fiery Path.
| Items | ||||||||||||||||
|---|---|---|---|---|---|---|---|---|---|---|---|---|---|---|---|---|
| ||||||||||||||||
Mt. Chimney (optional)
After visiting Lavaridge Town, return here to fight some trainers.
| Trainers | ||||||||||||||||||||||||||||||||||||||||||||||||||||||||||||||||||||||||||||||||||||||||||||||||||||||||||||||||||||||||||||||||||||||||||||||||||||||||||||||||||||||||||||||||||||||||||||||||||||||||||||||||||||||||||||
|---|---|---|---|---|---|---|---|---|---|---|---|---|---|---|---|---|---|---|---|---|---|---|---|---|---|---|---|---|---|---|---|---|---|---|---|---|---|---|---|---|---|---|---|---|---|---|---|---|---|---|---|---|---|---|---|---|---|---|---|---|---|---|---|---|---|---|---|---|---|---|---|---|---|---|---|---|---|---|---|---|---|---|---|---|---|---|---|---|---|---|---|---|---|---|---|---|---|---|---|---|---|---|---|---|---|---|---|---|---|---|---|---|---|---|---|---|---|---|---|---|---|---|---|---|---|---|---|---|---|---|---|---|---|---|---|---|---|---|---|---|---|---|---|---|---|---|---|---|---|---|---|---|---|---|---|---|---|---|---|---|---|---|---|---|---|---|---|---|---|---|---|---|---|---|---|---|---|---|---|---|---|---|---|---|---|---|---|---|---|---|---|---|---|---|---|---|---|---|---|---|---|---|---|---|---|---|---|---|---|---|---|---|---|---|---|---|---|---|---|---|
| ||||||||||||||||||||||||||||||||||||||||||||||||||||||||||||||||||||||||||||||||||||||||||||||||||||||||||||||||||||||||||||||||||||||||||||||||||||||||||||||||||||||||||||||||||||||||||||||||||||||||||||||||||||||||||||
Trick House - Puzzle 3 (optional)
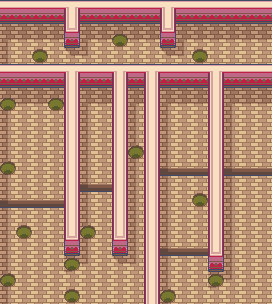
In Trick House now you can complete the puzzle 3. First, make sure you have a Pokémon that knows Rock Smash.

|
This article is part of Project Walkthroughs, a Bulbapedia project that aims to write comprehensive step-by-step guides on each Pokémon game. |
