Tera Raid Battle: Difference between revisions

From Bulbapedia, the community-driven Pokémon encyclopedia.
Jump to navigationJump to search
 
(44 intermediate revisions by 18 users not shown)
Line 3: Line 3:


==History==
==History==
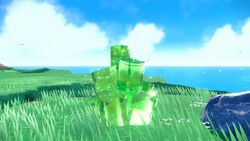
Tera Raid Crystals are created from energy unleashed from the [[Great Crater of Paldea]] over the years. During the post-game events of {{g|Scarlet and Violet}}, stronger 5★ and black 6★ raid crystals begin to appear. [[Jacq]] asks the player to not participate in the 6★ raids for the player's safety, due to the overwhelming energy contained within. If the player ignores his request and manages to defeat one, it's revealed from the readings that they're being caused by residual energy leaking from [[Area Zero]] into the rest of Paldea. In certain events, 7★ Raids show up with very rare Pokémon normally not found in [[Paldea]].
Tera Raid Crystals are created from energy unleashed from the [[Great Crater of Paldea]] over the years. During the post-game events of {{g|Scarlet and Violet}}, stronger 5★ and black 6★ raid crystals begin to appear. [[Jacq]] asks the player to not participate in the 6★ raids for the player's safety, due to the overwhelming energy contained within. If the player ignores his request and manages to defeat one, it's revealed from the readings that they're being caused by residual energy leaking from [[Area Zero]] into the rest of Paldea. In certain events, 7★ Raids show up with very rare Pokémon normally not found in [[Paldea]]. Some of the rare Pokemon discovered in 7★ Raids have been several [[Legendary Pokémon]], the Paradox Pokémon {{p|Walking Wake}} and {{p|Iron Leaves}}, and the three [[Hisuian form]]s of {{p|Typhlosion}}, {{p|Samurott}}, and {{p|Decidueye}}.


==In the games==
==In the games==
Line 10: Line 10:


Visiting each crystal for the first time awards a certain amount of LP, even if the player chooses not to participate in the raid:  
{| class="roundy" style="text-align:center; background: #{{paldea color light}}; border: 3px solid #{{paldea color dark}};"
{| class="roundy" style="text-align:center; background: #{{paldea color}}; border: 3px solid #{{paldea color dark}};"
|-  
|-  
! style="background: #{{paldea color}}; {{roundytl|5px}}"| Rank
! style="background: #{{paldea color light}}; {{roundytl|5px}}"| Rank
! style="background: #{{paldea color}}; {{roundytr|5px}}" | LP Reward
! style="background: #{{paldea color light}}; {{roundytr|5px}}" | LP Reward
|- style="background: #FFFFFF;"
|- style="background: #FFFFFF;"
! ★
! ★
Line 41: Line 41:


===Battle===
===Battle===
{{incomplete|section|needs=What are the effects of moves such as Destiny Bond, Endeavor, Pain Split, Eruption etc. when used in a Tera Raid Battle?}}
The battle system differs from typical turn-based battles in that the battle is timed, with an orange timer bar visible below the boss's HP bar that ticks down from 7½ minutes, and all participants are able to act at any point, regardless of whether the opponent Pokémon or allies are also performing an action at the same time (other than scripted actions which take place at predefined thresholds, and which interrupt players' access to the menu). It is even possible for a Pokémon to execute multiple moves before an ally chooses to act at all. The raid boss essentially participates in four concurrent one-on-one battles against each of the team members, and for each turn any player takes, the boss with get one turn against that player, with their relative order within that turn decided by priority or speed as usual. Moves used by other players' Pokémon will appear as small speech bubbles next to their sprites in the top-left corner. A player will not see any messages for moves the raid boss uses against other players' Pokémon (except for additional moves described below), but if some of those moves affect its own stat stages (such as {{m|Calm Mind}} or {{m|Ancient Power}}), those stages will be in effect for all players, and can be seen by checking its status with the Y button. Likewise, moves that create weather or terrain conditions will create them for all four lanes, even if some players don't see the move being used; a particle effect will be visible in the center of the screen to indicate their presence.


Players are allowed to target a teammate with their moves, but {{cat|moves that target all adjacent Pokémon}} (such as {{m|Earthquake}}) will only hit the raid boss. If the raid boss uses such a move, it will only hit the Pokémon whose lane it was used in, and will not receive a multiple-target damage penalty. If the raid boss attempts to use the move {{m|Self-Destruct}}, {{m|Explosion}}, {{m|Misty Explosion}} or {{m|Final Gambit}}, the move will fail. {{m|Guard Split}}, {{m|Power Split}} and {{m|Perish Song}} will fail if used in a Tera Raid Battle. If a [[one-hit knockout move]] lands, the raid boss will be unaffected by the move.
====Timer====
The battle system differs from typical turn-based battles in that the battle is timed, with an orange timer bar visible below the boss's HP bar that ticks down from 5 to 7½ minutes and beyond depending on the raid (the event Mewtwo raid having the longest length to date at 15 minutes), and all participants are able to act at any point, regardless of whether the opponent Pokémon or allies are also performing an action at the same time. It is even possible for a Pokémon to execute multiple moves before an ally chooses to act at all.
 
When the timer reaches 10% time remaining, the message "''You can feel a tremendous energy gathering! There isn't much time left!''" will appear. If the timer expires before players defeat the Tera Pokémon, the energy burst will be unleashed, expelling all players from the raid.
 
====Turn system====
The raid boss essentially participates in four concurrent one-on-one battles against each of the team members, and for each turn any player takes, the boss will get one turn against that player, with their relative order within that turn decided by priority or speed as usual. During these turns, the boss may use any move from its base moveset, which is the moveset it will have if it is caught and thus contains up to four moves. Moves used by other players' Pokémon will appear as small speech bubbles next to their sprites in the top-left corner. A player will not see any messages for moves the raid boss uses against other players' Pokémon (except for additional moves described below), but if some of those moves affect its own stat stages (such as {{m|Calm Mind}} or {{m|Ancient Power}}), those stages will be in effect for all players, and can be seen by checking its status with the Y button. Likewise, moves that create weather or terrain conditions will create them for all four lanes, even if some players don't see the move being used; a particle effect will be visible in the center of the screen to indicate their presence. Field effects that last for a certain number of turns will have their turn count decrease only after all players have made a move. [[Light Screen (move)|Light Screen]] and [[Reflect (move)|Reflect]] will use their reduced doubles damage multiplier.
 
If the raid has been opened to other players (even if no others joined), then each time a player's menu comes up, that player must select an action within 60 seconds, or else the earliest selectable move in their moveset will automatically be used at that time.
 
====Targeting====
 
Players are allowed to target a teammate with their moves, but {{cat|moves that target all adjacent Pokémon}} (such as {{m|Earthquake}}) will only hit the raid boss. If the raid boss uses such a move, it will only hit the Pokémon whose lane it was used in, and will not receive a multiple-target damage penalty (except if it uses it during an extra action as described below).  
 
====Knockouts====
If a non-boss Pokémon faints, it will be revived after five seconds initially, plus an additional five-second wait for each time it has previously fainted in the battle, up to a maximum of 30 seconds. Additionally, this also reduces the timer by a number of seconds equal to the fainted Pokémon's level. Pokémon used by NPCs do not reduce the timer when they faint.
 
====Terastallization====
Each time a player's Pokémon successfully uses a direct-damaging move, this player's [[Tera Orb]] will gain one charge. If a player's [[Tera Orb]] has three charges, this player can Terastallize their Pokémon on any turn. Each player may only Terastallize once per raid, even if their Terastallized Pokémon faints.
 
Only direct-damaging moves, targeting either the raid boss or an ally, will count towards the Tera Orb's charge. [[Status move]]s, [[#Cheers|cheering]], and moves that miss do not count. If a damaging move is used while the boss's shield is up and deals so little damage that the shield reduction causes the damage to be less than ½, it will round down to 0 damage and that attack will not charge the Tera Orb either.
 
Unlike [[Max Raid Battle]]s, where only a single player can [[Dynamax]] their Pokémon and the option to do so rotates between players until it's used, all four participants in a Tera Raid Battle are permitted to Terastallize their Pokémon separately.
 
The allied NPCs never Terastallize their Pokémon.
 
====Extra actions====
The boss may have extra actions which take place at predefined thresholds of health or time. These actions interrupt players' access to the menu. If the thresholds for two or more extra actions are met at the same moment (for instance because of heavy damages), the boss will perform all of them in sequence, and it will not be possible to access the menu again until each of them have finished their animations. An extra action can happen between a player's command and the corresponding turn.
 
There are six types of extra action: additional move, shield, removal of negative effects, removal of positive effects, [[Tera Orb]] charge stealing, and the double-action phase where the boss can use a second move in a turn. Additional moves appear in 3★-and-above raids, while all the other actions appear in 4★-and-above raids. The double-action phase has only appeared in certain 7★ raids so far.
 
If an action's trigger is at 100% of time or HP remaining, it will thus trigger at the very start of the battle, before the players can take a turn. This often happens in 7★ raids.<ref>https://twitter.com/Sibuna_Switch/status/1628992932039602177</ref>
 
=====Additional move=====
The boss uses a move outside of standard turn order. This move can be outside of their base moveset; if it is the case, it will not know it if it is caught.
* For moves that target a single Pokémon, a random target will be chosen, and all players will be able to see the move messages and the attack animation aimed in the direction of the targeted Pokémon even when it isn't their own.
* For moves that usually target multiple Pokémon, it will do so, and the multiple-target damage penalty will apply. This is the only way a move can ever hit multiple Pokémon during a Tera Raid Battle.
 
=====Shield=====
The boss produces a shield which severely reduces the damage of attacks from non-Terastallized Pokémon, blocks the effects of [[status move]]s, and cures any non-volatile [[status condition]] it has upon activation. This action is never done more than once in a battle.
 
The shield applies a multiplier to incoming damage. There are three multipliers depending on the situation of the attacking Pokémon:
* the attacking Pokémon is not Terastallized: ×0.2;
* the attacking Pokémon is Terastallized and the move's type '''does not match''' the user's Tera Type (including a non-{{type|Stellar}} move from a user with the Stellar Tera type): ×0.35;
* the attacking Pokémon is Terastallized and the move's type '''does match''' the user's Tera Type: ×0.75.
 
The previous multipliers' values are used for all 6★ and 5★ raids in Paldea,<ref>https://twitter.com/Sibuna_Switch/status/1610483831769018368</ref> which includes all non-event raids, but may be different for 7★ raids, going as far as being greater than 1 (thus increasing damage) or being very small (×0.01 for instance). 4★ raids in Paldea and Kitakami use ×0.4 multipliers and ×0.8 multipliers for the respective Terastallized scenarios. 5★ raids in Kitakami use ×0.3, ×0.6, and ×0.9 multipliers, while 6★ raids use ×0.3, ×0.55, and ×0.85 multipliers. 4★ raids in Blueberry Academy use ×0.4, ×0.5, and ×0.9 multipliers, while 5★ raids use the same multipliers as Paldea, and 6★ raids use ×0.4, ×0.6, and ×0.8 multipliers.


If the raid boss has {{a|Imposter}}, it will transform into the host's Pokémon.
After the multiplier is applied, damage is rounded to the nearest whole number, with values of 0.5 and above rounding up.


After three offensive [[move]]s performed by the player's Pokémon, that player's [[Tera Orb]] will be charged and allow their Pokémon to Terastallize. Only direct-damaging moves targetting the raid boss will count towards the Tera Orb's charge; [[status move]]s and cheering do not count. If a damaging move is used while the boss's shield is up, but it deals so little damage that the shield reduction causes the damage to be less than ½, it will round down to 0 damage and that attack will not charge the Tera Orb either.
After the boss's shield is broken, the boss will not move during the next turn the player takes.


Unlike [[Max Raid Battle]]s, where only a single player can [[Dynamax]] their Pokémon and the option to do so rotates between players until it's used, all four participants in a Tera Raid Battle are permitted to Terastallize their Pokémon separately, and this choice can be made on any turn after the Tera Orb has been fully charged. However, each player may only Terastallize once. If a player's Pokémon faints while Terastallized, it may not Terastallize again for the duration of the battle.
=====Removal of negatives effects=====
The boss removes any non-volatile [[status condition]] it has and its negative [[stat modifier]]s. Its positive stat modifiers will remain as they are. All other effects such as {{m|Leech Seed}} or ability changes remain untouched.


In an offline raid, the host can choose to run away, ending the battle as a forfeit. If the raid has been opened to other players (even if no others joined), running is not possible, and will give the error message ''"It's no good! You can't find an opening to run away from such a strong opponent!"'' Additionally, a raid that's been opened to others also imposes an action time limit, similar to online battles: each time a player's menu comes up, that player must select an action within 60 seconds, or else the earliest selectable move in their moveset will automatically be used at that time.
=====Removal of positive effects=====
The boss removes the positive [[stat modifier]]s of its opponents, and only for the following turn, nullifies their [[Ability|Abilities]] as well. Negative stat modifiers will remain as they are. Pokémon that are knocked out during the removal are not affected by the Ability nullification.


A 3★ and above Tera Pokémon may use additional moves outside of their moveset and standard turn order, once their HP or the remaining time falls below certain predefined thresholds. They will not know these moves when caught. For moves that target a single Pokémon, a random target will be chosen, and all players will be able to see the move message and the attack animation aimed in the direction of the targeted Pokémon even when it isn't their own. If one of the scripted moves is a move that normally targets multiple Pokémon, it will do so, and this is the only way a move can ever hit multiple Pokémon during a Tera Raid Battle.
=====Tera Orb charge stealing=====
The boss removes one charge from each player's [[Tera Orb]]. Pokémon that have already Terastallized, that have not built up any charge, or that are knocked out are unaffected.


A 4★ and above Tera Pokémon may perform certain other actions in addition to moves, when its health or the remaining time falls below a certain threshold:
=====Double-action phase=====
* It can produce a shield (a maximum of once per battle) which severely reduces the damage of attacks from non-Terastallized Pokémon and blocks the effects of [[status move]]s.
After a predefined HP or time threshold, the boss has a set-percentage chance to use a randomly selected attack at the end of the turn, allowing it to use two moves in a single turn. The choice of the second attack seems to be fully random, so it can select attacks that the target is visibly immune to, unlike the typical AI.
** The shield reduces damage from incoming moves in the following ways by default<ref>https://twitter.com/Sibuna_Switch/status/1610483831769018368</ref>:
*** Non-Terastallized Pokémon have all moves reduced to 20% damage.
*** Terastallized Pokémon using moves that '''do not match''' the user's Tera Type are reduced to 35% damage.
*** Terastallized Pokémon using moves that '''do match''' the user's Tera Type are reduced to 75% damage.
*** Damage is rounded to the nearest whole number, with values of 0.5 and above rounding up.
* It can remove negative effects from itself, including a non-volatile [[status condition]] and negative [[stat modifier]]s. Positive stat modifiers will remain as they are.
* It can remove the positive [[stat modifier]]s of its opponents, as well as nullify their [[Ability|Abilities]] for the following turn. Negative stat modifiers will remain as they are.
* It can steal power from each player's Tera Orb, causing them to lose one charge. Pokémon that have already Terastallized, or that have not built up any charge, are unaffected.


7★ [[Poké Portal News]] events may have custom behaviors that do not align with the above<ref>https://twitter.com/Sibuna_Switch/status/1628992932039602177</ref>, as many parameters can be set to custom values for events. For instance, they may immediately raise their shield, use moves before the player's first turn, or have different damage modifiers for their shield.
====Additional commands====
The players cannot use items from their bags, but have additional commands exclusive to raids.


If the thresholds for two or more scripted actions are met during the same turn, the boss will perform all of them in sequence, and it will not be possible to access the menu again until each of them have finished their animations.
=====Running away=====
In a single-player raid, the host can choose to run away, ending the battle as a forfeit. If the raid has been opened to other players (even if no others joined), running is not possible, and will give the message ''"It's no good! You can't find an opening to run away from such a strong opponent!"''.


If a Pokémon faints, it will be revived after five seconds initially, plus an additional five-second wait for each time it has previously fainted in the battle. Additionally, this also reduces the timer by a number of seconds equal to the fainted Pokémon's level. Pokémon used by NPCs do not reduce the timer if they faint. When the timer reaches 45 seconds left, the message "''You can feel a tremendous energy gathering! There isn't much time left!''" will appear. If the timer expires before players defeat the Tera Pokémon, the energy burst will be unleashed, expelling all players from the raid.
=====Cheers=====
{{incomplete|section|needs=Mechanics behind Go all out! and Hang tough! cheers are still not entirely understood, see [https://twitter.com/Sibuna_Switch/status/1772885083696791811 this twitter thread] <br>Missing chart for different probabilities Heal up! to restore different amounts of HP, see [https://twitter.com/Sibuna_Switch/status/1770995804129366511 this twitter thread].}}
Players can opt to cheer instead of executing a move, up to three times per Tera Raid. Cheering has increased [[priority]] over moves. The three cheer options are:
* '''Go all out!''': multiplies the user's and their allies' Attack and Sp. Atk by ×1.5
* '''Hang tough!''': multiplies the user's and their allies' Defense and Sp. Def by ×1.5<ref>https://twitter.com/Sibuna_Switch/status/1772885083696791811</ref>
* '''Heal up!''': removes non-volatile [[status condition]]s and {{status|confusion}} from the user and their allies, and restores 20% to 100% of their total HP randomly<ref>https://twitter.com/Sibuna_Switch/status/1770995804129366511</ref>
** The amount of HP restored is the same for all participants affected by the same cheer, rather than differing amounts per participant.<ref>https://twitter.com/Sibuna_Switch/status/1771005827702296934</ref>


Pokémon found in Tera Raid Battles have a higher-than-usual chance of having a [[Hidden Ability]].
[[Stat]]-boosting effects from cheers are independent from other [[stat modifier]]s, which means that their effects stack multiplicatively. Stat-boosting cheers last for three turns for each Pokémon, even if the Tera Raid Pokémon nullifies stat changes. If an ally faints and returns to battle within those turns, [[List of glitches (Generation IX)#Permanent cheer preservation on fainting|the stat boost from the cheer will be made permanent for the rest of the battle]], and this permanent boost can stack with a regular cheer afterwards, which can also be made permanent and repeated if fainted again.<ref>[https://twitter.com/Sibuna_Switch/status/1607557138271936513 Anubis on Twitter: "The more I look into Tera Raid cheer mechanics, the more confused I am..."]</ref>


====Cheers====
If there is at least one NPC Trainer in a Tera Raid Battle, the first one (based on the display order in the top-left corner) will always cheer "Hang tough!" on the first turn. NPCs will not perform any other cheers during the raid.
{{incomplete|section|needs=Mechanics behind cheers are still not entirely clear.}}
Players can opt to cheer instead of executing a move, up to three times per Tera Raid. Cheering has increased [[priority]] over moves, and its effectiveness appears to be random. [[Stat]]-boosting effects are independent from other [[stat modifier]]s, which means that their effects can stack. The stat boosts from the same cheers do not stack with each other, but a repeated cheer may occasionally reroll a higher stat multiplier. Stat-boosting cheers last for three turns for each Pokémon, even if the Tera Raid Pokémon nullifies stat changes, or if an ally faints and returns to battle within those turns.<ref>[https://mobile.twitter.com/Sibuna_Switch/status/1607557138271936513 Anubis on Twitter: "The more I look into Tera Raid cheer mechanics, the more confused I am..."]</ref>


The three cheer options are:
=====Callouts=====
* '''Go all out!''' — Multiplies the user's and their allies' Attack and Sp. Atk by ×1.5 or ×2.
The player can press the Minus button to choose between four Callouts: "Help!", "Everyone, attack together!", "Thanks!", and "I've got this!". They have no practical effect outside of communicating with other players. The Callouts are displayed to other players in a bubble just like how the player's Pokémon moves are displayed to them.
* '''Hang tough!''' — Multiplies the user's and their allies' Defense and Sp. Def by ×1.5 or ×2.
* '''Heal up!''' — Removes non-volatile [[status condition]]s and {{status|confusion}} from the user and their allies, and restores 20% to 100% of their total HP.


If there is at least one NPC Trainer in a Tera Raid Battle, the first one (based on the display order in the top-left corner) will always cheer "Hang tough!" on the first turn. They will not perform any other cheers during the raid.
====Additional info====
* The raid boss has infinite [[PP]] on all of its moves.
* Pokémon found in 3★-or-above Tera Raid Battles may have their [[Hidden Ability]].
** {{p|Ditto}} Tera Raid Battles are an exception, and always have their Hidden Ability.


====Callouts====
====Special cases====
The player can press the Minus button to choose between four Callouts: "Help!", "Everyone, attack together!", "Thanks!", and "I've got this!" They have no practical effect. The Callouts are displayed to other players in a bubble just like how the player's Pokémon moves are displayed to them.
{{incomplete|section|needs=What are the effects of moves such as Destiny Bond, Endeavor, Pain Split, Eruption etc. when used in a Tera Raid Battle?}}
* If the raid boss attempts to use the move {{m|Self-Destruct}}, {{m|Explosion}}, {{m|Misty Explosion}}, or {{m|Final Gambit}}, the move will fail.
* {{m|Guard Split}}, {{m|Power Split}}, and {{m|Perish Song}} will fail if used in a Tera Raid Battle.
* If a [[one-hit knockout move]] lands, the raid boss will be unaffected.
* HP-halving moves such as {{m|Super Fang}} or {{m|Nature's Madness}} will not halve the raid boss's HP.
* If the raid boss has {{a|Imposter}}, it will transform into the host's Pokémon.


===Capture===
===Capture===
Line 93: Line 144:


===Difficulty===
===Difficulty===
Tera Raid Pokémon have their [[HP]] increased for the duration of the battle, as well as having one or more of their [[IV]]s guaranteed to be set to 31. Additionally, 6★ raid Pokémon are temporarily set to level 90 for the duration of the battle, but are reduced to level 75 when captured.
{{incomplete|section|needs=The list of events with a non-typical HP multiplier is incomplete.}}
{| class="roundy" style="margin:auto; text-align:center; background:#{{paldea color}}; border: 3px solid #{{paldea color light}}; caption-side:bottom;" cellpadding="3px"
Tera Raid Pokémon have their [[HP]] increased for the duration of the battle, as well as having one or more of their [[IV]]s guaranteed to be set to 31, except for 3★ Pachirisu, which is not set to have any guaranteed IVs. Additionally, 6★-raid Pokémon are temporarily set to level 90 for the duration of the battle, but are reduced to level 75 when captured.
|- style="color:#fff"
{| class="roundy" style="margin:auto; text-align:center; background:#{{paldea color}}; border: 3px solid #{{paldea color dark}}; caption-side:bottom;" cellpadding="3px"
|-  
! style="background-color:#{{paldea color light}}; {{roundytl|5px}}" | Star Rating
! style="background-color:#{{paldea color light}}" | [[HP]] Modifier
! style="background-color:#{{paldea color light}}" | [[Level]]<br>During battle
! style="background-color:#{{paldea color light}}" | [[Level]]<br>When {{pkmn2|caught}}
! style="background-color:#{{paldea color light}}" | Guaranteed<br> [[Stats judge|Best]] [[IV]]s
! style="background-color:#{{paldea color light}}; {{roundytr|5px}}" | Guaranteed<br> [[Stats judge|Best]] [[IV]]s
|- style="background:#fff"
|- style="background:#fff"
! style="background-color:#{{paldea color light}}; color:#fff" | ★
! style="background-color:#{{paldea color light}}" | ★
| 5x
|
| 12
| 12
| 12
| 12
| 1
| 1
|- style="background:#fff"
|- style="background:#fff"
! style="background-color:#{{paldea color light}}; color:#fff" | ★★
! style="background-color:#{{paldea color light}}" | ★★
| 5x
|
| 20
| 20
| 20
| 20
| 1
| 1
|- style="background:#fff"
|- style="background:#fff"
! style="background-color:#{{paldea color light}}; color:#fff" | ★★★
! style="background-color:#{{paldea color light}}" | ★★★
| 8x
|
| 35
| 35
| 35
| 35
| 2
| 2
|- style="background:#fff"
|- style="background:#fff"
! style="background-color:#{{paldea color light}}; color:#fff" | ★★★★
! style="background-color:#{{paldea color light}}" | ★★★★
| 12x
| 12×
| 45
| 45
| 45
| 45
| 3
| 3
|- style="background:#fff"
|- style="background:#fff"
! style="background-color:#{{paldea color light}}; color:#fff" | ★★★★★
! style="background-color:#{{paldea color light}};" | ★★★★★
| 20x
| 20×<sup>*</sup>
| 75
| 75
| 75
| 75
| 4
| 4
|- style="background:#fff"
|- style="background:#fff"
! style="background-color:#{{violet color light}}; color:#fff" | ★★★★★★
! style="background-color:#{{violet color light}}" | ★★★★★★
| 25x
| 25×
| 90
| 90
| 75
| 75
| 5
| 5
|- style="background:#fff"
|- style="background:#fff"
! style="background-color:#{{violet color light}}; color:#FFF" | ★★★★★★★
! style="background-color:#{{violet color light}}" | ★★★★★★★
| Varies<sup>*</sup>
| Varies<sup>**</sup>
| 100
| 100
| 100
| 100
| 6
| 6
|+ style="font-size:80%; text-align:left; " |  
|+ style="font-size:80%; text-align:left; " |  
: <sup><nowiki>*</nowiki></sup> While this modifier is typically 30x, several events have deviated from this:
: <sup><nowiki>*</nowiki></sup> Some event 5★ Raids have a different multiplier, such as the Dialga and Palkia event which had a 35× HP modifier.
:: The 7★ event Pikachu had a 50x modifier.
: <sup><nowiki>**</nowiki></sup> While this modifier is typically 30×, several events have deviated from this, for instance:
:: The first 7★ event Charizard erroneously had a modifier of only 25x.
:: The 7★ event Samurott, Chesnaught, Rillaboom, Hisuian Samurott, Empoleon, and Blastoise had a 35× modifier.
:: The 7★ event Pikachu, Eevee, and Mewtwo had a 50× modifier.
:: The first 7★ event Charizard had a modifier of only 25×.
|}
|}


===Encounters===
===Encounters===
The Pokémon available to fight in Tera Raid Battles changes with the value of the raid, as well as which version of the game the player is playing. The raid boss's Tera Type is chosen independently of the Pokémon itself, and has no influence over which Pokémon the raid boss will be.
The Pokémon available to fight in a Tera Raid Battle changes with the star value of the raid, as well as which version of the game the player is playing. The raid boss's Tera Type is chosen independently of the Pokémon itself, and has no influence over which Pokémon the raid boss will be.


{| class="roundy" style="margin:auto; text-align:center; background:#{{paldea color}}; border: 3px solid #{{paldea color light}}" cellpadding="3px"
{| class="roundy" style="margin:auto; text-align:center; background:#{{paldea color}}; border: 3px solid #{{paldea color dark}}" cellpadding="3px"
|- style="color:#fff"
|-  
! style="background-color:#{{paldea color light}}; {{roundytl|5px}}" | Star Rating
! style="background-color:#{{paldea color light}}" | From Beginning
! style="background-color:#{{paldea color light}}" | From<br>Beginning
! style="background-color:#{{paldea color light}}" | After Three [[Badge | Gym Badge]]s
! style="background-color:#{{paldea color light}}" | After Three<br>[[Badge|Gym Badge]]s
! style="background-color:#{{paldea color light}}" | After Six [[Badge | Gym Badge]]s
! style="background-color:#{{paldea color light}}" | After Six<br>[[Badge|Gym Badge]]s
! style="background-color:#{{paldea color light}}" | After ending [[credits]]
! style="background-color:#{{paldea color light}}" | After<br>ending [[credits]]
! style="background-color:#{{paldea color light}}" | Complete [[Academy Ace Tournament]]<br>& Complete 10 4★ or 5★ Raids
! style="background-color:#{{paldea color light}}; {{roundytr|5px}}" | Complete [[Academy Ace Tournament]]<br>and Complete 10 4★ or 5★ Raids
|- style="background:#fff"
|- style="background:#fff"
! style="background-color:#{{paldea color light}}; color:#fff" | ★
! style="background-color:#{{paldea color light}}" | ★
| 80%
| 80%
| 30%
| 20%
| 20%
| 0%
| 0%
| 0%
| 0%
| 0%
|- style="background:#fff"
|- style="background:#fff"
! style="background-color:#{{paldea color light}}; color:#fff" | ★★
! style="background-color:#{{paldea color light}}" | ★★
| 20%
| 20%
| 40%
| 40%
Line 175: Line 229:
| 0%
| 0%
|- style="background:#fff"
|- style="background:#fff"
! style="background-color:#{{paldea color light}}; color:#fff" | ★★★
! style="background-color:#{{paldea color light}}" | ★★★
| 0%
| 0%
| 30%
| 30%
Line 182: Line 236:
| 30%
| 30%
|- style="background:#fff"
|- style="background:#fff"
! style="background-color:#{{paldea color light}}; color:#fff" | ★★★★
! style="background-color:#{{paldea color light}}" | ★★★★
| 0%
| 0%
| 0%
| 0%
Line 189: Line 243:
| 40%
| 40%
|- style="background:#fff"
|- style="background:#fff"
! style="background-color:#{{paldea color light}}; color:#fff" | ★★★★★
! style="background-color:#{{paldea color light}}" | ★★★★★
| 0%
| 0%
| 0%
| 0%
Line 196: Line 250:
| 30%
| 30%
|- style="background:#fff"
|- style="background:#fff"
! style="background-color:#{{violet color light}}; color:#fff" | ★★★★★★
! style="background-color:#{{violet color light}}" | ★★★★★★
| 0%
| 0%
| 0%
| 0%
Line 203: Line 257:
| Only one per real-life day
| Only one per real-life day
|- style="background:#fff"
|- style="background:#fff"
! style="background-color:#{{violet color light}}; color:#FFF" | ★★★★★★★<br><small>'''([[Poké Portal News]] exclusive)'''</small>
! style="background-color:#{{violet color light}}" | ★★★★★★★<br><small>'''([[Poké Portal News]] exclusive)'''</small>
| 0%
| 0%
| 0%
| 0%
Line 214: Line 268:


=====1★ Raids=====
=====1★ Raids=====
{{Catch/header/teraraid}}
{{main|List of 1★ Tera Raid Battles (Paldea)}}
{{Catch/entry9/teraraid|0048|Venonat|yes|yes|12|no|1|type1=Bug|type2=Poison}}
{{Catch/entry9/teraraid|0090|Shellder|yes|yes|12|no|1|type1=Water}}
{{Catch/entry9/teraraid|0096|Drowzee|yes|yes|12|no|1|type1=Psychic}}
{{Catch/entry9/teraraid|0172|Pichu|yes|yes|12|no|1|type1=Electric}}
{{Catch/entry9/teraraid|0174|Igglybuff|yes|yes|12|no|1|type1=Normal|type2=Fairy}}
{{Catch/entry9/teraraid|0187|Hoppip|yes|yes|12|no|1|type1=Grass|type2=Flying}}
{{Catch/entry9/teraraid|0191|Sunkern|yes|yes|12|no|1|type1=Grass}}
{{Catch/entry9/teraraid|0194-Paldea|Wooper|form=Paldean Form|yes|yes|12|no|1|type1=Poison|type2=Ground}}
{{Catch/entry9/teraraid|0206|Dunsparce|yes|yes|12|no|1|type1=Normal}}
{{Catch/entry9/teraraid|0278|Wingull|yes|yes|12|no|1|type1=Water|type2=Flying}}
{{Catch/entry9/teraraid|0280|Ralts|yes|yes|12|no|1|type1=Psychic|type2=Fairy}}
{{Catch/entry9/teraraid|0283|Surskit|yes|yes|12|no|1|type1=Bug|type2=Water}}
{{Catch/entry9/teraraid|0285|Shroomish|yes|yes|12|no|1|type1=Grass}}
{{Catch/entry9/teraraid|0296|Makuhita|yes|yes|12|no|1|type1=Fighting}}
{{Catch/entry9/teraraid|0298|Azurill|yes|yes|12|no|1|type1=Normal|type2=Fairy}}
{{Catch/entry9/teraraid|0333|Swablu|yes|yes|12|no|1|type1=Normal|type2=Flying}}
{{Catch/entry9/teraraid|0339|Barboach|yes|yes|12|no|1|type1=Water|type2=Ground}}
{{Catch/entry9/teraraid|0396|Starly|yes|yes|12|no|1|type1=Normal|type2=Flying}}
{{Catch/entry9/teraraid|0401|Kricketot|yes|yes|12|no|1|type1=Bug}}
{{Catch/entry9/teraraid|0415|Combee|yes|yes|12|no|1|type1=Bug|type2=Flying}}
{{Catch/entry9/teraraid|0438|Bonsly|yes|yes|12|no|1|type1=Rock}}
{{Catch/entry9/teraraid|0456|Finneon|yes|yes|12|no|1|type1=Water}}
{{Catch/entry9/teraraid|0548|Petilil|yes|yes|12|no|1|type1=Grass}}
{{Catch/entry9/teraraid|0585|Deerling|form=Spring Form|yes|yes|12|no|1|type1=Normal|type2=Grass}}
{{Catch/entry9/teraraid|0602|Tynamo|yes|yes|12|no|1|type1=Electric}}
{{Catch/entry9/teraraid|0667|Litleo|yes|yes|12|no|1|type1=Fire|type2=Normal}}
{{Catch/entry9/teraraid|0669|Flabébé|form=Red Flower|yes|yes|12|no|1|type1=Fairy}}
{{Catch/entry9/teraraid|0672|Skiddo|yes|yes|12|no|1|type1=Grass}}
{{Catch/entry9/teraraid|0734|Yungoos|yes|yes|12|no|1|type1=Normal}}
{{Catch/entry9/teraraid|0739|Crabrawler|yes|yes|12|no|1|type1=Fighting}}
{{Catch/entry9/teraraid|0744|Rockruff|form=Standard|yes|yes|12|no|1|type1=Rock}}
{{Catch/entry9/teraraid|0753|Fomantis|yes|yes|12|no|1|type1=Grass}}
{{Catch/entry9/teraraid|0761|Bounsweet|yes|yes|12|no|1|type1=Grass}}
{{Catch/entry9/teraraid|0819|Skwovet|yes|yes|12|no|1|type1=Normal}}
{{Catch/entry9/teraraid|0821|Rookidee|yes|yes|12|no|1|type1=Flying}}
{{Catch/entry9/teraraid|0833|Chewtle|yes|yes|12|no|1|type1=Water}}
{{Catch/entry9/teraraid|0840|Applin|yes|yes|12|no|1|type1=Grass|type2=Dragon}}
{{Catch/entry9/teraraid|0843|Silicobra|yes|yes|12|no|1|type1=Ground}}
{{Catch/entry9/teraraid|0848|Toxel|yes|yes|12|no|1|type1=Electric|type2=Poison}}
{{Catch/entry9/teraraid|0856|Hatenna|yes|yes|12|no|1|type1=Psychic}}
{{Catch/entry9/teraraid|0872|Snom|yes|yes|12|no|1|type1=Ice|type2=Bug}}
{{Catch/entry9/teraraid|0915|Lechonk|yes|yes|12|no|1|type1=Normal}}
{{Catch/entry9/teraraid|0917|Tarountula|yes|yes|12|no|1|type1=Bug}}
{{Catch/entry9/teraraid|0919|Nymble|yes|yes|12|no|1|type1=Bug}}
{{Catch/entry9/teraraid|0921|Pawmi|yes|yes|12|no|1|type1=Electric}}
{{Catch/entry9/teraraid|0926|Fidough|yes|yes|12|no|1|type1=Fairy}}
{{Catch/entry9/teraraid|0928|Smoliv|yes|yes|12|no|1|type1=Grass|type2=Normal}}
{{Catch/entry9/teraraid|0932|Nacli|yes|yes|12|no|1|type1=Rock}}
{{Catch/entry9/teraraid|0935|Charcadet|yes|yes|12|no|1|type1=Fire}}
{{Catch/entry9/teraraid|0938|Tadbulb|yes|yes|12|no|1|type1=Electric}}
{{Catch/entry9/teraraid|0940|Wattrel|yes|yes|12|no|1|type1=Electric|type2=Flying}}
{{Catch/entry9/teraraid|0942|Maschiff|yes|yes|12|no|1|type1=Dark}}
{{Catch/entry9/teraraid|0944|Shroodle|yes|yes|12|no|1|type1=Poison|type=Normal}}
{{Catch/entry9/teraraid|0948|Toedscool|yes|yes|12|no|1|type1=Ground|type=Grass}}
{{Catch/entry9/teraraid|0953|Rellor|yes|yes|12|no|1|type1=Bug}}
{{Catch/entry9/teraraid|0955|Flittle|yes|yes|12|no|1|type1=Psychic}}
{{Catch/entry9/teraraid|0960|Wiglett|yes|yes|12|no|1|type1=Water}}
{{Catch/entry9/teraraid|0971|Greavard|yes|yes|12|no|1|type1=Ghost}}
{{Catch/footer/teraraid}}


=====2★ Raids=====
=====2★ Raids=====
{{Catch/header/teraraid}}
{{main|List of 2★ Tera Raid Battles (Paldea)}}
{{Catch/entry9/teraraid|0025|Pikachu|yes|yes|20|no|1|type1=Electric}}
{{Catch/entry9/teraraid|0039|Jigglypuff|yes|yes|20|no|1|type1=Normal|type2=Fairy}}
{{Catch/entry9/teraraid|0050|Diglett|yes|yes|20|no|1|type1=Ground}}
{{Catch/entry9/teraraid|0052|Meowth|yes|yes|20|no|1|type1=Normal}}
{{Catch/entry9/teraraid|0054|Psyduck|yes|yes|20|no|1|type1=Water}}
{{Catch/entry9/teraraid|0056|Mankey|yes|yes|20|no|1|type1=Fighting}}
{{Catch/entry9/teraraid|0058|Growlithe|yes|yes|20|no|1|type1=Fire}}
{{Catch/entry9/teraraid|0079|Slowpoke|yes|yes|20|no|1|type1=Water|type2=Psychic}}
{{Catch/entry9/teraraid|0081|Magnemite|yes|yes|20|no|1|type1=Electric|type2=Steel}}
{{Catch/entry9/teraraid|0088|Grimer|yes|yes|20|no|1|type1=Poison}}
{{Catch/entry9/teraraid|0090|Shellder|yes|yes|20|no|1|type1=Water}}
{{Catch/entry9/teraraid|0092|Gastly|yes|yes|20|no|1|type1=Ghost|type2=Poison}}
{{Catch/entry9/teraraid|0100|Voltorb|yes|yes|20|no|1|type1=Electric}}
{{Catch/entry9/teraraid|0129|Magikarp|yes|yes|20|no|1|type1=Water}}
{{Catch/entry9/teraraid|0179|Mareep|yes|yes|20|no|1|type1=Electric}}
{{Catch/entry9/teraraid|0198|Murkrow|yes|yes|20|no|1|type1=Dark|type2=Flying}}
{{Catch/entry9/teraraid|0200|Misdreavus|no|yes|20|no|1|type1=Ghost}}
{{Catch/entry9/teraraid|0204|Pineco|yes|yes|20|no|1|type1=Bug}}
{{Catch/entry9/teraraid|0216|Teddiursa|yes|yes|20|no|1|type1=Normal}}
{{Catch/entry9/teraraid|0228|Houndour|yes|yes|20|no|1|type1=Dark|type2=Fire}}
{{Catch/entry9/teraraid|0231|Phanpy|yes|yes|20|no|1|type1=Ground}}
{{Catch/entry9/teraraid|0287|Slakoth|yes|yes|20|no|1|type1=Normal}}
{{Catch/entry9/teraraid|0307|Meditite|yes|yes|20|no|1|type1=Fighting|type2=Psychic}}
{{Catch/entry9/teraraid|0316|Gulpin|no|yes|20|no|1|type1=Poison}}
{{Catch/entry9/teraraid|0325|Spoink|yes|yes|20|no|1|type1=Psychic}}
{{Catch/entry9/teraraid|0331|Cacnea|yes|yes|20|no|1|type1=Grass}}
{{Catch/entry9/teraraid|0353|Shuppet|yes|yes|20|no|1|type1=Ghost}}
{{Catch/entry9/teraraid|0361|Snorunt|yes|yes|20|no|1|type1=Ice}}
{{Catch/entry9/teraraid|0370|Luvdisc|yes|yes|20|no|1|type1=Water}}
{{Catch/entry9/teraraid|0403|Shinx|yes|yes|20|no|1|type1=Electric}}
{{Catch/entry9/teraraid|0418|Buizel|yes|yes|20|no|1|type1=Water}}
{{Catch/entry9/teraraid|0422|Shellos|form=West Sea|yes|no|20|no|1|type1=Water}}
{{Catch/entry9/teraraid|0422-East|Shellos|form=East Sea|no|yes|20|no|1|type1=Water}}
{{Catch/entry9/teraraid|0425|Drifloon|yes|no|20|no|1|type1=Ghost|type2=Flying}}
{{Catch/entry9/teraraid|0434|Stunky|yes|no|20|no|1|type1=Poison|type2=Dark}}
{{Catch/entry9/teraraid|0453|Croagunk|yes|yes|20|no|1|type1=Poison|type2=Fighting}}
{{Catch/entry9/teraraid|0456|Finneon|yes|yes|20|no|1|type1=Water}}
{{Catch/entry9/teraraid|0551|Sandile|yes|yes|20|no|1|type1=Ground|type2=Dark}}
{{Catch/entry9/teraraid|0574|Gothita|yes|yes|20|no|1|type1=Psychic}}
{{Catch/entry9/teraraid|0590|Foongus|yes|yes|20|no|1|type1=Grass|type2=Poison}}
{{Catch/entry9/teraraid|0624|Pawniard|yes|yes|20|no|1|type1=Dark|type2=Steel}}
{{Catch/entry9/teraraid|0661|Fletchling|yes|yes|20|no|1|type1=Normal|type2=Flying}}
{{Catch/entry9/teraraid|0690|Skrelp|yes|no|20|no|1|type1=Poison|type2=Water}}
{{Catch/entry9/teraraid|0692|Clauncher|no|yes|20|no|1|type1=Water}}
{{Catch/entry9/teraraid|0749|Mudbray|yes|yes|20|no|1|type1=Ground}}
{{Catch/entry9/teraraid|0757|Salandit|yes|yes|20|no|1|type1=Poison|type2=Fire}}
{{Catch/entry9/teraraid|0769|Sandygast|yes|yes|20|no|1|type1=Ghost|type2=Ground}}
{{Catch/entry9/teraraid|0837|Rolycoly|yes|yes|20|no|1|type1=Rock}}
{{Catch/entry9/teraraid|0846|Arrokuda|yes|yes|20|no|1|type1=Water}}
{{Catch/entry9/teraraid|0854|Sinistea|form=Phony Form|yes|yes|20|no|1|type1=Ghost}}
{{Catch/entry9/teraraid|0859|Impidimp|yes|yes|20|no|1|type1=Dark|type2=Fairy}}
{{Catch/entry9/teraraid|0878|Cufant|yes|yes|20|no|1|type1=Steel}}
{{Catch/entry9/teraraid|0924|Tandemaus|yes|yes|20|no|1|type1=Normal}}
{{Catch/entry9/teraraid|0946|Bramblin|yes|yes|20|no|1|type1=Grass|type2=Ghost}}
{{Catch/entry9/teraraid|0951|Capsakid|yes|yes|20|no|1|type1=Grass}}
{{Catch/entry9/teraraid|0957|Tinkatink|yes|yes|20|no|1|type1=Fairy|type2=Steel}}
{{Catch/entry9/teraraid|0965|Varoom|yes|yes|20|no|1|type1=Steel|type2=Poison}}
{{Catch/footer/teraraid}}


=====3★ Raids=====
=====3★ Raids=====
{{Catch/header/teraraid}}
{{main|List of 3★ Tera Raid Battles (Paldea)}}
{{Catch/entry9/teraraid|0025|Pikachu|yes|yes|35|no|2|type1=Electric}}
{{Catch/entry9/teraraid|0049|Venomoth|yes|yes|35|no|2|type1=Bug|type2=Poison}}
{{Catch/entry9/teraraid|0093|Haunter|yes|yes|35|no|2|type1=Ghost|type2=Poison}}
{{Catch/entry9/teraraid|0113|Chansey|yes|yes|35|no|2|type1=Normal}}
{{Catch/entry9/teraraid|0129|Magikarp|yes|yes|35|no|2|type1=Water}}
{{Catch/entry9/teraraid|0132|Ditto|yes|yes|35|random|2|type1=Normal}}
{{Catch/entry9/teraraid|0133|Eevee|yes|yes|35|no|2|type1=Normal}}
{{Catch/entry9/teraraid|0147|Dratini|yes|yes|35|no|2|type1=Dragon}}
{{Catch/entry9/teraraid|0180|Flaaffy|yes|yes|35|no|2|type1=Electric}}
{{Catch/entry9/teraraid|0183|Marill|yes|yes|35|no|2|type1=Water|type2=Fairy}}
{{Catch/entry9/teraraid|0185|Sudowoodo|yes|yes|35|no|2|type1=Rock}}
{{Catch/entry9/teraraid|0188|Skiploom|yes|yes|35|no|2|type1=Grass|type2=Flying}}
{{Catch/entry9/teraraid|0192|Sunflora|yes|yes|35|no|2|type1=Grass}}
{{Catch/entry9/teraraid|0203|Girafarig|yes|yes|35|no|2|type1=Normal|type2=Psychic}}
{{Catch/entry9/teraraid|0206|Dunsparce|yes|yes|35|no|2|type1=Normal}}
{{Catch/entry9/teraraid|0211|Qwilfish|yes|yes|35|no|2|type1=Water|type2=Poison}}
{{Catch/entry9/teraraid|0215|Sneasel|yes|yes|35|no|2|type1=Dark|type2=Ice}}
{{Catch/entry9/teraraid|0234|Stantler|yes|yes|35|no|2|type1=Normal}}
{{Catch/entry9/teraraid|0246|Larvitar|yes|no|35|no|2|type1=Rock|type2=Ground}}
{{Catch/entry9/teraraid|0279|Pelipper|yes|yes|35|no|2|type1=Water|type2=Flying}}
{{Catch/entry9/teraraid|0281|Kirlia|yes|yes|35|no|2|type1=Psychic|type2=Fairy}}
{{Catch/entry9/teraraid|0296|Makuhita|yes|yes|35|no|2|type1=Fighting}}
{{Catch/entry9/teraraid|0302|Sableye|yes|yes|35|no|2|type1=Dark|type2=Ghost}}
{{Catch/entry9/teraraid|0322|Numel|yes|yes|35|no|2|type1=Fire|type2=Ground}}
{{Catch/entry9/teraraid|0335|Zangoose|yes|yes|35|no|2|type1=Normal}}
{{Catch/entry9/teraraid|0336|Seviper|yes|yes|35|no|2|type1=Poison}}
{{Catch/entry9/teraraid|0371|Bagon|no|yes|35|no|2|type1=Dragon}}
{{Catch/entry9/teraraid|0397|Staravia|yes|yes|35|no|2|type1=Normal|type2=Flying}}
{{Catch/entry9/teraraid|0402|Kricketune|yes|yes|35|no|2|type1=Bug}}
{{Catch/entry9/teraraid|0404|Luxio|yes|yes|35|no|2|type1=Electric}}
{{Catch/entry9/teraraid|0417|Pachirisu|yes|yes|35|no|2|type1=Electric}}
{{Catch/entry9/teraraid|0436|Bronzor|yes|yes|35|no|2|type1=Steel|type2=Psychic}}
{{Catch/entry9/teraraid|0443|Gible|yes|yes|35|no|2|type1=Dragon|type2=Ground}}
{{Catch/entry9/teraraid|0447|Riolu|yes|yes|35|no|2|type1=Fighting}}
{{Catch/entry9/teraraid|0449|Hippopotas|yes|yes|35|no|2|type1=Ground}}
{{Catch/entry9/teraraid|0459|Snover|yes|yes|35|no|2|type1=Ice}}
{{Catch/entry9/teraraid|0550|Basculin|form=Red-Striped Form|yes|yes|35|no|2|type1=Water}}
{{Catch/entry9/teraraid|0570|Zorua|yes|yes|35|no|2|type1=Dark}}
{{Catch/entry9/teraraid|0575|Gothorita|yes|yes|35|no|2|type1=Psychic}}
{{Catch/entry9/teraraid|0610|Axew|yes|yes|35|no|2|type1=Dragon}}
{{Catch/entry9/teraraid|0613|Cubchoo|yes|yes|35|no|2|type1=Ice}}
{{Catch/entry9/teraraid|0627|Rufflet|yes|yes|35|no|2|type1=Normal|type2=Flying}}
{{Catch/entry9/teraraid|0633|Deino|yes|no|35|no|2|type1=Dark|type2=Dragon}}
{{Catch/entry9/teraraid|0636|Larvesta|yes|yes|35|no|2|type1=Bug|type2=Fire}}
{{Catch/entry9/teraraid|0662|Fletchinder|yes|yes|35|no|2|type1=Fire|type2=Flying}}
{{Catch/entry9/teraraid|0702|Dedenne|yes|yes|35|no|2|type1=Electric|type2=Fairy}}
{{Catch/entry9/teraraid|0704|Goomy|yes|yes|35|no|2|type1=Dragon}}
{{Catch/entry9/teraraid|0712|Bergmite|yes|yes|35|no|2|type1=Ice}}
{{Catch/entry9/teraraid|0714|Noibat|yes|yes|35|no|2|type1=Flying|type2=Dragon}}
{{Catch/entry9/teraraid|0735|Gumshoos|yes|yes|35|no|2|type1=Normal}}
{{Catch/entry9/teraraid|0747|Mareanie|yes|yes|35|no|2|type1=Poison|type2=Water}}
{{Catch/entry9/teraraid|0762|Steenee|yes|yes|35|no|2|type1=Grass}}
{{Catch/entry9/teraraid|0765|Oranguru|yes|no|35|no|2|type1=Normal|type2=Psychic}}
{{Catch/entry9/teraraid|0766|Passimian|no|yes|35|no|2|type1=Fighting}}
{{Catch/entry9/teraraid|0779|Bruxish|yes|yes|35|no|2|type1=Water|type2=Psychic}}
{{Catch/entry9/teraraid|0820|Greedent|yes|yes|35|no|2|type1=Normal}}
{{Catch/entry9/teraraid|0822|Corvisquire|yes|yes|35|no|2|type1=Flying}}
{{Catch/entry9/teraraid|0838|Carkol|yes|yes|35|no|2|type1=Rock|type2=Fire}}
{{Catch/entry9/teraraid|0857|Hattrem|yes|yes|35|no|2|type1=Psychic}}
{{Catch/entry9/teraraid|0860|Morgrem|yes|yes|35|no|2|type1=Dark|type2=Fairy}}
{{Catch/entry9/teraraid|0871|Pincurchin|yes|yes|35|no|2|type1=Electric}}
{{Catch/entry9/teraraid|0876|Indeedee|form=Male|yes|yes|35|no|2|type1=Psychic|type2=Normal}}
{{Catch/entry9/teraraid|0876-Female|Indeedee|form=Female|yes|yes|35|no|2|type1=Psychic|type2=Normal}}
{{Catch/entry9/teraraid|0885|Dreepy|no|yes|35|no|2|type1=Dragon|type2=Ghost}}
{{Catch/entry9/teraraid|0916|Oinkologne|form=Male|yes|yes|35|no|2|type1=Normal}}
{{Catch/entry9/teraraid|0916-Female|Oinkologne|form=Female|yes|yes|35|no|2|type1=Normal}}
{{Catch/entry9/teraraid|0918|Spidops|yes|yes|35|no|2|type1=Bug}}
{{Catch/entry9/teraraid|0920|Lokix|yes|yes|35|no|2|type1=Bug|type2=Dark}}
{{Catch/entry9/teraraid|0922|Pawmo|yes|yes|35|no|2|type1=Electric|type2=Fighting}}
{{Catch/entry9/teraraid|0929|Dolliv|yes|yes|35|no|2|type1=Grass|type2=Normal}}
{{Catch/entry9/teraraid|0933|Naclstack|yes|yes|35|no|2|type1=Rock}}
{{Catch/entry9/teraraid|0935|Charcadet|yes|yes|35|no|2|type1=Fire}}
{{Catch/entry9/teraraid|0958|Tinkatuff|yes|yes|35|no|2|type1=Fairy|type2=Steel}}
{{Catch/entry9/teraraid|0963|Finizen|yes|yes|35|no|2|type1=Water}}
{{Catch/entry9/teraraid|0969|Glimmet|yes|yes|35|no|2|type1=Rock|type2=Poison}}
{{Catch/entry9/teraraid|0974|Cetoddle|yes|yes|35|no|2|type1=Ice}}
{{Catch/entry9/teraraid|0996|Frigibax|yes|yes|35|no|2|type1=Dragon|type2=Ice}}
{{Catch/footer/teraraid}}


=====4★ Raids=====
=====4★ Raids=====
{{Catch/header/teraraid}}
{{main|List of 4★ Tera Raid Battles (Paldea)}}
{{Catch/entry9/teraraid|0026|Raichu|yes|yes|45|no|3|type1=Electric}}
{{Catch/entry9/teraraid|0040|Wigglytuff|yes|yes|45|no|3|type1=Normal|type2=Fairy}}
{{Catch/entry9/teraraid|0051|Dugtrio|yes|yes|45|no|3|type1=Ground}}
{{Catch/entry9/teraraid|0053|Persian|yes|yes|45|no|3|type1=Normal}}
{{Catch/entry9/teraraid|0055|Golduck|yes|yes|45|no|3|type1=Water}}
{{Catch/entry9/teraraid|0057|Primeape|yes|yes|45|no|3|type1=Fighting}}
{{Catch/entry9/teraraid|0082|Magneton|yes|yes|45|no|3|type1=Electric|type2=Steel}}
{{Catch/entry9/teraraid|0089|Muk|yes|yes|45|no|3|type1=Poison}}
{{Catch/entry9/teraraid|0091|Cloyster|yes|yes|45|no|3|type1=Water|type2=Ice}}
{{Catch/entry9/teraraid|0097|Hypno|yes|yes|45|no|3|type1=Psychic}}
{{Catch/entry9/teraraid|0101|Electrode|yes|yes|45|no|3|type1=Electric}}
{{Catch/entry9/teraraid|0123|Scyther|yes|yes|45|no|3|type1=Bug|type=Flying}}
{{Catch/entry9/teraraid|0128-Paldea Combat|Tauros|form=Paldean Form (Combat Breed)|formlink=Regional form|yes|yes|45|no|3|type1=Fighting}}
{{Catch/entry9/teraraid|0132|Ditto|yes|yes|45|random|3|type1=Normal}}
{{Catch/entry9/teraraid|0148|Dragonair|yes|yes|45|no|3|type1=Dragon}}
{{Catch/entry9/teraraid|0181|Ampharos|yes|yes|45|no|3|type1=Electric}}
{{Catch/entry9/teraraid|0184|Azumarill|yes|yes|45|no|3|type1=Water|type2=Fairy}}
{{Catch/entry9/teraraid|0205|Forretress|yes|yes|45|no|3|type1=Bug|type2=Steel}}
{{Catch/entry9/teraraid|0214|Heracross|yes|yes|45|no|3|type1=Bug|type2=Fighting}}
{{Catch/entry9/teraraid|0217|Ursaring|yes|yes|45|no|3|type1=Normal}}
{{Catch/entry9/teraraid|0232|Donphan|yes|yes|45|no|3|type1=Ground}}
{{Catch/entry9/teraraid|0247|Pupitar|yes|no|45|no|3|type1=Rock|type2=Ground}}
{{Catch/entry9/teraraid|0284|Masquerain|yes|yes|45|no|3|type1=Bug|type2=Flying}}
{{Catch/entry9/teraraid|0288|Vigoroth|yes|yes|45|no|3|type1=Normal}}
{{Catch/entry9/teraraid|0308|Medicham|yes|yes|45|no|3|type1=Fighting|type2=Psychic}}
{{Catch/entry9/teraraid|0317|Swalot|no|yes|45|no|3|type1=Poison}}
{{Catch/entry9/teraraid|0324|Torkoal|yes|yes|45|no|3|type1=Fire}}
{{Catch/entry9/teraraid|0326|Grumpig|yes|yes|45|no|3|type1=Psychic}}
{{Catch/entry9/teraraid|0332|Cacturne|yes|yes|45|no|3|type1=Grass|type2=Dark}}
{{Catch/entry9/teraraid|0335|Zangoose|yes|yes|45|no|3|type1=Normal}}
{{Catch/entry9/teraraid|0336|Seviper|yes|yes|45|no|3|type1=Poison}}
{{Catch/entry9/teraraid|0340|Whiscash|yes|yes|45|no|3|type1=Water|type2=Ground}}
{{Catch/entry9/teraraid|0354|Banette|yes|yes|45|no|3|type1=Ghost}}
{{Catch/entry9/teraraid|0357|Tropius|yes|yes|45|no|3|type1=Grass|type2=Flying}}
{{Catch/entry9/teraraid|0372|Shelgon|no|yes|45|no|3|type1=Dragon}}
{{Catch/entry9/teraraid|0416|Vespiquen|yes|yes|45|no|3|type1=Bug|type2=Flying}}
{{Catch/entry9/teraraid|0419|Floatzel|yes|yes|45|no|3|type1=Water}}
{{Catch/entry9/teraraid|0423|Gastrodon|form=West Sea|no|yes|45|no|3|type1=Water|type2=Ground}}
{{Catch/entry9/teraraid|0423-East|Gastrodon|form=East Sea|yes|no|45|no|3|type1=Water|type2=Ground}}
{{Catch/entry9/teraraid|0426|Drifblim|yes|no|45|no|3|type1=Ghost|type2=Flying}}
{{Catch/entry9/teraraid|0435|Skuntank|yes|no|45|no|3|type1=Poison|type2=Dark}}
{{Catch/entry9/teraraid|0444|Gabite|yes|yes|45|no|3|type1=Dragon|type2=Ground}}
{{Catch/entry9/teraraid|0454|Toxicroak|yes|yes|45|no|3|type1=Poison|type2=Fighting}}
{{Catch/entry9/teraraid|0457|Lumineon|yes|yes|45|no|3|type1=Water}}
{{Catch/entry9/teraraid|0479|Rotom|yes|yes|45|no|3|type1=Electric|type2=Ghost}}
{{Catch/entry9/teraraid|0549|Lilligant|yes|yes|45|no|3|type1=Grass}}
{{Catch/entry9/teraraid|0552|Krokorok|yes|yes|45|no|3|type1=Ground|type2=Dark}}
{{Catch/entry9/teraraid|0586|Sawsbuck|form=Spring Form|yes|yes|45|no|3|type1=Normal|type2=Grass}}
{{Catch/entry9/teraraid|0594|Alomomola|yes|yes|45|no|3|type1=Water}}
{{Catch/entry9/teraraid|0603|Eelektrik|yes|yes|45|no|3|type1=Electric}}
{{Catch/entry9/teraraid|0611|Fraxure|yes|yes|45|no|3|type1=Dragon}}
{{Catch/entry9/teraraid|0614|Beartic|yes|yes|45|no|3|type1=Ice}}
{{Catch/entry9/teraraid|0615|Cryogonal|yes|yes|45|no|3|type1=Ice}}
{{Catch/entry9/teraraid|0625|Bisharp|yes|yes|45|no|3|type1=Dark|type2=Steel}}
{{Catch/entry9/teraraid|0634|Zweilous|yes|no|45|no|3|type1=Dark|type2=Dragon}}
{{Catch/entry9/teraraid|0668|Pyroar|form=Male|yes|yes|45|no|3|type1=Normal|type2=Fire}}
{{Catch/entry9/teraraid|0668-Female|Pyroar|form=Female|yes|yes|45|no|3|type1=Normal|type2=Fire}}
{{Catch/entry9/teraraid|0673|Gogoat|yes|yes|45|no|3|type1=Grass}}
{{Catch/entry9/teraraid|0701|Hawlucha|yes|yes|45|no|3|type1=Fighting|type2=Flying}}
{{Catch/entry9/teraraid|0702|Dedenne|yes|yes|45|no|3|type1=Electric|type2=Fairy}}
{{Catch/entry9/teraraid|0705|Sliggoo|yes|yes|45|no|3|type1=Dragon}}
{{Catch/entry9/teraraid|0740|Crabominable|yes|yes|45|no|3|type1=Fighting|type2=Ice}}
{{Catch/entry9/teraraid|0741|Oricorio|form=Balie Style|yes|yes|45|no|3|type1=Fire|type2=Flying}}
{{Catch/entry9/teraraid|0745|Lycanroc|form=Midday Form|yes|yes|45|no|3|type1=Rock}}
{{Catch/entry9/teraraid|0745-Midnight|Lycanroc|form=Midnight Form|yes|yes|45|no|3|type1=Rock}}
{{Catch/entry9/teraraid|0754|Lurantis|yes|yes|45|no|3|type1=Grass}}
{{Catch/entry9/teraraid|0775|Komala|yes|yes|45|no|3|type1=Normal}}
{{Catch/entry9/teraraid|0834|Drednaw|yes|yes|45|no|3|type1=Water|type2=Rock}}
{{Catch/entry9/teraraid|0844|Sandaconda|yes|yes|45|no|3|type1=Ground}}
{{Catch/entry9/teraraid|0847|Barraskewda|yes|yes|45|no|3|type1=Water}}
{{Catch/entry9/teraraid|0855|Polteageist|form=Phony Form|yes|yes|45|no|3|type1=Ghost}}
{{Catch/entry9/teraraid|0870|Falinks|yes|yes|45|no|3|type1=Fighting}}
{{Catch/entry9/teraraid|0873|Frosmoth|yes|yes|45|no|3|type1=Ice|type2=Bug}}
{{Catch/entry9/teraraid|0874|Stonjourner|yes|no|45|no|3|type1=Rock}}
{{Catch/entry9/teraraid|0875|Eiscue|no|yes|45|no|3|type1=Ice}}
{{Catch/entry9/teraraid|0886|Drakloak|no|yes|45|no|3|type1=Dragon|type2=Ghost}}
{{Catch/entry9/teraraid|0925-Three|Maushold|form=Family of Three|yes|yes|45|no|3|type1=Normal}}
{{Catch/entry9/teraraid|0927|Dachsbun|yes|yes|45|no|3|type1=Fairy}}
{{Catch/entry9/teraraid|0931|Squawkabilly|form=Green Plumage|yes|yes|45|no|3|type1=Normal|type2=Flying}}
{{Catch/entry9/teraraid|0939|Bellibolt|yes|yes|45|no|3|type1=Electric}}
{{Catch/entry9/teraraid|0941|Kilowattrel|yes|yes|45|no|3|type1=Electric|type2=Flying}}
{{Catch/entry9/teraraid|0945|Grafaiai|yes|yes|45|no|3|type1=Poison|type2=Normal}}
{{Catch/entry9/teraraid|0949|Toedscruel|yes|yes|45|no|3|type1=Ground|type2=Grass}}
{{Catch/entry9/teraraid|0952|Scovillain|yes|yes|45|no|3|type1=Grass|type2=Fire}}
{{Catch/entry9/teraraid|0954|Rabsca|yes|yes|45|no|3|type1=Bug|type2=Psychic}}
{{Catch/entry9/teraraid|0956|Espathra|yes|yes|45|no|3|type1=Psychic}}
{{Catch/entry9/teraraid|0961|Wugtrio|yes|yes|45|no|3|type1=Water}}
{{Catch/entry9/teraraid|0967|Cyclizar|yes|yes|45|no|3|type1=Dragon|type2=Normal}}
{{Catch/entry9/teraraid|0972|Houndstone|yes|yes|45|no|3|type1=Ghost}}
{{Catch/entry9/teraraid|0973|Flamigo|yes|yes|45|no|3|type1=Flying|type2=Fighting}}
{{Catch/entry9/teraraid|0976|Veluza|yes|yes|45|no|3|type1=Water|type2=Psychic}}
{{Catch/entry9/teraraid|0980|Clodsire|yes|yes|45|no|3|type1=Poison|type2=Ground}}
{{Catch/entry9/teraraid|0981|Farigiraf|yes|yes|45|no|3|type1=Normal|type2=Psychic}}
{{Catch/entry9/teraraid|0982|Dudunsparce|form=Two-Segment Form|yes|yes|45|no|3|type1=Normal}}
{{Catch/footer/teraraid}}


=====5★ Raids=====
=====5★ Raids=====
{{Catch/header/teraraid}}
{{main|List of 5★ Tera Raid Battles (Paldea)}}
{{Catch/entry9/teraraid|0026|Raichu|yes|yes|75|no|4|type1=Electric}}
{{Catch/entry9/teraraid|0059|Arcanine|yes|yes|75|no|4|type1=Fire}}
{{Catch/entry9/teraraid|0080|Slowbro|yes|yes|75|no|4|type1=Water|type2=Psychic}}
{{Catch/entry9/teraraid|0091|Cloyster|yes|yes|75|no|4|type1=Water|type2=Ice}}
{{Catch/entry9/teraraid|0094|Gengar|yes|yes|75|no|4|type1=Ghost|type2=Poison}}
{{Catch/entry9/teraraid|0123|Scyther|yes|yes|75|no|4|type1=Bug|type2=Flying}}
{{Catch/entry9/teraraid|0128-Paldea Blaze|Tauros|form=Paldean Form (Blaze Breed)|formlink=Regional form|yes|no|75|no|4|type1=Fighting|type2=Fire}}
{{Catch/entry9/teraraid|0128-Paldea Aqua|Tauros|form=Paldean Form (Aqua Breed)|formlink=Regional form|no|yes|75|no|4|type1=Fighting|type2=Water}}
{{Catch/entry9/teraraid|0130|Gyarados|yes|yes|75|no|4|type1=Water|type2=Flying}}
{{Catch/entry9/teraraid|0132|Ditto|yes|yes|75|random|4|type1=Normal}}
{{Catch/entry9/teraraid|0133|Eevee|yes|yes|75|no|4|type1=Normal}}
{{Catch/entry9/teraraid|0149|Dragonite|yes|yes|75|no|4|type1=Dragon}}
{{Catch/entry9/teraraid|0199|Slowking|yes|yes|75|no|4|type1=Water|type2=Psychic}}
{{Catch/entry9/teraraid|0212|Scizor|yes|yes|75|no|4|type1=Bug|type2=Steel}}
{{Catch/entry9/teraraid|0225|Delibird|yes|yes|75|no|4|type1=Ice|type2=Flying}}
{{Catch/entry9/teraraid|0229|Houndoom|yes|yes|75|no|4|type1=Dark|type2=Fire}}
{{Catch/entry9/teraraid|0242|Blissey|yes|yes|75|no|4|type1=Normal}}
{{Catch/entry9/teraraid|0248|Tyranitar|yes|no|75|no|4|type1=Rock|type2=Dark}}
{{Catch/entry9/teraraid|0282|Gardevoir|yes|yes|75|no|4|type1=Psychic|type2=Fairy}}
{{Catch/entry9/teraraid|0286|Breloom|yes|yes|75|no|4|type1=Grass|type2=Fighting}}
{{Catch/entry9/teraraid|0289|Slaking|yes|yes|75|no|4|type1=Normal}}
{{Catch/entry9/teraraid|0297|Hariyama|yes|yes|75|no|4|type1=Fighting}}
{{Catch/entry9/teraraid|0302|Sableye|yes|yes|75|no|4|type1=Dark|type2=Ghost}}
{{Catch/entry9/teraraid|0323|Camerupt|yes|yes|75|no|4|type1=Fire|type2=Ground}}
{{Catch/entry9/teraraid|0334|Altaria|yes|yes|75|no|4|type1=Dragon|type2=Flying}}
{{Catch/entry9/teraraid|0362|Glalie|yes|yes|75|no|4|type1=Ice}}
{{Catch/entry9/teraraid|0373|Salamence|no|yes|75|no|4|type1=Dragon|type2=Flying}}
{{Catch/entry9/teraraid|0398|Staraptor|yes|yes|75|no|4|type1=Normal|type2=Flying}}
{{Catch/entry9/teraraid|0405|Luxray|yes|yes|75|no|4|type1=Electric}}
{{Catch/entry9/teraraid|0426|Drifblim|yes|no|75|no|4|type1=Ghost|type2=Flying}}
{{Catch/entry9/teraraid|0429|Mismagius|no|yes|75|no|4|type1=Ghost}}
{{Catch/entry9/teraraid|0430|Honchkrow|yes|yes|75|no|4|type1=Dark|type2=Flying}}
{{Catch/entry9/teraraid|0437|Bronzong|yes|yes|75|no|4|type1=Steel|type2=Psychic}}
{{Catch/entry9/teraraid|0445|Garchomp|yes|yes|75|no|4|type1=Dragon|type2=Ground}}
{{Catch/entry9/teraraid|0450|Hippowdon|yes|yes|75|no|4|type1=Ground}}
{{Catch/entry9/teraraid|0460|Abomasnow|yes|yes|75|no|4|type1=Grass|type2=Ice}}
{{Catch/entry9/teraraid|0461|Weavile|yes|yes|75|no|4|type1=Dark|type2=Ice}}
{{Catch/entry9/teraraid|0462|Magnezone|yes|yes|75|no|4|type1=Electric|type2=Steel}}
{{Catch/entry9/teraraid|0475|Gallade|yes|yes|75|no|4|type1=Psychic|type2=Fighting}}
{{Catch/entry9/teraraid|0478|Froslass|yes|yes|75|no|4|type1=Ice|type2=Ghost}}
{{Catch/entry9/teraraid|0479|Rotom|yes|yes|75|no|4|type1=Electric|type2=Ghost}}
{{Catch/entry9/teraraid|0553|Krookodile|yes|yes|75|no|4|type1=Ground|type2=Dark}}
{{Catch/entry9/teraraid|0571|Zoroark|yes|yes|75|no|4|type1=Dark}}
{{Catch/entry9/teraraid|0576|Gothitelle|yes|yes|75|no|4|type1=Psychic}}
{{Catch/entry9/teraraid|0591|Amoonguss|yes|yes|75|no|4|type1=Grass|type2=Poison}}
{{Catch/entry9/teraraid|0604|Eelektross|yes|yes|75|no|4|type1=Electric}}
{{Catch/entry9/teraraid|0612|Haxorus|yes|yes|75|no|4|type1=Dragon}}
{{Catch/entry9/teraraid|0628|Braviary|yes|yes|75|no|4|type1=Normal|type2=Flying}}
{{Catch/entry9/teraraid|0635|Hydreigon|yes|no|75|no|4|type1=Dark|type2=Dragon}}
{{Catch/entry9/teraraid|0637|Volcarona|yes|yes|75|no|4|type1=Bug|type2=Fire}}
{{Catch/entry9/teraraid|0663|Talonflame|yes|yes|75|no|4|type1=Fire|type2=Flying}}
{{Catch/entry9/teraraid|0671|Florges|form=Red Flower|yes|yes|75|no|4|type1=Fairy}}
{{Catch/entry9/teraraid|0691|Dragalge|yes|no|75|no|4|type1=Poison|type2=Dragon}}
{{Catch/entry9/teraraid|0693|Clawitzer|no|yes|75|no|4|type1=Water}}
{{Catch/entry9/teraraid|0706|Goodra|yes|yes|75|no|4|type1=Dragon}}
{{Catch/entry9/teraraid|0713|Avalugg|yes|yes|75|no|4|type1=Ice}}
{{Catch/entry9/teraraid|0715|Noivern|yes|yes|75|no|4|type1=Flying|type2=Dragon}}
{{Catch/entry9/teraraid|0750|Mudsdale|yes|yes|75|no|4|type1=Ground}}
{{Catch/entry9/teraraid|0763|Tsareena|yes|yes|75|no|4|type1=Grass}}
{{Catch/entry9/teraraid|0765|Oranguru|yes|no|75|no|4|type1=Normal|type2=Psychic}}
{{Catch/entry9/teraraid|0766|Passimian|no|yes|75|no|4|type1=Fighting}}
{{Catch/entry9/teraraid|0778|Mimikyu|yes|yes|75|no|4|type1=Ghost|type2=Fairy}}
{{Catch/entry9/teraraid|0820|Greedent|yes|yes|75|no|4|type1=Normal}}
{{Catch/entry9/teraraid|0823|Corviknight|yes|yes|75|no|4|type1=Flying|type2=Steel}}
{{Catch/entry9/teraraid|0839|Coalossal|yes|yes|75|no|4|type1=Rock|type2=Fire}}
{{Catch/entry9/teraraid|0841|Flapple|yes|yes|75|no|4|type1=Grass|type2=Dragon}}
{{Catch/entry9/teraraid|0842|Appletun|yes|yes|75|no|4|type1=Grass|type2=Dragon}}
{{Catch/entry9/teraraid|0849|Toxtricity|form=Amped Form|yes|no|75|no|4|type1=Electric|type2=Poison}}
{{Catch/entry9/teraraid|0849-Low Key|Toxtricity|form=Low Key Form|no|yes|75|no|4|type1=Electric|type2=Poison}}
{{Catch/entry9/teraraid|0855|Polteageist|form=Phony Form|yes|yes|75|no|4|type1=Ghost}}
{{Catch/entry9/teraraid|0858|Hatterene|yes|yes|75|no|4|type1=Psychic|type2=Fairy}}
{{Catch/entry9/teraraid|0861|Grimmsnarl|yes|yes|75|no|4|type1=Dark|type2=Fairy}}
{{Catch/entry9/teraraid|0870|Falinks|yes|yes|75|no|4|type1=Fighting}}
{{Catch/entry9/teraraid|0871|Pincurchin|yes|yes|75|no|4|type1=Electric}}
{{Catch/entry9/teraraid|0876|Indeedee|form=Male|yes|yes|75|no|4|type1=Normal|type2=Psychic}}
{{Catch/entry9/teraraid|0876-Female|Indeedee|form=Female|yes|yes|75|no|4|type1=Normal|type2=Psychic}}
{{Catch/entry9/teraraid|0879|Copperajah|yes|yes|75|no|4|type1=Steel}}
{{Catch/entry9/teraraid|0887|Dragapult|no|yes|75|no|4|type1=Dragon|type2=Ghost}}
{{Catch/entry9/teraraid|0923|Pawmot|yes|yes|75|no|4|type1=Electric|type2=Fighting}}
{{Catch/entry9/teraraid|0930|Arboliva|yes|yes|75|no|4|type1=Grass|type2=Normal}}
{{Catch/entry9/teraraid|0934|Garganacl|yes|yes|75|no|4|type1=Rock}}
{{Catch/entry9/teraraid|0936|Armarouge|yes|no|75|no|4|type1=Fire|type2=Psychic}}
{{Catch/entry9/teraraid|0937|Ceruledge|no|yes|75|no|4|type1=Fire|type2=Ghost}}
{{Catch/entry9/teraraid|0943|Mabosstiff|yes|yes|75|no|4|type1=Dark}}
{{Catch/entry9/teraraid|0947|Brambleghast|yes|yes|75|no|4|type1=Grass|type2=Ghost}}
{{Catch/entry9/teraraid|0959|Tinkaton|yes|yes|75|no|4|type1=Fairy|type2=Steel}}
{{Catch/entry9/teraraid|0962|Bombirdier|yes|yes|75|no|4|type1=Flying|type2=Dark}}
{{Catch/entry9/teraraid|0964|Palafin|yes|yes|75|no|4|type1=Water}}
{{Catch/entry9/teraraid|0966|Revavroom|yes|yes|75|no|4|type1=Steel|type2=Poison}}
{{Catch/entry9/teraraid|0968|Orthworm|yes|yes|75|no|4|type1=Steel}}
{{Catch/entry9/teraraid|0970|Glimmora|yes|yes|75|no|4|type1=Rock|type2=Poison}}
{{Catch/entry9/teraraid|0975|Cetitan|yes|yes|75|no|4|type1=Ice}}
{{Catch/entry9/teraraid|0977|Dondozo|yes|yes|75|no|4|type1=Water}}
{{Catch/entry9/teraraid|0978|Tatsugiri|form=Curly Form|yes|yes|75|no|4|type1=Water|type2=Dragon}}
{{Catch/entry9/teraraid|0978-Droopy|Tatsugiri|form=Droopy Form|yes|yes|75|no|4|type1=Water|type2=Dragon}}
{{Catch/entry9/teraraid|0978-Stretchy|Tatsugiri|form=Stretchy Form|yes|yes|75|no|4|type1=Water|type2=Dragon}}
{{Catch/entry9/teraraid|0979|Annihilape|yes|yes|75|no|4|type1=Fighting|type2=Ghost}}
{{Catch/entry9/teraraid|0983|Kingambit|yes|yes|75|no|4|type1=Dark|type2=Steel}}
{{Catch/entry9/teraraid|0998|Baxcalibur|yes|yes|75|no|4|type1=Dragon|type2=Ice}}
{{Catch/footer/teraraid}}


=====6★ Raids=====
=====6★ Raids=====
{{Catch/header/teraraid}}
{{main|List of 6★ Tera Raid Battles (Paldea)}}
{{Catch/entry9/teraraid|0094|Gengar|yes|yes|75|no|5|type1=Ghost|type2=Poison}}
{{Catch/entry9/teraraid|0128-Paldea Combat|Tauros|form=Paldean Form (Combat Breed)|yes|yes|75|random|5|type1=Fighting}}
{{Catch/entry9/teraraid|0128-Paldea Blaze|Tauros|form=Paldean Form (Blaze Breed)|yes|no|75|random|5|type1=Fighting|type2=Fire}}
{{Catch/entry9/teraraid|0128-Paldea Aqua|Tauros|form=Paldean Form (Aqua Breed)|no|yes|75|random|5|type1=Fighting|type2=Water}}
{{Catch/entry9/teraraid|0130|Gyarados|yes|yes|75|random|5|type1=Water|type2=Flying}}
{{Catch/entry9/teraraid|0132|Ditto|yes|yes|75|random|5|type1=Normal}}
{{Catch/entry9/teraraid|0134|Vaporeon|yes|yes|75|random|5|type1=Water}}
{{Catch/entry9/teraraid|0135|Jolteon|yes|yes|75|random|5|type1=Electric}}
{{Catch/entry9/teraraid|0136|Flareon|yes|yes|75|random|5|type1=Fire}}
{{Catch/entry9/teraraid|0149|Dragonite|yes|yes|75|random|5|type1=Dragon|type2=Flying}}
{{Catch/entry9/teraraid|0196|Espeon|yes|yes|75|random|5|type1=Psychic}}
{{Catch/entry9/teraraid|0197|Umbreon|yes|yes|75|random|5|type1=Dark}}
{{Catch/entry9/teraraid|0199|Slowking|yes|yes|75|random|5|type1=Water|type2=Psychic}}
{{Catch/entry9/teraraid|0212|Scizor|yes|yes|75|random|5|type1=Bug|type2=Steel}}
{{Catch/entry9/teraraid|0214|Heracross|yes|yes|75|random|5|type1=Bug|type2=Fighting}}
{{Catch/entry9/teraraid|0242|Blissey|yes|yes|75|random|5|type1=Normal}}
{{Catch/entry9/teraraid|0248|Tyranitar|yes|no|75|random|5|type1=Rock|type2=Dark}}
{{Catch/entry9/teraraid|0279|Pelipper|yes|yes|75|yes|5|type1=Water|type2=Flying}}
{{Catch/entry9/teraraid|0282|Gardevoir|yes|yes|75|no|5|type1=Psychic|type2=Fairy}}
{{Catch/entry9/teraraid|0286|Breloom|yes|yes|75|random|5|type1=Grass|type2=Poison}}
{{Catch/entry9/teraraid|0324|Torkoal|yes|yes|75|yes|5|type1=Fire}}
{{Catch/entry9/teraraid|0373|Salamence|no|yes|75|random|5|type1=Dragon|type2=Flying}}
{{Catch/entry9/teraraid|0398|Staraptor|yes|yes|75|random|5|type1=Normal|type2=Flying}}
{{Catch/entry9/teraraid|0445|Garchomp|yes|yes|75|random|5|type1=Dragon|type2=Ground}}
{{Catch/entry9/teraraid|0450|Hippowdon|yes|yes|75|random|5|type1=Ground}}
{{Catch/entry9/teraraid|0462|Magnezone|yes|yes|75|random|5|type1=Electric|type2=Steel}}
{{Catch/entry9/teraraid|0470|Leafeon|yes|yes|75|random|5|type1=Grass}}
{{Catch/entry9/teraraid|0471|Glaceon|yes|yes|75|random|5|type1=Ice}}
{{Catch/entry9/teraraid|0475|Gallade|yes|yes|75|no|5|type1=Psychic|type2=Fighting}}
{{Catch/entry9/teraraid|0591|Amoonguss|yes|yes|75|random|5|type1=Grass|type2=Poison}}
{{Catch/entry9/teraraid|0612|Haxorus|yes|yes|75|random|5|type1=Grass|type2=Poison}}
{{Catch/entry9/teraraid|0635|Hydreigon|yes|no|75|random|5|type1=Dark|type2=Dragon}}
{{Catch/entry9/teraraid|0637|Volcarona|yes|yes|75|random|5|type1=Bug|type2=Fire}}
{{Catch/entry9/teraraid|0663|Talonflame|yes|yes|75|random|5|type1=Fire|type2=Flying}}
{{Catch/entry9/teraraid|0691|Dragalge|yes|no|75|random|5|type1=Poison|type2=Dragon}}
{{Catch/entry9/teraraid|0693|Clawitzer|no|yes|75|no|5|type1=Water}}
{{Catch/entry9/teraraid|0700|Sylveon|yes|yes|75|random|5|type1=Fairy}}
{{Catch/entry9/teraraid|0706|Goodra|yes|yes|75|random|5|type1=Dragon}}
{{Catch/entry9/teraraid|0713|Avalugg|yes|yes|75|random|5|type1=Ice}}
{{Catch/entry9/teraraid|0745-Dusk|Lycanroc|form=Dusk Form|yes|yes|75|no|5|type1=Rock}}
{{Catch/entry9/teraraid|0748|Toxapex|yes|yes|75|random|5|type1=Poison|type2=Water}}
{{Catch/entry9/teraraid|0778|Mimikyu|yes|yes|75|no|5|type1=Ghost|type2=Fairy}}
{{Catch/entry9/teraraid|0823|Corviknight|yes|yes|75|random|5|type1=Flying|type2=Steel}}
{{Catch/entry9/teraraid|0871|Pincurchin|yes|yes|75|random|5|type1=Electric}}
{{Catch/entry9/teraraid|0873|Frosmoth|yes|yes|75|random|5|type1=Ice|type2=Bug}}
{{Catch/entry9/teraraid|0887|Dragapult|no|yes|75|random|5|type1=Dragon|type2=Ghost}}
{{Catch/entry9/teraraid|0923|Pawmot|yes|yes|75|random|5|type1=Electric|type2=Fighting}}
{{Catch/entry9/teraraid|0925|Maushold|form=Family of Four|yes|yes|75|random|5|type1=Normal}}
{{Catch/entry9/teraraid|0927|Dachsbun|yes|yes|75|no|5|type1=Fairy}}
{{Catch/entry9/teraraid|0934|Garganacl|yes|yes|75|no|5|type1=Rock}}
{{Catch/entry9/teraraid|0936|Armarouge|yes|no|75|random|5|type1=Fire|type2=Psychic}}
{{Catch/entry9/teraraid|0937|Ceruledge|no|yes|75|random|5|type1=Fire|type2=Ghost}}
{{Catch/entry9/teraraid|0941|Kilowattrel|yes|yes|75|random|5|type1=Electric|type2=Flying}}
{{Catch/entry9/teraraid|0943|Mabosstiff|yes|yes|75|random|5|type1=Dark}}
{{Catch/entry9/teraraid|0945|Grafaiai|yes|yes|75|random|5|type1=Poison|type2=Normal}}
{{Catch/entry9/teraraid|0949|Toedscruel|yes|yes|75|no|5|type1=Ground|type2=Grass}}
{{Catch/entry9/teraraid|0950|Klawf|yes|yes|75|random|5|type1=Rock}}
{{Catch/entry9/teraraid|0959|Tinkaton|yes|yes|75|random|5|type1=Fairy|type2=Steel}}
{{Catch/entry9/teraraid|0962|Bombirdier|yes|yes|75|random|5|type1=Flying|type2=Dark}}
{{Catch/entry9/teraraid|0966|Revavroom|yes|yes|75|random|5|type1=Steel|type2=Poison}}
{{Catch/entry9/teraraid|0967|Cyclizar|yes|yes|75|random|5|type1=Dragon|type2=Normal}}
{{Catch/entry9/teraraid|0968|Orthworm|yes|yes|75|random|5|type1=Steel}}
{{Catch/entry9/teraraid|0977|Dondozo|yes|yes|75|random|5|type1=Water}}
{{Catch/entry9/teraraid|0979|Annihilape|yes|yes|75|random|5|type1=Fighting|type2=Ghost}}
{{Catch/entry9/teraraid|0980|Clodsire|yes|yes|75|no|5|type1=Poison|type2=Ground}}
{{Catch/entry9/teraraid|0981|Farigiraf|yes|yes|75|random|5|type1=Normal|type2=Psychic}}
{{Catch/entry9/teraraid|0983|Kingambit|yes|yes|75|random|5|type1=Dark|type2=Steel}}
{{Catch/entry9/teraraid|0998|Baxcalibur|yes|yes|75|no|5|type1=Dragon|type2=Ice}}
{{Catch/footer/teraraid|6star=yes}}


====Kitakami====
====Kitakami====
=====1★ Raids=====
=====1★ Raids=====
{{Catch/header/teraraid|Kitakami}}
{{main|List of 1★ Tera Raid Battles (Kitakami)}}
{{Catch/entry9/teraraid|0023|Ekans|yes|yes|12|no|1|type1=Poison}}
{{Catch/entry9/teraraid|0027|Sandshrew|yes|yes|12|no|1|type1=Ground}}
{{Catch/entry9/teraraid|0060|Poliwag|yes|yes|12|no|1|type1=Water}}
{{Catch/entry9/teraraid|0074|Geodude|yes|yes|12|no|1|type1=Rock|type2=Ground}}
{{Catch/entry9/teraraid|0161|Sentret|yes|yes|12|no|1|type1=Normal}}
{{Catch/entry9/teraraid|0163|Hoothoot|yes|yes|12|no|1|type1=Normal|type2=Flying}}
{{Catch/entry9/teraraid|0167|Spinarak|yes|yes|12|no|1|type1=Bug|type2=Poison}}
{{Catch/entry9/teraraid|0173|Cleffa|yes|yes|12|no|1|type1=Fairy}}
{{Catch/entry9/teraraid|0194|Wooper|yes|yes|12|no|1|type1=Water|type2=Ground}}
{{Catch/entry9/teraraid|0261|Poochyena|yes|yes|12|no|1|type1=Dark}}
{{Catch/entry9/teraraid|0433|Chingling|yes|yes|12|no|1|type1=Psychic}}
{{Catch/entry9/teraraid|0540|Sewaddle|yes|yes|12|no|1|type1=Bug|type2=Grass}}
{{Catch/entry9/teraraid|0580|Ducklett|yes|yes|12|no|1|type1=Water|type2=Flying}}
{{Catch/entry9/teraraid|0736|Grubbin|yes|yes|12|no|1|type1=Bug}}
{{Catch/entry9/teraraid|0742|Cutiefly|yes|yes|12|no|1|type1=Bug|type2=Fairy}}
{{Catch/footer/teraraid|Kitakami}}


=====2★ Raids=====
=====2★ Raids=====
{{Catch/header/teraraid|Kitakami}}
{{main|List of 2★ Tera Raid Battles (Kitakami)}}
{{Catch/entry9/teraraid|0037|Vulpix|yes|yes|20|no|1|type1=Fire}}
{{Catch/entry9/teraraid|0069|Bellsprout|yes|yes|20|no|1|type1=Grass|type2=Poison}}
{{Catch/entry9/teraraid|0193|Yanma|yes|yes|20|no|1|type1=Bug|type2=Flying}}
{{Catch/entry9/teraraid|0218|Slugma|yes|yes|20|no|1|type1=Fire}}
{{Catch/entry9/teraraid|0220|Swinub|yes|yes|20|no|1|type1=Ice|type2=Ground}}
{{Catch/entry9/teraraid|0270|Lotad|yes|yes|20|no|1|type1=Water|type2=Grass}}
{{Catch/entry9/teraraid|0273|Seedot|yes|yes|20|no|1|type1=Grass}}
{{Catch/entry9/teraraid|0313|Volbeat|yes|no|20|no|1|type1=Bug}}
{{Catch/entry9/teraraid|0314|Illumise|no|yes|20|no|1|type1=Bug}}
{{Catch/entry9/teraraid|0341|Corphish|yes|yes|20|no|1|type1=Water}}
{{Catch/entry9/teraraid|0349|Feebas|yes|yes|20|no|1|type1=Water}}
{{Catch/entry9/teraraid|0355|Duskull|yes|yes|20|no|1|type1=Ghost}}
{{Catch/entry9/teraraid|0446|Munchlax|yes|yes|20|no|1|type1=Normal}}
{{Catch/entry9/teraraid|0532|Timburr|yes|yes|20|no|1|type1=Fighting}}
{{Catch/entry9/teraraid|0607|Litwick|yes|yes|20|no|1|type1=Ghost|type2=Fire}}
{{Catch/entry9/teraraid|0840|Applin|yes|yes|20|no|1|type1=Grass|type2=Dragon}}
{{Catch/footer/teraraid|Kitakami}}


=====3★ Raids=====
=====3★ Raids=====
{{Catch/header/teraraid|Kitakami}}
{{main|List of 3★ Tera Raid Battles (Kitakami)}}
{{Catch/entry9/teraraid|0023|Ekans|yes|yes|35|no|2|type1=Poison}}
{{Catch/entry9/teraraid|0027|Sandshrew|yes|yes|35|no|2|type1=Ground}}
{{Catch/entry9/teraraid|0035|Clefairy|yes|yes|35|no|2|type1=Fairy}}
{{Catch/entry9/teraraid|0061|Poliwhirl|yes|yes|35|no|2|type1=Water}}
{{Catch/entry9/teraraid|0070|Weepinbell|yes|yes|35|no|2|type1=Grass|type2=Poison}}
{{Catch/entry9/teraraid|0162|Furret|yes|yes|35|no|2|type1=Normal}}
{{Catch/entry9/teraraid|0164|Noctowl|yes|yes|35|no|2|type1=Normal|type2=Flying}}
{{Catch/entry9/teraraid|0168|Ariados|yes|yes|35|no|2|type1=Bug|type2=Poison}}
{{Catch/entry9/teraraid|0190|Aipom|no|yes|35|no|2|type1=Normal}}
{{Catch/entry9/teraraid|0207|Gligar|yes|no|35|no|2|type1=Ground|type2=Flying}}
{{Catch/entry9/teraraid|0271|Lombre|yes|yes|35|no|2|type1=Water|type2=Grass}}
{{Catch/entry9/teraraid|0274|Nuzleaf|yes|yes|35|no|2|type1=Grass|type2=Dark}}
{{Catch/entry9/teraraid|0299|Nosepass|yes|yes|35|no|2|type1=Rock}}
{{Catch/entry9/teraraid|0349|Feebas|yes|yes|35|no|2|type1=Water}}
{{Catch/entry9/teraraid|0433|Chingling|yes|yes|35|no|2|type1=Psychic}}
{{Catch/entry9/teraraid|0446|Munchlax|yes|yes|35|no|2|type1=Normal}}
{{Catch/entry9/teraraid|0533|Gurdurr|yes|yes|35|no|2|type1=Fighting}}
{{Catch/entry9/teraraid|0541|Swadloon|yes|yes|35|no|2|type1=Bug|type2=Grass}}
{{Catch/entry9/teraraid|0550-White|Basculin|form=White-Striped Form|yes|yes|35|no|2|type1=Water}}
{{Catch/entry9/teraraid|0619|Mienfoo|yes|yes|35|no|2|type1=Fighting}}
{{Catch/entry9/teraraid|0629|Vullaby|yes|yes|35|no|2|type1=Dark|type2=Flying}}
{{Catch/entry9/teraraid|0708|Phantump|yes|yes|35|no|2|type1=Ghost|type2=Grass}}
{{Catch/entry9/teraraid|0737|Charjabug|yes|yes|35|no|2|type1=Bug|type2=Electric}}
{{Catch/entry9/teraraid|0782|Jangmo-o|yes|yes|35|no|2|type1=Dragon}}
{{Catch/entry9/teraraid|0840|Applin|yes|yes|35|no|2|type1=Grass|type2=Dragon}}
{{Catch/entry9/teraraid|1012|Poltchageist|form=Counterfeit Form|yes|yes|35|no|2|type1=Grass|type2=Ghost}}
{{Catch/footer/teraraid|Kitakami}}


=====4★ Raids=====
=====4★ Raids=====
{{Catch/header/teraraid|Kitakami}}
{{main|List of 4★ Tera Raid Battles (Kitakami)}}
{{Catch/entry9/teraraid|0036|Clefable|yes|yes|45|no|3|type1=Fairy}}
{{Catch/entry9/teraraid|0075|Graveler|yes|yes|45|no|3|type1=Rock|type2=Ground}}
{{Catch/entry9/teraraid|0162|Furret|yes|yes|45|no|3|type1=Normal}}
{{Catch/entry9/teraraid|0164|Noctowl|yes|yes|45|no|3|type1=Normal|type2=Flying}}
{{Catch/entry9/teraraid|0168|Ariados|yes|yes|45|no|3|type1=Bug|type2=Poison}}
{{Catch/entry9/teraraid|0195|Quagsire|yes|yes|45|no|3|type1=Water|type2=Ground}}
{{Catch/entry9/teraraid|0219|Magcargo|yes|yes|45|no|3|type1=Fire|type2=Rock}}
{{Catch/entry9/teraraid|0221|Piloswine|yes|yes|45|no|3|type1=Ice|type2=Ground}}
{{Catch/entry9/teraraid|0262|Mightyena|yes|yes|45|no|3|type1=Dark}}
{{Catch/entry9/teraraid|0313|Volbeat|yes|no|45|no|3|type1=Bug}}
{{Catch/entry9/teraraid|0314|Illumise|no|yes|45|no|3|type1=Bug}}
{{Catch/entry9/teraraid|0342|Crawdaunt|yes|yes|45|no|3|type1=Water|type=Dark}}
{{Catch/entry9/teraraid|0356|Dusclops|yes|yes|45|no|3|type1=Ghost}}
{{Catch/entry9/teraraid|0358|Chimecho|yes|yes|45|no|3|type1=Psychic}}
{{Catch/entry9/teraraid|0542|Leavanny|yes|yes|45|no|3|type1=Bug|type2=Grass}}
{{Catch/entry9/teraraid|0581|Swanna|yes|yes|45|no|3|type1=Water|type2=Flying}}
{{Catch/entry9/teraraid|0608|Lampent|yes|yes|45|no|3|type1=Ghost|type2=Fire}}
{{Catch/entry9/teraraid|0703|Carbink|yes|yes|45|no|3|type1=Rock|type2=Fairy}}
{{Catch/entry9/teraraid|0743|Ribombee|yes|yes|45|no|3|type1=Bug|type2=Fairy}}
{{Catch/entry9/teraraid|0783|Hakamo-o|yes|yes|45|no|3|type1=Dragon|type2=Fighting}}
{{Catch/entry9/teraraid|0845|Cramorant|yes|no|45|no|3|type1=Flying|type2=Water}}
{{Catch/entry9/teraraid|0877|Morpeko|no|yes|45|no|3|type1=Electric|type2=Dark}}
{{Catch/entry9/teraraid|1011|Dipplin|yes|yes|45|no|3|type1=Grass|type2=Dragon}}
{{Catch/footer/teraraid|Kitakami}}


=====5★ Raids=====
=====5★ Raids=====
{{Catch/header/teraraid|Kitakami}}
{{main|List of 5★ Tera Raid Battles (Kitakami)}}
{{Catch/footer/teraraid|Kitakami}}


=====6★ Raids=====
=====6★ Raids=====
{{Catch/header/teraraid|Kitakami}}
{{main|List of 6★ Tera Raid Battles (Kitakami)}}
{{Catch/footer/teraraid|6star=yes|Kitakami}}
 
====Blueberry Academy====
 
=====1★ Raids=====
{{main|List of 1★ Tera Raid Battles (Blueberry Academy)}}
 
=====2★ Raids=====
{{main|List of 2★ Tera Raid Battles (Blueberry Academy)}}
 
=====3★ Raids=====
{{main|List of 3★ Tera Raid Battles (Blueberry Academy)}}
 
=====4★ Raids=====
{{main|List of 4★ Tera Raid Battles (Blueberry Academy)}}
 
=====5★ Raids=====
{{main|List of 5★ Tera Raid Battles (Blueberry Academy)}}
 
=====6★ Raids=====
{{main|List of 6★ Tera Raid Battles (Blueberry Academy)}}


===NPC Trainers===
===NPC Trainers===
Line 1,431: Line 960:
|move3= Toxic|move3type=Poison|move3cat=Status}}
|move3= Toxic|move3type=Poison|move3cat=Status}}
|}
|}
===Penalty===
If the player drops out of three Online Tera Raid Battles (by closing the game), they will be unable to access the game's online service for 30 minutes.


==Trivia==
==Trivia==
* All NPC Trainers' [[gender]]ed Pokémon are male, except Austin's {{p|Growlithe}} and {{p|Arcanine}}.
* Each one of the 18 NPC Trainers is associated with one of the 18 [[type]]s.


* All NPC Trainers' [[Gender|gendered]] Pokémon are male, except Austin's {{p|Growlithe}} and {{p|Arcanine}}.
==In other languages==
* Each one of the 18 NPC Trainers is associated with one of the 18 [[type]]s.
{{incomplete|section|needs=Romanization of Chinese names for Cantonese}}
''Tera Raid Battle''
{{langtable|color={{scarlet color}}|bordercolor={{violet color dark}}
|ja=テラレイドバトル ''Tera Raid Battle''
|de=Tera-Raid
|es=Teraincursión
|fr=Raid Téracristal
|it=Raid Teracristal
|ko=테라 레이드배틀 ''Tera Raid Battle''
|zh_yue=太晶團體戰
|zh_cmn=太晶团体战 ''{{tt|Tàijīng|Tera}} Tuántǐ Zhàn''
}}
<div>
<div style="display: inline-block">
''Austin''
{{langtable|color={{fire color}}|bordercolor={{fire color dark}}
|ja=トモヒデ ''Tomohide''
|en=Austin
|de=Jakob
|es=Zacariás
|fr=Patrice
|it=Annibale
|ko=우영 ''Uyeong''
|zh_cmn=智英 ''Zhìyīng''
}}
</div>
<div style="display: inline-block">
''Ava''
{{langtable|color={{water color}}|bordercolor={{water color dark}}
|ja=ユウミ ''Yuumi''
|en=Ava
|de=Martina
|es=Maialen
|fr=Noëlle
|it=Mila
|ko=도미 ''Domi''
|zh_cmn=佑美 ''Yòuměi''
}}
</div>
<div style="display: inline-block">
''Logan''
{{langtable|color={{grass color}}|bordercolor={{grass color dark}}
|ja=ケンイチ ''Ken'ichi''
|en=Logan
|de=Antonio
|es=Virgilio
|fr=Ahmed
|it=David
|ko=헌일 ''Heonil''
|zh_cmn=健一 ''Jiànyī''
}}
</div>
<div style="display: inline-block">
''Hailey''
{{langtable|color={{electric color}}|bordercolor={{electric color dark}}
|ja=アイカ ''Aika''
|en=Hailey
|de=Emma
|es=Mai
|fr=Pascaline
|it=Moira
|ko=에이카 ''Eicha''
|zh_cmn=艾佳 ''Àijiā''
}}
</div>
<div style="display: inline-block">
''Evan''
{{langtable|color={{normal color}}|bordercolor={{normal color dark}}
|ja=シンペイ ''Shinpei''
|en=Evan
|de=Frank
|es=Jesús
|fr=Roger
|it=Matteo
|ko=신평 ''Sinpyeong''
|zh_cmn=申平 ''Shēnpíng''
}}
</div>
<div style="display: inline-block">
''Charlotte''
{{langtable|color={{flying color}}|bordercolor={{flying color dark}}
|ja=エリナ ''Elena''
|en=Charlotte
|de=Daria
|es=Leire
|fr=Valéria
|it=Maya
|ko=엘리나 ''Elena''
|zh_cmn=惠奈 ''Huìnài''
}}
</div>
<div style="display: inline-block">
''Kylie''
{{langtable|color={{fighting color}}|bordercolor={{fighting color dark}}
|ja=カヤ ''Kaya''
|en=Kylie
|de=Clarissa
|es=Celia
|fr=Soumaya
|it=Loretta
|ko=카야 ''Kaya''
|zh_cmn=歌雅 ''Gēyǎ''
}}
</div>
<div style="display: inline-block">
''Hunter''
{{langtable|color={{ghost color}}|bordercolor={{ghost color dark}}
|ja=アキラ ''Akira''
|en=Hunter
|de=Tom
|es=Zigor
|fr=Tony
|it=Valentino
|ko=강철 ''Gangcheol''
|zh_yue=齊樂 ''Qílè''
|zh_cmn=齐乐 ''Qílè''
}}
</div>
<div style="display: inline-block">
''Gianna''
{{langtable|color={{dark color}}|bordercolor={{dark color dark}}
|ja=チカ ''Chika''
|en=Gianna
|de=Josepha
|es=Linda
|fr=Célestine
|it=Simona
|ko=지혜 ''Jihye''
|zh_cmn=琦娜 ''Zīnuò''
}}
</div>
<div style="display: inline-block">
''Eli''
{{langtable|color={{psychic color}}|bordercolor={{psychic color dark}}
|ja=マサアキ ''Masaaki''
|en=Eli
|de=Peter
|es=Josué
|fr=Hilaire
|it=Gianfranco
|ko=정명 ''Jeongmyeong''
|zh_yue=勝昭 ''Shèngzhāo''
|zh_cmn=胜昭 ''Shèngzhāo''
}}
</div>
<div style="display: inline-block">
''Henry''
{{langtable|color={{steel color}}|bordercolor={{steel color dark}}
|ja=アキト ''Akito''
|en=Henry
|de=Maxim
|es=Eugenio
|fr=Yoachim
|it=Otto
|ko=조인 ''Join''
|zh_cmn=秋人 ''Qiūrén''
}}
</div>
<div style="display: inline-block">
''Chase''
{{langtable|color={{fairy color}}|bordercolor={{fairy color dark}}
|ja=ユウタロウ ''Yuutaro''
|en=Chase
|de=André
|es=Lázaro
|fr=César
|it=Nicolò
|ko=윤태 ''Yuntae''
|zh_cmn=悠太郎 ''Yōutàiláng''
}}
</div>
<div style="display: inline-block">
''Claire''
{{langtable|color={{bug color}}|bordercolor={{bug color dark}}
|ja=リカコ ''Rikako''
|en=Claire
|de=Rieke
|es=Asun
|fr=Delphine
|it=Danila
|ko=민주 ''Minju''
|zh_yue=裡佳子 ''Lǐjiāzi''
|zh_cmn=里佳子 ''Lǐjiāzi''
}}
</div>
<div style="display: inline-block">
''Brooklyn''
{{langtable|color={{rock color}}|bordercolor={{rock color dark}}
|ja=アケミ ''Akemi''
|en=Brooklyn
|de=Karolina
|es=Magda
|fr=Fabiola
|it=Veronica
|ko=진주 ''Jinju''
|zh_cmn=明美 ''Míngměi''
}}
</div>
<div style="display: inline-block">
''Zoe''
{{langtable|color={{ground color}}|bordercolor={{ground color dark}}
|ja=ヨシコ ''Yoshiko''
|en=Zoe
|de=Kati
|es=Catuxa
|fr=Jessica
|it=Hannah
|ko=희선 ''Huiseon''
|zh_cmn=佳子 ''Jiāzi''
}}
</div>
<div style="display: inline-block">
''Samantha''
{{langtable|color={{ice color}}|bordercolor={{ice color dark}}
|ja=ヒナコ ''Hinako''
|en=Samantha
|de=Annika
|es=Ona
|fr=Gabrielle
|it=Denise
|ko=자희 ''Jahui''
|zh_cmn=日奈子 ''Rìnàizi''
}}
</div>
<div style="display: inline-block">
''Dylan''
{{langtable|color={{dragon color}}|bordercolor={{dragon color dark}}
|ja=リュウイチ ''Ryuichi''
|en=Dylan
|de=Linus
|es=Guimar
|fr=Aimé
|it=Indro
|ko=용일 ''Yong-il''
|zh_cmn=隆一 ''Lóngyī''
}}
</div>
<div style="display: inline-block">
''Luke''
{{langtable|color={{poison color}}|bordercolor={{poison color dark}}
|ja=ツナキ ''Tsunaki''
|en=Luke
|de=Philipp
|es=Jun
|fr=Jean-Marc
|it=Fosco
|ko=상기 ''Sanggi''
|zh_yue=茲諾
|zh_cmn=茲諾 / 兹诺 ''Qínà''
}}
</div>
</div>


==See also==
==See also==
Line 1,448: Line 1,232:


{{-}}
{{-}}
{{Tera Raid Battles}}
{{battle}}<br>
{{battle}}<br>
{{Project Games notice|game mechanic}}


[[Category:Pokémon Scarlet and Violet]]
[[Category:Terminology]]
[[Category:Terminology]]
[[Category:Game mechanics]]
[[Category:Game mechanics]]

Latest revision as of 20:07, 11 April 2024
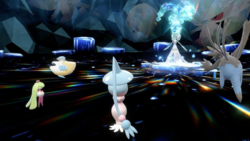
A Tera Raid Battle against a Water Tera-type Gardevoir

A Tera Raid Battle (Japanese: テラレイドバトル Tera Raid Battle) is a type of Pokémon battle featured in Pokémon Scarlet and Violet in which four Trainers battle a wild Tera Pokémon, which remains Terastallized until enough damage has been dealt to the Pokémon.

History

Tera Raid Crystals are created from energy unleashed from the Great Crater of Paldea over the years. During the post-game events of Pokémon Scarlet and Violet, stronger 5★ and black 6★ raid crystals begin to appear. Jacq asks the player to not participate in the 6★ raids for the player's safety, due to the overwhelming energy contained within. If the player ignores his request and manages to defeat one, it's revealed from the readings that they're being caused by residual energy leaking from Area Zero into the rest of Paldea. In certain events, 7★ Raids show up with very rare Pokémon normally not found in Paldea. Some of the rare Pokemon discovered in 7★ Raids have been several Legendary Pokémon, the Paradox Pokémon Walking Wake and Iron Leaves, and the three Hisuian forms of Typhlosion, Samurott, and Decidueye.

In the games

A Grass Tera crystal, containing a Grass Tera-type Pokémon

A number of shining crystals will be scattered across Paldea, which are visible at a distance in the overworld by a beam of light shooting up from them if they have not already been visited. The color of the crystal will also indicate the Tera Type of the Pokémon within, with the exception of black 6★ and 7★ difficulty crystals. These black raid crystals are displayed with the correct type icon on the minimap, but are displayed with a black background and subtle purple glow. Crystals associated with a Poké Portal News event will also be surrounded by circular ring-shaped auras when up close, and their type icons on the map will have a thicker, glowing border.

Visiting each crystal for the first time awards a certain amount of LP, even if the player chooses not to participate in the raid:

Rank LP Reward
500 LP
★★ 700 LP
★★★ 1000 LP
★★★★ 1200 LP
★★★★★ 1500 LP
★★★★★★ 1800 LP
★★★★★★★ 2000 LP

No LP is given for visiting the same crystal subsequent times, or for joining a raid hosted by another player. If the host manages to defeat the Tera Raid, their crystal will disappear. Unlike Max Raid Battles, completing all possible raids in the region will not make a new set of crystals respawn; instead, they will only respawn at midnight or when the player receives new Poké Portal News data.

Each Trainer uses a single Pokémon (from either their party or Box) against the Tera Pokémon. When starting a Tera Raid Battle, players can see a silhouette of the Tera Pokémon, its Tera Type, and a star rating of its difficulty. The objective, "Defeat the Tera Pokémon within the time limit!", is displayed in the lower right corner. Additionally, if the raid has been opened to other players, there is a 3-minute timer for those players to join and select a Pokémon, or the currently selected Pokémon will be locked in at the end of the timer and the raid automatically starts. Each player at the waiting screen in these raids can see the other three Trainers participating and the Pokémon they have currently chosen, with a checkmark if their choice has been locked in.

Battle

Timer

The battle system differs from typical turn-based battles in that the battle is timed, with an orange timer bar visible below the boss's HP bar that ticks down from 5 to 7½ minutes and beyond depending on the raid (the event Mewtwo raid having the longest length to date at 15 minutes), and all participants are able to act at any point, regardless of whether the opponent Pokémon or allies are also performing an action at the same time. It is even possible for a Pokémon to execute multiple moves before an ally chooses to act at all.

When the timer reaches 10% time remaining, the message "You can feel a tremendous energy gathering! There isn't much time left!" will appear. If the timer expires before players defeat the Tera Pokémon, the energy burst will be unleashed, expelling all players from the raid.

Turn system

The raid boss essentially participates in four concurrent one-on-one battles against each of the team members, and for each turn any player takes, the boss will get one turn against that player, with their relative order within that turn decided by priority or speed as usual. During these turns, the boss may use any move from its base moveset, which is the moveset it will have if it is caught and thus contains up to four moves. Moves used by other players' Pokémon will appear as small speech bubbles next to their sprites in the top-left corner. A player will not see any messages for moves the raid boss uses against other players' Pokémon (except for additional moves described below), but if some of those moves affect its own stat stages (such as Calm Mind or Ancient Power), those stages will be in effect for all players, and can be seen by checking its status with the Y button. Likewise, moves that create weather or terrain conditions will create them for all four lanes, even if some players don't see the move being used; a particle effect will be visible in the center of the screen to indicate their presence. Field effects that last for a certain number of turns will have their turn count decrease only after all players have made a move. Light Screen and Reflect will use their reduced doubles damage multiplier.

If the raid has been opened to other players (even if no others joined), then each time a player's menu comes up, that player must select an action within 60 seconds, or else the earliest selectable move in their moveset will automatically be used at that time.

Targeting

Players are allowed to target a teammate with their moves, but moves that target all adjacent Pokémon (such as Earthquake) will only hit the raid boss. If the raid boss uses such a move, it will only hit the Pokémon whose lane it was used in, and will not receive a multiple-target damage penalty (except if it uses it during an extra action as described below).

Knockouts

If a non-boss Pokémon faints, it will be revived after five seconds initially, plus an additional five-second wait for each time it has previously fainted in the battle, up to a maximum of 30 seconds. Additionally, this also reduces the timer by a number of seconds equal to the fainted Pokémon's level. Pokémon used by NPCs do not reduce the timer when they faint.

Terastallization

Each time a player's Pokémon successfully uses a direct-damaging move, this player's Tera Orb will gain one charge. If a player's Tera Orb has three charges, this player can Terastallize their Pokémon on any turn. Each player may only Terastallize once per raid, even if their Terastallized Pokémon faints.

Only direct-damaging moves, targeting either the raid boss or an ally, will count towards the Tera Orb's charge. Status moves, cheering, and moves that miss do not count. If a damaging move is used while the boss's shield is up and deals so little damage that the shield reduction causes the damage to be less than ½, it will round down to 0 damage and that attack will not charge the Tera Orb either.

Unlike Max Raid Battles, where only a single player can Dynamax their Pokémon and the option to do so rotates between players until it's used, all four participants in a Tera Raid Battle are permitted to Terastallize their Pokémon separately.

The allied NPCs never Terastallize their Pokémon.

Extra actions

The boss may have extra actions which take place at predefined thresholds of health or time. These actions interrupt players' access to the menu. If the thresholds for two or more extra actions are met at the same moment (for instance because of heavy damages), the boss will perform all of them in sequence, and it will not be possible to access the menu again until each of them have finished their animations. An extra action can happen between a player's command and the corresponding turn.

There are six types of extra action: additional move, shield, removal of negative effects, removal of positive effects, Tera Orb charge stealing, and the double-action phase where the boss can use a second move in a turn. Additional moves appear in 3★-and-above raids, while all the other actions appear in 4★-and-above raids. The double-action phase has only appeared in certain 7★ raids so far.

If an action's trigger is at 100% of time or HP remaining, it will thus trigger at the very start of the battle, before the players can take a turn. This often happens in 7★ raids.[1]

Additional move

The boss uses a move outside of standard turn order. This move can be outside of their base moveset; if it is the case, it will not know it if it is caught.

  • For moves that target a single Pokémon, a random target will be chosen, and all players will be able to see the move messages and the attack animation aimed in the direction of the targeted Pokémon even when it isn't their own.
  • For moves that usually target multiple Pokémon, it will do so, and the multiple-target damage penalty will apply. This is the only way a move can ever hit multiple Pokémon during a Tera Raid Battle.
Shield

The boss produces a shield which severely reduces the damage of attacks from non-Terastallized Pokémon, blocks the effects of status moves, and cures any non-volatile status condition it has upon activation. This action is never done more than once in a battle.

The shield applies a multiplier to incoming damage. There are three multipliers depending on the situation of the attacking Pokémon:

  • the attacking Pokémon is not Terastallized: ×0.2;
  • the attacking Pokémon is Terastallized and the move's type does not match the user's Tera Type (including a non-Stellar-type move from a user with the Stellar Tera type): ×0.35;
  • the attacking Pokémon is Terastallized and the move's type does match the user's Tera Type: ×0.75.

The previous multipliers' values are used for all 6★ and 5★ raids in Paldea,[2] which includes all non-event raids, but may be different for 7★ raids, going as far as being greater than 1 (thus increasing damage) or being very small (×0.01 for instance). 4★ raids in Paldea and Kitakami use ×0.4 multipliers and ×0.8 multipliers for the respective Terastallized scenarios. 5★ raids in Kitakami use ×0.3, ×0.6, and ×0.9 multipliers, while 6★ raids use ×0.3, ×0.55, and ×0.85 multipliers. 4★ raids in Blueberry Academy use ×0.4, ×0.5, and ×0.9 multipliers, while 5★ raids use the same multipliers as Paldea, and 6★ raids use ×0.4, ×0.6, and ×0.8 multipliers.

After the multiplier is applied, damage is rounded to the nearest whole number, with values of 0.5 and above rounding up.

After the boss's shield is broken, the boss will not move during the next turn the player takes.

Removal of negatives effects

The boss removes any non-volatile status condition it has and its negative stat modifiers. Its positive stat modifiers will remain as they are. All other effects such as Leech Seed or ability changes remain untouched.

Removal of positive effects

The boss removes the positive stat modifiers of its opponents, and only for the following turn, nullifies their Abilities as well. Negative stat modifiers will remain as they are. Pokémon that are knocked out during the removal are not affected by the Ability nullification.

Tera Orb charge stealing

The boss removes one charge from each player's Tera Orb. Pokémon that have already Terastallized, that have not built up any charge, or that are knocked out are unaffected.

Double-action phase

After a predefined HP or time threshold, the boss has a set-percentage chance to use a randomly selected attack at the end of the turn, allowing it to use two moves in a single turn. The choice of the second attack seems to be fully random, so it can select attacks that the target is visibly immune to, unlike the typical AI.

Additional commands

The players cannot use items from their bags, but have additional commands exclusive to raids.

Running away

In a single-player raid, the host can choose to run away, ending the battle as a forfeit. If the raid has been opened to other players (even if no others joined), running is not possible, and will give the message "It's no good! You can't find an opening to run away from such a strong opponent!".

Cheers
050Diglett.png This section is incomplete.
Please feel free to edit this section to add missing information and complete it.
Reason: Mechanics behind Go all out! and Hang tough! cheers are still not entirely understood, see this twitter thread
Missing chart for different probabilities Heal up! to restore different amounts of HP, see this twitter thread.

Players can opt to cheer instead of executing a move, up to three times per Tera Raid. Cheering has increased priority over moves. The three cheer options are:

  • Go all out!: multiplies the user's and their allies' Attack and Sp. Atk by ×1.5
  • Hang tough!: multiplies the user's and their allies' Defense and Sp. Def by ×1.5[3]
  • Heal up!: removes non-volatile status conditions and confusion from the user and their allies, and restores 20% to 100% of their total HP randomly[4]
    • The amount of HP restored is the same for all participants affected by the same cheer, rather than differing amounts per participant.[5]

Stat-boosting effects from cheers are independent from other stat modifiers, which means that their effects stack multiplicatively. Stat-boosting cheers last for three turns for each Pokémon, even if the Tera Raid Pokémon nullifies stat changes. If an ally faints and returns to battle within those turns, the stat boost from the cheer will be made permanent for the rest of the battle, and this permanent boost can stack with a regular cheer afterwards, which can also be made permanent and repeated if fainted again.[6]

If there is at least one NPC Trainer in a Tera Raid Battle, the first one (based on the display order in the top-left corner) will always cheer "Hang tough!" on the first turn. NPCs will not perform any other cheers during the raid.

Callouts

The player can press the Minus button to choose between four Callouts: "Help!", "Everyone, attack together!", "Thanks!", and "I've got this!". They have no practical effect outside of communicating with other players. The Callouts are displayed to other players in a bubble just like how the player's Pokémon moves are displayed to them.

Additional info

  • The raid boss has infinite PP on all of its moves.
  • Pokémon found in 3★-or-above Tera Raid Battles may have their Hidden Ability.
    • Ditto Tera Raid Battles are an exception, and always have their Hidden Ability.

Special cases

050Diglett.png This section is incomplete.
Please feel free to edit this section to add missing information and complete it.
Reason: What are the effects of moves such as Destiny Bond, Endeavor, Pain Split, Eruption etc. when used in a Tera Raid Battle?

Capture

Defeating the Tera Pokémon within the time limit will cause the Pokémon to cease being Terastallized, at which point the player is given the chance to select a Poké Ball from their bag to catch the Pokémon. This capture cannot fail, regardless of the type of ball used, or whether the player is the host or participant of the battle.

Difficulty

050Diglett.png This section is incomplete.
Please feel free to edit this section to add missing information and complete it.
Reason: The list of events with a non-typical HP multiplier is incomplete.

Tera Raid Pokémon have their HP increased for the duration of the battle, as well as having one or more of their IVs guaranteed to be set to 31, except for 3★ Pachirisu, which is not set to have any guaranteed IVs. Additionally, 6★-raid Pokémon are temporarily set to level 90 for the duration of the battle, but are reduced to level 75 when captured.

Star Rating HP Modifier Level
During battle
Level
When caught
Guaranteed
Best IVs
12 12 1
★★ 20 20 1
★★★ 35 35 2
★★★★ 12× 45 45 3
★★★★★ 20×* 75 75 4
★★★★★★ 25× 90 75 5
★★★★★★★ Varies** 100 100 6
* Some event 5★ Raids have a different multiplier, such as the Dialga and Palkia event which had a 35× HP modifier.
** While this modifier is typically 30×, several events have deviated from this, for instance:
The 7★ event Samurott, Chesnaught, Rillaboom, Hisuian Samurott, Empoleon, and Blastoise had a 35× modifier.
The 7★ event Pikachu, Eevee, and Mewtwo had a 50× modifier.
The first 7★ event Charizard had a modifier of only 25×.

Encounters

The Pokémon available to fight in a Tera Raid Battle changes with the star value of the raid, as well as which version of the game the player is playing. The raid boss's Tera Type is chosen independently of the Pokémon itself, and has no influence over which Pokémon the raid boss will be.

Star Rating From
Beginning
After Three
Gym Badges
After Six
Gym Badges
After
ending credits
Complete Academy Ace Tournament
and Complete 10 4★ or 5★ Raids
80% 30% 20% 0% 0%
★★ 20% 40% 20% 0% 0%
★★★ 0% 30% 30% 40% 30%
★★★★ 0% 0% 30% 35% 40%
★★★★★ 0% 0% 0% 25% 30%
★★★★★★ 0% 0% 0% 0% Only one per real-life day
★★★★★★★
(Poké Portal News exclusive)
0% 0% 0% 0% Only one per real-life day

Paldea

1★ Raids
Main article: List of 1★ Tera Raid Battles (Paldea)
2★ Raids
Main article: List of 2★ Tera Raid Battles (Paldea)
3★ Raids
Main article: List of 3★ Tera Raid Battles (Paldea)
4★ Raids
Main article: List of 4★ Tera Raid Battles (Paldea)
5★ Raids
Main article: List of 5★ Tera Raid Battles (Paldea)
6★ Raids
Main article: List of 6★ Tera Raid Battles (Paldea)

Kitakami

1★ Raids
Main article: List of 1★ Tera Raid Battles (Kitakami)
2★ Raids
Main article: List of 2★ Tera Raid Battles (Kitakami)
3★ Raids
Main article: List of 3★ Tera Raid Battles (Kitakami)
4★ Raids
Main article: List of 4★ Tera Raid Battles (Kitakami)
5★ Raids
Main article: List of 5★ Tera Raid Battles (Kitakami)
6★ Raids
Main article: List of 6★ Tera Raid Battles (Kitakami)

Blueberry Academy

1★ Raids
Main article: List of 1★ Tera Raid Battles (Blueberry Academy)
2★ Raids
Main article: List of 2★ Tera Raid Battles (Blueberry Academy)
3★ Raids
Main article: List of 3★ Tera Raid Battles (Blueberry Academy)
4★ Raids
Main article: List of 4★ Tera Raid Battles (Blueberry Academy)
5★ Raids
Main article: List of 5★ Tera Raid Battles (Blueberry Academy)
6★ Raids
Main article: List of 6★ Tera Raid Battles (Blueberry Academy)

NPC Trainers

If there are less than four players in a Tera Raid Battle, NPC Trainers will fill in. The Pokémon used by these Trainers get stronger as the player unlocks more difficult Tera Raids.

All Pokémon listed below have the following properties:

The NPC Pokémon will have a level equal to 80% of the level of the host's Pokémon, rounded down (but not to less than 1). If the host's Pokémon is at level 1, the NPC Pokémon will be at level 80.

1★

NPC Trainers use the following Pokémon after 1★ Tera Raids are unlocked. Their level of 16 assumes that the host is bringing a level 20 Pokémon.

Austin
0058Growlithe.png
Growlithe Lv.16
Ember
Fire Special
Leer
Normal Status
Bite
Dark Physical
  --  
   
Ava
0418Buizel.png
Buizel Lv.16
Aqua Jet
Water Physical
Bite
Dark Physical
Water Gun
Water Special
  --  
   
Logan
0672Skiddo.png
Skiddo Lv.16
Tackle
Normal Physical
Vine Whip
Grass Physical
Growth
Normal Status
  --  
   
Hailey
0081Magnemite.png
Magnemite Lv.16
Thunder Shock
Electric Special
Thunder Wave
Electric Status
Swift
Normal Special
  --  
   
Evan
0819Skwovet.png
Skwovet Lv.16
Tackle
Normal Physical
Defense Curl
Normal Status
Rollout
Rock Physical
  --  
   
Charlotte
0397Staravia.png
Staravia Lv.16
Wing Attack
Flying Physical
Quick Attack
Normal Physical
Growl
Normal Status
  --  
   
Kylie
0739Crabrawler.png
Crabrawler Lv.16
Rock Smash
Fighting Physical
Bubble Beam
Water Special
Work Up
Normal Status
  --  
   
Hunter
0425Drifloon.png
Drifloon Lv.16
Gust
Flying Special
Hex
Ghost Special
Payback
Dark Physical
  --  
   
Gianna
0434Stunky.png
Stunky Lv.16
Bite
Dark Physical
Acid Spray
Poison Special
Screech
Normal Status
  --  
   
Eli
0281Kirlia.png
Kirlia Lv.16
Confusion
Psychic Special
Calm Mind
Psychic Status
Disarming Voice
Fairy Special
  --  
   
Henry
0624Pawniard.png
Pawniard Lv.16
Metal Claw
Steel Physical
Scratch
Normal Physical
Scary Face
Normal Status
  --  
   
Chase
0702Dedenne.png
Dedenne Lv.16
Draining Kiss
Fairy Special
Parabolic Charge
Electric Special
Charm
Fairy Status
  --  
   
Claire
0402Kricketune.png
Kricketune Lv.16
Bug Bite
Bug Physical
Sing
Normal Status
Aerial Ace
Flying Physical
  --  
   
Brooklyn
0744Rockruff.png
Rockruff Lv.16
Rock Throw
Rock Physical
Bite
Dark Physical
Leer
Normal Status
  --  
   
Zoe
0551Sandile.png
Sandile Lv.16
Sand Tomb
Ground Physical
Scary Face
Normal Status
Bite
Dark Physical
  --  
   
Samantha
0361Snorunt.png
Snorunt Lv.16
Powder Snow
Ice Special
Ice Shard
Ice Physical
Bite
Dark Physical
  --  
   

3★

NPC Trainers use the following Pokémon after 3★ Tera Raids are unlocked. Their level of 40 assumes that the host is bringing a level 50 Pokémon.

Austin
0323Camerupt.png
Camerupt Lv.40
Flame Wheel
Fire Physical
Bulldoze
Ground Physical
Yawn
Normal Status
  --  
   
Ava
0419Floatzel.png
Floatzel Lv.40
Water Pulse
Water Special
Aqua Jet
Water Physical
Growl
Normal Status
  --  
   
Logan
0673Gogoat.png
Gogoat Lv.40
Horn Leech
Grass Physical
Facade
Normal Physical
Growth
Normal Status
  --  
   
Hailey
0082Magneton.png
Magneton Lv.40
Metal Sound
Steel Status
Shock Wave
Electric Special
Tri Attack
Normal Special
  --  
   
Evan
0820Greedent.png
Greedent Lv.40
Facade
Normal Physical
Bite
Dark Physical
Tail Whip
Normal Status
  --  
   
Charlotte
0334Altaria.png
Altaria Lv.40
Aerial Ace
Flying Physical
Dragon Breath
Dragon Special
Feather Dance
Flying Status
  --  
   
Kylie
0057Primeape.png
Primeape Lv.40
Low Kick
Fighting Physical
Rage Fist
Ghost Physical
Leer
Normal Status
  --  
   
Hunter
0426Drifblim.png
Drifblim Lv.40
Hex
Ghost Special
Air Slash
Flying Special
Will-O-Wisp
Fire Status
  --  
   
Gianna
0215Sneasel.png
Sneasel Lv.40
Thief
Dark Physical
Ice Shard
Ice Physical
Leer
Normal Status
  --  
   
Eli
0097Hypno.png
Hypno Lv.40
Zen Headbutt
Psychic Physical
Fire Punch
Fire Physical
Thunder Punch
Electric Physical
  --  
   
Henry
0437Bronzong.png
Bronzong Lv.40
Gyro Ball
Steel Physical
Psybeam
Psychic Special
Metal Sound
Steel Status
  --  
   
Chase
0700Sylveon.png
Sylveon Lv.40
Fairy Wind
Fairy Special
Quick Attack
Normal Physical
Charm
Fairy Status
  --  
   
Claire
0123Scyther.png
Scyther Lv.40
Fury Cutter
Bug Physical
Aerial Ace
Flying Physical
Leer
Normal Status
  --  
   
Brooklyn
0745Lycanroc.png
Lycanroc Lv.40
Rock Tomb
Rock Physical
Accelerock
Rock Physical
Leer
Normal Status
  --  
   
Zoe
0844Sandaconda.png
Sandaconda Lv.40
Bulldoze
Ground Physical
Sand Attack
Ground Status
Poison Tail
Poison Physical
  --  
   
Samantha
0362Glalie.png
Glalie Lv.40
Ice Fang
Ice Physical
Bite
Dark Physical
Scary Face
Normal Status
  --  
   
Dylan
0148Dragonair.png
Dragonair Lv.40
Dragon Breath
Dragon Special
Safeguard
Normal Status
Slam
Normal Physical
  --  
   
Luke
0454Toxicroak.png
Toxicroak Lv.40
Venoshock
Poison Special
Low Kick
Fighting Physical
Poison Sting
Poison Physical
  --  
   

5★

NPC Trainers use the following Pokémon after 5★ Tera Raids are unlocked. Their level of 80 assumes the host is bringing a level 100 Pokémon.

Austin
0059Arcanine.png
Arcanine Lv.80
Flamethrower
Fire Special
Bite
Dark Physical
Leer
Normal Status
  --  
   
Ava
0748Toxapex.png
Toxapex Lv.80
Surf
Water Special
Poison Jab
Poison Physical
Chilling Water
Water Special
  --  
   
Logan
0930Arboliva.png
Arboliva Lv.80
Energy Ball
Grass Special
Safeguard
Normal Status
Earth Power
Ground Special
  --  
   
Hailey
0939Bellibolt.png
Bellibolt Lv.80
Discharge
Electric Special
Mud Shot
Ground Special
Light Screen
Psychic Status
  --  
   
Evan
0982Dudunsparce.png
Dudunsparce Lv.80
Hyper Drill
Normal Physical
Glare
Normal Status
Drill Run
Ground Physical
  --  
   
Charlotte
0398Staraptor.png
Staraptor Lv.80
Brave Bird
Flying Physical
Facade
Normal Physical
Feather Dance
Flying Status
  --  
   
Kylie
0128Tauros-Paldea Combat.png
Tauros Lv.80
Raging Bull
Fighting Physical
Work Up
Normal Status
Assurance
Dark Physical
  --  
   
Hunter
0426Drifblim.png
Drifblim Lv.80
Shadow Ball
Ghost Special
Air Slash
Flying Special
Will-O-Wisp
Fire Status
  --  
   
Gianna
0197Umbreon.png
Umbreon Lv.80
Dark Pulse
Dark Special
Thunder Wave
Electric Status
Psychic
Psychic Special
  --  
   
Eli
0282Gardevoir.png
Gardevoir Lv.80
Psyshock
Psychic Special
Dazzling Gleam
Fairy Special
Life Dew
Water Status
  --  
   
Henry
0823Corviknight.png
Corviknight Lv.80
Iron Head
Steel Physical
Drill Peck
Flying Physical
Scary Face
Normal Status
  --  
   
Chase
0700Sylveon.png
Sylveon Lv.80
Moonblast
Fairy Special
Quick Attack
Normal Physical
Charm
Fairy Status
  --  
   
Claire
0214Heracross.png
Heracross Lv.80
Megahorn
Bug Physical
Brick Break
Fighting Physical
Bulk Up
Fighting Status
  --  
   
Brooklyn
0934Garganacl.png
Garganacl Lv.80
Rock Slide
Rock Physical
Rock Tomb
Rock Physical
Heavy Slam
Steel Physical
  --  
   
Zoe
0750Mudsdale.png
Mudsdale Lv.80
High Horsepower
Ground Physical
Rock Smash
Fighting Physical
Low Kick
Fighting Physical
  --  
   
Samantha
0461Weavile.png
Weavile Lv.80
Night Slash
Dark Physical
Ice Punch
Ice Physical
Leer
Normal Status
  --  
   
Dylan
0612Haxorus.png
Haxorus Lv.80
Dragon Claw
Dragon Physical
Facade
Normal Physical
Scary Face
Normal Status
  --  
   
Luke
0980Clodsire.png
Clodsire Lv.80
Poison Jab
Poison Physical
Stomping Tantrum
Ground Physical
Toxic
Poison Status
  --  
   

Penalty

If the player drops out of three Online Tera Raid Battles (by closing the game), they will be unable to access the game's online service for 30 minutes.

Trivia

  • All NPC Trainers' gendered Pokémon are male, except Austin's Growlithe and Arcanine.
  • Each one of the 18 NPC Trainers is associated with one of the 18 types.

In other languages

050Diglett.png This section is incomplete.
Please feel free to edit this section to add missing information and complete it.
Reason: Romanization of Chinese names for Cantonese

Tera Raid Battle

Language Title
Japan Flag.png Japanese テラレイドバトル Tera Raid Battle
Chinese Cantonese 太晶團體戰
Mandarin 太晶团体战 Tàijīng Tuántǐ Zhàn
France Flag.png French Raid Téracristal
Germany Flag.png German Tera-Raid
Italy Flag.png Italian Raid Teracristal
South Korea Flag.png Korean 테라 레이드배틀 Tera Raid Battle
Spain Flag.png Spanish Teraincursión

Austin

Language Title
Japan Flag.png Japanese トモヒデ Tomohide
England Flag.png English Austin
Mandarin Chinese 智英 Zhìyīng
France Flag.png French Patrice
Germany Flag.png German Jakob
Italy Flag.png Italian Annibale
South Korea Flag.png Korean 우영 Uyeong
Spain Flag.png Spanish Zacariás

Ava

Language Title
Japan Flag.png Japanese ユウミ Yuumi
England Flag.png English Ava
Mandarin Chinese 佑美 Yòuměi
France Flag.png French Noëlle
Germany Flag.png German Martina
Italy Flag.png Italian Mila
South Korea Flag.png Korean 도미 Domi
Spain Flag.png Spanish Maialen

Logan

Language Title
Japan Flag.png Japanese ケンイチ Ken'ichi
England Flag.png English Logan
Mandarin Chinese 健一 Jiànyī
France Flag.png French Ahmed
Germany Flag.png German Antonio
Italy Flag.png Italian David
South Korea Flag.png Korean 헌일 Heonil
Spain Flag.png Spanish Virgilio

Hailey

Language Title
Japan Flag.png Japanese アイカ Aika
England Flag.png English Hailey
Mandarin Chinese 艾佳 Àijiā
France Flag.png French Pascaline
Germany Flag.png German Emma
Italy Flag.png Italian Moira
South Korea Flag.png Korean 에이카 Eicha
Spain Flag.png Spanish Mai

Evan

Language Title
Japan Flag.png Japanese シンペイ Shinpei
England Flag.png English Evan
Mandarin Chinese 申平 Shēnpíng
France Flag.png French Roger
Germany Flag.png German Frank
Italy Flag.png Italian Matteo
South Korea Flag.png Korean 신평 Sinpyeong
Spain Flag.png Spanish Jesús

Charlotte

Language Title
Japan Flag.png Japanese エリナ Elena
England Flag.png English Charlotte
Mandarin Chinese 惠奈 Huìnài
France Flag.png French Valéria
Germany Flag.png German Daria
Italy Flag.png Italian Maya
South Korea Flag.png Korean 엘리나 Elena
Spain Flag.png Spanish Leire

Kylie

Language Title
Japan Flag.png Japanese カヤ Kaya
England Flag.png English Kylie
Mandarin Chinese 歌雅 Gēyǎ
France Flag.png French Soumaya
Germany Flag.png German Clarissa
Italy Flag.png Italian Loretta
South Korea Flag.png Korean 카야 Kaya
Spain Flag.png Spanish Celia

Hunter

Language Title
Japan Flag.png Japanese アキラ Akira
England Flag.png English Hunter
Chinese Cantonese 齊樂 Qílè
Mandarin 齐乐 Qílè
France Flag.png French Tony
Germany Flag.png German Tom
Italy Flag.png Italian Valentino
South Korea Flag.png Korean 강철 Gangcheol
Spain Flag.png Spanish Zigor

Gianna

Language Title
Japan Flag.png Japanese チカ Chika
England Flag.png English Gianna
Mandarin Chinese 琦娜 Zīnuò
France Flag.png French Célestine
Germany Flag.png German Josepha
Italy Flag.png Italian Simona
South Korea Flag.png Korean 지혜 Jihye
Spain Flag.png Spanish Linda

Eli

Language Title
Japan Flag.png Japanese マサアキ Masaaki
England Flag.png English Eli
Chinese Cantonese 勝昭 Shèngzhāo
Mandarin 胜昭 Shèngzhāo
France Flag.png French Hilaire
Germany Flag.png German Peter
Italy Flag.png Italian Gianfranco
South Korea Flag.png Korean 정명 Jeongmyeong
Spain Flag.png Spanish Josué

Henry

Language Title
Japan Flag.png Japanese アキト Akito
England Flag.png English Henry
Mandarin Chinese 秋人 Qiūrén
France Flag.png French Yoachim
Germany Flag.png German Maxim
Italy Flag.png Italian Otto
South Korea Flag.png Korean 조인 Join
Spain Flag.png Spanish Eugenio

Chase

Language Title
Japan Flag.png Japanese ユウタロウ Yuutaro
England Flag.png English Chase
Mandarin Chinese 悠太郎 Yōutàiláng
France Flag.png French César
Germany Flag.png German André
Italy Flag.png Italian Nicolò
South Korea Flag.png Korean 윤태 Yuntae
Spain Flag.png Spanish Lázaro

Claire

Language Title
Japan Flag.png Japanese リカコ Rikako
England Flag.png English Claire
Chinese Cantonese 裡佳子 Lǐjiāzi
Mandarin 里佳子 Lǐjiāzi
France Flag.png French Delphine
Germany Flag.png German Rieke
Italy Flag.png Italian Danila
South Korea Flag.png Korean 민주 Minju
Spain Flag.png Spanish Asun

Brooklyn

Language Title
Japan Flag.png Japanese アケミ Akemi
England Flag.png English Brooklyn
Mandarin Chinese 明美 Míngměi
France Flag.png French Fabiola
Germany Flag.png German Karolina
Italy Flag.png Italian Veronica
South Korea Flag.png Korean 진주 Jinju
Spain Flag.png Spanish Magda

Zoe

Language Title
Japan Flag.png Japanese ヨシコ Yoshiko
England Flag.png English Zoe
Mandarin Chinese 佳子 Jiāzi
France Flag.png French Jessica
Germany Flag.png German Kati
Italy Flag.png Italian Hannah
South Korea Flag.png Korean 희선 Huiseon
Spain Flag.png Spanish Catuxa

Samantha

Language Title
Japan Flag.png Japanese ヒナコ Hinako
England Flag.png English Samantha
Mandarin Chinese 日奈子 Rìnàizi
France Flag.png French Gabrielle
Germany Flag.png German Annika
Italy Flag.png Italian Denise
South Korea Flag.png Korean 자희 Jahui
Spain Flag.png Spanish Ona

Dylan

Language Title
Japan Flag.png Japanese リュウイチ Ryuichi
England Flag.png English Dylan
Mandarin Chinese 隆一 Lóngyī
France Flag.png French Aimé
Germany Flag.png German Linus
Italy Flag.png Italian Indro
South Korea Flag.png Korean 용일 Yong-il
Spain Flag.png Spanish Guimar

Luke

Language Title
Japan Flag.png Japanese ツナキ Tsunaki
England Flag.png English Luke
Chinese Cantonese 茲諾
Mandarin 茲諾 / 兹诺 Qínà
France Flag.png French Jean-Marc
Germany Flag.png German Philipp
Italy Flag.png Italian Fosco
South Korea Flag.png Korean 상기 Sanggi
Spain Flag.png Spanish Jun

See also

References


Paldea 1★2★3★4★5★6★
Kitakami 1★2★3★4★5★6★
Blueberry Academy 1★2★3★4★5★6★
Poké Portal News 202220232024
Pokémon battle variations
Double BattleMulti BattleTriple BattleRotation BattleHorde EncounterSOS BattleSupport PlayMax Raid BattleFull Battle
Contest BattleLauncher BattleSky BattleInverse BattleBattle RoyalDynamax AdventureAuto BattleTera Raid Battle
Battle modes


Project Games logo.png This game mechanic article is part of Project Games, a Bulbapedia project that aims to write comprehensive articles on the Pokémon games.