Celadon Department Store: Difference between revisions
Galarian Guy (talk | contribs) |
|||
| (108 intermediate revisions by 44 users not shown) | |||
| Line 1: | Line 1: | ||
{{Infobox location | {{Infobox location | ||
|image=Celadon Department Store | |image=Celadon Department Store Exterior LGPE.png | ||
|image_size=300 | |||
|type=building | |type=building | ||
|location_name=Celadon Department Store | |location_name=Celadon Department Store | ||
|japanese_name={{tt|タマムシデパート|Tamamushi Depāto}} | |japanese_name={{tt|タマムシデパート|Tamamushi Depāto}} | ||
|translated_name=Tamamushi Department Store | |translated_name=Tamamushi Department Store | ||
|slogan=Find what you need at the Celadon Dept. Store! | |||
|location=[[Celadon City]] | |location=[[Celadon City]] | ||
|region=Kanto | |region=Kanto | ||
|generation={{Gen|I}}, {{Gen|II}}, {{Gen|III}}, {{Gen|IV}}, {{Gen|VII}} | |||
|map=Celadon City.png | |map=Kanto Celadon City Map.png | ||
}} | }} | ||
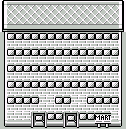
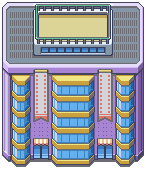
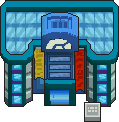
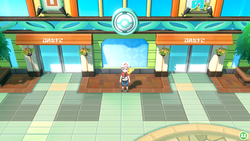
The '''Celadon Department Store''' (Japanese: '''{{tt|タマムシデパート|Tamamushi Depāto}}''' ''Tamamushi Department Store'') is the largest shop in [[Kanto | The '''Celadon Department Store''' (Japanese: '''{{tt|タマムシデパート|Tamamushi Depāto}}''' ''Tamamushi Department Store'') is the largest shop in [[Kanto]]. The store is six stories tall, including the roof. | ||
==Sign== | ==Sign== | ||
| Line 43: | Line 45: | ||
==Floors== | ==Floors== | ||
=== | {| class="wikitable" | ||
! rowspan=2 | Floor | |||
! colspan=5 | Name | |||
|- | |||
! {{GameIcon|R}}{{GameIcon|B}}{{GameIcon|Y}} | |||
! {{GameIcon|G}}{{GameIcon|S}}{{GameIcon|C}} | |||
! {{GameIcon|FR}}{{GameIcon|LG}} | |||
! {{GameIcon|HG}}{{GameIcon|SS}} | |||
! {{GameIcon|LGP}}{{GameIcon|LGE}} | |||
|- | |||
| 1F | |||
| colspan=3 | <sc>Service Counter</sc> | |||
| colspan=2 | Service Counter | |||
|- | |||
| 2F | |||
| colspan=3 | <sc>Trainer's Market</sc> | |||
| Trainer's Market | |||
| Trainers' Market | |||
|- | |||
| 3F | |||
| <sc>TV Game Shop</sc> | |||
| <sc>TM Shop</sc> | |||
| <sc>TV Game Shop</sc> | |||
| TM Shop | |||
| Video Game Shop | |||
|- | |||
| 4F | |||
| colspan=2 | <sc>Wiseman Gifts</sc> | |||
| <sc>Wise Man Gifts</sc> | |||
| colspan=2 | Wiseman Gifts | |||
|- | |||
| 5F | |||
| colspan=2 | <sc>Drug Store</sc> | |||
| <sc>Drugstore</sc> | |||
| Battle Collection | |||
| Accessory Market | |||
|- | |||
| Roof<ref group="lower-alpha">In Pokémon Red, Blue, Yellow, FireRed and LeafGreen, the floor is "<sc>Rooftop Square</sc>".<br />In Pokémon Gold, Silver, Crystal, HeartGold, and SoulSilver, the floor is "6F".<br />In Pokémon: Let's Go, Pikachu! and Let's Go, Eevee!, the floor is "Roof".</ref> | |||
| colspan=3 | <sc>Vending Machines</sc> | |||
| Rooftop Atrium | |||
| Relaxation Space & Vending Machines | |||
|} | |||
=== | ===1F=== | ||
This floor's motto is "Top | 1F is the Service Corner. Here, a receptionist welcomes customers and directs them to a board that describes the store layout. This is where the [[Poké Mart]] deliveryman can be found. | ||
===2F=== | |||
2F is the Trainers' Market (formatted Trainer's Market prior to [[Generation VII]]). In Pokémon: Let's Go, Pikachu! and Let's Go, Eevee!, this floor's motto is "Loads and loads of TMs!" In earlier games, the motto is "Top Grade [[Item]]s for Trainers!" | |||
According to the [[Fame Checker]], [[Lance]] is seen regularly on this floor buying capes. | |||
====[[Generation I]]==== | ====[[Generation I]]==== | ||
{{shop| | {{shop|Left cashier}} | ||
{{shoprow|{{shopitem|Great Ball|600}}|{{shopitem|Super Potion|700}}}} | {{shoprow|{{shopitem|Great Ball|600}}|{{shopitem|Super Potion|700}}}} | ||
{{shoprow|{{shopitem|Revive|1500}}|{{shopitem| | {{shoprow|{{shopitem|Revive|1500}}|{{shopitem|Super Repel|500}}}} | ||
{{shoprow|{{shopitem| | {{shoprow|{{shopitem|Antidote|100}}|{{shopitem|Burn Heal|250}}}} | ||
{{shoprow|{{shopitem| | {{shoprow|{{shopitem|Ice Heal|250}}|{{shopitem|Awakening|200}}}} | ||
{{shoprow|{{shopitem| | {{shoprow|{{shopitem|Paralyze Heal|200|display=Parlyz Heal}}}} | ||
{{shopfooter|multiple=yes}} | {{shopfooter|multiple=yes}} | ||
{{shop| | {{shop|Right cashier}} | ||
{{shoprow|{{shopitem|TM32|1000|PD||TM Normal|Double Team}}|{{shopitem|TM33|1000|PD||TM Psychic|Reflect}}}} | {{shoprow|{{shopitem|TM32|1000|PD||TM Normal|Double Team}}|{{shopitem|TM33|1000|PD||TM Psychic|Reflect}}}} | ||
{{shoprow|{{shopitem|TM02|2000|PD||TM Normal|Razor Wind}}|{{shopitem|TM07|2000|PD||TM Normal|Horn Drill}}}} | {{shoprow|{{shopitem|TM02|2000|PD||TM Normal|Razor Wind}}|{{shopitem|TM07|2000|PD||TM Normal|Horn Drill}}}} | ||
| Line 66: | Line 113: | ||
====[[Generation II]]==== | ====[[Generation II]]==== | ||
{{shop|Left | {{shop|Left cashier}} | ||
{{shoprow|{{shopitem|Potion|300}}|{{shopitem|Super Potion|700}}}} | {{shoprow|{{shopitem|Potion|300}}|{{shopitem|Super Potion|700}}}} | ||
{{shoprow|{{shopitem|Hyper Potion|1200}}|{{shopitem|Max Potion|2500}}}} | {{shoprow|{{shopitem|Hyper Potion|1200}}|{{shopitem|Max Potion|2500}}}} | ||
| Line 72: | Line 119: | ||
{{shoprow|{{shopitem|Max Repel|700}}}} | {{shoprow|{{shopitem|Max Repel|700}}}} | ||
{{shopfooter|multiple=yes}} | {{shopfooter|multiple=yes}} | ||
{{shop|Right | {{shop|Right cashier}} | ||
{{shoprow|{{shopitem|Poké Ball|200}}|{{shopitem|Great Ball|600}}}} | {{shoprow|{{shopitem|Poké Ball (item)|200|5=Poké Ball|display=Poké Ball}}|{{shopitem|Great Ball|600}}}} | ||
{{shoprow|{{shopitem|Ultra Ball|1200}}|{{shopitem| | {{shoprow|{{shopitem|Ultra Ball|1200}}|{{shopitem|Escape Rope|550}}}} | ||
{{shoprow|{{shopitem| | {{shoprow|{{shopitem|Full Heal|600}}|{{shopitem|Antidote|100}}}} | ||
{{shoprow|{{shopitem| | {{shoprow|{{shopitem|Burn Heal|250}}|{{shopitem|Ice Heal|250}}}} | ||
{{shoprow|{{shopitem| | {{shoprow|{{shopitem|Awakening|250}}|{{shopitem|Paralyze Heal|200|display=Paralyze Heal}}}} | ||
{{shopfooter}} | {{shopfooter}} | ||
====[[Generation III]]==== | ====[[Generation III]]==== | ||
{{shop| | {{shop|Upper cashier}} | ||
{{shoprow|{{shopitem|TM05|1000|PD||TM Normal|Roar}}|{{shopitem|TM15|7500|PD||TM Normal|Hyper Beam}}}} | {{shoprow|{{shopitem|TM05|1000|PD||TM Normal|Roar}}|{{shopitem|TM15|7500|PD||TM Normal|Hyper Beam}}}} | ||
{{shoprow|{{shopitem|TM28|2000|PD||TM Ground|Dig}}|{{shopitem|TM31|3000|PD||TM Fighting|Brick Break}}}} | {{shoprow|{{shopitem|TM28|2000|PD||TM Ground|Dig}}|{{shopitem|TM31|3000|PD||TM Fighting|Brick Break}}}} | ||
{{shoprow|{{shopitem|TM43|3000|PD||TM Normal|Secret Power}}|{{shopitem|TM45|3000|PD||TM Normal|Attract}}}} | {{shoprow|{{shopitem|TM43|3000|PD||TM Normal|Secret Power}}|{{shopitem|TM45|3000|PD||TM Normal|Attract}}}} | ||
{{shopfooter|multiple=yes}} | {{shopfooter|multiple=yes}} | ||
{{shop| | {{shop|Lower cashier}} | ||
{{shoprow|{{shopitem|Great Ball|600}}|{{shopitem|Super Potion|700}}}} | {{shoprow|{{shopitem|Great Ball|600}}|{{shopitem|Super Potion|700}}}} | ||
{{shoprow|{{shopitem|Revive|1500}}|{{shopitem|Antidote|100}}}} | {{shoprow|{{shopitem|Revive|1500}}|{{shopitem|Antidote|100}}}} | ||
{{shoprow|{{shopitem|Paralyze Heal|200|display=Paralyze Heal}}|{{shopitem|Awakening|250}}}} | |||
{{shoprow|{{shopitem|Burn Heal|250}}|{{shopitem|Ice Heal|250}}}} | {{shoprow|{{shopitem|Burn Heal|250}}|{{shopitem|Ice Heal|250}}}} | ||
{{shoprow|{{shopitem|Super Repel|500}}}} | {{shoprow|{{shopitem|Super Repel|500}}}} | ||
{{shopfooter}} | {{shopfooter}} | ||
====[[Generation IV]]==== | ====[[Generation IV]]==== | ||
{{shop|Left | {{shop|Left cashier}} | ||
{{shoprow|{{shopitem|Potion|300}}|{{shopitem|Super Potion|700}}}} | {{shoprow|{{shopitem|Potion|300}}|{{shopitem|Super Potion|700}}}} | ||
{{shoprow|{{shopitem|Hyper Potion|1200}}|{{shopitem|Max Potion|2500}}}} | {{shoprow|{{shopitem|Hyper Potion|1200}}|{{shopitem|Max Potion|2500}}}} | ||
{{shoprow|{{shopitem| | {{shoprow|{{shopitem|Revive|1500}}|{{shopitem|Antidote|100}}}} | ||
{{shoprow|{{shopitem| | {{shoprow|{{shopitem|Paralyze Heal|200|display=Parlyz Heal}}|{{shopitem|Burn Heal|250}}}} | ||
{{shoprow|{{shopitem| | {{shoprow|{{shopitem|Ice Heal|250}}|{{shopitem|Awakening|250}}}} | ||
{{shoprow | {{shoprow|{{shopitem|Full Heal|600}}}} | ||
{{shopfooter|multiple=yes}} | {{shopfooter|multiple=yes}} | ||
{{shop|Right | {{shop|Right cashier}} | ||
{{shoprow|{{shopitem|Poké Ball|200}}|{{shopitem|Great Ball|600}}}} | {{shoprow|{{shopitem|Poké Ball (item)|200|5=Poké Ball|display=Poké Ball}}|{{shopitem|Great Ball|600}}}} | ||
{{shoprow|{{shopitem|Ultra Ball|1200}}|{{shopitem|Escape Rope|550}}}} | {{shoprow|{{shopitem|Ultra Ball|1200}}|{{shopitem|Escape Rope|550}}}} | ||
{{shoprow|{{shopitem|Repel|350}}|{{shopitem|Super Repel|500}}}} | {{shoprow|{{shopitem|Poké Doll|1000}}|{{shopitem|Repel|350}}}} | ||
{{shoprow|{{shopitem| | {{shoprow|{{shopitem|Super Repel|500}}|{{shopitem|Max Repel|700}}}} | ||
{{shoprow|{{shopitem| | {{shoprow|{{shopitem|Grass Mail|50}}|{{shopitem|Flame Mail|50}}}} | ||
{{shoprow|{{shopitem| | {{shoprow|{{shopitem|Bubble Mail|50}}|{{shopitem|Space Mail|50}}}} | ||
{{shopfooter}} | |||
====[[Generation VII]]==== | |||
{{shop|Upper cashier}} | |||
{{shoprow|{{shopitem|TM17|20,000|PD||TM Dragon VI|Dragon Tail}}|{{shopitem|TM18|20,000|PD||TM Bug VI|U-turn}}}} | |||
{{shoprow|{{shopitem|TM19|50,000|PD||TM Steel VI|Iron Tail}}|{{shopitem|TM25|30,000|PD||TM Water VI|Waterfall}}}} | |||
{{shoprow|{{shopitem|TM28|30,000|PD||TM Normal VI|Tri Attack}}|{{shopitem|TM30|10,000|PD||TM Fighting VI|Bulk Up}}}} | |||
{{shoprow|{{shopitem|TM43|30,000|PD||TM Ghost VI|Shadow Ball}}|{{shopitem|TM48|100,000|PD||TM Normal VI|Hyper Beam}}}} | |||
{{shopfooter|multiple=yes}} | |||
{{shop|Lower cashier}} | |||
{{shoprow|{{shopitem|Poké Ball (item)|100|5=Poké Ball|display=Poké Ball}}|{{shopitem|Great Ball|300}}}} | |||
{{shoprow|{{shopitem|Potion|100}}|{{shopitem|Super Potion|700}}}} | |||
{{shoprow|{{shopitem|Antidote|200}}|{{shopitem|Burn Heal|300}}}} | |||
{{shoprow|{{shopitem|Ice Heal|100}}|{{shopitem|Awakening|100}}}} | |||
{{shoprow|{{shopitem|Paralyze Heal|300}}|{{shopitem|Escape Rope|300}}}} | |||
{{shoprow|{{shopitem|Repel|400}}|{{shopitem|Lure|400}}}} | |||
{{shoprow|{{shopitem|X Attack|550}}|{{shopitem|X Defense|500}}}} | |||
{{shoprow|{{shopitem|X Sp. Atk|350}}|{{shopitem|X Sp. Def|350}}}} | |||
{{shoprow|{{shopitem|X Speed|350}}|{{shopitem|X Accuracy|900}}}} | |||
{{shoprow|{{shopitem|Dire Hit|650}}|{{shopitem|Guard Spec.|700}}}} | |||
{{shopfooter}} | {{shopfooter}} | ||
=== | ===3F=== | ||
Video games are | In [[Generation]]s {{gen|I}}, {{gen|III}}, and {{gen|VII}}, 3F is the Video Game Shop (TV Game Shop in Generations I and III). Various video games are displayed on this floor. In Generation I, a man behind the counter gives the player {{TM|18|Counter}}; in Generation III, this man is a [[Move Tutor]] who teaches Counter to a Pokémon; in Generation VII, this man gives the player {{TM|03|Helping Hand}}. | ||
In Generations {{gen|II}} and {{gen|IV}}, 3F is the TM Shop. In Generation IV, the floor's motto is "Make Your Pokémon Stronger!" | |||
{{shop|Generation II}} | {{shop|Generation II}} | ||
| Line 129: | Line 198: | ||
{{shopfooter}} | {{shopfooter}} | ||
=== | ===4F=== | ||
4F is Wiseman Gifts (formatted "Wise Man Gifts" in Generation III). In Generations I, II, III, and VII, its motto is "Express yourself with gifts!"; in Generation IV, its motto is "Gifts to Express Yourself!". | |||
In Generations I, III, and VII, [[Evolution stone]]s are sold here. In Generation IV, [[Falkner]] and [[Janine]] appear here on Mondays. | |||
{{shop|Generation I}} | {{shop|Generation I}} | ||
{{shoprow|{{shopitem|Poké Doll|1000}}|{{shopitem|Fire Stone|2100}}}} | {{shoprow|{{shopitem|Poké Doll|1000}}|{{shopitem|Fire Stone|2100}}}} | ||
{{shoprow|{{shopitem| | {{shoprow|{{shopitem|Thunder Stone|2100|display=Thunderstone}}|{{shopitem|Water Stone|2100}}}} | ||
{{shoprow|{{shopitem|Leaf Stone|2100}}}} | {{shoprow|{{shopitem|Leaf Stone|2100}}}} | ||
{{shopfooter|multiple=yes}} | {{shopfooter|multiple=yes}} | ||
| Line 143: | Line 214: | ||
{{shop|Generation III}} | {{shop|Generation III}} | ||
{{shoprow|{{shopitem|Poké Doll|1000}}|{{shopitem|Retro Mail|50}}}} | {{shoprow|{{shopitem|Poké Doll|1000}}|{{shopitem|Retro Mail|50}}}} | ||
{{shoprow|{{shopitem|Fire Stone|2100}}|{{shopitem| | {{shoprow|{{shopitem|Fire Stone|2100}}|{{shopitem|Thunder Stone|2100|display=Thunderstone}}}} | ||
{{shoprow|{{shopitem|Water Stone|2100}}|{{shopitem|Leaf Stone|2100}}}} | {{shoprow|{{shopitem|Water Stone|2100}}|{{shopitem|Leaf Stone|2100}}}} | ||
{{shopfooter|multiple=yes}} | {{shopfooter|multiple=yes}} | ||
| Line 150: | Line 221: | ||
{{shoprow|{{shopitem|Bloom Mail|50}}}} | {{shoprow|{{shopitem|Bloom Mail|50}}}} | ||
{{shopfooter}} | {{shopfooter}} | ||
{{shop|Generation VII}} | |||
{{shoprow|{{shopitem|Fire Stone|5,000}}|{{shopitem|Thunder Stone|5,000}}}} | |||
{{shoprow|{{shopitem|Water Stone|5,000}}|{{shopitem|Leaf Stone|5,000}}}} | |||
{{shoprow|{{shopitem|Ice Stone|5,000}}}} | |||
{{shopfooter}} | |||
===5F=== | |||
From Generations I to IV, 5F is the Drugstore (Japanese: {{j|ドラッグ ストア}}{{sup/1|RGBY}}{{sup/3|FRLG}}{{sup/4|HGSS}} or {{j|ドラッグ・ストア}}{{sup/2|GSC}} ''Drug Store'')—formatted Drug Store in Generations I and II; in English Generation IV, it is called Battle Collection instead. This floor sells [[battle item]]s and [[vitamin]]s. In Generation IV, its motto is ''Bring Out Pokémon Potential'' (Japanese: {{j|「ポケモンの ちからを ひきだす」}} ''Bring Out a Pokémon's Power''). | |||
In Generation VII, 5F is the Accessory Market (Japanese: {{j|アクセサリー マーケット}} ''Accessory Market''). It sells accessories for the player and their {{ga|partner Pokémon}}. | |||
=== | ====Generation I==== | ||
{{shop|Left cashier}} | |||
{{shoprow|{{shopitem|X Accuracy|950}}|{{shopitem|Guard Spec.|700}}}} | |||
{{shoprow|{{shopitem|Dire Hit|650}}|{{shopitem|X Attack|500}}}} | |||
{{shoprow|{{shopitem|X Defense|550|display=X Defend}}|{{shopitem|X Speed|350}}}} | |||
{{shoprow|{{shopitem|X Sp. Atk|350|display=X Special}}}} | |||
{{shopfooter|multiple=yes}} | |||
{{shop|Right cashier}} | |||
{{shoprow|{{shopitem|HP Up|9800|note={{tt|*|except in Japanese Pokémon Red and Green}}}}|{{shopitem|Protein|9800}}}} | |||
{{shoprow|{{shopitem|Iron|9800}}|{{shopitem|Carbos|9800}}}} | |||
{{shoprow|{{shopitem|Calcium|9800}}}} | |||
{{shopfooter}} | |||
==== | ====Generation II==== | ||
{{shop|Left | {{shop|Left cashier}} | ||
{{shoprow|{{shopitem|HP Up|9800}}|{{shopitem|Protein|9800}}}} | {{shoprow|{{shopitem|HP Up|9800}}|{{shopitem|Protein|9800}}}} | ||
{{shoprow|{{shopitem|Iron|9800}}|{{shopitem| | {{shoprow|{{shopitem|Iron|9800}}|{{shopitem|Carbos|9800}}}} | ||
{{shoprow|{{shopitem| | {{shoprow|{{shopitem|Calcium|9800}}}} | ||
{{shopfooter|multiple=yes}} | {{shopfooter|multiple=yes}} | ||
{{shop|Right | {{shop|Right cashier}} | ||
{{shoprow|{{shopitem|X Accuracy|950}}|{{shopitem|Guard Spec.|700}}}} | {{shoprow|{{shopitem|X Accuracy|950}}|{{shopitem|Guard Spec.|700}}}} | ||
{{shoprow|{{shopitem|Dire Hit|650}}}} | {{shoprow|{{shopitem|Dire Hit|650}}|{{shopitem|X Attack|500}}}} | ||
{{shoprow|{{shopitem|X Defense|display=X Defend|550}}|{{shopitem|X Speed|350}}}} | |||
{{shoprow|{{shopitem|X Sp. Atk|350|display=X Special}}}} | |||
{{shopfooter}} | {{shopfooter}} | ||
====Generation III==== | ====Generation III==== | ||
{{shop| | {{shop|Upper cashier}} | ||
{{shoprow|{{shopitem|HP Up|9800}}|{{shopitem|Protein|9800}}}} | {{shoprow|{{shopitem|HP Up|9800}}|{{shopitem|Protein|9800}}}} | ||
{{shoprow|{{shopitem|Iron|9800}}|{{shopitem|Calcium|9800}}}} | {{shoprow|{{shopitem|Iron|9800}}|{{shopitem|Calcium|9800}}}} | ||
{{shoprow|{{shopitem|Zinc|9800}}|{{shopitem|Carbos|9800}}}} | {{shoprow|{{shopitem|Zinc|9800}}|{{shopitem|Carbos|9800}}}} | ||
{{shopfooter|multiple=yes}} | {{shopfooter|multiple=yes}} | ||
{{shop| | {{shop|Lower cashier}} | ||
{{shoprow|{{shopitem|X Attack|500}}|{{shopitem|X Defend|550}}}} | {{shoprow|{{shopitem|X Attack|500}}|{{shopitem|X Defense|display=X Defend|550}}}} | ||
{{shoprow|{{shopitem|X Speed|350}}|{{shopitem|X | {{shoprow|{{shopitem|X Speed|350}}|{{shopitem|X Sp. Atk|350|display=X Special}}}} | ||
{{shoprow|{{shopitem|X Accuracy|950}}|{{shopitem|Guard Spec.|700}}}} | {{shoprow|{{shopitem|X Accuracy|950}}|{{shopitem|Guard Spec.|700}}}} | ||
{{shoprow|{{shopitem|Dire Hit|650}}}} | {{shoprow|{{shopitem|Dire Hit|650}}}} | ||
| Line 181: | Line 272: | ||
====Generation IV==== | ====Generation IV==== | ||
{{shop|Left | {{shop|Left cashier}} | ||
{{shoprow|{{shopitem|X | {{shoprow|{{shopitem|X Speed|350}}|{{shopitem|X Attack|500}}}} | ||
{{shoprow|{{shopitem|X | {{shoprow|{{shopitem|X Defense|display=X Defend|550}}|{{shopitem|Guard Spec.|700}}}} | ||
{{shoprow|{{shopitem| | {{shoprow|{{shopitem|Dire Hit|650}}|{{shopitem|X Accuracy|950}}}} | ||
{{shoprow|{{shopitem| | {{shoprow|{{shopitem|X Sp. Atk|350|display=X Special}}|{{shopitem|X Sp. Def|350}}}} | ||
{{shopfooter|multiple=yes}} | {{shopfooter|multiple=yes}} | ||
{{shop|Right | {{shop|Right cashier}} | ||
{{shoprow|{{shopitem| | {{shoprow|{{shopitem|Protein|9800}}|{{shopitem|Iron|9800}}}} | ||
{{shoprow|{{shopitem| | {{shoprow|{{shopitem|Calcium|9800}}|{{shopitem|Zinc|9800}}}} | ||
{{shoprow|{{shopitem| | {{shoprow|{{shopitem|Carbos|9800}}|{{shopitem|HP Up|9800}}}} | ||
{{shopfooter}} | |||
====Generation VII==== | |||
=====Upper left stall===== | |||
{{shop|Hats}} | |||
{{shoprow|{{shopdec|Straw Hat|Bag Clothing Trunk Sprite|10,000|6=Clothing}}|{{shopdec|Sweet Hat|Bag Clothing Trunk Sprite|20,000|6=Clothing}}}} | |||
{{shoprow|{{shopdec|Elegant Hat|Bag Clothing Trunk Sprite|20,000|6=Clothing}}}} | |||
{{shopfooter|multiple=yes}} | |||
{{shop|Special}} | |||
{{shoprow|{{shopdec|Crown|Bag Clothing Trunk Sprite|999,999|6=Clothing}}}} | |||
{{shopfooter}} | |||
=====Lower left stall===== | |||
{{shop|}} | |||
{{shoprow|{{shopdec|Diglett Cap|Bag Clothing Trunk Sprite|50|6=Clothing}}}} | |||
{{shopfooter}} | |||
=====Upper right stall===== | |||
{{shop|Little Bows}} | |||
{{shoprow|{{shopdec|Little Red Bow|Bag Clothing Trunk Sprite|1,000|6=Clothing}}|{{shopdec|Little Green Bow|Bag Clothing Trunk Sprite|1,000|6=Clothing}}}} | |||
{{shoprow|{{shopdec|Little Blue Bow|Bag Clothing Trunk Sprite|1,000|6=Clothing}}|{{shopdec|Little Black Bow|Bag Clothing Trunk Sprite|1,000|6=Clothing}}}} | |||
{{shoprow|{{shopdec|Little Plaid Bow|Bag Clothing Trunk Sprite|1,000|6=Clothing}}|{{shopdec|Little Formal Bow|Bag Clothing Trunk Sprite|1,000|6=Clothing}}}} | |||
{{shoprow|{{shopdec|Little Polka-Dot Bow|Bag Clothing Trunk Sprite|1,000|6=Clothing}}|{{shopdec|Little Bow|Bag Clothing Trunk Sprite|1,000|6=Clothing}}}} | |||
{{shopfooter|multiple=yes}} | |||
{{shop|Fancy Bows}} | |||
{{shoprow|{{shopdec|Fancy Red Bow|Bag Clothing Trunk Sprite|2,000|6=Clothing}}|{{shopdec|Fancy Green Bow|Bag Clothing Trunk Sprite|2,000|6=Clothing}}}} | |||
{{shoprow|{{shopdec|Fancy Blue Bow|Bag Clothing Trunk Sprite|2,000|6=Clothing}}|{{shopdec|Fancy Black Bow|Bag Clothing Trunk Sprite|2,000|6=Clothing}}}} | |||
{{shoprow|{{shopdec|Fancy Plaid Bow|Bag Clothing Trunk Sprite|2,000|6=Clothing}}|{{shopdec|Fancy Formal Bow|Bag Clothing Trunk Sprite|2,000|6=Clothing}}}} | |||
{{shoprow|{{shopdec|Fancy Cute Bow|Bag Clothing Trunk Sprite|2,000|6=Clothing}}|{{shopdec|Fancy Frilly Bow|Bag Clothing Trunk Sprite|2,000|6=Clothing}}}} | |||
{{shopfooter}} | |||
{{shop|Bandannas}} | |||
{{shoprow|{{shopdec|Sailor Bandanna|Bag Clothing Trunk Sprite|3,000|6=Clothing}}|{{shopdec|Safari Bandanna|Bag Clothing Trunk Sprite|3,000|6=Clothing}}}} | |||
{{shoprow|{{shopdec|Polka-Dot Bandanna|Bag Clothing Trunk Sprite|3,000|6=Clothing}}|{{shopdec|Ruby Bandanna|Bag Clothing Trunk Sprite|3,000|6=Clothing}}}} | |||
{{shoprow|{{shopdec|Sapphire Bandanna|Bag Clothing Trunk Sprite|3,000|6=Clothing}}|{{shopdec|Emerald Bandanna|Bag Clothing Trunk Sprite|3,000|6=Clothing}}}} | |||
{{shoprow|{{shopdec|Black Bandanna|Bag Clothing Trunk Sprite|3,000|6=Clothing}}|{{shopdec|White Bandanna|Bag Clothing Trunk Sprite|3,000|6=Clothing}}}} | |||
{{shopfooter|multiple=yes}} | |||
{{shop|Flowers}} | |||
{{shoprow|{{shopdec|Red Flowers|Bag Clothing Trunk Sprite|5,000|6=Clothing}}|{{shopdec|Pink Flowers|Bag Clothing Trunk Sprite|5,000|6=Clothing}}}} | |||
{{shoprow|{{shopdec|Blue Flowers|Bag Clothing Trunk Sprite|5,000|6=Clothing}}|{{shopdec|White Flowers|Bag Clothing Trunk Sprite|5,000|6=Clothing}}}} | |||
{{shoprow|{{shopdec|Orange Flowers|Bag Clothing Trunk Sprite|5,000|6=Clothing}}|{{shopdec|Purple Flowers|Bag Clothing Trunk Sprite|5,000|6=Clothing}}}} | |||
{{shoprow|{{shopdec|Pale Blue Flowers|Bag Clothing Trunk Sprite|5,000|6=Clothing}}|{{shopdec|Green Flowers|Bag Clothing Trunk Sprite|5,000|6=Clothing}}}} | |||
{{shopfooter}} | |||
=====Lower right stall===== | |||
{{shop|Glasses}} | |||
{{shoprow|{{shopdec|Black Framed Glasses|Bag Clothing Trunk Sprite|8,000|6=Clothing}}|{{shopdec|Red Framed Glasses|Bag Clothing Trunk Sprite|8,000|6=Clothing}}}} | |||
{{shoprow|{{shopdec|Green Framed Glasses|Bag Clothing Trunk Sprite|8,000|6=Clothing}}|{{shopdec|Brown Framed Glasses|Bag Clothing Trunk Sprite|12,000|6=Clothing}}}} | |||
{{shoprow|{{shopdec|Thick Glasses|Bag Clothing Trunk Sprite|5,000|6=Clothing}}}} | |||
{{shopfooter|multiple=yes}} | |||
{{shop|Sunglasses}} | |||
{{shoprow|{{shopdec|Blue Sky Sunglasses|Bag Clothing Trunk Sprite|10,000|6=Clothing}}|{{shopdec|Dawn Sunglasses|Bag Clothing Trunk Sprite|10,000|6=Clothing}}}} | |||
{{shoprow|{{shopdec|Dusk Sunglasses|Bag Clothing Trunk Sprite|10,000|6=Clothing}}|{{shopdec|Midnight Sunglasses|Bag Clothing Trunk Sprite|10,000|6=Clothing}}}} | |||
{{shopfooter}} | {{shopfooter}} | ||
===Rooftop Square: Vending Machines | ===Rooftop=== | ||
The rooftop floor is described as the floor "Rooftop Square" in Generations I and III, 6F in Generations II and IV, and "Roof" in Pokémon: Let's Go, Pikachu! and Let's Go, Eevee! | |||
{{shop| | |||
The rooftop floor is called the Vending Machines in Generation I, II, and III; Rooftop Atrium in Generation IV; and Relaxation Space & Vending Machines in Pokémon: Let's Go, Pikachu! and Let's Go, Eevee! In all games, the floor contains a picnic table and some [[vending machine]]s. In Generation IV, its motto is "Have a Break at the Vending Machines". | |||
In Generations {{gen|I}}, {{gen|III}}, and {{gen|VII}}, a thirsty girl will give the player [[TM]]s in exchange for one of the [[drink]]s. | |||
{{shop|}} | |||
{{shoprow|{{shopitem|Fresh Water|200}}|{{shopitem|Soda Pop|300}}}} | {{shoprow|{{shopitem|Fresh Water|200}}|{{shopitem|Soda Pop|300}}}} | ||
{{shoprow|{{shopitem|Lemonade|350}}|}} | {{shoprow|{{shopitem|Lemonade|350}}|}} | ||
| Line 201: | Line 349: | ||
==Items== | ==Items== | ||
{{Itlisth|building}} | {{Itlisth|building}} | ||
{{ | {{Itemlist||sprite=Accessory Turtwig Mask Sprite|2F, from [[Crasher Wake]]|HG=yes|SS=yes|display=[[Accessory|Turtwig Mask]]}} | ||
{{ | {{Itemlist||sprite=Accessory Chimchar Mask Sprite|2F, from Crasher Wake|HG=yes|SS=yes|display=[[Accessory|Chimchar Mask]]}} | ||
{{ | {{Itemlist||sprite=Accessory Piplup Mask Sprite|2F, from Crasher Wake|HG=yes|SS=yes|display=[[Accessory|Piplup Mask]]}} | ||
{{Itemlist|TM Fighting|3F, from the man behind the counter|R=yes|B=yes|Y=yes|display={{TM|18|Counter}}}} | |||
{{Itemlist|TM Normal VI|3F, from the man behind the counter|LP=yes|LE=yes|display={{TM|03|Helping Hand}}}} | |||
{{Itlistfoot|building}} | {{Itlistfoot|building}} | ||
== | ===TMs from the girl on the rooftop=== | ||
{| style="background-color: #{{locationcolor/med|building}}; {{roundy|10px}}; border: 3px solid #{{locationcolor/dark|building}}" | |||
|- style="background-color: #{{locationcolor/light|building}}" | |||
! style="{{roundytl|5px}}" | Games →<br>[[Drink]] ↓ | |||
! {{gameIcon|R}}{{gameIcon|B}}{{gameIcon|Ye}} | |||
! {{gameIcon|FR}}{{gameIcon|LG}} | |||
! style="{{roundytr|5px}}" | {{gameIcon|LGP}}{{gameIcon|LGE}} | |||
|- style="background-color: #fff; text-align: center" | |||
! style="background-color: #{{locationcolor/light|building}}" | {{Bag2|Fresh Water}} | |||
| {{TMic|Ice|13|Ice Beam}}<br>{{TM|13|Ice Beam}} | |||
| {{TMic|Psychic|16|Light Screen}}<br>{{TM|16|Light Screen}} | |||
| {{TMic|Psychic VI|06|Light Screen}}<br>{{TM|06|Light Screen}} | |||
|- style="background-color: #fff; text-align: center" | |||
! style="background-color: #{{locationcolor/light|building}}" | {{Bag2|Soda Pop}} | |||
| {{TMic|Rock|48|Rock Slide}}<br>{{TM|48|Rock Slide}} | |||
| {{TMic|Normal|20|Safeguard}}<br>{{TM|20|Safeguard}} | |||
| {{TMic|Psychic VI|09|Reflect}}<br>{{TM|09|Reflect}} | |||
|- style="background-color: #fff; text-align: center" | |||
! style="background-color: #{{locationcolor/light|building}}; {{roundybl|5px}}" | {{Bag2|Lemonade}} | |||
| {{TMic|Normal|49|Tri Attack}}<br>{{TM|49|Tri Attack}} | |||
| {{TMic|Psychic|33|Reflect}}<br>{{TM|33|Reflect}} | |||
| style="{{roundybr|5px}}" | {{TMic|Normal VI|07|Protect}}<br>{{TM|07|Protect}} | |||
|} | |||
=== | ==Trainers== | ||
===Generation VII=== | |||
All of these Trainers appear at the Department Store once the player has become {{pkmn|Champion}}. | |||
{{trainerheader|building}} | |||
{{trainerdiv|building|2F}} | |||
{{trainerentry/master|VSLass Master PE.png{{!}}90px|Lass|Yue|134|Vaporeon|♀|75|Ghost|Shadow Ball|Poison|Toxic|Psychic|Rest|36=ユウ|37=Yū}} | |||
{{trainerdiv|building|3F}} | |||
{{trainerentry/master|VSScientist Master PE.png{{!}}90px|Scientist|Alphonse|135|Jolteon|♂|75|Psychic|Light Screen|Normal|Yawn|Ghost|Shadow Ball|36=シモン|37=Shimon}} | |||
{{trainerdiv|building|4F}} | |||
{{trainerentry/master|VSAce Trainer M Master PE.png{{!}}90px|Ace Trainer|Dax|136|Flareon|♂|75|Fire|Flare Blitz|Fighting|Superpower|Fire|Fire Spin|36=ヤマト|37=Yamato}} | |||
{{trainerfooter|building|PE}} | |||
==Artwork== | |||
{| style="margin:auto; text-align:center; {{roundy|20px}} border:2px solid #{{grass color dark}}; background:#{{grass color}}; font-size:80%" | |||
|style="{{roundy|5px}} border:2px solid #{{grass color dark}}; background:#{{grass color light}}"| [[File:Celadon Department Store LGPE Concept Art.jpg|x250px]] | |||
|- | |||
|Concept art from the {{color2|000|Pokémon: Let's Go, Pikachu! & Pokémon: Let's Go, Eevee! Super Music Collection|Let's Go, Pikachu and Eevee! Super Music Collection}} | |||
|} | |||
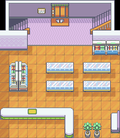
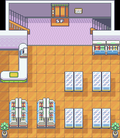
==Layout== | |||
===Interior=== | |||
{| class="roundy" style="margin:auto; background: #000; border: 3px solid #{{Locationcolor/dark|building}}" | |||
|- | |||
! style="background:#{{Locationcolor/light|building}}; {{roundytl|5px}}" | Version | |||
! style="background:#{{Locationcolor/light|building}}" | 1F | |||
! style="background:#{{Locationcolor/light|building}}" | 2F | |||
! style="background:#{{Locationcolor/light|building}}" | 3F | |||
! style="background:#{{Locationcolor/light|building}}" | 4F | |||
! style="background:#{{Locationcolor/light|building}}" | 5F | |||
! style="background:#{{Locationcolor/light|building}}; {{roundytr|5px}}" | Rooftop | |||
|- | |||
! style="background:#{{red color}}" | {{color2|000|Pokémon Red and Blue Versions|Red}} | |||
| rowspan="3" | [[File:Celadon Department Store 1F RBY.png|120px]] | |||
| rowspan="3" | [[File:Celadon Department Store 2F RBY.png|120px]] | |||
| rowspan="3" | [[File:Celadon Department Store 3F RBY.png|120px]] | |||
| rowspan="3" | [[File:Celadon Department Store 4F RBY.png|120px]] | |||
| rowspan="3" | [[File:Celadon Department Store 5F RBY.png|120px]] | |||
| rowspan="3" | [[File:Celadon Department Store Rooftop RBY.png|120px|center]] | |||
|- | |||
! style="background:#{{blue color}}" | {{color2|fff|Pokémon Red and Blue Versions|Blue}} | |||
|- | |||
! style="background:#{{yellow color}}" | {{color2|000|Pokémon Yellow Version|Yellow}} | |||
|- | |||
! style="background:#{{gold color}}" | {{color2|000|Pokémon Gold and Silver Versions|Gold}} | |||
| rowspan="2" | [[File:Celadon Department Store 1F GSC.png|120px]] | |||
| rowspan="2" | [[File:Celadon Department Store 2F GSC.png|120px]] | |||
| rowspan="2" | [[File:Celadon Department Store 3F GSC.png|120px]] | |||
| rowspan="2" | [[File:Celadon Department Store 4F GSC.png|120px]] | |||
| rowspan="2" | [[File:Celadon Department Store 5F GSC.png|120px]] | |||
| rowspan="3" | [[File:None.png|120px|center]] | |||
|- | |||
! style="background:#{{silver color}}" | {{color2|000|Pokémon Gold and Silver Versions|Silver}} | |||
|- | |||
! style="background:#{{crystal color}}" | {{color2|000|Pokémon Crystal Version|Crystal}} | |||
| [[File:Goldenrod Department Store 1F C.png|120px]] | |||
| [[File:Goldenrod Department Store 2F C.png|120px]] | |||
| [[File:Goldenrod Department Store 3F C.png|120px]] | |||
| [[File:Goldenrod Department Store 4F C.png|120px]] | |||
| [[File:Celadon Department Store 6F C.png|120px]] | |||
|- | |||
! style="background:#{{firered color}}" | {{color2|000|Pokémon FireRed and LeafGreen Versions|FireRed}} | |||
| rowspan="2" | [[File:Celadon Department Store 1F FRLG.png|120px]] | |||
| rowspan="2" | [[File:Celadon Department Store 2F FRLG.png|120px]] | |||
| rowspan="2" | [[File:Celadon Department Store 3F FRLG.png|120px]] | |||
| rowspan="2" | [[File:Celadon Department Store 4F FRLG.png|120px]] | |||
| rowspan="2" | [[File:Celadon Department Store 5F FRLG.png|120px]] | |||
| rowspan="2" | [[File:Celadon Department Store Rooftop FRLG.png|120px|center]] | |||
|- | |||
! style="background:#{{leafgreen color}}" | {{color2|000|Pokémon FireRed and LeafGreen Versions|LeafGreen}} | |||
|- | |||
! style="background:#{{heartgold color}}" | {{color2|000|Pokémon HeartGold and SoulSilver Versions|HeartGold}} | |||
| rowspan="2" | [[File:Celadon Department Store 1F HGSS.png|120px]] | |||
| rowspan="2" | [[File:Celadon Department Store 2F HGSS.png|120px]] | |||
| rowspan="2" | [[File:Celadon Department Store 3F HGSS.png|120px]] | |||
| rowspan="2" | [[File:Celadon Department Store 4F HGSS.png|120px]] | |||
| rowspan="2" | [[File:Celadon Department Store 5F HGSS.png|120px]] | |||
| rowspan="2" | [[File:Celadon Department Store Rooftop HGSS.png|120px|center]] | |||
|- | |||
! style="background:#{{soulsilver color}}" | {{color2|000|Pokémon HeartGold and SoulSilver Versions|SoulSilver}} | |||
|- | |||
! style="background:#{{Let's Go Pikachu color}}" | {{color2|000|Pokémon Let's Go, Pikachu! and Let's Go, Eevee!|Let's Go, Pikachu!}} | |||
| rowspan="2" | [[File:Celadon Department Store 1F LGPE.png|120px]] | |||
| rowspan="2" | [[File:Celadon Department Store 2F LGPE.png|120px]] | |||
| rowspan="2" | [[File:Celadon Department Store 3F LGPE.png|120px]] | |||
| rowspan="2" | [[File:Celadon Department Store 4F LGPE.png|120px]] | |||
| rowspan="2" | [[File:Celadon Department Store 5F LGPE.png|120px]] | |||
| rowspan="2" | [[File:Celadon Department Store Rooftop LGPE.png|120px|center]] | |||
|- | |||
! style="background:#{{Let's Go Eevee color}}" | {{color2|000|Pokémon Let's Go, Pikachu! and Let's Go, Eevee!|Let's Go, Eevee!}} | |||
|- | |||
| colspan="7" style="background:#{{Locationcolor/light|building}}; {{roundybottom|5px}}" | | |||
|} | |||
===Exterior=== | |||
{{Mapgen | {{Mapgen | ||
|hv=v | |hv=v | ||
| Line 223: | Line 487: | ||
|sizeIII=146px | |sizeIII=146px | ||
|genIV=Celadon Department Store HGSS.png | |genIV=Celadon Department Store HGSS.png | ||
|sizeIV=119px}} | |sizeIV=119px | ||
|genVII=Celadon Department Store Exterior LGPE.png | |||
|sizeVII=250px}} | |||
==Trivia== | ==Trivia== | ||
*Although the Rooftop Square opens into the sky and is uncovered, {{m|Fly}} cannot be used to leave from the roof. | * Although the Rooftop Square opens into the sky and is uncovered, {{m|Fly}} cannot be used to leave from the roof. | ||
*In {{game| | * In the Japanese version of [[Generation I]] games, and all language versions of {{game|FireRed and LeafGreen|s}} and [[Pokémon: Let's Go, Pikachu! and Let's Go, Eevee!|Let's Go, Pikachu! and Let's Go, Eevee!]], there are two boys trading a {{p|Haunter}} for a {{p|Kangaskhan}} at the 3F, and it is implied that Haunter [[evolution|evolves]] by trade into {{p|Gengar}}. In the international versions of [[Generation I]] games, they trade {{p|Graveler}} for Kangaskhan instead. | ||
*In {{game|HeartGold and SoulSilver|s}}, after | ** In the Japanese games, the boy who receives Haunter calls himself Haunter Maniac (Japanese: ゴーストマニア ''Ghost Maniac''). | ||
* In {{game|Red and Blue|s}} as well as {{game|FireRed and LeafGreen|s}}, a male [[non-player character|NPC]] at the 4F talks about buying a [[Poké Doll]] for his girlfriend. In {{game|Yellow}}, he says that he will give a Poké Doll to {{OBP|Copycat|character}}. In [[Pokémon: Let's Go, Pikachu! and Let's Go, Eevee!]], he talks about buying a [[Water Stone]] for his girlfriend. | |||
** In the Japanese, French, and Italian versions of Pokémon Yellow, he mentions that Copycat lives in [[Saffron City]]. However, due to a localization error in the English and Spanish versions, he incorrectly says that she lives in [[Cerulean City]]. In the German version, he does not mention where she lives. | |||
* In {{game|HeartGold and SoulSilver|s}}, after the {{player}} has obtained the {{badge|Soul}}, [[Falkner]] can be found on the fourth floor on Mondays talking to [[Janine]]. He will then exchange [[Pokégear]] phone numbers with the player for [[rematch]]es. | |||
* In Pokémon FireRed and LeafGreen, Celadon Department Store has a separate save and met location name, but uses the same [[List of locations by index number (Generation III)|location ID]] (<code>0x5E</code>) as the rest of Celadon City—the game temporarily replaces the name of the location with "<sc>Celadon Dept.</sc>" while inside the building. As a result, while inside the building, Pokémon with the met location "Celadon City" instead display "Celadon Dept." as their met location temporarily. | |||
==In other languages== | |||
{{langtable|color={{locationcolor/light|building}}|bordercolor={{locationcolor/dark|building}} | |||
|zh_yue=玉虹百貨公司 ''{{tt|Yúkhùhng Baakfo Gūngsī|Celadon Department Store}}'' {{tt|*|Games}}<br>彩虹百貨公司 ''{{tt|Chóihùhng Baakfo Gūngsī|Celadon Department Store}}'' {{tt|*|Manga}} | |||
|zh_cmn=玉虹百貨公司 / 玉虹百货公司 ''{{tt|Yùhóng Bǎihuò Gōngsī|Celadon Department Store}}'' {{tt|*|Games}}<br>彩虹百貨公司 ''{{tt|Cǎihóng Bǎihuò Gōngsī|Celadon Department Store}}'' {{tt|*|Manga}} | |||
|fr=Centre commercial de Céladopole | |||
|de=Prismania-Einkaufscenter ({{gen|VII}})<br>Prismania Einkaufszentrum ({{gen|I}}-{{gen|III}}) | |||
|it=Centro Commerciale di Azzurropoli | |||
|ko=무지개백화점 ''Mujigae Baekwajeom'' | |||
|pt_br=Loja de Departamentos da Cidade Celadon | |||
|pt_eu=Loja de Departamentos da Cidade Celadon | |||
|es=Centro Comercial de Ciudad Azulona | |||
}} | |||
==References== | |||
<references/> | |||
==Notes== | |||
<references group="lower-alpha" /> | |||
{{Dept}} | {{Dept}} | ||
{{Kanto}} | {{Kanto}}<br> | ||
{{Project Locations notice}} | {{Project Locations notice}} | ||
| Line 239: | Line 528: | ||
[[Category:FireRed and LeafGreen locations]] | [[Category:FireRed and LeafGreen locations]] | ||
[[Category:HeartGold and SoulSilver locations]] | [[Category:HeartGold and SoulSilver locations]] | ||
[[Category:Let's Go, Pikachu! and Let's Go, Eevee! locations]] | |||
[[de:Prismania | [[de:Prismania-Einkaufscenter]] | ||
[[es:Centro Comercial | [[es:Centro Comercial Azulona]] | ||
[[fr:Centre commercial de Céladopole]] | [[fr:Centre commercial de Céladopole]] | ||
[[it:Centro Commerciale di Azzurropoli]] | |||
[[ja:タマムシデパート]] | [[ja:タマムシデパート]] | ||
[[ | [[zh:玉虹百货公司]] | ||
Latest revision as of 11:30, 12 April 2024
| |||||
| |||||
| Location: | Celadon City | ||||
|---|---|---|---|---|---|
| Region: | Kanto | ||||
| Generations: | I, II, III, IV, VII | ||||
 Location of Celadon Department Store in Kanto. | |||||
| Pokémon world locations | |||||
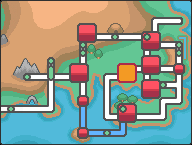
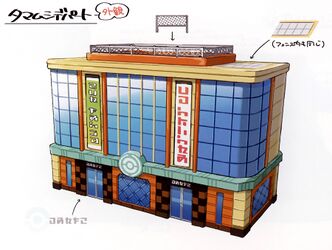
The Celadon Department Store (Japanese: タマムシデパート Tamamushi Department Store) is the largest shop in Kanto. The store is six stories tall, including the roof.
Sign
The sign outside the building has remained fundamentally the same throughout the generations, only with slight differences in grammar and spelling.
- Generation I
Find what you
need at CELADON
DEPT. STORE!
- Generation II
Find What You
Need at CELADON
DEPT.STORE!
- Generation III
- Generation IV
Floors
| Floor | Name | ||||
|---|---|---|---|---|---|
| R B Y | G S C | FR LG | HG SS | P E | |
| 1F | Service Counter | Service Counter | |||
| 2F | Trainer's Market | Trainer's Market | Trainers' Market | ||
| 3F | TV Game Shop | TM Shop | TV Game Shop | TM Shop | Video Game Shop |
| 4F | Wiseman Gifts | Wise Man Gifts | Wiseman Gifts | ||
| 5F | Drug Store | Drugstore | Battle Collection | Accessory Market | |
| Roof[a] | Vending Machines | Rooftop Atrium | Relaxation Space & Vending Machines | ||
1F
1F is the Service Corner. Here, a receptionist welcomes customers and directs them to a board that describes the store layout. This is where the Poké Mart deliveryman can be found.
2F
2F is the Trainers' Market (formatted Trainer's Market prior to Generation VII). In Pokémon: Let's Go, Pikachu! and Let's Go, Eevee!, this floor's motto is "Loads and loads of TMs!" In earlier games, the motto is "Top Grade Items for Trainers!"
According to the Fame Checker, Lance is seen regularly on this floor buying capes.
Generation I
| Left cashier | |||||||
|---|---|---|---|---|---|---|---|
|
| ||||||
|
| ||||||
|
| ||||||
|
| ||||||
|
|||||||
| Right cashier | |||||||
|---|---|---|---|---|---|---|---|
|
| ||||||
|
| ||||||
|
| ||||||
|
| ||||||
|
|||||||
Generation II
| Left cashier | |||||||
|---|---|---|---|---|---|---|---|
|
| ||||||
|
| ||||||
|
| ||||||
|
|||||||
| Right cashier | |||||||
|---|---|---|---|---|---|---|---|
|
| ||||||
|
| ||||||
|
| ||||||
|
| ||||||
|
| ||||||
Generation III
| Upper cashier | |||||||
|---|---|---|---|---|---|---|---|
|
| ||||||
|
| ||||||
|
| ||||||
| Lower cashier | |||||||
|---|---|---|---|---|---|---|---|
|
| ||||||
|
| ||||||
|
| ||||||
|
| ||||||
|
|||||||
Generation IV
| Left cashier | |||||||
|---|---|---|---|---|---|---|---|
|
| ||||||
|
| ||||||
|
| ||||||
|
| ||||||
|
| ||||||
|
|||||||
| Right cashier | |||||||
|---|---|---|---|---|---|---|---|
|
| ||||||
|
| ||||||
|
| ||||||
|
| ||||||
|
| ||||||
|
| ||||||
Generation VII
| Upper cashier | |||||||
|---|---|---|---|---|---|---|---|
|
| ||||||
|
| ||||||
|
| ||||||
|
| ||||||
| Lower cashier | |||||||
|---|---|---|---|---|---|---|---|
|
| ||||||
|
| ||||||
|
| ||||||
|
| ||||||
|
| ||||||
|
| ||||||
|
| ||||||
|
| ||||||
|
| ||||||
|
| ||||||
3F
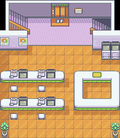
In Generations I, III, and VII, 3F is the Video Game Shop (TV Game Shop in Generations I and III). Various video games are displayed on this floor. In Generation I, a man behind the counter gives the player TM18 (Counter); in Generation III, this man is a Move Tutor who teaches Counter to a Pokémon; in Generation VII, this man gives the player TM03 (Helping Hand).
In Generations II and IV, 3F is the TM Shop. In Generation IV, the floor's motto is "Make Your Pokémon Stronger!"
| Generation II | |||||||
|---|---|---|---|---|---|---|---|
|
| ||||||
|
| ||||||
|
|||||||
| Generation IV | |||||||
|---|---|---|---|---|---|---|---|
|
| ||||||
|
| ||||||
|
| ||||||
|
| ||||||
|
| ||||||
|
| ||||||
4F
4F is Wiseman Gifts (formatted "Wise Man Gifts" in Generation III). In Generations I, II, III, and VII, its motto is "Express yourself with gifts!"; in Generation IV, its motto is "Gifts to Express Yourself!".
In Generations I, III, and VII, Evolution stones are sold here. In Generation IV, Falkner and Janine appear here on Mondays.
| Generation I | |||||||
|---|---|---|---|---|---|---|---|
|
| ||||||
|
| ||||||
|
|||||||
| Generation II | |||||||
|---|---|---|---|---|---|---|---|
|
| ||||||
|
|||||||
| Generation III | |||||||
|---|---|---|---|---|---|---|---|
|
| ||||||
|
| ||||||
|
| ||||||
| Generation IV | |||||||
|---|---|---|---|---|---|---|---|
|
| ||||||
|
|||||||
| Generation VII | |||||||
|---|---|---|---|---|---|---|---|
|
| ||||||
|
| ||||||
|
|||||||
5F
From Generations I to IV, 5F is the Drugstore (Japanese: ドラッグ ストアRGBYFRLGHGSS or ドラッグ・ストアGSC Drug Store)—formatted Drug Store in Generations I and II; in English Generation IV, it is called Battle Collection instead. This floor sells battle items and vitamins. In Generation IV, its motto is Bring Out Pokémon Potential (Japanese: 「ポケモンの ちからを ひきだす」 Bring Out a Pokémon's Power).
In Generation VII, 5F is the Accessory Market (Japanese: アクセサリー マーケット Accessory Market). It sells accessories for the player and their partner Pokémon.
Generation I
| Left cashier | |||||||
|---|---|---|---|---|---|---|---|
|
| ||||||
|
| ||||||
|
| ||||||
|
|||||||
| Right cashier | |||||||
|---|---|---|---|---|---|---|---|
|
| ||||||
|
| ||||||
|
|||||||
Generation II
| Left cashier | |||||||
|---|---|---|---|---|---|---|---|
|
| ||||||
|
| ||||||
|
|||||||
| Right cashier | |||||||
|---|---|---|---|---|---|---|---|
|
| ||||||
|
| ||||||
|
| ||||||
|
|||||||
Generation III
| Upper cashier | |||||||
|---|---|---|---|---|---|---|---|
|
| ||||||
|
| ||||||
|
| ||||||
| Lower cashier | |||||||
|---|---|---|---|---|---|---|---|
|
| ||||||
|
| ||||||
|
| ||||||
|
|||||||
Generation IV
| Left cashier | |||||||
|---|---|---|---|---|---|---|---|
|
| ||||||
|
| ||||||
|
| ||||||
|
| ||||||
| Right cashier | |||||||
|---|---|---|---|---|---|---|---|
|
| ||||||
|
| ||||||
|
| ||||||
Generation VII
Upper left stall
| Hats | |||||||
|---|---|---|---|---|---|---|---|
|
| ||||||
|
|||||||
| Special | ||||
|---|---|---|---|---|
|
||||
Lower left stall
|
||||
Upper right stall
| Little Bows | |||||||
|---|---|---|---|---|---|---|---|
|
| ||||||
|
| ||||||
|
| ||||||
|
| ||||||
| Fancy Bows | |||||||
|---|---|---|---|---|---|---|---|
|
| ||||||
|
| ||||||
|
| ||||||
|
| ||||||
| Bandannas | |||||||
|---|---|---|---|---|---|---|---|
|
| ||||||
|
| ||||||
|
| ||||||
|
| ||||||
| Flowers | |||||||
|---|---|---|---|---|---|---|---|
|
| ||||||
|
| ||||||
|
| ||||||
|
| ||||||
Lower right stall
| Glasses | |||||||
|---|---|---|---|---|---|---|---|
|
| ||||||
|
| ||||||
|
|||||||
| Sunglasses | |||||||
|---|---|---|---|---|---|---|---|
|
| ||||||
|
| ||||||
Rooftop
The rooftop floor is described as the floor "Rooftop Square" in Generations I and III, 6F in Generations II and IV, and "Roof" in Pokémon: Let's Go, Pikachu! and Let's Go, Eevee!
The rooftop floor is called the Vending Machines in Generation I, II, and III; Rooftop Atrium in Generation IV; and Relaxation Space & Vending Machines in Pokémon: Let's Go, Pikachu! and Let's Go, Eevee! In all games, the floor contains a picnic table and some vending machines. In Generation IV, its motto is "Have a Break at the Vending Machines".
In Generations I, III, and VII, a thirsty girl will give the player TMs in exchange for one of the drinks.
|
| ||||||
|
|||||||
Items
| Item | Location | Games | |
|---|---|---|---|
| Turtwig Mask | 2F, from Crasher Wake | HG SS | |
| Chimchar Mask | 2F, from Crasher Wake | HG SS | |
| Piplup Mask | 2F, from Crasher Wake | HG SS | |
| TM18 (Counter) | 3F, from the man behind the counter | R B Y | |
| TM03 (Helping Hand) | 3F, from the man behind the counter | P E | |
TMs from the girl on the rooftop
| Games → Drink ↓ |
R B Y | FR LG | P E |
|---|---|---|---|
TM13 (Ice Beam) |
TM16 (Light Screen) |
TM06 (Light Screen) | |
TM48 (Rock Slide) |
TM20 (Safeguard) |
TM09 (Reflect) | |
TM49 (Tri Attack) |
TM33 (Reflect) |
TM07 (Protect) |
Trainers
Generation VII
All of these Trainers appear at the Department Store once the player has become Champion.
| Trainer | Pokémon | |||||||||||||||
|---|---|---|---|---|---|---|---|---|---|---|---|---|---|---|---|---|
| 2F | ||||||||||||||||
|
| |||||||||||||||
| 3F | ||||||||||||||||
|
| |||||||||||||||
| 4F | ||||||||||||||||
|
| |||||||||||||||
Artwork
|
| Concept art from the Let's Go, Pikachu and Eevee! Super Music Collection |
Layout
Interior
| Version | 1F | 2F | 3F | 4F | 5F | Rooftop |
|---|---|---|---|---|---|---|
| Red | ||||||
| Blue | ||||||
| Yellow | ||||||
| Gold | 
|

|

|

|

|
|
| Silver | ||||||
| Crystal | 
|

|

|

|

| |
| FireRed | 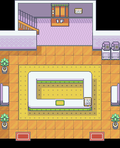
|

|
|
|
|
|
| LeafGreen | ||||||
| HeartGold | 
|

|

|

|

|
|
| SoulSilver | ||||||
| Let's Go, Pikachu! | 
|

|

|

|

|
|
| Let's Go, Eevee! | ||||||
Exterior
|
Trivia
- Although the Rooftop Square opens into the sky and is uncovered, Fly cannot be used to leave from the roof.
- In the Japanese version of Generation I games, and all language versions of Pokémon FireRed and LeafGreen and Let's Go, Pikachu! and Let's Go, Eevee!, there are two boys trading a Haunter for a Kangaskhan at the 3F, and it is implied that Haunter evolves by trade into Gengar. In the international versions of Generation I games, they trade Graveler for Kangaskhan instead.
- In the Japanese games, the boy who receives Haunter calls himself Haunter Maniac (Japanese: ゴーストマニア Ghost Maniac).
- In Pokémon Red and Blue as well as Pokémon FireRed and LeafGreen, a male NPC at the 4F talks about buying a Poké Doll for his girlfriend. In Pokémon Yellow, he says that he will give a Poké Doll to Copycat. In Pokémon: Let's Go, Pikachu! and Let's Go, Eevee!, he talks about buying a Water Stone for his girlfriend.
- In the Japanese, French, and Italian versions of Pokémon Yellow, he mentions that Copycat lives in Saffron City. However, due to a localization error in the English and Spanish versions, he incorrectly says that she lives in Cerulean City. In the German version, he does not mention where she lives.
- In Pokémon HeartGold and SoulSilver, after the player has obtained the Soul Badge, Falkner can be found on the fourth floor on Mondays talking to Janine. He will then exchange Pokégear phone numbers with the player for rematches.
- In Pokémon FireRed and LeafGreen, Celadon Department Store has a separate save and met location name, but uses the same location ID (
0x5E) as the rest of Celadon City—the game temporarily replaces the name of the location with "Celadon Dept." while inside the building. As a result, while inside the building, Pokémon with the met location "Celadon City" instead display "Celadon Dept." as their met location temporarily.
In other languages
| |||||||||||||||||||||||||||||||
References
Notes
- ↑ In Pokémon Red, Blue, Yellow, FireRed and LeafGreen, the floor is "Rooftop Square".
In Pokémon Gold, Silver, Crystal, HeartGold, and SoulSilver, the floor is "6F".
In Pokémon: Let's Go, Pikachu! and Let's Go, Eevee!, the floor is "Roof".
|
| |||||
| Kanto | ||||||||
|---|---|---|---|---|---|---|---|---|
|
| ||||||||
|

|
This article is part of Project Locations, a Bulbapedia project that aims to write comprehensive articles on every location in the Pokémon world. |


