

Walkthrough:Pokémon Ultra Sun and Ultra Moon/Part 24
These pages follow the enhanced versions, not Pokémon Sun and Moon. The guide for those games can be found here.
Ancient Poni Path
Back on Ancient Poni Path, a knot of Team Skull Grunts blocks the way north, looking to beat the location of Guzma out of you. Once the Grunts are down, Plumeria steps in and calls off the fight before it goes any further. She apologizes for Team Skull's actions and asks you, of all people, to save Guzma if you can, since it was you who stood up to the gang and to whatever the Aether Foundation was hiding. She hands over a Poisonium Z as thanks and walks off, and Lillie heals your team before the two of you press on toward Vast Poni Canyon.
| Trainers | ||||||||||||||||||||||||||||||||||||||||||||||||||||||||
|---|---|---|---|---|---|---|---|---|---|---|---|---|---|---|---|---|---|---|---|---|---|---|---|---|---|---|---|---|---|---|---|---|---|---|---|---|---|---|---|---|---|---|---|---|---|---|---|---|---|---|---|---|---|---|---|---|
| ||||||||||||||||||||||||||||||||||||||||||||||||||||||||


| Items | ||||||||||||
|---|---|---|---|---|---|---|---|---|---|---|---|---|
| ||||||||||||

Vast Poni Canyon

Past Ancient Poni Path, the trail opens onto Vast Poni Canyon, a stack of cliffs, rope bridges, and cave mouths that islanders reckon the toughest ground on Poni Island. A special magnetic field runs through the rock here, strong enough to evolve a Magneton, Nosepass, or Charjabug leveled up anywhere inside the canyon.
You are barely past the entrance when Dulse and ZossieUS/Phyco and SolieraUM catch up with you and Lillie again. Now that Lusamine has shown she can't be trusted with Necrozma, they tell you that you are their only real chance of stopping it, and DulseUS/SolieraUM challenges you to prove it with one more battle.


They admit their mistake and ask you to stop Necrozma in their place when the time comes, then let you continue on.
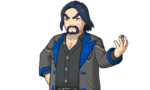
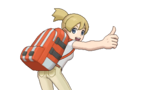
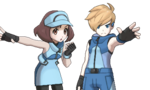
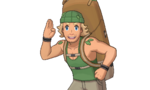
Three caves cut through the canyon's interior, linked by open grassy ledges and bridges outside. Backpacker Perdy, Hiker Zachary, Veteran Lynn, Ace Trainer Junko, and a handful of other Trainers are scattered through the caves and across the canyon floor, alongside wild Jangmo-o sunning themselves in the brown grass. Work your way north through the canyon and its caves until the path narrows toward the trial site at the far end.
| Trainers | ||||||||||||||||||||||||||||||||||||||||||||||||||||||||||||||||||||||||||||||||||||||||||||||||||||||||||||||||||||||||||||||||||||||||||||||||||||||||||||||||||||||||||||||||||||||||||||||||||||||||||||||||||||||||||||||||||||||||||||||||||||||||||||||||||||||||||||||||||||||||||||||||||||||||||||||||||||||||||||||||||
|---|---|---|---|---|---|---|---|---|---|---|---|---|---|---|---|---|---|---|---|---|---|---|---|---|---|---|---|---|---|---|---|---|---|---|---|---|---|---|---|---|---|---|---|---|---|---|---|---|---|---|---|---|---|---|---|---|---|---|---|---|---|---|---|---|---|---|---|---|---|---|---|---|---|---|---|---|---|---|---|---|---|---|---|---|---|---|---|---|---|---|---|---|---|---|---|---|---|---|---|---|---|---|---|---|---|---|---|---|---|---|---|---|---|---|---|---|---|---|---|---|---|---|---|---|---|---|---|---|---|---|---|---|---|---|---|---|---|---|---|---|---|---|---|---|---|---|---|---|---|---|---|---|---|---|---|---|---|---|---|---|---|---|---|---|---|---|---|---|---|---|---|---|---|---|---|---|---|---|---|---|---|---|---|---|---|---|---|---|---|---|---|---|---|---|---|---|---|---|---|---|---|---|---|---|---|---|---|---|---|---|---|---|---|---|---|---|---|---|---|---|---|---|---|---|---|---|---|---|---|---|---|---|---|---|---|---|---|---|---|---|---|---|---|---|---|---|---|---|---|---|---|---|---|---|---|---|---|---|---|---|---|---|---|---|---|---|---|---|---|---|---|---|---|---|---|---|---|---|---|---|---|---|---|---|---|---|---|---|---|---|---|---|---|---|---|---|---|---|---|---|---|---|---|---|---|---|---|---|---|---|---|---|---|---|---|---|---|---|---|---|---|---|
| ||||||||||||||||||||||||||||||||||||||||||||||||||||||||||||||||||||||||||||||||||||||||||||||||||||||||||||||||||||||||||||||||||||||||||||||||||||||||||||||||||||||||||||||||||||||||||||||||||||||||||||||||||||||||||||||||||||||||||||||||||||||||||||||||||||||||||||||||||||||||||||||||||||||||||||||||||||||||||||||||||























| Items | ||||||||||||||||||||||||||||||||||||||||||||||||||||||||||||||||||||||||||||||||||||||||||||||||||||||||||||||||||||||||||||||||||||||||||
|---|---|---|---|---|---|---|---|---|---|---|---|---|---|---|---|---|---|---|---|---|---|---|---|---|---|---|---|---|---|---|---|---|---|---|---|---|---|---|---|---|---|---|---|---|---|---|---|---|---|---|---|---|---|---|---|---|---|---|---|---|---|---|---|---|---|---|---|---|---|---|---|---|---|---|---|---|---|---|---|---|---|---|---|---|---|---|---|---|---|---|---|---|---|---|---|---|---|---|---|---|---|---|---|---|---|---|---|---|---|---|---|---|---|---|---|---|---|---|---|---|---|---|---|---|---|---|---|---|---|---|---|---|---|---|---|---|---|---|
| ||||||||||||||||||||||||||||||||||||||||||||||||||||||||||||||||||||||||||||||||||||||||||||||||||||||||||||||||||||||||||||||||||||||||||


The Captainless Trial
A stone tablet at the trial site's entrance explains what's ahead: this trial has no captain to guide you through it, since it is said to be the very first trial anyone in Alola ever attempted. Head forward along the path and a wild Jangmo-o drops down from above to attack, followed a short way on by a wild Hakamo-o.


Past them, the path leads to a Z-Crystal pedestal, but reaching for it triggers the trial's real challenge: a Totem-sized Kommo-o drops in, wreathed in an aura that boosts every one of its stats. Fairy-type moves are the safest way through the fight: they hit Kommo-o itself for quadruple damage between its Dragon- and Fighting-type typing, and still deal double damage to its ally Noivern. Save something else for the second ally, though: Totem Kommo-o calls in Noivern on its first turn, or Scizor first if its HP drops below two-thirds before then, and Scizor's Steel typing shrugs off Fairy moves entirely, so keep a Fire- or Flying-type attack in reserve for it instead. Each ally can only be called in once.


Ally Noivern

Ally Scizor

With the Totem Pokémon defeated, you finally claim the Dragonium Z from the pedestal.
Beyond the trial site, the canyon opens out toward the altar you and Lillie set out to reach.

|
This article is part of Project Walkthroughs, a Bulbapedia project that aims to write comprehensive step-by-step guides on each Pokémon game. |