Appendix:Crystal walkthrough/Section 8: Difference between revisions
mNo edit summary |
mNo edit summary |
||
| Line 2: | Line 2: | ||
[[File:Ecruteak City C.png|thumb|300px|Ecruteak City]] | [[File:Ecruteak City C.png|thumb|300px|Ecruteak City]] | ||
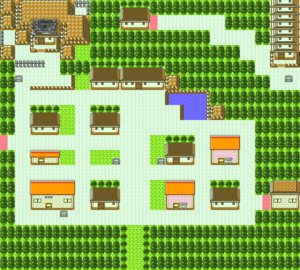
Welcome to {{ci|Ecruteak}}, a historical city where the past meets the present. The city is shrouded in mystery, as all but one of Johto's legendary Pokémon have ties to the area. | Welcome to {{ci|Ecruteak}}, a historical city where the past meets the present. The city is shrouded in mystery, as all but {{p|Celebi|one}} of Johto's legendary Pokémon have ties to the area. Unique landmarks include the [[Ecruteak Gym]], Kimono Dance Theater, and the twin towers; the [[Burned Tower]] in the west, and the [[Bell Tower|Tin Tower]] in the east. | ||
{| class="expandable" align="center" style="background: # | {| class="expandable" align="center" style="background: #BFA26B; {{roundy}}; border: 5px solid #CDB891;" | ||
|- align="center" | |- align="center" | ||
! Items | ! Items | ||
| Line 10: | Line 10: | ||
| | | | ||
{{itlisth|road}} | {{itlisth|road}} | ||
{{ | {{itlistbod|Itemfinder|From the man in the house east of the Gym|GS|display={{key|II|Itemfinder}}}} | ||
{{ | {{itlistbod|Hyper Potion|Next to the pond (hidden)|GS|display={{DL|Potion|Hyper Potion}}}} | ||
{{ | {{itlistbod|HM Water|From the man in the Dance Theater, after defeating the Kimono Girls|GS|display={{HM|03|Surf}}}} | ||
{{itlistbod|TM Ghost|From Morty upon his defeat|GS|display={{TM|30|Shadow Ball}}}} | |||
{{itlistfoot|road}} | {{itlistfoot|road}} | ||
|} | |} | ||
| Line 18: | Line 19: | ||
=== Bill's Time Capsule === | === Bill's Time Capsule === | ||
Stop by the | Stop by the Pokémon Center to meet [[Bill]], the inventor of the PC Storage System. It seems that he has just finished working on the [[Time Capsule]], a service found in every Pokémon Center that allows a Trainer to "trade with the past". This means that you can now trade between {{2v2|Gold|Silver}} and {{game3|Red and Blue|the Generation|s}} {{game3|Yellow|I games}}. The Time Capsule will take until the next day to be fully operational. | ||
=== | === Treasure Hunting === | ||
Stop by the house to the right of the Gym, and talk to the man inside. He gives you the {{ | Stop by the house to the right of the Gym, and talk to the man inside. He gives you the {{key|II|Itemfinder}}, a handy tool that reacts to hidden items lying nearby. It's a treasure hunter's best friend! | ||
=== Ecruteak Dance Theater === | === Ecruteak Dance Theater === | ||
The dance hall is owned by the [[Kimono Girl]]s, five sisters that each train one of {{p|Eevee}}'s [[Eeveelutions|evolutions]]. Speak to the man with his {{p|Rhydon}} after defeating them to receive {{HM|03|Surf}} | The dance hall is owned by the [[Kimono Girl]]s, five sisters that each train one of {{p|Eevee}}'s [[Eeveelutions|evolutions]]. Speak to the man with his {{p|Rhydon}} after defeating them to receive {{HM|03|Surf}}. | ||
{| class="expandable" align="center" style="background: #{{ | {| class="expandable" align="center" style="background: #{{locationcolor/med|building}}; {{roundy}}; border: 5px solid #{{locationcolor/light|building}};" | ||
|- align="center" | |- align="center" | ||
! Kimono Girls | ! Kimono Girls | ||
| Line 50: | Line 51: | ||
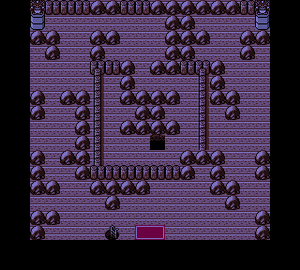
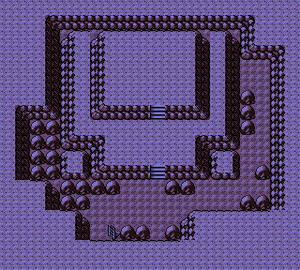
The charred, crumbling ruins of the [[Burned Tower]] can be found in the city's northwest district. Formerly known as the Brass Tower, it was once as majestic as the [[Bell Tower|Tin Tower]] to the east. Built 700 years ago, it was said to be the roost of {{p|Lugia|an immense, silver-colored Pokémon}}. But 150 years ago, the tower was struck by a lightning bolt that ignited a fire that raged for three days. The silver Pokémon and the {{p|Ho-Oh|glorious, rainbow-colored Pokémon}} that roosted on Tin Tower escaped to the skies unharmed, and a sudden downpour quenched the fire. The silver Pokémon flew off, while the rainbow Pokémon resurrected [[Legendary beasts|three nameless Pokémon]] that perished in the blaze before flying off as well. | The charred, crumbling ruins of the [[Burned Tower]] can be found in the city's northwest district. Formerly known as the Brass Tower, it was once as majestic as the [[Bell Tower|Tin Tower]] to the east. Built 700 years ago, it was said to be the roost of {{p|Lugia|an immense, silver-colored Pokémon}}. But 150 years ago, the tower was struck by a lightning bolt that ignited a fire that raged for three days. The silver Pokémon and the {{p|Ho-Oh|glorious, rainbow-colored Pokémon}} that roosted on Tin Tower escaped to the skies unharmed, and a sudden downpour quenched the fire. The silver Pokémon flew off, while the rainbow Pokémon resurrected [[Legendary beasts|three nameless Pokémon]] that perished in the blaze before flying off as well. | ||
Upon entering the tower, you are immediately approached by [[Eusine]], a researcher of the [[legendary beasts]] who is especially interested in {{p|Suicune}}. The local Gym Leader, [[Morty]], is also here investigating the trio. {{ga|Silver}} can be found in the center area, where he complains about not seeing Suicune before challenging you to a battle. | |||
{| class="expandable" align="center" style="background: #{{ | {| class="expandable" align="center" style="background: #{{locationcolor/med|ash}}; {{roundy}}; border: 5px solid #{{locationcolor/light|ash}};" | ||
|- align="center" | |- align="center" | ||
! Trainers | ! Trainers | ||
|- | |- | ||
| | | | ||
{{trainerheader| | {{trainerheader|ash}} | ||
{{trainerentry|Spr GS Firebreather.png|Firebreather|Ned|720|3|109|Koffing|♂|15|None|109|Koffing|♂|15|None|058|Growlithe|♂|16|None}} | {{trainerentry|Spr GS Firebreather.png|Firebreather|Ned|720|3|109|Koffing|♂|15|None|109|Koffing|♂|15|None|058|Growlithe|♂|16|None}} | ||
{{trainerdiv| | {{trainerdiv|ash}} | ||
{{trainerentry|Spr GS Firebreather.png|Firebreather|Dick|816|1|005|Charmeleon|♂|17|None}} | {{trainerentry|Spr GS Firebreather.png|Firebreather|Dick|816|1|005|Charmeleon|♂|17|None}} | ||
{{trainerfooter| | {{trainerfooter|ash|II}} | ||
|} | |} | ||
{| class="expandable" align="center" style="background: #{{ | {| class="expandable" align="center" style="background: #{{locationcolor/med|ash}}; {{roundy}}; border: 5px solid #{{locationcolor/light|ash}};" | ||
|- align="center" | |- align="center" | ||
! Available Pokémon | ! Available Pokémon | ||
|- | |- | ||
| | | | ||
{{Catch/header| | {{Catch/header|ash|4}} | ||
{{Catch/entry2|019|Rattata|no|no|yes|1F|13-15|all=55%|type1=Normal}} | {{Catch/entry2|019|Rattata|no|no|yes|1F|13-15|all=55%|type1=Normal}} | ||
{{Catch/entry2|109|Koffing|no|no|yes|1F|14|all=30%|type1=Poison}} | {{Catch/entry2|109|Koffing|no|no|yes|1F|14|all=30%|type1=Poison}} | ||
{{Catch/entry2|041|Zubat|no|no|yes|1F|14|all=10%|type1=Poison|type2=Flying}} | {{Catch/entry2|041|Zubat|no|no|yes|1F|14|all=10%|type1=Poison|type2=Flying}} | ||
{{Catch/entry2|020|Raticate|no|no|yes|1F|15|all=5%|type1=Normal}} | {{Catch/entry2|020|Raticate|no|no|yes|1F|15|all=5%|type1=Normal}} | ||
{{catch/div| | {{catch/div|ash|Rock Smash}} | ||
{{Catch/entry2|098|Krabby|no|no|yes|Rock Smash|15|all=90%|type1=Water}} | {{Catch/entry2|098|Krabby|no|no|yes|Rock Smash|15|all=90%|type1=Water}} | ||
{{Catch/entry2|213|Shuckle|no|no|yes|Rock Smash|15|all=10%|type1=Bug|type2=Rock}} | {{Catch/entry2|213|Shuckle|no|no|yes|Rock Smash|15|all=10%|type1=Bug|type2=Rock}} | ||
{{catch/div| | {{catch/div|ash|B1F}} | ||
{{Catch/entry2|109|Koffing|no|no|yes|B1F|12-16|all=59%|type1=Poison}} | {{Catch/entry2|109|Koffing|no|no|yes|B1F|12-16|all=59%|type1=Poison}} | ||
{{Catch/entry2|019|Rattata|no|no|yes|B1F|14|all=30%|type1=Normal}} | {{Catch/entry2|019|Rattata|no|no|yes|B1F|14|all=30%|type1=Normal}} | ||
{{Catch/entry2|041|Zubat|no|no|yes|B1F|15|all=10%|type1=Poison|type2=Flying}} | {{Catch/entry2|041|Zubat|no|no|yes|B1F|15|all=10%|type1=Poison|type2=Flying}} | ||
{{Catch/entry2|110|Weezing|no|no|yes|B1F|16|all=1%|type1=Poison}} | {{Catch/entry2|110|Weezing|no|no|yes|B1F|16|all=1%|type1=Poison}} | ||
{{Catch/footer| | {{Catch/footer|ash}} | ||
|} | |} | ||
{| class="expandable" align="center" style="background: #{{ | {| class="expandable" align="center" style="background: #{{locationcolor/med|ash}}; {{roundy}}; border: 5px solid #{{locationcolor/light|ash}};" | ||
|- align="center" | |- align="center" | ||
! Items | ! Items | ||
|- | |- | ||
| | | | ||
{{itlisth| | {{itlisth|ash}} | ||
{{catch/div| | {{catch/div|ash|1F}} | ||
{{ | {{itlistbod|Ultra Ball|Dead-end path east of the entrance (hidden)|C|display={{ball|Ultra}}}} | ||
{{ | {{itlistbod|HP Up|In the northeast corner (requires {{m|Rock Smash}})|C|display={{DL|Vitamin|HP Up}}}} | ||
{{catch/div| | {{catch/div|ash|B1F}} | ||
{{ | {{itlistbod|TM Normal|Northeast corner (requires {{m|Strength}})|C|display={{TM|20|Endure}}}} | ||
{{itlistfoot| | {{itlistfoot|ash}} | ||
|} | |} | ||
| Line 101: | Line 102: | ||
{| align="center" | {| align="center" | ||
! {{ | ! {{MSP|152|Chikorita}} Player chose {{p|Chikorita}}: | ||
! {{ | ! {{MSP|155|Cyndaquil}} Player chose {{p|Cyndaquil}}: | ||
! {{ | ! {{MSP|158|Totodile}} Player chose {{p|Totodile}}: | ||
|- | |- | ||
|{{Party|color={{silver color}}|headcolor={{silver color light}}|bordercolor={{silver color dark}} | |||
pokemon1={{Pokémon | |sprite=Spr GS Silver 1.png | ||
pokemon2={{Pokémon | |prize={{PDollar}}1320 | ||
pokemon3={{Pokémon | |class=Rival|name=Silver | ||
pokemon4={{Pokémon | |game=GSC|location=Burned Tower | ||
|pokemon=4 | |||
|pokemon1={{Pokémon/2|game=Crystal | |||
|ndex=093|pokemon=Haunter | |||
|type1=Ghost|type2=Poison | |||
|level=20|gender=male | |||
|move1=Lick|move1type=Ghost | |||
|move2=Spite|move2type=Ghost | |||
|move3=Mean Look|move3type=Normal | |||
|move4=Curse|move4type=???}} | |||
|pokemon2={{Pokémon/2|game=Crystal | |||
|ndex=041|pokemon=Zubat | |||
|type1=Poison|type2=Flying | |||
|level=20|gender=male | |||
|move1=Leech Life|move1type=Bug | |||
|move2=Supersonic|move2type=Normal | |||
|move3=Bite|move3type=Dark | |||
|move4=Confuse Ray|move4type=Ghost}} | |||
|pokemon3={{Pokémon/2|game=Crystal | |||
|ndex=081|pokemon=Magnemite | |||
|type1=Electric|type2=Steel | |||
|level=18 | |||
|move1=Tackle|move1type=Normal | |||
|move2=ThunderShock|move2type=Electric | |||
|move3=Supersonic|move3type=Normal | |||
|move4=SonicBoom|move4type=Normal}} | |||
|pokemon4={{Pokémon/2|game=Crystal | |||
|ndex=156|pokemon=Quilava | |||
|type1=Fire | |||
|level=22|gender=male | |||
|move1=Ember|move1type=Fire | |||
|move2=Leer|move2type=Normal | |||
|move3=Quick Attack|move3type=Normal | |||
|move4=SmokeScreen|move4type=Normal}} | |||
}} | }} | ||
|{{Party|color={{silver color}}|headcolor={{silver color light}}|bordercolor={{silver color dark}} | |||
pokemon1={{Pokémon | |sprite=Spr GS Silver 1.png | ||
pokemon2={{Pokémon | |prize={{PDollar}}1320 | ||
pokemon3={{Pokémon | |class=Rival|name=Silver | ||
pokemon4={{Pokémon | |game=GSC|location=Burned Tower | ||
|pokemon=4 | |||
|pokemon1={{Pokémon/2|game=Crystal | |||
|ndex=093|pokemon=Haunter | |||
|type1=Ghost|type2=Poison | |||
|level=20|gender=male | |||
|move1=Lick|move1type=Ghost | |||
|move2=Spite|move2type=Ghost | |||
|move3=Mean Look|move3type=Normal | |||
|move4=Curse|move4type=???}} | |||
|pokemon2={{Pokémon/2|game=Crystal | |||
|ndex=041|pokemon=Zubat | |||
|type1=Poison|type2=Flying | |||
|level=20|gender=male | |||
|move1=Leech Life|move1type=Bug | |||
|move2=Supersonic|move2type=Normal | |||
|move3=Bite|move3type=Dark | |||
|move4=Confuse Ray|move4type=Ghost}} | |||
|pokemon3={{Pokémon/2|game=Crystal | |||
|ndex=081|pokemon=Magnemite | |||
|type1=Electric|type2=Steel | |||
|level=18 | |||
|move1=Tackle|move1type=Normal | |||
|move2=ThunderShock|move2type=Electric | |||
|move3=Supersonic|move3type=Normal | |||
|move4=SonicBoom|move4type=Normal}} | |||
|pokemon4={{Pokémon/2|game=Crystal | |||
|ndex=159|pokemon=Croconaw | |||
|type1=Water | |||
|level=22|gender=male | |||
|move1=Water Gun|move1type=Water | |||
|move2=Leer|move2type=Normal | |||
|move3=Bite|move3type=Dark | |||
|move4=Rage|move4type=Normal}} | |||
}} | }} | ||
|{{Party|color={{silver color}}|headcolor={{silver color light}}|bordercolor={{silver color dark}} | |||
pokemon1={{Pokémon | |sprite=Spr GS Silver 1.png | ||
pokemon2={{Pokémon | |prize={{PDollar}}1320 | ||
pokemon3={{Pokémon | |class=Rival|name=Silver | ||
pokemon4={{Pokémon | |game=GSC|location=Burned Tower | ||
|pokemon=4 | |||
|pokemon1={{Pokémon/2|game=Crystal | |||
|ndex=093|pokemon=Haunter | |||
|type1=Ghost|type2=Poison | |||
|level=20|gender=male | |||
|move1=Lick|move1type=Ghost | |||
|move2=Spite|move2type=Ghost | |||
|move3=Mean Look|move3type=Normal | |||
|move4=Curse|move4type=???}} | |||
|pokemon2={{Pokémon/2|game=Crystal | |||
|ndex=041|pokemon=Zubat | |||
|type1=Poison|type2=Flying | |||
|level=20|gender=male | |||
|move1=Leech Life|move1type=Bug | |||
|move2=Supersonic|move2type=Normal | |||
|move3=Bite|move3type=Dark | |||
|move4=Confuse Ray|move4type=Ghost}} | |||
|pokemon3={{Pokémon/2|game=Crystal | |||
|ndex=081|pokemon=Magnemite | |||
|type1=Electric|type2=Steel | |||
|level=18 | |||
|move1=Tackle|move1type=Normal | |||
|move2=ThunderShock|move2type=Electric | |||
|move3=Supersonic|move3type=Normal | |||
|move4=SonicBoom|move4type=Normal}} | |||
|pokemon4={{Pokémon/2|game=Crystal | |||
|ndex=153|pokemon=Bayleef | |||
|type1=Grass | |||
|level=22|gender=male | |||
|move1=Razor Leaf|move1type=Grass | |||
|move2=Growl|move2type=Normal | |||
|move3=PoisonPowder|move3type=Poison | |||
|move4=Reflect|move4type=Psychic}} | |||
}} | }} | ||
|} | |} | ||
| Line 131: | Line 243: | ||
=== Tin Tower === | === Tin Tower === | ||
The [[Bell Tower|Tin Tower]] is a sacred place, and is off-limits to all but a few people. A group of monks known as the Wise Trio prevent anyone from reaching the tower for now. Two {{ | The [[Bell Tower|Tin Tower]] is a sacred place, and is off-limits to all but a few people. A group of monks known as the Wise Trio prevent anyone from reaching the tower for now. Two {{key|II|Clear Bell|special}} {{key|II|Rainbow Wing|items}} are required to enter and scale the tower. | ||
{| class="expandable" align="center" | {| class="expandable" align="center" | ||
| Line 138: | Line 250: | ||
|- | |- | ||
| | | | ||
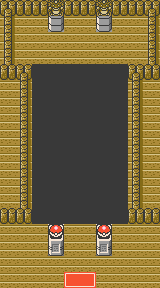
Upon meeting [[Eusine]] in [[Celadon City]], he informs you of fresh rumors of {{p|Ho-Oh|a rainbow-colored Pokémon}} appearing at the tower. | Upon meeting [[Eusine]] in [[Celadon City]], he informs you of fresh rumors of {{p|Ho-Oh|a rainbow-colored Pokémon}} appearing at the tower. Return here to find the monks in a state of awe; they saw the tower shake, which means that a large Pokémon must have landed at the top. Enter the tower to receive the {{key|II|Rainbow Wing}} from one of the Wise Trio. Suddenly a ladder appears, finally granting access to the tower. Stock up on {{ball|Ultra}}s, and bring a party capable of inflicting status ailments in order to wear Ho-Oh down faster. | ||
{| class="expandable" align="center" style="background: #{{ | {| class="expandable" align="center" style="background: #{{locationcolor/med|building}}; {{roundy}}; border: 5px solid #{{locationcolor/light|building}};" | ||
|- align="center" | |- align="center" | ||
! Available Pokémon | ! Available Pokémon | ||
| Line 153: | Line 265: | ||
{{catch/footer|building}} | {{catch/footer|building}} | ||
|} | |} | ||
{| class="expandable" align="center" style="background: #{{ | {| class="expandable" align="center" style="background: #{{locationcolor/med|building}}; {{roundy}}; border: 5px solid #{{locationcolor/light|building}};" | ||
|- align="center" | |- align="center" | ||
! Items | ! Items | ||
| Line 160: | Line 272: | ||
{{itlisth|building}} | {{itlisth|building}} | ||
{{catch/div|building|1F}} | {{catch/div|building|1F}} | ||
{{ | {{itlistbod|Rainbow Wing|From the Wise Trio after capturing the three [[legendary beasts]]|C|display={{key|II|Rainbow Wing}}}} | ||
{{catch/div|building|3F}} | {{catch/div|building|3F}} | ||
{{ | {{itlistbod|Full Heal|Southwest corner|C|display={{DL|Status ailment healing item|Full Heal}}}} | ||
{{catch/div|building|4F}} | {{catch/div|building|4F}} | ||
{{ | {{itlistbod|Ultra Ball|East of the pillar|C|display={{ball|Ultra}}}} | ||
{{ | {{itlistbod|Super Potion|Next to the southeast stairs|C|display={{DL|Potion|Super Potion}}}} | ||
{{ | {{itlistbod|Escape Rope|Near the southwest stairs|C}} | ||
{{catch/div|building|5F}} | {{catch/div|building|5F}} | ||
{{ | {{itlistbod|Rare Candy|Next to the pillar|C|display={{DL|Vitamin|Rare Candy}}}} | ||
{{catch/div|building|7F}} | {{catch/div|building|7F}} | ||
{{ | {{itlistbod|Max Revive|Northeast corner|C|display={{DL|Revive|Max Revive}}}} | ||
{{catch/div|building|8F}} | {{catch/div|building|8F}} | ||
{{ | {{itlistbod|Full Restore|Northwest corner|C|display={{DL|Potion|Full Restore}}}} | ||
{{ | {{itlistbod|Max Elixir|Next to the pillar|C|display={{DL|Ether|Max Elixir}}}} | ||
{{ | {{itlistbod|Nugget|South of the pillar|C|display={{DL|Valuable item|Nugget}}}} | ||
{{itlistfoot|building}} | {{itlistfoot|building}} | ||
|} | |} | ||
| Line 182: | Line 294: | ||
[[File:Tin Tower 4F.png|thumb|135px|Tin Tower, 4F]] | [[File:Tin Tower 4F.png|thumb|135px|Tin Tower, 4F]] | ||
==== 3F ==== | ==== 3F ==== | ||
Go | Go west to reach a {{DL|Status ailment healing item|Full Heal}}. Move around in an S-shape to reach the northeast stairs. | ||
==== 4F ==== | ==== 4F ==== | ||
Go south to find an {{ball|Ultra}}, and south again to get a {{DL|Potion|Super Potion}}. | Go south to find an {{ball|Ultra}}, and south again to get a {{DL|Potion|Super Potion}}. Grab the [[Escape Rope]] in the southwest, then climb the northwest stairs. | ||
[[File:Tin Tower 5F.png|thumb|135px|left|Tin Tower, 5F]] | [[File:Tin Tower 5F.png|thumb|135px|left|Tin Tower, 5F]] | ||
| Line 198: | Line 310: | ||
[[File:Tin Tower 8F.png|thumb|135px|Tin Tower, 8F]] | [[File:Tin Tower 8F.png|thumb|135px|Tin Tower, 8F]] | ||
==== 7F ==== | ==== 7F ==== | ||
Step on the nearest warp tile to reach the pillar, and take the next to reach the east wall of 9F. There are two warp tiles to the south; the right one takes to the center of 8F | Step on the nearest warp tile to reach the pillar, and take the next to reach the east wall of 9F. There are two warp tiles to the south; the right one takes to the center of 8F and a {{DL|Ether|Max Elixir}}, while the left one takes you to the south side of 8F and a {{DL|Valuable item|Nugget}}. Backtrack to the first warp on 7F, grab the {{DL|Revive|Max Revive}} to the northeast, and go south to take the next warp to the west side of 8F. | ||
==== 8F ==== | ==== 8F ==== | ||
| Line 229: | Line 341: | ||
|} | |} | ||
|} | |} | ||
=== Ecruteak Gym === | === Ecruteak Gym === | ||
| Line 234: | Line 347: | ||
{{sign|RBY|header}} | {{sign|RBY|header}} | ||
{{sign|RBY|ECRUTEAK CITY <br> POKéMON GYM <br> LEADER: MORTY | {{sign|RBY|title|ECRUTEAK CITY<br>POKéMON GYM<br>LEADER: MORTY}} | ||
{{sign|RBY|The Mystic Seer<br>of the Future}} | |||
{{sign|RBY|footer}} | {{sign|RBY|footer}} | ||
The [[Ecruteak Gym]] is dedicated to {{type|Ghost}} | The [[Ecruteak Gym]] is dedicated to {{type|Ghost}} Pokémon. These spirits take double the damage from Ghost- and {{type|Dark}} attacks, and are normally unaffected by {{t|Normal}}- and {{type|Fighting}} attacks. However, a Pokémon with {{m|Foresight}} can disable these immunities. To reach the Gym Leader, follow the invisible path by moving from one Trainer's line of sight to the next. Bring along some extra [[Potion]]s, since two of [[Morty]]'s Pokémon know {{m|Curse}}, which drains the target's health every turn. It's also good to bring a few {{DL|Status ailment healing item|Awakening}}s in order to disrupt his {{p|Gengar}}'s {{m|Hypnosis}}-{{m|Dream Eater}} combo. | ||
{{User:KCorp4000/Gymtag | |||
|gym=Ecruteak | |||
|badge=Fog | |||
|type=Ghost | |||
|trainers={{trainerheader|Ghost}} | |||
{{trainerheader|Ghost}} | |||
{{trainerentry|Spr GS Sage.png|Sage|Ping|512|5|092|Gastly|♂|16|None|092|Gastly|♂|16|None|092|Gastly|♂|16|None|092|Gastly|♂|16|None|092|Gastly|♂|16|None}} | {{trainerentry|Spr GS Sage.png|Sage|Ping|512|5|092|Gastly|♂|16|None|092|Gastly|♂|16|None|092|Gastly|♂|16|None|092|Gastly|♂|16|None|092|Gastly|♂|16|None}} | ||
{{trainerdiv|Ghost}} | {{trainerdiv|Ghost}} | ||
| Line 260: | Line 366: | ||
{{trainerdiv|Ghost}} | {{trainerdiv|Ghost}} | ||
{{trainerentry|Spr GS Medium.png|Medium|Martha|800|3|092|Gastly|♀|18|None|093|Haunter|♀|20|None|092|Gastly|♀|20|None}} | {{trainerentry|Spr GS Medium.png|Medium|Martha|800|3|092|Gastly|♀|18|None|093|Haunter|♀|20|None|092|Gastly|♀|20|None}} | ||
{{trainerfooter|Ghost| | {{trainerfooter|Ghost|I}} | ||
|leader={{Party|color={{ghost color}}|headcolor={{ghost color light}}|bordercolor={{ghost color dark}} | |||
{{Party | |||
|color={{ghost color}} | |||
|headcolor={{ghost color light}} | |||
|bordercolor={{ghost color dark}} | |||
|sprite=Spr GS Morty.png | |sprite=Spr GS Morty.png | ||
|prize={{PDollar}}2300 | |prize={{PDollar}}2300 | ||
|class=Leader | |class=Leader|name=Morty | ||
|name=Morty | |game=GSC|location=Ecruteak Gym | ||
|game=GSC | |||
|location=Ecruteak Gym | |||
|pokemon=4 | |pokemon=4 | ||
|pokemon1={{Pokémon/2 | |pokemon1={{Pokémon/2|game=Crystal | ||
|game=Crystal | |ndex=092|pokemon=Gastly | ||
|ndex=092 | |||
|pokemon=Gastly | |||
|type1=Ghost|type2=Poison | |type1=Ghost|type2=Poison | ||
|level=21|gender=male | |||
|move1=Lick|move1type=Ghost | |move1=Lick|move1type=Ghost | ||
|move2=Spite|move2type=Ghost | |move2=Spite|move2type=Ghost | ||
| Line 291: | Line 384: | ||
|move4=Curse|move4type=???}} | |move4=Curse|move4type=???}} | ||
|pokemon2={{Pokémon/2 | |pokemon2={{Pokémon/2|game=Crystal | ||
|game=Crystal | |ndex=093|pokemon=Haunter | ||
|ndex=093 | |||
|pokemon=Haunter | |||
|type1=Ghost|type2=Poison | |type1=Ghost|type2=Poison | ||
|level=21|gender=male | |||
|move1=Hypnosis|move1type=Psychic | |move1=Hypnosis|move1type=Psychic | ||
|move2=Curse|move2type=??? | |move2=Curse|move2type=??? | ||
| Line 303: | Line 393: | ||
|move4=Night Shade|move4type=Ghost}} | |move4=Night Shade|move4type=Ghost}} | ||
|pokemon3={{Pokémon/2 | |pokemon3={{Pokémon/2|game=Crystal | ||
|game=Crystal | |ndex=093|pokemon=Haunter | ||
|ndex=093 | |||
|pokemon=Haunter | |||
|type1=Ghost|type2=Poison | |type1=Ghost|type2=Poison | ||
|level=23|gender=male | |||
|move1=Spite|move1type=Ghost | |move1=Spite|move1type=Ghost | ||
|move2=Mean Look|move2type=Normal | |move2=Mean Look|move2type=Normal | ||
| Line 315: | Line 402: | ||
|move4=Night Shade|move4type=Ghost}} | |move4=Night Shade|move4type=Ghost}} | ||
|pokemon4={{Pokémon/2 | |pokemon4={{Pokémon/2|game=Crystal | ||
|game=Crystal | |ndex=094|pokemon=Gengar | ||
|ndex=094 | |||
|pokemon=Gengar | |||
|type1=Ghost|type2=Poison | |type1=Ghost|type2=Poison | ||
|level=25|gender=male | |||
|move1=Hypnosis|move1type=Psychic | |move1=Hypnosis|move1type=Psychic | ||
|move2=Mean Look|move2type=Normal | |move2=Mean Look|move2type=Normal | ||
| Line 327: | Line 411: | ||
|move4=Dream Eater|move4type=Psychic}} | |move4=Dream Eater|move4type=Psychic}} | ||
}} | }} | ||
}} | |||
Morty awards you the {{badge|Fog}}, which ensures obedience from all Pokémon up to level 50, and enables the use of {{m|Surf}} in the field. He also gives out {{TM|30|Shadow Ball}} as a prize. | |||
== Route 38 == | == Route 38 == | ||
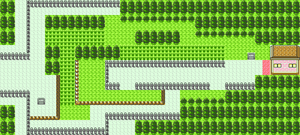
[[File:Johto Route 38 GSC.png|thumb|300px|Route 38]] | [[File:Johto Route 38 GSC.png|thumb|300px|Route 38]] | ||
{{rt|38|Johto}} connects [[Ecruteak City]] to {{rt|39|Johto}} in the west, near the MooMoo Farm. On your way west, you can trade phone numbers with Schoolboy Chad for alerts about {{p|Snubbull}} {{DL|Pokémon outbreak|Generation II|swarms}}. Register Lass Dana's number and she'll call for a rematch; defeat her again to | {{rt|38|Johto}} connects [[Ecruteak City]] to {{rt|39|Johto}} in the west, near the MooMoo Farm. On your way west, you can trade phone numbers with Schoolboy Chad for alerts about {{p|Snubbull}} {{DL|Pokémon outbreak|Generation II|swarms}}. Register Lass Dana's number and she'll call for a rematch; defeat her again to receive a {{evostone|Thunderstone}}. | ||
{| class="expandable" align="center" style="background: #{{ | {| class="expandable" align="center" style="background: #{{locationcolor/med|road}}; {{roundy}}; border: 5px solid #{{locationcolor/light|road}};" | ||
|- align="center" | |- align="center" | ||
! Trainers | ! Trainers | ||
| Line 360: | Line 440: | ||
{{trainerfooter|road|II}} | {{trainerfooter|road|II}} | ||
|} | |} | ||
{| class="expandable" align="center" style="background: #{{ | {| class="expandable" align="center" style="background: #{{locationcolor/med|road}}; {{roundy}}; border: 5px solid #{{locationcolor/light|road}};" | ||
|- align="center" | |- align="center" | ||
! Available Pokémon | ! Available Pokémon | ||
| Line 366: | Line 446: | ||
| | | | ||
{{catch/header|road}} | {{catch/header|road}} | ||
{{catch/entry2|019|Rattata|no|no|yes|Grass|16|30%|30%|0%|type1=Normal}} | |||
{{catch/entry2|052|Meowth|no|no|yes|Grass|16|0%|0%|40%|type1=Normal}} | {{catch/entry2|052|Meowth|no|no|yes|Grass|16|0%|0%|40%|type1=Normal}} | ||
{{catch/entry2|020|Raticate|no|no|yes|Grass|16|all=30%|type1=Normal}} | {{catch/entry2|020|Raticate|no|no|yes|Grass|16|all=30%|type1=Normal}} | ||
{{catch/entry2|081|Magnemite|no|no|yes|Grass|16|all=20%|type1=Electric|type2=Steel}} | {{catch/entry2|081|Magnemite|no|no|yes|Grass|16|all=20%|type1=Electric|type2=Steel}} | ||
| Line 374: | Line 454: | ||
{{catch/entry2|128|Tauros|no|no|yes|Grass|13|5%|5%|0%|type1=Normal}} | {{catch/entry2|128|Tauros|no|no|yes|Grass|13|5%|5%|0%|type1=Normal}} | ||
{{catch/entry2|241|Miltank|no|no|yes|Grass|13|5%|5%|0%|type1=Normal}} | {{catch/entry2|241|Miltank|no|no|yes|Grass|13|5%|5%|0%|type1=Normal}} | ||
{{catch/div| | {{catch/div|forest|Headbutt}} | ||
{{catch/entry2|021|Spearow|no|no|yes|Headbutt|10|all=80%|type1=Normal|type2=Flying}} | {{catch/entry2|021|Spearow|no|no|yes|Headbutt|10|all=80%|type1=Normal|type2=Flying}} | ||
{{catch/entry2|190|Aipom|no|no|yes|Headbutt|10|all=20%|type1=Normal}} | {{catch/entry2|190|Aipom|no|no|yes|Headbutt|10|all=20%|type1=Normal}} | ||
{{catch/div| | {{catch/div|forest|Headbutt (Special Tree)}} | ||
{{catch/entry2|021|Spearow|no|no|yes|Headbutt|10|all=50%|type1=Normal|type2=Flying}} | {{catch/entry2|021|Spearow|no|no|yes|Headbutt|10|all=50%|type1=Normal|type2=Flying}} | ||
{{catch/entry2|214|Heracross|no|no|yes|Headbutt|10|all=30%|type1=Bug|type2=Fighting}} | {{catch/entry2|214|Heracross|no|no|yes|Headbutt|10|all=30%|type1=Bug|type2=Fighting}} | ||
| Line 383: | Line 463: | ||
{{catch/footer|road}} | {{catch/footer|road}} | ||
|} | |} | ||
{| class="expandable" align="center" style="background: #{{ | {| class="expandable" align="center" style="background: #{{locationcolor/med|road}}; {{roundy}}; border: 5px solid #{{locationcolor/light|road}};" | ||
|- align="center" | |- align="center" | ||
! Items | ! Items | ||
| Line 389: | Line 469: | ||
| | | | ||
{{itlisth|road}} | {{itlisth|road}} | ||
{{ | {{itlistbod|none|On the tree west of the fenced-in path|C|display={{DL|Berries (Generation II)|Berry}}}} | ||
{{ | {{itlistbod|Thunderstone|From Lass Dana after defeating her in a rematch|C|display={{evostone|Thunderstone}}}} | ||
{{itlistfoot|road}} | {{itlistfoot|road}} | ||
|} | |} | ||
| Line 398: | Line 478: | ||
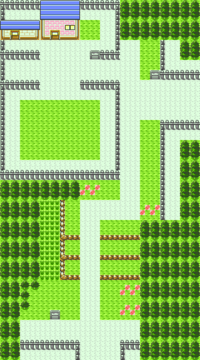
[[File:Johto Route 39 GSC.png|thumb|200px|left|Route 39]] | [[File:Johto Route 39 GSC.png|thumb|200px|left|Route 39]] | ||
{{rt|39|Johto}} | {{rt|39|Johto}} is a quiet, pastoral road that links {{rt|38|Johto}} to [[Olivine City]] in the south. The [[MooMoo Farm]] is located in the northwest part of the route. | ||
{| class="expandable" align="center" style="background: #{{ | {| class="expandable" align="center" style="background: #{{locationcolor/med|road}}; {{roundy}}; border: 5px solid #{{locationcolor/light|road}};" | ||
|- align="center" | |- align="center" | ||
! Trainers | ! Trainers | ||
| Line 417: | Line 497: | ||
{{Trainerfooter|road|II}} | {{Trainerfooter|road|II}} | ||
|} | |} | ||
{| class="expandable" align="center" style="background: #{{ | {| class="expandable" align="center" style="background: #{{locationcolor/med|road}}; {{roundy}}; border: 5px solid #{{locationcolor/light|road}};" | ||
|- align="center" | |- align="center" | ||
! Available Pokémon | ! Available Pokémon | ||
| Line 423: | Line 503: | ||
| | | | ||
{{Catch/header|road}} | {{Catch/header|road}} | ||
{{Catch/entry2|019|Rattata|no|no|yes|Grass|16|30%|30%|0%|type1=Normal}} | |||
{{Catch/entry2|052|Meowth|no|no|yes|Grass|16|0%|0%|40%|type1=Normal}} | {{Catch/entry2|052|Meowth|no|no|yes|Grass|16|0%|0%|40%|type1=Normal}} | ||
{{Catch/entry2|020|Raticate|no|no|yes|Grass|16|all=30%|type1=Normal}} | {{Catch/entry2|020|Raticate|no|no|yes|Grass|16|all=30%|type1=Normal}} | ||
{{Catch/entry2|081|Magnemite|yes|yes|yes|Grass|16|all=20%|type1=Electric|type2=Steel}} | {{Catch/entry2|081|Magnemite|yes|yes|yes|Grass|16|all=20%|type1=Electric|type2=Steel}} | ||
| Line 431: | Line 511: | ||
{{Catch/entry2|128|Tauros|no|no|yes|Grass|15|5%|5%|0%|type1=Normal}} | {{Catch/entry2|128|Tauros|no|no|yes|Grass|15|5%|5%|0%|type1=Normal}} | ||
{{Catch/entry2|241|Miltank|no|no|yes|Grass|15|5%|5%|0%|type1=Normal}} | {{Catch/entry2|241|Miltank|no|no|yes|Grass|15|5%|5%|0%|type1=Normal}} | ||
{{catch/div| | {{catch/div|forest|Headbutt}} | ||
{{catch/entry2|021|Spearow|no|no|yes|Headbutt|10|all=80%|type1=Normal|type2=Flying}} | {{catch/entry2|021|Spearow|no|no|yes|Headbutt|10|all=80%|type1=Normal|type2=Flying}} | ||
{{catch/entry2|190|Aipom|no|no|yes|Headbutt|10|all=20%|type1=Normal}} | {{catch/entry2|190|Aipom|no|no|yes|Headbutt|10|all=20%|type1=Normal}} | ||
{{catch/div| | {{catch/div|forest|Headbutt (Special)}} | ||
{{catch/entry2|021|Spearow|no|no|yes|Headbutt|10|all=50%|type1=Normal|type2=Flying}} | {{catch/entry2|021|Spearow|no|no|yes|Headbutt|10|all=50%|type1=Normal|type2=Flying}} | ||
{{catch/entry2|214|Heracross|no|no|yes|Headbutt|10|all=30%|type1=Bug|type2=Fighting}} | {{catch/entry2|214|Heracross|no|no|yes|Headbutt|10|all=30%|type1=Bug|type2=Fighting}} | ||
| Line 440: | Line 520: | ||
{{Catch/footer|road}} | {{Catch/footer|road}} | ||
|} | |} | ||
{| class="expandable" align="center" style="background: #{{ | {| class="expandable" align="center" style="background: #{{locationcolor/med|road}}; {{roundy}}; border: 5px solid #{{locationcolor/light|road}};" | ||
|- align="center" | |- align="center" | ||
! Items | ! Items | ||
| Line 446: | Line 526: | ||
| | | | ||
{{itlisth|road}} | {{itlisth|road}} | ||
{{ | {{itlistbod|none|On the tree east of the farm|C|display={{DL|Berries (Generation II)|Mint Berry}}}} | ||
{{ | {{itlistbod|Nugget|In the pasture, between the Miltank (hidden)|C|display={{DL|Valuable item|Nugget}}}} | ||
{{ | {{catch/div|road|After Miltank is healed}} | ||
{{ | {{itlistbod|TM Normal|From the farmer's wife|C|display={{TM|13|Snore}}}} | ||
{{itlistbod|Moomoo Milk|Buy from the farmer, {{pdollar}}500 per serving|C|display={{DL|Drink|Moomoo Milk}}}} | |||
{{itlistfoot|road}} | {{itlistfoot|road}} | ||
|} | |} | ||
=== MooMoo Farm === | |||
The [[MooMoo Farm]] depends on its herd of {{p|Miltank}} to produce milk, but one of these cows has gotten sick. In order for it to recover, it must be fed a total of seven Berries. Once its condition improves, speak to the farmer to receive {{TM|13|Snore}} as a reward. He also begins selling {{DL|Drink|Moomoo Milk}} for {{pdollar}}500 per serving. | |||
| Line 459: | Line 544: | ||
|gamename=Crystal | |gamename=Crystal | ||
|prev=yes | |prev=yes | ||
|prevsection=7 | |||
|prevname=Route 35, National Park, Route 36, Route 37 | |||
|next=yes | |next=yes | ||
|nextsection=9 | |nextsection=9 | ||
|nextname=Olivine City, Route 40, Route 41 | |nextname=Olivine City, Route 40, Route 41 | ||
}} | }} | ||
Revision as of 03:13, 5 June 2013
Ecruteak City
Welcome to Ecruteak, a historical city where the past meets the present. The city is shrouded in mystery, as all but one of Johto's legendary Pokémon have ties to the area. Unique landmarks include the Ecruteak Gym, Kimono Dance Theater, and the twin towers; the Burned Tower in the west, and the Tin Tower in the east.
| Items | ||||||||
|---|---|---|---|---|---|---|---|---|
| ||||||||
Bill's Time Capsule
Stop by the Pokémon Center to meet Bill, the inventor of the PC Storage System. It seems that he has just finished working on the Time Capsule, a service found in every Pokémon Center that allows a Trainer to "trade with the past". This means that you can now trade between Gold and Silver and the Generation I games. The Time Capsule will take until the next day to be fully operational.
Treasure Hunting
Stop by the house to the right of the Gym, and talk to the man inside. He gives you the Itemfinder, a handy tool that reacts to hidden items lying nearby. It's a treasure hunter's best friend!
Ecruteak Dance Theater
The dance hall is owned by the Kimono Girls, five sisters that each train one of Eevee's evolutions. Speak to the man with his Rhydon after defeating them to receive HM03 (Surf).
| Kimono Girls | |||||||||||||||||||||||||||||||||||||||||||||||||||||||||||||||||||||||||||||
|---|---|---|---|---|---|---|---|---|---|---|---|---|---|---|---|---|---|---|---|---|---|---|---|---|---|---|---|---|---|---|---|---|---|---|---|---|---|---|---|---|---|---|---|---|---|---|---|---|---|---|---|---|---|---|---|---|---|---|---|---|---|---|---|---|---|---|---|---|---|---|---|---|---|---|---|---|---|
| |||||||||||||||||||||||||||||||||||||||||||||||||||||||||||||||||||||||||||||
Burned Tower
The charred, crumbling ruins of the Burned Tower can be found in the city's northwest district. Formerly known as the Brass Tower, it was once as majestic as the Tin Tower to the east. Built 700 years ago, it was said to be the roost of an immense, silver-colored Pokémon. But 150 years ago, the tower was struck by a lightning bolt that ignited a fire that raged for three days. The silver Pokémon and the glorious, rainbow-colored Pokémon that roosted on Tin Tower escaped to the skies unharmed, and a sudden downpour quenched the fire. The silver Pokémon flew off, while the rainbow Pokémon resurrected three nameless Pokémon that perished in the blaze before flying off as well.
Upon entering the tower, you are immediately approached by Eusine, a researcher of the legendary beasts who is especially interested in Suicune. The local Gym Leader, Morty, is also here investigating the trio. Silver can be found in the center area, where he complains about not seeing Suicune before challenging you to a battle.
| Trainers | ||||||||||||||||||||||||||||||||||||||||||||
|---|---|---|---|---|---|---|---|---|---|---|---|---|---|---|---|---|---|---|---|---|---|---|---|---|---|---|---|---|---|---|---|---|---|---|---|---|---|---|---|---|---|---|---|---|
| ||||||||||||||||||||||||||||||||||||||||||||
| Available Pokémon | ||||||||||||||||||||||||||||||||||||||||||||||||||||||||||||||||||||||||||||||||||||||||||||||||||||||||||||||||||||||||||||||||||||||||||||||||||||||||||||||||||||||||||||||||||||||||||||||||||||||||||||||||||||||||
|---|---|---|---|---|---|---|---|---|---|---|---|---|---|---|---|---|---|---|---|---|---|---|---|---|---|---|---|---|---|---|---|---|---|---|---|---|---|---|---|---|---|---|---|---|---|---|---|---|---|---|---|---|---|---|---|---|---|---|---|---|---|---|---|---|---|---|---|---|---|---|---|---|---|---|---|---|---|---|---|---|---|---|---|---|---|---|---|---|---|---|---|---|---|---|---|---|---|---|---|---|---|---|---|---|---|---|---|---|---|---|---|---|---|---|---|---|---|---|---|---|---|---|---|---|---|---|---|---|---|---|---|---|---|---|---|---|---|---|---|---|---|---|---|---|---|---|---|---|---|---|---|---|---|---|---|---|---|---|---|---|---|---|---|---|---|---|---|---|---|---|---|---|---|---|---|---|---|---|---|---|---|---|---|---|---|---|---|---|---|---|---|---|---|---|---|---|---|---|---|---|---|---|---|---|---|---|---|---|---|---|---|---|---|---|---|---|
| ||||||||||||||||||||||||||||||||||||||||||||||||||||||||||||||||||||||||||||||||||||||||||||||||||||||||||||||||||||||||||||||||||||||||||||||||||||||||||||||||||||||||||||||||||||||||||||||||||||||||||||||||||||||||
| Items | ||||||||||||||||||||||||||||||||||||||
|---|---|---|---|---|---|---|---|---|---|---|---|---|---|---|---|---|---|---|---|---|---|---|---|---|---|---|---|---|---|---|---|---|---|---|---|---|---|---|
| ||||||||||||||||||||||||||||||||||||||
The battle causes the weakened floor to crumble, and you fall to the floor below, landing in front of the three legendary beasts. They do not react at first, but awaken when you approach them. Raikou and Entei run off immediately, but Suicune pauses for a moment before following the others. Eusine meets you on your way out, and thanks you for waking Suicune.
Tin Tower
The Tin Tower is a sacred place, and is off-limits to all but a few people. A group of monks known as the Wise Trio prevent anyone from reaching the tower for now. Two special items are required to enter and scale the tower.
| Climbing the Tower | |||||||||||||||||||||||||||||||||||||||||||||||||||||||||||||||||||||||||||||||||||||||||||||||||||||||||||||||||||||||||||||||||||||||||||||||||||||||||||||||||||||||||||||||||||||||||||||||||||||||||||||||||||||||||||||||||||||||||||
|
Upon meeting Eusine in Celadon City, he informs you of fresh rumors of a rainbow-colored Pokémon appearing at the tower. Return here to find the monks in a state of awe; they saw the tower shake, which means that a large Pokémon must have landed at the top. Enter the tower to receive the Rainbow Wing from one of the Wise Trio. Suddenly a ladder appears, finally granting access to the tower. Stock up on Ultra Balls, and bring a party capable of inflicting status ailments in order to wear Ho-Oh down faster.
File:Tin Tower 3F.png Tin Tower, 3F File:Tin Tower 4F.png Tin Tower, 4F 3FGo west to reach a Full Heal. Move around in an S-shape to reach the northeast stairs. 4FGo south to find an Ultra Ball, and south again to get a Super Potion. Grab the Escape Rope in the southwest, then climb the northwest stairs. File:Tin Tower 5F.png Tin Tower, 5F File:Tin Tower 6F.png Tin Tower, 6F 5FWork your way to the pillar for a Rare Candy. The ramps here keep you from advancing, so take the southeast stairs and backtrack through 4F. Stay to the west of the pillar to reach the stairs in the south. 6F6F has a simple layout that serves as a transition between the ramps on the lower floors and what lies above. The next three floors use a series of warp tiles for quick navigation. File:Tin Tower 7F.png Tin Tower, 7F File:Tin Tower 8F.png Tin Tower, 8F 7FStep on the nearest warp tile to reach the pillar, and take the next to reach the east wall of 9F. There are two warp tiles to the south; the right one takes to the center of 8F and a Max Elixir, while the left one takes you to the south side of 8F and a Nugget. Backtrack to the first warp on 7F, grab the Max Revive to the northeast, and go south to take the next warp to the west side of 8F. 8FThe next warp takes you to the north side of 9F, and the one after that brings you back to the east side of this floor. Pick up the Full Restore to the northwest and take one last warp to the center of 9F. File:Tin Tower 9F.png Tin Tower, 9F File:TinTowerRoof.png Ho-Oh's roost 9FClimb the stairs to reach the rooftop. Save your progress; there's only one Ho-Oh, so don't risk losing it. RooftopHo-OhStart off by using status-inflicting moves, like Spore or Thunder Wave, to wear it down. Follow up with Water- or Electric-type attacks to inflict double the damage. Use caution with Rock-type attacks, as Ho-Oh takes four times the normal damage from such moves. Then slowly chip away at its remaining health with Fire-, Grass-, Fighting-, Bug-, or Steel-type attacks, as moves of these types only inflict half- or quarter-damage.
| |||||||||||||||||||||||||||||||||||||||||||||||||||||||||||||||||||||||||||||||||||||||||||||||||||||||||||||||||||||||||||||||||||||||||||||||||||||||||||||||||||||||||||||||||||||||||||||||||||||||||||||||||||||||||||||||||||||||||||
Ecruteak Gym
ECRUTEAK CITY
POKéMON GYM
LEADER: MORTY
The Mystic Seer
of the Future
The Ecruteak Gym is dedicated to Ghost-type Pokémon. These spirits take double the damage from Ghost- and Dark-type attacks, and are normally unaffected by Normal- and Fighting-type attacks. However, a Pokémon with Foresight can disable these immunities. To reach the Gym Leader, follow the invisible path by moving from one Trainer's line of sight to the next. Bring along some extra Potions, since two of Morty's Pokémon know Curse, which drains the target's health every turn. It's also good to bring a few Awakenings in order to disrupt his Gengar's Hypnosis-Dream Eater combo.
| ||||||||||||||||||||||||||||||||||||||||||||||||||||||||||||||||||||||||||||||||||||||||||||||||||||||||||||||||||||||||||||||||||||||||||||||||||||||||||||||||||||||||||||||||||||||||||||||||||||||||||||||||||||||||||||||
Morty awards you the Fog Badge, which ensures obedience from all Pokémon up to level 50, and enables the use of Surf in the field. He also gives out TM30 (Shadow Ball) as a prize.
Route 38
Route 38 connects Ecruteak City to Route 39 in the west, near the MooMoo Farm. On your way west, you can trade phone numbers with Schoolboy Chad for alerts about Snubbull swarms. Register Lass Dana's number and she'll call for a rematch; defeat her again to receive a Thunderstone.
| Trainers | ||||||||||||||||||||||||||||||||||||||||||||||||||||||||||||||||||||||||||||||||||||||||||||||||||||||||||||||||||||
|---|---|---|---|---|---|---|---|---|---|---|---|---|---|---|---|---|---|---|---|---|---|---|---|---|---|---|---|---|---|---|---|---|---|---|---|---|---|---|---|---|---|---|---|---|---|---|---|---|---|---|---|---|---|---|---|---|---|---|---|---|---|---|---|---|---|---|---|---|---|---|---|---|---|---|---|---|---|---|---|---|---|---|---|---|---|---|---|---|---|---|---|---|---|---|---|---|---|---|---|---|---|---|---|---|---|---|---|---|---|---|---|---|---|---|---|---|
| ||||||||||||||||||||||||||||||||||||||||||||||||||||||||||||||||||||||||||||||||||||||||||||||||||||||||||||||||||||
| Available Pokémon | |||||||||||||||||||||||||||||||||||||||||||||||||||||||||||||||||||||||||||||||||||||||||||||||||||||||||||||||||||||||||||||||||||||||||||||||||||||||||||||||||||||||||||||||||||||||||||||||||||||||||||||||||||||||||||||||||||||||||||||||||||||||||||||||||||||||||||
|---|---|---|---|---|---|---|---|---|---|---|---|---|---|---|---|---|---|---|---|---|---|---|---|---|---|---|---|---|---|---|---|---|---|---|---|---|---|---|---|---|---|---|---|---|---|---|---|---|---|---|---|---|---|---|---|---|---|---|---|---|---|---|---|---|---|---|---|---|---|---|---|---|---|---|---|---|---|---|---|---|---|---|---|---|---|---|---|---|---|---|---|---|---|---|---|---|---|---|---|---|---|---|---|---|---|---|---|---|---|---|---|---|---|---|---|---|---|---|---|---|---|---|---|---|---|---|---|---|---|---|---|---|---|---|---|---|---|---|---|---|---|---|---|---|---|---|---|---|---|---|---|---|---|---|---|---|---|---|---|---|---|---|---|---|---|---|---|---|---|---|---|---|---|---|---|---|---|---|---|---|---|---|---|---|---|---|---|---|---|---|---|---|---|---|---|---|---|---|---|---|---|---|---|---|---|---|---|---|---|---|---|---|---|---|---|---|---|---|---|---|---|---|---|---|---|---|---|---|---|---|---|---|---|---|---|---|---|---|---|---|---|---|---|---|---|---|---|---|---|---|---|---|---|---|---|---|---|---|---|---|---|---|---|---|---|---|---|
| |||||||||||||||||||||||||||||||||||||||||||||||||||||||||||||||||||||||||||||||||||||||||||||||||||||||||||||||||||||||||||||||||||||||||||||||||||||||||||||||||||||||||||||||||||||||||||||||||||||||||||||||||||||||||||||||||||||||||||||||||||||||||||||||||||||||||||
| Items | ||||||||
|---|---|---|---|---|---|---|---|---|
| ||||||||
Route 39
Route 39 is a quiet, pastoral road that links Route 38 to Olivine City in the south. The MooMoo Farm is located in the northwest part of the route.
| Trainers | |||||||||||||||||||||||||||||||||||||||||||||||||||||||||||||||||||||||||||||||||||||||||||||||
|---|---|---|---|---|---|---|---|---|---|---|---|---|---|---|---|---|---|---|---|---|---|---|---|---|---|---|---|---|---|---|---|---|---|---|---|---|---|---|---|---|---|---|---|---|---|---|---|---|---|---|---|---|---|---|---|---|---|---|---|---|---|---|---|---|---|---|---|---|---|---|---|---|---|---|---|---|---|---|---|---|---|---|---|---|---|---|---|---|---|---|---|---|---|---|---|
| |||||||||||||||||||||||||||||||||||||||||||||||||||||||||||||||||||||||||||||||||||||||||||||||
| Available Pokémon | |||||||||||||||||||||||||||||||||||||||||||||||||||||||||||||||||||||||||||||||||||||||||||||||||||||||||||||||||||||||||||||||||||||||||||||||||||||||||||||||||||||||||||||||||||||||||||||||||||||||||||||||||||||||||||||||||||||||||||||||||||||||||||||||||||||||||||
|---|---|---|---|---|---|---|---|---|---|---|---|---|---|---|---|---|---|---|---|---|---|---|---|---|---|---|---|---|---|---|---|---|---|---|---|---|---|---|---|---|---|---|---|---|---|---|---|---|---|---|---|---|---|---|---|---|---|---|---|---|---|---|---|---|---|---|---|---|---|---|---|---|---|---|---|---|---|---|---|---|---|---|---|---|---|---|---|---|---|---|---|---|---|---|---|---|---|---|---|---|---|---|---|---|---|---|---|---|---|---|---|---|---|---|---|---|---|---|---|---|---|---|---|---|---|---|---|---|---|---|---|---|---|---|---|---|---|---|---|---|---|---|---|---|---|---|---|---|---|---|---|---|---|---|---|---|---|---|---|---|---|---|---|---|---|---|---|---|---|---|---|---|---|---|---|---|---|---|---|---|---|---|---|---|---|---|---|---|---|---|---|---|---|---|---|---|---|---|---|---|---|---|---|---|---|---|---|---|---|---|---|---|---|---|---|---|---|---|---|---|---|---|---|---|---|---|---|---|---|---|---|---|---|---|---|---|---|---|---|---|---|---|---|---|---|---|---|---|---|---|---|---|---|---|---|---|---|---|---|---|---|---|---|---|---|---|---|
| |||||||||||||||||||||||||||||||||||||||||||||||||||||||||||||||||||||||||||||||||||||||||||||||||||||||||||||||||||||||||||||||||||||||||||||||||||||||||||||||||||||||||||||||||||||||||||||||||||||||||||||||||||||||||||||||||||||||||||||||||||||||||||||||||||||||||||
| Items | |||||||||||||||||||||||
|---|---|---|---|---|---|---|---|---|---|---|---|---|---|---|---|---|---|---|---|---|---|---|---|
| |||||||||||||||||||||||
MooMoo Farm
The MooMoo Farm depends on its herd of Miltank to produce milk, but one of these cows has gotten sick. In order for it to recover, it must be fed a total of seven Berries. Once its condition improves, speak to the farmer to receive TM13 (Snore) as a reward. He also begins selling Moomoo Milk for $500 per serving.
|
Crystal walkthrough |
|

|
This article is part of Project Walkthroughs, a Bulbapedia project that aims to write comprehensive step-by-step guides on each Pokémon game. |
