Pokémon World Tournament

The Pokémon World Tournament
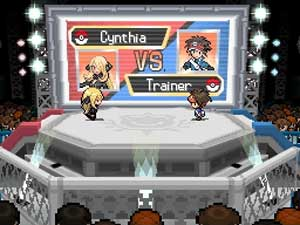
The Pokémon World Tournament is a facility south of Driftveil City that stands on the former Cold Storage site. Famous Pokémon Trainers from around the world gather here to compete against one another. Outside the building, several vendors stand ready to teach new moves to the competitors' Pokémon. To the west, the north side of the Relic Passage can be found.
| Items
|
| Item
|
Location
|
Games
|

|
Ether
|
In the southwest, near the Relic Passage (hidden)
|
B2 W2
|

|
PP Up
|
On the pier to the south
|
B2 W2
|

|
Rocky Helmet
|
From the Worker, southeast of the fountain
|
B2 W2
|

|
Zinc
|
In a trash can, north of the fountain (hidden)
|
B2 W2
|
|
|
|
Hidden Power Guy
The man in the northwest booth is able to see what type of Hidden Power a Pokémon will have. If you plan to teach the move, be sure to see what he has to say.
Move Reminder
The girl in the southwest booth is the Move Reminder. For the price of one Heart Scale per transaction, she will re-teach an old move that your Pokémon has forgotten.
Move Deleter
East of the Move Reminder is the Move Deleter. This old man can help a Pokémon forget one of its moves, even HM moves that can't normally be forgotten.
Ultimate Move Tutor
The old man at the southeast booth can teach an ultimate move to any fully-evolved starter Pokémon. However, it must share a strong bond with its Trainer. The quiet Grass Pokémon like Serperior can learn Frenzy Plant, the blazing Fire Pokémon like Emboar can learn Blast Burn, and the restless Water Pokémon like Samurott can learn Hydro Cannon.
Battle-Combo Move Tutor
The man in the easternmost booth teaches a special move to any members of the starter Pokémon families. Grass-type Pokémon like the Snivy family can learn Grass Pledge, Fire-type Pokémon like the Tepig family can learn Fire Pledge, and Water-type Pokémon like the Oshawott family can learn Water Pledge. Using these moves on the same turn in a Double or Triple Battle will raise their power to 150, and activate additional effects.
| Types Involved
|
Description
|
 
|
Creates a sea of fire where all non-Fire Pokémon lose 1/8 of their max HP every turn for four turns
|
 
|
Creates a rainbow that doubles the likelihood of a move's additional effect(s) for four turns
|
 
|
Creates a vast swamp that reduces the opponent's Speed by 50% for four turns
|
|
|
World Tournament building
Hugh and Clay are waiting outside the PWT building. When you approach, the Gym Leader proudly guides the two of you into the elaborate tournament hall. Inside is Cheren, who was busy investigating something when he was strong-armed by Clay into participating. Follow him and Hugh north to register in the tournament.
Driftveil Tournament
Three consecutive victories are needed to win the Driftveil Tournament. The use of items is prohibited during the tournament, so hand out items to your Pokémon before registering. Opponents are not usually decided ahead of time, but for your first tournament, you will need to defeat Hugh, Cheren, and Colress.

|
|
Reward: N/A
|
|
|
|
|
|
|

|
|
Reward: 1 BP
|
|
|
|
|
|
|
After earning 1 BP for winning the tournament, head outside to see Team Plasma members passing by the building. Colress tries to stop Hugh from chasing them, but he doesn't listen, and follows them south to the pier. Rest up before following him.
Plasma Frigate
A large ship is moored at the pier. Go with Hugh and Cheren to storm the ship, which turns out to be Team Plasma's base of operations. The three of you are immediately surrounded by a crowd of Grunts. Defeat the first two on your own, then team up with Cheren then Hugh to take out the others.

|
|
Reward: N/A
|
|
|
|
|
|
|
Zinzolin, one of the Seven Sages, emerges from the ship and declares that Team Plasma will rule Unova. He calls the Shadow Triad to appear, and they whisk the three of you off of the ship. Hugh runs off in a huff, and Cheren sets out for Route 6.
Relic Passage
The Relic Passage is a large underground cave that was only recently discovered. It connects the Pokémon World Tournament and the Castelia Sewers. One of the tunnels leads to the lowest floor of the Relic Castle, buried deep under the desert sands. The dust clouds that randomly pop up not only give you a chance of encountering a wild Drilbur or Onix, but it also gives you a chance of acquiring a random colored shard. This can help with collecting the shards you need to trade in to a Move Tutor for your Pokémon to learn any compatible move they offer.
| Available Pokémon
|
| North chamber
|
| Pokémon
|
Games
|
Location
|
Levels
|
Rate
|
|
|
B2
|
W2
|
|
27-30
|
34%
|
|
|
B2
|
W2
|
|
27-30
|
31%
|
|
|
B2
|
W2
|
|
28-30
|
20%
|
|
|
B2
|
W2
|
|
29
|
10%
|
|
|
B2
|
W2
|
|
30
|
5%
|
| Dust clouds
|
|
|
B2
|
W2
|
|
27-30
|
80%
|
|
|
B2
|
W2
|
|
27
|
20%
|
| A colored background means that the Pokémon can be found in this location in the specified game. A white background with a colored letter means that the Pokémon cannot be found here.
|
|
| Middle chamber
|
| Pokémon
|
Games
|
Location
|
Levels
|
Rate
|
|
|
B2
|
W2
|
|
27-30
|
34%
|
|
|
B2
|
W2
|
|
27-30
|
31%
|
|
|
B2
|
W2
|
|
28-30
|
20%
|
|
|
B2
|
W2
|
|
29
|
10%
|
|
|
B2
|
W2
|
|
30
|
5%
|
| Dust clouds
|
|
|
B2
|
W2
|
|
27-30
|
80%
|
|
|
B2
|
W2
|
|
27
|
20%
|
| A colored background means that the Pokémon can be found in this location in the specified game. A white background with a colored letter means that the Pokémon cannot be found here.
|
|
| South chamber
|
| Pokémon
|
Games
|
Location
|
Levels
|
Rate
|
|
|
B2
|
W2
|
|
16-18
|
34%
|
|
|
B2
|
W2
|
|
16-17
|
31%
|
|
|
B2
|
W2
|
|
17-18
|
20%
|
|
|
B2
|
W2
|
|
17
|
10%
|
|
|
B2
|
W2
|
|
18
|
5%
|
| Dust clouds
|
|
|
B2
|
W2
|
|
16-19
|
80%
|
|
|
B2
|
W2
|
|
16-18
|
20%
|
| A colored background means that the Pokémon can be found in this location in the specified game. A white background with a colored letter means that the Pokémon cannot be found here.
|
|
|
| Items
|
| Item
|
Location
|
Games
|
| North chamber
|

|
Protein
|
Northeast, near Backpacker Randall
|
B2 W2
|
| Middle chamber
|

|
Big Pearl
|
Northwest of the lake (requires Surf)
|
B2 W2
|

|
Blue Shard
|
In a rock, south of the lake (hidden)
|
B2 W2
|

|
Max Repel
|
Dead-end path southeast of the lake (hidden)
|
B2 W2
|

|
Green Shard
|
In a rock, south of Psychic Tully (hidden)
|
B2 W2
|

|
Red Shard
|
In a rock, west of Psychic Ena (hidden)
|
B2 W2
|

|
Yellow Shard
|
In a rock, north of Backpacker Annie (hidden)
|
B2 W2
|

|
Ultra Ball
|
East chamber, accessible from Castelia side (requires Strength)
|
B2 W2
|

|
Rock Gem
|
East chamber, accessible from Castelia side (hidden, requires Strength)
|
B2 W2
|

|
Rare Candy
|
East chamber, accessible from Castelia side (requires Strength)
|
B2 W2
|

|
Rocky Helmet
|
East chamber, accessible from Castelia side (requires Strength)
|
B2 W2
|
| South chamber
|

|
Max Repel
|
Between two western ledges, accessible from Driftveil side
|
B2 W2
|

|
Escape Rope ×2
|
- North of Scientist Terrance
- South of Scientist Lumina (hidden)
|
B2 W2
|

|
Hard Stone
|
West of Scientist Lumina
|
B2 W2
|
|
|
|
North chamber
Speak to the Worker near the entrance to add a new Funfest Mission, Find Treasure!, to the Entralink. Follow the tunnel eastward, then north to reach a Protein near Backpacker Randall. Battle Hiker Keith in the southeast, and step through the opening in the wall to reach the middle chamber.
Middle chamber
Go south to reach a small lake. A Big Pearl lies on the lake's west side, while a Blue Shard is hidden in a rock to the south, and a Max Repel hides in the dead-end path to the southeast. Continue eastward to fight Psychic Tully, and check the nearby rock for a Green Shard. Head northeast to battle Psychic Ena, then check the rock here for a Red Shard. Move the boulder out of the way, and walk through the northeast opening to reach the Relic Castle.
Relic Castle
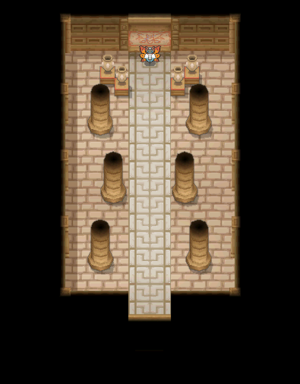
The lowest floor of the Relic Castle is a hallway comprised of five rooms. Visit the easternmost room to get an Ultra Ball, and check the center room for a hidden Sun Stone. Go north to reach the final room, which is home to the Bug/Fire Pokémon, Volcarona. If you defeat the Sun Pokémon, it will respawn when you enter the Hall of Fame.
| Available Pokémon
|
| Pokémon
|
Games
|
Location
|
Levels
|
Rate
|
| Relic Passage floor
|
|
|
B2
|
W2
|

|
Relic Passage floor
|
|
27-30
|
40%
|
|
|
B2
|
W2
|

|
Relic Passage floor
|
|
27-28
|
30%
|
|
|
B2
|
W2
|

|
Relic Passage floor
|
|
28-29
|
20%
|
|
|
B2
|
W2
|

|
Relic Passage floor
|
|
29-30
|
10%
|
| Volcarona's room
|
|
|
B2
|
W2
|

|
Volcarona's room
|
|
27-30
|
100%
|
| Special Pokémon
|
|
|
B2
|
W2
|

|
Only one
|
|
35, 65
|
One
|
| A colored background means that the Pokémon can be found in this location in the specified game. A white background with a colored letter means that the Pokémon cannot be found here.
|
|
Relic Passage
Middle chamber
Head southwest to fight Backpacker Annie, and check the rock near her to find a Yellow Shard. Turn east and climb the stairway to reach the south chamber.
South chamber
Go southeast and move the boulder over to the hole in the ground. Head north through the long tunnel to reach a small room in the middle chamber, where an Ultra Ball, Rocky Helmet, Rare Candy, and hidden Rock Gem can be found. Return to the boulder and jump the first ledge to the west to reach a Max Repel. Jump the last ledge and head east; this part of the passage was accessible when you first reached the Castelia Sewers. An Escape Rope lies north of Scientist Terrance, and a Hard Stone sits to the west of Scientist Lumina. Head south to exit through the sewers.
Fly back to Driftveil City, and go west to reach Route 6.
 If the player chose Snivy:
 If the player chose Tepig:
 If the player chose Oshawott:


