Loyalty Plaza: Difference between revisions
mNo edit summary |
mNo edit summary |
||
| (15 intermediate revisions by 10 users not shown) | |||
| Line 1: | Line 1: | ||
{{Town infobox | {{Town infobox | ||
|name=Loyalty Plaza | |name=Loyalty Plaza | ||
|jpname= | |jpname=ともっこプラザ | ||
|jptrans=Companion Plaza | |jptrans=Companion Plaza | ||
|image=Loyal Three Monument SV.png | |image=Loyal Three Monument SV.png | ||
| Line 8: | Line 8: | ||
|generation=9 | |generation=9 | ||
|slogan= | |slogan= | ||
|colordark={{ | |colordark={{Teal Mask color dark}} | ||
|colormed={{ | |colormed={{Teal Mask color}} | ||
|colorlight={{ | |colorlight={{Teal Mask color light}} | ||
}} | }} | ||
| Line 16: | Line 16: | ||
==Geography== | ==Geography== | ||
{{incomplete|section}} | |||
==History== | ==History== | ||
{{spoilers}} | {{spoilers}} | ||
As part of a school trip to [[Kitakami]], the | As part of a school trip to [[Kitakami]], the {{player}} groups up with [[Kieran]] to visit all three signboards detailing events in the history of [[Kitakami]]. The first such signboard is located within the park, directly adjacent to the Loyal Three Monument. | ||
:''Long, long ago, there was a fearsome ogre in the land of Kitakami.'' | :''Long, long ago, there was a fearsome ogre in the land of Kitakami.'' | ||
:''The ogre made its home in the mountain behind the village, frightening all who ventured there.'' | :''The ogre made its home in the mountain behind the village, frightening all who ventured there.'' | ||
| Line 31: | Line 32: | ||
After the player finishes reading the signboard, Kieran expresses his fascination in the {{p|Ogerpon|ogre}} within the story, impressed by its feats of strength and admits he has visited the [[Dreaded Den]] many times in an attempt to meet the ogre. Afterwards, he and the player take a photo together in front of the signboard, and Kieran directs the player to the location of the next signboard. | After the player finishes reading the signboard, Kieran expresses his fascination in the {{p|Ogerpon|ogre}} within the story, impressed by its feats of strength and admits he has visited the [[Dreaded Den]] many times in an attempt to meet the ogre. Afterwards, he and the player take a photo together in front of the signboard, and Kieran directs the player to the location of the next signboard. | ||
Later, Kieran heads back to Loyalty Plaza after stealing the [[Teal Mask]] that [[ | Later, Kieran heads back to Loyalty Plaza after stealing the [[Teal Mask]] that [[Yukito and Hideko|Carmine's grandfather]] had been working to fix, feeling betrayed that he was left in the dark of the true story of the Loyal Three and treated as an outcast. He challenges the player to a battle and promises to return the Teal Mask if he loses. After losing, he strikes one of the monument's stone fenceposts with his fist, which releases a faint purple mist. After returning the Teal Mask to the player, he runs off back home. | ||
A rumbling comes from the Loyal Three Monument, evolving into a shaking until suddenly the entire monument is enveloped into a pillar of purple light that extends high into the sky, clearing to reveal the revived Loyal Three standing on top of the destroyed monument. Carmine attempts to find out what they want, but they talk amongst themselves and quickly run off towards [[Kitakami Hall]]. | A rumbling comes from the Loyal Three Monument, evolving into a shaking until suddenly the entire monument is enveloped into a pillar of purple light that extends high into the sky, clearing to reveal the revived Loyal Three standing on top of the destroyed monument. Carmine attempts to find out what they want, but they talk amongst themselves and quickly run off towards [[Kitakami Hall]]. | ||
After the events of the main story conclude, the caretaker plans to repair the Loyal Three Monument for its tourism impact, obtaining funds with the assistance of the player. After the construction work finishes, the monument appears identical to how it was previously, the workers proud of having replicated the exact scratches and marks the monument had before it was destroyed. In a show of appreciation for restoring such an important source of tourism, the caretaker rewards the player with the Hurray! emote and the {{DL|List of clothing (Scarlet and Violet)|Uniforms|Flashy Festival Jinbei}}. | After the events of the main story conclude, the [[caretaker]] plans to repair the Loyal Three Monument for its tourism impact, obtaining funds with the assistance of the player. After the construction work finishes, the monument appears identical to how it was previously, the workers proud of having replicated the exact scratches and marks the monument had before it was destroyed. In a show of appreciation for restoring such an important source of tourism, the caretaker rewards the player with the Hurray! emote and the {{DL|List of clothing (Scarlet and Violet)|Uniforms|Flashy Festival Jinbei}}. | ||
==Items== | ==Items== | ||
{{incomplete|section}} | |||
==Trainers== | ==Trainers== | ||
| Line 43: | Line 45: | ||
====Before completing {{DL|Pokémon Scarlet and Violet|The Way Home}}==== | ====Before completing {{DL|Pokémon Scarlet and Violet|The Way Home}}==== | ||
{{Party/Single | {{Party/Single | ||
|color={{ | |color={{Indigo Disk color light}} | ||
|bordercolor={{violet color dark}} | |bordercolor={{violet color dark}} | ||
|headcolor={{violet color light}} | |headcolor={{violet color light}} | ||
|sprite=VSKieran.png | |sprite=VSKieran.png | ||
|size=x100px | |size=x100px|width=160px | ||
|prize={{PDollar}}1,232 | |prize={{PDollar}}1,232 | ||
|class=Pokémon Trainer | |class=Pokémon Trainer | ||
| Line 91: | Line 93: | ||
|move3=Fury Attack|move3type=Normal|move3cat=Physical | |move3=Fury Attack|move3type=Normal|move3cat=Physical | ||
|move4=Surf|move4type=Water|move4cat=Special}} | |move4=Surf|move4type=Water|move4cat=Special}} | ||
{{Party/Div|color={{ | {{Party/Div|color={{Indigo Disk color light}}}} | ||
| style="margin:auto" |{{Pokémon/9 | | style="margin:auto" |{{Pokémon/9 | ||
|ndex=1011 | |ndex=1011 | ||
| Line 119: | Line 121: | ||
====After completing The Way Home==== | ====After completing The Way Home==== | ||
{{Party/Single | {{Party/Single | ||
|color={{ | |color={{Indigo Disk color light}} | ||
|bordercolor={{violet color dark}} | |bordercolor={{violet color dark}} | ||
|headcolor={{violet color light}} | |headcolor={{violet color light}} | ||
|sprite=VSKieran.png | |sprite=VSKieran.png | ||
|size=x100px | |size=x100px|width=160px | ||
|prize={{PDollar}}4,260 | |prize={{PDollar}}4,260 | ||
|class=Pokémon Trainer | |class=Pokémon Trainer | ||
| Line 167: | Line 169: | ||
|move3=Thrash|move3type=Normal|move3cat=Physical | |move3=Thrash|move3type=Normal|move3cat=Physical | ||
|move4=Surf|move4type=Water|move4cat=Special}} | |move4=Surf|move4type=Water|move4cat=Special}} | ||
{{Party/Div|color={{ | {{Party/Div|color={{Indigo Disk color light}}}} | ||
| style="margin:auto" |{{Pokémon/9 | | style="margin:auto" |{{Pokémon/9 | ||
|ndex=1011 | |ndex=1011 | ||
| Line 195: | Line 197: | ||
===After catching {{p|Ogerpon}}=== | ===After catching {{p|Ogerpon}}=== | ||
Carmine will only battle the player if they have Ogerpon in their [[party]], or if Ogerpon is not in their party or [[Pokémon Storage System|boxes]]. | |||
====Before completing {{DL|Pokémon Scarlet and Violet|The Way Home}}==== | ====Before completing {{DL|Pokémon Scarlet and Violet|The Way Home}}==== | ||
{{Party/Single | {{Party/Single | ||
|color={{ | |color={{Indigo Disk color light}} | ||
|bordercolor={{scarlet color dark}} | |bordercolor={{scarlet color dark}} | ||
|headcolor={{scarlet color light}} | |headcolor={{scarlet color light}} | ||
|sprite=VSCarmine.png | |sprite=VSCarmine.png | ||
|size=x100px | |size=x100px|width=160px | ||
|prize={{PDollar}}1,960 | |prize={{PDollar}}1,960 | ||
|class=Pokémon Trainer | |class=Pokémon Trainer | ||
| Line 245: | Line 249: | ||
|move3=String Shot|move3type=Bug|move3cat=Status | |move3=String Shot|move3type=Bug|move3cat=Status | ||
|move4=Trailblaze|move4type=Grass|move4cat=Physical}} | |move4=Trailblaze|move4type=Grass|move4cat=Physical}} | ||
{{Party/Div|color={{ | {{Party/Div|color={{Indigo Disk color light}}}} | ||
| style="margin:auto" |{{Pokémon/9 | | style="margin:auto" |{{Pokémon/9 | ||
|ndex=038 | |ndex=038 | ||
| Line 272: | Line 276: | ||
====After completing The Way Home==== | ====After completing The Way Home==== | ||
{{Party/Single | {{Party/Single | ||
|color={{ | |color={{Indigo Disk color light}} | ||
|bordercolor={{scarlet color dark}} | |bordercolor={{scarlet color dark}} | ||
|headcolor={{scarlet color light}} | |headcolor={{scarlet color light}} | ||
|sprite=VSCarmine.png | |sprite=VSCarmine.png | ||
|size=x100px | |size=x100px|width=160px | ||
|prize={{PDollar}}5,920 | |prize={{PDollar}}5,920 | ||
|class=Pokémon Trainer | |class=Pokémon Trainer | ||
| Line 321: | Line 325: | ||
|move3=Swords Dance|move3type=Normal|move3cat=Status | |move3=Swords Dance|move3type=Normal|move3cat=Status | ||
|move4=Fell Stinger|move4type=Bug|move4cat=Physical}} | |move4=Fell Stinger|move4type=Bug|move4cat=Physical}} | ||
{{Party/Div|color={{ | {{Party/Div|color={{Indigo Disk color light}}}} | ||
| style="margin:auto" |{{Pokémon/9 | | style="margin:auto" |{{Pokémon/9 | ||
|ndex=038 | |ndex=038 | ||
| Line 346: | Line 350: | ||
|move4=Scald|move4type=Water|move4cat=Special}} | |move4=Scald|move4type=Water|move4cat=Special}} | ||
{{Party/Footer}} | {{Party/Footer}} | ||
===[[Mochi Mayhem]]=== | |||
{{MSP/9|0906|Sprigatito}} If the {{player}} chose {{p|Sprigatito}}:<br> | |||
{{Party/Single | |||
|color={{scarlet color}} | |||
|bordercolor={{scarlet color dark}} | |||
|headcolor={{scarlet color light}} | |||
|sprite=VSNemona Mochi Mayhem.png | |||
|size=x100px | |||
|prize={{PDollar}}20,880 | |||
|class=Pokémon Trainer | |||
|classlink=Pokémon Trainer | |||
|name={{color2|000|Nemona}} | |||
|game=SV | |||
|location=Loyalty Plaza | |||
|pokemon=6}} | |||
|{{Pokémon/9 | |||
|ndex=745 | |||
|pokemon=Lycanroc | |||
|gender=female | |||
|level=86 | |||
|type1=Rock | |||
|ability=Sand Rush | |||
|move1=Accelerock|move1type=Rock|move1cat=Physical | |||
|move2=Drill Run|move2type=Ground|move2cat=Physical | |||
|move3=Stone Edge|move3type=Rock|move3cat=Physical | |||
|move4=Stealth Rock|move4type=Rock|move4cat=Status}} | |||
|{{Pokémon/9 | |||
|ndex=784 | |||
|pokemon=Kommo-o | |||
|gender=female | |||
|level=86 | |||
|type1=Dragon | |||
|type2=Fighting | |||
|ability=Soundproof | |||
|move1=Clangorous Soul|move1type=Dragon|move1cat=Status | |||
|move2=Drain Punch|move2type=Fighting|move2cat=Physical | |||
|move3=Thunder Punch|move3type=Electric|move3cat=Physical | |||
|move4=Earthquake|move4type=Ground|move4cat=Physical}} | |||
|{{Pokémon/9 | |||
|ndex=706 | |||
|pokemon=Goodra | |||
|gender=female | |||
|level=86 | |||
|type1=Dragon | |||
|ability=Sap Sipper | |||
|move1=Dragon Pulse|move1type=Dragon|move1cat=Special | |||
|move2=Muddy Water|move2type=Water|move2cat=Special | |||
|move3=Ice Beam|move3type=Ice|move3cat=Special | |||
|move4=Sludge Bomb|move4type=Poison|move4cat=Special}} | |||
{{Party/Div|color={{scarlet color}}}} | |||
|{{Pokémon/9 | |||
|ndex=743 | |||
|pokemon=Ribombee | |||
|gender=female | |||
|level=86 | |||
|type1=Bug | |||
|type2=Fairy | |||
|ability=Shield Dust | |||
|move1=Bug Buzz|move1type=Bug|move1cat=Special | |||
|move2=Moonblast|move2type=Fairy|move2cat=Special | |||
|move3=Energy Ball|move3type=Grass|move3cat=Special | |||
|move4=Psychic|move4type=Psychic|move4cat=Special}} | |||
|{{Pokémon/9 | |||
|ndex=923 | |||
|pokemon=Pawmot | |||
|gender=male | |||
|level=86 | |||
|type1=Electric | |||
|type2=Fighting | |||
|ability=Volt Absorb | |||
|move1=Double Shock|move1type=Electric|move1cat=Physical | |||
|move2=Close Combat|move2type=Fighting|move2cat=Physical | |||
|move3=Ice Punch|move3type=Ice|move3cat=Physical | |||
|move4=Quick Attack|move4type=Normal|move4cat=Physical}} | |||
|{{Pokémon/9 | |||
|ndex=914 | |||
|pokemon=Quaquaval | |||
|gender=male | |||
|level=87 | |||
|type1=Water | |||
|type2=Fighting | |||
|tera=Fighting | |||
|ability=Torrent | |||
|move1=Aqua Step|move1type=Water|move1cat=Physical | |||
|move2=Brick Break|move2type=Fighting|move2cat=Physical | |||
|move3=Aerial Ace|move3type=Flying|move3cat=Physical | |||
|move4=Ice Spinner|move4type=Ice|move4cat=Physical}} | |||
{{Party/Footer}} | |||
{{MSP/9|0909|Fuecoco}} If the {{player}} chose {{p|Fuecoco}}:<br> | |||
{{Party/Single | |||
|color={{scarlet color}} | |||
|bordercolor={{scarlet color dark}} | |||
|headcolor={{scarlet color light}} | |||
|sprite=VSNemona Mochi Mayhem.png | |||
|size=x100px | |||
|prize={{PDollar}}20,880 | |||
|class=Pokémon Trainer | |||
|classlink=Pokémon Trainer | |||
|name={{color2|000|Nemona}} | |||
|game=SV | |||
|location=Loyalty Plaza | |||
|pokemon=6}} | |||
|{{Pokémon/9 | |||
|ndex=745 | |||
|pokemon=Lycanroc | |||
|gender=female | |||
|level=86 | |||
|type1=Rock | |||
|ability=Sand Rush | |||
|move1=Accelerock|move1type=Rock|move1cat=Physical | |||
|move2=Drill Run|move2type=Ground|move2cat=Physical | |||
|move3=Stone Edge|move3type=Rock|move3cat=Physical | |||
|move4=Stealth Rock|move4type=Rock|move4cat=Status}} | |||
|{{Pokémon/9 | |||
|ndex=784 | |||
|pokemon=Kommo-o | |||
|gender=female | |||
|level=86 | |||
|type1=Dragon | |||
|type2=Fighting | |||
|ability=Soundproof | |||
|move1=Clangorous Soul|move1type=Dragon|move1cat=Status | |||
|move2=Drain Punch|move2type=Fighting|move2cat=Physical | |||
|move3=Thunder Punch|move3type=Electric|move3cat=Physical | |||
|move4=Earthquake|move4type=Ground|move4cat=Physical}} | |||
|{{Pokémon/9 | |||
|ndex=706 | |||
|pokemon=Goodra | |||
|gender=female | |||
|level=86 | |||
|type1=Dragon | |||
|ability=Sap Sipper | |||
|move1=Dragon Pulse|move1type=Dragon|move1cat=Special | |||
|move2=Muddy Water|move2type=Water|move2cat=Special | |||
|move3=Ice Beam|move3type=Ice|move3cat=Special | |||
|move4=Sludge Bomb|move4type=Poison|move4cat=Special}} | |||
{{Party/Div|color={{scarlet color}}}} | |||
|{{Pokémon/9 | |||
|ndex=350 | |||
|pokemon=Milotic | |||
|gender=female | |||
|level=86 | |||
|type1=Water | |||
|ability=Competitive | |||
|move1=Draining Kiss|move1type=Fairy|move1cat=Special | |||
|move2=Surf|move2type=Water|move2cat=Special | |||
|move3=Ice Beam|move3type=Ice|move3cat=Special | |||
|move4=Mud Shot|move4type=Ground|move4cat=Special}} | |||
|{{Pokémon/9 | |||
|ndex=923 | |||
|pokemon=Pawmot | |||
|gender=male | |||
|level=86 | |||
|type1=Electric | |||
|type2=Fighting | |||
|ability=Volt Absorb | |||
|move1=Double Shock|move1type=Electric|move1cat=Physical | |||
|move2=Close Combat|move2type=Fighting|move2cat=Physical | |||
|move3=Ice Punch|move3type=Ice|move3cat=Physical | |||
|move4=Quick Attack|move4type=Normal|move4cat=Physical}} | |||
|{{Pokémon/9 | |||
|ndex=908 | |||
|pokemon=Meowscarada | |||
|gender=male | |||
|level=87 | |||
|type1=Grass | |||
|type2=Dark | |||
|tera=Dark | |||
|ability=Overgrow | |||
|move1=Flower Trick|move1type=Grass|move1cat=Physical | |||
|move2=Thunder Punch|move2type=Electric|move2cat=Physical | |||
|move3=Shadow Claw|move3type=Ghost|move3cat=Physical | |||
|move4=Play Rough|move4type=Fairy|move4cat=Physical}} | |||
{{Party/Footer}} | |||
{{MSP/9|0912|Quaxly}} If the {{player}} chose {{p|Quaxly}}:<br> | |||
{{Party/Single | |||
|color={{scarlet color}} | |||
|bordercolor={{scarlet color dark}} | |||
|headcolor={{scarlet color light}} | |||
|sprite=VSNemona Mochi Mayhem.png | |||
|size=x100px | |||
|prize={{PDollar}}20,880 | |||
|class=Pokémon Trainer | |||
|classlink=Pokémon Trainer | |||
|name={{color2|000|Nemona}} | |||
|game=SV | |||
|location=Loyalty Plaza | |||
|pokemon=6}} | |||
|{{Pokémon/9 | |||
|ndex=745 | |||
|pokemon=Lycanroc | |||
|gender=female | |||
|level=86 | |||
|type1=Rock | |||
|ability=Sand Rush | |||
|move1=Accelerock|move1type=Rock|move1cat=Physical | |||
|move2=Drill Run|move2type=Ground|move2cat=Physical | |||
|move3=Stone Edge|move3type=Rock|move3cat=Physical | |||
|move4=Stealth Rock|move4type=Rock|move4cat=Status}} | |||
|{{Pokémon/9 | |||
|ndex=784 | |||
|pokemon=Kommo-o | |||
|gender=female | |||
|level=86 | |||
|type1=Dragon | |||
|type2=Fighting | |||
|ability=Soundproof | |||
|move1=Clangorous Soul|move1type=Dragon|move1cat=Status | |||
|move2=Drain Punch|move2type=Fighting|move2cat=Physical | |||
|move3=Thunder Punch|move3type=Electric|move3cat=Physical | |||
|move4=Earthquake|move4type=Ground|move4cat=Physical}} | |||
|{{Pokémon/9 | |||
|ndex=706 | |||
|pokemon=Goodra | |||
|gender=female | |||
|level=86 | |||
|type1=Dragon | |||
|ability=Sap Sipper | |||
|move1=Dragon Pulse|move1type=Dragon|move1cat=Special | |||
|move2=Muddy Water|move2type=Water|move2cat=Special | |||
|move3=Ice Beam|move3type=Ice|move3cat=Special | |||
|move4=Sludge Bomb|move4type=Poison|move4cat=Special}} | |||
{{Party/Div|color={{scarlet color}}}} | |||
|{{Pokémon/9 | |||
|ndex=477 | |||
|pokemon=Dusknoir | |||
|gender=female | |||
|level=86 | |||
|type1=Ghost | |||
|ability=Pressure | |||
|move1=Earthquake|move1type=Ground|move1cat=Physical | |||
|move2=Thunder Punch|move2type=Electric|move2cat=Physical | |||
|move3=Shadow Sneak|move3type=Ghost|move3cat=Physical | |||
|move4=Ice Punch|move4type=Ice|move4cat=Physical}} | |||
|{{Pokémon/9 | |||
|ndex=923 | |||
|pokemon=Pawmot | |||
|gender=male | |||
|level=86 | |||
|type1=Electric | |||
|type2=Fighting | |||
|ability=Volt Absorb | |||
|move1=Double Shock|move1type=Electric|move1cat=Physical | |||
|move2=Close Combat|move2type=Fighting|move2cat=Physical | |||
|move3=Ice Punch|move3type=Ice|move3cat=Physical | |||
|move4=Quick Attack|move4type=Normal|move4cat=Physical}} | |||
|{{Pokémon/9 | |||
|ndex=911 | |||
|pokemon=Skeledirge | |||
|gender=male | |||
|level=87 | |||
|type1=Fire | |||
|type2=Ghost | |||
|tera=Ghost | |||
|ability=Blaze | |||
|move1=Torch Song|move1type=Fire|move1cat=Special | |||
|move2=Earth Power|move2type=Ground|move2cat=Special | |||
|move3=Shadow Ball|move3type=Ghost|move3cat=Special | |||
|move4=Snarl|move4type=Dark|move4cat=Special}} | |||
{{Party/Footer}} | |||
==Special encounters== | |||
After defeating Nemona during the [[Mochi Mayhem]] epilogue, the player will be able to battle {{p|Pecharunt}} as the final battle of the Mochi Mayhem story. It has twice the usual amount of HP during this battle, and after being defeated, the player is required to catch it (with every type of [[Poké Ball]] having a guaranteed success rate, as in [[Tera Raid Battle]]s). It is coded to never be {{Shiny}}, and always has a Timid [[Nature]]. | |||
{{Pokémon/9 | |||
|ndex=1025 | |||
|pokemon=Pecharunt | |||
|gender=None | |||
|level=88 | |||
|tera=Poison | |||
|type1=Poison | |||
|type2=Ghost | |||
|ability=Poison Puppeteer | |||
|move1=Nasty Plot|move1type=Dark|move1cat=Status | |||
|move2=Toxic|move2type=Poison|move2cat=Status | |||
|move3=Malignant Chain|move3type=Poison|move3cat=Special | |||
|move4=Shadow Ball|move4type=Ghost|move4cat=Special}} | |||
==Music== | ==Music== | ||
| Line 376: | Line 663: | ||
==In other languages== | ==In other languages== | ||
{{Langtable|color={{ | {{Langtable|color={{Teal Mask color light}}|bordercolor={{Teal Mask color dark}} | ||
|zh_yue=寶伴廣場 ''Bóubuhn {{tt|Gwóngchèuhng|Plaza}}'' | |zh_yue=寶伴廣場 ''Bóubuhn {{tt|Gwóngchèuhng|Plaza}}'' | ||
|zh_cmn=寶伴廣場 / 宝伴广场 ''Bǎobàn {{tt|Guǎngchǎng|Plaza}}'' | |zh_cmn=寶伴廣場 / 宝伴广场 ''Bǎobàn {{tt|Guǎngchǎng|Plaza}}'' | ||
| Line 387: | Line 674: | ||
{{Burial ground}} | {{Burial ground}} | ||
{{Kitakami}} | {{Kitakami}}<br> | ||
{{legendarylocations|kitakami}}<br> | |||
{{Project Locations notice}} | |||
[[Category:Scarlet and Violet locations]] | [[Category:Scarlet and Violet locations]] | ||
[[Category:Legendary and Mythical Pokémon locations]] | |||
[[de:Gefährten-Platz]] | [[de:Gefährten-Platz]] | ||
[[es:Parque de los compatrones]] | |||
[[fr:Parc Adorami]] | |||
[[it:Parco dei beniamici]] | [[it:Parco dei beniamici]] | ||
[[ja:ともっこプラザ]] | [[ja:ともっこプラザ]] | ||
[[zh:宝伴广场]] | [[zh:宝伴广场]] | ||
Latest revision as of 13:26, 21 April 2024
| |||
| |||
| |||
| Location File:Kitakami Loyalty Plaza Map.png Location of Loyalty Plaza in Kitakami. | |||
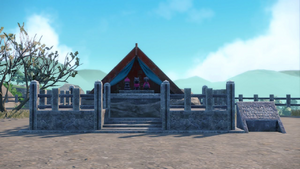
Loyalty Plaza (Japanese: ともっこプラザ Companion Plaza) is a small park near Mossui Town, home to statues of the Loyal Three: Okidogi, Munkidori, and Fezandipiti.
Geography

|
This section is incomplete. Please feel free to edit this section to add missing information and complete it. |
History
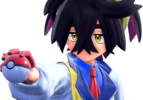
As part of a school trip to Kitakami, the player groups up with Kieran to visit all three signboards detailing events in the history of Kitakami. The first such signboard is located within the park, directly adjacent to the Loyal Three Monument.
- Long, long ago, there was a fearsome ogre in the land of Kitakami.
- The ogre made its home in the mountain behind the village, frightening all who ventured there.
- One day, the ogre came down from the mountain in a terrible rage, causing great fear in the village.
- By some stroke of luck, Okidogi, Munkidori, and Fezandipiti all happened to be there as well.
- The three Pokémon laid down their lives to fend off the ogre and send it back to the mountain.
- In admiration, the people of the village bestowed upon this brave trio the title "the Loyal Three."
- Their remains were given a proper burial, and statues of the three were erected above the site.
After the player finishes reading the signboard, Kieran expresses his fascination in the ogre within the story, impressed by its feats of strength and admits he has visited the Dreaded Den many times in an attempt to meet the ogre. Afterwards, he and the player take a photo together in front of the signboard, and Kieran directs the player to the location of the next signboard.
Later, Kieran heads back to Loyalty Plaza after stealing the Teal Mask that Carmine's grandfather had been working to fix, feeling betrayed that he was left in the dark of the true story of the Loyal Three and treated as an outcast. He challenges the player to a battle and promises to return the Teal Mask if he loses. After losing, he strikes one of the monument's stone fenceposts with his fist, which releases a faint purple mist. After returning the Teal Mask to the player, he runs off back home.
A rumbling comes from the Loyal Three Monument, evolving into a shaking until suddenly the entire monument is enveloped into a pillar of purple light that extends high into the sky, clearing to reveal the revived Loyal Three standing on top of the destroyed monument. Carmine attempts to find out what they want, but they talk amongst themselves and quickly run off towards Kitakami Hall.
After the events of the main story conclude, the caretaker plans to repair the Loyal Three Monument for its tourism impact, obtaining funds with the assistance of the player. After the construction work finishes, the monument appears identical to how it was previously, the workers proud of having replicated the exact scratches and marks the monument had before it was destroyed. In a show of appreciation for restoring such an important source of tourism, the caretaker rewards the player with the Hurray! emote and the Flashy Festival Jinbei.
Items

|
This section is incomplete. Please feel free to edit this section to add missing information and complete it. |
Trainers
After the Teal Mask is stolen
Before completing The Way Home
|
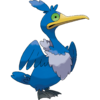
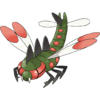
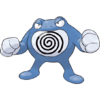
||||||||||||||||||||||||||||||||||||||||||||||||||||||||||||||||||||||||||||||||||||||||||||||||||||||||||||||||||||||||||||||||||||||||||||||||||||||||||||||||||||||||||||||
| ||||||||||||||||||||||||||||||||||||||||||||||||||||||||||||||||||||||||||||||||||||||||||||||||||||||||||||||||||||||||||||||||||||||||||||||||||||||||||||||||||||||||||||||
After completing The Way Home
|
||||||||||||||||||||||||||||||||||||||||||||||||||||||||||||||||||||||||||||||||||||||||||||||||||||||||||||||||||||||||||||||||||||||||||||||||||||||||||||||||||||||||||||||||
| ||||||||||||||||||||||||||||||||||||||||||||||||||||||||||||||||||||||||||||||||||||||||||||||||||||||||||||||||||||||||||||||||||||||||||||||||||||||||||||||||||||||||||||||||
After catching Ogerpon
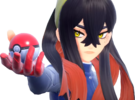
Carmine will only battle the player if they have Ogerpon in their party, or if Ogerpon is not in their party or boxes.
Before completing The Way Home
|
||||||||||||||||||||||||||||||||||||||||||||||||||||||||||||||||||||||||||||||||||||||||||||||||||||||||||||||||||||||||||||||||||||||||||||||||||||||||||||||||||||||||||||
| ||||||||||||||||||||||||||||||||||||||||||||||||||||||||||||||||||||||||||||||||||||||||||||||||||||||||||||||||||||||||||||||||||||||||||||||||||||||||||||||||||||||||||||
After completing The Way Home
|
||||||||||||||||||||||||||||||||||||||||||||||||||||||||||||||||||||||||||||||||||||||||||||||||||||||||||||||||||||||||||||||||||||||||||||||||||||||||||||||||||||||||||||
| ||||||||||||||||||||||||||||||||||||||||||||||||||||||||||||||||||||||||||||||||||||||||||||||||||||||||||||||||||||||||||||||||||||||||||||||||||||||||||||||||||||||||||||
Mochi Mayhem
 If the player chose Sprigatito:
|
|||||||||||||||||||||||||||||||||||||||||||||||||||||||||||||||||||||||||||||||||||||||||||||||||||||||||||||||||||||||||||||||||||||||||||||||||||||||||||||||||||||||||||||||||||||||||||||||||||||||||||||||
| |||||||||||||||||||||||||||||||||||||||||||||||||||||||||||||||||||||||||||||||||||||||||||||||||||||||||||||||||||||||||||||||||||||||||||||||||||||||||||||||||||||||||||||||||||||||||||||||||||||||||||||||
Special encounters
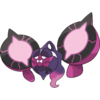
After defeating Nemona during the Mochi Mayhem epilogue, the player will be able to battle Pecharunt as the final battle of the Mochi Mayhem story. It has twice the usual amount of HP during this battle, and after being defeated, the player is required to catch it (with every type of Poké Ball having a guaranteed success rate, as in Tera Raid Battles). It is coded to never be Shiny, and always has a Timid Nature.
|
| ||||||||||||||||||||
| Pecharunt Lv.88 | |||||||||||||||||||||
| |||||||||||||||||||||
Music
| Games | Location | Song name | Composition | Arrangement |
|---|---|---|---|---|
| S V | Everywhere | The Land of Kitakami | Unknown | Unknown |
| When the Loyal Three are resurrected from their monument |
The Monument Reacts* | Unknown | Unknown | |
| When the Loyal Three are initially interacted with |
The Loyal Three* | Unknown | Unknown | |
| Song names marked with an asterisk are unofficial, as they have not received a soundtrack release. | ||||
In other languages
| ||||||||||||||||||||||||||
|
| |||||
| Kitakami | ||||
|---|---|---|---|---|
|
| ||||
|
| Game locations of Legendary and Mythical Pokémon | ||||||||||||||||||||||||||
|---|---|---|---|---|---|---|---|---|---|---|---|---|---|---|---|---|---|---|---|---|---|---|---|---|---|---|
| ||||||||||||||||||||||||||

|
This article is part of Project Locations, a Bulbapedia project that aims to write comprehensive articles on every location in the Pokémon world. |
