Appendix:Emerald walkthrough/Section 3: Difference between revisions
NeoCrimson (talk | contribs) No edit summary |
Tiddlywinks (talk | contribs) m (correct sprite) |
||
| (63 intermediate revisions by 18 users not shown) | |||
| Line 1: | Line 1: | ||
==Rustboro City== | ==Rustboro City== | ||
{| class="expandable" style="margin: auto; background: #725C42; {{roundy}}; border: 5px solid #7D6448;" | |||
|- align="center" | |||
! Items | |||
|- | |||
| | |||
{{itlisth|road}} | |||
{{catch/div|road|After retrieving the Devon Goods}} | |||
{{itemlist|Great Ball|Outside the Devon building, from the Devon researcher|E=yes}} | |||
{{itemlist|Letter|Devon Corporation, from Mr. Stone in his office|E=yes}} | |||
{{itemlist|None|Devon Corporation, from Mr. Stone in his office|E=yes|display=[[PokéNav]]|sprite=Rse nav}} | |||
{{itlistfoot|road}} | |||
|} | |||
===Devon Corporation=== | |||
Now that you have reclaimed the [[Devon Parts|Devon Goods]], head back to the Devon Corporation building in {{ci|Rustboro}}'s northwest corner. The grateful Devon researcher is waiting on the city's east side, and hands you a [[Great Ball]] before escorting you inside to meet his boss. | |||
On the third floor, the company president introduces himself as [[Mr. Stone]]. He thanks you for reclaiming the stolen parts, then asks for another favor. He doesn't expect you to work for free, of course, and rewards you with your very own [[PokéNav]]! In return, he asks that you deliver a [[Letter]] to a man named {{steven}} in [[Dewford Town]]. To reach Dewford, you will need to cross the sea, so Mr. Stone suggests booking passage with [[Mr. Briney]], the friendly old sailor from {{rt|104|Hoenn}}. | |||
As you leave, take note of the Scientists on the second floor. None of them are having much luck with their projects, except one, who has developed a device that can resurrect ancient Pokémon from [[Fossil]]s. | |||
{{ | ====PokéNav==== | ||
The [[PokéNav]] is a small, electronic device produced by Devon Corporation under the orders of Mr. Stone, who wanted a way to keep track of a Pokémon's feelings. It has four different functions, though only Map and Condition are available at first. | |||
* The Map page displays a map of [[Hoenn]], along with the user's current location. It's also possible to zoom in to see a basic layout of towns and cities. | |||
* The Condition page shows a Pokémon's five Contest stats in detail. It can be used to search for party Pokémon, or all owned Pokémon at once. | |||
* The Match Call function records data of up to 85 people, including non-Trainers like {{ho|Mom}} and [[Professor Birch]], and allows the user to call anyone who has registered their PokéNav with the user. This will also alert the user when any registered Trainer, including Gym Leaders, want a rematch. Only the first four rematches with each Trainer will see their Pokémon rise in level and evolve, though there is no limit on the number of times these Trainers may be rebattled. After entering the [[Hall of Fame]], each Gym Leader will offer a rematch as a [[Double Battle]]. | |||
:There are several people whom you have already encountered, that you must seek out and speak with in order to register them: | |||
:* [[Littleroot Town]]: Mom, Professor Birch | |||
:* {{rt|102|Hoenn}}: Youngster Calvin | |||
:* {{rt|104|Hoenn}} (south): Lady Cindy | |||
:* [[Petalburg Woods]]: Bug Catcher James | |||
:* Route 104 (north): Rich Boy Winston, Lass Haley | |||
:* {{rt|116|Hoenn}}: School Kid Karen, School Kid Jerry | |||
:* [[Rustboro Gym]]: Roxanne (she will do so at some point after you defeat [[Brawly]], the next Gym) | |||
* The Ribbons page displays all Ribbons the user's Pokémon have acquired. Though hidden initially, this function unlocks when any of the user's Pokémon gains a Ribbon. | |||
When you leave the building, you are stopped by one of the Devon Scientists. He adds the Match Call function to your new PokéNav, and asks that you call Mr. Stone as a tutorial. | |||
===Rival Battle 2 (optional)=== | |||
May/Brendan is waiting for you just outside the Poké Mart. She/He notices the Match Call feature on your new PokéNav, and each Trainer registers the other. Your friend mentions passing [[Mr. Briney]] in [[Petalburg Woods]], before asking about your Pokédex and challenging you to a battle. | |||
===={{MSP/3|252|Treecko}} Player chose {{p|Treecko}}==== | |||
{| style="margin: auto;" | |||
| | |||
{{Party/Single | {{Party/Single | ||
|color={{ruby color}} | |color={{ruby color}} | ||
| Line 93: | Line 120: | ||
|move3=Focus Energy|move3type=Normal | |move3=Focus Energy|move3type=Normal | ||
|move4=Ember|move4type=Fire}} | |move4=Ember|move4type=Fire}} | ||
{{Party/Footer}} | {{Party/Footer}} | ||
|} | |||
{{MSP|255|Torchic}} | ===={{MSP/3|255|Torchic}} Player chose {{p|Torchic}}==== | ||
{| style="margin: auto;" | |||
| | |||
{{Party/Single | {{Party/Single | ||
|color={{ruby color}} | |color={{ruby color}} | ||
| Line 116: | Line 146: | ||
|level=13 | |level=13 | ||
|type1=Fire | |type1=Fire | ||
|ability= | |ability=Magma Armor | ||
|move1=Yawn|move1type=Normal | |move1=Yawn|move1type=Normal | ||
|move2=Smog|move2type=Poison | |move2=Smog|move2type=Poison | ||
| Line 169: | Line 199: | ||
|move3=Water Gun|move3type=Water | |move3=Water Gun|move3type=Water | ||
|move4=Bide|move4type=Normal}} | |move4=Bide|move4type=Normal}} | ||
{{Party/Footer}} | {{Party/Footer}} | ||
|} | |||
{{MSP|258|Mudkip}} | ===={{MSP/3|258|Mudkip}} Player chose {{p|Mudkip}}==== | ||
{| style="margin: auto;" | |||
| | |||
{{Party/Single | {{Party/Single | ||
|color={{ruby color}} | |color={{ruby color}} | ||
| Line 248: | Line 281: | ||
|move4=Quick Attack|move4type=Normal}} | |move4=Quick Attack|move4type=Normal}} | ||
{{Party/Footer}} | {{Party/Footer}} | ||
|} | |||
==Routes 105 and 106== | |||
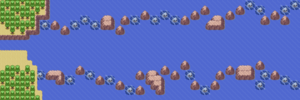
[[File:Hoenn Route 105 E.png|thumb|150px|left|Route 105]] | |||
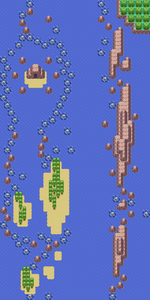
As the voyage is a quick one, there is no time to fully explore the waters of Routes {{rtn|105|Hoenn}} and {{rtn|106|Hoenn}} just yet. Return after earning the {{DL|Badge|Balance Badge|fifth Badge}} in order to {{m|Surf|travel}} at your own speed. | |||
===Checking In=== | |||
As you sail with [[Mr. Briney]] through Route 105, you receive a call on your PokéNav. It's [[Norman|Dad]]; he heard from [[Mr. Stone]] about you getting the device and just wanted to check in. After the brief conversation, the ship makes landfall in Dewford Town. | |||
{{-}} | |||
==Dewford Town== | ==Dewford Town== | ||
[[File:Dewford Town E.png | [[File:Dewford Town E.png|thumb|Dewford Town]] | ||
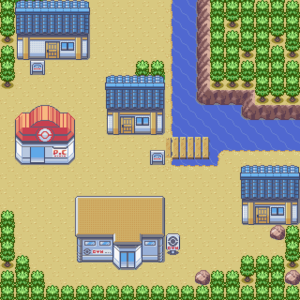
[[Dewford Town]] is a tiny island town in the southern ocean. Despite its isolation, many Trainers visit the area to challenge the [[Dewford Gym]]. | |||
{| class="expandable" style="margin: auto; background: #FFB27F; {{roundy}}; border: 5px solid #FFCC99;" | |||
{| class="expandable | |||
|- align="center" | |- align="center" | ||
! Available Pokémon | ! Available Pokémon | ||
|- | |- | ||
| | | | ||
{{Catch/header|sand|no}} | {{Catch/header|sand|no}} | ||
{{Catch/div|water|Fishing}} | {{Catch/div|water|Fishing}} | ||
{{Catch/entry3|129|Magikarp|no|no|yes|Fish Old|5-10|70%|type1=Water}} | {{Catch/entry3|129|Magikarp|no|no|yes|Fish Old|5-10|70%|type1=Water}} | ||
{{Catch/entry3|072|Tentacool|no|no|yes|Fish Old|5-10|30%|type1=Water|type2=Poison}} | {{Catch/entry3|072|Tentacool|no|no|yes|Fish Old|5-10|30%|type1=Water|type2=Poison}} | ||
{{Catch/footer|sand}} | {{Catch/footer|sand}} | ||
|} | |} | ||
{| class="expandable" style="margin: auto; background: #FFB27F; {{roundy}}; border: 5px solid #FFCC99;" | |||
{| class="expandable | |||
|- align="center" | |- align="center" | ||
! Items | ! Items | ||
|- | |- | ||
| | | | ||
{{itlisth|sand}} | {{itlisth|sand}} | ||
{{ | {{itemlist|Silk Scarf|From an Ace Trainer in the house at the pier|E=yes}} | ||
{{ | {{itemlist|Old Rod III|From the Fisherman east of the Gym|E=yes|display=[[Old Rod]]}} | ||
{{ | {{catch/div|sand|After defeating the Dewford Gym}} | ||
{{itemlist|TM Fighting|From Brawly upon his defeat|E=yes|display={{TM|08|Bulk Up}}}} | |||
{{itlistfoot|sand}} | {{itlistfoot|sand}} | ||
|} | |} | ||
===Dewford Hall=== | ===Dewford Hall=== | ||
Located to the north of the Pokémon Center, Dewford Hall is known as "Everyone's Information Exchange". Though Dewford is a tiny island community, when someone coins a [[Trend|trendy phrase]] here, it quickly spreads throughout the region. Speak to the boy outside the building to learn the coolest thing in cool right now; if you disagree, he offers a chance to change the current phrase, which the residents inside will quickly adopt. | |||
===Hook the Big One!=== | |||
Speak to the Fisherman outside the Gym, and answer his question to receive the [[Old Rod]]. This low-end fishing rod can hook Pokémon from almost any body of water, so be sure to try it out everywhere! | |||
===Dewford Gym=== | |||
[[File:Dewford Gym E.png|thumb|Dewford Gym]] | |||
{{sign|E|header}} | |||
{{sign|E|title|Dewford Town Pokémon Gym<br>Leader: Brawly}} | |||
{{sign|E|A big wave in fighting!}} | |||
{{sign|E|footer}} | |||
| | [[File:Vs Brawly.png|thumb|left|240px]] | ||
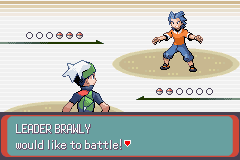
The [[Dewford Gym]] specializes in {{type|Fighting}} Pokémon. {{t|Flying}}- and {{type|Psychic}} moves are the most useful here, so this is a great opportunity to train a {{p|Taillow}}, {{p|Wingull}}, or {{p|Ralts}}. Keep your {{t|Normal}}-, {{t|Rock}}-, {{t|Steel}}-, and {{type|Dark}} Pokémon out of the fray for now. The Gym is dimly lit when you first enter, but the building lights up bit by bit for each Gym Trainer you defeat. Once the Gym Leader is defeated, the entire Gym lights up completely. | |||
| | |||
{{ | |||
{{ | |||
{{ | |||
{{ | |||
{{ | |||
{{ | |||
{{ | |||
{{ | |||
{{ | |||
{{ | |||
{{ | |||
{{ | |||
{{ | |||
Even with only three Pokémon, [[Brawly]] can be a tough opponent. Both his {{p|Machop}} and {{p|Makuhita}} have the {{a|Guts}} Ability, which boosts the Pokémon's {{stat|Attack}} by 50% when afflicted by a non-volatile status condition. {{p|Meditite}} can use {{m|Reflect}} and {{m|Light Screen}} to boost his team's {{stat|Defense}} and {{stat|Special Defense}}, respectively, and its {{m|Focus Punch}} is dangerous if you ever let Meditite go an entire turn without taking a hit. {{m|Bulk Up}} allows all three to raise their Attack and {{stat|Defense}}. | |||
= | {| align="center" | ||
|- align="center" valign="top" | |||
| | |||
{| align="center" style="background: #{{fighting color}}; {{roundy}}; border: 5px solid #{{fighting color light}};" | |||
{| align="center" style="background: #{{fighting color}}; {{ | |||
|- align="center" | |- align="center" | ||
! Dewford Gym <br> [[File:Knuckle Badge.png|35px|The Knuckle Badge]] <br><br> | ! Dewford Gym<br>[[File:Knuckle Badge.png|35px|The Knuckle Badge]]<br><br> | ||
|- | |- | ||
| | | | ||
{| align="center" class="expandable" style="background: #{{fighting color}}; {{ | {| align="center" class="expandable" style="background: #{{fighting color}}; {{roundy}}; border: 5px solid #{{fighting color light}};" | ||
|- align="center" | |- align="center" | ||
! Trainers | ! Trainers | ||
| Line 364: | Line 353: | ||
| | | | ||
{{Trainerheader|Fighting}} | {{Trainerheader|Fighting}} | ||
{{Trainerentry|Spr RS Battle Girl.png|Battle Girl|Laura|312|1|307|Meditite|♀|13 | {{Trainerentry|Spr RS Battle Girl.png|Battle Girl|Laura|312|1|307|Meditite|♀|13|}} | ||
{{Trainerdiv|Fighting}} | {{Trainerdiv|Fighting}} | ||
{{Trainerentry|Spr RS Battle Girl.png|Battle Girl|Lilith|312<br/><small>[[Double Battle]] with Brenden</small>|1|307|Meditite|♀|13 | {{Trainerentry|Spr RS Battle Girl.png|Battle Girl|Lilith|312<br/><small>[[Double Battle]] with Brenden</small>|1|307|Meditite|♀|13|}} | ||
{{Trainerentry|Spr RS Sailor.png|Sailor|Brenden|416<br/><small>[[Double Battle]] with Lilith</small>|1|066|Machop|♂|13 | {{Trainerentry|Spr RS Sailor.png|Sailor|Brenden|416<br/><small>[[Double Battle]] with Lilith</small>|1|066|Machop|♂|13|}} | ||
{{Trainerdiv|Fighting}} | {{Trainerdiv|Fighting}} | ||
{{Trainerentry|Spr RS Black Belt.png|Black Belt|Takao|416|1|066|Machop|♂|13 | {{Trainerentry|Spr RS Black Belt.png|Black Belt|Takao|416|1|066|Machop|♂|13|}} | ||
{{Trainerdiv|Fighting}} | {{Trainerdiv|Fighting}} | ||
{{Trainerentry|Spr RS Black Belt.png|Black Belt|Cristian|416|1|296|Makuhita|♂|13 | {{Trainerentry|Spr RS Black Belt.png|Black Belt|Cristian|416|1|296|Makuhita|♂|13|}} | ||
{{Trainerdiv|Fighting}} | {{Trainerdiv|Fighting}} | ||
{{Trainerentry|Spr RS Battle Girl.png|Battle Girl|{{ho|Shauna|Jocelyn}}|312|1|307|Meditite|♀|13 | {{Trainerentry|Spr RS Battle Girl.png|Battle Girl|{{ho|Shauna|Jocelyn}}|312|1|307|Meditite|♀|13|}} | ||
{{Trainerfooter|Fighting| | {{Trainerfooter|Fighting|I}} | ||
|} | |} | ||
{| style="margin: auto;" | |||
| | |||
{{Party/Single | {{Party/Single | ||
|color={{fighting color}} | |color={{fighting color}}|headcolor={{fighting color light}}|bordercolor={{fighting color dark}} | ||
|headcolor={{fighting color light}} | |||
|bordercolor={{fighting color dark}} | |||
|sprite=Spr RS Brawly.png | |sprite=Spr RS Brawly.png | ||
|prize={{ | |prize={{PDollar}}1900 | ||
|class=Leader | |class=Leader|classlink=Gym Leader|name={{color2|000|Brawly}} | ||
|name=Brawly | |game=E|location=Dewford Gym | ||
|game=E | |||
|location=Dewford Gym | |||
|pokemon=3}} | |pokemon=3}} | ||
|{{Pokémon/3 | |||
|game=Emerald | |{{Pokémon/3|game=Emerald | ||
|ndex=066 | |ndex=066|pokemon=Machop | ||
|pokemon=Machop | |||
|type1=Fighting | |type1=Fighting | ||
|level=16|gender=male | |||
|ability=Guts | |ability=Guts | ||
|move1=Karate Chop|move1type=Fighting | |move1=Karate Chop|move1type=Fighting | ||
| Line 402: | Line 385: | ||
|move3=Seismic Toss|move3type=Fighting | |move3=Seismic Toss|move3type=Fighting | ||
|move4=Bulk Up|move4type=Fighting}} | |move4=Bulk Up|move4type=Fighting}} | ||
|{{Pokémon/3 | |||
|game=Emerald | |{{Pokémon/3|game=Emerald | ||
|ndex=307 | |ndex=307|pokemon=Meditite | ||
|pokemon=Meditite | |type1=Fighting|type2=Psychic | ||
| | |level=16|gender=male | ||
|level=16 | |||
| | |||
|ability=Pure Power | |ability=Pure Power | ||
|move1=Focus Punch|move1type=Fighting | |move1=Focus Punch|move1type=Fighting | ||
| Line 415: | Line 395: | ||
|move3=Reflect|move3type=Psychic | |move3=Reflect|move3type=Psychic | ||
|move4=Bulk Up|move4type=Fighting}} | |move4=Bulk Up|move4type=Fighting}} | ||
|{{Pokémon/3 | |||
|game=Emerald | |{{Pokémon/3|game=Emerald | ||
|ndex=296 | |ndex=296|pokemon=Makuhita | ||
|pokemon=Makuhita | |||
|type1=Fighting | |type1=Fighting | ||
|ability= | |level=19|gender=male | ||
|ability=Thick Fat | |||
|held=Sitrus Berry | |held=Sitrus Berry | ||
|move1=Arm Thrust|move1type=Fighting | |move1=Arm Thrust|move1type=Fighting | ||
| Line 430: | Line 408: | ||
{{Party/Footer}} | {{Party/Footer}} | ||
|} | |} | ||
|} | |} | ||
|} | |} | ||
After the battle, Brawly awards you the {{badge|Knuckle}}, which ensures obedience of all Pokémon up to level 30 and enables the use of {{m|Flash}} in the field. He also hands out {{TM|08|Bulk Up}} as a prize, and registers himself in your PokéNav. | |||
==Route 106== | |||
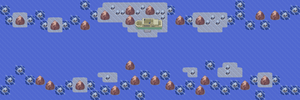
[[File:Hoenn Route 106 E.png|thumb|300px|Route 106]] | |||
Until you earn the {{DL|Badge|Balance Badge|fifth Badge}}, you cannot fully explore the waters of {{rt|106|Hoenn}}. Battle the trainers on the beach for now. | |||
{| class="expandable | {| class="expandable" style="margin: auto; background: #{{locationcolor/med|ocean}}; {{roundy}}; border: 5px solid #{{locationcolor/light|ocean}};" | ||
|- align="center" | |- align="center" | ||
! Trainers | ! Trainers | ||
|- | |- | ||
| | | | ||
{{trainerheader|ocean}} | {{trainerheader|ocean|3}} | ||
{{ | {{Trainerentry|Spr RS Fisherman.png|Fisherman|Ned|440|1|072|Tentacool|♂|11|}} | ||
{{trainerdiv|ocean}} | {{trainerdiv|ocean}} | ||
{{trainerentry|Spr RS | {{trainerentry|Spr RS Fisherman.png|Fisherman|Elliot|400|3|129|Magikarp|♂|10||072|Tentacool|♂|7||129|Magikarp|♂|10||38=Nav}} | ||
{{catch/div|ocean|Rematch}} | |||
{{trainerentry|Spr RS Fisherman.png|Fisherman|Elliot{{tt|*|First rematch}}|1080|3|072|Tentacool|♂|24||130|Gyarados|♂|27||130|Gyarados|♂|27||38=Nav}} | |||
{{ | {{trainerentry|Spr RS Fisherman.png|Fisherman|Elliot{{tt|*|Second rematch}}|1160|4|130|Gyarados|♂|29||318|Carvanha|♂|26||072|Tentacool|♂|26||130|Gyarados|♂|29||38=Nav}} | ||
{{trainerentry|Spr RS | {{trainerentry|Spr RS Fisherman.png|Fisherman|Elliot{{tt|*|Third rematch}}|1240|4|130|Gyarados|♂|31||318|Carvanha|♂|30||073|Tentacruel|♂|30||130|Gyarados|♂|31||38=Nav}} | ||
{{trainerentry|Spr RS Fisherman.png|Fisherman|Elliot{{tt|*|Fourth rematch onwards}}|1400|4|130|Gyarados|♂|33||319|Sharpedo|♂|33||130|Gyarados|♂|33||073|Tentacruel|♂|35||38=Nav}} | |||
{{trainerentry|Spr RS | |||
{{ | |||
{{trainerentry|Spr RS | |||
{{ | |||
{{trainerentry|Spr RS Fisherman.png|Fisherman| | |||
{{trainerfooter|ocean|3}} | {{trainerfooter|ocean|3}} | ||
|} | |} | ||
{| class="expandable | {| class="expandable" style="margin: auto; background: #{{locationcolor/med|ocean}}; {{roundy}}; border: 5px solid #{{locationcolor/light|ocean}};" | ||
! Available Pokémon | ! Available Pokémon | ||
|- | |- | ||
| | | | ||
{{catch/header|ocean|no}} | {{catch/header|ocean|no}} | ||
{{Catch/div|ocean|Fishing}} | {{Catch/div|ocean|Fishing}} | ||
{{Catch/entry3|129|Magikarp|no|no|yes|Fish Old|5-10|70%|type1=Water}} | {{Catch/entry3|129|Magikarp|no|no|yes|Fish Old|5-10|70%|type1=Water}} | ||
{{Catch/entry3|072|Tentacool|no|no|yes|Fish Old|5-10|30%|type1=Water|type2=Poison}} | {{Catch/entry3|072|Tentacool|no|no|yes|Fish Old|5-10|30%|type1=Water|type2=Poison}} | ||
{{catch/footer|ocean}} | {{catch/footer|ocean}} | ||
|} | |} | ||
{| class="expandable | {| class="expandable" style="margin: auto; background: #{{locationcolor/med|ocean}}; {{roundy}}; border: 5px solid #{{locationcolor/light|ocean}};" | ||
|- align="center" | |- align="center" | ||
! Items | ! Items | ||
|- | |- | ||
| | | | ||
{{ | {{itlisth|ocean}} | ||
{{ | {{itemlist|Heart Scale|Water's edge, southeast of Fisherman Ned (hidden)|E=yes}} | ||
{{itemlist|Stardust|On a rock, northwest of the signpost (hidden)|E=yes}} | |||
{{itemlist|Poké Ball|Water's edge, northwest of Fisherman Elliot (hidden)|E=yes|display={{i|Poké Ball}}}} | |||
{{itlistfoot|ocean}} | |||
{{ | |||
{{ | |||
{{ | |||
|} | |} | ||
== | ==Granite Cave== | ||
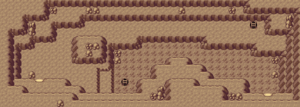
[[File: | [[File:Granite Cave 1F entrance E.png|thumb|left|Granite Cave, 1F (Entrance)]] | ||
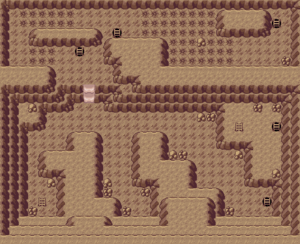
[[File:Granite Cave B1F E.png|thumb|Granite Cave, B1F]] | |||
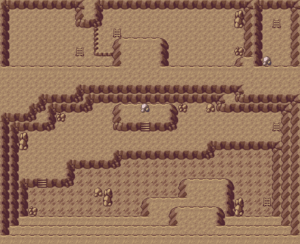
[[File:Granite Cave B2F E.png|thumb|left|Granite Cave, B2F]] | |||
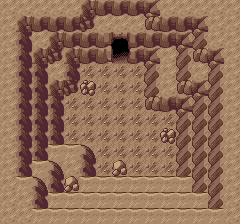
[[File:Granite Cave 1F E.png|thumb|Granite Cave, 1F (Back)]] | |||
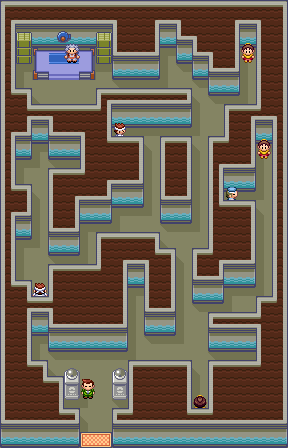
While the ground floor of [[Granite Cave]] is well-lit from the natural light outside, it can be difficult to explore the underground portion without the use of {{m|Flash}}. | |||
{| class="expandable | {| class="expandable" style="margin: auto; background: #{{locationcolor/med|cave}}; {{roundy}}; border: 5px solid #{{locationcolor/light|cave}};" | ||
|- align="center" | |- align="center" | ||
! Available Pokémon | ! Available Pokémon | ||
|- | |- | ||
| | |||
{| class="expandable" style="margin: auto; background: #{{locationcolor/med|cave}}; {{roundy}}; border: 5px solid #{{locationcolor/light|cave}};" | |||
|- align="center" | |||
! 1F | |||
|- | |||
| | |||
{{Catch/header|cave|no}} | |||
{{Catch/entry3|296|Makuhita|no|no|yes|Cave|6-10|50%|type1=Fighting}} | |||
{{Catch/entry3|041|Zubat|no|no|yes|Cave|7-8|30%|type1=Poison|type2=Flying}} | |||
{{Catch/entry3|063|Abra|no|no|yes|Cave|8|10%|type1=Psychic}} | |||
{{Catch/entry3|074|Geodude|no|no|yes|Cave|6-9|10%|type1=Rock|type2=Ground}} | |||
{{catch/div|cave|1F (Back)}} | |||
{{Catch/entry3|296|Makuhita|no|no|yes|Cave|6-10|50%|type1=Fighting}} | |||
{{Catch/entry3|041|Zubat|no|no|yes|Cave|7-8|30%|type1=Poison|type2=Flying}} | |||
{{Catch/entry3|063|Abra|no|no|yes|Cave|8|10%|type1=Psychic}} | |||
{{catch/entry3|304|Aron|no|no|yes|Cave|7-8|10%|type1=Steel|type2=Rock}} | |||
{{Catch/footer|cave}} | |||
|} | |||
{| class="expandable" style="margin: auto; background: #{{locationcolor/med|cave}}; {{roundy}}; border: 5px solid #{{locationcolor/light|cave}};" | |||
|- align="center" | |||
! B1F | |||
|- | |||
| | |||
{{Catch/header|cave|no}} | |||
{{Catch/entry3|304|Aron|no|no|yes|Cave|9-11|40%|type1=Steel|type2=Rock}} | |||
{{Catch/entry3|041|Zubat|no|no|yes|Cave|9-10|30%|type1=Poison|type2=Flying}} | |||
{{Catch/entry3|063|Abra|no|no|yes|Cave|9|10%|type1=Psychic}} | |||
{{Catch/entry3|296|Makuhita|no|no|yes|Cave|10-11|10%|type1=Fighting}} | |||
{{Catch/entry3|302|Sableye|no|no|yes|Cave|9-11|10%|type1=Dark|type2=Ghost}} | |||
{{Catch/footer|cave}} | |||
|} | |||
{| class="expandable" style="margin: auto; background: #{{locationcolor/med|cave}}; {{roundy}}; border: 5px solid #{{locationcolor/light|cave}};" | |||
|- align="center" | |||
! B2F | |||
|- | |||
| | |||
{{Catch/header|cave|no}} | |||
{{Catch/entry3|304|Aron|no|no|yes|Cave|10-12|40%|type1=Steel|type2=Rock}} | |||
{{Catch/entry3|041|Zubat|no|no|yes|Cave|10-11|30%|type1=Poison|type2=Flying}} | |||
{{Catch/entry3|302|Sableye|no|no|yes|Cave|10-12|20%|type1=Dark|type2=Ghost}} | |||
{{Catch/entry3|063|Abra|no|no|yes|Cave|10|10%|type1=Psychic}} | |||
{{Catch/footer|cave}} | |||
|} | |||
|} | |||
{| class="expandable" style="margin: auto; background: #{{locationcolor/med|cave}}; {{roundy}}; border: 5px solid #{{locationcolor/light|cave}};" | |||
|- align="center" | |||
! Items | |||
|- | |||
| | | | ||
{{ | {{itlisth|cave}} | ||
{{ | {{catch/div|cave|1F}} | ||
{{ | {{itemlist|HM Normal|From a Hiker near the entrance|E=yes|display={{HM|05|Flash}}}} | ||
{{ | {{itemlist|Escape Rope|West of the entrance|E=yes}} | ||
{{ | {{itemlist|TM Steel|From Steven, after delivering the [[Letter]] to him|E=yes|display={{TM|47|Steel Wing}}}} | ||
{{ | {{catch/div|cave|B1F}} | ||
{{ | {{itemlist|Poké Ball|Dead-end tunnel on the south side|E=yes|display={{i|Poké Ball}}}} | ||
{{ | {{catch/div|cave|B2F}} | ||
{{ | {{itemlist|Everstone|South side; in the rock on the upper platform (hidden)|E=yes}} | ||
{{itlistfoot|cave}} | |||
{{ | |||
{{ | |||
{{ | |||
|} | |} | ||
{| class="expandable | ===1F=== | ||
Speak to the Hiker near the entrance to receive {{HM|05|Flash}}. Head west to find an [[Escape Rope]], then climb down the ladder to B1F. | |||
===B1F=== | |||
Go northeast until you reach a {{DL|Bike obstacles|Muddy slopes|muddy slope}}, then collect the {{i|Poké Ball}} from the dead-end tunnel to the south. Continue moving to the southeast and take the ladder down to B2F. | |||
===B2F=== | |||
Head southwest to a group of {{m|Rock Smash|cracked rocks}}, then climb onto the upper level. Turn northeast and inspect the rock on the center platform for a hidden [[Everstone]] before taking the ladder back up to B1F. | |||
===B1F=== | |||
Climb the next ladder back up to the north side of 1F. | |||
===1F=== | |||
Follow the tunnel all the way to the west, then turn south to reach an isolated chamber. | |||
===1F (Back)=== | |||
In the rear chamber, you find {{steven}} researching rare stones. Give him the [[Letter]] from [[Mr. Stone]] to complete your mission, and Steven gives you [[TM47|the TM]] for his favorite move, {{m|Steel Wing}}, in return. | |||
==Dewford Town== | |||
Mr. Stone still needs you to deliver the [[Devon Parts|Devon Goods]] to [[Captain Stern]]. Talk to [[Mr. Briney]] on the pier to inform him of your successful delivery, and the two of you, along with [[Peeko]], set sail at once. Sail directly to [[Slateport City]], or briefly backtrack to receive thanks for delivering the Letter. | |||
==Rustboro City (optional)== | |||
{| class="expandable" style="margin: auto; background: #725C42; {{roundy}}; border: 5px solid #7D6448;" | |||
|- align="center" | |- align="center" | ||
! Items | ! Items | ||
|- | |- | ||
| | | | ||
{{itlisth|road}} | {{itlisth|road}} | ||
{{Itemlist| | {{Itemlist|Exp. Share|Reward from Mr. Stone after delivering the Letter to {{Steven}}|E=yes}} | ||
{{itlistfoot|road}} | {{itlistfoot|road}} | ||
|} | |} | ||
You can now return to [[Rustboro City]] to receive an [[Exp. Share]] from [[Mr. Stone]] at Devon Corporation. | |||
==Routes 107 and 108== | |||
[[File:Hoenn Route 107 E.png|thumb|left|Route 107]] | |||
[[File:Hoenn Route 108 E.png|thumb|Route 108]] | |||
Like with Routes {{rtn|105|Hoenn}} and {{rtn|106|Hoenn}}, there's no time to fully explore the area at the moment. | |||
== | ==Route 109== | ||
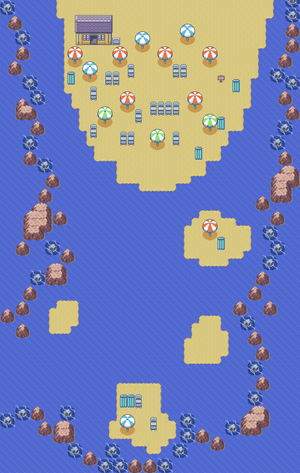
[[File:Hoenn Route 109 E.png|thumb|Route 109]] | |||
The sprawling beach of {{rt|109|Hoenn}} is packed with Trainers who aren't just here to work on their tans. Scour the sands for hidden items before heading north to [[Slateport City]]. | |||
The | |||
{| class="expandable" style="margin: auto; background: #{{locationcolor/med|ocean}}; {{roundy}}; border: 5px solid #{{locationcolor/light|ocean}};" | |||
{| class="expandable | |||
|- align="center" | |- align="center" | ||
! Trainers | ! Trainers | ||
|- | |- | ||
| | | | ||
{{trainerheader| | {{trainerheader|ocean}} | ||
{{trainerentry|Spr RS | {{trainerentry|Spr RS Sailor.png|Sailor|Huey|384|2|278|Wingull|♂|12||066|Machop|♂|12|}} | ||
{{trainerdiv| | {{trainerdiv|ocean}} | ||
{{trainerentry|Spr RS | {{trainerentry|Spr RS Sailor.png|Sailor|Edmond|416<br><small>Potential [[Double Battle]] with Hailey or Ricky</small>|1|278|Wingull|♂|13|}} | ||
{{trainerfooter| | {{trainerdiv|ocean}} | ||
{{trainerentry|Spr RS Tuber F.png|Tuber|Hailey|52<br><small>Potential [[Double Battle]] with Edmond or Ricky</small>|1|183|Marill|♀|13|}} | |||
{{trainerdiv|ocean}} | |||
{{trainerentry|Spr RS Tuber M.png|Tuber|Ricky|52<br><small>Potential [[Double Battle]] with Edmond or Hailey</small>|1|263|Zigzagoon|♂|13||38=Nav}} | |||
{{trainerdiv|ocean}} | |||
{{trainerentry|Spr RS Tuber F.png|Tuber|Lola|48<br><small>Potential [[Double Battle]] with Chandler</small>|2|298|Azurill|♀|12||298|Azurill|♀|12||38=Nav}} | |||
{{trainerdiv|ocean}} | |||
{{trainerentry|Spr RS Tuber M.png|Tuber|Chandler|48<br><small>Potential [[Double Battle]] with Lola</small>|2|072|Tentacool|♂|12||072|Tentacool|♂|12|}} | |||
{{catch/div|ocean|Seashore House}} | |||
{{trainerentry|Spr RS Tuber M.png|Tuber|Simon|48|2|298|Azurill|♀|12||183|Marill|♂|12|}} | |||
{{trainerdiv|ocean}} | |||
{{trainerentry|Spr RS Beauty.png|Beauty|Johanna|1040|1|118|Goldeen|♀|13|}} | |||
{{trainerdiv|ocean}} | |||
{{trainerentry|Spr RS Sailor.png|Sailor|Dwayne|352|3|278|Wingull|♂|11||066|Machop|♂|11||072|Tentacool|♂|11|}} | |||
{{catch/div|ocean|Rematch}} | |||
{{trainerentry|Spr RS Tuber M.png|Tuber|Ricky|{{tt|108|First rematch}}/{{tt|120|Second rematch}}/{{tt|132|Third rematch}}/{{tt|144|Fourth rematch onwards}}|1|264|Linoone|♂|{{tt|27|First rematch}}/{{tt|30|Second rematch}}/{{tt|33|Third rematch}}/{{tt|36|Fourth rematch onwards}}||38=Nav}} | |||
{{trainerdiv|ocean}} | |||
{{trainerentry|Spr RS Tuber F.png|Tuber|Lola{{tt|*|First, second and third rematch}}|{{tt|104|First rematch}}/{{tt|116|Second rematch}}/{{tt|128|Third rematch}}|2|183|Marill|♀|{{tt|26|First rematch}}/{{tt|29|Second rematch}}/{{tt|32|Third rematch}}|no|183|Marill|♀|{{tt|26|First rematch}}/{{tt|29|Second rematch}}/{{tt|32|Third rematch}}||38=Nav}} | |||
{{trainerentry|Spr RS Tuber F.png|Tuber|Lola{{tt|*|Fourth rematch onwards}}|140|2|184|Azumarill|♀|35||184|Azumarill|♀|35||38=Nav}} | |||
{{trainerfooter|ocean|3}} | |||
|} | |} | ||
{| class="expandable | {| class="expandable" style="margin: auto; background: #{{locationcolor/med|ocean}}; {{roundy}}; border: 5px solid #{{locationcolor/light|ocean}};" | ||
|- align="center" | |- align="center" | ||
! | ! Available Pokémon | ||
|- | |- | ||
| | | | ||
{{ | {{catch/header|ocean|no}} | ||
{{ | {{Catch/div|ocean|Fishing}} | ||
{{ | {{Catch/entry3|129|Magikarp|no|no|yes|Fish Old|5-10|70%|type1=Water}} | ||
{{Catch/entry3|072|Tentacool|no|no|yes|Fish Old|5-10|30%|type1=Water|type2=Poison}} | |||
{{catch/footer|ocean}} | |||
|} | |} | ||
{| class="expandable" style="margin: auto; background: #{{locationcolor/med|ocean}}; {{roundy}}; border: 5px solid #{{locationcolor/light|ocean}};" | |||
{| class="expandable | |||
|- align="center" | |- align="center" | ||
! Items | ! Items | ||
|- | |- | ||
| | | | ||
{{itlisth| | {{itlisth|ocean}} | ||
{{ | {{itemlist|Revive|Water's edge, west-northwest of Mr. Briney's ship (hidden)|E=yes}} | ||
{{ | {{itemlist|Ether|Southeast part of the beach (hidden)|E=yes}} | ||
{{itlistfoot| | {{itemlist|Soft Sand|From a female Tuber to the northeast of Mr. Briney's ship|E=yes}} | ||
{{itemlist|Heart Scale| | |||
* Under the green umbrella to the west (hidden) | |||
* North of the old man and his Zigzagoon (hidden)|E=yes|display=[[Heart Scale]] ×2}} | |||
{{itemlist|Great Ball|Under the blue beach towel near the Seashore House (hidden)|E=yes}} | |||
{{itemlist|Soda Pop|Reward for defeating all three Trainers inside the Seashore House|E=yes|display=[[Soda Pop]] ×6}} | |||
{{itemlist|Potion|To the left of the old man with the {{p|Zigzagoon}}|E=yes}} | |||
{{itlistfoot|ocean}} | |||
|} | |} | ||
===Seashore House=== | |||
The hut on the beach's west side is known as the Seashore House, where refreshments are sold to thirsty beachgoers. Defeat all three Trainers inside, then speak to the proprietor. He rewards your effort with a free six-pack of [[Soda Pop]]! From this point on, you can also buy individual bottles at {{pdollar}}300 apiece. | |||
{{WalkthroughPrevNext | |||
|game=Emerald | |||
|gamename=Emerald | |||
|prevsection=2 | |||
game=Emerald | |prevname=Route 104 (south), Petalburg Woods, Route 104 (north), Rustboro City, Route 116, Rusturf Tunnel | ||
|nextsection=4 | |||
gamename=Emerald | |nextname=Slateport City, Route 110, Trick House, Route 103 | ||
prevsection=2 | |||
prevname=Route 104 ( | |||
nextname=Route 110, | |||
}} | }} | ||
<br> | |||
{{Project Walkthroughs notice}} | {{Project Walkthroughs notice}} | ||
[[Category:Emerald walkthrough]] | [[Category:Emerald walkthrough]] | ||
Latest revision as of 16:46, 5 December 2022
Rustboro City
| Items | |||||||||||||||||||||||||||||||||||
|---|---|---|---|---|---|---|---|---|---|---|---|---|---|---|---|---|---|---|---|---|---|---|---|---|---|---|---|---|---|---|---|---|---|---|---|
| |||||||||||||||||||||||||||||||||||
Devon Corporation
Now that you have reclaimed the Devon Goods, head back to the Devon Corporation building in Rustboro's northwest corner. The grateful Devon researcher is waiting on the city's east side, and hands you a Great Ball before escorting you inside to meet his boss.
On the third floor, the company president introduces himself as Mr. Stone. He thanks you for reclaiming the stolen parts, then asks for another favor. He doesn't expect you to work for free, of course, and rewards you with your very own PokéNav! In return, he asks that you deliver a Letter to a man named Steven in Dewford Town. To reach Dewford, you will need to cross the sea, so Mr. Stone suggests booking passage with Mr. Briney, the friendly old sailor from Route 104.
As you leave, take note of the Scientists on the second floor. None of them are having much luck with their projects, except one, who has developed a device that can resurrect ancient Pokémon from Fossils.
The PokéNav is a small, electronic device produced by Devon Corporation under the orders of Mr. Stone, who wanted a way to keep track of a Pokémon's feelings. It has four different functions, though only Map and Condition are available at first.
- The Map page displays a map of Hoenn, along with the user's current location. It's also possible to zoom in to see a basic layout of towns and cities.
- The Condition page shows a Pokémon's five Contest stats in detail. It can be used to search for party Pokémon, or all owned Pokémon at once.
- The Match Call function records data of up to 85 people, including non-Trainers like Mom and Professor Birch, and allows the user to call anyone who has registered their PokéNav with the user. This will also alert the user when any registered Trainer, including Gym Leaders, want a rematch. Only the first four rematches with each Trainer will see their Pokémon rise in level and evolve, though there is no limit on the number of times these Trainers may be rebattled. After entering the Hall of Fame, each Gym Leader will offer a rematch as a Double Battle.
- There are several people whom you have already encountered, that you must seek out and speak with in order to register them:
- Littleroot Town: Mom, Professor Birch
- Route 102: Youngster Calvin
- Route 104 (south): Lady Cindy
- Petalburg Woods: Bug Catcher James
- Route 104 (north): Rich Boy Winston, Lass Haley
- Route 116: School Kid Karen, School Kid Jerry
- Rustboro Gym: Roxanne (she will do so at some point after you defeat Brawly, the next Gym)
- The Ribbons page displays all Ribbons the user's Pokémon have acquired. Though hidden initially, this function unlocks when any of the user's Pokémon gains a Ribbon.
When you leave the building, you are stopped by one of the Devon Scientists. He adds the Match Call function to your new PokéNav, and asks that you call Mr. Stone as a tutorial.
Rival Battle 2 (optional)
May/Brendan is waiting for you just outside the Poké Mart. She/He notices the Match Call feature on your new PokéNav, and each Trainer registers the other. Your friend mentions passing Mr. Briney in Petalburg Woods, before asking about your Pokédex and challenging you to a battle.
 Player chose Treecko
| ||||||||||||||||||||||||||||||||||||||||||||||||||||||||||||||||||||||||||||||||||||||||||||||||||||||||||||||||||||||||||||||||
 Player chose Torchic
| ||||||||||||||||||||||||||||||||||||||||||||||||||||||||||||||||||||||||||||||||||||||||||||||||||||||||||||||||||||||||||||||||||
 Player chose Mudkip
| ||||||||||||||||||||||||||||||||||||||||||||||||||||||||||||||||||||||||||||||||||||||||||||||||||||||||||||||||||||||||||||||||
Routes 105 and 106
As the voyage is a quick one, there is no time to fully explore the waters of Routes 105 and 106 just yet. Return after earning the fifth Badge in order to travel at your own speed.
Checking In
As you sail with Mr. Briney through Route 105, you receive a call on your PokéNav. It's Dad; he heard from Mr. Stone about you getting the device and just wanted to check in. After the brief conversation, the ship makes landfall in Dewford Town.
Dewford Town
Dewford Town is a tiny island town in the southern ocean. Despite its isolation, many Trainers visit the area to challenge the Dewford Gym.
| Available Pokémon | |||||||||||||||||||||||||||||||||||||||||||||||||||||||||||||||||||||||||
|---|---|---|---|---|---|---|---|---|---|---|---|---|---|---|---|---|---|---|---|---|---|---|---|---|---|---|---|---|---|---|---|---|---|---|---|---|---|---|---|---|---|---|---|---|---|---|---|---|---|---|---|---|---|---|---|---|---|---|---|---|---|---|---|---|---|---|---|---|---|---|---|---|---|
| |||||||||||||||||||||||||||||||||||||||||||||||||||||||||||||||||||||||||
| Items | |||||||||||||||||||||||||||||||||||
|---|---|---|---|---|---|---|---|---|---|---|---|---|---|---|---|---|---|---|---|---|---|---|---|---|---|---|---|---|---|---|---|---|---|---|---|
| |||||||||||||||||||||||||||||||||||
Dewford Hall
Located to the north of the Pokémon Center, Dewford Hall is known as "Everyone's Information Exchange". Though Dewford is a tiny island community, when someone coins a trendy phrase here, it quickly spreads throughout the region. Speak to the boy outside the building to learn the coolest thing in cool right now; if you disagree, he offers a chance to change the current phrase, which the residents inside will quickly adopt.
Hook the Big One!
Speak to the Fisherman outside the Gym, and answer his question to receive the Old Rod. This low-end fishing rod can hook Pokémon from almost any body of water, so be sure to try it out everywhere!
Dewford Gym
The Dewford Gym specializes in Fighting-type Pokémon. Flying- and Psychic-type moves are the most useful here, so this is a great opportunity to train a Taillow, Wingull, or Ralts. Keep your Normal-, Rock-, Steel-, and Dark-type Pokémon out of the fray for now. The Gym is dimly lit when you first enter, but the building lights up bit by bit for each Gym Trainer you defeat. Once the Gym Leader is defeated, the entire Gym lights up completely.
Even with only three Pokémon, Brawly can be a tough opponent. Both his Machop and Makuhita have the Guts Ability, which boosts the Pokémon's Attack by 50% when afflicted by a non-volatile status condition. Meditite can use Reflect and Light Screen to boost his team's Defense and Special Defense, respectively, and its Focus Punch is dangerous if you ever let Meditite go an entire turn without taking a hit. Bulk Up allows all three to raise their Attack and Defense.
| ||||||||||||||||||||||||||||||||||||||||||||||||||||||||||||||||||||||||||||||||||||||||||||||||||||||||||||||||||||||||||||||||||||||||||||||||||||||||||||||||||||||||||||||||||||||||
After the battle, Brawly awards you the Knuckle Badge, which ensures obedience of all Pokémon up to level 30 and enables the use of Flash in the field. He also hands out TM08 (Bulk Up) as a prize, and registers himself in your PokéNav.
Route 106
Until you earn the fifth Badge, you cannot fully explore the waters of Route 106. Battle the trainers on the beach for now.
| Trainers | |||||||||||||||||||||||||||||||||||||||||||||||||||||||||||||||||||||||||||||||||||||||||||||||||||||||||||||||||||||||||||||||||||||||||||||||||||||||||||||||||||||||||||||||||
|---|---|---|---|---|---|---|---|---|---|---|---|---|---|---|---|---|---|---|---|---|---|---|---|---|---|---|---|---|---|---|---|---|---|---|---|---|---|---|---|---|---|---|---|---|---|---|---|---|---|---|---|---|---|---|---|---|---|---|---|---|---|---|---|---|---|---|---|---|---|---|---|---|---|---|---|---|---|---|---|---|---|---|---|---|---|---|---|---|---|---|---|---|---|---|---|---|---|---|---|---|---|---|---|---|---|---|---|---|---|---|---|---|---|---|---|---|---|---|---|---|---|---|---|---|---|---|---|---|---|---|---|---|---|---|---|---|---|---|---|---|---|---|---|---|---|---|---|---|---|---|---|---|---|---|---|---|---|---|---|---|---|---|---|---|---|---|---|---|---|---|---|---|---|---|---|---|---|
| |||||||||||||||||||||||||||||||||||||||||||||||||||||||||||||||||||||||||||||||||||||||||||||||||||||||||||||||||||||||||||||||||||||||||||||||||||||||||||||||||||||||||||||||||
| Available Pokémon | |||||||||||||||||||||||||||||||||||||||||||||||||||||||||||||||||||||||||
|---|---|---|---|---|---|---|---|---|---|---|---|---|---|---|---|---|---|---|---|---|---|---|---|---|---|---|---|---|---|---|---|---|---|---|---|---|---|---|---|---|---|---|---|---|---|---|---|---|---|---|---|---|---|---|---|---|---|---|---|---|---|---|---|---|---|---|---|---|---|---|---|---|---|
| |||||||||||||||||||||||||||||||||||||||||||||||||||||||||||||||||||||||||
| Items | ||||||||||||||||||||
|---|---|---|---|---|---|---|---|---|---|---|---|---|---|---|---|---|---|---|---|---|
| ||||||||||||||||||||
Granite Cave
While the ground floor of Granite Cave is well-lit from the natural light outside, it can be difficult to explore the underground portion without the use of Flash.
| Available Pokémon | |||||||||||||||||||||||||||||||||||||||||||||||||||||||||||||||||||||||||||||||||||||||||||||||||||||||||||||||||||||||||||||||||||||||||||||||||||||||||||||||||||||||||||||||||||||||||||||||||||||||||||||||||||||||||||||||||||||||||||||||||||||||||||||||||||||||||||||||||||||||||||||||||||||||||||||||||||||||||||||||||||||||||||||||||||||||||||||||||||||||||||||||||||
|---|---|---|---|---|---|---|---|---|---|---|---|---|---|---|---|---|---|---|---|---|---|---|---|---|---|---|---|---|---|---|---|---|---|---|---|---|---|---|---|---|---|---|---|---|---|---|---|---|---|---|---|---|---|---|---|---|---|---|---|---|---|---|---|---|---|---|---|---|---|---|---|---|---|---|---|---|---|---|---|---|---|---|---|---|---|---|---|---|---|---|---|---|---|---|---|---|---|---|---|---|---|---|---|---|---|---|---|---|---|---|---|---|---|---|---|---|---|---|---|---|---|---|---|---|---|---|---|---|---|---|---|---|---|---|---|---|---|---|---|---|---|---|---|---|---|---|---|---|---|---|---|---|---|---|---|---|---|---|---|---|---|---|---|---|---|---|---|---|---|---|---|---|---|---|---|---|---|---|---|---|---|---|---|---|---|---|---|---|---|---|---|---|---|---|---|---|---|---|---|---|---|---|---|---|---|---|---|---|---|---|---|---|---|---|---|---|---|---|---|---|---|---|---|---|---|---|---|---|---|---|---|---|---|---|---|---|---|---|---|---|---|---|---|---|---|---|---|---|---|---|---|---|---|---|---|---|---|---|---|---|---|---|---|---|---|---|---|---|---|---|---|---|---|---|---|---|---|---|---|---|---|---|---|---|---|---|---|---|---|---|---|---|---|---|---|---|---|---|---|---|---|---|---|---|---|---|---|---|---|---|---|---|---|---|---|---|---|---|---|---|---|---|---|---|---|---|---|---|---|---|---|---|---|---|---|---|---|---|---|---|---|---|---|---|---|---|---|---|---|---|---|---|---|---|---|---|---|---|---|---|---|---|---|---|---|---|---|---|---|---|---|
| |||||||||||||||||||||||||||||||||||||||||||||||||||||||||||||||||||||||||||||||||||||||||||||||||||||||||||||||||||||||||||||||||||||||||||||||||||||||||||||||||||||||||||||||||||||||||||||||||||||||||||||||||||||||||||||||||||||||||||||||||||||||||||||||||||||||||||||||||||||||||||||||||||||||||||||||||||||||||||||||||||||||||||||||||||||||||||||||||||||||||||||||||||
| Items | |||||||||||||||||||||||||||||||||||||||||||||||||||||||||||||||||||||||||
|---|---|---|---|---|---|---|---|---|---|---|---|---|---|---|---|---|---|---|---|---|---|---|---|---|---|---|---|---|---|---|---|---|---|---|---|---|---|---|---|---|---|---|---|---|---|---|---|---|---|---|---|---|---|---|---|---|---|---|---|---|---|---|---|---|---|---|---|---|---|---|---|---|---|
| |||||||||||||||||||||||||||||||||||||||||||||||||||||||||||||||||||||||||
1F
Speak to the Hiker near the entrance to receive HM05 (Flash). Head west to find an Escape Rope, then climb down the ladder to B1F.
B1F
Go northeast until you reach a muddy slope, then collect the Poké Ball from the dead-end tunnel to the south. Continue moving to the southeast and take the ladder down to B2F.
B2F
Head southwest to a group of cracked rocks, then climb onto the upper level. Turn northeast and inspect the rock on the center platform for a hidden Everstone before taking the ladder back up to B1F.
B1F
Climb the next ladder back up to the north side of 1F.
1F
Follow the tunnel all the way to the west, then turn south to reach an isolated chamber.
1F (Back)
In the rear chamber, you find Steven researching rare stones. Give him the Letter from Mr. Stone to complete your mission, and Steven gives you the TM for his favorite move, Steel Wing, in return.
Dewford Town
Mr. Stone still needs you to deliver the Devon Goods to Captain Stern. Talk to Mr. Briney on the pier to inform him of your successful delivery, and the two of you, along with Peeko, set sail at once. Sail directly to Slateport City, or briefly backtrack to receive thanks for delivering the Letter.
Rustboro City (optional)
| Items | ||||||||||||
|---|---|---|---|---|---|---|---|---|---|---|---|---|
| ||||||||||||
You can now return to Rustboro City to receive an Exp. Share from Mr. Stone at Devon Corporation.
Routes 107 and 108
Like with Routes 105 and 106, there's no time to fully explore the area at the moment.
Route 109
The sprawling beach of Route 109 is packed with Trainers who aren't just here to work on their tans. Scour the sands for hidden items before heading north to Slateport City.
| Trainers | ||||||||||||||||||||||||||||||||||||||||||||||||||||||||||||||||||||||||||||||||||||||||||||||||||||||||||||||||||||||||||||||||||||||||||||||||||||||||||||||||||||||||||||||||||||||||||||||||||||||||||||||||||||||||||||||||||||||||||||||||||||||||||||||
|---|---|---|---|---|---|---|---|---|---|---|---|---|---|---|---|---|---|---|---|---|---|---|---|---|---|---|---|---|---|---|---|---|---|---|---|---|---|---|---|---|---|---|---|---|---|---|---|---|---|---|---|---|---|---|---|---|---|---|---|---|---|---|---|---|---|---|---|---|---|---|---|---|---|---|---|---|---|---|---|---|---|---|---|---|---|---|---|---|---|---|---|---|---|---|---|---|---|---|---|---|---|---|---|---|---|---|---|---|---|---|---|---|---|---|---|---|---|---|---|---|---|---|---|---|---|---|---|---|---|---|---|---|---|---|---|---|---|---|---|---|---|---|---|---|---|---|---|---|---|---|---|---|---|---|---|---|---|---|---|---|---|---|---|---|---|---|---|---|---|---|---|---|---|---|---|---|---|---|---|---|---|---|---|---|---|---|---|---|---|---|---|---|---|---|---|---|---|---|---|---|---|---|---|---|---|---|---|---|---|---|---|---|---|---|---|---|---|---|---|---|---|---|---|---|---|---|---|---|---|---|---|---|---|---|---|---|---|---|---|---|---|---|---|---|---|---|---|---|---|---|---|---|---|---|
| ||||||||||||||||||||||||||||||||||||||||||||||||||||||||||||||||||||||||||||||||||||||||||||||||||||||||||||||||||||||||||||||||||||||||||||||||||||||||||||||||||||||||||||||||||||||||||||||||||||||||||||||||||||||||||||||||||||||||||||||||||||||||||||||
| Available Pokémon | |||||||||||||||||||||||||||||||||||||||||||||||||||||||||||||||||||||||||
|---|---|---|---|---|---|---|---|---|---|---|---|---|---|---|---|---|---|---|---|---|---|---|---|---|---|---|---|---|---|---|---|---|---|---|---|---|---|---|---|---|---|---|---|---|---|---|---|---|---|---|---|---|---|---|---|---|---|---|---|---|---|---|---|---|---|---|---|---|---|---|---|---|---|
| |||||||||||||||||||||||||||||||||||||||||||||||||||||||||||||||||||||||||
| Items | ||||||||||||||||||||||||||||||||||||
|---|---|---|---|---|---|---|---|---|---|---|---|---|---|---|---|---|---|---|---|---|---|---|---|---|---|---|---|---|---|---|---|---|---|---|---|---|
| ||||||||||||||||||||||||||||||||||||
Seashore House
The hut on the beach's west side is known as the Seashore House, where refreshments are sold to thirsty beachgoers. Defeat all three Trainers inside, then speak to the proprietor. He rewards your effort with a free six-pack of Soda Pop! From this point on, you can also buy individual bottles at $300 apiece.
|
Emerald walkthrough |
|

|
This article is part of Project Walkthroughs, a Bulbapedia project that aims to write comprehensive step-by-step guides on each Pokémon game. |


