From Bulbapedia, the community-driven Pokémon encyclopedia.

|
This article is incomplete.
Please feel free to edit this article to add missing information and complete it.
Reason: monster houses, item list, unlock method?
|
| Ancient Barrow
|
いにしえの骨跡
Ancient Boneyard
|
|
|
|
|
|
|
|
Allowances
|
|
|
| Recruiting:
|
No*
|
| Items:
|
Current
|
| Money:
|
Allowed
|
| Starting level:
|
Current
|
| Team members:
|
Up to 3*
|
|
|
|
|
Location
|
|
|
| Please upload a world map highlighting this dungeon's location.
|
|
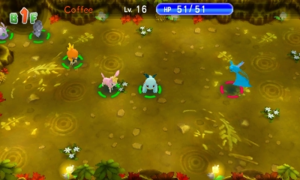
Ancient Barrow (Japanese: いにしえの骨跡 Ancient Boneyard) is a dungeon in Pokémon Super Mystery Dungeon that is located on the Water Continent. It is a sealed-off dungeon that lies beneath Serene Village. When villagers begin to go missing, they are taken here. When the Serene Village students attempt to investigate the incidents, Pancham and Shelmet are spirited away to this dungeon, now unsealed. The player, their partner, Goomy, Deerling, and Espurr enter the dungeon to pursue the captors.
At the bottom of the barrow, the students find Pancham and Shelmet suspended in the air. Before they can try to free them, they are confronted by the "Dark Land Emissary", a Giratina and its Litwick minions. Despite their disadvantage, the students manage to drive back the Ghost-type Pokémon. The Giratina is revealed to be a projection produced by a Solosis, and the Litwick state they were only trying to scare the villagers so they can feed. While the player's partner coincides that they can't stop them from eating, they demand that Solosis and the Litwick take less drastic measures, and to balance their mischief with good deeds. The Litwick and Solosis agree, and the students leave them in peace, with Pancham and Shelmet in tow.
Once the Ancient Barrow is completed, the dungeon cannot be revisited in the main game. From then on, it can only be revisited at Pelipper Island.
Pokémon encountered
Bosses
Items
| Item
|
Floors
|

|
35, 46, 51, 55-56, 58-59, 61, 67-68, 72, 74, 84 Poké
|
B2F-B4F, B6F, B8F, B10F-B11F
|

|
Apple
|
B6F-B7F, B11F
|

|
Cheri Berry
|
B2F
|

|
Oran Berry
|
B1F, B4F-B6F
|
| File:MDBag Emera TDS Sprite.png
|
Barrage Guard
|
B3F
|
| File:MDBag Emera TDS Sprite.png
|
Berry Power
|
B6F
|
| File:MDBag Emera TDS Sprite.png
|
Big Ears
|
B4F, B10F
|
| File:MDBag Emera TDS Sprite.png
|
Clutch Performer
|
B5F, B11F
|
| File:MDBag Emera TDS Sprite.png
|
Guard Boost
|
B8F
|
| File:MDBag Emera TDS Sprite.png
|
Payback
|
B10F
|
| File:MDBag Emera TDS Sprite.png
|
Power Boost Y
|
B9F
|
| File:MDBag Emera TDS Sprite.png
|
Sleep Guard
|
B3F
|
| File:MDBag Emera TDS Sprite.png
|
Super Critical
|
B1F, B5F
|
| File:MDBag Emera TDS Sprite.png
|
Toughness
|
B7F
|
| File:MDBag Emera TDS Sprite.png
|
Trap Proof
|
B10F
|
| File:MDBag Emera TDS Sprite.png
|
Wand Expert
|
B7F
|
| File:MDBag Health drink TDS Sprite.png
|
Elixir
|
B3F, B6F-B7F
|
| File:MDBag Wand TDS Sprite.png
|
3 Petrify Wand
|
B7F
|
| File:MDBag Wand TDS Sprite.png
|
3 Slumber Wand
|
B4F
|
| File:MDBag Wand TDS Sprite.png
|
5 Truant Wand
|
B8F, B10F
|

|
Totter Orb
|
B6F
|
|
|
Traps encountered
| Image
|
Trap
|
Floors
|

|
Gust Trap
|
B1F
|

|
Slow Trap
|
B5F
|

|
Slumber Trap
|
B10F
|
In other languages
|
|
This section is incomplete.
Please feel free to edit this section to add missing information and complete it.
|
| Language
|
Title
|
 French French
|
Ossuaire Antique
|
 German German
|
Modriges Mausoleum
|
|
|
|


