Appendix:Red and Blue walkthrough/Section 2: Difference between revisions
Force Fire (talk | contribs) |
mNo edit summary |
||
| (92 intermediate revisions by 29 users not shown) | |||
| Line 1: | Line 1: | ||
{{WalkthroughNotice|RB}} | |||
==Route 1== | |||
[[File:Kanto Route 1 RBY.png|thumb|Route 1]] | |||
- | {{rt|1|Kanto}} is a peaceful, country road that leads north from [[Pallet Town]] to [[Viridian City]]. The path is riddled with patches of [[tall grass]] and one-way [[ledge]]s that make northward travel difficult. It is not yet possible to catch any of the wild Pokémon here, but it is still good to battle them to earn valuable [[Experience|Experience Points]]. | ||
== | {| class="expandable" align="center" style="background: #{{locationcolor/med|land}}; {{roundy}}; border: 5px solid #{{locationcolor/light|land}};" | ||
|- align="center" | |||
! Available Pokémon | |||
|- | |||
| | |||
{{catch/header|land|no}} | |||
{{catch/entry1|016|Pidgey|yes|yes|no|Grass|2-5|50%|type1=normal|type2=flying}} | |||
{{catch/entry1|019|Rattata|yes|yes|no|Grass|2-4|50%|type1=normal}} | |||
{{catch/footer|land}} | |||
|} | |||
{| class="expandable" align="center" style="background: #{{locationcolor/med|land}}; {{roundy}}; border: 5px solid #{{locationcolor/light|land}};" | |||
|- align="center" | |||
! Items | |||
|- | |||
| | |||
{{itlisth|land}} | |||
{{itemlist|Potion|From the Viridian Poké Mart employee|R=yes|B=yes}} | |||
{{itlistfoot}} | |||
|} | |||
===Free Sample=== | |||
Speak to the man on the south side of the route, near the signpost. He works at the [[Poké Mart]] in [[Viridian City]] and gives you a [[Potion]] as a free sample. | |||
==Viridian City== | |||
[[File:Viridian City RBY.png|thumb|Viridian City]] | |||
[[Viridian City]] is a small, nature-loving city that is enveloped in green year-round. It is located between {{rt|1|Kanto}} to the south, {{rt|2|Kanto}} to the north, and {{rt|22|Kanto}} to the west. | |||
{| class="expandable" align="center" style="background: #6FA090; {{roundy}}; border: 5px solid #9FC0B5;" | |||
|- align="center" | |||
! Items | |||
|- | |||
| | |||
{{itlisth|forest}} | |||
{{itemlist|Oak's Parcel|Poké Mart; from the shopkeeper|R=yes|B=yes|display=[[Parcel|Oak's Parcel]]|sprite=Bag Parcel Sprite}} | |||
{{itemlist|Potion|Near the city's north exit, on the small tree ''(hidden)''|R=yes|B=yes}} | |||
{{catch/div|forest|Later visit}} | |||
{{itemlist|TM Psychic|From the sleeping man in the southwest (requires {{m|Cut}} or {{m|Surf}})|R=yes|B=yes|display={{TM|42|Dream Eater}}}} | |||
{{itemlist|Revive|Inside Viridian Gym|R=yes|B=yes}} | |||
{{itemlist|TM Ground|From the Gym Leader, after defeating him|R=yes|B=yes|display={{TM|27|Fissure}}}} | |||
{{itlistfoot|forest}} | |||
|} | |||
[[ | ===Pokémon Center=== | ||
The first building you will see is the [[Pokémon Center]]. This Pokémon hospital will heal your team to full health and eliminate any status ailments they may have. Each facility also has a PC for Trainers to use, where they can access their Pokémon storage and item storage. As Trainers may only carry six Pokémon with them at once, any others are immediately transferred to storage upon capture. It is a good idea to heal up and save your progress whenever you find a Pokémon Center. | |||
===Poké Mart=== | |||
Another shop sits to the northeast of the Pokémon Center. This is the local [[Poké Mart]]; these stores offer a variety of Poké Balls, Potions, and other items. It is a good idea to stock up on supplies whenever possible, as there is no telling what you may run into on your journey. | |||
{| style="margin: auto;" | |||
| | |||
{{shop|Poké Mart}} | |||
{{shoprow|{{shopitem|Poké Ball (item)|200|5=Poké Ball|display=Poké Ball}}|{{shopitem|Antidote|100}}}} | |||
{{shoprow|{{shopitem|Paralyze Heal|200|display=Parlyz Heal}}|{{shopitem|Burn Heal|250}}}} | |||
{{shopfooter|multiple=yes}} | |||
|} | |||
When you | ====Special Delivery==== | ||
When you step inside, the shopkeeper recognizes you as someone from [[Pallet Town]] and calls you over to the counter. It seems that [[Professor Oak]] had ordered something that was recently delivered. The shopkeeper hands [[Parcel|Oak's Parcel]] to you and asks that you take it to him. The man is adamant, so you will not be able to make any purchases until the delivery is made. | |||
== | ===Pokémon Academy=== | ||
The [[Pokémon academy]] in the city's center teaches inexperienced Trainers about the basics of battle. A blackboard in the front of the room describes the five {{DL|Status condition|Non-volatile status|status ailments}} that can affect a Pokémon. | |||
{| colspan="3" align="center" style="background: #D9D9D9; {{roundy}}; border: 2px solid #CCCCCC;" cellspacing="2" cellpadding="4" | |||
|- | |||
! colspan="2" style="background: #E6E6E6; {{roundytl|5px}};" | Ailment | |||
! style="background: #E6E6E6; {{roundytr|5px}};" | Effect(s) | |||
|- align="center" style="background: #FFF;" | |||
| style="background: #{{fire color}};" | '''{{color|FFF|BRN}}''' | |||
| {{status|Burn}} | |||
| {{stat|Attack}} drops to 50%; inflicts damage equal to 1/16 of maximum {{stat|HP}} every turn | |||
|- align="center" style="background: #FFF;" | |||
| style="background: #{{ice color}};" | '''{{color|FFF|FRZ}}''' | |||
| {{status|Freeze}} | |||
| Cannot move until thawed | |||
|- align="center" style="background: #FFF;" | |||
| style="background: #{{electric color}};" | '''{{color|FFF|PAR}}''' | |||
| {{status|Paralysis}} | |||
| {{stat|Speed}} drops to 25%; cannot attack 1/4 of the time | |||
|- align="center" style="background: #FFF;" | |||
| style="background: #{{poison color}};" | '''{{color|FFF|PSN}}''' | |||
| {{status|Poison}} | |||
| Inflicts damage equal to 1/16 of maximum {{stat|HP}} every turn; loses 1 HP for every four steps taken outside of battle | |||
|- align="center" style="background: #FFF;" | |||
| style="background: #{{status color}};" | '''{{color|FFF|SLP}}''' | |||
| {{status|Sleep}} | |||
| Cannot move for one to seven turns | |||
|- | |||
| colspan="3" style="background: #E6E6E6; {{roundybottom|5px}};" | | |||
|} | |||
== | ==Pallet Town== | ||
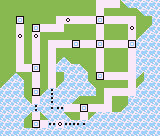
[[File:Kanto Town Map RBY.png|thumb|The [[Kanto]] region, as seen on the Town Map]] | |||
===Oak's Lab=== | |||
Deliver [[Parcel|Oak's Parcel]], a custom Poké Ball, to him and {{ga|Blue}} arrives a moment later. The professor has a request for each of you: take the [[Pokédex]] he invented and use it to gather information on all the Pokémon in the world. This handheld device is a high-tech encyclopedia that records data on every Pokémon you encounter, and will be complete when you catch a member of every species. It was Oak's dream to do this himself, but his advanced age means that he must rely on the two of you instead. | |||
===Blue's house=== | |||
Visit your rival's house before leaving town and speak to [[Daisy Oak|his sister]] to receive a [[Town Map]]. | |||
==Viridian City== | |||
With [[Parcel|Oak's Parcel]] delivered, it is now possible to purchase items at the Poké Mart, and the {{ka|old man}} that had blocked the path northward is feeling better now that he has had his coffee. When you pass him, he asks if you are in a hurry; if you say no, he demonstrates how to catch a Pokémon. | |||
At this point, you may proceed north to Route 2, or make an optional detour westward to {{rt|22|Kanto}} first. | |||
==Route 22== | |||
[[File:Route 22 Rival battle RBY.png|thumb|Running into Blue for the second battle]] | |||
It is not yet possible to fully explore {{rt|22|Kanto}}, but you may still hunt for new Pokémon. A short way into the route, {{ga|Blue}} appears and challenges you to a battle. | |||
== | {| class="expandable" align="center" style="background: #{{locationcolor/med|land}}; {{roundy}}; border: 5px solid #{{locationcolor/light|land}};" | ||
|- align="center" | |||
! Available Pokémon | |||
|- | |||
| | |||
{{Catch/header|land|no}} | |||
{{catch/entry1|019|Rattata|yes|yes|no|Grass|2-4|45%|type1=Normal}} | |||
{{catch/entry1|029|Nidoran♀|no|yes|no|Grass|2-4|40%|type1=Poison}} | |||
{{catch/entry1|032|Nidoran♂|yes|no|no|Grass|2-4|40%|type1=Poison}} | |||
{{catch/entry1|021|Spearow|yes|yes|no|Grass|3, 5|10%|type1=Normal|type2=Flying}} | |||
{{catch/entry1|029|Nidoran♀|yes|no|no|Grass|3-4|5%|type1=Poison}} | |||
{{catch/entry1|032|Nidoran♂|no|yes|no|Grass|3-4|5%|type1=Poison}} | |||
{{Catch/footer|land}} | |||
|} | |||
===Rival Battle 2=== | |||
Little has changed since your fight in Oak's Lab, but his [[first partner Pokémon]] has likely learned a new move. Trainers who chose {{p|Charmander}} should be especially wary, as his {{p|Squirtle}} can deal serious damage to {{t|Fire}} Pokémon with {{m|Bubble}}. Blue has added a {{p|Pidgey}} to his team, as well. Use the same tactics from your last battle to wear his Pokémon down and take the win. | |||
===={{MSP/6|001|Bulbasaur}} If the player chose {{p|Bulbasaur}}:==== | |||
{| style="margin: auto;" | |||
| | |||
{{Party/Single | |||
|color={{blue color}} | |||
|headcolor={{blue color light}} | |||
|bordercolor={{green color dark}} | |||
|sprite=Spr RG Blue 1.png | |||
|prize={{PDollar}}280 | |||
|name=Blue | |||
|game=RGB | |||
|location=Kanto Route 22 | |||
|locationname=Route 22 | |||
|pokemon=2 | |||
}} | |||
|{{Pokémon/1|game=Red | |||
|ndex=016 | |||
|pokemon=Pidgey | |||
|level=9 | |||
|type1=Normal|type2=Flying | |||
|move1=Gust|move1type=Normal | |||
|move2=Sand-Attack|move2type=Normal}} | |||
|{{Pokémon/1 | |||
|game=Red | |||
|ndex=004 | |||
|pokemon=Charmander | |||
|level=8 | |||
|type1=Fire | |||
|move1=Scratch|move1type=Normal | |||
|move2=Growl|move2type=Normal}} | |||
{{Party/Footer}} | |||
|} | |||
===={{MSP/6|004|Charmander}} If the player chose {{p|Charmander}}:==== | |||
{{Party|color={{ | {| style="margin: auto;" | ||
sprite= | | | ||
prize={{ | {{Party/Single | ||
|color={{blue color}} | |||
name=Blue| | |headcolor={{blue color light}} | ||
game= | |bordercolor={{green color dark}} | ||
location= | |sprite=Spr RG Blue 1.png | ||
pokemon=2| | |prize={{PDollar}}280 | ||
|name=Blue | |||
ndex= | |game=RGB | ||
pokemon= | |location=Kanto Route 22 | ||
level= | |locationname=Route 22 | ||
type1= | |pokemon=2 | ||
move1= | }} | ||
move1type=Normal| | |{{Pokémon/1 | ||
move2= | |game=Red | ||
move2type=Normal | |ndex=016 | ||
|pokemon=Pidgey | |||
|level=9 | |||
|type1=Normal|type2=Flying | |||
ndex= | |move1=Gust|move1type=Normal | ||
pokemon= | |move2=Sand-Attack|move2type=Normal}} | ||
level= | |{{Pokémon/1 | ||
type1= | |game=Red | ||
|ndex=007 | |||
move1= | |pokemon=Squirtle | ||
move1type=Normal| | |level=8 | ||
move2= | |type1=Water | ||
move2type=Normal|}}}} | |move1=Tackle|move1type=Normal | ||
|move2=Tail Whip|move2type=Normal | |||
|move3=Bubble|move3type=Water}} | |||
{{Party/Footer}} | |||
|} | |||
===={{MSP/6|007|Squirtle}} If the player chose {{p|Squirtle}}:==== | |||
{| style="margin: auto;" | |||
| | |||
{{Party/Single | |||
|color={{blue color}} | |||
|headcolor={{blue color light}} | |||
|bordercolor={{green color dark}} | |||
|sprite=Spr RG Blue 1.png | |||
|prize={{PDollar}}280 | |||
|name=Blue | |||
|game=RGB | |||
|location=Kanto Route 22 | |||
|locationname=Route 22 | |||
|pokemon=2 | |||
}} | |||
|{{Pokémon/1 | |||
|game=Red | |||
|ndex=016 | |||
|pokemon=Pidgey | |||
|level=9 | |||
|type1=Normal|type2=Flying | |||
|move1=Gust|move1type=Normal | |||
|move2=Sand-Attack|move2type=Normal}} | |||
|{{Pokémon/1 | |||
|game=Red | |||
|ndex=001 | |||
|pokemon=Bulbasaur | |||
|level=8 | |||
|type1=Grass|type2=Poison | |||
|move1=Tackle|move1type=Normal | |||
|move2=Growl|move2type=Normal | |||
|move3=Leech Seed|move3type=Grass}} | |||
{{Party/Footer}} | |||
|} | |||
After the battle, be sure to heal your Pokémon and stock up on Poké Balls, then continue on to {{rt|2|Kanto}}. | |||
If you managed to defeat Blue before catching any Pokémon and have no Poké Balls on-hand, you can return to [[Pallet Town]] first and speak to [[Professor Oak]] to receive 5 {{i|Poké Ball}}s. | |||
==Route 2 (West)== | |||
[[File:Kanto Route 2 RBY.png|thumb|100px|Route 2]] | |||
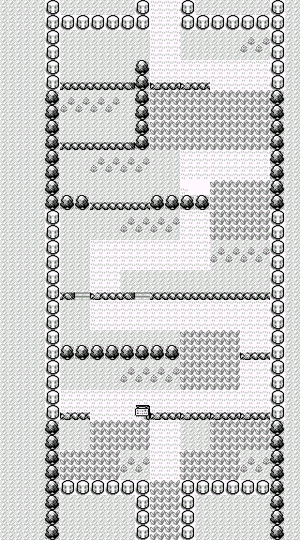
{{rt|2|Kanto}} runs northward from [[Viridian City]] to [[Pewter City]]. Much of the route's west side is occupied by a large maze of trees known as [[Viridian Forest]]. {{m|Cut|Overgrown trees}} block access to the east side for now. Head through the [[gate]] to enter the forest, a whole new area with new Pokémon to catch! | |||
{| class="expandable" align="center" style="background: #{{locationcolor/med|forest}}; {{roundy}}; border: 5px solid #{{locationcolor/light|forest}};" | |||
|- align="center" | |||
! Available Pokémon | |||
|- | |||
| | |||
{{Catch/header|forest|no}} | |||
{{Catch/entry1|016|Pidgey|yes|yes|no|Grass|3-5|45%|type1=Normal|type2=Flying}} | |||
{{Catch/entry1|019|Rattata|yes|yes|no|Grass|2-5|40%|type1=Normal}} | |||
{{Catch/entry1|010|Caterpie|no|yes|no|Grass|3-5|15%|type1=Bug}} | |||
{{Catch/entry1|013|Weedle|yes|no|no|Grass|3-5|15%|type1=Bug|type2=Poison}} | |||
{{Catch/footer|forest}} | |||
|} | |||
{{ | |||
game=Red | | {{WalkthroughPrevNext | ||
game2=Blue | | |game=Red|game2=Blue | ||
|gamename=Red and Blue | |||
prevsection=1 | | |prevsection=1 | ||
prevname=Pallet Town | | |prevname=Introduction, Pallet Town | ||
|nextsection=3 | |||
|nextname=Viridian Forest, Pewter City, Pewter Gym | |||
nextname=Viridian City | |||
}} | }} | ||
<br> | <br> | ||
{{Project Walkthroughs notice}} | {{Project Walkthroughs notice}} | ||
[[Category:Red and Blue walkthrough|R02]] | |||
[[Category:Red and Blue walkthrough]] | |||
Latest revision as of 20:29, 28 April 2024
These pages follow the original Game Boy iteration, not Pokémon FireRed and LeafGreen. The guide for those games can be found here.
Route 1
Route 1 is a peaceful, country road that leads north from Pallet Town to Viridian City. The path is riddled with patches of tall grass and one-way ledges that make northward travel difficult. It is not yet possible to catch any of the wild Pokémon here, but it is still good to battle them to earn valuable Experience Points.
| Available Pokémon | ||||||||||||||||||||||||||||||||||||||||||||||||||||||||||
|---|---|---|---|---|---|---|---|---|---|---|---|---|---|---|---|---|---|---|---|---|---|---|---|---|---|---|---|---|---|---|---|---|---|---|---|---|---|---|---|---|---|---|---|---|---|---|---|---|---|---|---|---|---|---|---|---|---|---|
| ||||||||||||||||||||||||||||||||||||||||||||||||||||||||||
| Items | ||||||||||||
|---|---|---|---|---|---|---|---|---|---|---|---|---|
| ||||||||||||
Free Sample
Speak to the man on the south side of the route, near the signpost. He works at the Poké Mart in Viridian City and gives you a Potion as a free sample.
Viridian City
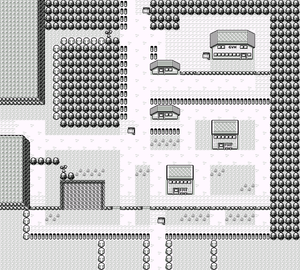
Viridian City is a small, nature-loving city that is enveloped in green year-round. It is located between Route 1 to the south, Route 2 to the north, and Route 22 to the west.
| Items | |||||||||||||||||||||||||||||||||||||||||||
|---|---|---|---|---|---|---|---|---|---|---|---|---|---|---|---|---|---|---|---|---|---|---|---|---|---|---|---|---|---|---|---|---|---|---|---|---|---|---|---|---|---|---|---|
| |||||||||||||||||||||||||||||||||||||||||||
Pokémon Center
The first building you will see is the Pokémon Center. This Pokémon hospital will heal your team to full health and eliminate any status ailments they may have. Each facility also has a PC for Trainers to use, where they can access their Pokémon storage and item storage. As Trainers may only carry six Pokémon with them at once, any others are immediately transferred to storage upon capture. It is a good idea to heal up and save your progress whenever you find a Pokémon Center.
Poké Mart
Another shop sits to the northeast of the Pokémon Center. This is the local Poké Mart; these stores offer a variety of Poké Balls, Potions, and other items. It is a good idea to stock up on supplies whenever possible, as there is no telling what you may run into on your journey.
| ||||||||||||||||||
Special Delivery
When you step inside, the shopkeeper recognizes you as someone from Pallet Town and calls you over to the counter. It seems that Professor Oak had ordered something that was recently delivered. The shopkeeper hands Oak's Parcel to you and asks that you take it to him. The man is adamant, so you will not be able to make any purchases until the delivery is made.
Pokémon Academy
The Pokémon academy in the city's center teaches inexperienced Trainers about the basics of battle. A blackboard in the front of the room describes the five status ailments that can affect a Pokémon.
| Ailment | Effect(s) | |
|---|---|---|
| BRN | Burn | Attack drops to 50%; inflicts damage equal to 1/16 of maximum HP every turn |
| FRZ | Freeze | Cannot move until thawed |
| PAR | Paralysis | Speed drops to 25%; cannot attack 1/4 of the time |
| PSN | Poison | Inflicts damage equal to 1/16 of maximum HP every turn; loses 1 HP for every four steps taken outside of battle |
| SLP | Sleep | Cannot move for one to seven turns |
Pallet Town

Oak's Lab
Deliver Oak's Parcel, a custom Poké Ball, to him and Blue arrives a moment later. The professor has a request for each of you: take the Pokédex he invented and use it to gather information on all the Pokémon in the world. This handheld device is a high-tech encyclopedia that records data on every Pokémon you encounter, and will be complete when you catch a member of every species. It was Oak's dream to do this himself, but his advanced age means that he must rely on the two of you instead.
Blue's house
Visit your rival's house before leaving town and speak to his sister to receive a Town Map.
Viridian City
With Oak's Parcel delivered, it is now possible to purchase items at the Poké Mart, and the old man that had blocked the path northward is feeling better now that he has had his coffee. When you pass him, he asks if you are in a hurry; if you say no, he demonstrates how to catch a Pokémon.
At this point, you may proceed north to Route 2, or make an optional detour westward to Route 22 first.
Route 22
It is not yet possible to fully explore Route 22, but you may still hunt for new Pokémon. A short way into the route, Blue appears and challenges you to a battle.
| Available Pokémon | ||||||||||||||||||||||||||||||||||||||||||||||||||||||||||||||||||||||||||||||||||||||||||||||||||||||||||||||||||||||||||
|---|---|---|---|---|---|---|---|---|---|---|---|---|---|---|---|---|---|---|---|---|---|---|---|---|---|---|---|---|---|---|---|---|---|---|---|---|---|---|---|---|---|---|---|---|---|---|---|---|---|---|---|---|---|---|---|---|---|---|---|---|---|---|---|---|---|---|---|---|---|---|---|---|---|---|---|---|---|---|---|---|---|---|---|---|---|---|---|---|---|---|---|---|---|---|---|---|---|---|---|---|---|---|---|---|---|---|---|---|---|---|---|---|---|---|---|---|---|---|---|---|---|---|
| ||||||||||||||||||||||||||||||||||||||||||||||||||||||||||||||||||||||||||||||||||||||||||||||||||||||||||||||||||||||||||
Rival Battle 2
Little has changed since your fight in Oak's Lab, but his first partner Pokémon has likely learned a new move. Trainers who chose Charmander should be especially wary, as his Squirtle can deal serious damage to Fire Pokémon with Bubble. Blue has added a Pidgey to his team, as well. Use the same tactics from your last battle to wear his Pokémon down and take the win.
 If the player chose Bulbasaur:
| |||||||||||||||||||||||||||||||||||||||||||||||||||||||||||||||||||
 If the player chose Charmander:
| ||||||||||||||||||||||||||||||||||||||||||||||||||||||||||||||||
 If the player chose Squirtle:
| ||||||||||||||||||||||||||||||||||||||||||||||||||||||||||||||||||
After the battle, be sure to heal your Pokémon and stock up on Poké Balls, then continue on to Route 2.
If you managed to defeat Blue before catching any Pokémon and have no Poké Balls on-hand, you can return to Pallet Town first and speak to Professor Oak to receive 5 Poké Balls.
Route 2 (West)
Route 2 runs northward from Viridian City to Pewter City. Much of the route's west side is occupied by a large maze of trees known as Viridian Forest. Overgrown trees block access to the east side for now. Head through the gate to enter the forest, a whole new area with new Pokémon to catch!
| Available Pokémon | ||||||||||||||||||||||||||||||||||||||||||||||||||||||||||||||||||||||||||||||||||||||||||
|---|---|---|---|---|---|---|---|---|---|---|---|---|---|---|---|---|---|---|---|---|---|---|---|---|---|---|---|---|---|---|---|---|---|---|---|---|---|---|---|---|---|---|---|---|---|---|---|---|---|---|---|---|---|---|---|---|---|---|---|---|---|---|---|---|---|---|---|---|---|---|---|---|---|---|---|---|---|---|---|---|---|---|---|---|---|---|---|---|---|---|
| ||||||||||||||||||||||||||||||||||||||||||||||||||||||||||||||||||||||||||||||||||||||||||
|
Red and Blue walkthrough |
|

|
This article is part of Project Walkthroughs, a Bulbapedia project that aims to write comprehensive step-by-step guides on each Pokémon game. |


