|
|
| Line 30: |
Line 30: |
| ==Poké Mart== | | ==Poké Mart== |
| {{shop|Left cashier}} | | {{shop|Left cashier}} |
| {{shoprow|{{shopitem|Poké Ball|200}}|{{shopitem|Great Ball|600|note=<sup>After 1 trial</sup>}}}} | | {{shoprow|{{shopitem|Poké Ball (item)|200|5=Poké Ball|display=Poké Ball}}|{{shopitem|Great Ball|600|note=<sup>After 1 trial</sup>}}}} |
| {{shoprow|{{shopitem|Ultra Ball|800|note=<sup>After 4 trials</sup>}}|{{shopitem|Potion|200}}}} | | {{shoprow|{{shopitem|Ultra Ball|800|note=<sup>After 4 trials</sup>}}|{{shopitem|Potion|200}}}} |
| {{shoprow|{{shopitem|Super Potion|700|note=<sup>After 1 trial</sup>}}|{{shopitem|Hyper Potion|1,500|note=<sup>After 4 trials</sup>}}}} | | {{shoprow|{{shopitem|Super Potion|700|note=<sup>After 1 trial</sup>}}|{{shopitem|Hyper Potion|1,500|note=<sup>After 4 trials</sup>}}}} |
| Line 57: |
Line 57: |
| {{Itemlist|Repel|Behind the lamppost in the southwest corner of the motel area ''(hidden)''|Su=yes|M=yes}} | | {{Itemlist|Repel|Behind the lamppost in the southwest corner of the motel area ''(hidden)''|Su=yes|M=yes}} |
| {{Itemlist|Repel|South of truck against the west fence of the motel area ''(hidden)''|US=yes|UM=yes}} | | {{Itemlist|Repel|South of truck against the west fence of the motel area ''(hidden)''|US=yes|UM=yes}} |
| {{Itemlist|Nest Ball|From a {{tc|Collector}} in the motel room|Su=yes|M=yes|US=yes|UM=yes|display={{ball|Nest}} ×2}} | | {{Itemlist|Nest Ball|From a {{tc|Collector}} in the motel room|Su=yes|M=yes|US=yes|UM=yes|display=[[Nest Ball]] ×2}} |
| {{Itemlist|X Speed|From the man by [[Guzma]]'s house after finding his {{alo|Meowth}}|US=yes|UM=yes}} | | {{Itemlist|X Speed|From the man by [[Guzma]]'s house after finding his {{alo|Meowth}}|US=yes|UM=yes}} |
| {{Itemlist|X Attack| | | {{Itemlist|X Attack| |
| Line 75: |
Line 75: |
| {{Itemlist|Fresh Water|From a Trial Guide for failing at volunteering to open gate for other Island Challengers, after completing Hala's grand trial ''(daily)''|US=yes|UM=yes|}} | | {{Itemlist|Fresh Water|From a Trial Guide for failing at volunteering to open gate for other Island Challengers, after completing Hala's grand trial ''(daily)''|US=yes|UM=yes|}} |
| {{Itemlist|TM Normal VI|From Guzma's mother after defeating [[Team Skull]]{{sup/7|SM}}/{{DL|List of Pokémon with form differences|Necrozma|Ultra}} {{p|Necrozma}}{{sup/7|USUM}}|Su=yes|M=yes|US=yes|UM=yes|display={{TM|87|Swagger}}}} | | {{Itemlist|TM Normal VI|From Guzma's mother after defeating [[Team Skull]]{{sup/7|SM}}/{{DL|List of Pokémon with form differences|Necrozma|Ultra}} {{p|Necrozma}}{{sup/7|USUM}}|Su=yes|M=yes|US=yes|UM=yes|display={{TM|87|Swagger}}}} |
| {{Itemlist|Beast Ball|From [[Looker]] at the start of the second [[Ultra Beast|UB]] mission|Su=yes|M=yes|display={{ball|Beast}} ×10}} | | {{Itemlist|Beast Ball|From [[Looker]] at the start of the second [[Ultra Beast|UB]] mission|Su=yes|M=yes|display=[[Beast Ball]] ×10}} |
| {{Itemlist|Beast Ball|From Looker if the player asks him about Beast Balls when they have none in their Bag|Su=yes|M=yes}} | | {{Itemlist|Beast Ball|From Looker if the player asks him about Beast Balls when they have none in their Bag|Su=yes|M=yes}} |
| {{Itlistfoot|land}} | | {{Itlistfoot|land}} |

|
This article is incomplete.
Please feel free to edit this article to add missing information and complete it.
Reason: Route description and full layout map are missing
|
Alola
Route 2
|
2番道路
Route 2
|
| "A path through many grassy patches."
|
|
|
|
Map description
| A path that leads to the northern part of Melemele Island. It's famous for being a training ground for the local Trainers.
|
|
|
Required for navigation

|
None
|
|
|
| Connecting locations
|
Location
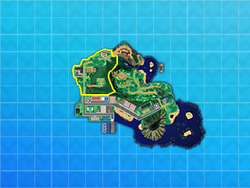
Location of Route 2 in Alola.
|
| Pokémon world routes
|
Route 2 (Japanese: 2番道路 Route 2) is a route on Alola's Melemele Island, connecting Hau'oli City to Big Wave Beach, Verdant Cavern, and Route 3. A Motel, Hau'oli Cemetery and the Berry fields are located along the route.
Team Skull Boss Guzma's home is located on this route.
Route description
Poké Mart
Items
Berry pile
The Berry pile can have two sizes: a small pile that yields three random Berries or a large pile that yields four to five Berries. The first Berry in a large pile is fixed to a specific berry as below, whereas the rest are random. In large piles, the player will always find a high level Crabrawler hiding among the Berries that the player must defeat in order to collect them; small piles only occasionally have low level Crabrawler hiding among the Berries. The Berry pile regenerates daily.
| Item
|
Location
|
Games
|

|
Chesto Berry
|
From the pile of Berries by the Berry tree (random, daily)
|
S M US UM
|

|
Leppa Berry
|
From the pile of Berries by the Berry tree (random, daily)
|
S M US UM
|

|
Oran Berry
|
From the pile of Berries by the Berry tree (random, daily)
|
S M US UM
|

|
Persim Berry
|
From the pile of Berries by the Berry tree (random, daily)
|
S M US UM
|

|
Sitrus Berry
|
The first Berry from a large pile of Berries by the Berry tree (random, daily)
|
S M US UM
|
|
|
Dropped after ambush encounters
Sometimes, after a Pokémon from rustling grass is defeated or caught, it will drop an item.
Found in smashed rocks
Sometimes, after smashing rocks with Tauros Charge, items can be found in the debris.
| Item
|
Location
|
Games
|

|
Stardust
|
Sometimes found in smashed rocks
|
S M US UM
|
|
|
Zygarde Cube
| Item
|
Location
|
Games
|

|
Zygarde Cell
|
In the northwest corner of the motel area
|
S M
|
|
|
Totem Stickers
Pokémon Center Café
- Main article: Pokémon Center Café
At the Pokémon Center Café, the owner will give the player two gifts the first time they buy a drink each day: an item and a dozen Poké Beans.
He will also give the player a Rare Candy if they have fed certain amounts of Poké Beans to their Pokémon.
Pokémon
Pokémon Sun and Moon
Pokémon Ultra Sun and Ultra Moon
Trainers
Pokémon Sun and Moon
| Trainer
|
Pokémon
|

|
|
|
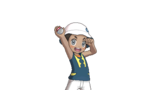
Beauty Krystal
カナミ Kanami
Reward: $288
|
|
|
|
|
|
|
|
|
| After defeating Team Skull at the Berry fields
|
|
|
|
|
|
|
|
|
|
|
|
|
|
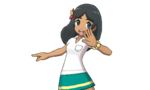
Lass Isabella
ユカ Yuka
Reward: $216
|
|
|
|
|
|
|
|
|
|
|
Pokémon Ultra Sun and Ultra Moon
| Trainer
|
Pokémon
|
|
|
|
|
Beauty Krystal
カナミ Kanami
Reward: $288
|
|
|
|
|
|
|
|
|
|
|
|
|
|
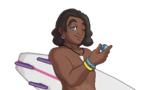
Surfer Carlton
ノリヤス Noriyasu
Reward: $216
|
|
|
|
| After defeating Team Skull at Big Wave Beach
|
|
|
|
|
|
|
|
|
|
|
|
|
|
|
Lass Isabella
ユカ Yuka
Reward: $216
|
|
|
|
|
|
In the manga

Route 2 in Pokémon Adventures
In the Pokémon Adventures manga
In the Sun, Moon, Ultra Sun & Ultra Moon arc, Sun transported Moon through Route 2 so that she could deliver a Rotom to Professor Kukui.


