|
|
| (16 intermediate revisions by 8 users not shown) |
| Line 11: |
Line 11: |
| |location={{rt|10|Kanto}} | | |location={{rt|10|Kanto}} |
| |region=Kanto | | |region=Kanto |
| |generation={{Gen|I}}, {{Gen|II}}, {{Gen|III}}, {{Gen|IV}} | | |generation={{Gen|I}}, {{Gen|II}}, {{Gen|III}}, {{Gen|IV}}, {{Gen|VII}} |
| |map=Kanto Rock Tunnel Map.png | | |map=Kanto Rock Tunnel Map.png |
| }} | | }} |
| Line 21: |
Line 21: |
|
| |
|
| In {{g|FireRed and LeafGreen}}, there is a [[Move Tutor]] who will teach the move {{m|Rock Slide}} to a Pokémon. | | In {{g|FireRed and LeafGreen}}, there is a [[Move Tutor]] who will teach the move {{m|Rock Slide}} to a Pokémon. |
|
| |
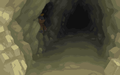
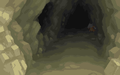
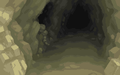
| [wp|Hornblende biotite granite] is present in Rock Tunnel
| |
|
| |
|
| ==Items== | | ==Items== |
| Line 29: |
Line 27: |
| {{Itemlist|Escape Rope|1F, in the southeast corner of the northeast section|FR=yes|LG=yes|LP=yes|LE=yes}} | | {{Itemlist|Escape Rope|1F, in the southeast corner of the northeast section|FR=yes|LG=yes|LP=yes|LE=yes}} |
| {{Itemlist|Super Potion|1F, north of the rock formation in the southeast corner|LP=yes|LE=yes}} | | {{Itemlist|Super Potion|1F, north of the rock formation in the southeast corner|LP=yes|LE=yes}} |
| {{Itemlist|Poké Ball|1F, from a man in the southeast near the ladder to B1F, if the player has less than 10 {{ball|Poké}}s (repeatable)|LP=yes|LE=yes|display={{ball|Poké}}}} | | {{Itemlist|Poké Ball|1F, from a man in the southeast near the ladder to B1F, if the {{player}} has less than 10 {{i|Poké Ball}}s (repeatable)|LP=yes|LE=yes|display={{i|Poké Ball}}}} |
| {{Itemlist|Stardust|1F, at the north end of the second-easternmost room in the southeast|LP=yes|LE=yes}} | | {{Itemlist|Stardust|1F, at the north end of the second-easternmost room in the southeast|LP=yes|LE=yes}} |
| {{Itemlist|Pearl|1F, northwest of {{tc|Picnicker}} Ariana|FR=yes|LG=yes|display={{OBP|Pearl|item}}}} | | {{Itemlist|Pearl|1F, northwest of {{tc|Picnicker}} Ariana|FR=yes|LG=yes|display={{i|Pearl}}}} |
| {{Itemlist|Pearl|1F, in the southwest corner|LP=yes|LE=yes|display={{OBP|Pearl|item}}}} | | {{Itemlist|Pearl|1F, in the southwest corner|LP=yes|LE=yes|display={{i|Pearl}}}} |
| {{Itemlist|TM Steel|1F, center platform|display={{TM|47|Steel Wing}}|G=yes|S=yes|C=yes}} | | {{Itemlist|TM Steel|1F, center platform|display={{TM|47|Steel Wing}}|G=yes|S=yes|C=yes}} |
| {{Itemlist|Elixer|1F, southwest|G=yes|S=yes|C=yes|display=[[Elixir|Elixer]]|sprite=Bag Elixir Sprite}} | | {{Itemlist|Elixer|1F, southwest|G=yes|S=yes|C=yes|display=[[Elixir|Elixer]]|sprite=Bag Elixir Sprite}} |
| Line 44: |
Line 42: |
| {{Itemlist|Max Ether|B1F, northeast of {{tc|Hiker}} Dudley, accessible from the ladder northwest of the center of 1F|FR=yes|LG=yes}} | | {{Itemlist|Max Ether|B1F, northeast of {{tc|Hiker}} Dudley, accessible from the ladder northwest of the center of 1F|FR=yes|LG=yes}} |
| {{Itemlist|Dire Hit|B1F, northeast of {{tc|Black Belt}} Dudley, in the middle of the floor|LP=yes|LE=yes}} | | {{Itemlist|Dire Hit|B1F, northeast of {{tc|Black Belt}} Dudley, in the middle of the floor|LP=yes|LE=yes}} |
| {{Itemlist|Great Ball|B1F, in the northeast corner|LP=yes|LE=yes|display={{ball|Great}} ×3}} | | {{Itemlist|Great Ball|B1F, in the northeast corner|LP=yes|LE=yes|display=[[Great Ball]] ×3}} |
| {{Itemlist|Full Heal|B1F, in the northeast corner of the northeast section|LP=yes|LE=yes}} | | {{Itemlist|Full Heal|B1F, in the northeast corner of the northeast section|LP=yes|LE=yes}} |
| {{Itemlist|Super Potion|B1F, in the southwest corner of the northeast section|LP=yes|LE=yes}} | | {{Itemlist|Super Potion|B1F, in the southwest corner of the northeast section|LP=yes|LE=yes}} |
| Line 61: |
Line 59: |
| ===Rock Smash=== | | ===Rock Smash=== |
| {{itlisth|cave}} | | {{itlisth|cave}} |
| {{Itemlist|Red Shard|Randomly found by {{m|Rock Smash|smashing rocks}}|HG=yes|SS=yes}} | | {{Itemlist|Red Shard|Randomly found by smashing [[breakable rock]]s|HG=yes|SS=yes}} |
| {{Itemlist|Blue Shard|Randomly found by {{m|Rock Smash|smashing rocks}}|HG=yes|SS=yes}} | | {{Itemlist|Blue Shard|Randomly found by smashing [[breakable rock]]s|HG=yes|SS=yes}} |
| {{Itemlist|Yellow Shard|Randomly found by {{m|Rock Smash|smashing rocks}}|HG=yes|SS=yes}} | | {{Itemlist|Yellow Shard|Randomly found by smashing [[breakable rock]]s|HG=yes|SS=yes}} |
| {{Itemlist|Green Shard|Randomly found by {{m|Rock Smash|smashing rocks}}|HG=yes|SS=yes}} | | {{Itemlist|Green Shard|Randomly found by smashing [[breakable rock]]s|HG=yes|SS=yes}} |
| {{Itemlist|Heart Scale|Randomly found by {{m|Rock Smash|smashing rocks}}|HG=yes|SS=yes}} | | {{Itemlist|Heart Scale|Randomly found by smashing [[breakable rock]]s|HG=yes|SS=yes}} |
| {{Itemlist|Revive|Randomly found by {{m|Rock Smash|smashing rocks}}|HG=yes|SS=yes}} | | {{Itemlist|Revive|Randomly found by smashing [[breakable rock]]s|HG=yes|SS=yes}} |
| {{Itemlist|Max Ether|Randomly found by {{m|Rock Smash|smashing rocks}}|HG=yes|SS=yes}} | | {{Itemlist|Max Ether|Randomly found by smashing [[breakable rock]]s|HG=yes|SS=yes}} |
| {{Itemlist|Star Piece|Randomly found by {{m|Rock Smash|smashing rocks}}|HG=yes|SS=yes}} | | {{Itemlist|Star Piece|Randomly found by smashing [[breakable rock]]s|HG=yes|SS=yes}} |
| {{itlistfoot|cave}} | | {{itlistfoot|cave}} |
|
| |
|
| Line 188: |
Line 186: |
|
| |
|
| ===Generation VII=== | | ===Generation VII=== |
| | ====1F==== |
| | {{Catch/header|cave|no}} |
| | {{Catch/entrype|041|Zubat|yes|yes|Cave|18-23|10%|type1=Poison|type2=Flying}} |
| | {{Catch/entrype|042|Golbat|yes|yes|Cave|18-23|20%|type1=Poison|type2=Flying}} |
| | {{Catch/entrype|066|Machop|yes|yes|Cave|18-23|10%|type1=Fighting}} |
| | {{Catch/entrype|074|Geodude|yes|yes|Cave|18-23|10%|type1=Rock|type2=Ground}} |
| | {{Catch/entrype|075|Graveler|yes|yes|Cave|18-23|20%|type1=Rock|type2=Ground}} |
| | {{Catch/entrype|095|Onix|yes|yes|Cave|18-23|10%|type1=Rock|type2=Ground}} |
| | {{Catch/entrype|104|Cubone|yes|yes|Cave|18-23|9%|type1=Ground}} |
| | {{Catch/entrype|111|Rhyhorn|yes|yes|Cave|18-23|10%|type1=Ground|type2=Rock}} |
| | {{Catch/entrype|115|Kangaskhan|yes|yes|Cave|18-23|1%|type1=Normal}} |
| | {{Catch/div|cave|Rare Spawns}} |
| | {{Catch/entrype|004|Charmander|yes|yes|Cave|18-23|-|type1=Fire}} |
| | {{Catch/footer|cave|2}} |
| | |
| | ====B1F==== |
| {{Catch/header|cave|no}} | | {{Catch/header|cave|no}} |
| {{Catch/entrype|041|Zubat|yes|yes|Cave|18-23|20%|type1=Poison|type2=Flying}} | | {{Catch/entrype|041|Zubat|yes|yes|Cave|18-23|20%|type1=Poison|type2=Flying}} |
| Line 198: |
Line 212: |
| {{Catch/entrype|111|Rhyhorn|yes|yes|Cave|18-23|10%|type1=Ground|type2=Rock}} | | {{Catch/entrype|111|Rhyhorn|yes|yes|Cave|18-23|10%|type1=Ground|type2=Rock}} |
| {{Catch/entrype|115|Kangaskhan|yes|yes|Cave|18-23|1%|type1=Normal}} | | {{Catch/entrype|115|Kangaskhan|yes|yes|Cave|18-23|1%|type1=Normal}} |
| | {{Catch/div|cave|Rare Spawns}} |
| | {{Catch/entrype|004|Charmander|yes|yes|Cave|18-23|-|type1=Fire}} |
| {{Catch/footer|cave|2}} | | {{Catch/footer|cave|2}} |
|
| |
|
| Line 269: |
Line 285: |
| ===Generation VII=== | | ===Generation VII=== |
| {{trainerheader|cave}} | | {{trainerheader|cave}} |
| {{Trainerentry|VSPoké Maniac PE.png{{!}}90px|Poké Maniac|Ashton|1,104<br/>3 {{ball|Poké}}s|1|079|Slowpoke|♂|23|None|36=サチオ|37=Sachio}} | | {{Trainerentry|VSPoké Maniac PE.png{{!}}90px|Poké Maniac|Ashton|1,104<br/>3 {{i|Poké Ball}}s|1|079|Slowpoke|♂|23|None|36=サチオ|37=Sachio}} |
| {{trainerdiv|cave}} | | {{trainerdiv|cave}} |
| {{Trainerentry|VSPoké Maniac PE.png{{!}}90px|Poké Maniac|Winston|1,104<br/>3 {{ball|Poké}}s|1|115|Kangaskhan|♀|23|None|36=ミツグ|37=Mitsugu}} | | {{Trainerentry|VSPoké Maniac PE.png{{!}}90px|Poké Maniac|Winston|1,104<br/>3 {{i|Poké Ball}}s|1|115|Kangaskhan|♀|23|None|36=ミツグ|37=Mitsugu}} |
| {{trainerdiv|cave}} | | {{trainerdiv|cave}} |
| {{Trainerentry|VSBlack Belt PE.png{{!}}90px|Black Belt|Dudley|672<br/>3 {{ball|Poké}}s|1|095|Onix|♂|24|None|36=トクオ|37=Tokuo}} | | {{Trainerentry|VSBlack Belt PE.png{{!}}90px|Black Belt|Dudley|672<br/>3 {{i|Poké Ball}}s|1|095|Onix|♂|24|None|36=トクオ|37=Tokuo}} |
| {{trainerdiv|cave}} | | {{trainerdiv|cave}} |
| {{Trainerentry|VSHiker PE.png{{!}}90px|Hiker|Allen|920<br/>3 {{ball|Poké}}s|3|074|Geodude|♂|23|None|095|Onix|♂|23|None|075|Graveler|♂|23|None|36=イサム|37=Isamu}} | | {{Trainerentry|VSHiker PE.png{{!}}90px|Hiker|Allen|920<br/>3 {{i|Poké Ball}}s|3|074|Geodude|♂|23|None|095|Onix|♂|23|None|075|Graveler|♂|23|None|36=イサム|37=Isamu}} |
| {{trainerdiv|cave}} | | {{trainerdiv|cave}} |
| {{Trainerentry|VSBlack Belt PE.png{{!}}90px|Black Belt|Eric|672<br/>3 {{ball|Poké}}s|2|056|Mankey|♂|24|None|061|Poliwhirl|♂|24|None|36=ダイチ|37=Daichi}} | | {{Trainerentry|VSBlack Belt PE.png{{!}}90px|Black Belt|Eric|672<br/>3 {{i|Poké Ball}}s|2|056|Mankey|♂|24|None|061|Poliwhirl|♂|24|None|36=ダイチ|37=Daichi}} |
| {{trainerdiv|cave}} | | {{trainerdiv|cave}} |
| {{Trainerentry|VSCamper PE.png{{!}}90px|Camper|Lenny|440<br/>2 {{ball|Great}}s|1|058|Growlithe|♂|22|None|36=カツヒト|37=Katsuhito}} | | {{Trainerentry|VSCamper PE.png{{!}}90px|Camper|Lenny|440<br/>2 [[Great Ball]]s|1|058|Growlithe|♂|22|None|36=カツヒト|37=Katsuhito}} |
| {{trainerdiv|cave}} | | {{trainerdiv|cave}} |
| {{Trainerentry|VSHiker PE.png{{!}}90px|Hiker|Oliver|920<br/>3 {{ball|Poké}}s|2|095|Onix|♂|23|None|028|Sandslash|♂|23|None|36=コダマ|37=Kodama}} | | {{Trainerentry|VSHiker PE.png{{!}}90px|Hiker|Oliver|920<br/>3 {{i|Poké Ball}}s|2|095|Onix|♂|23|None|028|Sandslash|♂|23|None|36=コダマ|37=Kodama}} |
| {{trainerdiv|cave}} | | {{trainerdiv|cave}} |
| {{Trainerentry|VSHiker PE.png{{!}}90px|Hiker|Claus|920<br/>3 {{ball|Poké}}s|2|066|Machop|♂|23|None|111|Rhyhorn|♂|23|None|36=サブロウ|37=Saburō}} | | {{Trainerentry|VSHiker PE.png{{!}}90px|Hiker|Claus|920<br/>3 {{i|Poké Ball}}s|2|066|Machop|♂|23|None|111|Rhyhorn|♂|23|None|36=サブロウ|37=Saburō}} |
| {{trainerdiv|cave}} | | {{trainerdiv|cave}} |
| {{Trainerentry|VSPoké Maniac PE.png{{!}}90px|Poké Maniac|Cooper|1,104<br/>3 {{ball|Poké}}s|1|002|Ivysaur|♂|23|None|36=キヨハル|37=Kiyoharu}} | | {{Trainerentry|VSPoké Maniac PE.png{{!}}90px|Poké Maniac|Cooper|1,104<br/>3 {{i|Poké Ball}}s|1|002|Ivysaur|♂|23|None|36=キヨハル|37=Kiyoharu}} |
| {{trainerdiv|cave}} | | {{trainerdiv|cave}} |
| {{Trainerentry|VSAce Trainer F PE.png{{!}}90px|Ace Trainer|Sofia|2,500<br/>5 {{ball|Ultra}}s|2|037|Vulpix|♀|24|None|064|Kadabra|♂|25|None|36=ミノリ|37=Minori}} | | {{Trainerentry|VSAce Trainer F PE.png{{!}}90px|Ace Trainer|Sofia|2,500<br/>5 [[Ultra Ball]]s|2|037|Vulpix|♀|24|None|064|Kadabra|♂|25|None|36=ミノリ|37=Minori}} |
| {{trainerdiv|cave}} | | {{trainerdiv|cave}} |
| {{Trainerentry|VSAce Trainer M PE.png{{!}}90px|Ace Trainer|Charlie|2,500<br/>5 {{ball|Ultra}}s|2|050|Diglett|♂|24|None|136|Flareon|♂|25|None|36=マナブ|37=Manabu}} | | {{Trainerentry|VSAce Trainer M PE.png{{!}}90px|Ace Trainer|Charlie|2,500<br/>5 [[Ultra Ball]]s|2|050|Diglett|♂|24|None|136|Flareon|♂|25|None|36=マナブ|37=Manabu}} |
| {{trainerdiv|cave}} | | {{trainerdiv|cave}} |
| {{Trainerentry|VSBlack Belt PE.png{{!}}90px|Black Belt|Steve|672<br/>3 {{ball|Poké}}s|2|066|Machop|♂|24|None|066|Machop|♂|24|None|36=トシオ|37=Toshio}} | | {{Trainerentry|VSBlack Belt PE.png{{!}}90px|Black Belt|Steve|672<br/>3 {{i|Poké Ball}}s|2|066|Machop|♂|24|None|066|Machop|♂|24|None|36=トシオ|37=Toshio}} |
| {{trainerdiv|cave}} | | {{trainerdiv|cave}} |
| {{Trainerentry|VSPicnicker PE.png{{!}}90px|Picnicker|Leah|440<br/>2 {{ball|Great}}s|1|030|Nidorina|♀|22|None|36=エミ|37=Emi}} | | {{Trainerentry|VSPicnicker PE.png{{!}}90px|Picnicker|Leah|440<br/>2 [[Great Ball]]s|1|030|Nidorina|♀|22|None|36=エミ|37=Emi}} |
| {{trainerdiv|cave}} | | {{trainerdiv|cave}} |
| {{Trainerentry|VSCamper PE.png{{!}}90px|Camper|Leroy|440<br/>2 {{ball|Great}}s|1|033|Nidorino|♂|22|None|36=マコト|37=Makota}} | | {{Trainerentry|VSCamper PE.png{{!}}90px|Camper|Leroy|440<br/>2 [[Great Ball]]s|1|033|Nidorino|♂|22|None|36=マコト|37=Makoto}} |
| {{trainerdiv|cave}} | | {{trainerdiv|cave}} |
| {{Trainerentry|VSPicnicker PE.png{{!}}90px|Picnicker|Dana|440<br/>2 {{ball|Great}}s|2|052|Meowth|♀|22|None|037|Vulpix|♀|22|None|36=ミユキ|37=Miyuki}} | | {{Trainerentry|VSPicnicker PE.png{{!}}90px|Picnicker|Dana|440<br/>2 [[Great Ball]]s|2|052|Meowth|♀|22|None|037|Vulpix|♀|22|None|36=ミユキ|37=Miyuki}} |
| {{trainerdiv|cave|After becoming Champion}} | | {{trainerdiv|cave|After becoming Champion}} |
| {{Trainerentry|VSHiker Master PE.png{{!}}90px|Hiker|Irwin|N/A<br><small>[[Master Trainer]]</small>|1|074|Geodude|♂|65|None|36=ヨシヒロ|37=Yoshihiro}} | | {{Trainerentry/master|VSHiker Master PE.png{{!}}90px|Hiker|Irwin|074|Geodude|♂|65|Normal|Bide|Fighting|Brick Break|36=ヨシヒロ|37=Yoshihiro}} |
| {{trainerdiv|cave}} | | {{trainerdiv|cave}} |
| {{Trainerentry|VSScientist Master PE.png{{!}}90px|Scientist|West|N/A<br><small>[[Master Trainer]]</small>|1|041|Zubat|♂|70|None|36=トキオ|37=Tokio}} | | {{Trainerentry/master|VSScientist Master PE.png{{!}}90px|Scientist|West|041|Zubat|♂|70|Flying|Air Slash|Ghost|Confuse Ray|36=トキオ|37=Tokio}} |
| {{trainerfooter|cave|PE}} | | {{trainerfooter|cave|PE}} |
|
| |
|
| Line 363: |
Line 379: |
| * {{tc|Hiker}}{{sup/1|RBY}}{{sup/3|FRLG}}/{{tc|Black Belt}}{{sup/7|PE}} Dudley makes a reference to the song ''{{wp|Hit Me with Your Best Shot}}'' by {{wp|Pat Benatar}}, saying "Hit me with your best shot!" prior to battle, and "Fired away!" after being defeated. | | * {{tc|Hiker}}{{sup/1|RBY}}{{sup/3|FRLG}}/{{tc|Black Belt}}{{sup/7|PE}} Dudley makes a reference to the song ''{{wp|Hit Me with Your Best Shot}}'' by {{wp|Pat Benatar}}, saying "Hit me with your best shot!" prior to battle, and "Fired away!" after being defeated. |
| * One of the {{tc|Poké Maniac}}s in the tunnel makes a reference to ''{{wp|Mobile Fighter G Gundam}}'', saying "Pokémon Fight! Ready, Go!" prior to battle. Official Gundam Fights in the series began with both participants declaring "Gundam Fight! Ready, Go!" | | * One of the {{tc|Poké Maniac}}s in the tunnel makes a reference to ''{{wp|Mobile Fighter G Gundam}}'', saying "Pokémon Fight! Ready, Go!" prior to battle. Official Gundam Fights in the series began with both participants declaring "Gundam Fight! Ready, Go!" |
| * Rock Tunnel is the only one of Kanto's caves to appear in each of the first four [[Generation|generations]] with the same background music. | | * Rock Tunnel is the only one of Kanto's caves to appear in each of the first four [[generation]]s with the same background music. |
| | * Hornblende biotite granite is present here, as revealed in {{DL|Mossdeep City|Steven's house|Steven Stone's house}} in [[Pokémon Omega Ruby and Alpha Sapphire]]. |
|
| |
|
| ==In other languages== | | ==In other languages== |