Petalburg Gym: Difference between revisions
| (121 intermediate revisions by 57 users not shown) | |||
| Line 3: | Line 3: | ||
|characters=トウカ | |characters=トウカ | ||
|japanese=Touka | |japanese=Touka | ||
|image= | |image=Petalburg Gym Exterior ORAS.png | ||
|imagesize=300px | |||
|location=Petalburg City | |location=Petalburg City | ||
|leader=[[Norman]] | |leader=[[Norman]] | ||
|badge=Balance Badge | |badge=Balance Badge | ||
|type=Normal | |type=Normal | ||
|region=Hoenn | |region=Hoenn | ||
|battlefield=Petalburg. | |battlefield=Petalburg Gym Leader Battle Environment ORAS.png | ||
|battlefieldsize=300px | |||
|colordark=00ff7f | |colordark=00ff7f | ||
|colorlight=d0f0c0 | |colorlight=d0f0c0 | ||
}} | }} | ||
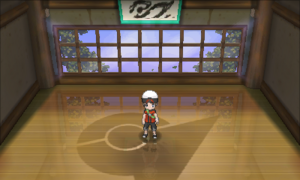
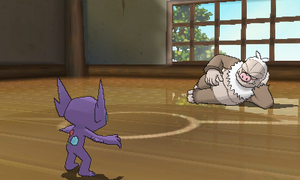
The '''Petalburg Gym''' (Japanese: '''トウカジム''' ''Touka Gym'') is the official [[ | [[File:Norman's Gym Leader Room ORAS.png|thumb|300px|Norman's Gym Leader room]] | ||
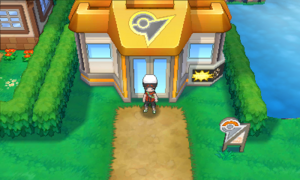
The '''Petalburg Gym''' (Japanese: '''トウカジム''' ''Touka Gym'') is the official [[Gym]] of [[Petalburg City]]. It is based on {{type|Normal}} {{OBP|Pokémon|species}}. The [[Gym Leader]] is [[Norman]]. {{pkmn|Trainer}}s who defeat him receive the {{Badge|Balance}}. | |||
==In the games== | |||
===Core series=== | |||
{{flexheader|gap=0px}} | |||
{{sign|E|header}} | |||
{{sign|E|title|Petalburg City Pokémon Gym<br>Leader: Norman}} | |||
{{sign|E|A man in pursuit of power!}} | |||
{{sign|E|footer}} | |||
{{sign|RS|header}} | |||
{{sign|RS|title|Petalburg City Pokémon Gym<br>Leader: Norman}} | |||
{{sign|RS|A man in pursuit of power!}} | |||
{{sign|RS|footer}} | |||
{{flexfooter}} | |||
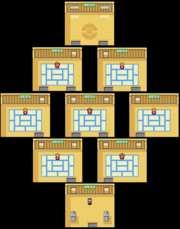
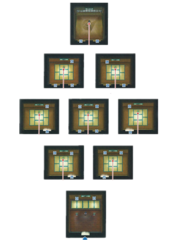
Between the entrance and Gym Leader [[Norman]] are a series of rooms, each containing a Trainer. In order to access these rooms, all of the first four Badges must be obtained first; otherwise, the doors will be locked. The Trainers have special methods of battling, as displayed on the doors leading to their rooms. They include the One-Hit KO Room, Accuracy Room, Attack Room, Defense Room, Speed Room, Recovery Room and either Zero Reduction Room{{sup/3|RS}}{{sup/6|ORAS}} or Confusion Room{{sup/3|E}}. Once three rooms in a row are completed, they can access the Gym Leader Room with Norman. In {{game|Ruby and Sapphire|s}} and [[Pokémon Omega Ruby and Alpha Sapphire]], all seven Trainers in their respective rooms use [[item]]s in the battle, whereas in {{game|Emerald}}, the strategy of these Trainers is dependent on the [[move]]s of their Pokémon. | |||
When defeated, Norman will give the player the {{Badge|Balance}} as well as {{TM|42|Facade}}{{sup/3|RSE}} or {{TM|67|Retaliate}}{{sup/6|ORAS}} as a reward. Also, in Pokémon Emerald, Wally's father will then enter Norman's room and lead the player to Wally's house. | |||
After the player enters the [[Hall of Fame]], the Gym's [[Gym guide|guide]] disappears, and Norman appears at the first room of the Gym like he did earlier in the game. In Pokémon Emerald, Norman will return to the furthest room back if he is ready to rebattle the player. | |||
====Appearance==== | |||
=====Interior===== | |||
{| class="roundy" style="margin:auto; background: #000; border: 3px solid #{{normal color dark}};" | |||
|- | |||
! style="background:#{{ruby color}}; {{roundytl|5px}}" | {{color2|fff|Pokémon Ruby and Sapphire Versions|Ruby}} | |||
! style="background:#{{sapphire color}}" | {{color2|fff|Pokémon Ruby and Sapphire Versions|Sapphire}} | |||
! style="background:#{{emerald color}}" | {{color2|fff|Pokémon Emerald Version|Emerald}} | |||
! style="background:#{{omega ruby color}}" | {{color2|fff|Pokémon Omega Ruby and Alpha Sapphire|Omega Ruby}} | |||
! style="background:#{{alpha sapphire color}}; {{roundytr|5px}}" | {{color2|fff|Pokémon Omega Ruby and Alpha Sapphire|Alpha Sapphire}} | |||
|- | |||
| colspan="2" | [[File:Petalburg Gym RS.png|180px]] | |||
| [[File:Petalburg Gym E.png|180px]] | |||
! colspan="2" | [[File:Petalburg Gym ORAS.png|180px]] | |||
|- | |||
| colspan="5" style="background:#{{normal color light}}; {{roundybottom|5px}}" | | |||
|} | |||
====Items==== | |||
{{itlisth|Normal}} | |||
{{Itemlist|TM Normal|Reward for defeating Norman|Ru=yes|Sa=yes|E=yes|display={{TM|42|Facade}}}} | |||
{{Itemlist|TM Normal VI|Reward for defeating Norman|OR=yes|AS=yes|display={{TM|67|Retaliate}}}} | |||
{{Itemlist||Gift from [[Wally]] after helping him to catch {{p|Ralts}}|OR=yes|AS=yes|display={{DL|PokéNav Plus|PlayNav}}|sprite=PlayNav icon}} | |||
{{itlistfoot|Normal}} | |||
====Trainers==== | |||
====={{game|Ruby and Sapphire|s}}===== | |||
{{trainerheader|Normal}} | |||
{{trainerdiv|Normal|Speed Room}} | |||
{{trainerentry|Spr RS Cooltrainer M.png|Cooltrainer|Randall|1296|1|301|Delcatty|♀|27|36=トシキ|37=Toshiki}} | |||
{{trainerdiv|Normal|Accuracy Room}} | |||
{{trainerentry|Spr RS Cooltrainer F.png|Cooltrainer|Mary|1296|1|301|Delcatty|♀|27|36=アヤカ|37=Ayaka}} | |||
{{trainerdiv|Normal|Zero Reduction Room}} | |||
{{trainerentry|Spr RS Cooltrainer M.png|Cooltrainer|Parker|1296|1|264|Linoone|♂|27|36=ヒデキ|37=Hideki}} | |||
{{trainerdiv|Normal|Defense Room}} | |||
{{trainerentry|Spr RS Cooltrainer F.png|Cooltrainer|Lori|1296|1|264|Linoone|♀|27|36=ヒトミ|37=Hitomi}} | |||
{{trainerdiv|Normal|Recovery Room}} | |||
{{trainerentry|Spr RS Cooltrainer M.png|Cooltrainer|George|1296|1|264|Linoone|♂|27|36=カズマ|37=Kazuma}} | |||
{{trainerdiv|Normal|Strength Room}} | |||
{{trainerentry|Spr RS Cooltrainer F.png|Cooltrainer|Jody|1296|1|335|Zangoose|♀|27|36=サオリ|37=Saori}} | |||
{{trainerdiv|Normal|One-Hit KO Room}} | |||
{{trainerentry|Spr RS Cooltrainer M.png|Cooltrainer|Berke|1296|1|335|Zangoose|♂|27|36=ナオキ|37=Naoki}} | |||
{{trainerfooter|Normal|3}} | |||
Norman uses two [[Hyper Potion]]s. | |||
{{Party/Single | |||
|color={{normal color}} | |||
|bordercolor={{normal color dark}} | |||
|headcolor={{normal color light}} | |||
|sprite=Spr RS Norman.png | |||
|prize={{PDollar}}3100 | |||
|class=Leader | |||
|classlink=Gym Leader | |||
|name={{color2|000|Norman}} | |||
|game=RS | |||
|location=Petalburg Gym | |||
|pokemon=3}} | |||
|{{Pokémon/3 | |||
|game=Ruby | |||
|ndex=289 | |||
|pokemon=Slaking | |||
|gender=male | |||
|ability=Truant | |||
|level=28 | |||
|type1=Normal | |||
|move1=Encore|move1type=Normal | |||
|move2=Facade|move2type=Normal | |||
|move3=Yawn|move3type=Normal | |||
|move4=Faint Attack|move4type=Dark}} | |||
|{{Pokémon/3 | |||
|game=Ruby | |||
|ndex=288 | |||
|pokemon=Vigoroth | |||
|gender=male | |||
|ability=Vital Spirit | |||
|level=30 | |||
|type1=Normal | |||
|move1=Slash|move1type=Normal | |||
|move2=Faint Attack|move2type=Dark | |||
|move3=Facade|move3type=Normal | |||
|move4=Encore|move4type=Normal}} | |||
|{{Pokémon/3 | |||
|game=Ruby | |||
|ndex=289 | |||
|pokemon=Slaking | |||
|gender=male | |||
|ability=Truant | |||
|level=31 | |||
|type1=Normal | |||
|move1=Focus Punch|move1type=Fighting | |||
|move2=Slack Off|move2type=Normal | |||
|move3=Facade|move3type=Normal | |||
|move4=Faint Attack|move4type=Dark}} | |||
{{Party/Footer}} | |||
====={{game|Emerald}}===== | |||
{{trainerheader|Normal}} | |||
{{trainerdiv|Normal|Speed Room}} | |||
{{trainerentry|Spr RS Cooltrainer M.png|Cooltrainer|Randall|1248|1|277|Swellow|♂|26|36=トシキ|37=Toshiki}} | |||
{{trainerdiv|Normal|Accuracy Room}} | |||
{{trainerentry|Spr RS Cooltrainer F.png|Cooltrainer|Mary|1248|1|301|Delcatty|♀|26|36=アヤカ|37=Ayaka}} | |||
{{trainerdiv|Normal|Confusion Room}} | |||
{{trainerentry|Spr RS Cooltrainer M.png|Cooltrainer|Parker|1248|1|327|Spinda|♂|26|36=ヒデキ|37=Hideki}} | |||
{{trainerdiv|Normal|Defense Room}} | |||
{{trainerentry|Spr RS Cooltrainer F.png|Cooltrainer|Alexia|1248|1|040|Wigglytuff|♀|26|36=ミハル|37=Miharu}} | |||
{{trainerdiv|Normal|Recovery Room}} | |||
{{trainerentry|Spr RS Cooltrainer M.png|Cooltrainer|George|1248|1|287|Slakoth|♂|26|Sitrus Berry|36=カズマ|37=Kazuma}} | |||
{{trainerdiv|Normal|Strength Room}} | |||
{{trainerentry|Spr RS Cooltrainer F.png|Cooltrainer|Jody|1248|1|335|Zangoose|♀|26|36=サオリ|37=Saori}} | |||
{{trainerdiv|Normal|One-Hit KO Room}} | |||
{{trainerentry|Spr RS Cooltrainer M.png|Cooltrainer|Berke|1248|1|288|Vigoroth|♂|26|36=ナオキ|37=Naoki}} | |||
{{trainerfooter|Normal|3}} | |||
Norman uses two [[Hyper Potion]]s in the Gym battle and three [[Full Restore]]s in the rematches. | |||
{{Party/Single | |||
|color={{normal color}} | |||
|headcolor={{normal color light}} | |||
|bordercolor={{normal color dark}} | |||
|sprite=Spr RS Norman.png | |||
|prize={{PDollar}}3100 | |||
|class=Leader | |||
|classlink=Gym Leader | |||
|name={{color2|000|Norman}} | |||
|game=E | |||
|location=Petalburg Gym | |||
|pokemon=4}} | |||
|{{Pokémon/3 | |||
|game=Emerald | |||
|ndex=327Norman1 | |||
|pokemon=Spinda | |||
|gender=male | |||
|ability=Own Tempo | |||
|level=27 | |||
|type1=Normal | |||
|move1=Teeter Dance|move1type=Normal | |||
|move2=Psybeam|move2type=Psychic | |||
|move3=Facade|move3type=Normal | |||
|move4=Encore|move4type=Normal}} | |||
|{{Pokémon/3 | |||
|game=Emerald | |||
|ndex=288 | |||
|pokemon=Vigoroth | |||
|gender=male | |||
|ability=Vital Spirit | |||
|level=27 | |||
|type1=Normal | |||
|move1=Slash|move1type=Normal | |||
|move2=Facade|move2type=Normal | |||
|move3=Encore|move3type=Normal | |||
|move4=Faint Attack|move4type=Dark}} | |||
{{Party/Div|color={{normal color}}}} | |||
|{{Pokémon/3 | |||
|game=Emerald | |||
|ndex=264 | |||
|pokemon=Linoone | |||
|gender=male | |||
|ability=Pickup | |||
|level=29 | |||
|type1=Normal | |||
|move1=Slash|move1type=Normal | |||
|move2=Belly Drum|move2type=Normal | |||
|move3=Facade|move3type=Normal | |||
|move4=Headbutt|move4type=Normal}} | |||
|{{Pokémon/3 | |||
|game=Emerald | |||
|ndex=289 | |||
|pokemon=Slaking | |||
|gender=male | |||
|ability=Truant | |||
|held=Sitrus Berry | |||
|level=31 | |||
|type1=Normal | |||
|move1=Counter|move1type=Fighting | |||
|move2=Yawn|move2type=Normal | |||
|move3=Facade|move3type=Normal | |||
|move4=Faint Attack|move4type=Dark}} | |||
{{Party/Footer}} | |||
======First [[rematch]]====== | |||
{{Party/Single | |||
|color={{normal color}} | |||
|headcolor={{normal color light}} | |||
|bordercolor={{normal color dark}} | |||
|sprite=Spr RS Norman.png | |||
|prize={{PDollar}}9000 | |||
|class=Leader | |||
|classlink=Gym Leader | |||
|name={{color2|000|Norman}} | |||
|game=E | |||
|location=Petalburg Gym | |||
|pokemon=4}} | |||
|{{Pokémon/3 | |||
|game=Emerald | |||
|ndex=113 | |||
|pokemon=Chansey | |||
|gender=female | |||
|ability=Natural Cure | |||
|level=42 | |||
|type1=Normal | |||
|move1=Light Screen|move1type=Psychic | |||
|move2=Sing|move2type=Normal | |||
|move3=Skill Swap|move3type=Psychic | |||
|move4=Focus Punch|move4type=Fighting}} | |||
|{{Pokémon/3 | |||
|game=Emerald | |||
|ndex=289 | |||
|pokemon=Slaking | |||
|gender=male | |||
|ability=Truant | |||
|held=Sitrus Berry | |||
|level=42 | |||
|type1=Normal | |||
|move1=Blizzard|move1type=Ice | |||
|move2=Shadow Ball|move2type=Ghost | |||
|move3=Double-Edge|move3type=Normal | |||
|move4=Fire Blast|move4type=Fire}} | |||
{{Party/Div|color={{normal color}}}} | |||
|{{Pokémon/3 | |||
|game=Emerald | |||
|ndex=327Norman2 | |||
|pokemon=Spinda | |||
|gender=male | |||
|ability=Own Tempo | |||
|level=43 | |||
|type1=Normal | |||
|move1=Teeter Dance|move1type=Normal | |||
|move2=Skill Swap|move2type=Psychic | |||
|move3=Facade|move3type=Normal | |||
|move4=Hypnosis|move4type=Psychic}} | |||
|{{Pokémon/3 | |||
|game=Emerald | |||
|ndex=289 | |||
|pokemon=Slaking | |||
|gender=male | |||
|ability=Truant | |||
|held=Sitrus Berry | |||
|level=45 | |||
|type1=Normal | |||
|move1=Hyper Beam|move1type=Normal | |||
|move2=Flamethrower|move2type=Fire | |||
|move3=Thunderbolt|move3type=Electric | |||
|move4=Shadow Ball|move4type=Ghost}} | |||
{{Party/Footer}} | |||
======Second rematch====== | |||
{{Party/Single | |||
|color={{normal color}} | |||
|headcolor={{normal color light}} | |||
|bordercolor={{normal color dark}} | |||
|sprite=Spr RS Norman.png | |||
|prize={{PDollar}}10000 | |||
|class=Leader | |||
|classlink=Gym Leader | |||
|name={{color2|000|Norman}} | |||
|game=E | |||
|location=Petalburg Gym | |||
|pokemon=5}} | |||
|{{Pokémon/3 | |||
|game=Emerald | |||
|ndex=289 | |||
|pokemon=Slaking | |||
|gender=male | |||
|ability=Truant | |||
|held=Sitrus Berry | |||
|level=47 | |||
|type1=Normal | |||
|move1=Blizzard|move1type=Ice | |||
|move2=Shadow Ball|move2type=Ghost | |||
|move3=Double-Edge|move3type=Normal | |||
|move4=Fire Blast|move4type=Fire}} | |||
|{{Pokémon/3 | |||
|game=Emerald | |||
|ndex=113 | |||
|pokemon=Chansey | |||
|gender=female | |||
|ability=Natural Cure | |||
|level=47 | |||
|type1=Normal | |||
|move1=Light Screen|move1type=Psychic | |||
|move2=Sing|move2type=Normal | |||
|move3=Skill Swap|move3type=Psychic | |||
|move4=Focus Punch|move4type=Fighting}} | |||
|{{Pokémon/3 | |||
|game=Emerald | |||
|ndex=115 | |||
|pokemon=Kangaskhan | |||
|gender=female | |||
|ability=Early Bird | |||
|level=45 | |||
|type1=Normal | |||
|move1=Fake Out|move1type=Normal | |||
|move2=Dizzy Punch|move2type=Normal | |||
|move3=Endure|move3type=Normal | |||
|move4=Reversal|move4type=Fighting}} | |||
{{Party/Div|color={{normal color}}}} | |||
| style="margin:auto" |{{Pokémon/3 | |||
|game=Emerald | |||
|ndex=327Norman3 | |||
|pokemon=Spinda | |||
|gender=male | |||
|ability=Own Tempo | |||
|level=48 | |||
|type1=Normal | |||
|move1=Teeter Dance|move1type=Normal | |||
|move2=Skill Swap|move2type=Psychic | |||
|move3=Facade|move3type=Normal | |||
|move4=Hypnosis|move4type=Psychic}} | |||
| style="margin:auto" |{{Pokémon/3 | |||
|game=Emerald | |||
|ndex=289 | |||
|pokemon=Slaking | |||
|gender=male | |||
|ability=Truant | |||
|held=Sitrus Berry | |||
|level=50 | |||
|type1=Normal | |||
|move1=Hyper Beam|move1type=Normal | |||
|move2=Flamethrower|move2type=Fire | |||
|move3=Thunderbolt|move3type=Electric | |||
|move4=Shadow Ball|move4type=Ghost}} | |||
{{Party/Footer}} | |||
======Third rematch====== | |||
{{Party/Single | |||
|color={{normal color}} | |||
|headcolor={{normal color light}} | |||
|bordercolor={{normal color dark}} | |||
|sprite=Spr RS Norman.png | |||
|prize={{PDollar}}11000 | |||
|class=Leader | |||
|classlink=Gym Leader | |||
|name={{color2|000|Norman}} | |||
|game=E | |||
|location=Petalburg Gym | |||
|pokemon=5}} | |||
|{{Pokémon/3 | |||
|game=Emerald | |||
|ndex=289 | |||
|pokemon=Slaking | |||
|gender=male | |||
|ability=Truant | |||
|held=Sitrus Berry | |||
|level=52 | |||
|type1=Normal | |||
|move1=Blizzard|move1type=Ice | |||
|move2=Shadow Ball|move2type=Ghost | |||
|move3=Double-Edge|move3type=Normal | |||
|move4=Fire Blast|move4type=Fire}} | |||
|{{Pokémon/3 | |||
|game=Emerald | |||
|ndex=242 | |||
|pokemon=Blissey | |||
|gender=female | |||
|ability=Natural Cure | |||
|level=52 | |||
|type1=Normal | |||
|move1=Light Screen|move1type=Psychic | |||
|move2=Sing|move2type=Normal | |||
|move3=Skill Swap|move3type=Psychic | |||
|move4=Focus Punch|move4type=Fighting}} | |||
|{{Pokémon/3 | |||
|game=Emerald | |||
|ndex=115 | |||
|pokemon=Kangaskhan | |||
|gender=female | |||
|ability=Early Bird | |||
|level=50 | |||
|type1=Normal | |||
|move1=Fake Out|move1type=Normal | |||
|move2=Dizzy Punch|move2type=Normal | |||
|move3=Endure|move3type=Normal | |||
|move4=Reversal|move4type=Fighting}} | |||
{{Party/Div|color={{normal color}}}} | |||
| style="margin:auto" |{{Pokémon/3 | |||
|game=Emerald | |||
|ndex=327Norman4 | |||
|pokemon=Spinda | |||
|gender=male | |||
|ability=Own Tempo | |||
|level=53 | |||
|type1=Normal | |||
|move1=Teeter Dance|move1type=Normal | |||
|move2=Skill Swap|move2type=Psychic | |||
|move3=Facade|move3type=Normal | |||
|move4=Hypnosis|move4type=Psychic}} | |||
| style="margin:auto" |{{Pokémon/3 | |||
|game=Emerald | |||
|ndex=289 | |||
|pokemon=Slaking | |||
|gender=male | |||
|ability=Truant | |||
|held=Sitrus Berry | |||
|level=55 | |||
|type1=Normal | |||
|move1=Hyper Beam|move1type=Normal | |||
|move2=Flamethrower|move2type=Fire | |||
|move3=Thunderbolt|move3type=Electric | |||
|move4=Shadow Ball|move4type=Ghost}} | |||
{{Party/Footer}} | |||
======Fourth rematch onwards====== | |||
{{Party/Single | |||
|color={{normal color}} | |||
|headcolor={{normal color light}} | |||
|bordercolor={{normal color dark}} | |||
|sprite=Spr RS Norman.png | |||
|prize={{PDollar}}12000 | |||
|class=Leader | |||
|classlink=Gym Leader | |||
|name={{color2|000|Norman}} | |||
|game=E | |||
|location=Petalburg Gym | |||
|pokemon=6}} | |||
|{{Pokémon/3 | |||
|game=Emerald | |||
|ndex=289 | |||
|pokemon=Slaking | |||
|gender=male | |||
|ability=Truant | |||
|held=Sitrus Berry | |||
|level=57 | |||
|type1=Normal | |||
|move1=Blizzard|move1type=Ice | |||
|move2=Shadow Ball|move2type=Ghost | |||
|move3=Double-Edge|move3type=Normal | |||
|move4=Fire Blast|move4type=Fire}} | |||
|{{Pokémon/3 | |||
|game=Emerald | |||
|ndex=242 | |||
|pokemon=Blissey | |||
|gender=female | |||
|ability=Natural Cure | |||
|level=57 | |||
|type1=Normal | |||
|move1=Protect|move1type=Normal | |||
|move2=Sing|move2type=Normal | |||
|move3=Skill Swap|move3type=Psychic | |||
|move4=Focus Punch|move4type=Fighting}} | |||
|{{Pokémon/3 | |||
|game=Emerald | |||
|ndex=115 | |||
|pokemon=Kangaskhan | |||
|gender=female | |||
|ability=Early Bird | |||
|level=55 | |||
|type1=Normal | |||
|move1=Fake Out|move1type=Normal | |||
|move2=Dizzy Punch|move2type=Normal | |||
|move3=Endure|move3type=Normal | |||
|move4=Reversal|move4type=Fighting}} | |||
{{Party/Div|color={{normal color}}}} | |||
|{{Pokémon/3 | |||
|game=Emerald | |||
|ndex=128 | |||
|pokemon=Tauros | |||
|gender=male | |||
|ability=Intimidate | |||
|level=57 | |||
|type1=Normal | |||
|move1=Take Down|move1type=Normal | |||
|move2=Protect|move2type=Normal | |||
|move3=Fire Blast|move3type=Fire | |||
|move4=Earthquake|move4type=Ground}} | |||
|{{Pokémon/3 | |||
|game=Emerald | |||
|ndex=327Norman5 | |||
|pokemon=Spinda | |||
|gender=male | |||
|ability=Own Tempo | |||
|level=58 | |||
|type1=Normal | |||
|move1=Teeter Dance|move1type=Normal | |||
|move2=Skill Swap|move2type=Psychic | |||
|move3=Facade|move3type=Normal | |||
|move4=Hypnosis|move4type=Psychic}} | |||
|{{Pokémon/3 | |||
|game=Emerald | |||
|ndex=289 | |||
|pokemon=Slaking | |||
|gender=male | |||
|ability=Truant | |||
|held=Sitrus Berry | |||
|level=60 | |||
|type1=Normal | |||
|move1=Hyper Beam|move1type=Normal | |||
|move2=Flamethrower|move2type=Fire | |||
|move3=Thunderbolt|move3type=Electric | |||
|move4=Shadow Ball|move4type=Ghost}} | |||
{{Party/Footer}} | |||
====={{g|Omega Ruby and Alpha Sapphire}}===== | |||
{{trainerheader|Normal}} | |||
{{trainerdiv|Normal|Speed Room}} | |||
{{trainerentry|VSAce Trainer M ORAS.png{{!}}150px|game=6|Ace Trainer|Randall|1,680|1|301|Delcatty|♀|28|36=トシキ|37=Toshiki}} | |||
{{trainerdiv|Normal|Accuracy Room}} | |||
{{trainerentry|VSAce Trainer F ORAS.png{{!}}150px|game=6|Ace Trainer|Mary|1,680|1|301|Delcatty|♀|28|36=アヤカ|37=Ayaka}} | |||
{{trainerdiv|Normal|Zero Reduction Room}} | |||
{{trainerentry|VSAce Trainer M ORAS.png{{!}}150px|game=6|Ace Trainer|Parker|1,680|1|264|Linoone|♂|28|36=ヒデキ|37=Hideki}} | |||
{{trainerdiv|Normal|Defense Room}} | |||
{{trainerentry|VSAce Trainer F ORAS.png{{!}}150px|game=6|Ace Trainer|Lori|1,680|1|264|Linoone|♀|28|36=ヒトミ|37=Hitomi}} | |||
{{trainerdiv|Normal|Recovery Room}} | |||
{{trainerentry|VSAce Trainer M ORAS.png{{!}}150px|game=6|Ace Trainer|George|1,680|1|264|Linoone|♂|28|36=カズマ|37=Kazuma}} | |||
{{trainerdiv|Normal|Strength Room}} | |||
{{trainerentry|VSAce Trainer F ORAS.png{{!}}150px|game=6|Ace Trainer|Jody|1,680|1|335|Zangoose|♀|28|36=サオリ|37=Saori}} | |||
{{trainerdiv|Normal|One-Hit KO Room}} | |||
{{trainerentry|VSAce Trainer M ORAS.png{{!}}150px|game=6|Ace Trainer|Berke|1,680|1|335|Zangoose|♂|28|36=ナオキ|37=Naoki}} | |||
{{trainerfooter|Normal|3}} | |||
{{Party/Single | |||
|color={{normal color}} | |||
|bordercolor={{normal color dark}} | |||
|headcolor={{normal color light}} | |||
|sprite=VSNorman.png | |||
|size=150px | |||
|prize={{PDollar}}3,600 | |||
|class=Leader | |||
|classlink=Gym Leader | |||
|name={{color2|000|Norman}} | |||
|game=ORAS | |||
|location=Petalburg Gym | |||
|pokemon=3}} | |||
|{{Pokémon/6 | |||
|game=Ruby | |||
|ndex=289 | |||
|pokemon=Slaking | |||
|gender=male | |||
|ability=Truant | |||
|level=28 | |||
|type1=Normal | |||
|move1=Retaliate|move1type=Normal|move1cat=Physical | |||
|move2=Yawn|move2type=Normal|move2cat=Status | |||
|move3=Feint Attack|move3type=Dark|move3cat=Physical | |||
|move4=Encore|move4type=Normal|move4cat=Status}} | |||
|{{Pokémon/6 | |||
|game=Ruby | |||
|ndex=288 | |||
|pokemon=Vigoroth | |||
|gender=male | |||
|ability=Vital Spirit | |||
|level=28 | |||
|type1=Normal | |||
|move1=Encore|move1type=Normal|move1cat=Status | |||
|move2=Feint Attack|move2type=Dark|move2cat=Physical | |||
|move3=Retaliate|move3type=Normal|move3cat=Physical | |||
|move4=Fury Swipes|move4type=Normal|move4cat=Physical}} | |||
|{{Pokémon/6 | |||
|game=Ruby | |||
|ndex=289 | |||
|pokemon=Slaking | |||
|gender=male | |||
|ability=Truant | |||
|level=30 | |||
|type1=Normal | |||
|move1=Retaliate|move1type=Normal|move1cat=Physical | |||
|move2=Feint Attack|move2type=Dark|move2cat=Physical | |||
|move3=Swagger|move3type=Normal|move3cat=Status | |||
|move4=Chip Away|move4type=Normal|move4cat=Physical}} | |||
{{Party/Footer}} | |||
===Spin-off games=== | |||
====[[Pokémon Masters EX]]==== | |||
Artwork depicting the Petalburg Gym is seen in {{mas|Norman}}'s mindscape. | |||
{| style="margin:auto; text-align:center;background: #7B30B2; {{roundy}}; border: #7B30B2;" | |||
| | |||
{| style="background: #AB60E2; {{roundy}}; border: #AB60E2;" | |||
|- style="text-align:center" | |||
| | |||
{| style="background: #{{normal color light}}; {{roundy}}; border: #{{normal color light}}; padding: 0px 5px 5px 5px" | |||
|- | |||
|<big>'''{{color2|000|Norman (Masters)#Slaking|Norman & Slaking}}'''</big> | |||
|- | |||
| [[File:Norman Mindscape.png|200px]] | |||
|} | |||
|} | |||
|} | |||
==In the anime== | ==In the anime== | ||
The Petalburg Gym | [[File:Petalburg Gym anime.png|thumb|250px|left|Petalburg Gym in the {{pkmn|anime}}]] | ||
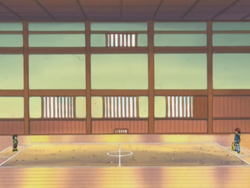
[[File:Petalburg Gym Battlefield.png|thumb|250px|Petalburg Gym's battlefield in the anime]] | |||
The Petalburg Gym first appeared in ''[[AG003|There's no Place Like Hoenn]]'', where {{Ash}} and {{an|May}} reached the facility, with Ash intending to battle [[Norman]] and win his first [[Hoenn League]] [[Badge]]. However, when Norman learned that Ash only had {{AP|Pikachu}} with him, he declined the Gym battle, as challengers needed three Pokémon to have an official battle. He did agree to an unofficial battle, which Ash lost. It was also at the Petalburg Gym where Ash first met May's younger brother [[Max]], who joined him and May on their {{pkmn|journey}}. | |||
The Gym's next major appearance came in ''[[AG069|Love, Petalburg Style]]'', when Ash and {{ashfr}} returned to [[Petalburg City]]. In ''[[AG070|Balance of Power!]]'', Ash had his official Gym battle against Norman. This time, with the help of his {{AP|Grovyle}} and {{AP|Torkoal}}, Ash defeated the Gym Leader and earned the {{Badge|Balance}}. | |||
In addition to housing the battlefield, the Gym is also home to Norman, his family, and the Gym assistant {{ho|Kenny}}. A greenhouse is also on the Gym's property. The various {{type|Normal}} Pokémon at the Gym are housed in the greenhouse when they're not battling. May also left her {{TP|May|Beautifly}} and {{TP|May|Skitty}} at the Gym before heading to the [[Kanto]] [[region]] in ''[[AG133|The Right Place and the Right Mime]]''. | |||
It is Max's dream to one day succeed his father as Gym Leader, and he approaches this goal through learning battling strategies. | |||
{{-}} | |||
===Gallery=== | |||
{| style="margin:auto; text-align:center; background: #{{normal color}}; {{roundy}}; border: 3px solid #{{normal color dark}}" | |||
|- style="background:#{{normal color}}" | |||
! style="{{roundytl|5px}}{{roundytr|5px}}" | Greenhouse | |||
|- style="background:#fff" | |||
| [[File:Petalburg Gym greenhouse.png|x200px]] | |||
|} | |||
===Pokémon used in the Gym=== | |||
{{TrainerPoké | |||
|trainer=Norman | |||
|pkmn=Vigoroth | |||
|type1=Normal | |||
|img=Norman Vigoroth.png | |||
|epnum=AG003 | |||
|epname=There's no Place Like Hoenn | |||
|vajp=Yūji Ueda | |||
|vaen=Dan Green | |||
|desc={{p|Vigoroth}} was first seen after [[Norman]] agreed to have an unofficial {{pkmn|battle}} with {{Ash}} because he had less than three Pokémon at the time. After a tough battle with [[Ash's Pikachu]], Vigoroth managed to defeat him. Later, it helped in destroying one of [[Team Rocket's mechas]] that was attacking the Gym. | |||
== | In ''[[AG070|Balance of Power]]'', Vigoroth was the second Pokémon used by Norman in his official [[Gym]] battle with Ash. It managed to easily defeat {{AP|Torkoal}} before once again facing Pikachu. This time, Pikachu was able to defeat Vigoroth, but ended up exhausting all of his own energy as well in the process, resulting in a double knockout. | ||
{{ | |||
{{ | Vigoroth's known moves are {{m|Scratch}} and {{m|Flamethrower}}.}} | ||
{{ | |||
{{ | {{TrainerPoké | ||
{{ | |trainer=Norman | ||
|pkmn=Slakoth | |||
|type1=Normal | |||
|img=Norman Slakoth.png | |||
|epnum=AG069 | |||
|epname=Love, Petalburg Style! | |||
|vajp=Shin-ichiro Miki | |||
<!--|vaen=--> | |||
|desc={{p|Slakoth}} first appeared in the greenhouse where [[Norman]] keeps his Pokémon. It appeared again in ''[[AG070|Balance of Power!]]'', during Norman's [[Gym]] {{pkmn|battle}} with {{Ash}}. It first went up against {{AP|Pikachu}}, but when Pikachu's strategies failed to work, Ash switched him out for {{AP|Torkoal}}, who was able to defeat its opponent. | |||
Slakoth's known moves are {{m|Shadow Ball}}, {{m|Hidden Power}}, and {{m|Blizzard}}.}} | |||
{{TrainerPoké | |||
|main=yes | |||
|trainer=Norman | |||
|pkmn=Slaking | |||
|type1=Normal | |||
|img=Norman Slaking.png | |||
|epnum=AG069 | |||
|epname=Love, Petalburg Style! | |||
|vajp=Unshō Ishizuka | |||
|vaen=Dan Green | |||
|desc={{p|Slaking}} debuted in [[Norman]]'s greenhouse with the rest of his Pokémon. In ''[[AG070|Balance of Power!]]'', it battled {{AP|Grovyle}} during {{Ash}}'s [[Gym]] battle against Norman, but was ultimately defeated.}} | |||
==In the manga== | |||
[[File:Petalburg Gym Adventures.png|thumb|left|250px|Petalburg Gym in [[Pokémon Adventures]]]] | |||
[[File:Petalburg Gym PMRS.png|thumb|200px|Petalburg Gym in [[Pokémon Pocket Monsters]]]] | |||
===Pokémon Adventures=== | |||
===={{MangaArc|Ruby & Sapphire}}==== | |||
The Petalburg Gym appeared in ''[[PS184|Distracting Dustox]]'', where {{adv|Ruby}}'s {{ho|Mom|mother}} called [[Norman]] to inform him that their son had run away from home. Hearing this, Norman decided to find his son himself. | |||
===Pokémon Pocket Monsters=== | |||
The Petalburg Gym appeared in ''[[PMRS04|There's Someone More Important Than Clefairy?!]]''. {{PPM|Red}} and {{TP|Red|Clefairy}} visited it after seeing a {{i|Poké Ball}} flying out of there, and found Norman, who was feeling down due to his {{badge|Balance}} having gotten stuck inside his {{p|Slakoth}}. Clefairy managed to retrieve it, but then refused to return it to Norman, much to his anger. | |||
{{-}} | |||
== | ==Trivia== | ||
{{ | * The Petalburg Gym is similar to [[Kanto]]'s [[Viridian Gym]], in the sense that it was the first Gym the {{player}} can reach, but cannot be challenged until the player has collected a certain amount of [[Badge]]s. | ||
** Also, both cities housing said Gyms, Petalburg City and [[Viridian City]], are followed by a route ({{rt|104|Hoenn}} and {{rt|2|Kanto}}) split into sections by the regional forests of [[Petalburg Woods]] and [[Viridian Forest]], respectively, and leading to the first Gym, the [[Rustboro Gym]] and [[Pewter Gym]], which are also both {{type|Rock}} facilities that the player can challenge. | |||
{{ | * Due to the structure of the Gym, the Petalburg Gym is the only Gym in {{game|Emerald}} where the player cannot face a pair of {{pkmn|Trainer}}s in a [[Double Battle]]. | ||
{{ | |||
{{ | |||
| | |||
{{ | |||
{{-}} | |||
{{ | {{Gym Leaders of Hoenn}}<br/> | ||
{{Project Locations notice}} | |||
{{ | |||
[[Category:Hoenn Gyms]] | |||
[[Category:Gyms]] | [[Category:Gyms]] | ||
[[de:Pokémon-Arena von Blütenburg City]] | [[de:Pokémon-Arena von Blütenburg City]] | ||
[[es:Gimnasio Pokémon de Ciudad Petalia]] | |||
[[fr:Arène de Clémenti-Ville]] | |||
[[it:Palestra di Petalipoli]] | |||
[[ja:トウカジム]] | [[ja:トウカジム]] | ||
[[zh:橙華道館]] | |||
Latest revision as of 02:25, 19 April 2024
| Petalburg Gym トウカジム Touka Gym | |
| |
| Location | Petalburg City |
| Gym Leader | Norman |
| Badge | Balance Badge |
| Dominant Type | Normal |
| Region | Hoenn |
| |
| Battlefield | |
The Petalburg Gym (Japanese: トウカジム Touka Gym) is the official Gym of Petalburg City. It is based on Normal-type Pokémon. The Gym Leader is Norman. Trainers who defeat him receive the Balance Badge.
In the games
Core series
Between the entrance and Gym Leader Norman are a series of rooms, each containing a Trainer. In order to access these rooms, all of the first four Badges must be obtained first; otherwise, the doors will be locked. The Trainers have special methods of battling, as displayed on the doors leading to their rooms. They include the One-Hit KO Room, Accuracy Room, Attack Room, Defense Room, Speed Room, Recovery Room and either Zero Reduction RoomRSORAS or Confusion RoomE. Once three rooms in a row are completed, they can access the Gym Leader Room with Norman. In Pokémon Ruby and Sapphire and Pokémon Omega Ruby and Alpha Sapphire, all seven Trainers in their respective rooms use items in the battle, whereas in Pokémon Emerald, the strategy of these Trainers is dependent on the moves of their Pokémon.
When defeated, Norman will give the player the Balance Badge as well as TM42 (Facade)RSE or TM67 (Retaliate)ORAS as a reward. Also, in Pokémon Emerald, Wally's father will then enter Norman's room and lead the player to Wally's house.
After the player enters the Hall of Fame, the Gym's guide disappears, and Norman appears at the first room of the Gym like he did earlier in the game. In Pokémon Emerald, Norman will return to the furthest room back if he is ready to rebattle the player.
Appearance
Interior
| Ruby | Sapphire | Emerald | Omega Ruby | Alpha Sapphire |
|---|---|---|---|---|
|

|
| ||
Items
| Item | Location | Games | |
|---|---|---|---|
| TM42 (Facade) | Reward for defeating Norman | R S E | |
| TM67 (Retaliate) | Reward for defeating Norman | OR AS | |
| PlayNav | Gift from Wally after helping him to catch Ralts | OR AS | |
Trainers
Pokémon Ruby and Sapphire
| Trainer | Pokémon | |||||||||||
|---|---|---|---|---|---|---|---|---|---|---|---|---|
| Speed Room | ||||||||||||
|
| |||||||||||
| Accuracy Room | ||||||||||||
|
| |||||||||||
| Zero Reduction Room | ||||||||||||
|
| |||||||||||
| Defense Room | ||||||||||||
|
| |||||||||||
| Recovery Room | ||||||||||||
|
| |||||||||||
| Strength Room | ||||||||||||
|
| |||||||||||
| One-Hit KO Room | ||||||||||||
|
| |||||||||||
| Trainers with a PokéNav by their names will be registered in the Trainer's Eyes or Match Call function after the first battle, and may have a rematch with the player with higher-level Pokémon. | ||||||||||||
Norman uses two Hyper Potions.
|
||||||||||||||||||||||||||||||||||||||||||||||||||||||||||||||||||||||||||||
| ||||||||||||||||||||||||||||||||||||||||||||||||||||||||||||||||||||||||||||
Pokémon Emerald
| Trainer | Pokémon | |||||||||||
|---|---|---|---|---|---|---|---|---|---|---|---|---|
| Speed Room | ||||||||||||
|
| |||||||||||
| Accuracy Room | ||||||||||||
|
| |||||||||||
| Confusion Room | ||||||||||||
|
| |||||||||||
| Defense Room | ||||||||||||
|
| |||||||||||
| Recovery Room | ||||||||||||
|
| |||||||||||
| Strength Room | ||||||||||||
|
| |||||||||||
| One-Hit KO Room | ||||||||||||
|
| |||||||||||
| Trainers with a PokéNav by their names will be registered in the Trainer's Eyes or Match Call function after the first battle, and may have a rematch with the player with higher-level Pokémon. | ||||||||||||
Norman uses two Hyper Potions in the Gym battle and three Full Restores in the rematches.
|
|||||||||||||||||||||||||||||||||||||||||||||||||||||||||||||||||||||||||||||||||||||||||||||||||||||
| |||||||||||||||||||||||||||||||||||||||||||||||||||||||||||||||||||||||||||||||||||||||||||||||||||||
First rematch
|
|||||||||||||||||||||||||||||||||||||||||||||||||||||||||||||||||||||||||||||||||||||||||||||||||||||
| |||||||||||||||||||||||||||||||||||||||||||||||||||||||||||||||||||||||||||||||||||||||||||||||||||||
Second rematch
|
||||||||||||||||||||||||||||||||||||||||||||||||||||||||||||||||||||||||||||||||||||||||||||||||||||||||||||||||||||||||||||||
| ||||||||||||||||||||||||||||||||||||||||||||||||||||||||||||||||||||||||||||||||||||||||||||||||||||||||||||||||||||||||||||||
Third rematch
|
||||||||||||||||||||||||||||||||||||||||||||||||||||||||||||||||||||||||||||||||||||||||||||||||||||||||||||||||||||||||||||||
| ||||||||||||||||||||||||||||||||||||||||||||||||||||||||||||||||||||||||||||||||||||||||||||||||||||||||||||||||||||||||||||||
Fourth rematch onwards
|
|||||||||||||||||||||||||||||||||||||||||||||||||||||||||||||||||||||||||||||||||||||||||||||||||||||||||||||||||||||||||||||||||||||||||||||||||||||||
| |||||||||||||||||||||||||||||||||||||||||||||||||||||||||||||||||||||||||||||||||||||||||||||||||||||||||||||||||||||||||||||||||||||||||||||||||||||||
Pokémon Omega Ruby and Alpha Sapphire
| Trainer | Pokémon | |||||||||||
|---|---|---|---|---|---|---|---|---|---|---|---|---|
| Speed Room | ||||||||||||
|
| |||||||||||
| Accuracy Room | ||||||||||||
|
| |||||||||||
| Zero Reduction Room | ||||||||||||
|
| |||||||||||
| Defense Room | ||||||||||||
|
| |||||||||||
| Recovery Room | ||||||||||||
|
| |||||||||||
| Strength Room | ||||||||||||
|
| |||||||||||
| One-Hit KO Room | ||||||||||||
|
| |||||||||||
| Trainers with a PokéNav by their names will be registered in the Trainer's Eyes or Match Call function after the first battle, and may have a rematch with the player with higher-level Pokémon. | ||||||||||||
|
||||||||||||||||||||||||||||||||||||||||||||||||||||||||||||||||||||||||||||||||||||||||||||||||||||
| ||||||||||||||||||||||||||||||||||||||||||||||||||||||||||||||||||||||||||||||||||||||||||||||||||||
Spin-off games
Pokémon Masters EX
Artwork depicting the Petalburg Gym is seen in Norman's mindscape.
|
In the anime

The Petalburg Gym first appeared in There's no Place Like Hoenn, where Ash and May reached the facility, with Ash intending to battle Norman and win his first Hoenn League Badge. However, when Norman learned that Ash only had Pikachu with him, he declined the Gym battle, as challengers needed three Pokémon to have an official battle. He did agree to an unofficial battle, which Ash lost. It was also at the Petalburg Gym where Ash first met May's younger brother Max, who joined him and May on their journey.
The Gym's next major appearance came in Love, Petalburg Style, when Ash and his friends returned to Petalburg City. In Balance of Power!, Ash had his official Gym battle against Norman. This time, with the help of his Grovyle and Torkoal, Ash defeated the Gym Leader and earned the Balance Badge.
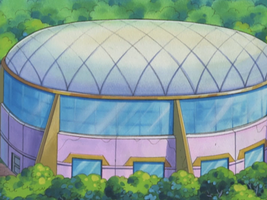
In addition to housing the battlefield, the Gym is also home to Norman, his family, and the Gym assistant Kenny. A greenhouse is also on the Gym's property. The various Normal-type Pokémon at the Gym are housed in the greenhouse when they're not battling. May also left her Beautifly and Skitty at the Gym before heading to the Kanto region in The Right Place and the Right Mime.
It is Max's dream to one day succeed his father as Gym Leader, and he approaches this goal through learning battling strategies.
Gallery
| Greenhouse |
|---|
|
Pokémon used in the Gym

|
||
| Vigoroth was first seen after Norman agreed to have an unofficial battle with Ash because he had less than three Pokémon at the time. After a tough battle with Ash's Pikachu, Vigoroth managed to defeat him. Later, it helped in destroying one of Team Rocket's mechas that was attacking the Gym.
In Balance of Power, Vigoroth was the second Pokémon used by Norman in his official Gym battle with Ash. It managed to easily defeat Torkoal before once again facing Pikachu. This time, Pikachu was able to defeat Vigoroth, but ended up exhausting all of his own energy as well in the process, resulting in a double knockout. Vigoroth's known moves are Scratch and Flamethrower. | ||
| Debut | There's no Place Like Hoenn | |
|---|---|---|
| Voice actors | ||
| Japanese | Yūji Ueda | |
| English | Dan Green | |

|
||
| Slakoth first appeared in the greenhouse where Norman keeps his Pokémon. It appeared again in Balance of Power!, during Norman's Gym battle with Ash. It first went up against Pikachu, but when Pikachu's strategies failed to work, Ash switched him out for Torkoal, who was able to defeat its opponent.
Slakoth's known moves are Shadow Ball, Hidden Power, and Blizzard. | ||
| Debut | Love, Petalburg Style! | |
|---|---|---|
| Voice actors | ||
| Japanese | Shin-ichiro Miki | |
|
||
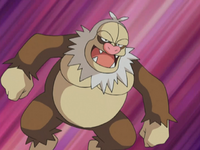
Slaking debuted in Norman's greenhouse with the rest of his Pokémon. In Balance of Power!, it battled Grovyle during Ash's Gym battle against Norman, but was ultimately defeated. | ||
| Debut | Love, Petalburg Style! | |
|---|---|---|
| Voice actors | ||
| Japanese | Unshō Ishizuka | |
| English | Dan Green | |
In the manga


Pokémon Adventures
Ruby & Sapphire arc
The Petalburg Gym appeared in Distracting Dustox, where Ruby's mother called Norman to inform him that their son had run away from home. Hearing this, Norman decided to find his son himself.
Pokémon Pocket Monsters
The Petalburg Gym appeared in There's Someone More Important Than Clefairy?!. Red and Clefairy visited it after seeing a Poké Ball flying out of there, and found Norman, who was feeling down due to his Balance Badge having gotten stuck inside his Slakoth. Clefairy managed to retrieve it, but then refused to return it to Norman, much to his anger.
Trivia
- The Petalburg Gym is similar to Kanto's Viridian Gym, in the sense that it was the first Gym the player can reach, but cannot be challenged until the player has collected a certain amount of Badges.
- Also, both cities housing said Gyms, Petalburg City and Viridian City, are followed by a route (Route 104 and Route 2) split into sections by the regional forests of Petalburg Woods and Viridian Forest, respectively, and leading to the first Gym, the Rustboro Gym and Pewter Gym, which are also both Rock-type facilities that the player can challenge.
- Due to the structure of the Gym, the Petalburg Gym is the only Gym in Pokémon Emerald where the player cannot face a pair of Trainers in a Double Battle.

|
This article is part of Project Locations, a Bulbapedia project that aims to write comprehensive articles on every location in the Pokémon world. |
