|
|
| (12 intermediate revisions by 10 users not shown) |
| Line 18: |
Line 18: |
|
| |
|
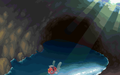
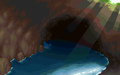
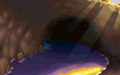
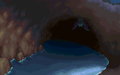
| ===The Karate King=== | | ===The Karate King=== |
| The Karate King, [[Kiyo]], is the leader of the [[Fighting Dojo]] in [[Saffron City]]. In {{3v2|Gold|Silver|Crystal}}, he has gone to Mt. Mortar to train. In order to find him, the player must use the center entrance which offers access to water, then {{m|Surf}} ahead and climb a {{m|Waterfall}}. Then they must make their way to the bottom of the cave, where they will eventually find him waiting to be challenged. Kiyo uses a {{p|Hitmonchan}} and a {{p|Hitmonlee}}, and once they are defeated, he will give the player a {{p|Tyrogue}} as a reward. However, if the player does not have an empty slot in their party, Kiyo will tell them to make room for it, then come back. | | The Karate King, [[Kiyo]], is the leader of the [[Fighting Dojo]] in [[Saffron City]]. In {{3v2|Gold|Silver|Crystal}}, he has gone to Mt. Mortar to train. In order to find him, the player must use the center entrance which offers access to water, then {{m|Surf}} ahead and climb a {{OBP|waterfall|obstacle}}. Then they must make their way to the bottom of the cave, where they will eventually find him waiting to be challenged. Kiyo uses a {{p|Hitmonchan}} and a {{p|Hitmonlee}}, and once they are defeated, he will give the player a {{p|Tyrogue}} as a reward. However, if the player does not have an empty slot in their party, Kiyo will tell them to make room for it, then come back. |
|
| |
|
| ==Items== | | ==Items== |
| Line 27: |
Line 27: |
| {{Itemlist|Guard Spec.|East side, accessible from the southeastern ladder from 1F (back)|G=yes|S=yes}} | | {{Itemlist|Guard Spec.|East side, accessible from the southeastern ladder from 1F (back)|G=yes|S=yes}} |
| {{Itemlist|Revive|East side, accessible from the southeastern ladder from 1F (back)|C=yes|HG=yes|SS=yes}} | | {{Itemlist|Revive|East side, accessible from the southeastern ladder from 1F (back)|C=yes|HG=yes|SS=yes}} |
| {{Itemlist|Hyper Potion|East side, on a rock west of the entrance to 1F (back)''(hidden)''|G=yes|S=yes|C=yes}} | | {{Itemlist|Hyper Potion|East side, on a rock west of the entrance to 1F (back) ''(hidden)''|G=yes|S=yes|C=yes}} |
| {{Itemlist|Revive|East side, north of the upper exit to Route 42 (requires {{m|Rock Climb}}) ''(hidden)''|HG=yes|SS=yes}} | | {{Itemlist|Revive|East side, north of the upper exit to Route 42 (requires {{m|Rock Climb}}) ''(hidden)''|HG=yes|SS=yes}} |
| {{itlistfoot|mountain}} | | {{itlistfoot|mountain}} |
| Line 39: |
Line 39: |
| {{Itemlist|Nugget|Central area, northeast of the central platform (requires {{m|Strength}})|C=yes}} | | {{Itemlist|Nugget|Central area, northeast of the central platform (requires {{m|Strength}})|C=yes}} |
| {{Itemlist|Escape Rope|Central area, southeast of the central platform, at the bottom of a series of ledges (requires {{m|Strength}})|C=yes}} | | {{Itemlist|Escape Rope|Central area, southeast of the central platform, at the bottom of a series of ledges (requires {{m|Strength}})|C=yes}} |
| {{Itemlist|Max Repel|Central area, in the crater just north of the movable boulder (requires {{m|Strength}} ''(hidden)''|HG=yes|SS=yes}} | | {{Itemlist|Max Repel|Central area, in the crater just north of the movable boulder (requires {{m|Strength}}) ''(hidden)''|HG=yes|SS=yes}} |
| {{Itemlist|Ultra Ball|Central area, atop the western platform (requires {{m|Strength}})|HG=yes|SS=yes|display=[[Ultra Ball]]}} | | {{Itemlist|Ultra Ball|Central area, atop the western platform (requires {{m|Strength}})|HG=yes|SS=yes|display=[[Ultra Ball]]}} |
| {{Itemlist|Max Potion|Central area, north of the central platform, just below the raised path (requires {{m|Strength}})|HG=yes|SS=yes}} | | {{Itemlist|Max Potion|Central area, north of the central platform, just below the raised path (requires {{m|Strength}})|HG=yes|SS=yes}} |
| {{Itemlist|Escape Rope|Central area, east of the central platform, at the southern end of the raised path (requires {{m|Strength}})|HG=yes|SS=yes}} | | {{Itemlist|Escape Rope|Central area, east of the central platform, at the southern end of the raised path (requires {{m|Strength}})|HG=yes|SS=yes}} |
| {{Itemlist|Nugget|Central area, atop the northeastern platform (requires {{m|Strength}})|HG=yes|SS=yes}} | | {{Itemlist|Nugget|Central area, atop the northeastern platform (requires {{m|Strength}})|HG=yes|SS=yes}} |
| {{Itemlist|Max Repel|Northern area, on a rock in the eastern corner''(hidden)'' (requires {{m|Surf}} and {{m|Waterfall}})|G=yes|S=yes|C=yes}} | | {{Itemlist|Max Repel|Northern area, on a rock in the eastern corner (requires {{m|Surf}} and {{m|Waterfall}}) ''(hidden)''|G=yes|S=yes|C=yes}} |
| {{Itemlist|Max Revive|Northern area, in the indent east of the ladder from 2F (requires {{m|Surf}} and {{m|Waterfall}})|G=yes|S=yes|C=yes}} | | {{Itemlist|Max Revive|Northern area, in the indent east of the ladder from 2F (requires {{m|Surf}} and {{m|Waterfall}})|G=yes|S=yes|C=yes}} |
| {{Itemlist|Max Potion|Northern area, at the southwestern end of the path in the eastern corner (requires {{m|Surf}} and {{m|Waterfall}})|C=yes}} | | {{Itemlist|Max Potion|Northern area, at the southwestern end of the path in the eastern corner (requires {{m|Surf}} and {{m|Waterfall}})|C=yes}} |
| Line 98: |
Line 98: |
| ====1F (entrance)==== | | ====1F (entrance)==== |
| {{Catch/header|mountain}} | | {{Catch/header|mountain}} |
| {{Catch/entry2|019|Rattata|yes|yes|no|Cave|14-16|all=14%|type1=Normal}} | | {{Catch/entry2|019|Rattata|yes|yes|no|Cave|14,16|all=14%|type1=Normal}} |
| {{Catch/entry2|019|Rattata|no|no|yes|Cave|14|all=30%|type1=Normal}} | | {{Catch/entry2|019|Rattata|no|no|yes|Cave|14|all=30%|type1=Normal}} |
| {{Catch/entry2|020|Raticate|no|no|yes|Cave|16|all=5%|type1=Normal}} | | {{Catch/entry2|020|Raticate|no|no|yes|Cave|16|all=5%|type1=Normal}} |
| {{Catch/entry2|041|Zubat|yes|yes|no|Cave|13-15|all=60%|type1=Poison|type2=Flying}} | | {{Catch/entry2|041|Zubat|yes|yes|no|Cave|13,15|all=60%|type1=Poison|type2=Flying}} |
| {{Catch/entry2|041|Zubat|no|no|yes|Cave|13|all=30%|type1=Poison|type2=Flying}} | | {{Catch/entry2|041|Zubat|no|no|yes|Cave|13|all=30%|type1=Poison|type2=Flying}} |
| {{Catch/entry2|042|Golbat|no|no|yes|Cave|13|all=10%|type1=Poison|type2=Flying}} | | {{Catch/entry2|042|Golbat|no|no|yes|Cave|13|all=10%|type1=Poison|type2=Flying}} |
| Line 134: |
Line 134: |
| {{Catch/entry2|019|Rattata|yes|yes|no|Cave|14|all=10%|type1=Normal}} | | {{Catch/entry2|019|Rattata|yes|yes|no|Cave|14|all=10%|type1=Normal}} |
| {{Catch/entry2|019|Rattata|no|no|yes|Cave|14|all=30%|type1=Normal}} | | {{Catch/entry2|019|Rattata|no|no|yes|Cave|14|all=30%|type1=Normal}} |
| {{Catch/entry2|020|Raticate|no|no|yes|Cave|14|10%|10%|20%|type1=Normal}} | | {{Catch/entry2|020|Raticate|no|no|yes|Cave|14|10%|10%|0%|type1=Normal}} |
| | {{Catch/entry2|020|Raticate|no|no|yes|Cave|15|0%|0%|20%|type1=Normal}} |
| {{Catch/entry2|041|Zubat|yes|yes|no|Cave|14|all=5%|type1=Poison|type2=Flying}} | | {{Catch/entry2|041|Zubat|yes|yes|no|Cave|14|all=5%|type1=Poison|type2=Flying}} |
| {{Catch/entry2|041|Zubat|no|no|yes|Cave|15|5%|5%|10%|type1=Poison|type2=Flying}} | | {{Catch/entry2|041|Zubat|no|no|yes|Cave|15|5%|5%|0%|type1=Poison|type2=Flying}} |
| | {{Catch/entry2|041|Zubat|no|no|yes|Cave|14|0%|0%|10%|type1=Poison|type2=Flying}} |
| {{Catch/entry2|042|Golbat|no|no|yes|Cave|15|all=5%|type1=Poison|type2=Flying}} | | {{Catch/entry2|042|Golbat|no|no|yes|Cave|15|all=5%|type1=Poison|type2=Flying}} |
| {{Catch/entry2|066|Machop|yes|yes|no|Cave|13-15|all=35%|type1=Fighting}} | | {{Catch/entry2|066|Machop|yes|yes|no|Cave|13,15|all=35%|type1=Fighting}} |
| {{Catch/entry2|066|Machop|no|no|yes|Cave|15|20%|20%|0%|type1=Fighting}} | | {{Catch/entry2|066|Machop|no|no|yes|Cave|15|20%|20%|0%|type1=Fighting}} |
| {{Catch/entry2|074|Geodude|yes|yes|no|Cave|13-15|all=50%|type1=Rock|type2=Ground}} | | {{Catch/entry2|074|Geodude|yes|yes|no|Cave|13,15|all=50%|type1=Rock|type2=Ground}} |
| {{Catch/entry2|074|Geodude|no|no|yes|Cave|13|all=30%|type1=Rock|type2=Ground}} | | {{Catch/entry2|074|Geodude|no|no|yes|Cave|13|all=30%|type1=Rock|type2=Ground}} |
| {{Catch/entry2|183|Marill|no|no|yes|Cave|15|0%|0%|5%|type1=Water}} | | {{Catch/entry2|183|Marill|no|no|yes|Cave|15|0%|0%|5%|type1=Water}} |
| Line 150: |
Line 152: |
| {{Catch/entry2|020|Raticate|no|no|yes|Cave|30|10%|10%|20%|type1=Normal}} | | {{Catch/entry2|020|Raticate|no|no|yes|Cave|30|10%|10%|20%|type1=Normal}} |
| {{Catch/entry2|042|Golbat|yes|yes|no|Cave|30|all=5%|type1=Poison|type2=Flying}} | | {{Catch/entry2|042|Golbat|yes|yes|no|Cave|30|all=5%|type1=Poison|type2=Flying}} |
| {{Catch/entry2|042|Golbat|no|no|yes|Cave|30|5%|5%|15%|type1=Poison|type2=Flying}} | | {{Catch/entry2|042|Golbat|no|no|yes|Cave|30|5%|5%|0%|type1=Poison|type2=Flying}} |
| | {{Catch/entry2|042|Golbat|no|no|yes|Cave|30,32|0%|0%|15%|type1=Poison|type2=Flying}} |
| {{Catch/entry2|066|Machop|yes|yes|no|Cave|28|all=5%|type1=Fighting}} | | {{Catch/entry2|066|Machop|yes|yes|no|Cave|28|all=5%|type1=Fighting}} |
| {{Catch/entry2|066|Machop|no|no|yes|Cave|28|5%|5%|0%|type1=Fighting}} | | {{Catch/entry2|066|Machop|no|no|yes|Cave|28|5%|5%|0%|type1=Fighting}} |
| Line 156: |
Line 159: |
| {{Catch/entry2|067|Machoke|no|no|yes|Cave|32|30%|30%|0%|type1=Fighting}} | | {{Catch/entry2|067|Machoke|no|no|yes|Cave|32|30%|30%|0%|type1=Fighting}} |
| {{Catch/entry2|074|Geodude|yes|yes|no|Cave|31|all=20%|type1=Rock|type2=Ground}} | | {{Catch/entry2|074|Geodude|yes|yes|no|Cave|31|all=20%|type1=Rock|type2=Ground}} |
| {{Catch/entry2|074|Geodude|no|no|yes|Cave|31|0%|20%|30%|type1=Rock|type2=Ground}} | | {{Catch/entry2|074|Geodude|no|no|yes|Cave|31|20%|20%|30%|type1=Rock|type2=Ground}} |
| {{Catch/entry2|075|Graveler|yes|yes|yes|Cave|31|all=30%|type1=Rock|type2=Ground}} | | {{Catch/entry2|075|Graveler|yes|yes|yes|Cave|31|all=30%|type1=Rock|type2=Ground}} |
| {{Catch/entry2|183|Marill|no|no|yes|Cave|28|0%|0%|5%|type1=Water}} | | {{Catch/entry2|183|Marill|no|no|yes|Cave|28|0%|0%|5%|type1=Water}} |
| Line 179: |
Line 182: |
| {{Catch/entry2|020|Raticate|yes|yes|no|Cave|16|all=5%|type1=Normal}} | | {{Catch/entry2|020|Raticate|yes|yes|no|Cave|16|all=5%|type1=Normal}} |
| {{Catch/entry2|020|Raticate|no|no|yes|Cave|18|all=5%|type1=Normal}} | | {{Catch/entry2|020|Raticate|no|no|yes|Cave|18|all=5%|type1=Normal}} |
| {{Catch/entry2|041|Zubat|yes|yes|yes|Cave|15-17|all=60%|type1=Poison|type2=Flying}} | | {{Catch/entry2|041|Zubat|yes|yes|yes|Cave|15,17|all=60%|type1=Poison|type2=Flying}} |
| {{Catch/entry2|042|Golbat|no|no|yes|Cave|17|all=20%|type1=Poison|type2=Flying}} | | {{Catch/entry2|042|Golbat|no|no|yes|Cave|17|all=20%|type1=Poison|type2=Flying}} |
| {{Catch/entry2|066|Machop|yes|yes|no|Cave|16|all=10%|type1=Fighting}} | | {{Catch/entry2|066|Machop|yes|yes|no|Cave|16|all=10%|type1=Fighting}} |
| Line 221: |
Line 224: |
| {{Catch/entryhs|119|Seaking|yes|yes|Fish Super|40|all=10%|type1=Water}} | | {{Catch/entryhs|119|Seaking|yes|yes|Fish Super|40|all=10%|type1=Water}} |
| {{Catch/entryhs|129|Magikarp|yes|yes|Fish Super|40|all=20%|type1=Water}} | | {{Catch/entryhs|129|Magikarp|yes|yes|Fish Super|40|all=20%|type1=Water}} |
| {{Catch/div|mountain|During Marill swarm}} | | {{Catch/div|mountain|Swarm}} |
| {{Catch/entryhs|019|Rattata|yes|yes|Cave|14, 16|all=14%|type1=Normal}}
| | {{Catch/entryhs|183|Marill|yes|yes|Swarm|13-15|all=40%|type1=Water}} |
| {{Catch/entryhs|041|Zubat|yes|yes|Cave|13, 15|all=20%|type1=Poison|type2=Flying}}
| |
| {{Catch/entryhs|066|Machop|yes|yes|Cave|14|all=20%|type1=Fighting}}
| |
| {{Catch/entryhs|074|Geodude|yes|yes|Cave|14|all=5%|type1=Rock|type2=Ground}}
| |
| {{Catch/entryhs|183|Marill|yes|yes|Cave|13-15|all=41%|type1=Water}} | |
| {{Catch/div|mountain|Special}} | | {{Catch/div|mountain|Special}} |
| {{Catch/entryhs|296|Makuhita|yes|yes|Hoenn|14|all=20%|type1=Fighting}} | | {{Catch/entryhs|296|Makuhita|yes|yes|Hoenn|14|all=20%|type1=Fighting}} |
| {{Catch/entryhs|359|Absol|yes|yes|Hoenn|13-15|all=20%|type1=Dark}} | | {{Catch/entryhs|359|Absol|yes|yes|Hoenn|13, 15|all=20%|type1=Dark}} |
| {{Catch/entryhs|433|Chingling|yes|yes|Sinnoh|14|all=20%|type1=Psychic}} | | {{Catch/entryhs|433|Chingling|yes|yes|Sinnoh|14|all=20%|type1=Psychic}} |
| {{Catch/entryhs|436|Bronzor|yes|yes|Sinnoh|13-15|all=20%|type1=Steel|type2=Psychic}} | | {{Catch/entryhs|436|Bronzor|yes|yes|Sinnoh|13, 15|all=20%|type1=Steel|type2=Psychic}} |
| {{Catch/footer|mountain}} | | {{Catch/footer|mountain}} |
|
| |
|
| Line 237: |
Line 236: |
| {{Catch/header|mountain|4}} | | {{Catch/header|mountain|4}} |
| {{Catch/entryhs|019|Rattata|yes|yes|Cave|14|all=10%|type1=Normal}} | | {{Catch/entryhs|019|Rattata|yes|yes|Cave|14|all=10%|type1=Normal}} |
| {{Catch/entryhs|041|Zubat|yes|yes|Cave|13-15|all=5%|type1=Poison|type2=Flying}} | | {{Catch/entryhs|041|Zubat|yes|yes|Cave|14|all=5%|type1=Poison|type2=Flying}} |
| {{Catch/entryhs|066|Machop|yes|yes|Cave|13-15|all=35%|type1=Fighting}} | | {{Catch/entryhs|066|Machop|yes|yes|Cave|13, 15|all=35%|type1=Fighting}} |
| {{Catch/entryhs|074|Geodude|yes|yes|Cave|13-15|all=50%|type1=Rock|type2=Ground}} | | {{Catch/entryhs|074|Geodude|yes|yes|Cave|13, 15|all=50%|type1=Rock|type2=Ground}} |
| {{Catch/div|mountain|Special}} | | {{Catch/div|mountain|Special}} |
| {{Catch/entryhs|296|Makuhita|yes|yes|Hoenn|15|all=20%|type1=Fighting}} | | {{Catch/entryhs|296|Makuhita|yes|yes|Hoenn|15|all=20%|type1=Fighting}} |
| Line 277: |
Line 276: |
| {{Catch/entryhs|019|Rattata|yes|yes|Cave|16|all=20%|type1=Normal}} | | {{Catch/entryhs|019|Rattata|yes|yes|Cave|16|all=20%|type1=Normal}} |
| {{Catch/entryhs|020|Raticate|yes|yes|Cave|16|all=5%|type1=Normal}} | | {{Catch/entryhs|020|Raticate|yes|yes|Cave|16|all=5%|type1=Normal}} |
| {{Catch/entryhs|041|Zubat|yes|yes|Cave|15-17|all=60%|type1=Poison|type2=Flying}} | | {{Catch/entryhs|041|Zubat|yes|yes|Cave|15, 17|all=60%|type1=Poison|type2=Flying}} |
| {{Catch/entryhs|066|Machop|yes|yes|Cave|13-16|all=10%|type1=Fighting}} | | {{Catch/entryhs|066|Machop|yes|yes|Cave|16|all=10%|type1=Fighting}} |
| {{Catch/entryhs|074|Geodude|yes|yes|Cave|13-16|all=5%|type1=Rock|type2=Ground}} | | {{Catch/entryhs|074|Geodude|yes|yes|Cave|16|all=5%|type1=Rock|type2=Ground}} |
| {{Catch/div|water|Surfing}} | | {{Catch/div|water|Surfing}} |
| {{Catch/entryhs|118|Goldeen|yes|yes|Surf|10-15|all=90%|type1=Water}} | | {{Catch/entryhs|118|Goldeen|yes|yes|Surf|10-25|all=90%|type1=Water}} |
| {{Catch/entryhs|119|Seaking|yes|yes|Surf|15|all=10%|type1=Water}} | | {{Catch/entryhs|119|Seaking|yes|yes|Surf|15-25|all=10%|type1=Water}} |
| {{Catch/div|water|Fishing}} | | {{Catch/div|water|Fishing}} |
| {{Catch/entryhs|118|Goldeen|yes|yes|Fish Old|10|all=15%|type1=Water}} | | {{Catch/entryhs|118|Goldeen|yes|yes|Fish Old|10|all=15%|type1=Water}} |
| Line 292: |
Line 291: |
| {{Catch/entryhs|129|Magikarp|yes|yes|Fish Super|40|all=20%|type1=Water}} | | {{Catch/entryhs|129|Magikarp|yes|yes|Fish Super|40|all=20%|type1=Water}} |
| {{Catch/div|mountain|Special}} | | {{Catch/div|mountain|Special}} |
| {{Catch/entryhs|296|Makuhita|yes|yes|Hoenn|15|all=20%|type1=Fighting}} | | {{Catch/entryhs|296|Makuhita|yes|yes|Hoenn|16|all=20%|type1=Fighting}} |
| {{Catch/entryhs|359|Absol|yes|yes|Hoenn|13|all=20%|type1=Dark}} | | {{Catch/entryhs|359|Absol|yes|yes|Hoenn|15, 17|all=20%|type1=Dark}} |
| {{Catch/entryhs|433|Chingling|yes|yes|Sinnoh|15|all=20%|type1=Psychic}} | | {{Catch/entryhs|433|Chingling|yes|yes|Sinnoh|16|all=20%|type1=Psychic}} |
| {{Catch/entryhs|436|Bronzor|yes|yes|Sinnoh|13|all=20%|type1=Steel|type2=Psychic}} | | {{Catch/entryhs|436|Bronzor|yes|yes|Sinnoh|15, 17|all=20%|type1=Steel|type2=Psychic}} |
| {{Catch/div|mountain|Gift Pokémon}} | | {{Catch/div|mountain|Gift Pokémon}} |
| {{Catch/entryhs|236|Tyrogue|yes|yes|Gift|10|all={{tt|One|Gift from Kiyo after defeating him}}|type1=Fighting}} | | {{Catch/entryhs|236|Tyrogue|yes|yes|Gift|10|all={{tt|One|Gift from Kiyo after defeating him}}|type1=Fighting}} |
| Line 446: |
Line 445: |
|
| |
|
| ==In the manga== | | ==In the manga== |
| | [[File:Mt Mortar Adventures.png|thumb|150px|Mt. Mortar in [[Pokémon Adventures]]]] |
| ===Pokémon Adventures=== | | ===Pokémon Adventures=== |
| {{incomplete|section|Missing image}}
| | ===={{MangaArc|Gold, Silver & Crystal}}==== |
| {{spoilers}}
| | Years before the chapter, {{adv|Crystal}} had trained on Mt. Mortar to develop her [[Caught Pokémon|Pokémon catching]] skills. During her training, she was attacked by a {{pkmn2|wild}} {{p|Arcanine}}, but a group of other wild Pokémon helped her recover. While her hands were covered in bandages as they recovered, Crystal learned to launch [[Poké Ball]]s more effectively by kicking them instead of throwing them. When the wild Arcanine appeared again, Crystal noticed an injury next to one of its eyes, and used the wild Pokémon she had befriended to help treat Arcanine's wound. Subsequently, Arcanine and the other wild Pokémon joined Crystal, forming her main [[party|team]]. |
| ===={{chap|Gold, Silver & Crystal}}==== | |
| Mt. Mortar was where {{adv|Crystal}} trained her Pokémon-catching skills. A [[Archy|wild Arcanine]] scared the young Crystal, chasing her away from the mountain, during which she fell and broke her arms. When she awakened, Crystal found a [[Xatee|Natu]], Parasect, [[Monlee|Hitmonchan]] and [[Bonee|Cubone]] all tending to her injuries. She also discovered that the four Pokémon were also being chased by the wild Arcanine. When Arcanine reappeared, Crystal noticed that an injury to Arcanine's right eye had caused Arcanine to become enraged, and convinced the Parasect that helped heal her earlier to heal Arcanine. The healing toned down Arcanine's aggression, and all five Pokémon became members of Crystal's team.
| |
|
| |
|
| Under her mother's guidance, Crystal returned to Mt. Mortar after the battle with {{p|Suicune}} drained her confidence and made her lose her ability to capture even weak Pokémon. At Mt. Mortar, Crystal had her arms bandaged, as like before, it would have helped her gain the skills with her feet. During her re-training, Crystal encountered a wild {{p|Larvitar}} which turned out to have caused Archy's eye injury years earlier. [[Megaree]] evolved and helped defeat Larvitar, and Crystal was able to rediscover her capturing touch as she captured Larvitar with the first kick of the ball.
| | In ''[[PS133|Absolutely Azumarill]]'', [[Mirei]] sent Crystal to Mt. Mortar to relearn her Pokémon catching skills, which she had suddenly lost after failing to catch {{p|Suicune}}. In ''[[PS135|Lively Larvitar]]'', Crystal was attacked by a wild {{p|Larvitar}} a few days into her training. As it kept attacking Crystal's Arcanine, [[Archy]], only from its blind side, Crystal was able to figure out that this Larvitar was the Pokémon that had attacked Archy years earlier. Thanks to Crystal's {{p|Chikorita}}, [[Megaree]], evolving into {{p|Bayleef}}, Crystal was able to capture Larvitar, showing that she had recovered her ability to catch Pokémon. |
| | {{-}} |
|
| |
|
| ==Trivia== | | ==Trivia== |
| * There is a volcano, also called {{wp|Iwo Jima|Mt. Suribachi}}, in Iwo Jima, Japan. | | * There is a real-life volcano also called {{wp|Iwo Jima|Mt. Suribachi}} in Iwo Jima, Japan. However, Mt. Mortar itself is likely based on Mt. Hiei in Shiga, Japan. |
| * In the Japanese version of the {{pkmn|anime}}, {{an|Casey}} mentions the cave in the first line of her {{p|Electabuzz}} [[baseball]] team theme song. | | * In the Japanese version of the {{pkmn|anime}}, {{an|Casey}} mentions the cave in the first line of her {{p|Electabuzz}} [[baseball]] team theme song. |
| * {{wp|Pitchstone}} is present here, as revealed in {{DL|Mossdeep City|Steven's house|Steven Stone's house}} in [[Pokémon Omega Ruby and Alpha Sapphire]]. | | * {{wp|Pitchstone}} is present here, as revealed in {{DL|Mossdeep City|Steven's house|Steven Stone's house}} in [[Pokémon Omega Ruby and Alpha Sapphire]]. |
| Line 466: |
Line 465: |
| |zh_yue=擂鉢山 ''Lèuihbut Sāan'' {{tt|*|GS Pokédex, GS Guidebook}}<br>斯里巴吉山 ''Sīlǐbājí Shān'' {{tt|*|Anime}} | | |zh_yue=擂鉢山 ''Lèuihbut Sāan'' {{tt|*|GS Pokédex, GS Guidebook}}<br>斯里巴吉山 ''Sīlǐbājí Shān'' {{tt|*|Anime}} |
| |zh_cmn=擂鉢山 / 擂钵山 ''Léibō Shān'' {{tt|*|Manga}}<br>斯里巴吉山 ''Sīlǐbājí Shān'' {{tt|*|Anime}} | | |zh_cmn=擂鉢山 / 擂钵山 ''Léibō Shān'' {{tt|*|Manga}}<br>斯里巴吉山 ''Sīlǐbājí Shān'' {{tt|*|Anime}} |
| |fr_eu=Mont Creuset | | |cs=Hmoždířová hora |
| | |fr=Mont Creuset |
| |de=Kesselberg | | |de=Kesselberg |
| |it=Monte Scodella | | |it=Monte Scodella |
| |ko=절구산 ''Jeolgu San'' | | |ko=절구산 ''Jeolgu San'' |
| |pt_br=Monte Mortar<br>Mt. Mortar | | |pt_br=Monte Mortar<br>Mt. Mortar |
| |es_eu=Mt. Mortero | | |es=Mt. Mortero |
| |vi=Núi Suribachi | | |vi=Núi Suribachi |
| }} | | }} |