Appendix:Platinum walkthrough/Section 16: Difference between revisions
m (→4F) |
mNo edit summary |
||
| (15 intermediate revisions by 8 users not shown) | |||
| Line 3: | Line 3: | ||
|- align="center" | |- align="center" | ||
! Items | ! Items | ||
|- | |- | ||
|{{itlisth|snow}} | |{{itlisth|snow}} | ||
{{Itemlist|Reaper Cloth|Near the entrance to Lake Acuity (requires {{m|Rock Climb}})|Pt=yes|display={{DL|Evolution-inducing held item|Reaper Cloth}}}} | {{Itemlist|Reaper Cloth|Near the entrance to Lake Acuity (requires {{m|Rock Climb}})|Pt=yes|display={{DL|Evolution-inducing held item|Reaper Cloth}}}} | ||
{{itlistfoot|snow}} | {{itlistfoot|snow}} | ||
|} | |} | ||
[[File:Acuity Lakefront Pt.png|right|thumb|180px|Acuity Lakefront]] | |||
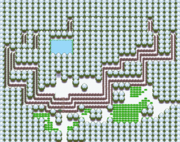
Now that you have the Icicle Badge, you can climb the walls that have the bits of rock in them with {{m|Rock Climb}}. Pick up the {{DL|Evolution-inducing held item|Reaper Cloth}} before entering [[Lake Acuity]]. | |||
==Lake Acuity== | |||
[[File:Lake Acuity Pt.png|thumb|left|180px|Lake Acuity]] | |||
{| class="expandable" align="center" style="background: #{{platinum color}}; {{roundy|10px}}; border: 5px solid #{{platinum color light}};" | |||
|- align="center" | |||
! Available Pokémon | |||
|- | |||
|{{Catch/header|snow}} | |||
{{Catch/entry4|054|Psyduck|no|no|yes|Grass|38|all=5%|type1=water}} | |||
{{Catch/entry4|055|Golduck|no|no|yes|Grass|39-40|all=15%|type1=water}} | |||
{{Catch/entry4|215|Sneasel|no|no|yes|Grass|41|all=10%|type1=dark|type2=ice}} | |||
{{Catch/entry4|361|Snorunt|no|no|yes|Grass|39-40|0%|0%|20%|type1=ice}} | |||
{{Catch/entry4|400|Bibarel|no|no|yes|Grass|39-40|all=25%|type2=water}} | |||
{{Catch/entry4|459|Snover|no|no|yes|Grass|38-41|45%|45%|0%|type1=grass|type2=ice}} | |||
{{Catch/entry4|459|Snover|no|no|yes|Grass|38,41|0%|0%|25%|type1=grass|type2=ice}} | |||
{{Catch/div|lake|Surfing}} | |||
{{Catch/entry4|054|Psyduck|no|no|yes|Surf|20-30|all=90%|type1=water}} | |||
{{Catch/entry4|055|Golduck|no|no|yes|Surf|20-40|all=10%|type1=water}} | |||
{{Catch/div|lake|Fishing}} | |||
{{Catch/entry4|129|Magikarp|no|no|yes|Fish Old|3-15|all=100%|type1=water}} | |||
{{Catch/entry4|118|Goldeen|no|no|yes|Fish Good|15-20|all=30%|type1=water}} | |||
{{Catch/entry4|119|Seaking|no|no|yes|Fish Good|25-35|all=5%|type1=water}} | |||
{{Catch/entry4|129|Magikarp|no|no|yes|Fish Good|10-25|all=65%|type1=water}} | |||
{{Catch/entry4|119|Seaking|no|no|yes|Fish Super|30-55|all=35%|type1=water}} | |||
{{Catch/entry4|130|Gyarados|no|no|yes|Fish Super|30-55|all=65%|type1=water|type2=flying}} | |||
{{Catch/div|snow|Special}} | |||
{{Catch/entry4|216|Teddiursa|no|no|yes|E|40-41|all=8%|type1=normal}} | |||
{{Catch/entry4|337|Lunatone|no|no|yes|S|40-41|all=8%|type1=rock|type2=psychic}} | |||
{{Catch/entry4|338|Solrock|no|no|yes|R|40-41|all=8%|type1=rock|type2=psychic}} | |||
{{Catch/footer|snow}} | |||
|} | |||
{| class="expandable" align="center" style="background: #{{platinum color}}; {{roundy|10px}}; border: 5px solid #{{platinum color light}};" | |||
|- align="center" | |||
! Items | |||
|- | |||
|{{itlisth|Lake}} | |||
{{Itemlist|TM Ice|At northwest corner of tall grass in the northeast part of the lake (requires {{m|Surf}})|Pt=yes|display={{TM|14|Blizzard}}}} | |||
{{itlistfoot|Lake}} | |||
|} | |||
When you arrive, Galactic [[Commander]] [[Jupiter]] has already defeated {{ga|Barry}} and caught {{p|Uxie}}. She leaves while stating that Barry is a weak Trainer. Barry, though upset, states his desire to become stronger. {{m|Surf}} across the lake to the patch of grass in the northeastern corner, where you can pick up {{TM|14|Blizzard}}. | |||
Now {{m|Fly}} back to [[Veilstone City]] and make sure you're ready for a lot of fighting. It's time to raid [[Team Galactic]]'s Headquarters! | |||
==Veilstone City== | ==Veilstone City== | ||
Head towards the [[Team Galactic HQ]] and talk to the lone grunt there, who is angry at you since his {{p|Clefairy}} was taken away after you defeated him before | [[File:Veilstone City DP.png|left|thumb|180px|Veilstone City]] | ||
[[File:Team Galactic HQ Pt.png|right|thumb|180px|Team Galactic HQ]] | |||
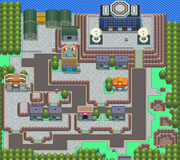
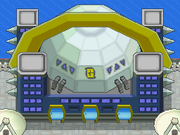
Head towards the [[Team Galactic HQ]] in the northeast corner of the city and talk to the lone grunt there, who is angry at you since his {{p|Clefairy}} was taken away after you defeated him before. He claims ignorance about a [[List of key items in Generation IV#Storage Key|Storage Key]] and runs away. Luckily, [[Looker]] shows up and states he has the Storage Key with him. He suggests that it is best to enter the HQ through the [[Galactic Warehouse]] you were at before. Make sure to select a well-balanced team for this mission, as you are going to need it. | |||
===Galactic Warehouse=== | ===Galactic Warehouse=== | ||
[[File:Galactic Warehouse | [[File:Galactic Warehouse exterior DP.png|left|thumb|180px|Galactic Warehouse exterior]] | ||
[[File:Galactic Warehouse B1F DP.png|right|thumb|350px|Galactic Warehouse B1F]] | |||
{| class="expandable" align="center" style="background: | {| class="expandable" align="center" style="background: #{{platinum color}}; {{roundy|10px}}; border: 5px solid #{{platinum color light}};" | ||
|- align="center" | |- align="center" | ||
! Items | ! Items | ||
|- | |- | ||
|{{itlisth|building}} | |{{itlisth|building}} | ||
{{ | {{Itemlist|Dusk Stone|Behind the locked door that required the {{DL|List of key items in Generation IV|Storage Key}}|Pt=yes|display={{evostone|Dusk Stone}}}} | ||
{{Itemlist|Zinc|Downstairs near the entrance, down a fork in the hallway|Pt=yes|display={{DL|Vitamin|Zinc}}}} | |||
{{ | {{Itemlist|TM Poison|Southeast of the Galactic Key|Pt=yes|display={{TM|36|Sludge Bomb}}}} | ||
{{ | {{Itemlist|Galactic Key|Downstairs near the entrance, behind the locked door|Pt=yes|display={{DL|List of key items in Generation IV|Galactic Key}}}} | ||
{{ | |||
{{itlistfoot|building}} | {{itlistfoot|building}} | ||
|} | |} | ||
{| class="expandable" align="center" style="background: | {| class="expandable" align="center" style="background: #{{platinum color}}; {{roundy|10px}}; border: 5px solid #{{platinum color light}};" | ||
|- align="center" | |- align="center" | ||
! Team Galactic | ! Team Galactic | ||
|- | |- | ||
| {{trainerheader| | | {{trainerheader|building}} | ||
{{trainerdiv| | {{trainerdiv|building}} | ||
{{trainerentry|Spr DP Galactic Grunt M.png|Galactic Grunt||1640|1|042|Golbat|♂|41||}} | {{trainerentry|Spr DP Galactic Grunt M.png|Galactic Grunt||1640|1|042|Golbat|♂|41||}} | ||
{{trainerdiv| | {{trainerdiv|building}} | ||
{{trainerentry|Spr DP Galactic Grunt M.png|Galactic Grunt||1600|2|228|Houndour|♂|38||198|Murkrow|♂|40||}} | {{trainerentry|Spr DP Galactic Grunt M.png|Galactic Grunt||1600|2|228|Houndour|♂|38||198|Murkrow|♂|40||}} | ||
{{trainerfooter| | {{trainerfooter|building}} | ||
|} | |} | ||
Head to the metal doors you saw before and Looker will arrive and open them for you. Once that is done, continue down the stairs to the basement of the warehouse. This bottom floor connects to the Team Galactic HQ. Follow the hallway east to the stairs at the end, battling the two grunts. | |||
===Team Galactic HQ=== | ===Team Galactic HQ=== | ||
[[File:Galactic HQ 1F Pt.png|thumb|300px|Galactic HQ 1F]] | [[File:Galactic HQ 1F Pt.png|thumb|300px|Galactic HQ 1F]] | ||
{| class="expandable" align="center" style="background: | {| class="expandable" align="center" style="background: #{{platinum color}}; {{roundy|10px}}; border: 5px solid #{{platinum color light}};" | ||
|- align="center" | |||
! Items | |||
|- | |||
|{{itlisth|building}} | |||
{{Itemlist|TM Dark|At the first pair of warp panels, take the right|Pt=yes|display={{TM|49|Snatch}}}} | |||
{{itemlist|Dubious Disc|1F; in the room that connects to the warehouse through the locked door, between two seats at the table|Pt=yes|display={{DL|Evolution-inducing held item|Dubious Disc}}}} | |||
{{itemlist|Rare Candy|In the hallway leading up to TM21, by a machine ''(hidden)''|Pt=yes|display={{DL|Vitamin|Rare Candy}}}} | |||
{{Itemlist|TM Normal|Behind the locked door in the generator room|Pt=yes|display={{TM|21|Frustration}}}} | |||
{{itemlist|Green Shard|From the first pair of Galactic Grunts, go east and take the top warp pad|Pt=yes|display={{DL|Shard|Green Shard}}}} | |||
{{itemlist|Max Potion|In the room with the Green Shard, in a box ''(hidden)''|Pt=yes|display={{DL|Potion|Max Potion}}}} | |||
{{itemlist|Max Revive|From the first pair of Galactic Grunts, go east and take the bottom warp pad|Pt=yes|display={{DL|Revive|Max Revive}}}} | |||
{{itemlist|Poké Doll|In the bed on the right in the nap room ''(hidden)''|Pt=yes|display={{DL|Escape item|Poké Doll}}}} | |||
{{itemlist|Nugget|Near three warp panels after battling a duo of grunts ''(hidden)''|Pt=yes|display={{DL|Valuable item|Nugget}}}} | |||
{{itemlist|Protein|In a room where three warp pads are located near each other, the right pad leads to the room with the Protein|Pt=yes|display={{DL|Vitamin|Protein}}}} | |||
{{itemlist|Max Elixir|In a room where three warp pads are located near each other, the middle pad leads to the room with the Max Elixir|Pt=yes|display={{DL|Ether|Max Elixir}}}} | |||
{{itemlist|Elixir|In a room with two tables and a Max Elixir, in a crate in the southwest corner ''(hidden)''|Pt=yes|display={{DL|Ether|Elixir}}}} | |||
{{itemlist|Master Ball|Received from [[Cyrus]] after defeating him|Pt=yes}} | |||
{{itemlist|Razor Claw|In the room to the east of the one where [[Cyrus]] awaits ''(hidden)''|Pt=yes|display={{DL|Evolution-inducing held item|Razor Claw}}}} | |||
{{itemlist|Full Restore|After leaving [[Cyrus]]'s office, in the room with the green fluid machines|Pt=yes|display={{DL|Potion|Full Restore}}}} | |||
{{itemlist|PP Up|Among boxes to the right of the doorway of the easternmost door at the entrance ''(hidden)''|Pt=yes|display={{DL|Vitamin|PP Up}}}} | |||
{{itlistfoot|building}} | |||
|} | |||
{| class="expandable" align="center" style="background: #{{platinum color}}; {{roundy|10px}}; border: 5px solid #{{platinum color light}};" | |||
|- align="center" | |- align="center" | ||
! Team Galactic | ! Team Galactic | ||
|- | |- | ||
|{{trainerheader|building}} | |{{trainerheader|building}} | ||
{{trainerdiv|building|These Trainers are accessible by going through the {{color2|fff|Galactic Warehouse}}}} | {{trainerdiv|building|These Trainers are accessible by going through the {{color2|fff|Galactic Warehouse}}}} | ||
| Line 74: | Line 136: | ||
{{trainerfooter|building|1}} | {{trainerfooter|building|1}} | ||
|} | |} | ||
====1F==== | ====1F==== | ||
Once up the stairs, you'll arrive in the very upper right-hand corner of 1F. After defeating the Galactic Grunt there, use the right [[warp panel]] to enter a closed-off area where you will find {{TM|49|Snatch}}. Step back onto the panel from whence you came. Afterwards, use the left warp panel to go up to 2F. | |||
====2F==== | ====2F==== | ||
[[File:Galactic HQ 2F Pt.png|thumb|left|300px|Galactic HQ 2F]] | [[File:Galactic HQ 2F Pt.png|thumb|left|300px|Galactic HQ 2F]] | ||
From here use the nearby warp panel to return to 1F | From here, use the nearby warp panel to return to 1F. | ||
====1F==== | ====1F==== | ||
Ignore the grunt to the right and take the panel to the left, go down the stairs and defeat the {{tc|Scientist}}, grab the {{DL|Evolution-inducing held item|Dubious Disc}}, take the second set of stairs to the left and keep going west. | |||
===Galactic Warehouse=== | ===Galactic Warehouse=== | ||
Grab the Galactic Key which will allow you to open the locked steel doors and you will meet a Galactic Grunt who mentions that Cyrus is having a meeting | Grab the [[Galactic Key]], which will allow you to open the locked steel doors, and you will meet a Galactic Grunt who mentions that [[Cyrus]] is having a meeting. You can get to it by entering the HQ's main building from Veilstone and using the Galactic Key. You can unlock the nearby door which will allow you to head back easily to the Warehouse's entrance, but let's make a little side trip by backtracking to 2F. Use the stairs to access 3F. | ||
===Team Galactic HQ=== | ===Team Galactic HQ=== | ||
====3F==== | ====3F==== | ||
[[File:Galactic HQ 3F Pt.png|thumb|200px|Galactic HQ 3F]] | [[File:Galactic HQ 3F Pt.png|thumb|200px|Galactic HQ 3F]] | ||
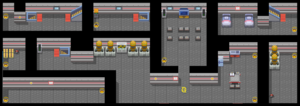
Defeat the Galactic Grunts and then open the locked door to find {{TM|21|Frustration}}. Now head back to the Galactic Warehouse and leave there to return to Veilstone City. It is now time to enter the main building. | |||
Defeat the Galactic Grunts and then open the locked door to find {{TM|21|Frustration}}. Now head back to the Galactic Warehouse and leave there to return to Veilstone City | |||
===Team Galactic HQ (main building)=== | ===Team Galactic HQ (main building)=== | ||
| Line 126: | Line 160: | ||
====2F==== | ====2F==== | ||
You should now be in the middle area of | You should now be in the middle area of 2F. Simply fight the grunts and then use each of the warp panels. This will earn you two items. Afterwards, use the warp panel that is located by the TVs to reach the meeting hall, where Cyrus is. | ||
====Meeting Hall==== | ====Meeting Hall==== | ||
[[File:Galactic_HQ_Hall_Pt.png|thumb|left| | [[File:Galactic_HQ_Hall_Pt.png|thumb|left|180px|Galactic Meeting Hall]] | ||
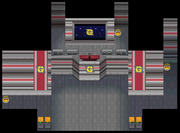
You will meet up with Looker here and listen to Cyrus giving his speech about how the world is incomplete and that he now has the power to create a new one for Team Galactic's benefit. After he and the grunts leave, Looker | You will meet up with Looker here and listen to Cyrus giving his speech about how the world is incomplete and the fact that he now has the power to create a new one for Team Galactic's benefit. After he and the grunts leave, Looker leaves to investigate this further. Follow in the direction he went to find another warp panel that will take you to a new area of 2F. | ||
====2F==== | ====2F==== | ||
You'll be in the upper right area of 2F where there are some beds to rest your Pokémon team. Hidden in the right | You'll be in the upper-right area of 2F where there are some beds to rest your Pokémon team. Hidden in the right-hand bed is a {{DL|Escape item|Poké Doll}}. Climb the stairs to 3F. | ||
====3F==== | ====3F==== | ||
After dealing with two Galactic Grunts you'll find | After dealing with two Galactic Grunts you'll find three warp panels here. The upper right one takes you to an area where you can find a [[Protein]]. The upper left will get you another item, and the lower left is the one you'll need to proceed to an area with stairs up to 4F. | ||
====4F==== | ====4F==== | ||
[[File:Galactic HQ 4F Pt.png|thumb|250px|Galactic HQ 4F]] | [[File:Galactic HQ 4F Pt.png|thumb|250px|Galactic HQ 4F]] | ||
This is where Cyrus's office is located. After you open the locked door, Cyrus will greet you and mention that the new world is actually only for him, since he feels his underlings are just as flawed as the rest of the world. Finding you interesting, he'll challenge you to a battle. | |||
{{Party/Single | |||
{{Party | |||
|color={{silver color}} | |color={{silver color}} | ||
|headcolor={{silver color light}} | |headcolor={{silver color light}} | ||
| Line 155: | Line 187: | ||
|game=Pt | |game=Pt | ||
|location=Team Galactic HQ | |location=Team Galactic HQ | ||
|pokemon=3 | |pokemon=3}} | ||
| | |{{Pokémon/4 | ||
|game=Platinum | |game=Platinum | ||
|ndex=215 m | |ndex=215 m | ||
| Line 168: | Line 200: | ||
|move3=Slash|move3type=Normal|move3cat=Physical | |move3=Slash|move3type=Normal|move3cat=Physical | ||
|move4=Quick Attack|move4type=Normal|move4cat=Physical}} | |move4=Quick Attack|move4type=Normal|move4cat=Physical}} | ||
| | |{{Pokémon/4 | ||
|game=Platinum | |game=Platinum | ||
|ndex=169 | |ndex=169 | ||
| Line 180: | Line 212: | ||
|move3=Supersonic|move3type=Normal|move3cat=Status | |move3=Supersonic|move3type=Normal|move3cat=Status | ||
|move4=Bite|move4type=Dark|move4cat=Physical}} | |move4=Bite|move4type=Dark|move4cat=Physical}} | ||
| | |{{Pokémon/4 | ||
|game=Platinum | |game=Platinum | ||
|ndex=430 | |ndex=430 | ||
| Line 193: | Line 225: | ||
|move3=Drill Peck|move3type=Flying|move3cat=Physical | |move3=Drill Peck|move3type=Flying|move3cat=Physical | ||
|move4=Astonish|move4type=Ghost|move4cat=Physical}} | |move4=Astonish|move4type=Ghost|move4cat=Physical}} | ||
}} | {{Party/Footer}} | ||
His first Pokémon {{p|Sneasel}} is easily vulnerable to {{type|Fighting}}s. His other two {{p|Crobat}} and {{p|Honchkrow}} both have {{type|Flying}} characteristics and should be easily vulnerable to {{t|Rock}}, {{t|Ice}} and {{type|Electric}}s. Just remember that Crobat is the faster of the two and may try to confuse your Pokémon with {{m|Supersonic}} and Honchkrow possesses better physical attack moves that could KO your Pokémon if you are not careful. | His team is the same as the previous, except that two of his Pokémon have evolved. His first Pokémon, {{p|Sneasel}}, is easily vulnerable to {{type|Fighting}}s. His other two {{p|Crobat}} and {{p|Honchkrow}} both have {{type|Flying}} characteristics and should be easily vulnerable to {{t|Rock}}, {{t|Ice}} and {{type|Electric}}s. Just remember that Crobat is the faster of the two and may try to confuse your Pokémon with {{m|Supersonic}} and Honchkrow possesses better physical attack moves that could KO your Pokémon if you are not careful. | ||
[[File:Galactic HQ lake trio room DP.png|left|thumb| | [[File:Galactic HQ lake trio room DP.png|left|thumb|180px|Lake Trio room]] | ||
Afterwards Cyrus will give you a [[Master Ball]] and then | Afterwards, Cyrus will give you a [[Master Ball]] and then leave. He mentions that if you want to save the [[Lake Trio|Lake Pokémon]], you should use the nearby warp panel to get to them. Use that warp panel and you will reach a hallway. At the end is where the Lake Trio are being held. Once you reach that room, where they are, you can overhear a conversation between [[Charon]] and [[Saturn]] about how Charon is happy with the new world Cyrus will create. Talk to Saturn and he'll challenge you to a battle since, unlike Cyrus, he will not let you roam freely and interfere with their plans. | ||
{{Party | {{Party/Single | ||
|color={{silver color}} | |color={{silver color}} | ||
|bordercolor={{dark color}} | |bordercolor={{dark color}} | ||
| Line 210: | Line 242: | ||
|location=Team Galactic HQ | |location=Team Galactic HQ | ||
|prize={{pdollar}}3520 | |prize={{pdollar}}3520 | ||
|pokemon=3 | |pokemon=3}} | ||
| | |{{Pokémon/4 | ||
|game=Platinum | |game=Platinum | ||
|pokemon=Golbat | |pokemon=Golbat | ||
| Line 223: | Line 255: | ||
|move2=Air Cutter|move2type=Flying|move2cat=Special | |move2=Air Cutter|move2type=Flying|move2cat=Special | ||
|move3=Poison Fang|move3type=Poison|move3cat=Physical | |move3=Poison Fang|move3type=Poison|move3cat=Physical | ||
|move4=Confuse Ray|move4type=Ghost|move4cat=Status | |move4=Confuse Ray|move4type=Ghost|move4cat=Status}} | ||
}} | |{{Pokémon/4 | ||
| | |||
|game=Platinum | |game=Platinum | ||
|pokemon=Toxicroak | |pokemon=Toxicroak | ||
| Line 238: | Line 269: | ||
|move2=Faint Attack|move2type=Dark|move2cat=Physical | |move2=Faint Attack|move2type=Dark|move2cat=Physical | ||
|move3=X-Scissor|move3type=Bug|move3cat=Physical | |move3=X-Scissor|move3type=Bug|move3cat=Physical | ||
|move4=Poison Jab|move4type=Poison|move4cat=Physical | |move4=Poison Jab|move4type=Poison|move4cat=Physical}} | ||
}} | |{{Pokémon/4 | ||
| | |||
|pokemon=Bronzor | |pokemon=Bronzor | ||
|game=Platinum | |game=Platinum | ||
| Line 253: | Line 283: | ||
|move3=Confuse Ray|move3type=Ghost|move3cat=Status | |move3=Confuse Ray|move3type=Ghost|move3cat=Status | ||
|move4=Shadow Ball|move4type=Ghost|move4cat=Special}} | |move4=Shadow Ball|move4type=Ghost|move4cat=Special}} | ||
}} | {{Party/Footer}} | ||
Saturn's team is the same as before but at higher levels, so the same tactics you used at [[Lake Valor]] should work here. Once you defeat him, Saturn will let you press the switch that will set {{p|Azelf}}, {{p|Mesprit}}, and {{p|Uxie}} free. He mentions that Cyrus crafted a special [[Red Chain]] for capturing something on [[Mt. Coronet]]. | |||
Return to Cyrus's office and a new pathway will have opened up with a warp panel that will take you to the green warp panel just inside one of the main doors of the Galactic HQ. Take it, exit the building, and heal up at the Pokémon Center. | |||
Your biggest quest now awaits you. You will need a strong Pokémon team with the HM abilities {{m|Surf}}, {{m|Strength}}, {{m|Rock Smash}}, and {{m|Rock Climb}}. You should stock up on [[Hyper Potion]]s and make sure you have some [[Full Heal]]s just in case. | |||
Once you feel truly prepared, {{m|Fly}} to [[Oreburgh City]]. From there, go north to the entrance of Mt. Coronet. | |||
{{WalkthroughPrevNext | | {{WalkthroughPrevNext | | ||
Revision as of 04:49, 17 June 2014
Acuity Lakefront
| Items | ||||||||||||
|---|---|---|---|---|---|---|---|---|---|---|---|---|
| ||||||||||||
Now that you have the Icicle Badge, you can climb the walls that have the bits of rock in them with Rock Climb. Pick up the Reaper Cloth before entering Lake Acuity.
Lake Acuity
| Available Pokémon | ||||||||||||||||||||||||||||||||||||||||||||||||||||||||||||||||||||||||||||||||||||||||||||||||||||||||||||||||||||||||||||||||||||||||||||||||||||||||||||||||||||||||||||||||||||||||||||||||||||||||||||||||||||||||||||||||||||||||||||||||||||||||||||||||||||||||||||||||||||||||||||||||||||||||||||||||||||||||||||||||||||||||||||||||||||||||||||||||||||||||||
|---|---|---|---|---|---|---|---|---|---|---|---|---|---|---|---|---|---|---|---|---|---|---|---|---|---|---|---|---|---|---|---|---|---|---|---|---|---|---|---|---|---|---|---|---|---|---|---|---|---|---|---|---|---|---|---|---|---|---|---|---|---|---|---|---|---|---|---|---|---|---|---|---|---|---|---|---|---|---|---|---|---|---|---|---|---|---|---|---|---|---|---|---|---|---|---|---|---|---|---|---|---|---|---|---|---|---|---|---|---|---|---|---|---|---|---|---|---|---|---|---|---|---|---|---|---|---|---|---|---|---|---|---|---|---|---|---|---|---|---|---|---|---|---|---|---|---|---|---|---|---|---|---|---|---|---|---|---|---|---|---|---|---|---|---|---|---|---|---|---|---|---|---|---|---|---|---|---|---|---|---|---|---|---|---|---|---|---|---|---|---|---|---|---|---|---|---|---|---|---|---|---|---|---|---|---|---|---|---|---|---|---|---|---|---|---|---|---|---|---|---|---|---|---|---|---|---|---|---|---|---|---|---|---|---|---|---|---|---|---|---|---|---|---|---|---|---|---|---|---|---|---|---|---|---|---|---|---|---|---|---|---|---|---|---|---|---|---|---|---|---|---|---|---|---|---|---|---|---|---|---|---|---|---|---|---|---|---|---|---|---|---|---|---|---|---|---|---|---|---|---|---|---|---|---|---|---|---|---|---|---|---|---|---|---|---|---|---|---|---|---|---|---|---|---|---|---|---|---|---|---|---|---|---|---|---|---|---|---|---|---|---|---|---|---|---|---|---|---|---|---|---|---|---|---|---|---|---|---|---|---|---|---|
| ||||||||||||||||||||||||||||||||||||||||||||||||||||||||||||||||||||||||||||||||||||||||||||||||||||||||||||||||||||||||||||||||||||||||||||||||||||||||||||||||||||||||||||||||||||||||||||||||||||||||||||||||||||||||||||||||||||||||||||||||||||||||||||||||||||||||||||||||||||||||||||||||||||||||||||||||||||||||||||||||||||||||||||||||||||||||||||||||||||||||||
| Items | ||||||||||||
|---|---|---|---|---|---|---|---|---|---|---|---|---|
| ||||||||||||
When you arrive, Galactic Commander Jupiter has already defeated Barry and caught Uxie. She leaves while stating that Barry is a weak Trainer. Barry, though upset, states his desire to become stronger. Surf across the lake to the patch of grass in the northeastern corner, where you can pick up TM14 (Blizzard).
Now Fly back to Veilstone City and make sure you're ready for a lot of fighting. It's time to raid Team Galactic's Headquarters!
Veilstone City
Head towards the Team Galactic HQ in the northeast corner of the city and talk to the lone grunt there, who is angry at you since his Clefairy was taken away after you defeated him before. He claims ignorance about a Storage Key and runs away. Luckily, Looker shows up and states he has the Storage Key with him. He suggests that it is best to enter the HQ through the Galactic Warehouse you were at before. Make sure to select a well-balanced team for this mission, as you are going to need it.
Galactic Warehouse
| Items | ||||||||||||||||||||||||
|---|---|---|---|---|---|---|---|---|---|---|---|---|---|---|---|---|---|---|---|---|---|---|---|---|
| ||||||||||||||||||||||||
| Team Galactic | ||||||||||||||||||||||||||||||||||||||||
|---|---|---|---|---|---|---|---|---|---|---|---|---|---|---|---|---|---|---|---|---|---|---|---|---|---|---|---|---|---|---|---|---|---|---|---|---|---|---|---|---|
| ||||||||||||||||||||||||||||||||||||||||
Head to the metal doors you saw before and Looker will arrive and open them for you. Once that is done, continue down the stairs to the basement of the warehouse. This bottom floor connects to the Team Galactic HQ. Follow the hallway east to the stairs at the end, battling the two grunts.
Team Galactic HQ
| Items | ||||||||||||||||||||||||||||||||||||||||||||||||||||||||||||||||||||||||
|---|---|---|---|---|---|---|---|---|---|---|---|---|---|---|---|---|---|---|---|---|---|---|---|---|---|---|---|---|---|---|---|---|---|---|---|---|---|---|---|---|---|---|---|---|---|---|---|---|---|---|---|---|---|---|---|---|---|---|---|---|---|---|---|---|---|---|---|---|---|---|---|---|
| ||||||||||||||||||||||||||||||||||||||||||||||||||||||||||||||||||||||||
| Team Galactic | ||||||||||||||||||||||||||||||||||||||||||||||||||||||||||||||||||||||||||||||||||||||||||||||||||||||||||||||||||||||||||||||||||||||||||||||||||||||||||||||||||||||||||||||||||||||||||||||||||||||||||||
|---|---|---|---|---|---|---|---|---|---|---|---|---|---|---|---|---|---|---|---|---|---|---|---|---|---|---|---|---|---|---|---|---|---|---|---|---|---|---|---|---|---|---|---|---|---|---|---|---|---|---|---|---|---|---|---|---|---|---|---|---|---|---|---|---|---|---|---|---|---|---|---|---|---|---|---|---|---|---|---|---|---|---|---|---|---|---|---|---|---|---|---|---|---|---|---|---|---|---|---|---|---|---|---|---|---|---|---|---|---|---|---|---|---|---|---|---|---|---|---|---|---|---|---|---|---|---|---|---|---|---|---|---|---|---|---|---|---|---|---|---|---|---|---|---|---|---|---|---|---|---|---|---|---|---|---|---|---|---|---|---|---|---|---|---|---|---|---|---|---|---|---|---|---|---|---|---|---|---|---|---|---|---|---|---|---|---|---|---|---|---|---|---|---|---|---|---|---|---|---|---|---|---|---|---|
| ||||||||||||||||||||||||||||||||||||||||||||||||||||||||||||||||||||||||||||||||||||||||||||||||||||||||||||||||||||||||||||||||||||||||||||||||||||||||||||||||||||||||||||||||||||||||||||||||||||||||||||
1F
Once up the stairs, you'll arrive in the very upper right-hand corner of 1F. After defeating the Galactic Grunt there, use the right warp panel to enter a closed-off area where you will find TM49 (Snatch). Step back onto the panel from whence you came. Afterwards, use the left warp panel to go up to 2F.
2F
From here, use the nearby warp panel to return to 1F.
1F
Ignore the grunt to the right and take the panel to the left, go down the stairs and defeat the Scientist, grab the Dubious Disc, take the second set of stairs to the left and keep going west.
Galactic Warehouse
Grab the Galactic Key, which will allow you to open the locked steel doors, and you will meet a Galactic Grunt who mentions that Cyrus is having a meeting. You can get to it by entering the HQ's main building from Veilstone and using the Galactic Key. You can unlock the nearby door which will allow you to head back easily to the Warehouse's entrance, but let's make a little side trip by backtracking to 2F. Use the stairs to access 3F.
Team Galactic HQ
3F
Defeat the Galactic Grunts and then open the locked door to find TM21 (Frustration). Now head back to the Galactic Warehouse and leave there to return to Veilstone City. It is now time to enter the main building.
Team Galactic HQ (main building)
1F
Use your new Galactic Key to open the locked door and head up to 2F.
2F
You should now be in the middle area of 2F. Simply fight the grunts and then use each of the warp panels. This will earn you two items. Afterwards, use the warp panel that is located by the TVs to reach the meeting hall, where Cyrus is.
Meeting Hall
You will meet up with Looker here and listen to Cyrus giving his speech about how the world is incomplete and the fact that he now has the power to create a new one for Team Galactic's benefit. After he and the grunts leave, Looker leaves to investigate this further. Follow in the direction he went to find another warp panel that will take you to a new area of 2F.
2F
You'll be in the upper-right area of 2F where there are some beds to rest your Pokémon team. Hidden in the right-hand bed is a Poké Doll. Climb the stairs to 3F.
3F
After dealing with two Galactic Grunts you'll find three warp panels here. The upper right one takes you to an area where you can find a Protein. The upper left will get you another item, and the lower left is the one you'll need to proceed to an area with stairs up to 4F.
4F
This is where Cyrus's office is located. After you open the locked door, Cyrus will greet you and mention that the new world is actually only for him, since he feels his underlings are just as flawed as the rest of the world. Finding you interesting, he'll challenge you to a battle.
|
||||||||||||||||||||||||||||||||||||||||||||||||||||||||||||||||||||||||||||||||||||||||||||||||||||||||||
| ||||||||||||||||||||||||||||||||||||||||||||||||||||||||||||||||||||||||||||||||||||||||||||||||||||||||||
His team is the same as the previous, except that two of his Pokémon have evolved. His first Pokémon, Sneasel, is easily vulnerable to Fighting-types. His other two Crobat and Honchkrow both have Flying-type characteristics and should be easily vulnerable to Rock, Ice and Electric-types. Just remember that Crobat is the faster of the two and may try to confuse your Pokémon with Supersonic and Honchkrow possesses better physical attack moves that could KO your Pokémon if you are not careful.
Afterwards, Cyrus will give you a Master Ball and then leave. He mentions that if you want to save the Lake Pokémon, you should use the nearby warp panel to get to them. Use that warp panel and you will reach a hallway. At the end is where the Lake Trio are being held. Once you reach that room, where they are, you can overhear a conversation between Charon and Saturn about how Charon is happy with the new world Cyrus will create. Talk to Saturn and he'll challenge you to a battle since, unlike Cyrus, he will not let you roam freely and interfere with their plans.
|
||||||||||||||||||||||||||||||||||||||||||||||||||||||||||||||||||||||||||||||||||||||||||||||||||||||||||
| ||||||||||||||||||||||||||||||||||||||||||||||||||||||||||||||||||||||||||||||||||||||||||||||||||||||||||
Saturn's team is the same as before but at higher levels, so the same tactics you used at Lake Valor should work here. Once you defeat him, Saturn will let you press the switch that will set Azelf, Mesprit, and Uxie free. He mentions that Cyrus crafted a special Red Chain for capturing something on Mt. Coronet.
Return to Cyrus's office and a new pathway will have opened up with a warp panel that will take you to the green warp panel just inside one of the main doors of the Galactic HQ. Take it, exit the building, and heal up at the Pokémon Center.
Your biggest quest now awaits you. You will need a strong Pokémon team with the HM abilities Surf, Strength, Rock Smash, and Rock Climb. You should stock up on Hyper Potions and make sure you have some Full Heals just in case.
Once you feel truly prepared, Fly to Oreburgh City. From there, go north to the entrance of Mt. Coronet.
|
Platinum walkthrough |
|

|
This article is part of Project Walkthroughs, a Bulbapedia project that aims to write comprehensive step-by-step guides on each Pokémon game. |
