Appendix:HeartGold and SoulSilver walkthrough/Section 13: Difference between revisions
mNo edit summary |
(→Ho-Oh) |
||
| Line 141: | Line 141: | ||
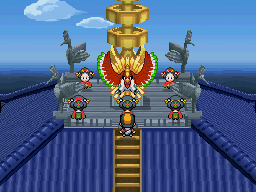
[[File:Ho-Oh Bell Tower HGSS.png|frame|right|Ho-Oh descends from the sky]] | [[File:Ho-Oh Bell Tower HGSS.png|frame|right|Ho-Oh descends from the sky]] | ||
You have the option to throw the {{DL|Poké Ball|Master Ball}} at it as soon as the battle starts, but if you choose not to, get ready for a long fight. | You have the option to throw the {{DL|Poké Ball|Master Ball}} at it as soon as the battle starts, but if you choose not to, get ready for a long and intense fight. | ||
Start off by using status-inflicting moves, like {{m|Spore}} or {{m|Thunder Wave}} to wear it down. Follow up with {{type2|Water}} or {{type2|Electric}} attacks to inflict double the damage(be extremely careful if you try using {{type2|Rock}} attacks -- these attacks aim at Ho-Oh's major weakness and may knock Ho-Oh out in 1 or 2 shots due to Ho-Oh's low Defense, if the Rock-type attacks that will be used are Physical-based like {{m|Rock Slide}} or {{m|Stone Edge}}). Then gradually whittle down its remaining HP with {{t|Fire}}-, {{t|Grass}}-, {{t|Fighting}}-, {{t|Bug}}-, or {{type2|Steel}} attacks, since these types only inflict half or quarter damage. Rely on Special-based moves so that Ho-Oh can survive with its very high Sp. Def. | |||
Ho-Oh has it's signature move {{m|Sacred Fire}} to attack and has a higher chance to inflict burn. Despite Ho-Oh neither makes contact nor use any objects to attack, this move is Physical-based instead of Special-based, so it deals a lot of damage(Ho-Oh's Attack is very high). Ho-Oh also has {{m|Fire Blast}}, but it actually deals only about the damage caused by Sacred Fire due to Ho-Oh's low Sp. Atk. Ho-Oh's {{m|Extrasensory}} is not really a threat. {{m|Sunny Day}} can make Sacred Fire and Fire Blast dreadful, so be very cautious when Ho-Oh uses Sunny Day. | |||
{| class="expandable" align="center" style="background: #{{heartgold color light}}; -moz-border-radius: 1em; border: 5px solid #{{heartgold color}};" | {| class="expandable" align="center" style="background: #{{heartgold color light}}; -moz-border-radius: 1em; border: 5px solid #{{heartgold color}};" | ||
| Line 200: | Line 204: | ||
Don't panic if you accidentally knock Ho-Oh out instead of catching it. You can return to the Bell Tower after defeating the {{DL|Elite Four|Generation II and IV|Elite Four}} and entering the [[Hall of Fame]] to get another shot at catching it. | Don't panic if you accidentally knock Ho-Oh out instead of catching it. You can return to the Bell Tower after defeating the {{DL|Elite Four|Generation II and IV|Elite Four}} and entering the [[Hall of Fame]] to get another shot at catching it. | ||
If you successfully caught it and want to use it, you can consider about teaching it some Flying-type moves like {{TM|40|Aerial Ace}} and {{HM|02|Fly}}. You can also consider about going to [[Blackthorn City]] again and visit the Move Relearner, so that Ho-Oh can remember the move {{m|Brave Bird}} (just be careful about the recoil damage). With Ho-Oh's high Attack and the same-type attack-bonus, Brave Bird, Fly and even Aerial Ace can deal some decent damage. | |||
== Lugia Emerges From the Waterfall Basin == | == Lugia Emerges From the Waterfall Basin == | ||
Revision as of 13:17, 10 October 2011
The guide for those can be found here.
New Bark Town
Elm's Lab
When you enter Elm's lab, Lyra/Ethan talks to you, impressed that you've already earned eight badges. Elm tells you that his research is going great, thanks to you. To show his appreciation, he gives you the Master Ball, a Poké Ball guaranteed to catch any Pokémon, which is normally given only to noted Pokémon researchers. He also mentions that a group of Kimono Girls was looking for you not long ago. The girls are waiting for you at the Ecruteak Dance Theater.
Ecruteak City
Ecruteak Dance Theater
As you reach the door, your rival bumps into you, agonizing over his defeat at the hands of the Kimono Girls. Step inside, and you'll automatically walk up onto the stage. You are welcomed by Zuki, the Kimono Girl you met in Violet City. She tells you that in order to bring Ho-OhWrong template. See Template:Sup/doc. / LugiaWrong template. See Template:Sup/doc. back, they needed to find someone that has the right bond with Pokémon. She reveals that it was they who gave the Mystery Egg to Mr. Pokémon, asking him to give it to whoever showed "true potential". However, being pure alone is not enough to face the power of that Pokémon, and Zuki will give you an opportunity to prove yourself by defeating each of the five Kimono Girls in a row.
- Zuki, who you met in Violet City, and her Umbreon
- Naoko, who was lost in Ilex Forest, and her Espeon
- Miki, assaulted by a Rocket in the Dance Theater, and her Flareon
- Sayo, frozen to the ground in Ice Path, and her Jolteon
- Kuni, who you met in Goldenrod Tunnel, and her Vaporeon
| Kimono Girls | |||||||||||||||||||||||||||||||||||||||||||||||||||||||||||||||||||||||||||||
|---|---|---|---|---|---|---|---|---|---|---|---|---|---|---|---|---|---|---|---|---|---|---|---|---|---|---|---|---|---|---|---|---|---|---|---|---|---|---|---|---|---|---|---|---|---|---|---|---|---|---|---|---|---|---|---|---|---|---|---|---|---|---|---|---|---|---|---|---|---|---|---|---|---|---|---|---|---|
| |||||||||||||||||||||||||||||||||||||||||||||||||||||||||||||||||||||||||||||
For defeating all five sisters, Zuki gives you the Clear BellWrong template. See Template:Sup/doc. / Tidal BellWrong template. See Template:Sup/doc.. When combined with the Rainbow Wing / Silver Wing, the two sets of items can be used to summon Ho-Oh and Lugia, respectively.
Ho-Oh Descends to the Bell Tower
Suddenly, their little sister runs in, saying that she just saw the shadow of a big Pokémon over the Bell Tower. The sisters run off, leaving you to follow them to the tower. Stock up on Ultra Balls if you haven't already; Ho-Oh won't let itself be caught without a fight. Repels, Escape Ropes, and a high-level Pokémon with a status-inflicting move (like Spore or Thunder Wave) are also recommended.
Head north from the Dance Theater to reach the tower's Barrier Station. Flash your Fog Badge to reach Bellchime Trail, and step inside the tower.
Bell Tower
As you approach the rear of the first floor, the monk blocking the stairs walks up to you, and the Rainbow Wing suddenly floats up into the air. Seeing the shimmering rainbow feather, the monk finally lets you pass.
| Available Pokémon | ||||||||||||||||||||||||||||||||||||||||||||||||||||||||||||||||||||||||||||||||||||||||||||||||||||||||||||
|---|---|---|---|---|---|---|---|---|---|---|---|---|---|---|---|---|---|---|---|---|---|---|---|---|---|---|---|---|---|---|---|---|---|---|---|---|---|---|---|---|---|---|---|---|---|---|---|---|---|---|---|---|---|---|---|---|---|---|---|---|---|---|---|---|---|---|---|---|---|---|---|---|---|---|---|---|---|---|---|---|---|---|---|---|---|---|---|---|---|---|---|---|---|---|---|---|---|---|---|---|---|---|---|---|---|---|---|---|
| ||||||||||||||||||||||||||||||||||||||||||||||||||||||||||||||||||||||||||||||||||||||||||||||||||||||||||||
2F
Head south and climb the ladder to the third floor.
3F
Now you'll start to see small ramps that make reaching the top of the tower all the more roundabout. Jump the ramp to the west, and grab the Full Heal. Head to the east, and walk past the pillar in a large S-shape to reach the stairs in the northeast.
4F
Jump the first ramp to the south, then head west in order to reach an Ultra Ball. Grab the PP Up near the southeast stairs, and head west to reach an Escape Rope. Head north to reach the central pillar, and take the stairs in the northwest to reach the fifth floor.
5F
Follow the walkway along the north wall to reach the pillar. Pick up the Rare Candy, and climb down the stairs in the southeast to the fourth floor again. Take the stairs in the northwest to climb back to the 5th floor. Jump the first two ramps along the north wall again, but this time jump the ramp located along the north wall, just east of the pillar. Follow that path to the south, and when you reach the upside-down Y-shaped intersection, take the right-hand path to the south, and climb the ladder to reach the sixth floor.
6F
Walk north and grab a Max Potion sitting by the pillar. Head east over the rope bridge, and walk north. Take the northernmost bridge west, pick up the Full Heal, and jump south to reach the ladder that leads to the seventh floor.
7F
The 7th floor introduces a group of warp panels. Walk north past the first warp panel, and pick up the Max Revive in the northeast. Trek back west and step on the warp panel, which teleports you to the platform around the pillar (on this floor). Walk west to find another warp; this one takes you to the eastern side of the 9th floor.
9F
Head south and jump over the first ramp. Jump west over the next two ramps, then south over a single ramp, and three more to the west and take the warp to 8F.
Grab the Nugget, and warp back.
Follow the ramps, and step on the warp south of the pillar.
Pick up the Max Elixir, and warp back.
Jump back east, and take the warp north of here back to 7F.
7F
Take the warp on the other side of the pillar to reach the northern area of 7F again. Head east across the ramps again, then south to reach a warp to the western side of 8F.
8F
Step on the next warp to find yourself on the north side of 9F.
9F
Walk west and grab an HP Up behind the pillar. Continue west and take the warp to the east side of 8F.
8F
Head north, grab the Full Restore in the northwest area, and step on the warp behind the pillar to reach the central area of 9F.
9F
Climb the ladder on the opposite side of the pillar to reach the 10th floor.
10F
Pass by the pillar, and walk over the old, rotten walkway to reach the stairs to the roof.
Bell Tower Roof
Climb the golden steps to reach the the tower's spire, where the Kimono Girls are waiting for you. Zuki tells you that once their mystical dance combines with the sound of the Clear Bell they entrusted to you, Ho-Oh will return from the great arch of the sky once more. The Clear Bell floats up above you, and the Kimono Girls begin their dance. The four other bells, hanging from the edges of the roof, also activate. As if drawn by the dance and chime of the bells, Ho-Oh descends to the tower's roof. SAVE THE GAME, and walk up to it to start the battle.
SoulSilver players will need to wait to challenge Ho-Oh until after obtaining the Rainbow Wing in Pewter City. Unlike HeartGold players, you don't need the Clear Bell to summon it — you can face it right away, though at a greatly increased level.
Ho-Oh
You have the option to throw the Master Ball at it as soon as the battle starts, but if you choose not to, get ready for a long and intense fight.
Start off by using status-inflicting moves, like Spore or Thunder Wave to wear it down. Follow up with Template:Type2 or Template:Type2 attacks to inflict double the damage(be extremely careful if you try using Template:Type2 attacks -- these attacks aim at Ho-Oh's major weakness and may knock Ho-Oh out in 1 or 2 shots due to Ho-Oh's low Defense, if the Rock-type attacks that will be used are Physical-based like Rock Slide or Stone Edge). Then gradually whittle down its remaining HP with Fire-, Grass-, Fighting-, Bug-, or Template:Type2 attacks, since these types only inflict half or quarter damage. Rely on Special-based moves so that Ho-Oh can survive with its very high Sp. Def.
Ho-Oh has it's signature move Sacred Fire to attack and has a higher chance to inflict burn. Despite Ho-Oh neither makes contact nor use any objects to attack, this move is Physical-based instead of Special-based, so it deals a lot of damage(Ho-Oh's Attack is very high). Ho-Oh also has Fire Blast, but it actually deals only about the damage caused by Sacred Fire due to Ho-Oh's low Sp. Atk. Ho-Oh's Extrasensory is not really a threat. Sunny Day can make Sacred Fire and Fire Blast dreadful, so be very cautious when Ho-Oh uses Sunny Day.
| Ho-Oh | ||||||||||||||||||||||||||||||||||||||||||||||||||||||||||||||||||||||||
|---|---|---|---|---|---|---|---|---|---|---|---|---|---|---|---|---|---|---|---|---|---|---|---|---|---|---|---|---|---|---|---|---|---|---|---|---|---|---|---|---|---|---|---|---|---|---|---|---|---|---|---|---|---|---|---|---|---|---|---|---|---|---|---|---|---|---|---|---|---|---|---|---|
| ||||||||||||||||||||||||||||||||||||||||||||||||||||||||||||||||||||||||
Don't panic if you accidentally knock Ho-Oh out instead of catching it. You can return to the Bell Tower after defeating the Elite Four and entering the Hall of Fame to get another shot at catching it.
If you successfully caught it and want to use it, you can consider about teaching it some Flying-type moves like TM40 (Aerial Ace) and HM02 (Fly). You can also consider about going to Blackthorn City again and visit the Move Relearner, so that Ho-Oh can remember the move Brave Bird (just be careful about the recoil damage). With Ho-Oh's high Attack and the same-type attack-bonus, Brave Bird, Fly and even Aerial Ace can deal some decent damage.
Lugia Emerges From the Waterfall Basin
Suddenly, their little sister runs in, saying that she just saw the shadow of a big Pokémon in the Whirl Islands' waters. The sisters run off, leaving you to follow them to the islands. Stock up on Ultra Balls and Dusk Balls if you haven't already; Lugia won't let itself be caught without a fight. Repels, Escape Ropes, and a high-level Pokémon with a status-inflicting move (like Spore or Thunder Wave) are also recommended. You'll also need to bring Pokémon that know Surf and Whirlpool in order to fully navigate the underwater cave network beneath the islands; Flash and Strength can be helpful, but aren't needed.
Fly to Olivine City, head west to Route 40, and surf south to reach the islands.
Whirl Islands
It's a good idea to explore each island in order to find all items and wild Pokémon, but if you're only here for Lugia, start off at the northeast island.
| Available Pokémon | |||||||||||||||||||||||||||||||||||||||||||||||||||||||||||||||||||||||||||||||||||||||||||||||||||||||||||||||||||||||||||||||||||||||||||||||||||||||||||||||||||||||||||||||||||||||||||||||||||||||||||||||||||||||||||||||||||||||||||||||||||||||||||||||||||||||||||||||||||||||||||||||||||||||||||||||||||||||||||||||||||||||||||||||||||||||||||||||||||||||||||||||||||||||||||||||||||||||||||||||||||||||||||||||||||||||||||||||||||||||||||||||||||||||||||||||||||||||||||||||||||||||||||||||||||||||||||||||||||||||||||||||||||||||||||||||||||||||||||||||||||||||||||||||||||||||||||||||||||||||||||||||||||||||||||||||||||||||||||||||||||||||
|---|---|---|---|---|---|---|---|---|---|---|---|---|---|---|---|---|---|---|---|---|---|---|---|---|---|---|---|---|---|---|---|---|---|---|---|---|---|---|---|---|---|---|---|---|---|---|---|---|---|---|---|---|---|---|---|---|---|---|---|---|---|---|---|---|---|---|---|---|---|---|---|---|---|---|---|---|---|---|---|---|---|---|---|---|---|---|---|---|---|---|---|---|---|---|---|---|---|---|---|---|---|---|---|---|---|---|---|---|---|---|---|---|---|---|---|---|---|---|---|---|---|---|---|---|---|---|---|---|---|---|---|---|---|---|---|---|---|---|---|---|---|---|---|---|---|---|---|---|---|---|---|---|---|---|---|---|---|---|---|---|---|---|---|---|---|---|---|---|---|---|---|---|---|---|---|---|---|---|---|---|---|---|---|---|---|---|---|---|---|---|---|---|---|---|---|---|---|---|---|---|---|---|---|---|---|---|---|---|---|---|---|---|---|---|---|---|---|---|---|---|---|---|---|---|---|---|---|---|---|---|---|---|---|---|---|---|---|---|---|---|---|---|---|---|---|---|---|---|---|---|---|---|---|---|---|---|---|---|---|---|---|---|---|---|---|---|---|---|---|---|---|---|---|---|---|---|---|---|---|---|---|---|---|---|---|---|---|---|---|---|---|---|---|---|---|---|---|---|---|---|---|---|---|---|---|---|---|---|---|---|---|---|---|---|---|---|---|---|---|---|---|---|---|---|---|---|---|---|---|---|---|---|---|---|---|---|---|---|---|---|---|---|---|---|---|---|---|---|---|---|---|---|---|---|---|---|---|---|---|---|---|---|---|---|---|---|---|---|---|---|---|---|---|---|---|---|---|---|---|---|---|---|---|---|---|---|---|---|---|---|---|---|---|---|---|---|---|---|---|---|---|---|---|---|---|---|---|---|---|---|---|---|---|---|---|---|---|---|---|---|---|---|---|---|---|---|---|---|---|---|---|---|---|---|---|---|---|---|---|---|---|---|---|---|---|---|---|---|---|---|---|---|---|---|---|---|---|---|---|---|---|---|---|---|---|---|---|---|---|---|---|---|---|---|---|---|---|---|---|---|---|---|---|---|---|---|---|---|---|---|---|---|---|---|---|---|---|---|---|---|---|---|---|---|---|---|---|---|---|---|---|---|---|---|---|---|---|---|---|---|---|---|---|---|---|---|---|---|---|---|---|---|---|---|---|---|---|---|---|---|---|---|---|---|---|---|---|---|---|---|---|---|---|---|---|---|---|---|---|---|---|---|---|---|---|---|---|---|---|---|---|---|---|---|---|---|---|---|---|---|---|---|---|---|---|---|---|---|---|---|---|---|---|---|---|---|---|---|---|---|---|---|---|---|---|---|---|---|---|---|---|---|---|---|---|---|---|---|---|---|---|---|---|---|---|---|---|---|---|---|---|---|---|---|---|---|---|---|---|---|---|---|---|---|---|---|---|
| |||||||||||||||||||||||||||||||||||||||||||||||||||||||||||||||||||||||||||||||||||||||||||||||||||||||||||||||||||||||||||||||||||||||||||||||||||||||||||||||||||||||||||||||||||||||||||||||||||||||||||||||||||||||||||||||||||||||||||||||||||||||||||||||||||||||||||||||||||||||||||||||||||||||||||||||||||||||||||||||||||||||||||||||||||||||||||||||||||||||||||||||||||||||||||||||||||||||||||||||||||||||||||||||||||||||||||||||||||||||||||||||||||||||||||||||||||||||||||||||||||||||||||||||||||||||||||||||||||||||||||||||||||||||||||||||||||||||||||||||||||||||||||||||||||||||||||||||||||||||||||||||||||||||||||||||||||||||||||||||||||||||
| Items | ||||||||
|---|---|---|---|---|---|---|---|---|
| ||||||||
Northwest Island
Step inside the cave, and take the stairs to the floor below.
From the stairs, step down off of the rock ledge and head south to find a Full Restore. Jump the ledge and head east, and step up onto another rock ledge; follow it clockwise, step down from the northern end, and pick up the Nugget from the center. Head east, jump the two ledges, and take the stairs - grab the Ultra Ball here, and head back downstairs. Walk to the south, jump another ledge, and head west, back towards the entrance stairs in the northwest. From the stairs, walk south along the rock ledge and pick up the Carbos. Trek east onto another rock ledge, and climb down the stairs.
Grab the Max Elixir and the Full Restore near the stairs. Now that you've hit a dead-end, use an Escape Rope to exit the island.
Northeast Island
Step inside the cave and head east, jumping over the two northern ledges. Take the stairs in the northeast to reach the large, central cavern beneath the islands.
Head south from the stairs, pick up a Revive hidden in the blue-green rocks, and follow the rock ledge to the south. Climb the ladder at the southern end to reach the Waterfall Basin's entrance chamber.
Check the northern wall to find a hidden Full Restore, and walk west from the ladder to find a Max Revive. Talk to the monk, and the Silver Wing floats up into the air. When he sees the shimmering silver feather, he lets you pass. Step through the archway just south of him to find a Rare Candy. Leave that room and follow the walkway down the front of the cliff to find one last cave at the bottom, where your lead Pokémon retreats into its Poké Ball.
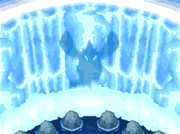
Step through the archway and climb up onto the platform, where you'll find the five Kimono Girls waiting for you. Zuki tells you that once their mystical dance combines with the sound of the Tidal Bell they entrusted to you, Lugia will finally emerge from the waterfall basin once more. The Tidal Bell floats up onto the central altar area, and the Kimono Girls begin their dance. The two other bells on either side of the waterfall activate. As if summoned by the dance and the peal of the bells, an awakened Lugia appears from behind the waterfall. SAVE THE GAME, and swim out to meet it.
HeartGold players will need to wait to challenge Lugia until after obtaining the Silver Wing in Pewter City. Unlike SoulSilver players, you don't need the Tidal Bell to summon it — you can face it right away, though at a greatly increased level.
Lugia
You have the option to throw the Master Ball at it as soon as the battle starts, but if you choose not to, get ready for a long fight. Start off by using status-inflicting moves, like Spore or Thunder Wave to wear it down. Follow up with super-effective (Electric-, Ice-, or Template:Type2) attacks to drain its health. Then gradually lower its remaining HP with Grass-, Fighting-, or Template:Type2 attacks, since these types only inflict half or quarter damage.
| Lugia | ||||||||||||||||||||||||||||||||||||||||||||||||||||||||||||||||||||||||
|---|---|---|---|---|---|---|---|---|---|---|---|---|---|---|---|---|---|---|---|---|---|---|---|---|---|---|---|---|---|---|---|---|---|---|---|---|---|---|---|---|---|---|---|---|---|---|---|---|---|---|---|---|---|---|---|---|---|---|---|---|---|---|---|---|---|---|---|---|---|---|---|---|
| ||||||||||||||||||||||||||||||||||||||||||||||||||||||||||||||||||||||||
Don't panic if you accidentally knock Lugia out instead of catching it. You can return to the Whirl Islands after defeating the Elite Four and entering the Hall of Fame to get another shot at catching it.
Southwest Island
Enter the cave, and climb down the ladder to the northwest.
Head east from the ladder to find an Escape Rope. This area of B1F is a total dead-end: a one-way ledge blocks your way to the north, and while you can move a boulder east of here, you won't be able to walk out around it. Use an Escape Rope, or climb back to the cave's entrance.
Southeast Island
Step inside the cave, and climb down the ladder on the rocky ledge to the north.
Pick up the nearby Calcium, and head south to step down off of the rock ledge. Follow the eastern wall to the north, and then turn to the southwest. Climb the stairs to find an Ultra Ball. You can either use an Escape Rope from here, or surf west across the water to reach the southwest island's exit.
Back to New Bark
Now that you've battled with Ho-OhWrong template. See Template:Sup/doc. / LugiaWrong template. See Template:Sup/doc., your next step is the Pokémon League, high atop Indigo Plateau. Fly back home to New Bark Town, and surf east across the water to reach Route 27.
|
HeartGold and SoulSilver walkthrough |
|

|
This article is part of Project Walkthroughs, a Bulbapedia project that aims to write comprehensive step-by-step guides on each Pokémon game. |


