Appendix:Gold and Silver walkthrough/Section 11: Difference between revisions
mNo edit summary |
mNo edit summary |
||
| Line 6: | Line 6: | ||
== Mahogany Town == | == Mahogany Town == | ||
[[ | [[File:Mahogany Town GSC.png|thumb|left|Mahogany Town]] | ||
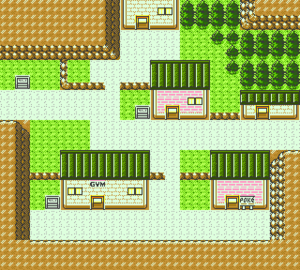
[[Mahogany Town]] is a small, quiet town in northern Johto. On your first visit, the [[Mahogany Gym]] is blocked off, and a man at the town's east end prevents travel to {{rt|43|Johto}}. There is no official Poké Mart here, but the shop in the center of town sells odd items (like [[TinyMushroom]] and {{DL|Valuable item|SlowpokeTail}}) as well as the standard Poké Balls and Potions. With nothing else to do, head up north to the [[Lake of Rage]]. | [[Mahogany Town]] is a small, quiet town in northern Johto. On your first visit, the [[Mahogany Gym]] is blocked off, and a man at the town's east end prevents travel to {{rt|43|Johto}}. There is no official Poké Mart here, but the shop in the center of town sells odd items (like [[TinyMushroom]] and {{DL|Valuable item|SlowpokeTail}}) as well as the standard Poké Balls and Potions. With nothing else to do, head up north to the [[Lake of Rage]]. | ||
| Line 12: | Line 12: | ||
== Route 43 == | == Route 43 == | ||
[[ | [[File:Johto Route 43 GSC.png|thumb|right|150px|Route 43]] | ||
{{rt|43|Johto}} stretches between Mahogany Town and Lake of Rage. <br> | {{rt|43|Johto}} stretches between Mahogany Town and Lake of Rage. <br> | ||
| Line 23: | Line 23: | ||
| | | | ||
{{trainerheader}} | {{trainerheader}} | ||
{{Trainerentry| | {{Trainerentry|GSC Camper.png|Camper|Spencer|380|3|027|Sandshrew|?|17|None|028|Sandslash|?|17|None|041|Zubat|?|19|None|36=???|37=Taichi}} | ||
{{Trainerdiv}} | {{Trainerdiv}} | ||
{{Trainerentry| | {{Trainerentry|GSC Picnicker.png|Picnicker|Tiffany|400|1|035|Clefairy|?|20|None|36=???|37=Chisato|38=phone}} | ||
{{Trainerdiv}} | {{Trainerdiv}} | ||
{{Trainerentry| | {{Trainerentry|GSC Fisherman.png|Fisherman|Marvin|600|4|129|Magikarp|?|10|None|130|Gyarados|?|10|None|129|Magikarp|?|15|None|130|Gyarados|?|15|None|36=????|37=Yoshihito}} | ||
{{Trainerdiv}} | {{Trainerdiv}} | ||
{{Trainerentry| | {{Trainerentry|GSC PokeManiac.png|PokéManiac|Ron|1140|1|034|Nidoking|?|19|None|36=???|37=Kazushi}} | ||
{{Trainerdiv}} | {{Trainerdiv}} | ||
{{Trainerentry| | {{Trainerentry|GSC PokeManiac.png|PokéManiac|Brent|1140|1|108|Lickitung|?|19|None|36=???|37=Makoto|38=phone}} | ||
{{Trainerdiv}} | {{Trainerdiv}} | ||
{{Trainerentry| | {{Trainerentry|GSC PokeManiac.png|PokéManiac|Ben|1140|1|080|Slowbro|?|19|None|36=???|37=Suguru}} | ||
{{Trainerfooter|land|II}} | {{Trainerfooter|land|II}} | ||
|} | |} | ||
| Line 83: | Line 83: | ||
== Lake of Rage == | == Lake of Rage == | ||
[[ | [[File:Lake of Rage GSC.png|thumb|left|250px|Lake of Rage]] | ||
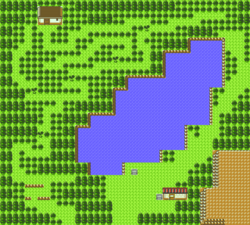
Once you reach the [[Lake of Rage|lake]], save your game. | Once you reach the [[Lake of Rage|lake]], save your game. {{m|Surf}} to the center to battle the [[red Gyarados]]. It isn't necessary to capture it, thought not a bad idea. After the battle, it drops a {{DL|List of key items in Generation II|Red Scale}}; show this to [[Mr. Pokémon]] on {{rt|30|Johto}} and he will give you an {{DL|Experience-affecting item|Exp Share}}. | ||
<br><br> | <br><br> | ||
Step onto the shore, and you'll see [[Lance]] reading the nearby sign. Speak to him to learn more about Team Rocket's plans, and head back to Mahogany. Visit the shop, and Lance will show you the entrance to the Rocket hideout. | Step onto the shore, and you'll see [[Lance]] reading the nearby sign. Speak to him to learn more about Team Rocket's plans, and head back to Mahogany. Visit the shop, and Lance will show you the entrance to the Rocket hideout. | ||
| Line 128: | Line 128: | ||
== Rocket Hideout == | == Rocket Hideout == | ||
[[ | [[File:Rocket Hidout B1F GSC.png|thumb|right|Rocket Hideout, B1F]] | ||
{| class="expandable" align="center" style="background: #666666; {{roundytop|10px}} {{roundybottom|10px}}; border: 5px solid #CC0000;" | {| class="expandable" align="center" style="background: #666666; {{roundytop|10px}} {{roundybottom|10px}}; border: 5px solid #CC0000;" | ||
|- align="center" | |- align="center" | ||
| Line 158: | Line 158: | ||
| | | | ||
{{trainerheader}} | {{trainerheader}} | ||
{{Trainerentry| | {{Trainerentry|GSC Rocket GruntM.png|Rocket Grunt||760|2|096|Drowzee|♂|17|None|041|Zubat|♂|19|None}} | ||
{{Trainerdiv}} | {{Trainerdiv}} | ||
{{Trainerentry| | {{Trainerentry|GSC Rocket GruntM.png|Rocket Grunt||720|3|041|Zubat|♂|16|None|088|Grimer|♂|17|None|019|Rattata|♂|18|None}} | ||
{{Trainerfooter|land|II}} | {{Trainerfooter|land|II}} | ||
|} | |} | ||
| Line 172: | Line 172: | ||
| | | | ||
{{trainerheader}} | {{trainerheader}} | ||
{{Trainerentry| | {{Trainerentry|GSC Rocket GruntM.png|Rocket Grunt||640|4|019|Rattata|♂|16|None|019|Rattata|♂|16|None|019|Rattata|♂|16|None|019|Rattata|♂|16|None}} | ||
{{Trainerdiv}} | {{Trainerdiv}} | ||
{{Trainerentry| | {{Trainerentry|GSC Scientist.png|Scientist|Jed|2000|3|081|Magnemite|♂|20|None|081|Magnemite|♂|20|None|081|Magnemite|♂|20|None}} | ||
{{Trainerfooter|land|II}} | {{Trainerfooter|land|II}} | ||
|} | |} | ||
===B2F=== | ===B2F=== | ||
[[ | [[File:Rocket Hideout B2F GSC.png|thumb|right|Rocket Hideout, B2F]] | ||
On the next lower floor, you will see Lance waiting for you, where he heals your team before running off. Battle past the two nearby Rockets, and take the stairs to the basement. | On the next lower floor, you will see Lance waiting for you, where he heals your team before running off. Battle past the two nearby Rockets, and take the stairs to the basement. | ||
| Line 188: | Line 188: | ||
| | | | ||
{{trainerheader}} | {{trainerheader}} | ||
{{Trainerentry| | {{Trainerentry|GSC Rocket GruntM.png|Rocket Grunt||720|2|048|Venonat|♂|18|None|048|Venonat|♂|18|None}} | ||
{{Trainerdiv}} | {{Trainerdiv}} | ||
{{Trainerentry| | {{Trainerentry|GSC Rocket GruntM.png|Rocket Grunt||720|1|042|Golbat|♂|16|None}} | ||
{{Trainerfooter|land|II}} | {{Trainerfooter|land|II}} | ||
|} | |} | ||
===B3F=== | ===B3F=== | ||
[[ | [[File:Rocket Hideout B3F GSC.png|thumb|right|Rocket Hideout, B3F]] | ||
Lance approaches you, saying that there are two passwords needed to reach the boss. Grab the Protein along the east wall, then head west through the southern area. Beat the scientist near the stairs, and battle the red-haired grunt just north of here. After defeating her, she gives up the first password: "SlowpokeTail". One down, but it's useless without the second. Leave this room and head west, battling Scientist Mitch on your way. Past Mitch is another Rocket, and this one knows the other password: "Raticate Tail". Grab the Dire Hit and Full Heal nearby, and head north. Pick up the Ice Heal, and head up the stairs in the northeast. | Lance approaches you, saying that there are two passwords needed to reach the boss. Grab the Protein along the east wall, then head west through the southern area. Beat the scientist near the stairs, and battle the red-haired grunt just north of here. After defeating her, she gives up the first password: "SlowpokeTail". One down, but it's useless without the second. Leave this room and head west, battling Scientist Mitch on your way. Past Mitch is another Rocket, and this one knows the other password: "Raticate Tail". Grab the Dire Hit and Full Heal nearby, and head north. Pick up the Ice Heal, and head up the stairs in the northeast. | ||
| Line 204: | Line 204: | ||
| | | | ||
{{trainerheader}} | {{trainerheader}} | ||
{{Trainerentry| | {{Trainerentry|GSC Rocket GruntF.png|Rocket Grunt||720|2|023|Ekans|♂|18|None|044|Gloom|♂|18|None}} | ||
{{Trainerdiv}} | {{Trainerdiv}} | ||
{{Trainerentry| | {{Trainerentry|GSC Rocket GruntM.png|Rocket Grunt||760|1|020|Raticate|♂|19|None}} | ||
{{Trainerdiv}} | {{Trainerdiv}} | ||
{{Trainerentry| | {{Trainerentry|GSC Scientist.png|Scientist|Ross|2200|2|109|Koffing|♂|22|None|109|Koffing|♂|22|None|}} | ||
{{Trainerdiv}} | {{Trainerdiv}} | ||
{{Trainerentry| | {{Trainerentry|GSC Scientist.png|Scientist|Mitch|2400|1|132|Ditto||24|None}} | ||
{{Trainerfooter|land|II}} | {{Trainerfooter|land|II}} | ||
|} | |} | ||
| Line 224: | Line 224: | ||
| | | | ||
{{Trainerheader}} | {{Trainerheader}} | ||
{{Trainerentry| | {{Trainerentry|GSC Rocket GruntM.png|Rocket Grunt||680|3|019|Rattata|♂|17|None|041|Zubat|♂|17|None|019|Rattata|♂|17|None}} | ||
{{Trainerdiv}} | {{Trainerdiv}} | ||
{{Trainerentry| | {{Trainerentry|GSC Rocket ExecutiveM.png|Rocket Executive||1584|3|041|Zubat|♂|22|None|109|Koffing|♂|22|None|020|Raticate|♂|24|None}} | ||
{{Trainerfooter|land|II}} | {{Trainerfooter|land|II}} | ||
|} | |} | ||
| Line 238: | Line 238: | ||
| | | | ||
{{Trainerheader}} | {{Trainerheader}} | ||
{{Trainerentry| | {{Trainerentry|GSC Rocket ExecutiveF.png|Rocket Executive||1800|3|024|Arbok|♂|23|None|044|Gloom|♂|23|None|198|Murkrow|♂|23|None}} | ||
{{Trainerfooter|land|II}} | {{Trainerfooter|land|II}} | ||
|} | |} | ||
| Line 247: | Line 247: | ||
== Mahogany Gym == | == Mahogany Gym == | ||
[[ | [[File:Mahogany Gym GS.png|frame|right|Mahogany Gym]] | ||
{{sign|RBY|header}} | {{sign|RBY|header}} | ||
| Line 260: | Line 260: | ||
{| align="center" style="background: #{{ice color}}; {{roundytop|10px}} {{roundybottom|10px}}; border: 5px solid #{{ice color light}};" | {| align="center" style="background: #{{ice color}}; {{roundytop|10px}} {{roundybottom|10px}}; border: 5px solid #{{ice color light}};" | ||
|- align="center" | |- align="center" | ||
! Mahogany Gym <br> [[ | ! Mahogany Gym <br> [[File:Glacier Badge.png|35px|The Glacier Badge]] <br><br> | ||
|- | |- | ||
| | | | ||
| Line 269: | Line 269: | ||
| | | | ||
{{Trainerheader|Ice}} | {{Trainerheader|Ice}} | ||
{{Trainerentry| | {{Trainerentry|GSC Skier.png|Skier|Roxanne|2016|1|124|Jynx||28|None|36=サチコ|37=Sachiko}} | ||
{{Trainerdiv|Ice}} | {{Trainerdiv|Ice}} | ||
{{Trainerentry| | {{Trainerentry|GSC Boarder.png|Boarder|Ronald|1728|3|086|Seel||24|None|086|Seel||24|None|087|Dewgong||25|None|36=フミヤ|37=Fumiya}} | ||
{{Trainerdiv|Ice}} | {{Trainerdiv|Ice}} | ||
{{Trainerentry| | {{Trainerentry|GSC Skier.png|Skier|Clarissa|2016|1|087|Dewgong||28|None|36=アユミ|37=Ayumi}} | ||
{{Trainerdiv|Ice}} | {{Trainerdiv|Ice}} | ||
{{Trainerentry| | {{Trainerentry|GSC Boarder.png|Boarder|Brad|1872|2|220|Swinub||26|None|220|Swinub||26|None|36=ノリヒロ|37=Norihiro}} | ||
{{Trainerdiv|Ice}} | {{Trainerdiv|Ice}} | ||
{{Trainerentry| | {{Trainerentry|GSC Boarder.png|Boarder|Douglas|1728|3|090|Shellder||24|None|090|Shellder||24|None|091|Cloyster||25|None|36=キンジ|37=Kinji}} | ||
{{Trainerfooter|Ice|2|inside}} | {{Trainerfooter|Ice|2|inside}} | ||
|} | |} | ||
Revision as of 15:06, 20 March 2012
The guide for those can be found here.
Mahogany Town
Mahogany Town is a small, quiet town in northern Johto. On your first visit, the Mahogany Gym is blocked off, and a man at the town's east end prevents travel to Route 43. There is no official Poké Mart here, but the shop in the center of town sells odd items (like TinyMushroom and SlowpokeTail) as well as the standard Poké Balls and Potions. With nothing else to do, head up north to the Lake of Rage.
Route 43
Route 43 stretches between Mahogany Town and Lake of Rage.
There are two paths to reach the lake. Traveling through the gate will cost Trainers $1000, since a pair of Rocket grunts jumps you as soon as you step inside. The grassy trail alongside the pond is just as long, but doesn't require payment to pass. Whichever way you choose, continue north to the Lake of Rage.
| Trainers | ||||||||||||||||||||||||||||||||||||||||||||||||||||||||||||||||||||||||||||||||||||||||||||||||||||||||||||||||||||||||||
|---|---|---|---|---|---|---|---|---|---|---|---|---|---|---|---|---|---|---|---|---|---|---|---|---|---|---|---|---|---|---|---|---|---|---|---|---|---|---|---|---|---|---|---|---|---|---|---|---|---|---|---|---|---|---|---|---|---|---|---|---|---|---|---|---|---|---|---|---|---|---|---|---|---|---|---|---|---|---|---|---|---|---|---|---|---|---|---|---|---|---|---|---|---|---|---|---|---|---|---|---|---|---|---|---|---|---|---|---|---|---|---|---|---|---|---|---|---|---|---|---|---|---|
| ||||||||||||||||||||||||||||||||||||||||||||||||||||||||||||||||||||||||||||||||||||||||||||||||||||||||||||||||||||||||||
| Available Pokémon | ||||||||||||||||||||||||||||||||||||||||||||||||||||||||||||||||||||||||||||||||||||||||||||||||||||||||||||||||||||||||||||||||||||||||||||||||||||||||||||||||||||||||||||||||||||||||||||||||||||||||||||||||||||||||||||||||||||||||||||||||||||||||||||||||||||||||||||||||||||||||||||||||||||||||||||||||||||||||||||||||||||||||||||||||||||||||||||||||||||||||||||||||||||||||||||||||||||||||||||||||||||||||||||||||||||||||||||||||||||||||||||
|---|---|---|---|---|---|---|---|---|---|---|---|---|---|---|---|---|---|---|---|---|---|---|---|---|---|---|---|---|---|---|---|---|---|---|---|---|---|---|---|---|---|---|---|---|---|---|---|---|---|---|---|---|---|---|---|---|---|---|---|---|---|---|---|---|---|---|---|---|---|---|---|---|---|---|---|---|---|---|---|---|---|---|---|---|---|---|---|---|---|---|---|---|---|---|---|---|---|---|---|---|---|---|---|---|---|---|---|---|---|---|---|---|---|---|---|---|---|---|---|---|---|---|---|---|---|---|---|---|---|---|---|---|---|---|---|---|---|---|---|---|---|---|---|---|---|---|---|---|---|---|---|---|---|---|---|---|---|---|---|---|---|---|---|---|---|---|---|---|---|---|---|---|---|---|---|---|---|---|---|---|---|---|---|---|---|---|---|---|---|---|---|---|---|---|---|---|---|---|---|---|---|---|---|---|---|---|---|---|---|---|---|---|---|---|---|---|---|---|---|---|---|---|---|---|---|---|---|---|---|---|---|---|---|---|---|---|---|---|---|---|---|---|---|---|---|---|---|---|---|---|---|---|---|---|---|---|---|---|---|---|---|---|---|---|---|---|---|---|---|---|---|---|---|---|---|---|---|---|---|---|---|---|---|---|---|---|---|---|---|---|---|---|---|---|---|---|---|---|---|---|---|---|---|---|---|---|---|---|---|---|---|---|---|---|---|---|---|---|---|---|---|---|---|---|---|---|---|---|---|---|---|---|---|---|---|---|---|---|---|---|---|---|---|---|---|---|---|---|---|---|---|---|---|---|---|---|---|---|---|---|---|---|---|---|---|---|---|---|---|---|---|---|---|---|---|---|---|---|---|---|---|---|---|---|---|---|---|---|---|---|---|---|---|---|---|---|---|---|---|---|---|---|---|---|---|---|---|---|---|---|---|---|---|---|---|---|---|---|---|---|---|---|---|---|---|---|---|---|---|---|---|---|---|---|---|---|---|---|---|---|---|---|---|---|
| ||||||||||||||||||||||||||||||||||||||||||||||||||||||||||||||||||||||||||||||||||||||||||||||||||||||||||||||||||||||||||||||||||||||||||||||||||||||||||||||||||||||||||||||||||||||||||||||||||||||||||||||||||||||||||||||||||||||||||||||||||||||||||||||||||||||||||||||||||||||||||||||||||||||||||||||||||||||||||||||||||||||||||||||||||||||||||||||||||||||||||||||||||||||||||||||||||||||||||||||||||||||||||||||||||||||||||||||||||||||||||||
| Items | ||||||||
|---|---|---|---|---|---|---|---|---|
| ||||||||
Lake of Rage
Once you reach the lake, save your game. Surf to the center to battle the red Gyarados. It isn't necessary to capture it, thought not a bad idea. After the battle, it drops a Red Scale; show this to Mr. Pokémon on Route 30 and he will give you an Exp Share.
Step onto the shore, and you'll see Lance reading the nearby sign. Speak to him to learn more about Team Rocket's plans, and head back to Mahogany. Visit the shop, and Lance will show you the entrance to the Rocket hideout.
| Available Pokémon | ||||||||||||||||||||||||||||||||||||||||||||||||||||||||||||||||||||||||||||||||||||||||||||||||||||||||||||||||||||||||||||||||||||||||||||||||||||||||||||||||||||||||||||
|---|---|---|---|---|---|---|---|---|---|---|---|---|---|---|---|---|---|---|---|---|---|---|---|---|---|---|---|---|---|---|---|---|---|---|---|---|---|---|---|---|---|---|---|---|---|---|---|---|---|---|---|---|---|---|---|---|---|---|---|---|---|---|---|---|---|---|---|---|---|---|---|---|---|---|---|---|---|---|---|---|---|---|---|---|---|---|---|---|---|---|---|---|---|---|---|---|---|---|---|---|---|---|---|---|---|---|---|---|---|---|---|---|---|---|---|---|---|---|---|---|---|---|---|---|---|---|---|---|---|---|---|---|---|---|---|---|---|---|---|---|---|---|---|---|---|---|---|---|---|---|---|---|---|---|---|---|---|---|---|---|---|---|---|---|---|---|---|---|---|---|---|---|
| ||||||||||||||||||||||||||||||||||||||||||||||||||||||||||||||||||||||||||||||||||||||||||||||||||||||||||||||||||||||||||||||||||||||||||||||||||||||||||||||||||||||||||||
| Items | ||||||||
|---|---|---|---|---|---|---|---|---|
| ||||||||
Later...
Wander through the forest maze on a Wednesday, and you will run into Wesley near the house in the northwest. Speak to him to get a Black Belt, a power-up for Template:Type2s.
Rocket Hideout
B1F
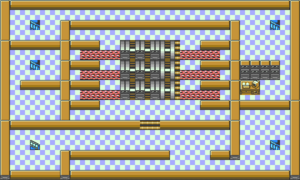
Walk down the stairs, and you will find yourself in Team Rocket's underground base. Be aware of the Pokémon statues lining the northern wall. Each one has a hidden camera that will alert two Rocket Grunts to attack you, and each pair of Grunts will have the same Pokémon.
| Rocket Security | ||||||||||||||||||||||||||||||||||||||||||||||||||
|---|---|---|---|---|---|---|---|---|---|---|---|---|---|---|---|---|---|---|---|---|---|---|---|---|---|---|---|---|---|---|---|---|---|---|---|---|---|---|---|---|---|---|---|---|---|---|---|---|---|---|
| ||||||||||||||||||||||||||||||||||||||||||||||||||
Walk to the west, and just before the second statue is a break in the southern wall. Continue south until you battle Scientist Jed. Pick up the X Accuracy behind him, and inspect his computer to deactivate the security cameras. Now you won't be ambushed by any more Grunts! Head out of Jed's room and walk east, where you'll find a Hyper Potion on the ground. Follow the hallway south from here, and then west. There is a Nugget halfway along the south hallway, and the stairs are in the southwest corner.
| Team Rocket | ||||||||||||||||||||||||||||||||||||||||||||||||||||||||||||||
|---|---|---|---|---|---|---|---|---|---|---|---|---|---|---|---|---|---|---|---|---|---|---|---|---|---|---|---|---|---|---|---|---|---|---|---|---|---|---|---|---|---|---|---|---|---|---|---|---|---|---|---|---|---|---|---|---|---|---|---|---|---|---|
| ||||||||||||||||||||||||||||||||||||||||||||||||||||||||||||||
B2F
On the next lower floor, you will see Lance waiting for you, where he heals your team before running off. Battle past the two nearby Rockets, and take the stairs to the basement.
| Team Rocket | ||||||||||||||||||||||||||||||||||||||
|---|---|---|---|---|---|---|---|---|---|---|---|---|---|---|---|---|---|---|---|---|---|---|---|---|---|---|---|---|---|---|---|---|---|---|---|---|---|---|
| ||||||||||||||||||||||||||||||||||||||
B3F
Lance approaches you, saying that there are two passwords needed to reach the boss. Grab the Protein along the east wall, then head west through the southern area. Beat the scientist near the stairs, and battle the red-haired grunt just north of here. After defeating her, she gives up the first password: "SlowpokeTail". One down, but it's useless without the second. Leave this room and head west, battling Scientist Mitch on your way. Past Mitch is another Rocket, and this one knows the other password: "Raticate Tail". Grab the Dire Hit and Full Heal nearby, and head north. Pick up the Ice Heal, and head up the stairs in the northeast.
| Team Rocket | ||||||||||||||||||||||||||||||||||||||||||||||||||||||||||||||||||||||||||
|---|---|---|---|---|---|---|---|---|---|---|---|---|---|---|---|---|---|---|---|---|---|---|---|---|---|---|---|---|---|---|---|---|---|---|---|---|---|---|---|---|---|---|---|---|---|---|---|---|---|---|---|---|---|---|---|---|---|---|---|---|---|---|---|---|---|---|---|---|---|---|---|---|---|---|
| ||||||||||||||||||||||||||||||||||||||||||||||||||||||||||||||||||||||||||
B2F
Walk to the west along the north wall, and you'll be challenged by another Rocket. Head down the stairs, and you'll be near the boss's room. When you approach, your rival appears, insisting that he is the one who will eliminate Team Rocket. Take the south set of stairs to get TM46 (Thief), then enter the two passwords at the boss's door. The Rocket executive here talks about Giovanni disbanding the group three years ago, and how the organization has lingered since then, formulating plans for his return to command. After defeating him, he runs off to warn the others that their plans are in trouble. Talk to the Murkrow here to learn a third password, "Hail Giovanni", for the generator room.
| Team Rocket | ||||||||||||||||||||||||||||||||||||||||||||||||||||||||
|---|---|---|---|---|---|---|---|---|---|---|---|---|---|---|---|---|---|---|---|---|---|---|---|---|---|---|---|---|---|---|---|---|---|---|---|---|---|---|---|---|---|---|---|---|---|---|---|---|---|---|---|---|---|---|---|---|
| ||||||||||||||||||||||||||||||||||||||||||||||||||||||||
Backtrack to the generator room, where Lance healed your Pokémon. After entering the password, you get ambushed by two more grunts, who are looking to have a 2-on-1 battle. Their trick is short-lived, since Lance shows up with his Dragonite. You each battle a Rocket, and they run off, claiming that their experiment was a success regardless of their defeat here. Lance inspects the large generator, and you each have to defeat (or capture) the three Electrode on each side of the machine in order to shut it down. With the machine disabled, Mahogany is finally rid of the Rockets, and Lance rewards you with HM06 (Whirlpool). Follow him up the stairs, and take the warp tile back to the entrance.
| Team Rocket | |||||||||||||||||||||||||||||
|---|---|---|---|---|---|---|---|---|---|---|---|---|---|---|---|---|---|---|---|---|---|---|---|---|---|---|---|---|---|
| |||||||||||||||||||||||||||||
Now you can challenge the Mahogany Gym!
Mahogany Gym
MAHOGANY TOWN
POKéMON GYM
LEADER: PRYCE
The Teacher of
Winter's Harshness
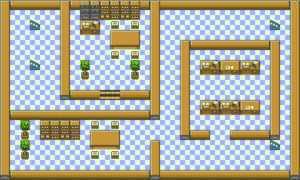
Pryce is at home in the winter wilderness, and has installed icy tiles in his Gym to thwart all but the most determined Trainers. The Mahogany Gym specializes in Ice-types, so Fire-types (like Typhlosion) and Fighting-types will have an easy time here.
| ||||||||||||||||||||||||||||||||||||||||||||||||||||||||||||||||||||||||||||||||||||||||||||||||||||||||||||||||||||||||||||||||||||||||||||||||||||||||||||||||||||||||||||||||||||||||||||||||||||||||
After defeating him, Pryce gives out the Glacier Badge, which increases your party's Special Attack and Special Defense, and allows the use of Whirlpool outside of battle. Pryce also gives you TM16 (Icy Wind), symbolizing winter's harshness. One more badge to go!
When you step outside the Gym, Elm calls you about strange radio broadcasts that mention Team Rocket. It seems the gang won't take a hint, so fly back to Goldenrod to finally put an end to them.
|
Gold and Silver walkthrough |
|

|
This article is part of Project Walkthroughs, a Bulbapedia project that aims to write comprehensive step-by-step guides on each Pokémon game. |


