Appendix:FireRed and LeafGreen walkthrough/Section 4: Difference between revisions
m (→Vermilion City) |
|||
| (41 intermediate revisions by 28 users not shown) | |||
| Line 1: | Line 1: | ||
{{WalkthroughNotice|FRLG}} | |||
== Route 6 == | |||
Route | [[File:Kanto Route 6 FRLG.png|250px|thumbnail|Route 6]] | ||
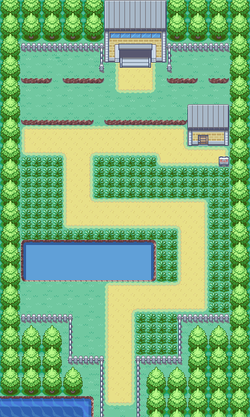
{{rt|6|Kanto}} links [[Saffron City]] and [[Vermilion City]], and connects to {{rt|5|Kanto}} via the [[Underground Path (Kanto Routes 5-6)|Underground Path]]. The area has six Trainers total, but only the last two are unavoidable. The wild Pokémon here are all the same as on Route 5, though {{p|Poliwag|certain}} {{p|Goldeen|water-}}{{p|Psyduck|dwelling}} {{p|Slowpoke|Pokémon}} will be available later with the right fishing rod. | |||
=== | {| class="expandable" align="center" style="background: #{{leafgreen color light}}; {{roundy}}; border: 5px solid #{{firered color light}};" | ||
|- align="center" | |||
! Items | |||
|- | |||
| | |||
{{Itlisth}} | |||
{{Itemlist|Rare Candy|To the right of [[gate]] ''(hidden)''|FR=yes|LG=yes|display={{DL|Vitamin|Rare Candy}}}} | |||
{{Itemlist|Sitrus Berry|To left of [[gate]] ''(hidden)''|FR=yes|LG=yes}} | |||
{{Itlistfoot}} | |||
|} | |||
{| class="expandable" align="center" style="background: #{{leafgreen color light}}; {{roundy}}; border: 5px solid #{{firered color light}};" | |||
|- align="center" | |||
! Available Pokémon | |||
|- | |||
| | |||
{{Catch/header|land|no}} | |||
{{Catch/entryfl|016|Pidgey|yes|yes|Grass|13, 15-16|40%|type1=Normal|type2=Flying}} | |||
{{Catch/entryfl|052|Meowth|yes|yes|Grass|10, 12, 14, 16|35%|type1=Normal}} | |||
{{Catch/entryfl|043|Oddish|yes|no|Grass|13, 15-16|25%|type1=Grass|type2=Poison}} | |||
{{Catch/entryfl|069|Bellsprout|no|yes|Grass|13, 15-16|25%|type1=Grass|type2=Poison}} | |||
{{Catch/footer|land}} | |||
|} | |||
{| class="expandable" align="center" style="background: #{{leafgreen color light}}; {{roundy}}; border: 5px solid #{{firered color light}};" | |||
|- align="center" | |||
! Trainers | |||
|- | |||
| | |||
{{trainerheader}} | |||
{{Trainerentry|Spr FRLG Bug Catcher.png|Bug Catcher|Keigo|192|3|013|Weedle|♂|16|None|010|Caterpie|♂|16|None|013|Weedle|♂|16|None|36=テツジ|37=Tetsuji}} | |||
{{trainerdiv}} | |||
{{Trainerentry|Spr FRLG Camper.png|Camper|Ricky|400|1|007|Squirtle|♂|20|None|36=ユウタ|37=Yūta|38=Vs. Seeker}} | |||
{{trainerdiv}} | |||
{{Trainerentry|Spr FRLG Picnicker.png|Picnicker|Nancy|320|2|019|Rattata|♀|16|None|025|Pikachu|♀|16|None|36=サツキ|37=Satsuki}} | |||
{{trainerdiv}} | |||
{{Trainerentry|Spr FRLG Bug Catcher.png|Bug Catcher|Elijah|240|1|012|Butterfree|♂|20|None|36=ノブユキ|37=Nobuyuki}} | |||
{{trainerdiv}} | |||
{{Trainerentry|Spr FRLG Picnicker.png|Picnicker|Isabelle|320|3|016|Pidgey|♀|16|None|016|Pidgey|♀|16|None|016|Pidgey|♀|16|None|36=ナズナ|37=Nazuna|38=Vs. Seeker}} | |||
{{trainerdiv}} | |||
{{Trainerentry|Spr FRLG Camper.png|Camper|Jeff|320|2|021|Spearow|♂|16|None|020|Raticate|♂|16|None|36=コウタ|37=Kōta|38=Vs. Seeker}} | |||
{{trainerfooter|land}} | |||
|} | |||
== Vermilion City == | |||
[[File:Vermilion City FRLG.png|250px|thumbnail|left|Vermilion City]] | |||
[[File:Vermilion Harbor FRLG.png|250px|thumbnail|left|The harbor]] | |||
[[File:SS Anne FRLG.png|250px|thumbnail|S.S. Anne]] | |||
[[File:SS Anne 1F FRLG.png|250px|thumbnail|S.S. Anne, 1F]] | |||
[[File:SS Anne Basement FRLG.png|250px|thumbnail|S.S. Anne, B1F]] | |||
[[File:SS Anne 2F FRLG.png|250px|thumbnail|S.S. Anne, 2F]] | |||
[[File:SS Anne 3F FRLG.png|250px|thumbnail|S.S. Anne, 3F]] | |||
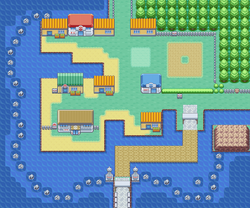
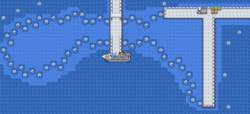
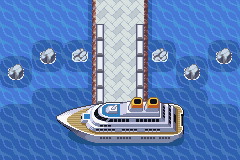
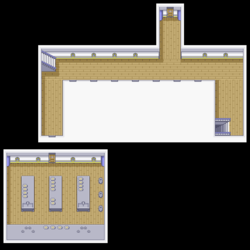
[[Vermilion City]] is a major port city, and the harbor is always busy. The [[Vermilion Gym]] is blocked off by a small tree, so it is impossible to challenge the Gym Leader just yet. The luxury cruise liner [[S.S. Anne]] visits the city once per year, and has just docked in the harbor. | |||
Stop by the Pokémon Center and talk to the girl near the counter. She gives the player the {{key|III|Vs Seeker}}, a rechargeable device that attracts the attention of any nearby Trainers who would like a rematch. The battery is charged while traveling, and will reach full capacity after taking 100 steps. The device cannot be used in buildings or caves. | |||
{| align="center" | |||
|{{shop|Poké Mart}} | |||
{{shoprow|{{shopitem|Poké Ball|200}}|{{shopitem|Super Potion|700}}}} | |||
{{shoprow|{{shopitem|Antidote|100}}|{{shopitem|Parlyz Heal|200}}}} | |||
{{shoprow|{{shopitem|Awakening|250}}|{{shopitem|Ice Heal|250}}}} | |||
{{shoprow|{{shopitem|Repel|350}}}} | |||
{{shopfooter}} | |||
|} | |||
=== | {| class="expandable" align="center" style="background: #{{leafgreen color light}}; {{roundy}}; border: 5px solid #{{firered color light}};" | ||
|- align="center" | |||
! Items | |||
|- | |||
| | |||
{{itlisth|sand}} | |||
{{Itemlist|Max Ether|Five steps south and one step west of the [[Pokémon Center]] entrance ''(hidden)''|FR=yes|LG=yes|display={{DL|Ether|Max Ether}}}} | |||
{{Itemlist|Vs. Seeker|Received from the female at the Pokémon Center counter|FR=yes|LG=yes}} | |||
{{Itemlist|Bike Voucher|Received from the [[Pokémon Fan Club Chairman]]|FR=yes|LG=yes|display={{key|I|Bike Voucher|Bike}} {{key|III|Bike Voucher|Voucher}}}} | |||
{{Itemlist|Stick|Held by Ch'Ding, a {{p|Farfetch'd}} the {{player}} can obtain in a {{DL|In-game trade|Generation III|trade}}|FR=yes|LG=yes|display={{DL|Stat-enhancing item|Stick}}}} | |||
{{Itemlist|Old Rod|Received from the [[Fishing Brothers|Fishing Guru]]|FR=yes|LG=yes|display={{DL|Fishing|Old Rod}}}} | |||
{{itemlist|TM Electric|Reward for defeating Lt. Surge|FR=yes|LG=yes|display={{TM|34|Shock Wave}}}} | |||
{{itlistfoot|sand}} | |||
|} | |||
{| class="expandable" align="center" style="background: #{{leafgreen color light}}; {{roundy}}; border: 5px solid #{{firered color light}};" | |||
|- align="center" | |||
! Available Pokémon | |||
|- | |||
| | |||
{{Catch/header|sand|no}} | |||
{{Catch/div|sand|Special}} | |||
{{Catch/entryfl|083|Farfetch'd|yes|yes|Trade|tradenum=021|tradename=Spearow|The same as the Traded Pokémon|One|type1=Normal|type2=Flying}} | |||
{{Catch/div|water|Fishing}} | |||
{{Catch/entryfl|129|Magikarp|yes|yes|Fish Old|5|100%|type1=Water}} | |||
{{catch/footer|sand}} | |||
|} | |||
=== | === Pokémon Fan Club === | ||
The building just north of the [[Vermilion Gym]] is the [[Pokémon Fan Club]]. Listen to the Chairman's rambling thoughts to receive a {{key|III|Bike Voucher}}. This can be exchanged at the Bike Shop in {{ci|Cerulean}} to finally get a {{key|III|Bicycle}}. | |||
=== | === In-game trade === | ||
A little girl in the house next to the Fan Club would like to trade. She is hoping to receive a {{p|Spearow}} in exchange for her {{p|Farfetch'd}}. This is the only one of its kind, and though it may not be the best choice in battle, it can learn two {{m|Cut|field}} {{m|Fly|moves}} to help navigate the countryside. | |||
=== | === Fishing Brother === | ||
Visit the house to the west of the Pokémon Center and talk to the fisherman inside. Convince him that the {{player}} loves fishing as much as he does to receive the {{key|III|Old Rod}}. The only fish that can be caught with it is {{p|Magikarp}}, but at least they can be found for free now. The {{key|III|Good Rod}} and {{key|III|Super Rod}} are better, but cannot be obtained until later. | |||
=== | === S.S. Anne === | ||
The [[S.S. Anne]] caters to the world's best Pokémon Trainers, so expect some heavy battling on board. | |||
{| class="expandable" align="center" style="background: #{{leafgreen color light}}; {{roundy}}; border: 5px solid #{{firered color light}};" | |||
|- align="center" | |||
! Items | |||
|- | |||
| | |||
{| class="expandable" align="center" style="background: #{{leafgreen color light}}; {{roundy}}; border: 5px solid #{{firered color light}};" | |||
|- align="center" | |||
! Port | |||
|- | |||
| | |||
{{Itlisth|ocean}} | |||
{{itemlist|Lava Cookie|South of the [[#Rumors|truck]] in the harbor (requires {{m|Surf}}) ''(hidden)''|FR=yes|LG=yes|display={{DL|Status ailment healing item|Lava Cookie}}}} | |||
{{Itlistfoot|ocean}} | |||
|} | |||
{| class="expandable" align="center" style="background: #{{leafgreen color light}}; {{roundy}}; border: 5px solid #{{firered color light}};" | |||
|- align="center" | |||
! B1F | |||
|- | |||
| | |||
{{Itlisth|ocean}} | |||
{{Itemlist|Hyper Potion|In the trash can ''(hidden)''|FR=yes|LG=yes|display={{DL|Potion|Hyper Potion}}}} | |||
{{Itemlist|TM Psychic|In room 2|FR=yes|LG=yes|display={{TM|44|Rest}}}} | |||
{{Itemlist|Ether|In room 3|FR=yes|LG=yes|display={{DL|Ether|Ether}}}} | |||
{{Itemlist|Super Potion|In room 5|FR=yes|LG=yes|display={{DL|Potion|Super Potion}}}} | |||
{{Itlistfoot|ocean}} | |||
|} | |||
{| class="expandable" align="center" style="background: #{{leafgreen color light}}; {{roundy}}; border: 5px solid #{{firered color light}};" | |||
|- align="center" | |||
! 1F | |||
|- | |||
| | |||
{{Itlisth|ocean}} | |||
{{Itemlist|TM Fighting|In room 2 on main deck|FR=yes|LG=yes|display={{TM|31|Brick Break}}}} | |||
{{Itemlist|Great Ball|In the galley|FR=yes|LG=yes|display={{ball|Great}}}} | |||
{{Itemlist|Pecha Berry|In trash can in the galley ''(hidden)''|FR=yes|LG=yes}} | |||
{{Itemlist|Cheri Berry|In trash can in the galley ''(hidden)''|FR=yes|LG=yes}} | |||
{{Itemlist|Chesto Berry|In trash can in the galley ''(hidden)''|FR=yes|LG=yes}} | |||
{{Itlistfoot|ocean}} | |||
|} | |||
{| class="expandable" align="center" style="background: #{{leafgreen color light}}; {{roundy}}; border: 5px solid #{{firered color light}};" | |||
|- align="center" | |||
! 2F | |||
|- | |||
| | |||
{{Itlisth|ocean}} | |||
{{Itemlist|Stardust|In room 2|FR=yes|LG=yes|display={{DL|Valuable item|Stardust}}}} | |||
{{Itemlist|X Attack|In room 4|FR=yes|LG=yes|display={{DL|Battle item|X Attack}}}} | |||
{{Itlistfoot|ocean}} | |||
|} | |||
{| class="expandable" align="center" style="background: #{{leafgreen color light}}; {{roundy}}; border: 5px solid #{{firered color light}};" | |||
|- align="center" | |||
! 3F | |||
|- | |||
| | |||
{{Itlisth|ocean}} | |||
{{Itemlist|HM Normal|Gift from the Captain|FR=yes|LG=yes|display={{HM|01|Cut}}}} | |||
{{Itlistfoot|ocean}} | |||
|} | |||
|} | |||
==== | {| class="expandable" align="center" style="background: #{{leafgreen color light}}; {{roundy}}; border: 5px solid #{{firered color light}};" | ||
|- align="center" | |||
! Trainers | |||
|- | |||
| | |||
{| class="expandable" align="center" style="background: #{{leafgreen color light}}; {{roundy}}; border: 5px solid #{{firered color light}};" | |||
|- align="center" | |||
! B1F | |||
|- | |||
| | |||
{{trainerheader|ocean}} | |||
{{Trainerentry|Spr FRLG Fisherman.png|Fisherman|Barny|612|3|072|Tentacool|♂|17||120|Staryu||17||090|Shellder|♂|17|36=カズヒコ|37=Kazuhiko}} | |||
{{Trainerdiv|ocean}} | |||
{{Trainerentry|Spr FRLG Sailor.png|Sailor|Phillip|640|1|066|Machop|♂|20|36=ユウサク|37=Yūsaku}} | |||
{{Trainerdiv|ocean}} | |||
{{Trainerentry|Spr FRLG Sailor.png|Sailor|Huey|576|2|072|Tentacool|♂|18||120|Staryu||18|36=タツロウ|37=Tatsurō}} | |||
{{Trainerdiv|ocean}} | |||
{{Trainerentry|Spr FRLG Sailor.png|Sailor|Dylan|544|3|116|Horsea|♂|17||116|Horsea|♂|17||116|Horsea|♂|17|36=ツヨシ|37=Tsuyoshi}} | |||
{{Trainerdiv|ocean}} | |||
{{Trainerentry|Spr FRLG Sailor.png|Sailor|Duncan|544|3|116|Horsea|♂|17||090|Shellder|♂|17||072|Tentacool|♂|17|36=ヒデフミ|37=Hidefumi}} | |||
{{Trainerdiv|ocean}} | |||
{{Trainerentry|Spr FRLG Sailor.png|Sailor|Leonard|672|1|090|Shellder|♂|21|36=ダイキ|37=Daiki}} | |||
{{Trainerfooter|ocean}} | |||
|} | |||
{| class="expandable" align="center" style="background: #{{leafgreen color light}}; {{roundy}}; border: 5px solid #{{firered color light}};" | |||
|- align="center" | |||
! 1F | |||
|- | |||
| | |||
{{trainerheader|ocean}} | |||
{{Trainerentry|Spr FRLG Gentleman.png|Gentleman|Arthur|1368|2|032|Nidoran♂||19||029|Nidoran♀||19|36=ケント|37=Kent}} | |||
{{Trainerdiv|ocean}} | |||
{{Trainerentry|Spr FRLG Gentleman.png|Gentleman|Thomas|1296|2|058|Growlithe|♂|18||058|Growlithe|♂|18|36=スコット|37=Scott}} | |||
{{Trainerdiv|ocean}} | |||
{{Trainerentry|Spr FRLG Lass.png|Lass|Ann|288|2|016|Pidgey|♀|18||029|Nidoran♀||18|36=カヤ|37=Kaya}} | |||
{{Trainerdiv|ocean}} | |||
{{Trainerentry|Spr FRLG Youngster.png|Youngster|Tyler|336|1|032|Nidoran♂||21|36=マサノブ|37=Masanobu}} | |||
{{Trainerfooter|ocean}} | |||
|} | |||
{| class="expandable" align="center" style="background: #{{leafgreen color light}}; {{roundy}}; border: 5px solid #{{firered color light}};" | |||
|- align="center" | |||
! 2F | |||
|- | |||
| | |||
{{trainerheader|ocean}} | |||
{{Trainerentry|Spr FRLG Fisherman.png|Fisherman|Dale|612|3|118|Goldeen|♂|17||118|Goldeen|♂|17||072|Tentacool|♂|17|36=タカフミ|37=Takafumi}} | |||
{{Trainerdiv|ocean}} | |||
{{Trainerentry|Spr FRLG Gentleman.png|Gentleman|Brooks|1656|1|025|Pikachu|♂|23|36=スミス|37=Smith}} | |||
{{Trainerdiv|ocean}} | |||
{{Trainerentry|Spr FRLG Lass.png|Lass|Dawn|288|2|019|Rattata|♀|18||025|Pikachu|♀|18|36=ユカ|37=Yuka}} | |||
{{Trainerdiv|ocean}} | |||
{{Trainerentry|Spr FRLG Gentleman.png|Gentleman|Lamar|1224|2|058|Growlithe|♂|17||077|Ponyta|♂|17|36=パーカー|37=Parker}} | |||
{{Trainerfooter|ocean}} | |||
|} | |||
{| class="expandable" align="center" style="background: #{{leafgreen color light}}; {{roundy}}; border: 5px solid #{{firered color light}};" | |||
|- align="center" | |||
! 3F | |||
|- | |||
| | |||
{{trainerheader|ocean}} | |||
{{Trainerentry|Spr FRLG Sailor.png|Sailor|Trevor|544|2|066|Machop|♂|17||072|Tentacool|♂|17|36=サンジ|37=Sanji}} | |||
{{Trainerdiv|ocean}} | |||
{{Trainerentry|Spr FRLG Sailor.png|Sailor|Edmond|576|2|066|Machop|♂|18||090|Shellder|♂|18|36=カツヤ|37=Katsuya}} | |||
{{Trainerfooter|ocean}} | |||
|} | |||
|} | |||
==== | ==== 1F ==== | ||
Check the second cabin from the left to find {{TM|31|Brick Break}}, then follow the hallway to the right and go down the stairs. | |||
==== | ==== B1F ==== | ||
This part of the ship is a dead-end hallway with five cabins. Check the far-right cabin for a {{DL|Potion|Super Potion}}, and the center cabin for an {{DL|Ether|Ether}}. The second cabin from the left has {{TM|44|Rest}}, and a hidden {{DL|Potion|Hyper Potion}} lies in the trash can near the stairs. | |||
==== 1F ==== | |||
Follow the hallway to the front of the ship, then turn left to reach the galley. Check the three trash cans on the right side of the room to find a [[Pecha Berry]], a [[Cheri Berry]], and a [[Chesto Berry]], then collect the {{ball|Great}} in the corner. Leave the galley and climb up the nearby stairs. | |||
==== | ==== 2F ==== | ||
To the south is another set of stairs; this one leads to the deck of the ship, where two Sailors are waiting to battle. Step inside the second cabin from the left for a {{DL|Valuable item|Stardust}}, and the fourth cabin from the left for an {{DL|Battle item|X Attack}}. the player reaches the Captain's quarters at the back of the ship just as {{ga|Blue}} is leaving. | |||
His {{p|Pidgeotto}} is not much of a threat, even though it is only one level lower than his starter Pokémon. Conversely, his newly evolved {{p|Raticate}} has an improved {{stat|Attack}} stat, allowing it to deal serious damage with {{m|Hyper Fang}}. Its {{m|Tail Whip}} lowers the foe's {{stat|Defense}}, making Hyper Fang even more painful. Moves from {{t|Bug|three}} {{t|Ghost|different}} {{t|Dark|types}} will inflict major damage on {{p|Kadabra}}, and its low Defense also leaves it vulnerable to physical attacks. His starter Pokémon has recently evolved as well; use a Pokémon with a type advantage for best results. | |||
{| align="center" | |||
! {{MS|001|Bulbasaur (Pokémon)}} If the {{player}} chose {{p|Bulbasaur}}: | |||
! {{MS|004|Charmander (Pokémon)}} If the {{player}} chose {{p|Charmander}}: | |||
! {{MS|007|Squirtle (Pokémon)}} If the {{player}} chose {{p|Squirtle}}: | |||
|- | |||
|{{Party/Single | |||
|color={{blue color}} | |||
|headcolor={{blue color light}} | |||
|bordercolor={{blue color dark}} | |||
|sprite=Spr FRLG Blue 2.png | |||
|prize={{PDollar}}720 | |||
|class=Rival | |||
|classlink=Rival | |||
|name={{color2|000|Blue (game)|Blue}} | |||
|game=FRLG | |||
|location=S.S. Anne | |||
|pokemon=4}} | |||
|{{Pokémon/3 | |||
|game=FireRed | |||
|ndex=017 | |||
|pokemon=Pidgeotto | |||
|gender=male | |||
|level=19 | |||
|type1=Normal|type2=Flying | |||
|ability=Keen Eye | |||
|move1=Tackle|move1type=Normal | |||
|move2=Gust|move2type=Flying | |||
|move3=Sand-Attack|move3type=Ground | |||
|move4=Quick Attack|move4type=Normal}} | |||
|{{Pokémon/3 | |||
|game=FireRed | |||
|ndex=020 | |||
|pokemon=Raticate | |||
|level=16 | |||
|gender=male | |||
|type1=Normal | |||
|ability=Guts | |||
|move1=Tackle|move1type=Normal | |||
|move2=Tail Whip|move2type=Normal | |||
|move3=Quick Attack|move3type=Normal | |||
|move4=Hyper Fang|move4type=Normal}} | |||
{{Party/Div|color={{blue color}}}} | |||
|{{Pokémon/3 | |||
|game=FireRed | |||
|ndex=064 | |||
|pokemon=Kadabra | |||
|gender=male | |||
|level=18 | |||
|type1=Psychic | |||
|ability=Synchronize | |||
|move1=Teleport|move1type=Psychic | |||
|move2=Confusion|move2type=Psychic | |||
|move3=Disable|move3type=Normal | |||
|move4=Kinesis|move4type=Psychic}} | |||
|{{Pokémon/3 | |||
|game=FireRed | |||
|ndex=005 | |||
|pokemon=Charmeleon | |||
|level=20 | |||
|gender=male | |||
|type1=Fire | |||
|ability=Blaze | |||
|move1=Scratch|move1type=Normal | |||
|move2=Growl|move2type=Normal | |||
|move3=Ember|move3type=Fire | |||
|move4=Metal Claw|move4type=Steel}} | |||
{{Party/Footer}} | |||
|{{Party/Single | |||
|color={{blue color}} | |||
|headcolor={{blue color light}} | |||
|bordercolor={{blue color dark}} | |||
|sprite=Spr FRLG Blue 2.png | |||
|prize={{PDollar}}720 | |||
|class=Rival | |||
|classlink=Rival | |||
|name={{color2|000|Blue (game)|Blue}} | |||
|game=FRLG | |||
|location=S.S. Anne | |||
|pokemon=4}} | |||
|{{Pokémon/3 | |||
|game=FireRed | |||
|ndex=017 | |||
|pokemon=Pidgeotto | |||
|level=19 | |||
|gender=male | |||
|type1=Normal|type2=Flying | |||
|ability=Keen Eye | |||
|move1=Tackle|move1type=Normal | |||
|move2=Gust|move2type=Flying | |||
|move3=Sand-Attack|move3type=Ground | |||
|move4=Quick Attack|move4type=Normal}} | |||
|{{Pokémon/3 | |||
|game=FireRed | |||
|ndex=020 | |||
|pokemon=Raticate | |||
|level=16 | |||
|gender=male | |||
|type1=Normal | |||
|ability=Guts | |||
|move1=Tackle|move1type=Normal | |||
|move2=Tail Whip|move2type=Normal | |||
|move3=Quick Attack|move3type=Normal | |||
|move4=Hyper Fang|move4type=Normal}} | |||
{{Party/Div|color={{blue color}}}} | |||
|{{Pokémon/3 | |||
|game=FireRed | |||
|ndex=064 | |||
|pokemon=Kadabra | |||
|level=18 | |||
|gender=male | |||
|type1=Psychic | |||
|ability=Synchronize | |||
|move1=Teleport|move1type=Psychic | |||
|move2=Confusion|move2type=Psychic | |||
|move3=Disable|move3type=Normal | |||
|move4=Kinesis|move4type=Psychic}} | |||
|{{Pokémon/3 | |||
|game=FireRed | |||
|ndex=008 | |||
|pokemon=Wartortle | |||
|level=20 | |||
|gender=male | |||
|type1=Water | |||
|ability=Torrent | |||
|move1=Withdraw|move1type=Water | |||
|move2=Bite|move2type=Dark | |||
|move3=Bubble|move3type=Water | |||
|move4=Water Gun|move4type=Water}} | |||
{{Party/Footer}} | |||
{{ | |{{Party/Single | ||
| | |color={{blue color}} | ||
| | |headcolor={{blue color light}} | ||
| | |bordercolor={{blue color dark}} | ||
| | |sprite=Spr FRLG Blue 2.png | ||
| | |prize={{PDollar}}720 | ||
| | |class=Rival | ||
| | |classlink=Rival | ||
| | |name={{color2|000|Blue (game)|Blue}} | ||
| | |game=FRLG | ||
|location=S.S. Anne | |||
|pokemon=4}} | |||
|{{Pokémon/3 | |||
|game=FireRed | |||
|ndex=017 | |||
|pokemon=Pidgeotto | |||
|level=19 | |||
|gender=male | |||
|type1=Normal|type2=Flying | |||
|ability=Keen Eye | |||
|move1=Tackle|move1type=Normal | |||
|move2=Gust|move2type=Flying | |||
|move3=Sand-Attack|move3type=Ground | |||
|move4=Quick Attack|move4type=Normal}} | |||
|{{Pokémon/3 | |||
|game=FireRed | |||
|ndex=020 | |||
|pokemon=Raticate | |||
|level=16 | |||
|gender=male | |||
|type1=Normal | |||
|ability=Guts | |||
|move1=Tackle|move1type=Normal | |||
|move2=Tail Whip|move2type=Normal | |||
|move3=Quick Attack|move3type=Normal | |||
|move4=Hyper Fang|move4type=Normal}} | |||
{{Party/Div|color={{blue color}}}} | |||
|{{Pokémon/3 | |||
|game=FireRed | |||
|ndex=064 | |||
|pokemon=Kadabra | |||
|level=18 | |||
|gender=male | |||
|type1=Psychic | |||
|ability=Synchronize | |||
|move1=Teleport|move1type=Psychic | |||
|move2=Confusion|move2type=Psychic | |||
|move3=Disable|move3type=Normal | |||
|move4=Kinesis|move4type=Psychic}} | |||
|{{Pokémon/3 | |||
|game=FireRed | |||
|ndex=002 | |||
|pokemon=Ivysaur | |||
|level=20 | |||
|gender=male | |||
|type1=Grass|type2=Poison | |||
|ability=Overgrow | |||
|move1=Tackle|move1type=Normal | |||
|move2=Sleep Powder|move2type=Grass | |||
|move3=Leech Seed|move3type=Grass | |||
|move4=Vine Whip|move4type=Grass}} | |||
{{Party/Footer}} | |||
|} | |||
Even though he lost, he taunts the player again before running off. Enter the Captain's quarters to find him hunched over a trash can; it looks like he got seasick. | |||
==== 3F ==== | |||
Talk to him to give him a quick backrub, which is all it takes to settle his stomach. He rewards the player with {{HM|01|Cut}}. This moves makes it possible to chop down thin trees to reach new areas! Be sure to collect all the items, as the ferry glides out of the harbor when the player disembarks. Use HM01 to teach Cut to Bulbasaur or Charmander, and set out for the Gym. | |||
| | |||
=== Vermilion Gym === | |||
[[File:Vermilion Gym FRLG.png|250px|thumbnail|Vermilion Gym]] | |||
| | |||
| | |||
| | |||
| | {{sign|FRLG|header}} | ||
| | {{sign|FRLG|title|VERMILION CITY POKéMON GYM<br />LEADER: LT. SURGE}} | ||
| | {{sign|FRLG|The Lightning American!}} | ||
| | {{sign|FRLG|footer}} | ||
| | |||
| | |||
| | |||
| | |||
| | |||
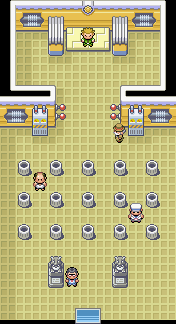
| | The [[Vermilion Gym]] specializes in {{type|Electric}} Pokémon. {{type|Ground}} Pokémon like {{p|Geodude}} and {{p|Diglett}} are immune to electrical attacks, and can inflict serious damage with their Ground-type attacks. Avoid using {{t|Water}}- and {{type|Flying}} Pokémon. [[Lt. Surge]] forces his challengers to flip two switches hidden randomly in the trash cans to reach him. The second switch is always located right next to the first one. If the second switch is not flipped, the trap resets. Avoid attacking his {{p|Pikachu}} and {{p|Raichu}} with physical moves, as their {{a|Static}} ability may {{status|paralyze}} their opponent on contact. | ||
| | |||
| | |||
| | |||
| | |||
| | |||
| | |||
| | |||
| | |||
}} | |||
{| align="center" | |||
|- align="center" valign="top" | |||
| | |||
{| align="center" style="background: #{{electric color}}; {{roundy}}; border: 5px solid #{{electric color light}};" | |||
|- align="center" | |||
! Thunder Gym <br> [[File:Thunder Badge.png|35px|The Thunder Badge]] <br><br> | |||
|- | |||
| | |||
{| align="center" class="expandable" style="background: #{{electric color}}; {{roundy}}; border: 5px solid #{{electric color light}};" | |||
|- align="center" | |||
! Trainers | |||
|- | |||
| | |||
{{Trainerheader|Electric}} | |||
{{Trainerentry|Spr FRLG Sailor.png|Sailor|Dwayne|672|2|025|Pikachu|♂|21|None|025|Pikachu|♂|21|None|36=タツヒコ|37=Tatsuhiko}} | |||
{{Trainerdiv|Electric}} | |||
{{Trainerentry|Spr FRLG Engineer.png|Engineer|Baily|1008|2|100|Voltorb||21|None|081|Magnemite||21|None|36=フミオ|37=Fumio}} | |||
{{Trainerdiv|Electric}} | |||
{{Trainerentry|Spr FRLG Gentleman.png|Gentleman|Tucker|1656|1|025|Pikachu|♂|23|None|36=オルソン|37=Olson}} | |||
{{Trainerfooter|Electric|1}} | |||
|} | |||
=== | {{Party/Single|color={{electric color}}|bordercolor={{electric color dark}}|headcolor={{electric color light}} | ||
====Pokémon | |sprite=Spr FRLG Lt Surge.png | ||
|prize={{PDollar}}2400 | |||
|class=Leader | |||
|classlink=Gym Leader | |||
|name={{color2|000000|Lt. Surge}} | |||
|game=FRLG | |||
|location=Vermilion Gym | |||
|pokemon=3}} | |||
|{{Pokémon/3|game=FireRed and LeafGreen|ndex=100|pokemon=Voltorb | |||
|ability=Soundproof|level=21|type1=Electric | |||
|move1=Shock Wave|move1type=Electric | |||
|move2=Tackle|move2type=Normal | |||
|move3=Screech|move3type=Normal | |||
|move4=SonicBoom|move4type=Normal}} | |||
|{{Pokémon/3|game=FireRed and LeafGreen|ndex=025|pokemon=Pikachu | |||
|ability=Static|level=18|gender=male|type1=Electric | |||
|move1=Shock Wave|move1type=Electric | |||
|move2=Thunder Wave|move2type=Electric | |||
|move3=Quick Attack|move3type=Normal | |||
|move4=Double Team|move4type=Normal}} | |||
|{{Pokémon/3|game=FireRed and LeafGreen|ndex=026|pokemon=Raichu | |||
|ability=Static|level=24|gender=male|type1=Electric | |||
|move1=Shock Wave|move1type=Electric | |||
|move2=Thunder Wave|move2type=Electric | |||
|move3=Quick Attack|move3type=Normal | |||
|move4=Double Team|move4type=Normal}} | |||
{{Party/Footer}} | |||
|} | |||
|} | |||
Defeated, Lt. Surge presents the player with the {{badge|Thunder}}. This Badge gives a slight {{stat|Speed}} boost during battle, and enables the use of {{m|Fly}} in the field. He also hands over {{TM|34|Shock Wave}} as a prize. | |||
Rest up at the Pokémon Center, then set out for {{rt|11|Kanto}} to the east. | |||
=== | {{WalkthroughPrevNext | ||
|game=FireRed | |||
|game2=LeafGreen | |||
|gamename=FireRed and LeafGreen | |||
|prev=yes | |||
|prevsection=3 | |||
|prevname=Cerulean City, Cerulean Gym, Routes 24 and 25, Route 5 | |||
|next=yes | |||
|nextsection=5 | |||
|nextname=Route 11, Route 2, Pewter City, Cerulean City, Routes 9 and 10 (north) | |||
}} | |||
<br /> | |||
{{Project Walkthroughs notice}} | |||
[[Category:FireRed and LeafGreen walkthrough|F04]] | |||
Revision as of 00:57, 20 January 2016
These pages follow the remade Game Boy Advance iteration, not Pokémon Red and Blue. The guide for those games can be found here.
Route 6
Route 6 links Saffron City and Vermilion City, and connects to Route 5 via the Underground Path. The area has six Trainers total, but only the last two are unavoidable. The wild Pokémon here are all the same as on Route 5, though certain water-dwelling Pokémon will be available later with the right fishing rod.
| Items | ||||||||||||||||
|---|---|---|---|---|---|---|---|---|---|---|---|---|---|---|---|---|
| ||||||||||||||||
| Available Pokémon | ||||||||||||||||||||||||||||||||||||||||||||||||||||||||||||||||||||||||||||||||||||||||||
|---|---|---|---|---|---|---|---|---|---|---|---|---|---|---|---|---|---|---|---|---|---|---|---|---|---|---|---|---|---|---|---|---|---|---|---|---|---|---|---|---|---|---|---|---|---|---|---|---|---|---|---|---|---|---|---|---|---|---|---|---|---|---|---|---|---|---|---|---|---|---|---|---|---|---|---|---|---|---|---|---|---|---|---|---|---|---|---|---|---|---|
| ||||||||||||||||||||||||||||||||||||||||||||||||||||||||||||||||||||||||||||||||||||||||||
| Trainers | ||||||||||||||||||||||||||||||||||||||||||||||||||||||||||||||||||||||||||||||||||||||||||||||||||||||||||||||||||||||||||||||||
|---|---|---|---|---|---|---|---|---|---|---|---|---|---|---|---|---|---|---|---|---|---|---|---|---|---|---|---|---|---|---|---|---|---|---|---|---|---|---|---|---|---|---|---|---|---|---|---|---|---|---|---|---|---|---|---|---|---|---|---|---|---|---|---|---|---|---|---|---|---|---|---|---|---|---|---|---|---|---|---|---|---|---|---|---|---|---|---|---|---|---|---|---|---|---|---|---|---|---|---|---|---|---|---|---|---|---|---|---|---|---|---|---|---|---|---|---|---|---|---|---|---|---|---|---|---|---|---|---|
| ||||||||||||||||||||||||||||||||||||||||||||||||||||||||||||||||||||||||||||||||||||||||||||||||||||||||||||||||||||||||||||||||
Vermilion City
Vermilion City is a major port city, and the harbor is always busy. The Vermilion Gym is blocked off by a small tree, so it is impossible to challenge the Gym Leader just yet. The luxury cruise liner S.S. Anne visits the city once per year, and has just docked in the harbor.
Stop by the Pokémon Center and talk to the girl near the counter. She gives the player the Vs Seeker, a rechargeable device that attracts the attention of any nearby Trainers who would like a rematch. The battery is charged while traveling, and will reach full capacity after taking 100 steps. The device cannot be used in buildings or caves.
| |||||||||||||||||||||||||||||||
| Items | ||||||||||||||||||||||||||||||||
|---|---|---|---|---|---|---|---|---|---|---|---|---|---|---|---|---|---|---|---|---|---|---|---|---|---|---|---|---|---|---|---|---|
| ||||||||||||||||||||||||||||||||
| Available Pokémon | ||||||||||||||||||||||||||||||||||||||||||||||||||||||||||||||||||||||||||||||||||||||||
|---|---|---|---|---|---|---|---|---|---|---|---|---|---|---|---|---|---|---|---|---|---|---|---|---|---|---|---|---|---|---|---|---|---|---|---|---|---|---|---|---|---|---|---|---|---|---|---|---|---|---|---|---|---|---|---|---|---|---|---|---|---|---|---|---|---|---|---|---|---|---|---|---|---|---|---|---|---|---|---|---|---|---|---|---|---|---|---|---|
| ||||||||||||||||||||||||||||||||||||||||||||||||||||||||||||||||||||||||||||||||||||||||
Pokémon Fan Club
The building just north of the Vermilion Gym is the Pokémon Fan Club. Listen to the Chairman's rambling thoughts to receive a Bike Voucher. This can be exchanged at the Bike Shop in Cerulean to finally get a Bicycle.
In-game trade
A little girl in the house next to the Fan Club would like to trade. She is hoping to receive a Spearow in exchange for her Farfetch'd. This is the only one of its kind, and though it may not be the best choice in battle, it can learn two field moves to help navigate the countryside.
Fishing Brother
Visit the house to the west of the Pokémon Center and talk to the fisherman inside. Convince him that the player loves fishing as much as he does to receive the Old Rod. The only fish that can be caught with it is Magikarp, but at least they can be found for free now. The Good Rod and Super Rod are better, but cannot be obtained until later.
S.S. Anne
The S.S. Anne caters to the world's best Pokémon Trainers, so expect some heavy battling on board.
| Items | ||||||||||||||||||||||||||||||||||||||||||||||||||||||||||||||||||||||||||||||||||||||||||||||||||||||
|---|---|---|---|---|---|---|---|---|---|---|---|---|---|---|---|---|---|---|---|---|---|---|---|---|---|---|---|---|---|---|---|---|---|---|---|---|---|---|---|---|---|---|---|---|---|---|---|---|---|---|---|---|---|---|---|---|---|---|---|---|---|---|---|---|---|---|---|---|---|---|---|---|---|---|---|---|---|---|---|---|---|---|---|---|---|---|---|---|---|---|---|---|---|---|---|---|---|---|---|---|---|---|
| ||||||||||||||||||||||||||||||||||||||||||||||||||||||||||||||||||||||||||||||||||||||||||||||||||||||
| Trainers | ||||||||||||||||||||||||||||||||||||||||||||||||||||||||||||||||||||||||||||||||||||||||||||||||||||||||||||||||||||||||||||||||||||||||||||||||||||||||||||||||||||||||||||||||||||||||||||||||||||||||||||||||||||||||||||||||||||||||||||||||||||||||||||||||||||||||||||||||||||||||||||||||||||||||||||||||||||||||||||||||||||||||||||||||||||||||||||||||
|---|---|---|---|---|---|---|---|---|---|---|---|---|---|---|---|---|---|---|---|---|---|---|---|---|---|---|---|---|---|---|---|---|---|---|---|---|---|---|---|---|---|---|---|---|---|---|---|---|---|---|---|---|---|---|---|---|---|---|---|---|---|---|---|---|---|---|---|---|---|---|---|---|---|---|---|---|---|---|---|---|---|---|---|---|---|---|---|---|---|---|---|---|---|---|---|---|---|---|---|---|---|---|---|---|---|---|---|---|---|---|---|---|---|---|---|---|---|---|---|---|---|---|---|---|---|---|---|---|---|---|---|---|---|---|---|---|---|---|---|---|---|---|---|---|---|---|---|---|---|---|---|---|---|---|---|---|---|---|---|---|---|---|---|---|---|---|---|---|---|---|---|---|---|---|---|---|---|---|---|---|---|---|---|---|---|---|---|---|---|---|---|---|---|---|---|---|---|---|---|---|---|---|---|---|---|---|---|---|---|---|---|---|---|---|---|---|---|---|---|---|---|---|---|---|---|---|---|---|---|---|---|---|---|---|---|---|---|---|---|---|---|---|---|---|---|---|---|---|---|---|---|---|---|---|---|---|---|---|---|---|---|---|---|---|---|---|---|---|---|---|---|---|---|---|---|---|---|---|---|---|---|---|---|---|---|---|---|---|---|---|---|---|---|---|---|---|---|---|---|---|---|---|---|---|---|---|---|---|---|---|---|---|---|---|---|---|---|---|---|---|---|---|---|---|---|---|---|---|---|---|---|---|---|---|---|---|---|---|---|---|---|---|---|---|---|---|---|---|---|---|---|---|
| ||||||||||||||||||||||||||||||||||||||||||||||||||||||||||||||||||||||||||||||||||||||||||||||||||||||||||||||||||||||||||||||||||||||||||||||||||||||||||||||||||||||||||||||||||||||||||||||||||||||||||||||||||||||||||||||||||||||||||||||||||||||||||||||||||||||||||||||||||||||||||||||||||||||||||||||||||||||||||||||||||||||||||||||||||||||||||||||||
1F
Check the second cabin from the left to find TM31 (Brick Break), then follow the hallway to the right and go down the stairs.
B1F
This part of the ship is a dead-end hallway with five cabins. Check the far-right cabin for a Super Potion, and the center cabin for an Ether. The second cabin from the left has TM44 (Rest), and a hidden Hyper Potion lies in the trash can near the stairs.
1F
Follow the hallway to the front of the ship, then turn left to reach the galley. Check the three trash cans on the right side of the room to find a Pecha Berry, a Cheri Berry, and a Chesto Berry, then collect the Great Ball in the corner. Leave the galley and climb up the nearby stairs.
2F
To the south is another set of stairs; this one leads to the deck of the ship, where two Sailors are waiting to battle. Step inside the second cabin from the left for a Stardust, and the fourth cabin from the left for an X Attack. the player reaches the Captain's quarters at the back of the ship just as Blue is leaving.
His Pidgeotto is not much of a threat, even though it is only one level lower than his starter Pokémon. Conversely, his newly evolved Raticate has an improved Attack stat, allowing it to deal serious damage with Hyper Fang. Its Tail Whip lowers the foe's Defense, making Hyper Fang even more painful. Moves from three different types will inflict major damage on Kadabra, and its low Defense also leaves it vulnerable to physical attacks. His starter Pokémon has recently evolved as well; use a Pokémon with a type advantage for best results.
Even though he lost, he taunts the player again before running off. Enter the Captain's quarters to find him hunched over a trash can; it looks like he got seasick.
3F
Talk to him to give him a quick backrub, which is all it takes to settle his stomach. He rewards the player with HM01 (Cut). This moves makes it possible to chop down thin trees to reach new areas! Be sure to collect all the items, as the ferry glides out of the harbor when the player disembarks. Use HM01 to teach Cut to Bulbasaur or Charmander, and set out for the Gym.
Vermilion Gym
The Vermilion Gym specializes in Electric-type Pokémon. Ground-type Pokémon like Geodude and Diglett are immune to electrical attacks, and can inflict serious damage with their Ground-type attacks. Avoid using Water- and Flying-type Pokémon. Lt. Surge forces his challengers to flip two switches hidden randomly in the trash cans to reach him. The second switch is always located right next to the first one. If the second switch is not flipped, the trap resets. Avoid attacking his Pikachu and Raichu with physical moves, as their Static ability may paralyze their opponent on contact.
| ||||||||||||||||||||||||||||||||||||||||||||||||||||||||||||||||||||||||||||||||||||||||||||||||||||||||||||||||||||||||||||||||||||||||||||||||||||||
Defeated, Lt. Surge presents the player with the Thunder Badge. This Badge gives a slight Speed boost during battle, and enables the use of Fly in the field. He also hands over TM34 (Shock Wave) as a prize.
Rest up at the Pokémon Center, then set out for Route 11 to the east.
|
FireRed and LeafGreen walkthrough |
|

|
This article is part of Project Walkthroughs, a Bulbapedia project that aims to write comprehensive step-by-step guides on each Pokémon game. |
