Battle Villa: Difference between revisions
(stopping here for now. my goodness, coding this is longgg) |
Superjothan (talk | contribs) (→Co-op) |
||
| (101 intermediate revisions by 20 users not shown) | |||
| Line 1: | Line 1: | ||
[[File:Battle Villa.png|thumb|200px|Artwork of the Battle Villa]] | |||
The '''Battle Villa''' (Japanese: '''バトルヴィラ''' ''Battle Villa'') is a facility in [[Pokémon Masters]] | The '''Battle Villa''' (Japanese: '''バトルヴィラ''' ''Battle Villa'') is a [[battle facility|facility]] in [[Pokémon Masters EX]]. Introduced in Version 1.7.1, it features sequential battle stages that allow the {{player}} to earn special rewards. It is unlocked after completing Chapter 7 of the [[PML Arc|Main Story]]. Unlike other battles in Pokémon Masters EX, the HP and MP (Move Points) of the team will be carried over from battles. The stages in the Battle Villa are available for a limited duration of time, and rotate approximately every two weeks. | ||
While single-player is initially the only mode available, completion of the 20th and 25th halls will unlock co-op mode for those specific halls. | |||
==Mechanics== | ==Mechanics== | ||
===Battles=== | ===Battles=== | ||
Battles in the Battle Villa occur in stages known as halls which feature the same three-on-three battles found elsewhere in [[Pasio]]. The player must sequentially defeat 25 halls at the Villa, with battles becoming more difficult as the player progresses through the halls. The stages can be divided into sets of five battles, with each set focusing on three various Pokémon types. The fourth and fifth battles in each set are arranged against a specific NPC (including [[Gym Leader]]s | Battles in the Battle Villa occur in stages known as halls which feature the same three-on-three battles found elsewhere in [[Pasio]]. The player must sequentially defeat 30 halls (25 halls prior to update 1.9.0) at the Villa, with battles becoming more difficult as the player progresses through the halls. The stages can be divided into sets of five battles, with each set focusing on three various Pokémon types. The fourth and fifth battles in each set are arranged against a specific NPC (including [[Gym Leader]]s, the [[Elite Four]], and [[Frontier Brain]]s). | ||
The player can choose up to nine sync pairs in their roster to challenge the Battle Villa. Unlike other battles in Pokémon Masters EX, the HP and MP of the team are carried over from each battle and when a sync pair's HP goes to 0, the sync pair cannot participate in any further battles on the day. Likewise, the opponent's HP will be carried over from the previous battle. Prior to the update on November 19, 2020, the HP and MP of all sync pairs and sync pair roster were automatically restored at the start of each day. Since the Battle Villa update, a full recovery and sync pair roster reset is given to the player each day to be used when the player chooses to do so. | |||
As with other battles in Pokémon Masters EX, defeating a hall earns the player with rewards. Along with these, the player can also receive bonus rewards after every five halls, and {{mas|medal}}s for defeating specific halls. Milestone rewards were awarded prior to the update on November 19, 2020. The Battle Villa is currently the only way to obtain Lucky Cookies and Lucky Scrolls to unlock a sync pair's [[lucky skill]], except for certain events like [[Blissful Bonanza!]] and the [[Legendary Gauntlet]]. | |||
Since January 7, 2022, the player is able to skip up to the chosen hall (4th, 9th, 14th, or 19th) if they completed all halls (excluding co-op) during the previous Villa. If the skip option is not used at the start of the Villa, it cannot be used later. The player receives all first-time clear rewards from skipped halls, but no bonus rewards, Coins, or XP. | |||
====Battle rewards==== | |||
=====??? to present===== <!--not sure what date to use as the date Sprint and Field Move Candy Coins were added to the rotation--> | |||
{| class="roundy" style="margin:auto; background:#{{shield color dark}}; border:3px solid #{{shield color}}; text-align:center" | |||
|- style="background-color:#{{shield color light}}" | |||
! style="{{roundytl|5px}}" | Hall no. | |||
! XP | |||
! First-time rewards | |||
! style="{{roundytr|5px}}" | Completion rewards | |||
|- style="background:#fff" | |||
| 1 | |||
| 1,000 | |||
| [[File:Masters Gem.png|30px]]Gems ×100 | |||
| [[File:Masters Coin.png|30px]]400 coins | |||
|- style="background:#fff" | |||
| 2 | |||
| 1,400 | |||
| [[File:Masters Gem.png|30px]]Gems ×100 | |||
| [[File:Masters Coin.png|30px]]700 coins | |||
|- style="background:#fff" | |||
| 3 | |||
| 1,800 | |||
| [[File:Masters Gem.png|30px]]Gems ×100 | |||
| [[File:Masters Coin.png|30px]]1000 coins | |||
|- style="background:#fff" | |||
| 4 | |||
| 2,000 | |||
| [[File:Masters Lucky Scroll.png|30px]]Lucky Scroll ×5 | |||
| [[File:Masters Coin.png|30px]]1300 coins | |||
|- style="background:#fff" | |||
| 5 | |||
| 2,200 | |||
| [[File:Masters 5 Star Scout Ticket.png|30px]]5★ Scout Ticket ×2<br>[[File:Masters Skip Ticket.png|30px]]Skip Ticket ×5 | |||
| [[File:Masters Coin.png|30px]]1600 coins | |||
|- style="background:#fff" | |||
| 6 | |||
| 2,400 | |||
| [[File:Masters 1 Star Crunchy Lucky Cookie.png|30px]]1★ Crunchy Lucky Cookie ×12 | |||
| [[File:Masters Coin.png|30px]]1800 coins | |||
|- style="background:#fff" | |||
| 7 | |||
| 2,600 | |||
| [[File:Masters 1 Star Creamy Lucky Cookie.png|30px]]1★ Creamy Lucky Cookie ×12 | |||
| [[File:Masters Coin.png|30px]]2000 coins | |||
|- style="background:#fff" | |||
| 8 | |||
| 2,800 | |||
| [[File:Masters 1 Star Crispy Lucky Cookie.png|30px]]1★ Crispy Lucky Cookie ×12 | |||
| [[File:Masters Coin.png|30px]]2200 coins | |||
|- style="background:#fff" | |||
| 9 | |||
| 3,000 | |||
| [[File:Masters Lucky Scroll.png|30px]]Lucky Scroll ×10 | |||
| [[File:Masters Coin.png|30px]]2400 coins | |||
|- style="background:#fff" | |||
| 10 | |||
| 3,200 | |||
| [[File:Masters Gem.png|30px]]Gems ×300<br>[[File:Masters Skip Ticket.png|30px]]Skip Ticket ×5 | |||
| [[File:Masters Coin.png|30px]]2600 coins | |||
|- style="background:#fff" | |||
| 11 | |||
| 3,400 | |||
| [[File:Masters 2 Star Crunchy Lucky Cookie.png|30px]]2★ Crunchy Lucky Cookie ×6 | |||
| [[File:Masters Coin.png|30px]]2800 coins | |||
|- style="background:#fff" | |||
| 12 | |||
| 3,600 | |||
| [[File:Masters 2 Star Creamy Lucky Cookie.png|30px]]2★ Creamy Lucky Cookie ×6 | |||
| [[File:Masters Coin.png|30px]]3000 coins | |||
|- style="background:#fff" | |||
| 13 | |||
| 3,800 | |||
| [[File:Masters 2 Star Crispy Lucky Cookie.png|30px]]2★ Crispy Lucky Cookie ×6 | |||
| [[File:Masters Coin.png|30px]]3200 coins | |||
|- style="background:#fff" | |||
| 14 | |||
| 4,000 | |||
| [[File:Masters 5 Star Scout Ticket.png|30px]]5★ Scout Ticket ×2 | |||
| [[File:Masters Coin.png|30px]]3400 coins | |||
|- style="background:#fff" | |||
| 15 | |||
| 4,200 | |||
| [[File:Masters Gem.png|30px]]Gems ×300<br>[[File:Masters Skip Ticket.png|30px]]Skip Ticket ×10 | |||
| [[File:Masters Coin.png|30px]]3600 coins | |||
|- style="background:#fff" | |||
| 16 | |||
| 4,400 | |||
| [[File:Masters 2 Star Crunchy Lucky Cookie.png|30px]]2★ Crunchy Lucky Cookie ×8 | |||
| [[File:Masters Coin.png|30px]]3800 coins | |||
|- style="background:#fff" | |||
| 17 | |||
| 4,600 | |||
| [[File:Masters 2 Star Creamy Lucky Cookie.png|30px]]2★ Creamy Lucky Cookie ×8 | |||
| [[File:Masters Coin.png|30px]]4000 coins | |||
|- style="background:#fff" | |||
| 18 | |||
| 4,800 | |||
| [[File:Masters 2 Star Crispy Lucky Cookie.png|30px]]2★ Crispy Lucky Cookie ×8 | |||
| [[File:Masters Coin.png|30px]]4200 coins | |||
|- style="background:#fff" | |||
| 19 | |||
| 5,000 | |||
| [[File:Masters Lucky Scroll.png|30px]]Lucky Scroll ×15 | |||
| [[File:Masters Coin.png|30px]]4400 coins | |||
|- style="background:#fff" | |||
| 20 | |||
| 5,200 | |||
| [[File:Masters Gem.png|30px]]Gems ×300<br>[[File:Masters Skip Ticket.png|30px]]Skip Ticket ×10 | |||
| [[File:Masters Coin.png|30px]]4600 coins | |||
|- style="background:#fff" | |||
| 21 | |||
| 5,400 | |||
| [[File:Masters 3 Star Crunchy Lucky Cookie.png|30px]]3★ Crunchy Lucky Cookie ×4 | |||
| [[File:Masters Coin.png|30px]]4800 coins | |||
|- style="background:#fff" | |||
| 22 | |||
| 5,600 | |||
| [[File:Masters 3 Star Creamy Lucky Cookie.png|30px]]3★ Creamy Lucky Cookie ×4 | |||
| [[File:Masters Coin.png|30px]]5000 coins | |||
|- style="background:#fff" | |||
| 23 | |||
| 5,800 | |||
| [[File:Masters 3 Star Crispy Lucky Cookie.png|30px]]3★ Crispy Lucky Cookie ×4 | |||
| [[File:Masters Coin.png|30px]]5200 coins | |||
|- style="background:#fff" | |||
| 24 | |||
| 6,000 | |||
| [[File:Masters Lucky Scroll.png|30px]]Lucky Scroll ×20 | |||
| [[File:Masters Coin.png|30px]]5400 coins | |||
|- style="background:#fff" | |||
| 25 | |||
| 6,200 | |||
| [[File:Masters Gem.png|30px]]Gems ×300<br>[[File:Masters Skip Ticket.png|30px]]Skip Ticket ×10 | |||
| [[File:Masters Coin.png|30px]]5600 coins | |||
|- style="background:#fff" | |||
| 26 | |||
| 6,400 | |||
| [[File:Masters 3 Star Crunchy Lucky Cookie.png|30px]]3★ Crunchy Lucky Cookie ×5 | |||
| [[File:Masters Coin.png|30px]]5800 coins | |||
|- style="background:#fff" | |||
| 27 | |||
| 6,600 | |||
| [[File:Masters 3 Star Creamy Lucky Cookie.png|30px]]3★ Creamy Lucky Cookie ×5 | |||
| [[File:Masters Coin.png|30px]]6000 coins | |||
|- style="background:#fff" | |||
| 28 | |||
| 6,800 | |||
| [[File:Masters 3 Star Crispy Lucky Cookie.png|30px]]3★ Crispy Lucky Cookie ×5 | |||
| [[File:Masters Coin.png|30px]]6200 coins | |||
|- style="background:#fff" | |||
| 29 | |||
| 7,000 | |||
| {{tt|[[File:Masters Tech Move Candy Coin.png|30px]]Tech /[[File:Masters Strike Move Candy Coin.png|30px]]Strike /[[File:Masters Support Move Candy Coin.png|30px]]Support /[[File:Masters Sprint Move Candy Coin.png|30px]]Sprint /[[File:Masters Field Move Candy Coin.png|30px]]Field|Rotates each time Battle Villa returns}} Move Candy Coin ×1 | |||
| [[File:Masters Coin.png|30px]]6400 coins | |||
|- style="background:#fff" | |||
| style="{{roundybl}}" | 30 | |||
| 7,200 | |||
| [[File:Masters Gem.png|30px]]Gems ×500<br>[[File:Masters Skip Ticket.png|30px]]Skip Ticket ×10 | |||
| style="{{roundybr}}" | [[File:Masters Coin.png|30px]]6600 coins | |||
|} | |||
=====November 19, 2020 to ???===== | |||
{| class="roundy mw-collapsible mw-collapsed" style="margin:auto; background:#{{shield color dark}}; border:3px solid #{{shield color}}; text-align:center" | |||
|- style="background-color:#{{shield color light}}" | |||
! style="{{roundytl|5px}}" | Hall no. | |||
! XP | |||
! First-time Rewards | |||
! style="{{roundytr|5px}}" | Completion Rewards | |||
|- style="background:#fff" | |||
| 1 | |||
| 1,000 | |||
| [[File:Masters Gem.png|30px]]Gems ×100 | |||
| [[File:Masters Coin.png|30px]]400 coins | |||
|- style="background:#fff" | |||
| 2 | |||
| 1,400 | |||
| [[File:Masters Gem.png|30px]]Gems ×100 | |||
| [[File:Masters Coin.png|30px]]700 coins | |||
|- style="background:#fff" | |||
| 3 | |||
| 1,800 | |||
| [[File:Masters Gem.png|30px]]Gems ×100 | |||
| [[File:Masters Coin.png|30px]]1000 coins | |||
|- style="background:#fff" | |||
| 4 | |||
| 2,000 | |||
| [[File:Masters Lucky Scroll.png|30px]]Lucky Scroll ×5 | |||
| [[File:Masters Coin.png|30px]]1300 coins | |||
|- style="background:#fff" | |||
| 5 | |||
| 2,200 | |||
| [[File:Masters 5 Star Scout Ticket.png|30px]]5★ Scout Ticket ×2<br>[[File:Masters Skip Ticket.png|30px]]Skip Ticket ×5 | |||
| [[File:Masters Coin.png|30px]]1600 coins | |||
|- style="background:#fff" | |||
| 6 | |||
| 2,400 | |||
| [[File:Masters 1 Star Crunchy Lucky Cookie.png|30px]]1★ Crunchy Lucky Cookie ×12 | |||
| [[File:Masters Coin.png|30px]]1800 coins | |||
|- style="background:#fff" | |||
| 7 | |||
| 2,600 | |||
| [[File:Masters 1 Star Creamy Lucky Cookie.png|30px]]1★ Creamy Lucky Cookie ×12 | |||
| [[File:Masters Coin.png|30px]]2000 coins | |||
|- style="background:#fff" | |||
| 8 | |||
| 2,800 | |||
| [[File:Masters 1 Star Crispy Lucky Cookie.png|30px]]1★ Crispy Lucky Cookie ×12 | |||
| [[File:Masters Coin.png|30px]]2200 coins | |||
|- style="background:#fff" | |||
| 9 | |||
| 3,000 | |||
| [[File:Masters Lucky Scroll.png|30px]]Lucky Scroll ×10 | |||
| [[File:Masters Coin.png|30px]]2400 coins | |||
|- style="background:#fff" | |||
| 10 | |||
| 3,200 | |||
| [[File:Masters Gem.png|30px]]Gems ×300<br>[[File:Masters Skip Ticket.png|30px]]Skip Ticket ×5 | |||
| [[File:Masters Coin.png|30px]]2600 coins | |||
|- style="background:#fff" | |||
| 11 | |||
| 3,400 | |||
| [[File:Masters 2 Star Crunchy Lucky Cookie.png|30px]]2★ Crunchy Lucky Cookie ×6 | |||
| [[File:Masters Coin.png|30px]]2800 coins | |||
|- style="background:#fff" | |||
| 12 | |||
| 3,600 | |||
| [[File:Masters 2 Star Creamy Lucky Cookie.png|30px]]2★ Creamy Lucky Cookie ×6 | |||
| [[File:Masters Coin.png|30px]]3000 coins | |||
|- style="background:#fff" | |||
| 13 | |||
| 3,800 | |||
| [[File:Masters 2 Star Crispy Lucky Cookie.png|30px]]2★ Crispy Lucky Cookie ×6 | |||
| [[File:Masters Coin.png|30px]]3200 coins | |||
|- style="background:#fff" | |||
| 14 | |||
| 4,000 | |||
| [[File:Masters 5 Star Scout Ticket.png|30px]]5★ Scout Ticket ×2 | |||
| [[File:Masters Coin.png|30px]]3400 coins | |||
|- style="background:#fff" | |||
| 15 | |||
| 4,200 | |||
| [[File:Masters Gem.png|30px]]Gems ×300<br>[[File:Masters Skip Ticket.png|30px]]Skip Ticket ×10 | |||
| [[File:Masters Coin.png|30px]]3600 coins | |||
|- style="background:#fff" | |||
| 16 | |||
| 4,400 | |||
| [[File:Masters 2 Star Crunchy Lucky Cookie.png|30px]]2★ Crunchy Lucky Cookie ×8 | |||
| [[File:Masters Coin.png|30px]]3800 coins | |||
|- style="background:#fff" | |||
| 17 | |||
| 4,600 | |||
| [[File:Masters 2 Star Creamy Lucky Cookie.png|30px]]2★ Creamy Lucky Cookie ×8 | |||
| [[File:Masters Coin.png|30px]]4000 coins | |||
|- style="background:#fff" | |||
| 18 | |||
| 4,800 | |||
| [[File:Masters 2 Star Crispy Lucky Cookie.png|30px]]2★ Crispy Lucky Cookie ×8 | |||
| [[File:Masters Coin.png|30px]]4200 coins | |||
|- style="background:#fff" | |||
| 19 | |||
| 5,000 | |||
| [[File:Masters Lucky Scroll.png|30px]]Lucky Scroll ×15 | |||
| [[File:Masters Coin.png|30px]]4400 coins | |||
|- style="background:#fff" | |||
| 20 | |||
| 5,200 | |||
| [[File:Masters Gem.png|30px]]Gems ×300<br>[[File:Masters Skip Ticket.png|30px]]Skip Ticket ×10 | |||
| [[File:Masters Coin.png|30px]]4600 coins | |||
|- style="background:#fff" | |||
| 21 | |||
| 5,400 | |||
| [[File:Masters 3 Star Crunchy Lucky Cookie.png|30px]]3★ Crunchy Lucky Cookie ×4 | |||
| [[File:Masters Coin.png|30px]]4800 coins | |||
|- style="background:#fff" | |||
| 22 | |||
| 5,600 | |||
| [[File:Masters 3 Star Creamy Lucky Cookie.png|30px]]3★ Creamy Lucky Cookie ×4 | |||
| [[File:Masters Coin.png|30px]]5000 coins | |||
|- style="background:#fff" | |||
| 23 | |||
| 5,800 | |||
| [[File:Masters 3 Star Crispy Lucky Cookie.png|30px]]3★ Crispy Lucky Cookie ×4 | |||
| [[File:Masters Coin.png|30px]]5200 coins | |||
|- style="background:#fff" | |||
| 24 | |||
| 6,000 | |||
| [[File:Masters Lucky Scroll.png|30px]]Lucky Scroll ×20 | |||
| [[File:Masters Coin.png|30px]]5400 coins | |||
|- style="background:#fff" | |||
| 25 | |||
| 6,200 | |||
| [[File:Masters Gem.png|30px]]Gems ×300<br>[[File:Masters Skip Ticket.png|30px]]Skip Ticket ×10 | |||
| [[File:Masters Coin.png|30px]]5600 coins | |||
|- style="background:#fff" | |||
| 26 | |||
| 6,400 | |||
| [[File:Masters 3 Star Crunchy Lucky Cookie.png|30px]]3★ Crunchy Lucky Cookie ×5 | |||
| [[File:Masters Coin.png|30px]]5800 coins | |||
|- style="background:#fff" | |||
| 27 | |||
| 6,600 | |||
| [[File:Masters 3 Star Creamy Lucky Cookie.png|30px]]3★ Creamy Lucky Cookie ×5 | |||
| [[File:Masters Coin.png|30px]]6000 coins | |||
|- style="background:#fff" | |||
| 28 | |||
| 6,800 | |||
| [[File:Masters 3 Star Crispy Lucky Cookie.png|30px]]3★ Crispy Lucky Cookie ×5 | |||
| [[File:Masters Coin.png|30px]]6200 coins | |||
|- style="background:#fff" | |||
| 29 | |||
| 7,000 | |||
| {{tt|[[File:Masters Tech Move Candy Coin.png|30px]]Tech /[[File:Masters Strike Move Candy Coin.png|30px]]Strike /[[File:Masters Support Move Candy Coin.png|30px]]Support|Rotates each time Battle Villa returns}} Move Candy Coin ×1 | |||
| [[File:Masters Coin.png|30px]]6400 coins | |||
|- style="background:#fff" | |||
| style="{{roundybl}}" | 30 | |||
| 7,200 | |||
| [[File:Masters Gem.png|30px]]Gems ×500<br>[[File:Masters Skip Ticket.png|30px]]Skip Ticket ×10 | |||
| style="{{roundybr}}" | [[File:Masters Coin.png|30px]]6600 coins | |||
|} | |||
=====June 30, 2020 to October 26, 2020===== | |||
{| class="roundy mw-collapsible mw-collapsed" style="margin:auto; background:#{{shield color dark}}; border:3px solid #{{shield color}}; text-align:center" | |||
|- style="background-color:#{{shield color light}} | |||
! style="{{roundytl|5px}}" | Hall no. | |||
! style="{{roundytr|5px}}" | First-time Reward | |||
|- style="background:#fff" | |||
| 1 | |||
| [[File:Masters 1 Star Crunchy Lucky Cookie.png|30px]]1★ Crunchy Lucky Cookie | |||
|- style="background:#fff" | |||
| 2 | |||
| [[File:Masters 1 Star Creamy Lucky Cookie.png|30px]]1★ Creamy Lucky Cookie | |||
|- style="background:#fff" | |||
| 3 | |||
| [[File:Masters 1 Star Crispy Lucky Cookie.png|30px]]1★ Crispy Lucky Cookie | |||
|- style="background:#fff" | |||
| 4 | |||
| [[File:Masters Skip Ticket.png|30px]]Skip Ticket ×5 | |||
|- style="background:#fff" | |||
| 5 | |||
| [[File:Masters Lucky Scroll.png|30px]]Lucky Scroll ×2 | |||
|- style="background:#fff" | |||
| 6 | |||
| [[File:Masters 1 Star Crunchy Lucky Cookie.png|30px]]1★ Crunchy Lucky Cookie ×2 | |||
|- style="background:#fff" | |||
| 7 | |||
| [[File:Masters 1 Star Creamy Lucky Cookie.png|30px]]1★ Creamy Lucky Cookie ×2 | |||
|- style="background:#fff" | |||
| 8 | |||
| [[File:Masters 1 Star Crispy Lucky Cookie.png|30px]]1★ Crispy Lucky Cookie ×2 | |||
|- style="background:#fff" | |||
| 9 | |||
| [[File:Masters Skip Ticket.png|30px]]Skip Ticket ×5 | |||
|- style="background:#fff" | |||
| 10 | |||
| [[File:Masters Lucky Scroll.png|30px]]Lucky Scroll ×2 | |||
|- style="background:#fff" | |||
| 11 | |||
| [[File:Masters 1 Star Crunchy Lucky Cookie.png|30px]]1★ Crunchy Lucky Cookie ×3 | |||
|- style="background:#fff" | |||
| 12 | |||
| [[File:Masters 1 Star Creamy Lucky Cookie.png|30px]]1★ Creamy Lucky Cookie ×3 | |||
|- style="background:#fff" | |||
| 13 | |||
| [[File:Masters 1 Star Crispy Lucky Cookie.png|30px]]1★ Crispy Lucky Cookie ×3 | |||
|- style="background:#fff" | |||
| 14 | |||
| [[File:Masters Skip Ticket.png|30px]]Skip Ticket ×5 | |||
|- style="background:#fff" | |||
| 15 | |||
| [[File:Masters Lucky Scroll.png|30px]]Lucky Scroll ×2 | |||
|- style="background:#fff" | |||
| 16 | |||
| [[File:Masters 2 Star Crunchy Lucky Cookie.png|30px]]2★ Crunchy Lucky Cookie ×2 | |||
|- style="background:#fff" | |||
| 17 | |||
| [[File:Masters 2 Star Creamy Lucky Cookie.png|30px]]2★ Creamy Lucky Cookie ×2 | |||
|- style="background:#fff" | |||
| 18 | |||
| [[File:Masters 2 Star Crispy Lucky Cookie.png|30px]]2★ Crispy Lucky Cookie ×2 | |||
|- style="background:#fff" | |||
| 19 | |||
| [[File:Masters Skip Ticket.png|30px]]Skip Ticket ×5 | |||
|- style="background:#fff" | |||
| 20 | |||
| [[File:Masters Lucky Scroll.png|30px]]Lucky Scroll ×2 | |||
|- style="background:#fff" | |||
| 21 | |||
| [[File:Masters 3 Star Crunchy Lucky Cookie.png|30px]]3★ Crunchy Lucky Cookie | |||
|- style="background:#fff" | |||
| 22 | |||
| [[File:Masters 3 Star Creamy Lucky Cookie.png|30px]]3★ Creamy Lucky Cookie | |||
|- style="background:#fff" | |||
| 23 | |||
| [[File:Masters 3 Star Crispy Lucky Cookie.png|30px]]3★ Crispy Lucky Cookie | |||
|- style="background:#fff" | |||
| 24 | |||
| [[File:Masters Chewy Lucky Cookie.png|30px]]Chewy Lucky Cookie | |||
|- style="background:#fff" | |||
| 25 | |||
| [[File:Masters Lucky Scroll.png|30px]]Lucky Scroll ×6 | |||
|- style="background:#fff" | |||
| 26 | |||
| [[File:Masters 3 Star Crunchy Lucky Cookie.png|30px]]3★ Crunchy Lucky Cookie ×2 | |||
|- style="background:#fff" | |||
| 27 | |||
| [[File:Masters 3 Star Creamy Lucky Cookie.png|30px]]3★ Creamy Lucky Cookie ×2 | |||
|- style="background:#fff" | |||
| 28 | |||
| [[File:Masters 3 Star Crispy Lucky Cookie.png|30px]]3★ Crispy Lucky Cookie ×2 | |||
|- style="background:#fff" | |||
| 29 | |||
| [[File:Masters Chewy Lucky Cookie.png|30px]]Chewy Lucky Cookie ×2 | |||
|- style="background:#fff" | |||
| style="{{roundybl}}" | 30 | |||
| style="{{roundybr}}" | [[File:Masters Lucky Scroll.png|30px]]Lucky Scroll ×8 | |||
|} | |||
=====February 28 to June 30, 2020===== | |||
{| class="roundy mw-collapsible mw-collapsed" style="margin:auto; background:#{{shield color dark}}; border:3px solid #{{shield color}}; text-align:center" | |||
|- style="background-color:#{{shield color light}} | |||
! style="{{roundytl|5px}}" | Hall no. | |||
! First-Time Reward | |||
! style="{{roundytr|5px}}" | Completion Reward | |||
|- style="background:#fff" | |||
| 1 | |||
| [[File:Masters Buff Blend.png|30px]]Buff Blend ×100 | |||
| [[File:Masters Tech Tonic.png|30px]]Tech Tonic ×100<br>[[File:Masters Aid Ade.png|30px]]Aid Ade ×100<br>[[File:Masters Training Machine.png|30px]]Training Machine ×30 | |||
|- style="background:#fff" | |||
| 2 | |||
| [[File:Masters Great Buff Blend.png|30px]]Great Buff Blend ×50 | |||
| [[File:Masters Great Tech Tonic.png|30px]]Great Tech Tonic ×50<br>[[File:Masters Great Aid Ade.png|30px]]Great Aid Ade ×50 | |||
|- style="background:#fff" | |||
| 3 | |||
| [[File:Masters Big Pearl.png|30px]]Big Pearl ×10 | |||
| [[File:Masters Buff Blend.png|30px]]Buff Blend ×100<br>[[File:Masters Tech Tonic.png|30px]]Tech Tonic ×100<br>[[File:Masters Aid Ade.png|30px]]Aid Aide ×100 | |||
|- style="background:#fff" | |||
| 4 | |||
| [[File:Masters 3 Star Level-Up Manual.png|30px]]3★ Level-Up Manual ×5 | |||
| [[File:Masters Great Buff Blend.png|30px]]Great Buff Blend ×100<br>[[File:Masters Great Tech Tonic.png|30px]]Great Tech Tonic ×100<br>[[File:Masters Great Aid Ade.png|30px]]Great Aid Aide ×100 | |||
|- style="background:#fff" | |||
| 5 | |||
| [[File:Masters Gym Leader Notes.png|30px]]Gym Leader Notes ×5 | |||
| [[File:Masters Super Training Machine.png|30px]]Super Training Machine ×15<br>[[File:Masters Skill Capsule.png|30px]]Skill Capsule ×10 | |||
|- style="background:#fff" | |||
| 6 | |||
| [[File:Masters Ultra Buff Blend.png|30px]]Ultra Buff Blend ×100 | |||
| [[File:Masters Buff Blend.png|30px]]Buff Blend ×300<br>[[File:Masters Tech Tonic.png|30px]]Tech Tonic ×300<br>[[File:Masters Aid Ade.png|30px]]Aid Ade ×300<br>[[File:Masters Training Machine.png|30px]]Training Machine ×30 | |||
|- style="background:#fff" | |||
| 7 | |||
| [[File:Masters Ultra Aid Ade.png|30px]]Ultra Aid Aide ×100 | |||
| [[File:Masters Great Buff Blend.png|30px]]Great Buff Blend ×150<br>[[File:Masters Great Tech Tonic.png|30px]]Great Tech Tonic ×150<br>[[File:Masters Great Aid Ade.png|30px]]Great Aid Ade ×150 | |||
|- style="background:#fff" | |||
| 8 | |||
| [[File:Masters Ultra Tech Tonic.png|30px]]Ultra Tech Tonic ×100 | |||
| [[File:Masters 3 Star Level-Up Manual.png|30px]]3★ Level-Up Manual ×15 | |||
|- style="background:#fff" | |||
| 9 | |||
| [[File:Masters Elite Four Notes.png|30px]]Elite Four Notes ×3 | |||
| None | |||
|- style="background:#fff" | |||
| 10 | |||
| [[File:Masters Lucky Scroll.png|30px]]Lucky Scroll ×2 | |||
| None | |||
|- style="background:#fff" | |||
| 11 | |||
| [[File:Masters 1 Star Crunchy Lucky Cookie.png|30px]]1★ Crunchy Lucky Cookie ×3 | |||
| None | |||
|- style="background:#fff" | |||
| 12 | |||
| [[File:Masters 1 Star Creamy Lucky Cookie.png|30px]]1★ Creamy Lucky Cookie ×3 | |||
| None | |||
|- style="background:#fff" | |||
| 13 | |||
| [[File:Masters 1 Star Crispy Lucky Cookie.png|30px]]1★ Crispy Lucky Cookie ×3 | |||
| None | |||
|- style="background:#fff" | |||
| 14 | |||
| [[File:Masters Big Pearl.png|30px]]Big Pearl ×15 | |||
| None | |||
|- style="background:#fff" | |||
| 15 | |||
| [[File:Masters Lucky Scroll.png|30px]]Lucky Scroll ×2 | |||
| None | |||
|- style="background:#fff" | |||
| 16 | |||
| [[File:Masters 2 Star Crunchy Lucky Cookie.png|30px]]2★ Crunchy Lucky Cookie ×2 | |||
| None | |||
|- style="background:#fff" | |||
| 17 | |||
| [[File:Masters 2 Star Creamy Lucky Cookie.png|30px]]2★ Creamy Lucky Cookie ×2 | |||
| None | |||
|- style="background:#fff" | |||
| 18 | |||
| [[File:Masters 2 Star Crispy Lucky Cookie.png|30px]]2★ Crispy Lucky Cookie ×2 | |||
| None | |||
|- style="background:#fff" | |||
| 19 | |||
| [[File:Masters Evolution Crystal.png|30px]]Evolution Crystal | |||
| None | |||
|- style="background:#fff" | |||
| 20 | |||
| [[File:Masters Lucky Scroll.png|30px]]Lucky Scroll ×2 | |||
| None | |||
|- style="background:#fff" | |||
| 21 | |||
| [[File:Masters 3 Star Crunchy Lucky Cookie.png|30px]]3★ Crunchy Lucky Cookie | |||
| None | |||
|- style="background:#fff" | |||
| 22 | |||
| [[File:Masters 3 Star Creamy Lucky Cookie.png|30px]]3★ Creamy Lucky Cookie | |||
| None | |||
|- style="background:#fff" | |||
| 23 | |||
| [[File:Masters 3 Star Crispy Lucky Cookie.png|30px]]3★ Crispy Lucky Cookie | |||
| None | |||
|- style="background:#fff" | |||
| 24 | |||
| [[File:Masters Chewy Lucky Cookie.png|30px]]Chewy Lucky Cookie | |||
| None | |||
|- style="background:#fff" | |||
| 25 | |||
| [[File:Masters Lucky Scroll.png|30px]]Lucky Scroll ×6 | |||
| None | |||
|- style="background:#fff" | |||
| 26 | |||
| [[File:Masters 3 Star Crunchy Lucky Cookie.png|30px]]3★ Crunchy Lucky Cookie ×2 | |||
| None | |||
|- style="background:#fff" | |||
| 27 | |||
| [[File:Masters 3 Star Creamy Lucky Cookie.png|30px]]3★ Creamy Lucky Cookie ×2 | |||
| None | |||
|- style="background:#fff" | |||
| 28 | |||
| [[File:Masters 3 Star Crispy Lucky Cookie.png|30px]]3★ Crispy Lucky Cookie ×2 | |||
| None | |||
|- style="background:#fff" | |||
| 29 | |||
| [[File:Masters Chewy Lucky Cookie.png|30px]]Chewy Lucky Cookie ×2 | |||
| None | |||
|- style="background:#fff" | |||
| style="{{roundybl}}" | 30 | |||
| [[File:Masters Lucky Scroll.png|30px]]Lucky Scroll ×8 | |||
| style="{{roundybr}}" | None | |||
|} | |||
Bonus rewards are obtained every fifth hall, where upon defeating the opponent, the player can choose one of: | ====Bonus rewards==== | ||
* Extra rewards: an additional | Bonus rewards are obtained every fifth hall (excluding Hall 30), where upon defeating the opponent, the player can choose one of: | ||
* Extra rewards: an additional Lucky Cookie reward, chosen at random | |||
{| class=" roundtable" style="margin:auto; background:#{{shield color dark}}; border:3px solid #{{shield color}}; text-align:center" | |||
|- style="background-color:#{{shield color light}} | |||
! Hall | |||
! Reward | |||
! Quantity | |||
! Chance | |||
|- style="background:#fff" | |||
| rowspan=3 | 5 | |||
| class="l" | [[File:Masters 1 Star Crunchy Lucky Cookie.png|30px]]1★ Crunchy Lucky Cookie | |||
| rowspan=3 | 10 | |||
| 34% | |||
|- style="background:#fff" | |||
| class="l" | [[File:Masters 1 Star Creamy Lucky Cookie.png|30px]]1★ Creamy Lucky Cookie | |||
| 33% | |||
|- style="background:#fff" | |||
| class="l" | [[File:Masters 1 Star Crispy Lucky Cookie.png|30px]]1★ Crispy Lucky Cookie | |||
| 33% | |||
|- style="background:#fff" | |||
| rowspan=3 | 10 | |||
| class="l" | [[File:Masters 1 Star Crunchy Lucky Cookie.png|30px]]1★ Crunchy Lucky Cookie | |||
| rowspan=3 | 14 | |||
| 34% | |||
|- style="background:#fff" | |||
| class="l" | [[File:Masters 1 Star Creamy Lucky Cookie.png|30px]]1★ Creamy Lucky Cookie | |||
| 33% | |||
|- style="background:#fff" | |||
| class="l" | [[File:Masters 1 Star Crispy Lucky Cookie.png|30px]]1★ Crispy Lucky Cookie | |||
| 33% | |||
|- style="background:#fff" | |||
| rowspan=3 | 15 | |||
| class="l" | [[File:Masters 2 Star Crunchy Lucky Cookie.png|30px]]2★ Crunchy Lucky Cookie | |||
| rowspan=3 | 8 | |||
| 34% | |||
|- style="background:#fff" | |||
| class="l" | [[File:Masters 2 Star Creamy Lucky Cookie.png|30px]]2★ Creamy Lucky Cookie | |||
| 33% | |||
|- style="background:#fff" | |||
| class="l" | [[File:Masters 2 Star Crispy Lucky Cookie.png|30px]]2★ Crispy Lucky Cookie | |||
| 33% | |||
|- style="background:#fff" | |||
| rowspan=4 | 20 | |||
| class="l" | [[File:Masters 3 Star Crunchy Lucky Cookie.png|30px]]3★ Crunchy Lucky Cookie | |||
| rowspan=4 | 4 | |||
| 20% | |||
|- style="background:#fff" | |||
| class="l" | [[File:Masters 3 Star Creamy Lucky Cookie.png|30px]]3★ Creamy Lucky Cookie | |||
| 20% | |||
|- style="background:#fff" | |||
| class="l" | [[File:Masters 3 Star Crispy Lucky Cookie.png|30px]]3★ Crispy Lucky Cookie | |||
| 20% | |||
|- style="background:#fff" | |||
| class="l" | [[File:Masters Chewy Lucky Cookie.png|30px]]Chewy Lucky Cookie | |||
| 40% | |||
|- style="background:#fff" | |||
| rowspan=4 | 25 | |||
| class="l" | [[File:Masters 3 Star Crunchy Lucky Cookie.png|30px]]3★ Crunchy Lucky Cookie | |||
| rowspan=4 | 7 | |||
| 20% | |||
|- style="background:#fff" | |||
| class="l" | [[File:Masters 3 Star Creamy Lucky Cookie.png|30px]]3★ Creamy Lucky Cookie | |||
| 20% | |||
|- style="background:#fff" | |||
| class="l" | [[File:Masters 3 Star Crispy Lucky Cookie.png|30px]]3★ Crispy Lucky Cookie | |||
| 20% | |||
|- style="background:#fff" | |||
| class="l" | [[File:Masters Chewy Lucky Cookie.png|30px]]Chewy Lucky Cookie | |||
| 40% | |||
|} | |||
* Vitality treats: items which restore sync pair HP or MP | * Vitality treats: items which restore sync pair HP or MP | ||
{| class=" roundtable" style="margin:auto; background:#{{shield color dark}}; border:3px solid #{{shield color}}; text-align:center" | |||
|- style="background-color:#{{shield color light}} | |||
! Hall | |||
! Reward | |||
|- style="background:#fff" | |||
| 5 | |||
| rowspan=3 | [[File:Masters Hearty Stew.png|30px]]Hearty Stew ×1<br>[[File:Masters Replenishing Patty.png|30px]]Replenishing Patty ×1 | |||
|- style="background:#fff" | |||
| 10 | |||
|- style="background:#fff" | |||
| 15 | |||
|- style="background:#fff" | |||
| 20 | |||
| rowspan=2 | [[File:Masters Hearty Stew.png|30px]]Hearty Stew ×2<br>[[File:Masters Replenishing Patty.png|30px]]Replenishing Patty ×2 | |||
|- style="background:#fff" | |||
| 25 | |||
|} | |||
* Vigor treats: items which provide useful boosts to sync pairs during battle | * Vigor treats: items which provide useful boosts to sync pairs during battle | ||
{| class=" roundtable" style="margin:auto; background:#{{shield color dark}}; border:3px solid #{{shield color}}; text-align:center" | |||
|- style="background-color:#{{shield color light}} | |||
! Hall | |||
! Reward | |||
|- style="background:#fff" | |||
| 5 | |||
| rowspan=3 | [[File:Masters Almighty Apple Pie.png|30px]]Almighty Apple Pie ×1<br>[[File:Masters Critical Herb Tea.png|30px]]Critical Herb Tea ×1<br>[[File:Masters Preventative Pea Soup.png|30px]]Preventative Pea Soup ×1<br>[[File:Masters Hard-Shell Taco.png|30px]]Hard-Shell Taco ×1<br>[[File:Masters Ziti Special.png|30px]]Ziti Special ×1 | |||
|- style="background:#fff" | |||
| 10 | |||
|- style="background:#fff" | |||
| 15 | |||
|- style="background:#fff" | |||
| 20 | |||
| rowspan=2 | [[File:Masters Almighty Apple Pie.png|30px]]Almighty Apple Pie ×2<br>[[File:Masters Critical Herb Tea.png|30px]]Critical Herb Tea ×2<br>[[File:Masters Preventative Pea Soup.png|30px]]Preventative Pea Soup ×2<br>[[File:Masters Hard-Shell Taco.png|30px]]Hard-Shell Taco ×2<br>[[File:Masters Ziti Special.png|30px]]Ziti Special ×2 | |||
|- style="background:#fff" | |||
| 25 | |||
|} | |||
Milestone rewards | ====Milestone rewards==== | ||
{| class="roundy" style="margin:auto; background:#{{shield color}}; border:3px solid #{{ | Milestone rewards were previously obtained by defeating specific halls. These could only be claimed once the Battle Villa challenge period ended, and the rewards were stored for up to four Battle Villa challenges before they could no longer be claimed. With the update on November 19, 2020, milestone rewards were removed, and the Gem rewards included amongst the usual Battle Villa post-battle rewards. | ||
{| class="roundy mw-collapsible mw-collapsed" style="margin:auto; background:#{{shield color}}; border:3px solid #{{shield color dark}}; text-align:center" | |||
! style=" | |- style="background-color:#{{shield color light}} | ||
! style="{{roundytl|5px}}" | Hall | |||
! style="{{roundytr|5px}}" | Rewards | |||
|- style="background:#fff" | |- style="background:#fff" | ||
| 1 | | 1 | ||
| Gems ×100<br> | | [[File:Masters Gem.png|30px]]Gems ×100<br>[[File:Masters Skip Ticket.png|30px]]Skip Ticket ×5 | ||
|- style="background:#fff" | |- style="background:#fff" | ||
| 5 | | 5 | ||
| Gems ×100<br>Great Buff Blend ×100<br>Great Tech Tonic ×100<br>Great Aid Ade ×100 | | [[File:Masters Gem.png|30px]]Gems ×100<br>[[File:Masters Great Buff Blend.png|30px]]Great Buff Blend ×100<br>[[File:Masters Great Tech Tonic.png|30px]]Great Tech Tonic ×100<br>[[File:Masters Great Aid Ade.png|30px]]Great Aid Ade ×100 | ||
|- style="background:#fff" | |- style="background:#fff" | ||
| 10 | | 10 | ||
| Gems ×100<br>Ultra Buff Blend ×100<br>Ultra Tech Tonic ×100<br>Ultra Aid Ade ×100<br>Lucky Scroll | | [[File:Masters Gem.png|30px]]Gems ×100<br>[[File:Masters Ultra Buff Blend.png|30px]]Ultra Buff Blend ×100<br>[[File:Masters Ultra Tech Tonic.png|30px]]Ultra Tech Tonic ×100<br>[[File:Masters Ultra Aid Ade.png|30px]]Ultra Aid Ade ×100<br>[[File:Masters Lucky Scroll.png|30px]]Lucky Scroll ×1 | ||
|- style="background:#fff" | |- style="background:#fff" | ||
| 15 | | 15 | ||
| Gems ×300<br>Gym Leader Notes ×5<br>3★ Crunchy Lucky Cookie | | [[File:Masters Gem.png|30px]]Gems ×300<br>[[File:Masters Gym Leader Notes.png|30px]]Gym Leader Notes ×5<br>[[File:Masters 3 Star Crunchy Lucky Cookie.png|30px]]3★ Crunchy Lucky Cookie ×1 | ||
|- style="background:#fff" | |- style="background:#fff" | ||
| 20 | | 20 | ||
| Gems ×300<br>Buff Blend + ×100<br>Tech Tonic + ×100<br>Aid Ade + ×100<br>3★ Creamy Lucky Cookie | | [[File:Masters Gem.png|30px]]Gems ×300<br>[[File:Masters Buff Blend +.png|30px]]Buff Blend + ×100<br>[[File:Masters Tech Tonic +.png|30px]]Tech Tonic + ×100<br>[[File:Masters Aid Ade +.png|30px]]Aid Ade + ×100<br>[[File:Masters 3 Star Creamy Lucky Cookie.png|30px]]3★ Creamy Lucky Cookie ×1 | ||
|- style="background:#fff" | |||
| 25 | |||
| [[File:Masters Gem.png|30px]]Gems ×300<br>[[File:Masters Elite Four Notes.png|30px]]Elite Four Notes ×10<br>[[File:Masters 3 Star Crispy Lucky Cookie.png|30px]]3★ Crispy Lucky Cookie ×1<br>[[File:Masters Chewy Lucky Cookie.png|30px]]Chewy Lucky Cookie ×1 | |||
|- style="background:#fff" | |- style="background:#fff" | ||
| style="{{roundybl}}" | | | style="{{roundybl}}" | 30 | ||
| style="{{roundybr}}" | Gems ×600 | | style="{{roundybr}}" | [[File:Masters Gem.png|30px]]Gems ×600 | ||
|} | |} | ||
=====Medal rewards===== | |||
The {{mas|medal}}s Battle Pawn, Battle Knight, Battle Bishop, and Battle Rook are obtainable upon completing halls 15, 20, 25, and 30, respectively. A number of additional medals were added after the update on November 19, 2020. | |||
===Items=== | ===Items=== | ||
Items exclusive to the Battle Villa can be used to provide useful effects to sync pairs. | Items exclusive to the Battle Villa can be used to provide useful effects to sync pairs. Players start off with one of each item at the start of the Battle Villa{{tt|*|Prior to the update on November 19, 2020, players started off with one of each of Hearty Stew, Replenishing Patty, and Almighty Apple Pie only}}. | ||
====Vitality treats==== | ====Vitality treats==== | ||
{| class="roundy" style="margin:auto; background:#{{ | {| class="roundy" style="margin:auto; background:#{{shield color dark}}; border:3px solid #{{shield color}}; text-align:center" | ||
|- style="background-color:#{{shield color light}} | |||
! style=" | ! style="{{roundytl|5px}}" colspan=2 | Name | ||
! style="{{roundytr|5px}}" | Use | |||
|- style="background:#fff" | |- style="background:#fff" | ||
| [[File:Masters Hearty Stew.png|60px]] | | [[File:Masters Hearty Stew.png|60px]] | ||
| Line 57: | Line 717: | ||
====Vigor treats==== | ====Vigor treats==== | ||
{| class="roundy" style="margin:auto; background:#{{ | {| class="roundy" style="margin:auto; background:#{{shield color dark}}; border:3px solid #{{shield color}}; text-align:center" | ||
|- style="background-color:#{{shield color light}} | |||
! style=" | ! style="{{roundytl|5px}}" colspan=2 | Name | ||
! style="{{roundytr|5px}}" | Use | |||
|- style="background:#fff" | |- style="background:#fff" | ||
| [[File:Masters Almighty Apple Pie.png|60px]] | | [[File:Masters Almighty Apple Pie.png|60px]] | ||
| Line 83: | Line 744: | ||
==Stages== | ==Stages== | ||
{| class="roundy" style="margin:auto; background:#{{ | ===Single player=== | ||
Battle Villa has 30 halls grouped into "sets" of five halls. Each set specializes in three different [[type]]s. The first three halls of each set focus on one specific type, while the last two halls of each set focus on all of those three types. The order of these sets within the Villa change frequently. | |||
{| class="roundy" style="margin:auto; background:#{{shield color dark}}; border:3px solid #{{shield color}}; text-align:center" | |||
|- style="background-color:#{{shield color light}}" | |||
! style="{{roundytl|5px}}" | Dates | |||
! style="{{roundytr|5px}}" | Order of sets (ascending) | |||
|- style="background:#fff" | |||
| February 28 to March 31, 2020 | |||
| A, B, C, D, E | |||
|- style="background:#fff" | |||
| March 30 to April 30, 2020 | |||
| A, E, B, C, D | |||
|- style="background:#fff" | |||
| April 30 to May 29, 2020 | |||
| A, C, D, E, B, F | |||
|- style="background:#fff" | |||
| May 29 to June 29, 2020 | |||
| A, D, E, B, F, C | |||
|- style="background:#fff" | |||
| June 30 to July 28, 2020 | |||
| A, F, C, D, E, B | |||
|- style="background:#fff" | |||
| July 29 to August 30, 2020 | |||
| A, B, F, C, D, E | |||
|- style="background:#fff" | |||
| August 31 to September 29, 2020 | |||
| A, C, B, E, F, D | |||
|- style="background:#fff" | |||
| September 30 to October 26, 2020 | |||
| A, D, E, F, C, B | |||
|- style="background:#fff" | |||
| November 19 to December 4, 2020 | |||
| A, E, D, F, B, C | |||
|- style="background:#fff" | |||
| December 14 to 28, 2020 | |||
| A, B, D, E, C, F | |||
|- style="background:#fff" | |||
| January 7 to 21, 2021 | |||
| A, F, C, B, E, D | |||
|- style="background:#fff" | |||
| February 4 to 18, 2021 | |||
| A, D, E, C, F, B | |||
|- style="background:#fff" | |||
| March 11 to 25, 2021 | |||
| A, C, F, D, B, E | |||
|- style="background:#fff" | |||
| April 8 to 22, 2021 | |||
| A, B, D, C, E, F | |||
|- style="background:#fff" | |||
| April 30 to May 14, 2021 | |||
| A, C, F, E, D, B | |||
|- style="background:#fff" | |||
| June 7 to 21, 2021 | |||
| A, D, E, B, F, C | |||
|- style="background:#fff" | |||
| July 5 to 19, 2021 | |||
| A, C, D, E, B, F | |||
|- style="background:#fff" | |||
| August 2 to 16, 2021 | |||
| A, D, E, B, F, C | |||
|- style="background:#fff" | |||
| September 2 to 16, 2021 | |||
| A, F, C, D, E, B | |||
|- style="background:#fff" | |||
| October 19 to November 2, 2021 | |||
| A, B, F, C, D, E | |||
|- style="background:#fff" | |||
| November 8 to 22, 2021 | |||
| A, C, B, E, F, D | |||
|- style="background:#fff" | |||
| December 3 to 17, 2021 | |||
| A, D, E, F, C, B | |||
|- style="background:#fff" | |||
| January 6 to 20, 2022 | |||
| A, E, D, F, B, C | |||
|- style="background:#fff" | |||
| February 7 to 21, 2022 | |||
| A, B, D, E, C, F | |||
|- style="background:#fff" | |||
| March 7 to 21, 2022 | |||
| A, F, C, B, D, E | |||
|- style="background:#fff" | |||
| April 11 to 25, 2022 | |||
| A, D, E, C, F, B | |||
|- style="background:#fff" | |||
| May 10 to 24, 2022 | |||
| A, C, F, D, B, E | |||
|- style="background:#fff" | |||
| June 9 to 23, 2022 | |||
| A, B, D, C, E, F | |||
|- style="background:#fff" | |||
| July 11 to 25, 2022 | |||
| A, C, F, E, D, B | |||
|- style="background:#fff" | |||
| August 8 to 22, 2022 | |||
| A, D, E, B, F, C | |||
|- style="background:#fff" | |||
| September 8 to 22, 2022 | |||
| A, C, D, E, B, F | |||
|- style="background:#fff" | |||
| October 20 to November 3, 2022 | |||
| A, D, E, B, F, C | |||
|- style="background:#fff" | |||
| November 17 to December 1, 2022 | |||
| A, F, C, D, E, B | |||
|- style="background:#fff" | |||
| December 16 to 30, 2022 | |||
| A, B, F, C, D, E | |||
|- style="background:#fff" | |||
| January 9 to 23, 2023 | |||
| A, C, B, E, F, D | |||
|- style="background:#fff" | |||
| February 9 to 23, 2023 | |||
| A, D, E, F, C, B | |||
|- style="background:#fff" | |||
| March 10 to 24, 2023 | |||
| A, E, D, F, B, C | |||
|- style="background:#fff" | |||
| April 11 to 25, 2023 | |||
| A, B, D, E, C, F | |||
|- style="background:#fff" | |||
| May 16 to 30, 2023 | |||
| A, F, C, B, E, D | |||
|- style="background:#fff" | |||
| June 12 to 26, 2023 | |||
| A, D, E, C, F, B | |||
|- style="background:#fff" | |||
| July 4 to 18, 2023 | |||
| A, C, F, D, B, E | |||
|- style="background:#fff" | |||
| style="{{roundybl|5px}}" | August 10 to 24, 2023 | |||
| style="{{roundybr|5px}}" | A, B, D, C, E, F | |||
|} | |||
{| class="roundy" style="margin:auto; background:#{{shield color dark}}; border:3px solid #{{shield color}}; text-align:center" | |||
|- style="background-color:#{{shield color light}}" | |||
! style="{{roundytl|5px}}" rowspan=2 | Hall no. | |||
! rowspan=2 | Trainer | |||
! style="{{roundytr|5px}}" colspan=3 | Pokémon | |||
|- style="background-color:#{{shield color light}}" | |- style="background-color:#{{shield color light}}" | ||
! Left | ! Left | ||
! Middle | ! Middle | ||
! Right | ! Right | ||
|- style="background:#{{shield color dark}}" | |||
| colspan=7 style="color:#fff" | '''Set A''' | |||
|- style="background:#fff" | |- style="background:#fff" | ||
| | | 1 | ||
| [[File:VSCamper Masters.png|80px]]<br>{{tc|Camper}} Irwin | | [[File:VSCamper Masters.png|80px]]<br>{{tc|Camper}} Irwin | ||
| [[File: | | [[File:Masters0661.png|80px]]<br>{{p|Fletchling}}<br><span style=font-size:80%>Weakness: [[File:ElectricIC Masters.png|15px]] | ||
| [[File: | | [[File:Masters0397.png|80px]]<br>{{p|Staravia}}<br><span style=font-size:80%>Weakness: [[File:ElectricIC Masters.png|15px]] | ||
| [[File: | | [[File:Masters0016.png|80px]]<br>{{p|Pidgey}}<br><span style=font-size:80%>Weakness: [[File:ElectricIC Masters.png|15px]] | ||
|- style="background:#fff" | |- style="background:#fff" | ||
| | | 2 | ||
| [[File:VSAce Trainer F Masters.png|80px]]<br>{{tc|Ace Trainer}} Kathy | | [[File:VSAce Trainer F Masters.png|80px]]<br>{{tc|Ace Trainer}} Kathy | ||
| [[File: | | [[File:Masters0218.png|80px]]<br>{{p|Slugma}}<br><span style=font-size:80%>Weakness: [[File:WaterIC Masters.png|15px]] | ||
| [[File: | | [[File:Masters0031.png|80px]]<br>{{p|Nidoqueen}}<br><span style=font-size:80%>Weakness: [[File:WaterIC Masters.png|15px]] | ||
| [[File: | | [[File:Masters0328.png|80px]]<br>{{p|Trapinch}}<br><span style=font-size:80%>Weakness: [[File:WaterIC Masters.png|15px]] | ||
|- style="background:#fff" | |- style="background:#fff" | ||
| | | 3 | ||
| [[File:VSBlack Belt Masters.png|80px]]<br>{{tc|Black Belt}} | | [[File:VSBlack Belt Masters.png|80px]]<br>{{tc|Black Belt}} Radcliff | ||
| | | [[File:Masters0443.png|80px]]<br>{{p|Gible}}<br><span style=font-size:80%>Weakness: [[File:IceIC Masters.png|15px]] | ||
| | | [[File:Masters0075.png|80px]]<br>{{p|Graveler}}<br><span style=font-size:80%>Weakness: [[File:IceIC Masters.png|15px]] | ||
| | | [[File:Masters0074.png|80px]]<br>{{p|Geodude}}<br><span style=font-size:80%>Weakness: [[File:IceIC Masters.png|15px]] | ||
|- style="background:#fff" | |- style="background:#fff" | ||
| | | 4 | ||
| [[File:VSErika Masters.png|80px]]<br>[[ | | [[File:VSErika Masters.png|80px]]<br>{{mas|Erika}} | ||
| < | | [[File:Masters0425.png|80px]]<br>{{p|Drifloon}}<br><span style=font-size:80%>Weakness: [[File:ElectricIC Masters.png|15px]]</span><br>↓<br>[[File:Masters0400.png|80px]]<br>{{p|Bibarel}}<br><span style=font-size:80%>Weakness: [[File:ElectricIC Masters.png|15px]] | ||
| < | | [[File:Masters0476.png|80px]]<br>{{p|Probopass}}<br><span style=font-size:80%>Weakness: [[File:WaterIC Masters.png|15px]]</span><br>↓<br>[[File:Masters0045 f.png|80px]]<br>{{p|Vileplume}}<br><span style=font-size:80%>Weakness: [[File:IceIC Masters.png|15px]] | ||
| | | [[File:Masters0396.png|80px]]<br>{{p|Starly}}<br><span style=font-size:80%>Weakness: [[File:ElectricIC Masters.png|15px]]</span><br>↓<br>[[File:Masters0747.png|80px]]<br>{{p|Mareanie}}<br><span style=font-size:80%>Weakness: [[File:ElectricIC Masters.png|15px]] | ||
| | |||
| | |||
|- style="background:#fff" | |- style="background:#fff" | ||
| | | 5 | ||
| [[File:VSRachel Masters.png|80px]]<br>[[Rachel]] | | [[File:VSRachel Masters.png|80px]]<br>[[Rachel]] | ||
| < | | [[File:Masters0373.png|80px]]<br>{{p|Salamence}}<br><span style=font-size:80%>Weakness: [[File:IceIC Masters.png|15px]]</span><br>↓<br>[[File:Masters0059.png|80px]]<br>{{p|Arcanine}}<br><span style=font-size:80%>Weakness: [[File:WaterIC Masters.png|15px]]</span><br>↓<br>[[File:Masters0365.png|80px]]<br>{{p|Walrein}}<br><span style=font-size:80%>Weakness: [[File:ElectricIC Masters.png|15px]] | ||
| < | | [[File:Masters0445 f.png|80px]]<br>{{p|Garchomp}}<br><span style=font-size:80%>Weakness: [[File:IceIC Masters.png|15px]]</span><br>↓<br>[[File:Masters0229.png|80px]]<br>{{p|Houndoom}}<br><span style=font-size:80%>Weakness: [[File:WaterIC Masters.png|15px]]</span><br>↓<br>[[File:Masters0131.png|80px]]<br>{{p|Lapras}}<br><span style=font-size:80%>Weakness: [[File:ElectricIC Masters.png|15px]] | ||
| < | | [[File:Masters0612.png|80px]]<br>{{p|Haxorus}}<br><span style=font-size:80%>Weakness: [[File:IceIC Masters.png|15px]]</span><br>↓<br>[[File:Masters0078.png|80px]]<br>{{p|Rapidash}}<br><span style=font-size:80%>Weakness: [[File:WaterIC Masters.png|15px]]</span><br>↓<br>[[File:Masters0087.png|80px]]<br>{{p|Dewgong}}<br><span style=font-size:80%>Weakness: [[File:ElectricIC Masters.png|15px]] | ||
| | |- style="background:#{{shield color dark}}" | ||
| | | colspan=7 style="color:#fff" | '''Set B''' | ||
|- style="background:#fff" | |||
| 1 | |||
| [[File:VSBlack Belt Masters.png|80px]]<br>{{tc|Black Belt}} Rodney | |||
| [[File:Masters0019.png|80px]]<br>{{p|Rattata}}<br><span style=font-size:80%>Weakness: [[File:FightingIC Masters.png|15px]] | |||
| [[File:Masters0289.png|80px]]<br>{{p|Slaking}}<br><span style=font-size:80%>Weakness: [[File:FightingIC Masters.png|15px]] | |||
| [[File:Masters0019.png|80px]]<br>{{p|Rattata}}<br><span style=font-size:80%>Weakness: [[File:FightingIC Masters.png|15px]] | |||
|- style="background:#fff" | |||
| 2 | |||
| [[File:VSStreet Thug Masters.png|80px]]<br>{{tc|Street Thug}} Carson | |||
| [[File:Masters0299.png|80px]]<br>{{p|Nosepass}}<br><span style=font-size:80%>Weakness: [[File:SteelIC Masters.png|15px]] | |||
| [[File:Masters0248.png|80px]]<br>{{p|Tyranitar}}<br><span style=font-size:80%>Weakness: [[File:SteelIC Masters.png|15px]] | |||
| [[File:Masters0524.png|80px]]<br>{{p|Roggenrola}}<br><span style=font-size:80%>Weakness: [[File:SteelIC Masters.png|15px]] | |||
|- style="background:#fff" | |||
| 3 | |||
| [[File:VSHiker Masters.png|80px]]<br>{{tc|Hiker}} Tilden | |||
| [[File:Masters0356.png|80px]]<br>{{p|Dusclops}}<br><span style=font-size:80%>Weakness: [[File:DarkIC Masters.png|15px]] | |||
| [[File:Masters0178 f.png|80px]]<br>{{p|Xatu}}<br><span style=font-size:80%>Weakness: [[File:DarkIC Masters.png|15px]] | |||
| [[File:Masters0561.png|80px]]<br>{{p|Sigilyph}}<br><span style=font-size:80%>Weakness: [[File:DarkIC Masters.png|15px]] | |||
|- style="background:#fff" | |||
| 4 | |||
| [[File:VSAgatha Masters.png|80px]]<br>{{mas|Agatha}} | |||
| [[File:Masters0241.png|80px]]<br>{{p|Miltank}}<br><span style=font-size:80%>Weakness: [[File:FightingIC Masters.png|15px]]</span><br>↓<br>[[File:Masters0261.png|80px]]<br>{{p|Poochyena}}<br><span style=font-size:80%>Weakness: [[File:FightingIC Masters.png|15px]] | |||
| [[File:Masters0225.png|80px]]<br>{{p|Delibird}}<br><span style=font-size:80%>Weakness: [[File:SteelIC Masters.png|15px]]</span><br>↓<br>[[File:Masters0094.png|80px]]<br>{{TP|Agatha|Gengar}}<br><span style=font-size:80%>Weakness: [[File:DarkIC Masters.png|15px]] | |||
| [[File:Masters0133.png|80px]]<br>{{p|Eevee}}<br><span style=font-size:80%>Weakness: [[File:FightingIC Masters.png|15px]]</span><br>↓<br>[[File:Masters0509.png|80px]]<br>{{p|Purrloin}}<br><span style=font-size:80%>Weakness: [[File:FightingIC Masters.png|15px]] | |||
|- style="background:#fff" | |||
| 5 | |||
| [[File:VSSawyer Masters.png|80px]]<br>{{mas|Sawyer}} | |||
| [[File:Masters0338.png|80px]]<br>{{p|Solrock}}<br><span style=font-size:80%>Weakness: [[File:DarkIC Masters.png|15px]]</span><br>↓<br>[[File:Masters0526.png|80px]]<br>{{p|Gigalith}}<br><span style=font-size:80%>Weakness: [[File:SteelIC Masters.png|15px]]</span><br>↓<br>[[File:Masters0508.png|80px]]<br>{{p|Stoutland}}<br><span style=font-size:80%>Weakness: [[File:FightingIC Masters.png|15px]] | |||
| [[File:Masters0609.png|80px]]<br>{{p|Chandelure}}<br><span style=font-size:80%>Weakness: [[File:DarkIC Masters.png|15px]]</span><br>↓<br>[[File:Masters0745.png|80px]]<br>{{p|Lycanroc}}<br><small>Midday Form</small><br><span style=font-size:80%>Weakness: [[File:SteelIC Masters.png|15px]]</span><br>↓<br>[[File:Masters0760.png|80px]]<br>{{p|Bewear}}<br><span style=font-size:80%>Weakness: [[File:FightingIC Masters.png|15px]] | |||
| [[File:Masters0337.png|80px]]<br>{{p|Lunatone}}<br><span style=font-size:80%>Weakness: [[File:DarkIC Masters.png|15px]]</span><br>↓<br>[[File:Masters0699.png|80px]]<br>{{p|Aurorus}}<br><span style=font-size:80%>Weakness: [[File:SteelIC Masters.png|15px]]</span><br>↓<br>[[File:Masters0408.png|80px]]<br>{{p|Cranidos}}<br><span style=font-size:80%>Weakness: [[File:FightingIC Masters.png|15px]] | |||
|- style="background:#{{shield color dark}}" | |||
| colspan=7 style="color:#fff" | '''Set C''' | |||
|- style="background:#fff" | |||
| 1 | |||
| [[File:VSStreet Thug Masters.png|80px]]<br>{{tc|Street Thug}} Derek | |||
| [[File:Masters0147.png|80px]]<br>{{p|Dratini}}<br><span style=font-size:80%>Weakness: [[File:DragonIC Masters.png|15px]] | |||
| [[File:Masters0776.png|80px]]<br>{{p|Turtonator}}<br><span style=font-size:80%>Weakness: [[File:DragonIC Masters.png|15px]] | |||
| [[File:Masters0704.png|80px]]<br>{{p|Goomy}}<br><span style=font-size:80%>Weakness: [[File:DragonIC Masters.png|15px]] | |||
|- style="background:#fff" | |||
| 2 | |||
| [[File:VSSwimmer M Masters.png|80px]]<br>{{tc|Swimmer}} Cole | |||
| [[File:Masters0102.png|80px]]<br>{{p|Exeggcute}}<br><span style=font-size:80%>Weakness: [[File:FlyingIC Masters.png|15px]] | |||
| [[File:Masters0271.png|80px]]<br>{{p|Lombre}}<br><span style=font-size:80%>Weakness: [[File:FlyingIC Masters.png|15px]] | |||
| [[File:Masters0307 f.png|80px]]<br>{{p|Meditite}}<br><span style=font-size:80%>Weakness: [[File:FlyingIC Masters.png|15px]] | |||
|- style="background:#fff" | |||
| 3 | |||
| [[File:VSCollector Masters.png|80px]]<br>{{tc|Collector}} Ira | |||
| [[File:Masters0274.png|80px]]<br>{{p|Nuzleaf}}<br><span style=font-size:80%>Weakness: [[File:PoisonIC Masters.png|15px]] | |||
| [[File:Masters0460 f.png|80px]]<br>{{p|Abomasnow}}<br><span style=font-size:80%>Weakness: [[File:PoisonIC Masters.png|15px]] | |||
| [[File:Masters0187.png|80px]]<br>{{p|Hoppip}}<br><span style=font-size:80%>Weakness: [[File:PoisonIC Masters.png|15px]] | |||
|- style="background:#fff" | |||
| 4 | |||
| [[File:VSLyra Masters.png|80px]]<br>{{mas|Lyra}} | |||
| [[File:Masters0329.png|80px]]<br>{{p|Vibrava}}<br><span style=font-size:80%>Weakness: [[File:DragonIC Masters.png|15px]]</span><br>↓<br>[[File:Masters0443.png|80px]]<br>{{p|Gible}}<br><span style=font-size:80%>Weakness: [[File:DragonIC Masters.png|15px]] | |||
| [[File:Masters0534.png|80px]]<br>{{p|Conkeldurr}}<br><span style=font-size:80%>Weakness: [[File:FlyingIC Masters.png|15px]]</span><br>↓<br>[[File:Masters0154 f.png|80px]]<br>{{p|Meganium}}<br><span style=font-size:80%>Weakness: [[File:PoisonIC Masters.png|15px]] | |||
| [[File:Masters0610.png|80px]]<br>{{p|Axew}}<br><span style=font-size:80%>Weakness: [[File:DragonIC Masters.png|15px]]</span><br>↓<br>[[File:Masters0633.png|80px]]<br>{{p|Deino}}<br><span style=font-size:80%>Weakness: [[File:DragonIC Masters.png|15px]] | |||
|- style="background:#fff" | |||
| 5 | |||
| [[File:VSHilda Masters.png|80px]]<br>{{mas|Hilda}} | |||
| [[File:Masters0189.png|80px]]<br>{{p|Jumpluff}}<br><span style=font-size:80%>Weakness: [[File:PoisonIC Masters.png|15px]]</span><br>↓<br>[[File:Masters0168.png|80px]]<br>{{p|Ariados}}<br><span style=font-size:80%>Weakness: [[File:FlyingIC Masters.png|15px]]</span><br>↓<br>[[File:Masters0373.png|80px]]<br>{{p|Salamence}}<br><span style=font-size:80%>Weakness: [[File:DragonIC Masters.png|15px]] | |||
| [[File:Masters0210.png|80px]]<br>{{p|Granbull}}<br><span style=font-size:80%>Weakness: [[File:PoisonIC Masters.png|15px]]</span><br>↓<br>[[File:Masters0127.png|80px]]<br>{{p|Pinsir}}<br><span style=font-size:80%>Weakness: [[File:FlyingIC Masters.png|15px]]</span><br>↓<br>[[File:Masters0612.png|80px]]<br>{{p|Haxorus}}<br><span style=font-size:80%>Weakness: [[File:DragonIC Masters.png|15px]] | |||
| [[File:Masters0546.png|80px]]<br>{{p|Cottonee}}<br><span style=font-size:80%>Weakness: [[File:PoisonIC Masters.png|15px]]</span><br>↓<br>[[File:Masters0015.png|80px]]<br>{{p|Beedrill}}<br><span style=font-size:80%>Weakness: [[File:FlyingIC Masters.png|15px]]</span><br>↓<br>[[File:Masters0230.png|80px]]<br>{{p|Kingdra}}<br><span style=font-size:80%>Weakness: [[File:DragonIC Masters.png|15px]] | |||
|- style="background:#{{shield color dark}}" | |||
| colspan=7 style="color:#fff" | '''Set D''' | |||
|- style="background:#fff" | |||
| 1 | |||
| [[File:VSAce Trainer M Masters.png|80px]]<br>{{tc|Ace Trainer}} Justin | |||
| [[File:Masters0070.png|80px]]<br>{{p|Weepinbell}}<br><span style=font-size:80%>Weakness: [[File:PsychicIC Masters.png|15px]] | |||
| [[File:Masters0071.png|80px]]<br>{{p|Victreebel}}<br><span style=font-size:80%>Weakness: [[File:PsychicIC Masters.png|15px]] | |||
| [[File:Masters0088.png|80px]]<br>{{p|Grimer}}<br><span style=font-size:80%>Weakness: [[File:PsychicIC Masters.png|15px]] | |||
|- style="background:#fff" | |||
| 2 | |||
| [[File:VSPoké Fan M Masters.png|80px]]<br>{{tc|Poké Fan}} Stanton | |||
| [[File:Masters0307 f.png|80px]]<br>{{p|Meditite}}<br><span style=font-size:80%>Weakness: [[File:GhostIC Masters.png|15px]] | |||
| [[File:Masters0477.png|80px]]<br>{{p|Dusknoir}}<br><span style=font-size:80%>Weakness: [[File:GhostIC Masters.png|15px]] | |||
| [[File:Masters0677.png|80px]]<br>{{p|Espurr}}<br><span style=font-size:80%>Weakness: [[File:GhostIC Masters.png|15px]] | |||
|- style="background:#fff" | |||
| 3 | |||
| [[File:VSAce Trainer F Masters.png|80px]]<br>{{tc|Ace Trainer}} Sandy | |||
| [[File:Masters0053A.png|80px]]<br>{{p|Persian}}<br><small>[[Alolan form]]</small><br><span style=font-size:80%>Weakness: [[File:BugIC Masters.png|15px]] | |||
| [[File:Masters0510.png|80px]]<br>{{p|Liepard}}<br><span style=font-size:80%>Weakness: [[File:BugIC Masters.png|15px]] | |||
| [[File:Masters0325.png|80px]]<br>{{p|Spoink}}<br><span style=font-size:80%>Weakness: [[File:BugIC Masters.png|15px]] | |||
|- style="background:#fff" | |||
| 4 | |||
| [[File:VSTate Masters.png|80px]]<br>{{mas|Tate}}<br>↓<br>[[File:VSLiza Masters.png|80px]]<br>{{mas|Liza}} | |||
| [[File:Masters0538.png|80px]]<br>{{p|Throh}}<br><span style=font-size:80%>Weakness: [[File:PsychicIC Masters.png|15px]]</span><br>↓<br>[[File:Masters0030.png|80px]]<br>{{p|Nidorina}}<br><span style=font-size:80%>Weakness: [[File:PsychicIC Masters.png|15px]] | |||
| [[File:Masters0338.png|80px]]<br>{{TP|Tate|Solrock}}<br><span style=font-size:80%>Weakness: [[File:GhostIC Masters.png|15px]]</span><br>↓<br>[[File:Masters0337.png|80px]]<br>{{TP|Liza|Lunatone}}<br><span style=font-size:80%>Weakness: [[File:BugIC Masters.png|15px]] | |||
| [[File:Masters0539.png|80px]]<br>{{p|Sawk}}<br><span style=font-size:80%>Weakness: [[File:PsychicIC Masters.png|15px]]</span><br>↓<br>[[File:Masters0029.png|80px]]<br>{{p|Nidoran♀}}<br><span style=font-size:80%>Weakness: [[File:PsychicIC Masters.png|15px]] | |||
|- style="background:#fff" | |||
| 5 | |||
| [[File:VSNoland Masters.png|80px]]<br>{{mas|Noland}} | |||
| [[File:Masters0678.png|80px]]<br>{{p|Meowstic}}<br><span style=font-size:80%>Weakness: [[File:BugIC Masters.png|15px]]</span><br>↓<br>[[File:Masters0026A.png|80px]]<br>{{p|Raichu}}<br><small>[[Alolan form]]</small><br><span style=font-size:80%>Weakness: [[File:GhostIC Masters.png|15px]]</span><br>↓<br>[[File:Masters0534.png|80px]]<br>{{p|Conkeldurr}}<br><span style=font-size:80%>Weakness: [[File:PsychicIC Masters.png|15px]] | |||
| [[File:Masters0579.png|80px]]<br>{{p|Reuniclus}}<br><span style=font-size:80%>Weakness: [[File:BugIC Masters.png|15px]]</span><br>↓<br>[[File:Masters0376.png|80px]]<br>{{p|Metagross}}<br><span style=font-size:80%>Weakness: [[File:GhostIC Masters.png|15px]]</span><br>↓<br>[[File:Masters0068.png|80px]]<br>{{p|Machamp}}<br><span style=font-size:80%>Weakness: [[File:PsychicIC Masters.png|15px]] | |||
| [[File:Masters0326.png|80px]]<br>{{p|Grumpig}}<br><span style=font-size:80%>Weakness: [[File:BugIC Masters.png|15px]]</span><br>↓<br>[[File:Masters0308 f.png|80px]]<br>{{p|Medicham}}<br><span style=font-size:80%>Weakness: [[File:GhostIC Masters.png|15px]]</span><br>↓<br>[[File:Masters0297.png|80px]]<br>{{p|Hariyama}}<br><span style=font-size:80%>Weakness: [[File:PsychicIC Masters.png|15px]] | |||
|- style="background:#{{shield color dark}}" | |||
| colspan=7 style="color:#fff" | '''Set E''' | |||
|- style="background:#fff" | |||
| 1 | |||
| [[File:VSCamper Masters.png|80px]]<br>{{tc|Camper}} Brandt | |||
| [[File:Masters0048.png|80px]]<br>{{p|Venonat}}<br><span style=font-size:80%>Weakness: [[File:FireIC Masters.png|15px]] | |||
| [[File:Masters0545.png|80px]]<br>{{p|Scolipede}}<br><span style=font-size:80%>Weakness: [[File:FireIC Masters.png|15px]] | |||
| [[File:Masters0069.png|80px]]<br>{{p|Bellsprout}}<br><span style=font-size:80%>Weakness: [[File:FireIC Masters.png|15px]] | |||
|- style="background:#fff" | |||
| 2 | |||
| [[File:VSPoké Fan M Masters.png|80px]]<br>{{tc|Poké Fan}} Damien | |||
| [[File:Masters0269.png|80px]]<br>{{p|Dustox}}<br><span style=font-size:80%>Weakness: [[File:RockIC Masters.png|15px]] | |||
| [[File:Masters0284.png|80px]]<br>{{p|Masquerain}}<br><span style=font-size:80%>Weakness: [[File:RockIC Masters.png|15px]] | |||
| [[File:Masters0267.png|80px]]<br>{{p|Beautifly}}<br><span style=font-size:80%>Weakness: [[File:RockIC Masters.png|15px]] | |||
|- style="background:#fff" | |- style="background:#fff" | ||
| | | 3 | ||
| [[File: | | [[File:VSSwimmer M Masters.png|80px]]<br>{{tc|Swimmer}} Wiley | ||
| | | [[File:Masters0086.png|80px]]<br>{{p|Seel}}<br><span style=font-size:80%>Weakness: [[File:GrassIC Masters.png|15px]] | ||
| | | [[File:Masters0537.png|80px]]<br>{{p|Seismitoad}}<br><span style=font-size:80%>Weakness: [[File:GrassIC Masters.png|15px]] | ||
| | | [[File:Masters0364.png|80px]]<br>{{p|Sealeo}}<br><span style=font-size:80%>Weakness: [[File:GrassIC Masters.png|15px]] | ||
|- style="background:#fff" | |- style="background:#fff" | ||
| | | 4 | ||
| [[File: | | [[File:VSKris Masters.png|80px]]<br>{{mas|Kris}} | ||
| < | | [[File:Masters0188.png|80px]]<br>{{p|Skiploom}}<br><span style=font-size:80%>Weakness: [[File:FireIC Masters.png|15px]]</span><br>↓<br>[[File:Masters0599.png|80px]]<br>{{p|Klink}}<br><span style=font-size:80%>Weakness: [[File:FireIC Masters.png|15px]] | ||
| < | | [[File:Masters0460 f.png|80px]]<br>{{p|Abomasnow}}<br><span style=font-size:80%>Weakness: [[File:RockIC Masters.png|15px]]</span><br>↓<br>[[File:Masters0160.png|80px]]<br>{{p|Feraligatr}}<br><span style=font-size:80%>Weakness: [[File:GrassIC Masters.png|15px]] | ||
| < | | [[File:Masters0284.png|80px]]<br>{{p|Masquerain}}<br><span style=font-size:80%>Weakness: [[File:FireIC Masters.png|15px]]</span><br>↓<br>[[File:Masters0081.png|80px]]<br>{{p|Magnemite}}<br><span style=font-size:80%>Weakness: [[File:FireIC Masters.png|15px]] | ||
|- style="background:#fff" | |- style="background:#fff" | ||
| | | 5 | ||
| [[File: | | [[File:VSThorton Masters.png|80px]]<br>{{mas|Thorton}} | ||
| < | | [[File:Masters0131.png|80px]]<br>{{p|Lapras}}<br><span style=font-size:80%>Weakness: [[File:GrassIC Masters.png|15px]]</span><br>↓<br>[[File:Masters0460 f.png|80px]]<br>{{p|Abomasnow}}<br><span style=font-size:80%>Weakness: [[File:RockIC Masters.png|15px]]</span><br>↓<br>[[File:Masters0545.png|80px]]<br>{{p|Scolipede}}<br><span style=font-size:80%>Weakness: [[File:FireIC Masters.png|15px]] | ||
| < | | [[File:Masters0693.png|80px]]<br>{{p|Clawitzer}}<br><span style=font-size:80%>Weakness: [[File:GrassIC Masters.png|15px]]</span><br>↓<br>[[File:Masters0284.png|80px]]<br>{{p|Masquerain}}<br><span style=font-size:80%>Weakness: [[File:RockIC Masters.png|15px]]</span><br>↓<br>[[File:Masters0437.png|80px]]<br>{{p|Bronzong}}<br><span style=font-size:80%>Weakness: [[File:FireIC Masters.png|15px]] | ||
| < | | [[File:Masters0699.png|80px]]<br>{{p|Aurorus}}<br><span style=font-size:80%>Weakness: [[File:GrassIC Masters.png|15px]]</span><br>↓<br>[[File:Masters0169.png|80px]]<br>{{p|Crobat}}<br><span style=font-size:80%>Weakness: [[File:RockIC Masters.png|15px]]</span><br>↓<br>[[File:Masters0713.png|80px]]<br>{{p|Avalugg}}<br><span style=font-size:80%>Weakness: [[File:FireIC Masters.png|15px]] | ||
| | |- style="background:#{{shield color dark}}" | ||
| | | colspan=7 style="color:#fff" | '''Set F''' | ||
|- style="background:#fff" | |- style="background:#fff" | ||
| | | 1 | ||
| [[File: | | [[File:VSPokémon Ranger F Masters.png|80px]]<br>{{tc|Pokémon Ranger}} Hannah | ||
| [[File:Masters0324.png|80px]]<br>{{p|Torkoal}}<br><span style=font-size:80%>Weakness: [[File:GroundIC Masters.png|15px]] | |||
| [[File: | | [[File:Masters0101.png|80px]]<br>{{p|Electrode}}<br><span style=font-size:80%>Weakness: [[File:GroundIC Masters.png|15px]] | ||
| [[File: | | [[File:Masters0324.png|80px]]<br>{{p|Torkoal}}<br><span style=font-size:80%>Weakness: [[File:GroundIC Masters.png|15px]] | ||
|- style="background:#fff" | |- style="background:#fff" | ||
| | | 2 | ||
| [[File: | | [[File:VSLass Masters.png|80px]]<br>{{tc|Lass}} Alice | ||
| [[File:Masters0147.png|80px]]<br>{{p|Dratini}}<br><span style=font-size:80%>Weakness: [[File:FairyIC Masters.png|15px]] | |||
| [[File: | | [[File:Masters0197.png|80px]]<br>{{p|Umbreon}}<br><span style=font-size:80%>Weakness: [[File:FairyIC Masters.png|15px]] | ||
| [[File: | | [[File:Masters0509.png|80px]]<br>{{p|Purrloin}}<br><span style=font-size:80%>Weakness: [[File:FairyIC Masters.png|15px]] | ||
|- style="background:#fff" | |- style="background:#fff" | ||
| | | 3 | ||
| [[File: | | [[File:VSPunk Girl Masters.png|80px]]<br>{{tc|Punk Girl}} Lucy | ||
| [[File: | | [[File:Masters0409.png|80px]]<br>{{p|Rampardos}}<br><span style=font-size:80%>Weakness: [[File:WaterIC Masters.png|15px]] | ||
| [[File: | | [[File:Masters0208 f.png|80px]]<br>{{p|Steelix}}<br><span style=font-size:80%>Weakness: [[File:WaterIC Masters.png|15px]] | ||
| [[File: | | [[File:Masters0750.png|80px]]<br>{{p|Mudsdale}}<br><span style=font-size:80%>Weakness: [[File:WaterIC Masters.png|15px]] | ||
|- style="background:#fff" | |- style="background:#fff" | ||
| | | 4 | ||
| [[File: | | [[File:VSShauntal Masters.png|80px]]<br>{{mas|Shauntal}} | ||
| [[File: | | [[File:Masters0322.png|80px]]<br>{{p|Numel}}<br><span style=font-size:80%>Weakness: [[File:GroundIC Masters.png|15px]]</span><br>↓<br>[[File:Masters0698.png|80px]]<br>{{p|Amaura}}<br><span style=font-size:80%>Weakness: [[File:GroundIC Masters.png|15px]] | ||
| [[File: | | [[File:Masters0553.png|80px]]<br>{{p|Krookodile}}<br><span style=font-size:80%>Weakness: [[File:FairyIC Masters.png|15px]]</span><br>↓<br>[[File:Masters0609.png|80px]]<br>{{p|Chandelure}}<br><span style=font-size:80%>Weakness: [[File:WaterIC Masters.png|15px]] | ||
| [[File: | | [[File:Masters0078.png|80px]]<br>{{p|Rapidash}}<br><span style=font-size:80%>Weakness: [[File:GroundIC Masters.png|15px]]</span><br>↓<br>[[File:Masters0031.png|80px]]<br>{{p|Nidoqueen}}<br><span style=font-size:80%>Weakness: [[File:GroundIC Masters.png|15px]] | ||
| | |||
| | |||
|- style="background:#fff" | |- style="background:#fff" | ||
| | | style="{{roundybl|5px}}" | 5 | ||
| [[File: | | [[File:VSDarach Masters.png|80px]]<br>{{mas|Darach}} | ||
| [[File: | | [[File:Masters0078.png|80px]]<br>{{p|Rapidash}}<br><span style=font-size:80%>Weakness: [[File:WaterIC Masters.png|15px]]</span><br>↓<br>[[File:Masters0510.png|80px]]<br>{{p|Liepard}}<br><span style=font-size:80%>Weakness: [[File:FairyIC Masters.png|15px]]</span><br>↓<br>[[File:Masters0157.png|80px]]<br>{{p|Typhlosion}}<br><span style=font-size:80%>Weakness: [[File:GroundIC Masters.png|15px]] | ||
| [[File: | | [[File:Masters0006.png|80px]]<br>{{p|Charizard}}<br><span style=font-size:80%>Weakness: [[File:WaterIC Masters.png|15px]]</span><br>↓<br>[[File:Masters0230.png|80px]]<br>{{p|Kingdra}}<br><span style=font-size:80%>Weakness: [[File:FairyIC Masters.png|15px]]</span><br>↓<br>[[File:Masters0229.png|80px]]<br>{{p|Houndoom}}<br><span style=font-size:80%>Weakness: [[File:GroundIC Masters.png|15px]] | ||
| [[File: | | style="{{roundybr|5px}}" | [[File:Masters0758.png|80px]]<br>{{p|Salazzle}}<br><span style=font-size:80%>Weakness: [[File:WaterIC Masters.png|15px]]</span><br>↓<br>[[File:Masters0475.png|80px]]<br>{{p|Gallade}}<br><span style=font-size:80%>Weakness: [[File:FairyIC Masters.png|15px]]</span><br>↓<br>[[File:Masters0523.png|80px]]<br>{{p|Zebstrika}}<br><span style=font-size:80%>Weakness: [[File:GroundIC Masters.png|15px]] | ||
| | |} | ||
| | |||
===Co-op=== | |||
In version 1.9.0, each battle became limited to one clear per day. Battle rewards and additional completion rewards were added in conjunction with this change. | |||
As of version 2.41.0, due to the Battle Villa now being part of the Side Area, these battles have been removed. | |||
{| class="roundy" style="margin:auto; background:#{{shield color dark}}; border:3px solid #{{shield color}}; text-align:center" | |||
|- style="background-color:#{{shield color light}}" | |||
! style="{{roundytl|5px}}" rowspan=2 | Name | |||
! rowspan=2 | Trainer | |||
! colspan=3 | Pokémon | |||
! rowspan=2 | First-Time Rewards | |||
! rowspan=2 | Completion Rewards | |||
! style="{{roundytr|5px}}" rowspan=2 | Battle Rewards | |||
|- style="background-color:#{{shield color light}}" | |||
! Left | |||
! Middle | |||
! Right | |||
|- style="background:#fff" | |- style="background:#fff" | ||
| Challenge | | Challenge Noland | ||
| [[File: | | [[File:VSNoland Masters.png|80px]]<br>{{mas|Noland}} | ||
| [[File: | | [[File:Masters0015.png|80px]]<br>{{p|Beedrill}}<br><span style=font-size:80%>Weakness: [[File:FlyingIC Masters.png|15px]]</span><br>↓<br>[[File:Masters0699.png|80px]]<br>{{p|Aurorus}}<br><span style=font-size:80%>Weakness: [[File:FightingIC Masters.png|15px]] | ||
| [[File: | | [[File:Masters0127.png|80px]]<br>{{p|Pinsir}}<br><span style=font-size:80%>Weakness: [[File:FlyingIC Masters.png|15px]] | ||
| [[File:Masters0015.png|80px]]<br>{{p|Beedrill}}<br><span style=font-size:80%>Weakness: [[File:FlyingIC Masters.png|15px]]</span><br>↓<br>[[File:Masters0248.png|80px]]<br>{{p|Tyranitar}}<br><span style=font-size:80%>Weakness: [[File:FightingIC Masters.png|15px]] | |||
| | | [[File:Masters Gem.png|30px]]Gems ×30<br>[[File:Masters 3 Star Creamy Lucky Cookie.png|30px]]3★ Creamy Lucky Cookie ×1 | ||
| | | '''Prior to November 19, 2020:'''<br>[[File:Masters 1 Star Creamy Lucky Cookie.png|30px]]1★ Creamy Lucky Cookie ×1<br>'''Starting from November 19, 2020:'''<br>[[File:Masters 1 Star Creamy Lucky Cookie.png|30px]]1★ Creamy Lucky Cookie ×2<br>[[File:Masters 1 Star Crunchy Lucky Cookie.png|30px]]1★ Crunchy Lucky Cookie ×2<br>[[File:Masters 2 Star Creamy Lucky Cookie.png|30px]]2★ Creamy Lucky Cookie ×1<br>[[File:Masters 2 Star Crunchy Lucky Cookie.png|30px]]2★ Crunchy Lucky Cookie ×1 | ||
| '''Starting from November 19, 2020:'''<br>[[File:Masters 2 Star Crunchy Lucky Cookie.png|30px]]2★ Crunchy Lucky Cookie ×1<br>[[File:Masters 3 Star Crunchy Lucky Cookie.png|30px]]3★ Crunchy Lucky Cookie ×1<br>[[File:Masters 2 Star Creamy Lucky Cookie.png|30px]]2★ Creamy Lucky Cookie ×1<br>[[File:Masters 3 Star Creamy Lucky Cookie.png|30px]]3★ Creamy Lucky Cookie ×1 | |||
|- style="background:#fff" | |- style="background:#fff" | ||
| Challenge | | style="{{roundybl|5px}}" | Challenge Thorton | ||
| [[File: | | [[File:VSThorton Masters.png|80px]]<br>{{mas|Thorton}} | ||
| [[File: | | [[File:Masters0087.png|80px]]<br>{{p|Dewgong}}<br><span style=font-size:80%>Weakness: [[File:ElectricIC Masters.png|15px]] | ||
| [[File: | | [[File:Masters0553.png|80px]]<br>{{p|Krookodile}}<br><span style=font-size:80%>Weakness: [[File:GrassIC Masters.png|15px]] | ||
| [[File:Masters0131.png|80px]]<br>{{p|Lapras}}<br><span style=font-size:80%>Weakness: [[File:ElectricIC Masters.png|15px]] | |||
| [[File:Masters Gem.png|30px]]Gems ×30<br>[[File:Masters 3 Star Crispy Lucky Cookie.png|30px]]3★ Crispy Lucky Cookie ×1 | |||
| '''Prior to November 19, 2020:'''<br>[[File:Masters 1 Star Crunchy Lucky Cookie.png|30px]]1★ Crunchy Lucky Cookie ×1<br>'''Starting from November 19, 2020:'''<br>[[File:Masters 1 Star Crunchy Lucky Cookie.png|30px]]1★ Crunchy Lucky Cookie ×2<br>[[File:Masters 1 Star Crispy Lucky Cookie.png|30px]]1★ Crispy Lucky Cookie ×2<br>[[File:Masters 2 Star Crunchy Lucky Cookie.png|30px]]2★ Crunchy Lucky Cookie ×1<br>[[File:Masters 2 Star Crispy Lucky Cookie.png|30px]]2★ Crispy Lucky Cookie ×1 | |||
| style="{{roundybr|5px}}" | '''Starting from November 19, 2020:'''<br>[[File:Masters 2 Star Crunchy Lucky Cookie.png|30px]]2★ Crunchy Lucky Cookie ×1<br>[[File:Masters 3 Star Crunchy Lucky Cookie.png|30px]]3★ Crunchy Lucky Cookie ×1<br>[[File:Masters 2 Star Crispy Lucky Cookie.png|30px]]2★ Crispy Lucky Cookie ×1<br>[[File:Masters 3 Star Crispy Lucky Cookie.png|30px]]3★ Crispy Lucky Cookie ×1 | |||
|} | |} | ||
==Gallery== | |||
<gallery> | |||
File:Battle Villa hall.png|Battle Villa hall | |||
File:Battle Villa banquet.png|x200px|Banquet at the Villa | |||
</gallery> | |||
==In other languages== | ==In other languages== | ||
| Line 228: | Line 1,139: | ||
{{Project Sidegames notice}} | {{Project Sidegames notice}} | ||
[[Category:Pokémon Masters]] | [[Category:Pokémon Masters EX]] | ||
[[Category:Pasio locations]] | [[Category:Pasio locations]] | ||
[[Category:Battle facilities]] | |||
[[de:Kampfvilla]] | |||
[[fr:Villa de Combat]] | |||
[[it:Residenza Lotta]] | |||
[[ja:バトルヴィラ]] | |||
[[zh:對戰莊園]] | [[zh:對戰莊園]] | ||
Latest revision as of 01:32, 18 March 2024

The Battle Villa (Japanese: バトルヴィラ Battle Villa) is a facility in Pokémon Masters EX. Introduced in Version 1.7.1, it features sequential battle stages that allow the player to earn special rewards. It is unlocked after completing Chapter 7 of the Main Story. Unlike other battles in Pokémon Masters EX, the HP and MP (Move Points) of the team will be carried over from battles. The stages in the Battle Villa are available for a limited duration of time, and rotate approximately every two weeks.
While single-player is initially the only mode available, completion of the 20th and 25th halls will unlock co-op mode for those specific halls.
Mechanics
Battles
Battles in the Battle Villa occur in stages known as halls which feature the same three-on-three battles found elsewhere in Pasio. The player must sequentially defeat 30 halls (25 halls prior to update 1.9.0) at the Villa, with battles becoming more difficult as the player progresses through the halls. The stages can be divided into sets of five battles, with each set focusing on three various Pokémon types. The fourth and fifth battles in each set are arranged against a specific NPC (including Gym Leaders, the Elite Four, and Frontier Brains).
The player can choose up to nine sync pairs in their roster to challenge the Battle Villa. Unlike other battles in Pokémon Masters EX, the HP and MP of the team are carried over from each battle and when a sync pair's HP goes to 0, the sync pair cannot participate in any further battles on the day. Likewise, the opponent's HP will be carried over from the previous battle. Prior to the update on November 19, 2020, the HP and MP of all sync pairs and sync pair roster were automatically restored at the start of each day. Since the Battle Villa update, a full recovery and sync pair roster reset is given to the player each day to be used when the player chooses to do so.
As with other battles in Pokémon Masters EX, defeating a hall earns the player with rewards. Along with these, the player can also receive bonus rewards after every five halls, and medals for defeating specific halls. Milestone rewards were awarded prior to the update on November 19, 2020. The Battle Villa is currently the only way to obtain Lucky Cookies and Lucky Scrolls to unlock a sync pair's lucky skill, except for certain events like Blissful Bonanza! and the Legendary Gauntlet.
Since January 7, 2022, the player is able to skip up to the chosen hall (4th, 9th, 14th, or 19th) if they completed all halls (excluding co-op) during the previous Villa. If the skip option is not used at the start of the Villa, it cannot be used later. The player receives all first-time clear rewards from skipped halls, but no bonus rewards, Coins, or XP.
Battle rewards
??? to present
| Hall no. | XP | First-time rewards | Completion rewards |
|---|---|---|---|
| 1 | 1,000 | ||
| 2 | 1,400 | ||
| 3 | 1,800 | ||
| 4 | 2,000 | ||
| 5 | 2,200 | ||
| 6 | 2,400 | ||
| 7 | 2,600 | ||
| 8 | 2,800 | ||
| 9 | 3,000 | ||
| 10 | 3,200 | ||
| 11 | 3,400 | ||
| 12 | 3,600 | ||
| 13 | 3,800 | ||
| 14 | 4,000 | ||
| 15 | 4,200 | ||
| 16 | 4,400 | ||
| 17 | 4,600 | ||
| 18 | 4,800 | ||
| 19 | 5,000 | ||
| 20 | 5,200 | ||
| 21 | 5,400 | ||
| 22 | 5,600 | ||
| 23 | 5,800 | ||
| 24 | 6,000 | ||
| 25 | 6,200 | ||
| 26 | 6,400 | ||
| 27 | 6,600 | ||
| 28 | 6,800 | ||
| 29 | 7,000 | ||
| 30 | 7,200 |
November 19, 2020 to ???
| Hall no. | XP | First-time Rewards | Completion Rewards |
|---|---|---|---|
| 1 | 1,000 | ||
| 2 | 1,400 | ||
| 3 | 1,800 | ||
| 4 | 2,000 | ||
| 5 | 2,200 | ||
| 6 | 2,400 | ||
| 7 | 2,600 | ||
| 8 | 2,800 | ||
| 9 | 3,000 | ||
| 10 | 3,200 | ||
| 11 | 3,400 | ||
| 12 | 3,600 | ||
| 13 | 3,800 | ||
| 14 | 4,000 | ||
| 15 | 4,200 | ||
| 16 | 4,400 | ||
| 17 | 4,600 | ||
| 18 | 4,800 | ||
| 19 | 5,000 | ||
| 20 | 5,200 | ||
| 21 | 5,400 | ||
| 22 | 5,600 | ||
| 23 | 5,800 | ||
| 24 | 6,000 | ||
| 25 | 6,200 | ||
| 26 | 6,400 | ||
| 27 | 6,600 | ||
| 28 | 6,800 | ||
| 29 | 7,000 | ||
| 30 | 7,200 |
June 30, 2020 to October 26, 2020
| Hall no. | First-time Reward |
|---|---|
| 1 | |
| 2 | |
| 3 | |
| 4 | |
| 5 | |
| 6 | |
| 7 | |
| 8 | |
| 9 | |
| 10 | |
| 11 | |
| 12 | |
| 13 | |
| 14 | |
| 15 | |
| 16 | |
| 17 | |
| 18 | |
| 19 | |
| 20 | |
| 21 | |
| 22 | |
| 23 | |
| 24 | |
| 25 | |
| 26 | |
| 27 | |
| 28 | |
| 29 | |
| 30 |
February 28 to June 30, 2020
| Hall no. | First-Time Reward | Completion Reward |
|---|---|---|
| 1 | ||
| 2 | ||
| 3 | ||
| 4 | ||
| 5 | ||
| 6 | ||
| 7 | ||
| 8 | ||
| 9 | None | |
| 10 | None | |
| 11 | None | |
| 12 | None | |
| 13 | None | |
| 14 | None | |
| 15 | None | |
| 16 | None | |
| 17 | None | |
| 18 | None | |
| 19 | None | |
| 20 | None | |
| 21 | None | |
| 22 | None | |
| 23 | None | |
| 24 | None | |
| 25 | None | |
| 26 | None | |
| 27 | None | |
| 28 | None | |
| 29 | None | |
| 30 | None |
Bonus rewards
Bonus rewards are obtained every fifth hall (excluding Hall 30), where upon defeating the opponent, the player can choose one of:
- Extra rewards: an additional Lucky Cookie reward, chosen at random
| Hall | Reward | Quantity | Chance |
|---|---|---|---|
| 5 | 10 | 34% | |
| 33% | |||
| 33% | |||
| 10 | 14 | 34% | |
| 33% | |||
| 33% | |||
| 15 | 8 | 34% | |
| 33% | |||
| 33% | |||
| 20 | 4 | 20% | |
| 20% | |||
| 20% | |||
| 40% | |||
| 25 | 7 | 20% | |
| 20% | |||
| 20% | |||
| 40% |
- Vitality treats: items which restore sync pair HP or MP
| Hall | Reward |
|---|---|
| 5 | |
| 10 | |
| 15 | |
| 20 | |
| 25 |
- Vigor treats: items which provide useful boosts to sync pairs during battle
| Hall | Reward |
|---|---|
| 5 | |
| 10 | |
| 15 | |
| 20 | |
| 25 |
Milestone rewards
Milestone rewards were previously obtained by defeating specific halls. These could only be claimed once the Battle Villa challenge period ended, and the rewards were stored for up to four Battle Villa challenges before they could no longer be claimed. With the update on November 19, 2020, milestone rewards were removed, and the Gem rewards included amongst the usual Battle Villa post-battle rewards.
| Hall | Rewards |
|---|---|
| 1 | |
| 5 | |
| 10 | |
| 15 | |
| 20 | |
| 25 | |
| 30 |
Medal rewards
The medals Battle Pawn, Battle Knight, Battle Bishop, and Battle Rook are obtainable upon completing halls 15, 20, 25, and 30, respectively. A number of additional medals were added after the update on November 19, 2020.
Items
Items exclusive to the Battle Villa can be used to provide useful effects to sync pairs. Players start off with one of each item at the start of the Battle Villa*.
Vitality treats
| Name | Use | |
|---|---|---|

|
Hearty Stew | Restores 40% of an allied sync pair's HP |

|
Replenishing Patty | Recovers all MP of all allied sync pairs |
Vigor treats
| Name | Use | |
|---|---|---|

|
Almighty Apple Pie | At the start of battle, raises the Attack, Defense, Sp. Atk, Sp. Def, and Speed of all allied sync pairs |

|
Critical Herb Tea | At the start of battle, makes all allied sync pairs' next attacks a critical hit |

|
Preventative Pea Soup | At the start of battle, makes all allied sync pairs nullify status conditions inflicted upon them |

|
Hard-Shell Taco | At the start of battle, reduces physical damage done to the allied field of play |

|
Ziti Special | At the start of battle, reduces special damage done to the allied field of play |
Stages
Single player
Battle Villa has 30 halls grouped into "sets" of five halls. Each set specializes in three different types. The first three halls of each set focus on one specific type, while the last two halls of each set focus on all of those three types. The order of these sets within the Villa change frequently.
| Dates | Order of sets (ascending) |
|---|---|
| February 28 to March 31, 2020 | A, B, C, D, E |
| March 30 to April 30, 2020 | A, E, B, C, D |
| April 30 to May 29, 2020 | A, C, D, E, B, F |
| May 29 to June 29, 2020 | A, D, E, B, F, C |
| June 30 to July 28, 2020 | A, F, C, D, E, B |
| July 29 to August 30, 2020 | A, B, F, C, D, E |
| August 31 to September 29, 2020 | A, C, B, E, F, D |
| September 30 to October 26, 2020 | A, D, E, F, C, B |
| November 19 to December 4, 2020 | A, E, D, F, B, C |
| December 14 to 28, 2020 | A, B, D, E, C, F |
| January 7 to 21, 2021 | A, F, C, B, E, D |
| February 4 to 18, 2021 | A, D, E, C, F, B |
| March 11 to 25, 2021 | A, C, F, D, B, E |
| April 8 to 22, 2021 | A, B, D, C, E, F |
| April 30 to May 14, 2021 | A, C, F, E, D, B |
| June 7 to 21, 2021 | A, D, E, B, F, C |
| July 5 to 19, 2021 | A, C, D, E, B, F |
| August 2 to 16, 2021 | A, D, E, B, F, C |
| September 2 to 16, 2021 | A, F, C, D, E, B |
| October 19 to November 2, 2021 | A, B, F, C, D, E |
| November 8 to 22, 2021 | A, C, B, E, F, D |
| December 3 to 17, 2021 | A, D, E, F, C, B |
| January 6 to 20, 2022 | A, E, D, F, B, C |
| February 7 to 21, 2022 | A, B, D, E, C, F |
| March 7 to 21, 2022 | A, F, C, B, D, E |
| April 11 to 25, 2022 | A, D, E, C, F, B |
| May 10 to 24, 2022 | A, C, F, D, B, E |
| June 9 to 23, 2022 | A, B, D, C, E, F |
| July 11 to 25, 2022 | A, C, F, E, D, B |
| August 8 to 22, 2022 | A, D, E, B, F, C |
| September 8 to 22, 2022 | A, C, D, E, B, F |
| October 20 to November 3, 2022 | A, D, E, B, F, C |
| November 17 to December 1, 2022 | A, F, C, D, E, B |
| December 16 to 30, 2022 | A, B, F, C, D, E |
| January 9 to 23, 2023 | A, C, B, E, F, D |
| February 9 to 23, 2023 | A, D, E, F, C, B |
| March 10 to 24, 2023 | A, E, D, F, B, C |
| April 11 to 25, 2023 | A, B, D, E, C, F |
| May 16 to 30, 2023 | A, F, C, B, E, D |
| June 12 to 26, 2023 | A, D, E, C, F, B |
| July 4 to 18, 2023 | A, C, F, D, B, E |
| August 10 to 24, 2023 | A, B, D, C, E, F |
| Hall no. | Trainer | Pokémon | ||||
|---|---|---|---|---|---|---|
| Left | Middle | Right | ||||
| Set A | ||||||
| 1 |  Camper Irwin |
 Fletchling Weakness: |
 Staravia Weakness: |
 Pidgey Weakness: | ||
| 2 |  Ace Trainer Kathy |
 Slugma Weakness: |
 Nidoqueen Weakness: |
 Trapinch Weakness: | ||
| 3 |  Black Belt Radcliff |
 Gible Weakness: |
 Graveler Weakness: |
 Geodude Weakness: | ||
| 4 |  Erika |
 Drifloon Weakness: ↓  Bibarel Weakness: |
 Probopass Weakness: ↓  Vileplume Weakness: |
 Starly Weakness: ↓  Mareanie Weakness: | ||
| 5 |  Rachel |
 Salamence Weakness: ↓  Arcanine Weakness: ↓  Walrein Weakness: |
 Garchomp Weakness: ↓  Houndoom Weakness: ↓  Lapras Weakness: |
 Haxorus Weakness: ↓  Rapidash Weakness: ↓  Dewgong Weakness: | ||
| Set B | ||||||
| 1 | Black Belt Rodney |
 Rattata Weakness: |
 Slaking Weakness: |
Rattata Weakness: | ||
| 2 |  Street Thug Carson |
 Nosepass Weakness: |
 Tyranitar Weakness: |
 Roggenrola Weakness: | ||
| 3 |  Hiker Tilden |
 Dusclops Weakness: |
 Xatu Weakness: |
 Sigilyph Weakness: | ||
| 4 |  Agatha |
 Miltank Weakness: ↓  Poochyena Weakness: |
 Delibird Weakness: ↓  Gengar Weakness: |
 Eevee Weakness: ↓  Purrloin Weakness: | ||
| 5 |  Sawyer |
 Solrock Weakness: ↓  Gigalith Weakness: ↓  Stoutland Weakness: |
 Chandelure Weakness: ↓  Lycanroc Midday Form Weakness: ↓  Bewear Weakness: |
 Lunatone Weakness: ↓  Aurorus Weakness: ↓  Cranidos Weakness: | ||
| Set C | ||||||
| 1 | Street Thug Derek |
 Dratini Weakness: |
 Turtonator Weakness: |
 Goomy Weakness: | ||
| 2 |  Swimmer Cole |
 Exeggcute Weakness: |
 Lombre Weakness: |
 Meditite Weakness: | ||
| 3 |  Collector Ira |
 Nuzleaf Weakness: |
 Abomasnow Weakness: |
 Hoppip Weakness: | ||
| 4 |  Lyra |
 Vibrava Weakness: ↓ Gible Weakness: |
 Conkeldurr Weakness: ↓  Meganium Weakness: |
 Axew Weakness: ↓  Deino Weakness: | ||
| 5 |  Hilda |
 Jumpluff Weakness: ↓  Ariados Weakness: ↓ Salamence Weakness: |
 Granbull Weakness: ↓  Pinsir Weakness: ↓ Haxorus Weakness: |
 Cottonee Weakness: ↓  Beedrill Weakness: ↓  Kingdra Weakness: | ||
| Set D | ||||||
| 1 |  Ace Trainer Justin |
 Weepinbell Weakness: |
 Victreebel Weakness: |
 Grimer Weakness: | ||
| 2 |  Poké Fan Stanton |
Meditite Weakness: |
 Dusknoir Weakness: |
 Espurr Weakness: | ||
| 3 | Ace Trainer Sandy |
 Persian Alolan form Weakness: |
 Liepard Weakness: |
 Spoink Weakness: | ||
| 4 |  Tate ↓  Liza |
 Throh Weakness: ↓  Nidorina Weakness: |
Solrock Weakness: ↓ Lunatone Weakness: |
 Sawk Weakness: ↓  Nidoran♀ Weakness: | ||
| 5 |  Noland |
 Meowstic Weakness: ↓  Raichu Alolan form Weakness: ↓ Conkeldurr Weakness: |
 Reuniclus Weakness: ↓  Metagross Weakness: ↓  Machamp Weakness: |
 Grumpig Weakness: ↓  Medicham Weakness: ↓  Hariyama Weakness: | ||
| Set E | ||||||
| 1 | Camper Brandt |
 Venonat Weakness: |
 Scolipede Weakness: |
 Bellsprout Weakness: | ||
| 2 | Poké Fan Damien |
 Dustox Weakness: |
 Masquerain Weakness: |
 Beautifly Weakness: | ||
| 3 | Swimmer Wiley |
 Seel Weakness: |
 Seismitoad Weakness: |
 Sealeo Weakness: | ||
| 4 |  Kris |
 Skiploom Weakness: ↓  Klink Weakness: |
Abomasnow Weakness: ↓  Feraligatr Weakness: |
Masquerain Weakness: ↓  Magnemite Weakness: | ||
| 5 |  Thorton |
Lapras Weakness: ↓ Abomasnow Weakness: ↓ Scolipede Weakness: |
 Clawitzer Weakness: ↓ Masquerain Weakness: ↓  Bronzong Weakness: |
Aurorus Weakness: ↓  Crobat Weakness: ↓  Avalugg Weakness: | ||
| Set F | ||||||
| 1 |  Pokémon Ranger Hannah |
 Torkoal Weakness: |
 Electrode Weakness: |
Torkoal Weakness: | ||
| 2 |  Lass Alice |
Dratini Weakness: |
 Umbreon Weakness: |
Purrloin Weakness: | ||
| 3 |  Punk Girl Lucy |
 Rampardos Weakness: |
 Steelix Weakness: |
 Mudsdale Weakness: | ||
| 4 |  Shauntal |
 Numel Weakness: ↓  Amaura Weakness: |
 Krookodile Weakness: ↓ Chandelure Weakness: |
Rapidash Weakness: ↓ Nidoqueen Weakness: | ||
| 5 |  Darach |
Rapidash Weakness: ↓ Liepard Weakness: ↓  Typhlosion Weakness: |
 Charizard Weakness: ↓ Kingdra Weakness: ↓ Houndoom Weakness: |
 Salazzle Weakness: ↓  Gallade Weakness: ↓  Zebstrika Weakness: | ||
Co-op
In version 1.9.0, each battle became limited to one clear per day. Battle rewards and additional completion rewards were added in conjunction with this change.
As of version 2.41.0, due to the Battle Villa now being part of the Side Area, these battles have been removed.
| Name | Trainer | Pokémon | First-Time Rewards | Completion Rewards | Battle Rewards | ||
|---|---|---|---|---|---|---|---|
| Left | Middle | Right | |||||
| Challenge Noland | Noland |
Beedrill Weakness: ↓ Aurorus Weakness: |
Pinsir Weakness: |
Beedrill Weakness: ↓ Tyranitar Weakness: |
Prior to November 19, 2020: Starting from November 19, 2020: |
Starting from November 19, 2020: | |
| Challenge Thorton | Thorton |
Dewgong Weakness: |
Krookodile Weakness: |
Lapras Weakness: |
Prior to November 19, 2020: Starting from November 19, 2020: |
Starting from November 19, 2020: | |
Gallery
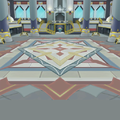
Battle Villa hall
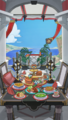
Banquet at the Villa


In other languages
| ||||||||||||||||||||||||||
| This article is part of Project Sidegames, a Bulbapedia project that aims to write comprehensive articles on the Pokémon Sidegames. |