|
|
| (20 intermediate revisions by 11 users not shown) |
| Line 12: |
Line 12: |
| }} | | }} |
|
| |
|
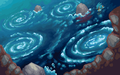
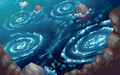
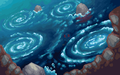
| The '''Whirl Islands''' (Japanese: '''うずまきじま''' ''Whirlpool Islands'') are a small archipelago located between the mainland of [[Johto]] and [[Cianwood City]], on {{rt|41|Johto}}. Beneath the sea, a maze of dark caves sprawl, with explorers able to travel between the four islands with some amount of difficulty. Deep within these caves, {{p|Lugia}} can be found. | | The '''Whirl Islands''' (Japanese: '''うずまきじま''' ''Whirlpool Islands'') are a small archipelago located between the mainland of [[Johto]] and [[Cianwood City]], on {{rt|41|Johto}}. Beneath the sea, a maze of dark caves sprawl, with explorers able to travel between the four islands with some amount of difficulty. Deep within these caves, {{p|Lugia}} can be found once the {{player}} has obtained the [[Silver and Rainbow Wings|Silver Wing]] and {{DL|Legendary artifacts|Tidal Bell}}{{sup/4|SS}}. |
|
| |
|
| Named after the dangerous {{m|whirlpool}}s that surround them, some parts of the Whirl Islands are mysterious and largely inaccessible. Children in [[Olivine City]] are told that bad kids are sent to the islands. | | Named after the dangerous {{m|whirlpool}}s that surround them, some parts of the Whirl Islands are mysterious and largely inaccessible. Children in [[Olivine City]] are told that bad kids are sent to the islands. |
| Line 34: |
Line 34: |
| {{Itemlist|Max Revive|B2F; west of main ladder located at the top|G=yes|S=yes|C=yes|HG=yes|SS=yes|display={{DL|Revive|Max Revive}}}} | | {{Itemlist|Max Revive|B2F; west of main ladder located at the top|G=yes|S=yes|C=yes|HG=yes|SS=yes|display={{DL|Revive|Max Revive}}}} |
| {{Itemlist|Max Elixir|B2F; southwest of ladder in enclosed section|G=yes|S=yes|C=yes|HG=yes|SS=yes|display={{DL|Ether|Max Elixir}}}} | | {{Itemlist|Max Elixir|B2F; southwest of ladder in enclosed section|G=yes|S=yes|C=yes|HG=yes|SS=yes|display={{DL|Ether|Max Elixir}}}} |
| | {{Itemlist|Full Restore|B2F; east of ladder in enclosed section|G=yes|S=yes|display={{DL|Potion|Full Restore}}}} |
| {{Itemlist|Full Restore|B2F; northeast of ladder in enclosed section|C=yes|HG=yes|SS=yes|display={{DL|Potion|Full Restore}}}} | | {{Itemlist|Full Restore|B2F; northeast of ladder in enclosed section|C=yes|HG=yes|SS=yes|display={{DL|Potion|Full Restore}}}} |
| {{Itemlist|Ultra Ball|Southwest island; east section|C=yes|HG=yes|SS=yes|display={{ball|Ultra}}}} | | {{Itemlist|Ultra Ball|Southwest island; east section|C=yes|HG=yes|SS=yes|display={{ball|Ultra}}}} |
| Line 40: |
Line 41: |
| {{Itemlist|Full Restore|B1F; southeast of northwest ladder|HG=yes|SS=yes|display={{DL|Potion|Full Restore}}}} | | {{Itemlist|Full Restore|B1F; southeast of northwest ladder|HG=yes|SS=yes|display={{DL|Potion|Full Restore}}}} |
| {{Itemlist|Revive|B1F; in a rock south of northeast ladder ''(hidden)''|HG=yes|SS=yes|display={{DL|Revive|Revive}}}} | | {{Itemlist|Revive|B1F; in a rock south of northeast ladder ''(hidden)''|HG=yes|SS=yes|display={{DL|Revive|Revive}}}} |
| {{Itemlist|Super Repel|B1F; on rock northeast of ladder southwest of northeast ladder ''(hidden)''|HG=yes|SS=yes|display={{DL|Repel|Super Repel}}}} | | {{Itemlist|Super Repel|B1F; on rock west of northeast ladder ''(hidden)''|HG=yes|SS=yes|display={{DL|Repel|Super Repel}}}} |
| {{Itemlist|Ultra Ball|B1F; in wall northwest of southeast ladder ''(hidden)''|HG=yes|SS=yes|display={{ball|Ultra}}}} | | {{Itemlist|Ultra Ball|B1F; in wall northwest of southeast ladder ''(hidden)''|HG=yes|SS=yes|display={{ball|Ultra}}}} |
| {{Itemlist|Full Restore|B2F; in wall northwest of main ladder ''(hidden)''|HG=yes|SS=yes|display={{DL|Potion|Full Restore}}}} | | {{Itemlist|Full Restore|B2F; in wall northwest of main ladder ''(hidden)''|HG=yes|SS=yes|display={{DL|Potion|Full Restore}}}} |
| Line 98: |
Line 99: |
| {{Catch/entry2|098|Krabby|no|no|yes|Cave|24-26|40%|40%|60%|type1=Water}} | | {{Catch/entry2|098|Krabby|no|no|yes|Cave|24-26|40%|40%|60%|type1=Water}} |
| {{Catch/div|water|Surfing}} | | {{Catch/div|water|Surfing}} |
| | {{Catch/entry2|072|Tentacool|yes|yes|yes|Surf|20-24|all=10%|type1=Water|type2=Poison}} |
| {{Catch/entry2|116|Horsea|yes|yes|yes|Surf|15-24|all=90%|type1=Water}} | | {{Catch/entry2|116|Horsea|yes|yes|yes|Surf|15-24|all=90%|type1=Water}} |
| {{Catch/entry2|072|Tentacool|yes|yes|yes|Surf|20-24|all=10%|type1=Water|type2=Poison}}
| |
| {{Catch/div|water|Fishing}} | | {{Catch/div|water|Fishing}} |
| {{Catch/entry2|098|Krabby|yes|yes|yes|Fish Old|10|all=15%|type1=Water}} | | {{Catch/entry2|098|Krabby|yes|yes|yes|Fish Old|10|all=15%|type1=Water}} |
| Line 124: |
Line 125: |
| {{Catch/entry2|098|Krabby|no|no|yes|Cave|25-27|40%|40%|60%|type1=Water}} | | {{Catch/entry2|098|Krabby|no|no|yes|Cave|25-27|40%|40%|60%|type1=Water}} |
| {{Catch/div|water|Surfing}} | | {{Catch/div|water|Surfing}} |
| | {{Catch/entry2|073|Tentacruel|yes|yes|yes|Surf|20-24|all=30%|type1=Water|type2=Poison}} |
| {{Catch/entry2|116|Horsea|yes|yes|yes|Surf|20-24|all=60%|type1=Water}} | | {{Catch/entry2|116|Horsea|yes|yes|yes|Surf|20-24|all=60%|type1=Water}} |
| {{Catch/entry2|117|Seadra|yes|yes|yes|Surf|20-24|all=10%|type1=Water}} | | {{Catch/entry2|117|Seadra|yes|yes|yes|Surf|20-24|all=10%|type1=Water}} |
| {{Catch/entry2|073|Tentacruel|yes|yes|yes|Surf|20-24|all=30%|type1=Water|type2=Poison}}
| |
| {{Catch/div|water|Fishing}} | | {{Catch/div|water|Fishing}} |
| {{Catch/entry2|098|Krabby|yes|yes|yes|Fish Old|10|all=15%|type1=Water}} | | {{Catch/entry2|098|Krabby|yes|yes|yes|Fish Old|10|all=15%|type1=Water}} |
| Line 143: |
Line 144: |
| ===Generation IV=== | | ===Generation IV=== |
| [[File:Summoning Lugia.png|thumb|right|200px|Kimono Girls summoning Lugia inside the Whirl Islands in SoulSilver]] | | [[File:Summoning Lugia.png|thumb|right|200px|Kimono Girls summoning Lugia inside the Whirl Islands in SoulSilver]] |
| ====1F, B1F, B2F==== | | ====1F-B1F==== |
| {{Catch/header|water|4}} | | {{Catch/header|water|4}} |
| {{Catch/entryhs|098|Krabby|yes|yes|Cave|22-24|all=50%|type1=Water}}
| |
| {{Catch/entryhs|041|Zubat|yes|yes|Cave|23|all=30%|type1=Poison|type2=Flying}} | | {{Catch/entryhs|041|Zubat|yes|yes|Cave|23|all=30%|type1=Poison|type2=Flying}} |
| | {{Catch/entryhs|042|Golbat|yes|yes|Cave|23|all=5%|type1=Poison|type2=Flying}} |
| {{Catch/entryhs|086|Seel|yes|yes|Cave|22-24|all=15%|type1=Water}} | | {{Catch/entryhs|086|Seel|yes|yes|Cave|22-24|all=15%|type1=Water}} |
| {{Catch/entryhs|042|Golbat|yes|yes|Cave|23|all=5%|type1=Poison|type2=Flying}} | | {{Catch/entryhs|098|Krabby|yes|yes|Cave|22-24|all=50%|type1=Water}} |
| {{Catch/div|water|Surfing}} | | {{Catch/div|water|Surfing}} |
| {{Catch/entryhs|072|Tentacool|yes|yes|Surf|15-25|all=60%|type1=Water|type2=Poison}} | | {{Catch/entryhs|072|Tentacool|yes|yes|Surf|15-25|all=60%|type1=Water|type2=Poison}} |
| Line 160: |
Line 161: |
| {{Catch/entryhs|129|Magikarp|yes|yes|Fish Good|20|all=60%|type1=Water}} | | {{Catch/entryhs|129|Magikarp|yes|yes|Fish Good|20|all=60%|type1=Water}} |
| {{Catch/entryhs|098|Krabby|yes|yes|Fish Super|40|all=60%|type1=Water}} | | {{Catch/entryhs|098|Krabby|yes|yes|Fish Super|40|all=60%|type1=Water}} |
| | {{Catch/entryhs|099|Kingler|yes|yes|Fish Super|40|all=7%|type1=Water}} |
| {{Catch/entryhs|116|Horsea|yes|yes|Fish Super|40|all=30%|type1=Water}} | | {{Catch/entryhs|116|Horsea|yes|yes|Fish Super|40|all=30%|type1=Water}} |
| {{Catch/entryhs|117|Seadra|yes|yes|Fish Super|40|all=3%|type1=Water}} | | {{Catch/entryhs|117|Seadra|yes|yes|Fish Super|40|all=3%|type1=Water}} |
| | {{Catch/div|water|Special}} |
| | {{Catch/entryhs|296|Makuhita|yes|yes|Hoenn|24|all=20%|type1=Fighting}} |
| | {{Catch/entryhs|359|Absol|yes|yes|Hoenn|22-23|all=20%|type1=Dark}} |
| | {{Catch/entryhs|433|Chingling|yes|yes|Sinnoh|24|all=20%|type1=Psychic}} |
| | {{Catch/entryhs|436|Bronzor|yes|yes|Sinnoh|22-23|all=20%|type1=Steel|type2=Psychic}} |
| | {{Catch/footer|water}} |
| | |
| | ===B2F=== |
| | {{Catch/header|water|4}} |
| | {{Catch/entryhs|041|Zubat|yes|yes|Cave|23|all=30%|type1=Poison|type2=Flying}} |
| | {{Catch/entryhs|042|Golbat|yes|yes|Cave|23|all=5%|type1=Poison|type2=Flying}} |
| | {{Catch/entryhs|086|Seel|yes|yes|Cave|22-24|all=15%|type1=Water}} |
| | {{Catch/entryhs|098|Krabby|yes|yes|Cave|22-24|all=50%|type1=Water}} |
| | {{Catch/div|water|Surfing}} |
| | {{Catch/entryhs|073|Tentacruel|yes|yes|Surf|15-25|all=30%|type1=Water|type2=Poison}} |
| | {{Catch/entryhs|116|Horsea|yes|yes|Surf|15-25|all=60%|type1=Water}} |
| | {{Catch/entryhs|117|Seadra|yes|yes|Surf|10-30|all=10%|type1=Water}} |
| | {{Catch/div|water|Fishing}} |
| | {{Catch/entryhs|098|Krabby|yes|yes|Fish Old|10|all=5%|type1=Water}} |
| | {{Catch/entryhs|129|Magikarp|yes|yes|Fish Old|10|all=95%|type1=Water}} |
| | {{Catch/entryhs|098|Krabby|yes|yes|Fish Good|20|all=37%|type1=Water}} |
| | {{Catch/entryhs|116|Horsea|yes|yes|Fish Good|20|all=3%|type1=Water}} |
| | {{Catch/entryhs|129|Magikarp|yes|yes|Fish Good|20|all=60%|type1=Water}} |
| | {{Catch/entryhs|098|Krabby|yes|yes|Fish Super|40|all=60%|type1=Water}} |
| {{Catch/entryhs|099|Kingler|yes|yes|Fish Super|40|all=7%|type1=Water}} | | {{Catch/entryhs|099|Kingler|yes|yes|Fish Super|40|all=7%|type1=Water}} |
| | {{Catch/entryhs|116|Horsea|yes|yes|Fish Super|40|all=30%|type1=Water}} |
| | {{Catch/entryhs|117|Seadra|yes|yes|Fish Super|40|all=3%|type1=Water}} |
| {{Catch/div|water|Special}} | | {{Catch/div|water|Special}} |
| {{Catch/entryhs|296|Makuhita|yes|yes|Hoenn|24|all=20%|type1=Fighting}} | | {{Catch/entryhs|296|Makuhita|yes|yes|Hoenn|24|all=20%|type1=Fighting}} |
| Line 188: |
Line 216: |
| ==Layout== | | ==Layout== |
| ===Generation II=== | | ===Generation II=== |
| {| class="roundy" style="margin:auto; background: #000; border: 5px solid #{{Locationcolor/med|water}}" | | {| class="roundy" style="margin:auto; background: #000; border: 3px solid #{{Locationcolor/dark|water}}" |
| |- | | |- |
| ! style="background:#{{Locationcolor/light|water}}; {{roundytl|5px}}" | Version | | ! style="background:#{{Locationcolor/light|water}}; {{roundytl|5px}}" | Version |
| Line 209: |
Line 237: |
| |} | | |} |
| {{-}} | | {{-}} |
| {| class="roundy" style="margin:auto; background: #000; border: 5px solid #{{Locationcolor/med|water}}" | | {| class="roundy" style="margin:auto; background: #000; border: 3px solid #{{Locationcolor/dark|water}}" |
| |- | | |- |
| ! style="background:#{{Locationcolor/light|water}}; {{roundytl|5px}}" | Version | | ! style="background:#{{Locationcolor/light|water}}; {{roundytl|5px}}" | Version |
| Line 231: |
Line 259: |
|
| |
|
| ===Generation IV=== | | ===Generation IV=== |
| {| class="roundy" style="margin:auto; background: #000; border: 5px solid #{{Locationcolor/med|water}}" | | {| class="roundy" style="margin:auto; background: #000; border: 3px solid #{{Locationcolor/dark|water}}" |
| |- | | |- |
| ! style="background:#{{Locationcolor/light|water}}; {{roundytl|5px}}" | Version | | ! style="background:#{{Locationcolor/light|water}}; {{roundytl|5px}}" | Version |
| Line 240: |
Line 268: |
| |- | | |- |
| ! style="background:#{{heartgold color}}" | {{color2|000|Pokémon HeartGold and SoulSilver Versions|HeartGold}} | | ! style="background:#{{heartgold color}}" | {{color2|000|Pokémon HeartGold and SoulSilver Versions|HeartGold}} |
| | rowspan="2" | [[File:Whirl Islands 1F NW HGSS.png|150px]] | | | rowspan="2" | [[File:Whirl Islands 1F NW HGSS.png|125px]] |
| | rowspan="2" | [[File:Whirl Islands 1F NE HGSS.png|150px]] | | | rowspan="2" | [[File:Whirl Islands 1F NE HGSS.png|175px]] |
| | rowspan="2" | [[File:Whirl Islands 1F SW HGSS.png|150px]] | | | rowspan="2" | [[File:Whirl Islands 1F SW HGSS.png|175px]] |
| | rowspan="2" | [[File:Whirl Islands 1F SE HGSS.png|150px]] | | | rowspan="2" | [[File:Whirl Islands 1F SE HGSS.png|125px]] |
| |- | | |- |
| ! style="background:#{{soulsilver color}}" | {{color2|000|Pokémon HeartGold and SoulSilver Versions|SoulSilver}} | | ! style="background:#{{soulsilver color}}" | {{color2|000|Pokémon HeartGold and SoulSilver Versions|SoulSilver}} |
| Line 250: |
Line 278: |
| |} | | |} |
| {{-}} | | {{-}} |
| {| class="roundy" style="margin:auto; background: #000; border: 5px solid #{{Locationcolor/med|water}}" | | {| class="roundy" style="margin:auto; background: #000; border: 3px solid #{{Locationcolor/dark|water}}" |
| |- | | |- |
| ! style="background:#{{Locationcolor/light|water}}; {{roundytl|5px}}" | Version | | ! style="background:#{{Locationcolor/light|water}}; {{roundytl|5px}}" | Version |
| Line 259: |
Line 287: |
| |- | | |- |
| ! style="background:#{{heartgold color}}" | {{color2|000|Pokémon HeartGold and SoulSilver Versions|HeartGold}} | | ! style="background:#{{heartgold color}}" | {{color2|000|Pokémon HeartGold and SoulSilver Versions|HeartGold}} |
| | rowspan="2" | [[File:Whirl Islands B1F HGSS.png|150px]] | | | rowspan="2" | [[File:Whirl Islands B1F HGSS.png|200px]] |
| | rowspan="2" | [[File:Whirl Islands B2F HGSS.png|150px]] | | | rowspan="2" | [[File:Whirl Islands B2F HGSS.png|90px]] |
| | rowspan="2" | [[File:Whirl Islands B3F HGSS.png|150px]] | | | rowspan="2" | [[File:Whirl Islands B3F HGSS.png|160px]] |
| | rowspan="2" | [[File:Whirl Islands B3F Lugia HGSS.png|150px]] | | | rowspan="2" | [[File:Whirl Islands B3F Lugia HGSS.png|150px]] |
| |- | | |- |
| Line 269: |
Line 297: |
| |} | | |} |
|
| |
|
| ==Eyecatch== | | ==[[Location preview|Preview]]== |
| <gallery> | | <gallery> |
| File:HGSS Whirl Islands-Morning.png|Morning (Seadra) | | File:HGSS Whirl Islands-Morning.png|Morning (Seadra) |
| Line 293: |
Line 321: |
|
| |
|
| According to the [[Nurse Joy]] on Blue Point Isle, the climate varies from island to island. | | According to the [[Nurse Joy]] on Blue Point Isle, the climate varies from island to island. |
| | {{-}} |
|
| |
|
| ==In the manga== | | ==In the manga== |
| [[File:Whirl Islands HGSS Adventures.png|thumb|200px|right|{{adv|Silver}} flying over the Whirl Islands]] | | [[File:Whirl Islands HGSS Adventures.png|thumb|200px|right|{{adv|Silver}} flying over the Whirl Islands]] |
| The Whirl Islands first appeared in the ''[[Pokémon Adventures]]'' manga in ''[[PS142|Really Remoraid]]'', where [[Morty]] was able to track the location of {{Adv|Gold}} and {{adv|Silver}} at [[Lt. Surge]]'s request. Having been nursed back to health by the {{p|Entei}} that had just left, the two awaken to find that Gold lost his [[backpack]] again (along with several of his other belongings), and Silver was missing the [[Red Gyarados]] he caught at the [[Lake of Rage]]. After fighting off a herd of {{p|Sandslash}}, the two come across Surge, who then returns them. However, there was a catch: before he could even inquire information regarding the [[Masked Man]], the three were attacked by the wild {{p|Lugia}} that inhabited the islands, quite a berserk one that rampaged firing {{m|Aeroblast}}s left and right. After a tough battle during which they are joined by {{adv|Crystal}} and their [[Exbo|starters]] [[Silver's Feraligatr|all]] [[Megaree|evolve]], they try to it in a Poké Ball, only to find out someone else, later revealed to be the Masked Man himself, did so before them. | | ===In the Pokémon Adventures manga=== |
| | The Whirl Islands first appeared in the [[Pokémon Adventures]] manga in ''[[PS142|Really Remoraid]]'', where [[Morty]] was able to track the location of {{Adv|Gold}} and {{adv|Silver}} at [[Lt. Surge]]'s request. Having been nursed back to health by the {{p|Entei}} that had just left, the two awaken to find that Gold lost his [[backpack]] again (along with several of his other belongings), and Silver was missing the [[Red Gyarados]] he caught at the [[Lake of Rage]]. After fighting off a herd of {{p|Sandslash}}, the two come across Surge, who then returns them. However, there was a catch: before he could even inquire information regarding the [[Masked Man]], the three were attacked by the wild {{p|Lugia}} that inhabited the islands, quite a berserk one that rampaged firing {{m|Aeroblast}}s left and right. After a tough battle during which they are joined by {{adv|Crystal}} and their [[Exbo|starters]] [[Silver's Feraligatr|all]] [[Megaree|evolve]], they try to it in a Poké Ball, only to find out someone else, later revealed to be the Masked Man himself, did so before them. |
|
| |
|
| After the incident, the three fail to track it down even with the Pokédexes' Area function, and soon Silver flies off on his own to the fourth and final island, in which [[Lance]]'s hidden chamber resides. By using the three {{type|Water}} [[HM]] moves available at the time, he is able to enter it and acquire information from Lance, during which he returns the {{p|Tyranitar}} he borrowed. | | After the incident, the three fail to track it down even with the Pokédexes' Area function, and soon Silver flies off on his own to the fourth and final island, in which [[Lance]]'s hidden chamber resides. By using the three {{type|Water}} [[HM]] moves available at the time ({{m|Whirlpool}}, {{m|Waterfall}}, and {{m|Surf}}), he is able to enter it and acquire information from Lance, during which he returns the {{p|Tyranitar}} he borrowed. |
|
| |
|
| Much later, in the {{chap|HeartGold & SoulSilver}}, Silver returns to Lance's chamber again, only to be joined by an angry [[Clair]] who demanded to know what he did to her cousin, who had recently gone missing. They are soon attacked by [[Petrel]]'s many {{p|Koffing}}. | | Much later, in the {{chap|HeartGold & SoulSilver}}, Silver returns to Lance's chamber again, only to be joined by an angry [[Clair]] who demanded to know what he did to her cousin, who had recently gone missing. They are soon attacked by [[Petrel]]'s many {{p|Koffing}}. |
| | {{-}} |
|
| |
|
| ==Trivia== | | ==Trivia== |
| * The whirlpools are based on the real world {{wp|Naruto whirlpools}} on the {{wp|Naruto Strait}}. The islands are based on {{wp|Awaji Island}} and its surrounding islands. | | * The whirlpools are based on the real world {{wp|Naruto whirlpools}} on the {{wp|Naruto Strait}}. The islands are based on {{wp|Awaji Island}} and its surrounding islands. |
| * In {{3v|Diamond|Pearl|Platinum}}, a guest at [[Hotel Grand Lake]] by [[Lake Valor]] mentions a {{p|Lugia|silver-colored Pokémon}} at Whirl Islands. | | * In {{3v|Diamond|Pearl|Platinum}}, a guest at [[Hotel Grand Lake]] by [[Lake Valor]] mentions a {{p|Lugia|silver-colored Pokémon}} at Whirl Islands. |
| * In Generation II, it was possible to get to {{p|Lugia}} without having the [[HM]] {{m|Waterfall}}. | | * Since the {{m|Waterfall}} [[HM]] is not required to go down waterfalls in [[Generation II]], it is possible to get to {{p|Lugia}} without it. A series of ladders starting below the waterfall allows players to return to the entrance. |
|
| |
|
| ==In other languages== | | ==In other languages== |
| Line 314: |
Line 345: |
| |it=Isole Vorticose | | |it=Isole Vorticose |
| |ko=소용돌이섬 ''Soyongdol-iseom'' | | |ko=소용돌이섬 ''Soyongdol-iseom'' |
| |es_eu=Islas Remolino | | |pt_br=Ilhas Redemoinho |
| |pt_br=Ilhas dos Redemoinhos{{tt|*|sometimes mistranslated from the similar-sounding World Islands (Ilhas Mundo)}}}} | | |es=Islas Remolino |
| | |vi=Quần đảo Xoắn Ốc |
| | }} |
| {{-}} | | {{-}} |
|
| |
|


