Villain Arc

|
This article is incomplete. Please feel free to edit this article to add missing information and complete it. Reason: Plots for most chapters |
The Villain Arc (Japanese: 悪の組織編) is a storyline available in Pokémon Masters EX as part of its Main Story (Japanese: メインストーリー Main Story). It follows on from the events of the PML Arc, and it tells the stories of various villainous teams and their exploits on Pasio.
As with the PML Arc, each chapter is unlocked once the previous one is completed and battles are available in Normal and Hard difficulties. All Normal difficulty battles provide 30 Gems as a First-Time Reward, while Hard difficulty battles reward the player with 100 Gems upon defeating the stage for the first time. The recommended level for the Villain Arc is level 30.
The script for the Villain Arc can be found here.
Kanto: Team Rocket Returns
This chapter introduces Team Rocket.
Plot
Area info
This chapter was added on September 30, 2021. It was the only chapter of the Villain Arc to be added all at once instead of in two parts.
| Area name | Unlock condition | First-Time Rewards |
|---|---|---|
| Available from start | ||
| Complete Challenge the Rocket Grunts: Part 1 | ||
| Complete Challenge the Rocket Grunts: Part 2 | ||
| Complete Challenge the Rocket Grunts: Part 3 | ||
| Complete Challenge Giovanni: Part 1 | ||
| Complete Giovanni's Gambit | ||
| Complete Challenge the Rocket Grunts: Part 4 | ||
| Complete Challenge the Rocket Grunts: Part 5 | ||
| Complete Challenge the Rocket Grunts: Part 6 | ||
| Complete Challenge Giovanni: Part 2 |
Battles
| Name | Difficulty | Trainer | Pokémon | First-Time Rewards | Completion Rewards | Egg Chance | ||
|---|---|---|---|---|---|---|---|---|
| Left | Middle | Right | ||||||
| Challenge the Rocket Grunts: Part 1 | Normal |  Team Rocket Grunt |
 Pidgey Weakness: |
 Fearow Weakness: |
 Farfetch'd Weakness: |
10% | ||
| Challenge the Rocket Grunts: Part 2 | Normal |  Team Rocket Grunt |
 Zubat Weakness: |
 Venomoth Weakness: |
 Pinsir Weakness: |
10% | ||
| Challenge the Rocket Grunts: Part 3 | Normal | Team Rocket Grunt |
 Arcanine Weakness: |
 Ninetales Weakness: |
 Magmar Weakness: |
10% | ||
| Challenge Giovanni: Part 1 | Normal |  Giovanni |
 Golbat Weakness: |
 Mewtwo Weakness: |
 Beedrill Weakness: |
10% | ||
| Challenge the Rocket Grunts: Part 4 | Normal | Team Rocket Grunt |
 Kabuto Weakness: |
 Dewgong Weakness: |
 Seaking Weakness: |
10% | ||
| Challenge the Rocket Grunts: Part 5 | Normal | Team Rocket Grunt |
 Seel Weakness: |
 Kabutops Weakness: |
 Starmie Weakness: |
10% | ||
| Challenge the Rocket Grunts: Part 6 | Normal | Team Rocket Grunt |
 Graveler Weakness: |
 Sandslash Weakness: |
 Marowak Weakness: |
10% | ||
| Challenge Giovanni: Part 2 | Normal | Giovanni |
 Omastar Weakness: |
 Mega Mewtwo Y Weakness: |
 Lapras Weakness: |
10% | ||
| Hard | 10% | |||||||
Sinnoh: Dreaming in Darkness
This chapter introduces Team Galactic. Unlike other chapters of the Villain Arc, it does not take place in the order it appears on the Explore menu. Despite being placed between the Hoenn and Unova chapters, it takes place between the Kanto and Johto chapters.
Plot

|
This section does not yet meet the quality standards of Bulbapedia. Please feel free to edit this section to make it conform to Bulbapedia norms and conventions. |
The episode begins with Cyrus waking up from a never-ending darkness caused by Darkrai. Wanting to live in this never-ending ideal void, Cyrus states he will learn more about sync stones and Sygna Suits to harness their power.
At the laboratory, Professor Bellis informs the player that the International Police have started their investigations on Pasio, including into recent issues with Team Galactic. Barry leaves to stop Team Galactic, while Lucas and Dawn go to inform Cynthia.
At some ruins, Lucas and Dawn arrive and find Cynthia. Cynthia tells them that Legendary Pokémon seem to have been appearing at these ruins, and that Giratina appears to be interested in the traces of other Pokémon that have come here. Dialga then appears suddenly before disappearing, and Lucas wonders if it was trying to tell them something. Dawn then goes on to report to Cynthia about Team Galactic's operations on Pasio. A mysterious man spots the cave and enters the Team Galactic hideout disguised as Grunt with Croagunk.
At Centra City, Brock and Erika confront and defeat Team Galactic commanders Jupiter, Mas and Saturn who have been trapping other Trainers in a nightmare. Barry arrives, and the team head back to Bellis's lab to update Cynthia, Dawn and Lucas on this mysterious phenomenon. They speculate that Team Galactic appear to be harnessing Darkrai's power, before Professor Bellis reports to the team that the International Police have found Team Galactic's hideout. Near the hideout, Cynthia, Lucas and Dawn meet Barry. Cynthia suggests that the team should split out with her being alone. That means Lucas, Dawn, and Barry will go as a group.
Inside the hideout, the team battling against three Grunts. The other Grunt, which is mystery man that was with Croagunk, commands it to stop the other Grunt's Pokémon. Later, these Pokémon has fainted and the Grunts retreated. The mystery man who was actually Looker, removes his Grunt disguise and introduced himself. He was sent to International Police to investigate Pasio. Looker left and he disguises as Grunt again. Cynthia alone met with commanders, challenges their Pokémon with Giratina and wins. She warns the commanders about consequences what Cyrus will do. Saturn say that he is seeking more power to create a brand-new universe.
Lucas, Dawn, and Barry met with Cyrus, who now have both Dialga and Palkia and command to get them. Dialga disobey Cyrus. Palkia attacks it, and Lucas wants him to stop this. Cyrus say he wants to create a world that got rid of incomplete spirit and where feelings no longer exist with all human spirit must be erased, with his conversation was heard at the lab. At hideout, Cynthia left the commanders, as they are questioning him. Cyrus become victorious on the team's Pokémon. Lucas's sync stone is reacting what Dialga has been waiting for this and he forms the sync pair with it. Lucas and Dialga use their sync move against Cyrus's Palkia and defeated Cyrus. After the battle, Cyrus with Darkrai were vanished. Looker inform team that Grunts were asleep due to Darkrai powers.
A few days later, at the lab, the team discuss that Cyrus's plans has been putting into action and all sync pairs all over Pasio are falling asleep, having terrible nightmares and no waking up. Looker mentions that the affected sync pairs are getting treated at the Pokémon Center. Dawn arrives and she informed that she was able to wake up all affected sync pairs with Cresselia's power.
Cyrus in his sygna suit appears inside the Darkrai's Dark Void and claim that it is the ideal world he seek.
At the Bellis Lab, Dawn dresses herself in sygna suit to match Cresselia's colors. Professors Sycamore and Bellis arrive to the lab and report that Darkrai's nightmare is taken over with Sycamore falls asleep because of it.
Cynthia and company arrive to Centra City to see the sync pairs fall asleep. They thought that Darkrai's power overpowering Cresselia's. They later returned to the lab, because they can also be asleep. The commanders arrive to the lab to help the company finding Cyrus.
They found the asleep grunt, which actually is disguised Looker. He found the whereabouts of Cyrus. The group arrive to the cave and see Darkrai. They entered the Dark Void, with Dawn's Cresselia using power to wake up Cyrus from nightmare. They battled him and won. After that, they told Cyrus about how important feelings and bonds are. Cyrus managed to understand it and leaves with his commanders. Meanwhile, Giovanni appears at the scene after Cyrus leave and calls his loyal subordinates to preparing Team Rocket's Revival. At the lab, the group hope Cyrus will change.
Area info
The first half of this chapter, from Team Galactic on the Move to Together in Spirit, was added on January 13, 2022. The second half of this chapter, from The Nightmare Spreads to A Mission to Complete, was added on February 10, 2022.
| Area name | Unlock condition | First-Time Rewards |
|---|---|---|
| Available from start | ||
| Complete Challenge the Galactic Grunts: Part 1 | ||
| Complete Challenge the Galactic Grunts: Part 2 | ||
| Complete Challenge the Galactic Grunts: Part 3 | ||
| Complete Challenge Cyrus: Part 1 | ||
| Complete Together in Spirit | ||
| Complete Challenge the Galactic Grunts: Part 4 | ||
| Complete Challenge the Galactic Grunts: Part 5 | ||
| Complete Challenge the Galactic Grunts: Part 6 | Challenge Sygna Suit Cyrus | |
| Complete Challenge Sygna Suit Cyrus | Challenge Sygna Suit Cyrus (Hard) |
Battles
| Name | Difficulty | Trainer | Pokémon | First-Time Rewards | Completion Rewards | Egg Chance | ||
|---|---|---|---|---|---|---|---|---|
| Left | Middle | Right | ||||||
| Challenge the Galactic Grunts: Part 1 | Normal |  Team Galactic Grunt |
 Vibrava Weakness: |
 Noivern Weakness: |
 Dragonair Weakness: |
10% | ||
| Challenge the Galactic Grunts: Part 2 | Normal | 10% | ||||||
| Challenge the Galactic Grunts: Part 3 | Normal | 10% | ||||||
| Challenge Cyrus: Part 1 | Normal |  Cyrus |
 Flygon Weakness: |
 Palkia Weakness: |
File:Masters445.png Garchomp Weakness: |
10% | ||
| Challenge the Galactic Grunts: Part 4 | Normal | Team Galactic Grunt |
 Sneasel Weakness: |
 Absol Weakness: |
 Mightyena Weakness: |
10% | ||
| Challenge the Galactic Grunts: Part 5 | Normal | 10% | ||||||
| Challenge the Galactic Grunts: Part 6 | Normal | 10% | ||||||
| Challenge Cyrus: Part 2 / Challenge Sygna Suit Cyrus |
Normal |  Cyrus Sygna Suit |
 Darkrai Weakness: |
10% | ||||
| Hard | 10% | |||||||
Johto: Team Rocket's Revival
Unlike other villain arc chapters, this chapter serves as a direct sequel to Kanto: Team Rocket Returns. It introduces the Team Rocket executives.
Plot
Area info
The first half of this chapter, from Resuming Operations to One or Many, was added on May 19, 2022. The second half of this chapter, from As Your Friend to Endings and Beginnings, was added on May 30, 2022.
| Area name | Unlock condition | First-Time Rewards |
|---|---|---|
| Available from start | ||
| Complete Challenge Proton: Part 1 | ||
| Complete Challenge Proton: Part 2 | ||
| Complete Challenge Proton: Part 3 | ||
| Complete Challenge Archer: Part 1 | ||
| Complete One or Many | ||
| Complete Challenge Archer: Part 2 | ||
| Complete Challenge Archer: Part 3 | ||
| Complete Challenge Archer: Part 4 | ||
| Complete Challenge Sygna Suit Giovanni |
Battles
| Name | Difficulty | Trainers | Pokémon | First-Time Rewards | Completion Rewards | Egg Chance | ||||
|---|---|---|---|---|---|---|---|---|---|---|
| Left | Middle | Right | ||||||||
| Challenge Proton: Part 1 | Normal |  Proton |
Zubat Weakness: |
Golbat Weakness: |
 Honchkrow Weakness: |
10% | ||||
| Challenge Proton: Part 2 | Normal | 10% | ||||||||
| Challenge Proton: Part 3 | Normal | 10% | ||||||||
| Challenge Archer: Part 1 | Normal |  Archer |
Beedrill Weakness: |
 Houndoom Weakness: |
Golbat Weakness: |
10% | ||||
| Challenge Archer: Part 2 | Normal |  Petrel |
Archer |
 Ariana |
 Weezing Weakness: |
Houndoom Weakness: |
 Arbok Weakness: |
10% | ||
| Challenge Archer: Part 3 | Normal | 10% | ||||||||
| Challenge Archer: Part 4 | Normal | 10% | ||||||||
| Challenge Sygna Suit Giovanni | Normal |  Giovanni Sygna Suit |
Mega Mewtwo Y Weakness: ↓  Nidoking Weakness: |
10% | ||||||
| Hard | 10% | |||||||||
Hoenn: Delta of Land, Sea, and Sky
This chapter introduces Team Magma and Team Aqua.
Plot
Area info
The first half of this chapter, from Differing Perspectives to Uncontrollable Power, was added on July 29, 2022. The second half of this chapter, from The Meteor's Passenger to In the Shadows of Pasio's Crisis, was added on August 10, 2022.
| Area name | Unlock condition | First-Time Rewards |
|---|---|---|
| Available from start | Challenge the Magma Grunts: Part 1 | |
| Complete Challenge Team Magma: Part 1 / Challenge the Magma Grunts: Part 1 |
Challenge the Aqua Grunts: Part 1 | |
| Complete Challenge Team Aqua: Part 1 / Challenge the Aqua Grunts: Part 1 |
Challenge the Magma Grunts: Part 2 | |
| Complete Challenge Team Magma: Part 2 / Challenge the Magma Grunts: Part 2 |
Challenge the Aqua Grunts: Part 2 | |
| Complete Challenge Team Aqua: Part 2 / Challenge the Aqua Grunts: Part 2 |
||
| Complete Uncontrollable Power | Challenge the Magma Grunts: Part 3 | |
| Complete Challenge Team Magma: Part 3 / Challenge the Magma Grunts: Part 3 |
Challenge the Aqua Grunts: Part 3 | |
| Complete Challenge Team Aqua: Part 3 / Challenge the Aqua Grunts: Part 3 |
Challenge the Magma Grunts: Part 4 | |
| Complete Challenge Team Magma: Part 4 / Challenge the Magma Grunts: Part 4 |
||
| Complete Challenge Courtney and Matt |
Battles
| Name | Difficulty | Trainers | Pokémon | First-Time Rewards | Completion Rewards | Egg Chance | ||
|---|---|---|---|---|---|---|---|---|
| Left | Middle | Right | ||||||
| Challenge Team Magma: Part 1 / Challenge the Magma Grunts: Part 1 |
Normal |  Team Magma Grunt |
 Numel Weakness: |
File:Masters323 m.png Camerupt Weakness: |
Numel Weakness: |
10% | ||
| Challenge Team Aqua: Part 1 / Challenge the Aqua Grunts: Part 1 |
Normal |  Team Aqua Grunt |
 Carvanha Weakness: |
 Sharpedo Weakness: |
Carvanha Weakness: |
10% | ||
| Challenge Team Magma: Part 2 / Challenge the Magma Grunts: Part 2 |
Normal | Team Magma Grunt |
Numel Weakness: |
File:Masters323 m.png Camerupt Weakness: |
Numel Weakness: |
10% | ||
| Challenge Team Aqua: Part 2 / Challenge the Aqua Grunts: Part 2 |
Normal | Team Aqua Grunt |
Carvanha Weakness: |
Sharpedo Weakness: |
Carvanha Weakness: |
10% | ||
| Challenge Team Magma: Part 3 / Challenge the Magma Grunts: Part 3 |
Normal | Team Magma Grunt |
Numel Weakness: |
File:Masters323 m.png Camerupt Weakness: |
Numel Weakness: |
10% | ||
| Challenge Team Aqua: Part 3 / Challenge the Aqua Grunts: Part 3 |
Normal | Team Aqua Grunt |
Carvanha Weakness: |
Sharpedo Weakness: |
Carvanha Weakness: |
10% | ||
| Challenge Team Magma: Part 4 / Challenge the Magma Grunts: Part 4 |
Normal | Team Magma Grunt |
Numel Weakness: |
File:Masters323 m.png Camerupt Weakness: |
Numel Weakness: |
10% | ||
| Challenge Courtney and Matt | Normal |  Courtney ↓  Matt |
 Groudon Weakness: ↓  Kyogre Weakness: |
10% | ||||
| Hard | 10% | |||||||
Unova: Team Plasma & Two Heroes
This chapter introduces Team Plasma.
Plot
Area info
The first half of this chapter, from The One to Rule the World to Sync Pairs' Hearts Align, was added on October 31, 2022. The second half of this chapter, from Spoken Names to Two Heroes, was added on November 14, 2022.
| Area name | Unlock condition | First-Time Rewards |
|---|---|---|
| Available from start | ||
| Complete Challenge the Plasma Grunts: Part 1 | ||
| Complete Challenge the Plasma Grunts: Part 2 | ||
| Complete Challenge the Plasma Grunts: Part 3 | ||
| Complete Challenge the Plasma Grunts: Part 4 | ||
| Complete Sync Pairs' Hearts Align | ||
| Complete Challenge the Shadow Triad: Part 1 | ||
| Complete Challenge the Shadow Triad: Part 2 | ||
| Complete Challenge the Shadow Triad: Part 3 | ||
| Complete Challenge Ghetsis |
Battles
| Name | Difficulty | Trainers | Pokémon | First-Time Rewards | Completion Rewards | Egg Chance | ||
|---|---|---|---|---|---|---|---|---|
| Left | Middle | Right | ||||||
| Challenge the Team Plasma Grunts: Part 1 | Normal |  Team Plasma Grunt |
 Muk Weakness: |
 Drapion Weakness: |
 Seviper Weakness: |
10% | ||
| Challenge the Team Plasma Grunts: Part 2 | Normal | 10% | ||||||
| Challenge the Team Plasma Grunts: Part 3 | Normal | 10% | ||||||
| Challenge the Team Plasma Grunts: Part 4 | Normal | 10% | ||||||
| Challenge the Shadow Triad: Part 1 | Normal |  Shadow Triad |
 Bisharp Weakness: |
Bisharp Weakness: |
10% | ||
| Challenge the Shadow Triad: Part 2 | Normal | 10% | ||||||
| Challenge the Shadow Triad: Part 3 | Normal | 10% | ||||||
| Challenge Ghetsis | Normal |  Ghetsis |
 Liepard Weakness: |
 Kyurem Weakness: |
 Krookodile Weakness: |
10% | ||
| Hard | 10% | |||||||
Kalos: Team Flare Flares Up
This chapter introduces Team Flare.
Plot
Area info
The first half of this chapter, from A Kalos Peace Ceremony to Team Flare vs. Team Flare?!, was added on January 12, 2023. The second half of this chapter, from Hidden from Sight to Under a Beautiful Night Sky, was added on February 13, 2023.
| Area name | Unlock condition | First-Time Rewards |
|---|---|---|
| Available from start | ||
| Complete Challenge the Flare Grunts: Part 1 | ||
| Complete Challenge the Flare Grunts: Part 2 | ||
| Complete Challenge the Flare Grunts: Part 3 | ||
| Complete Challenge the Flare Grunts: Part 4 | ||
| Complete Team Flare vs. Team Flare?! | ||
| Complete Challenge the Flare Grunts: Part 5 | ||
| Complete Challenge the Flare Grunts(?): Part 1 | ||
| Complete Challenge the Flare Grunts(?): Part 2 | ||
| Complete Challenge the Flare Grunts(?): Part 3 |
Battles
| Name | Difficulty | Trainers | Pokémon | First-Time Rewards | Completion Rewards | Egg Chance | ||
|---|---|---|---|---|---|---|---|---|
| Left | Middle | Right | ||||||
| Challenge the Flare Grunts: Part 1 | Normal |  Team Flare Grunt |
 Poochyena Weakness: |
Mightyena Weakness: |
 Purrloin Weakness: |
10% | ||
| Challenge the Flare Grunts: Part 2 | Normal |  Team Flare Grunt |
Purrloin Weakness: |
Liepard Weakness: |
Poochyena Weakness: |
10% | ||
| Challenge the Flare Grunts: Part 3 | Normal | Team Flare Grunt |
Poochyena Weakness: |
Mightyena Weakness: |
Purrloin Weakness: |
10% | ||
| Challenge the Flare Grunts: Part 4 | Normal | Team Flare Grunt |
Purrloin Weakness: |
Liepard Weakness: |
Poochyena Weakness: |
10% | ||
| Challenge the Flare Grunts: Part 5 | Normal | Team Flare Grunt |
Poochyena Weakness: |
Mightyena Weakness: |
Purrloin Weakness: |
10% | ||
| Challenge the Flare Grunts(?): Part 1 | Normal | Team Flare Grunt |
Golbat Weakness: |
Arbok Weakness: |
Muk Weakness: |
10% | ||
| Challenge the Flare Grunts(?): Part 2 | Normal | 10% | ||||||
| Challenge the Flare Grunts(?): Part 3 | Normal | 10% | ||||||
| Hard | 10% | |||||||
Alola: Protecting the Island
This chapter introduces Team Skull and the Aether Foundation.
Plot
Area info
The first half of this chapter, from Signs of Disturbance to Illuminating the Darkness, was added on April 28, 2023. The second half of this chapter, from Guardian Deities Assemble to A Future Together, was added on May 12, 2023.
| Area name | Unlock condition | First-Time Rewards |
|---|---|---|
| Available from start | ||
| Complete Challenge the Aether Foundation: Part 1 | ||
| Complete Challenge the Aether Foundation: Part 2 | ||
| Complete Challenge the Aether Foundation: Part 3 | ||
| Complete Challenge the Aether Foundation: Part 4 | ||
| Complete Illuminating the Darkness | ||
| Complete Challenge the Aether Foundation: Part 5 | ||
| Complete Challenge the Aether Foundation: Part 6 | ||
| Complete Challenge the Aether Foundation: Part 7 | ||
| Complete Challenge the Aether Foundation: Part 8 |
Battles
| Name | Difficulty | Trainers | Pokémon | First-Time Rewards | Completion Rewards | Egg Chance | ||
|---|---|---|---|---|---|---|---|---|
| Left | Middle | Right | ||||||
| Challenge the Aether Foundation: Part 1 | Normal |  Aether Foundation Employee |
 Pelipper Weakness: |
 Toucannon Weakness: |
 Vanilluxe Weakness: |
10% | ||
| Challenge the Aether Foundation: Part 2 | Normal |  Aether Foundation Employee |
 Electabuzz Weakness: |
 Dugtrio Alolan Weakness: |
Magmar Weakness: |
10% | ||
| Challenge the Aether Foundation: Part 3 | Normal | Aether Foundation Employee |
Pelipper Weakness: |
Toucannon Weakness: |
Vanilluxe Weakness: |
10% | ||
| Challenge the Aether Foundation: Part 4 | Normal | Aether Foundation Employee |
Electabuzz Weakness: |
Dugtrio Alolan Weakness: |
Magmar Weakness: |
10% | ||
| Challenge the Aether Foundation: Part 5 | Normal | Aether Foundation Employee |
Pelipper Weakness: |
Toucannon Weakness: |
Vanilluxe Weakness: |
10% | ||
| Challenge the Aether Foundation: Part 6 | Normal | Aether Foundation Employee |
Electabuzz Weakness: |
Dugtrio Alolan Weakness: |
Magmar Weakness: |
10% | ||
| Challenge the Aether Foundation: Part 7 | Normal | Aether Foundation Employee |
Pelipper Weakness: |
Toucannon Weakness: |
Vanilluxe Weakness: |
10% | ||
| Challenge the Aether Foundation: Part 8 | Normal | Aether Foundation Employee |
Electabuzz Weakness: |
Dugtrio Alolan Weakness: |
Magmar Weakness: |
10% | ||
| Hard | 10% | |||||||
Galar: A Millennium into the Future
This chapter introduces Rose, Oleana and Team Yell.
Paulo Interlude: The Path Forward
This chapter focuses on Paulo and his quest for strength. It also introduces Tina, Paulo's childhood friend.
Plot
Area info
| Area name | Unlock condition | Date added | First-Time Rewards |
|---|---|---|---|
| Complete 1 chapter of the Villain Arc on Normal difficulty | November 26, 2021 | ||
| Complete 2 chapters of the Villain Arc on Normal difficulty | March 29, 2022 | ||
| Complete 3 chapters of the Villain Arc on Normal difficulty | October 10, 2022 | ||
| Complete 4 chapters of the Villain Arc on Normal difficulty | October 10, 2022 | ||
| Complete 5 chapters of the Villain Arc on Normal difficulty | December 5, 2022 | ||
| Complete 6 chapters of the Villain Arc on Normal difficulty | April 11, 2023 |
Medals
| Medal | Conditions | |
|---|---|---|
| Image | Name | |

|
Hostile Take-Over | Complete the following single-player area on Normal: Kanto The Last Laugh |

|
Shining Brilliance | Complete the following single-player area on Normal: Sinnoh A Mission to Complete |

|
Bold Heart and Soul | Complete the following single-player area on Normal: Johto Endings and Beginnings |
| File:Masters Medal Earth, Sea, and Sky.png | Earth, Sea, and Sky | Complete the following single-player area on Normal: Hoenn In the Shadows of Pasio's Crisis |

|
Unbound from the Past | Complete the following single-player area on Normal: Unova Two Heroes |

|
Ablaze for Beauty | Complete the following single-player area on Normal: Kalos Under a Beautiful Night Sky |

|
Guardians of Alola | Complete the following single-player area on Normal: Alola A Future Together |
Artwork

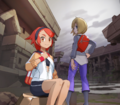
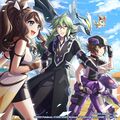
Villain Arc Kanto artwork
Villain Arc Paulo Interlude artwork
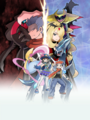
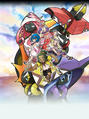
Villain Arc Sinnoh artwork
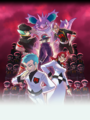
Villain Arc Sinnoh (Part 2) artwork
Villain Arc Johto (Part 1) artwork
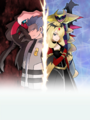
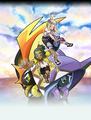
![Villain Arc Johto (Part 2) artwork by Megumi Mizutani[1]](https://archives.bulbagarden.net/media/upload/thumb/9/9f/Masters_Sygna_Suit_Johto_artwork.png/87px-Masters_Sygna_Suit_Johto_artwork.png)
Villain Arc Johto (Part 2) artwork by Megumi Mizutani[1]
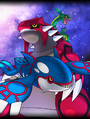
Villain Arc Hoenn (Part 1) artwork
![Villain Arc Hoenn (Part 2) artwork by Hitoshi Ariga[2]](https://archives.bulbagarden.net/media/upload/thumb/3/33/Masters_Villain_Arc_Hoenn_Part_2_artwork.png/91px-Masters_Villain_Arc_Hoenn_Part_2_artwork.png)
Villain Arc Hoenn (Part 2) artwork by Hitoshi Ariga[2]
![Villain Arc Unova (Part 1) artwork by Hitoshi Ariga[3]](https://archives.bulbagarden.net/media/upload/thumb/e/eb/Masters_Villain_Arc_Unova_Part_1_artwork.png/90px-Masters_Villain_Arc_Unova_Part_1_artwork.png)
Villain Arc Unova (Part 1) artwork by Hitoshi Ariga[3]
![Villain Arc Unova (Part 2) artwork by Hitoshi Ariga[4]](https://archives.bulbagarden.net/media/upload/thumb/d/d4/Masters_Villain_Arc_Unova_Part_2_artwork.png/90px-Masters_Villain_Arc_Unova_Part_2_artwork.png)
Villain Arc Unova (Part 2) artwork by Hitoshi Ariga[4]
Villain Arc Unova artwork by MONO-Land
![Villain Arc Kalos (Part 1) artwork by Hitoshi Ariga[5]](https://archives.bulbagarden.net/media/upload/thumb/e/ea/Masters_Villain_Arc_Kalos_Part_1_artwork.png/100px-Masters_Villain_Arc_Kalos_Part_1_artwork.png)
Villain Arc Kalos (Part 1) artwork by Hitoshi Ariga[5]
![Villain Arc Kalos (Part 2) artwork by Hitoshi Ariga[5]](https://archives.bulbagarden.net/media/upload/thumb/f/f0/Masters_Villain_Arc_Kalos_Part_2_artwork.png/90px-Masters_Villain_Arc_Kalos_Part_2_artwork.png)
Villain Arc Kalos (Part 2) artwork by Hitoshi Ariga[5]
Villain Arc Alola (Part 1) artwork
Villain Arc Alola (Part 2) artwork


![Villain Arc Johto (Part 2) artwork by Megumi Mizutani[1]](/wiki/File:Masters_Sygna_Suit_Johto_artwork.png)

![Villain Arc Hoenn (Part 2) artwork by Hitoshi Ariga[2]](/wiki/File:Masters_Villain_Arc_Hoenn_Part_2_artwork.png)
![Villain Arc Unova (Part 1) artwork by Hitoshi Ariga[3]](/wiki/File:Masters_Villain_Arc_Unova_Part_1_artwork.png)
![Villain Arc Unova (Part 2) artwork by Hitoshi Ariga[4]](/wiki/File:Masters_Villain_Arc_Unova_Part_2_artwork.png)

![Villain Arc Kalos (Part 1) artwork by Hitoshi Ariga[5]](/wiki/File:Masters_Villain_Arc_Kalos_Part_1_artwork.png)
![Villain Arc Kalos (Part 2) artwork by Hitoshi Ariga[5]](/wiki/File:Masters_Villain_Arc_Kalos_Part_2_artwork.png)


References
- ↑ Tweet about illustrating the second Johto Villain Arc title screen
- ↑ Tweet about illustrating the Hoenn Villain Arc (Part 2) title screen
- ↑ Tweet about illustrating the Unova Villain Arc (Part 1) title screen
- ↑ Tweet about illustrating the Unova Villain Arc (Part 2) title screen
- ↑ 5.0 5.1 Tweet about illustrating the Kalos Villain Arc title screen
| This article is part of Project Sidegames, a Bulbapedia project that aims to write comprehensive articles on the Pokémon Sidegames. |